


Mastering Boat Gelcoat Repairs for a Perfect Finish
Learning how to repair your boat's gelcoat is one of the most important skills you can have. It's about way more than just keeping your boat looking good—it's about protecting the fiberglass hull from water, UV rays, and everything else the marine environment throws at it. A solid gelcoat repair is what stands between a minor chip and a major structural problem.
Why Gelcoat Repair Is A Non-Negotiable Skill
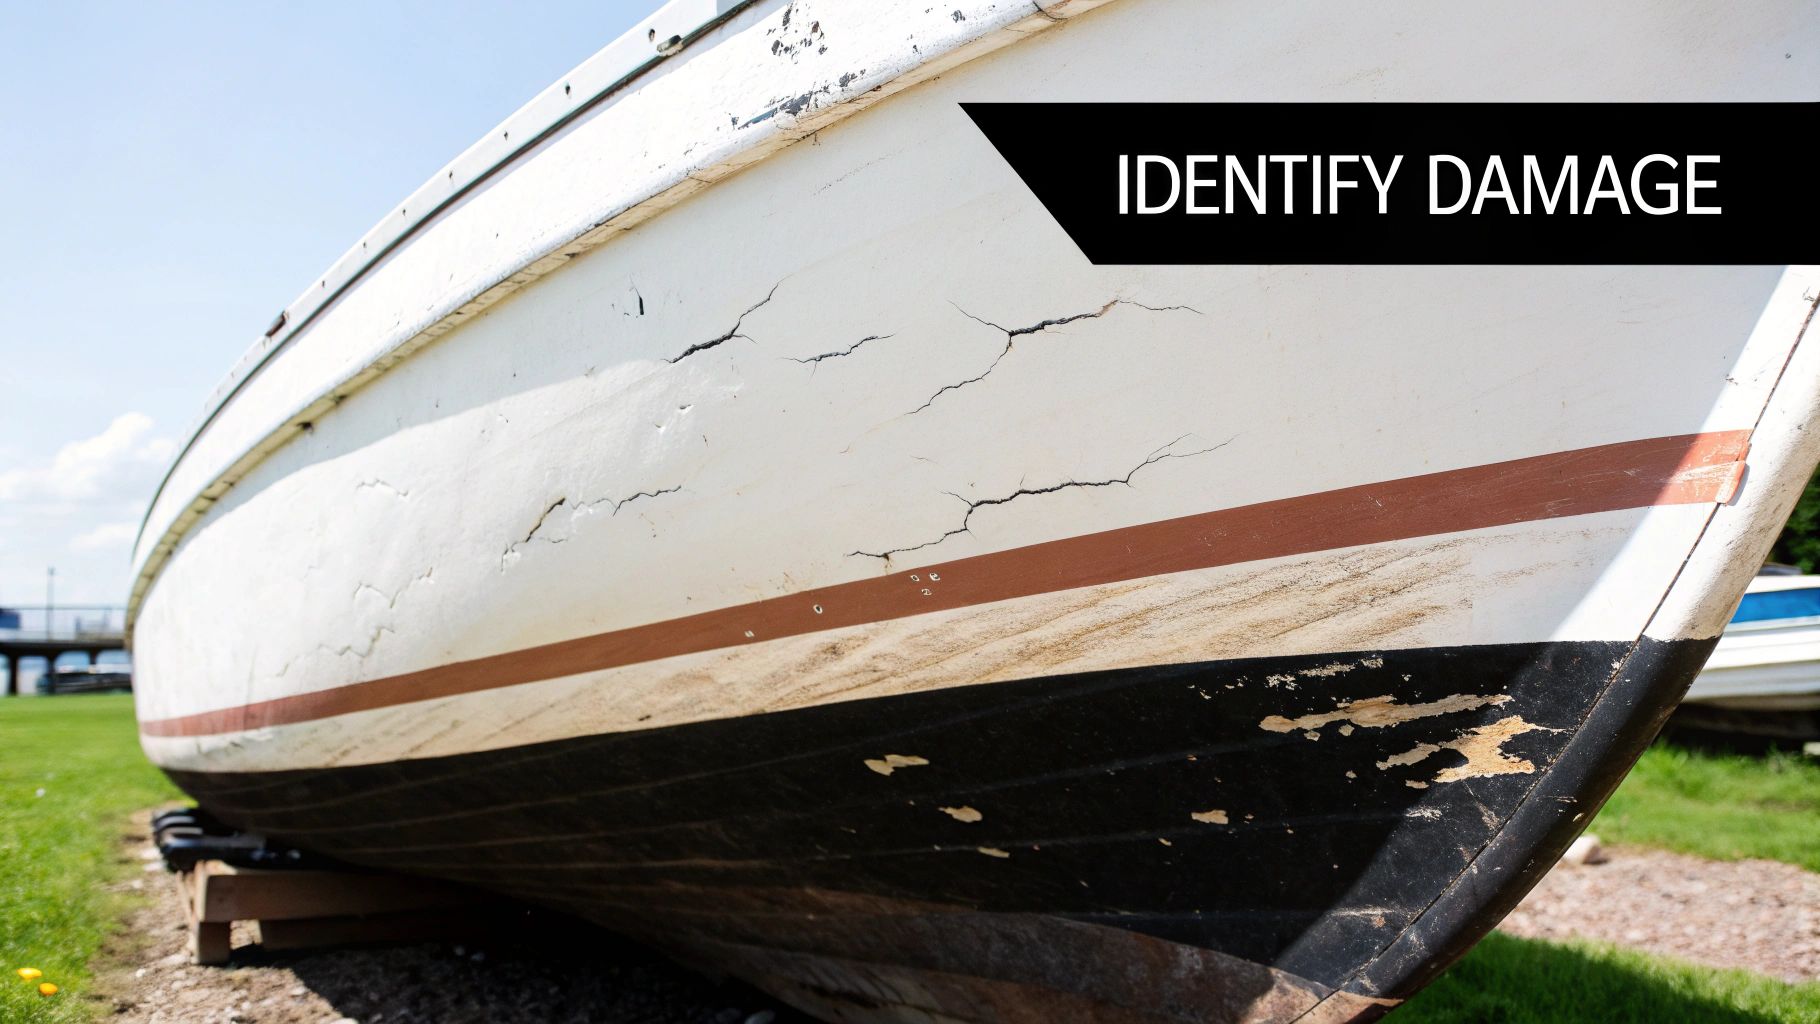
That glossy, slick finish on your boat isn't just for show. It’s the armor protecting your investment. Too many boat owners write off small spider cracks or little dings as just cosmetic issues, but ignoring them is a mistake that can cost you big time down the road.
Those little blemishes are basically open doors for water. Once water gets past the gelcoat and into the fiberglass laminate, you're opening yourself up to serious headaches like osmotic blistering or delamination. What looks like a tiny hairline crack today can quietly become a massive, expensive failure.
From Minor Flaw to Major Failure
I’ve seen it happen more times than I can count. A friend of mine had a small, inch-long scratch on the corner of his ski boat's transom—probably just from a little bump against the dock. He figured it was no big deal and left it for a season.
Over the summer, water seeped into the fiberglass. Then, during the winter freeze, that trapped moisture expanded. That tiny scratch turned into a spiderweb of deep cracks. The fix? A professional had to grind out a huge chunk of the hull. The final bill was well over a thousand dollars for a repair that would have been a quick and easy DIY job if he'd just handled it right away.
This story isn't unique. Gelcoat is the go-to protective layer for a reason. In fact, the global gelcoat market was valued at USD 1.28 billion in 2023 and is expected to hit USD 4.42 billion by 2033. That growth tells you just how critical this material is for manufacturing durable fiberglass products. You can explore more data about the growing gelcoat market to see its industrial impact.
To help you prioritize, here’s a quick rundown of common gelcoat issues and how urgently you should tackle them.
Common Gelcoat Damage and Repair Priority
Use this quick reference to identify different types of gelcoat damage and understand how quickly you need to act.
| Damage Type | What It Looks Like | Repair Urgency | Potential Long-Term Risk |
|---|---|---|---|
| Stress Cracks | Fine, web-like cracks, often radiating from a point of impact or stress (like around fittings). | High | These are gateways for water intrusion directly into the fiberglass laminate, leading to delamination. |
| Chips & Gouges | Deeper damage that exposes the underlying fiberglass mat. Usually from impacts. | High | Direct and immediate exposure of the hull to water. Can lead to rapid water saturation and core damage. |
| Scratches | Surface-level abrasions that haven't penetrated the full thickness of the gelcoat. | Medium | While not immediately critical, deep scratches can weaken the gelcoat layer and eventually allow water in. |
| Oxidation/Fading | A chalky, dull, or faded appearance caused by UV exposure. | Low | Primarily a cosmetic issue, but heavily oxidized gelcoat becomes brittle and more prone to cracking over time. |
| Blisters | Bumps or bubbles on the surface, often indicating moisture trapped beneath the gelcoat. | Very High | This is a sign of osmosis, where water has already penetrated. It requires immediate and thorough repair. |
As you can see, even small-looking damage can signal big trouble.
The takeaway is simple: Gelcoat repair is preventative maintenance. It directly impacts your boat's longevity, safety, and how much it'll be worth when you decide to sell it.
By learning to handle these fixes yourself, you're not just saving a few bucks on yard fees. You're actively taking care of your boat's core structure. This guide will walk you through the process, giving you the confidence to turn a potential problem into a job well done, keeping your boat beautiful and seaworthy for years.
Your Essential Toolkit for Gelcoat Repairs
Walking into a marine supply store can be a bit overwhelming. The shelves are packed with products, all promising a perfect, factory-fresh finish. The truth is, you don't need a massive arsenal of tools to pull off a professional-looking boat gelcoat repair. You just need the right ones.
Getting everything you need in one go transforms a potentially frustrating project into a smooth and rewarding one. This list is designed to cut through the noise and get you exactly what you need.
Core Repair and Prep Materials
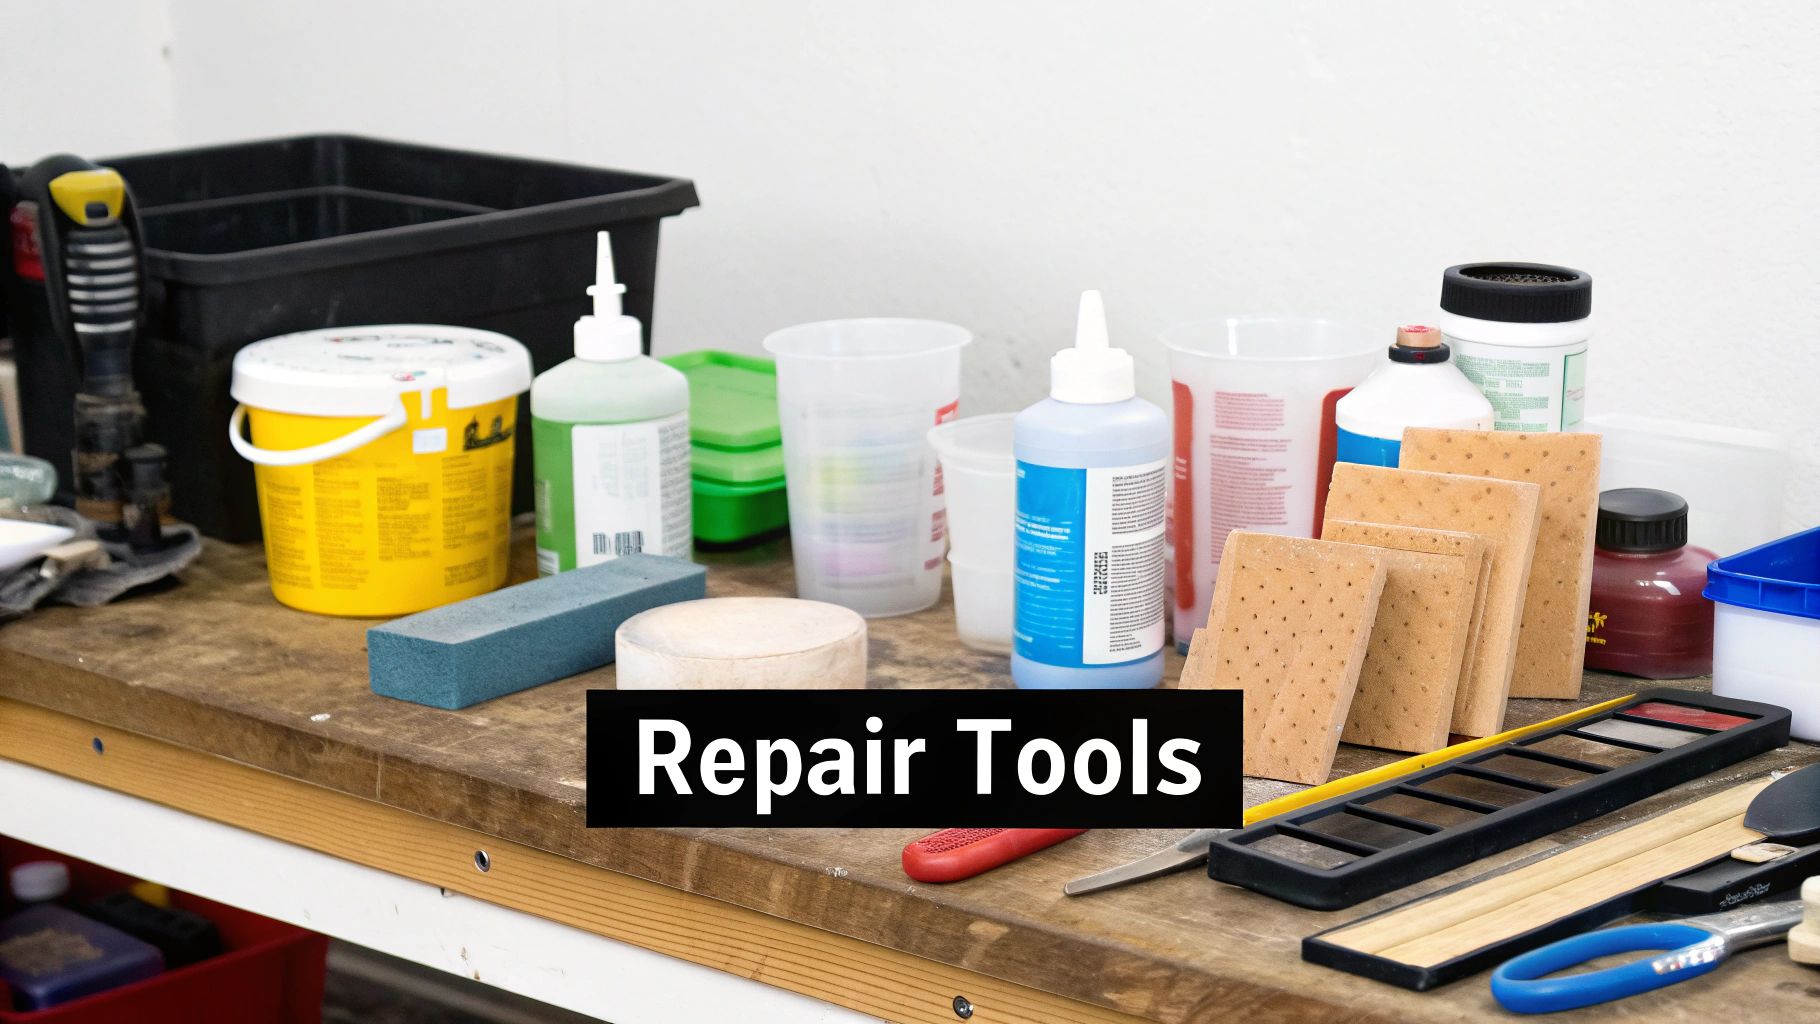
First things first, let's talk about the non-negotiables. These are the items you absolutely must have for prepping the damaged area and laying down the new gelcoat for a strong, permanent bond.
- Gelcoat Paste Repair Kit: This is the heart of the operation. A good kit will come with gelcoat paste (which is much easier to work with than liquid gelcoat on vertical surfaces), the MEKP hardener that kicks off the curing process, and often some coloring agents for tinting.
- Acetone or a Dewaxing Solvent: Don't even think about skipping this step. Waxes, old polish, oils, and other contaminants are the number one enemy of a good gelcoat bond. A thorough wipe-down with acetone ensures your repair has a perfectly clean surface to grab onto.
- Rotary Tool with a V-Shaped Bit: For spider cracks and deeper chips, just sanding the surface won't cut it. You need to give the new gelcoat something to bite into. Gently grinding a "V" groove into the crack with a Dremel-style tool creates a ton more surface area, resulting in a much stronger mechanical bond.
Choosing the Right Gelcoat
Not all gelcoat is created equal, and picking the right one is crucial for getting the job done right the first time. The biggest difference you'll encounter is between waxing and non-waxing formulas.
Pro Tip: Always use gelcoat with wax for your final, top coat. As the gelcoat cures, the wax rises to the surface and forms an airtight barrier. This is what allows it to fully harden. Without that barrier (or an alternative like PVA film), the surface will stay frustratingly tacky.
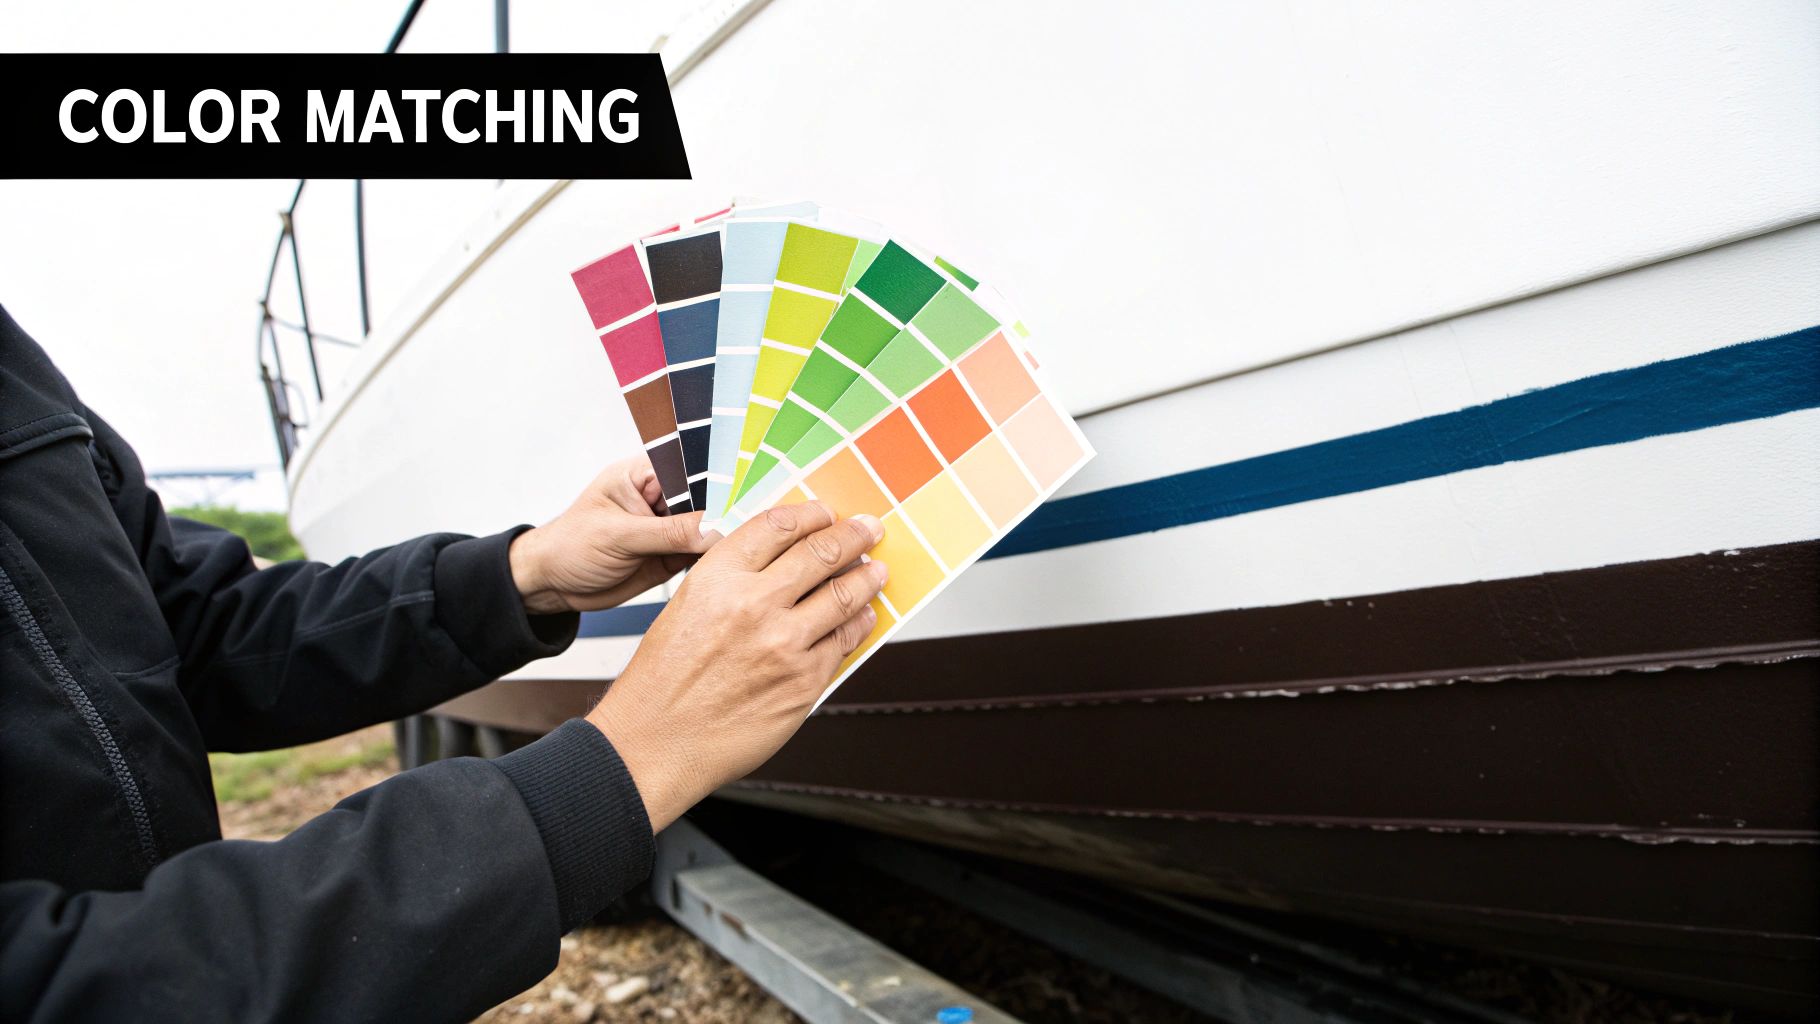
Color matching is the next hurdle. If you've got a standard white boat, a pre-matched kit will probably get you 90% of the way there. For custom colors or hulls that have faded over time, you'll need a good tinting kit. The key is to add tiny amounts of pigment and mix thoroughly until you've nailed the perfect shade.
For a deeper dive into bonding agents and fillers, especially if you suspect there's more structural damage underneath the cosmetic gelcoat, The Ultimate Guide to Choosing Epoxy Resin for Your Boat offers some excellent insights.
Lastly, never forget about the weather. Temperature and humidity play a massive role in how gelcoat cures. On a hot, humid day, you’ll need a little less catalyst to prevent the gelcoat from hardening in your mixing cup before you can even apply it.
On the flip side, a cool, dry day might require an extra drop to ensure it cures properly. Mastering this little adjustment is often the secret to a stress-free application.
Flawless Prep Work for a Lasting Repair
I can’t tell you how many times I’ve seen a DIY boat gelcoat repair fail, and almost every single time, it comes down to one thing: poor prep work. You can buy the fanciest materials on the market, but if the surface isn't ready to receive them, your patch is destined to fail. It's like building a house—without a solid foundation, the whole thing will eventually crumble.
First thing's first, and this is non-negotiable: cleaning. Your boat's hull is coated in an invisible film of wax, oils, and other grime. Gelcoat needs a pure, chemical bond to the original surface, and any leftover residue will act as a barrier, pretty much guaranteeing your new gelcoat will peel right off.
Grab a clean rag and a strong solvent like acetone. Wipe down the damaged area and a few inches around it with some real purpose. Here's a pro tip: use one rag to apply the solvent and a fresh, clean one to wipe it away before it evaporates. This lifts the contaminants off the surface instead of just smearing them around. It seems simple, but this step is absolutely critical.
Tailoring Your Prep to the Damage
Not all damage is created equal, so your prep method needs to match the problem you're fixing. A light scratch is a world away from a deep gouge that’s showing fiberglass.
For those deeper chips and gouges, you need to create a "V" shape. I use a rotary tool with a pointed bit to carefully grind the edges of the damage at about a 45-degree angle. This beveling technique does two things: it maximizes the surface area for the new gelcoat paste and gives it a much stronger mechanical grip, which helps prevent the patch from popping out later on.
Those frustrating spider cracks need a special trick to keep them from spreading. Before you even think about grinding them out, drill a tiny hole at the very end of each crack. This is called "stop-drilling," and it relieves the stress in the gelcoat that causes the crack to creep further across your hull. Once that’s done, you can use your rotary tool to open up the crack into a V-groove for filling.
The goal of preparation isn't just to clean the area; it's to create the ideal physical and chemical environment for the new gelcoat to permanently bond with the old. Taking an extra ten minutes here can add years to the life of your repair.
Final Steps Before Mixing
With all the grinding done, it’s time to clean the area again with acetone to get rid of every last bit of dust. Next, grab some high-quality painter's tape and carefully mask off the area just outside the repair zone. This creates a clean boundary and, trust me, it will save you a ton of sanding work later by keeping the gelcoat contained.
This kind of meticulous prep is what separates a professional-looking repair from an obvious, ugly patch job. It's a skill that's becoming more valuable, too. The global pleasure boat gelcoat market was valued at about USD 1.2 billion in 2024 and is expected to climb to USD 1.8 billion by 2033. That growth really shows how much people are focusing on proper boat maintenance and restoration these days.
Now that you have a perfectly prepped surface, you're ready to start mixing and applying. For more help, you should check out our comprehensive guide on boat gelcoat repair techniques that walks you through the entire process from start to finish.
Applying and Curing Gelcoat Like a Pro
Alright, all that cleaning and grinding is behind you. This next part is where your careful prep work really starts to shine. Applying and curing the gelcoat is what transforms that prepped gouge into a seamless, solid part of your hull. It might look tricky, but if you take your time, it’s a surprisingly satisfying process.
Here’s the single most important trick I can share: always slightly overfill the repair. It feels wrong, I know. But gelcoat has a natural tendency to shrink as it cures. If you fill a scratch perfectly flush, you’ll end up with a shallow dent once it’s hard. You need to build the paste up just a little proud of the surface. That extra material is what you’ll sand down to get that perfectly level, invisible finish.
Choosing Your Application Tool
The right tool for the job really depends on what kind of damage you're tackling. There’s no single best option here; it’s all about matching the tool to the repair.
- Plastic Spreader: This is your go-to for wider gouges or big flat spots. A simple, flexible plastic spreader lets you press the gelcoat paste firmly into the repair and feather out the edges nice and smooth.
- Small Artist's Brush: A spreader is way too clumsy for fine spider cracks. For those, a small, stiff-bristled artist's brush is perfect for working the gelcoat deep into that V-groove you carved out.
- Popsicle Stick or Mixing Stick: Don't laugh—sometimes the simplest tools are the best. For little, isolated dings and chips, the end of a wooden mixing stick is often the ideal tool for dabbing and pressing paste into a small hole.
This graphic lays out the whole workflow pretty clearly, from the initial prep right through to the final polish.
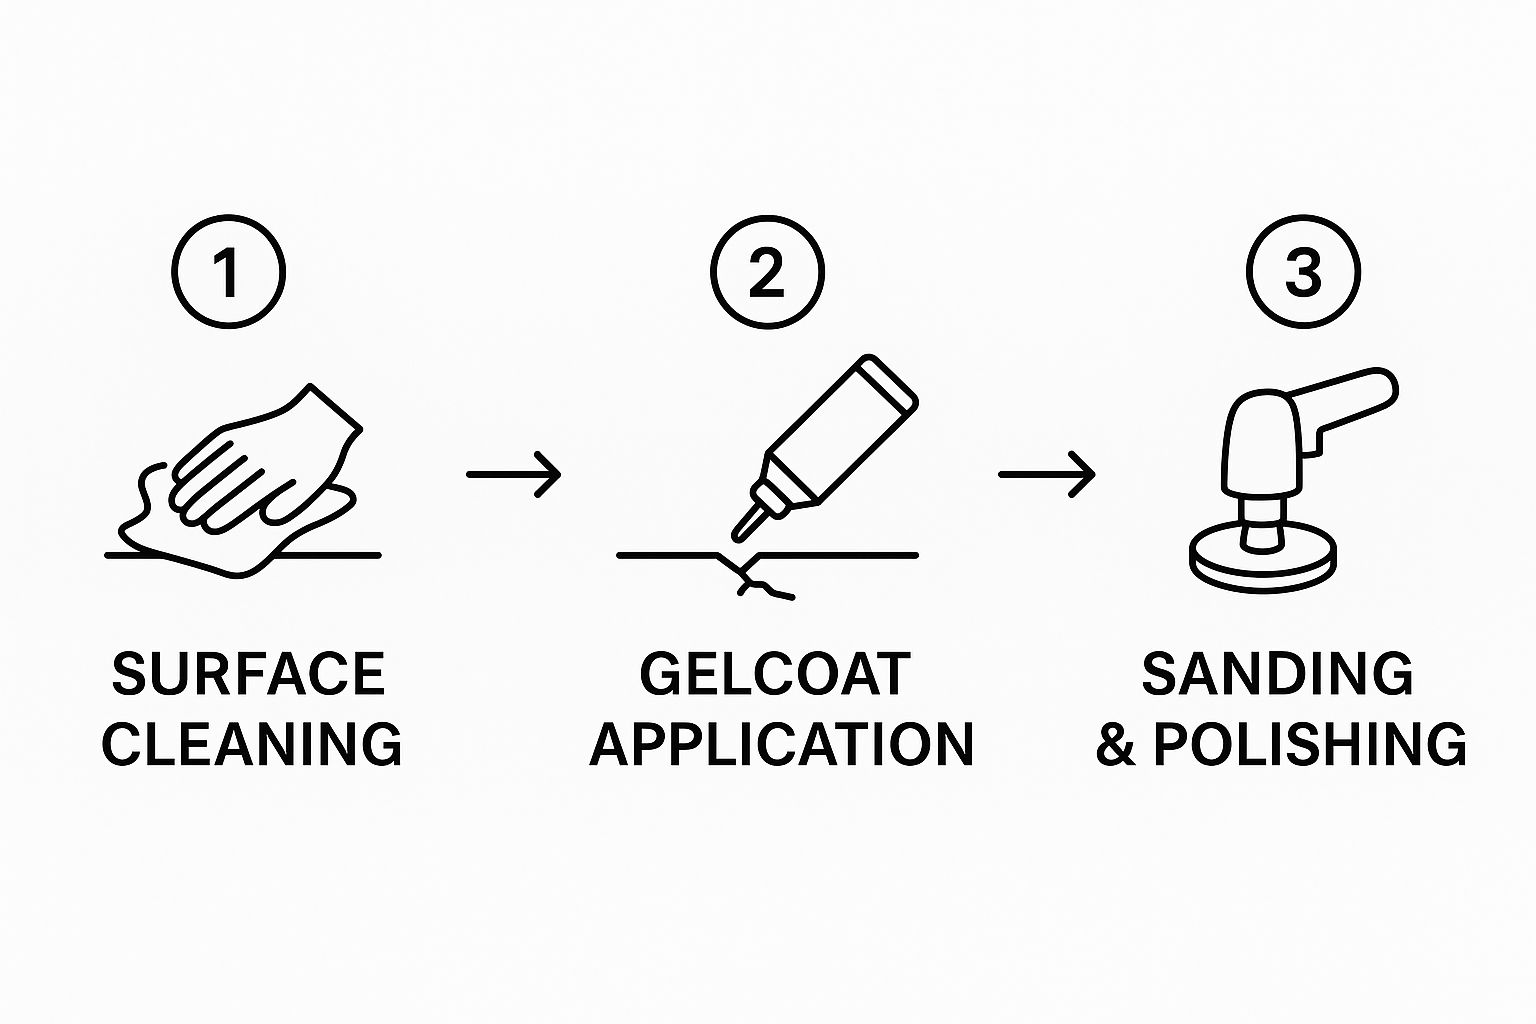
As you can see, successful boat gelcoat repairs are all about following a methodical process. Each step builds on the one before it.
Ensuring a Proper Cure
One of the most common mistakes I see DIYers make is ending up with a repair that stays sticky or tacky, even hours later. This happens because polyester resin—the heart of gelcoat—won’t fully harden when it’s exposed to air. You have to seal it off.
Now, if you bought a "waxed" or "finishing" gelcoat, the job is done for you. These formulas contain a wax additive that floats to the surface as it cures, creating its own airtight barrier. But if you're using a standard, non-waxed gelcoat, you have to create that barrier yourself.
Key Takeaway: Sealing the repair from oxygen is non-negotiable. The easiest way is to cover the wet gelcoat with a piece of PVA (Polyvinyl Alcohol) film. In a pinch, clear wax paper works too. Just smooth it over the surface, pushing out any air bubbles, and tape down the edges.
Once you’ve applied and sealed the gelcoat, just let it cure. This can take anywhere from a couple of hours to a full day, depending on the temperature and humidity. Patience is key here. If you try to sand a patch that isn't fully cured, you’ll just make a gummy, frustrating mess. And remember, a good cure starts with a clean surface, which you can learn more about in our guide on how to clean fiberglass boat surfaces.
Finishing Techniques for an Invisible Repair
Alright, this is where your hard work really starts to shine—literally. The final finishing steps are what separate an obvious, lumpy patch from a repair that truly disappears into your boat's hull. It’s an art form, really, and it all comes down to patience and a methodical approach to turn that solid repair into a flawless one.
The journey from a cured, overfilled patch to a mirror-like shine starts with wet sanding. This is a game-changer. Using water with the sandpaper acts as a lubricant, stopping it from getting clogged with gelcoat dust while whisking away all the debris. Trust me, the result is a much smoother, more refined surface than you could ever get dry sanding.
The Art of Wet Sanding Progression
Your main goal here is to carefully level the overfilled repair until it's perfectly flush with the surrounding gelcoat. This isn't a time for guesswork; you need to follow a specific progression through different sandpaper grits. And whatever you do, always wrap your sandpaper around a firm sanding block. If you just use your fingers, you’re guaranteed to create ugly dips and an uneven finish.
You'll start with a coarser grit to knock down the high spots and then work your way to a glass-smooth surface.
- 320-Grit: This is your workhorse. Start here to level the hardened gelcoat patch. It cuts fast but will leave some pretty visible scratches. Don't panic, that's normal.
- 600-Grit: Once the patch is level, switch to 600-grit. Its job is to start erasing the deeper scratches left by the 320-grit.
- 800-Grit: This step continues the refining process, smoothing out the marks from the 600-grit paper.
- 1200-Grit and Higher: Now you're in the home stretch. Keep working your way up to ultra-fine grits like 1500 or even 2000. Each successive grit polishes away the marks from the previous one, leaving you with a smooth, hazy, but totally scratch-free surface.
It's no surprise that more boat owners are taking on these jobs themselves. The global market for boat restoration products is expected to jump from about USD 7.7 billion in 2024 to USD 11.2 billion by 2032. This just shows how many of us are investing in the upkeep of our vessels. If you're curious, you can discover more insights about the boat restoration market to see just how big this trend is.
Compounding and Polishing for a Mirror Finish
After you’ve finished with your finest sandpaper, the surface will be smooth but dull. The real magic—that brilliant, deep shine—comes from compounding and polishing. Think of them as liquid abrasives that are even finer than your sandpaper.
For this part of the job, a variable-speed power buffer is your absolute best friend. Sure, you can do it by hand, but a machine gives you far better and more consistent results in a fraction of the time.
Pro Tip: Use a separate buffing pad for each product—one for compound, one for polish, and a clean one for wax. If you cross-contaminate your pads, you'll drag coarse compound particles across your finely polished surface and ruin the finish.
To help you keep the process straight, here's a simple guide to follow for that perfect, factory-new shine.
Wet Sanding and Polishing Progression Guide
Follow this step-by-step grit and compound sequence to achieve a mirror-like finish on your boat gelcoat repairs.
| Step | Abrasive or Compound | Key Objective | Insider Tip |
|---|---|---|---|
| 1 | 320-Grit Sandpaper | Level the overfilled gelcoat patch so it's flush. | Use a firm sanding block to avoid creating low spots. |
| 2 | 600-Grit Sandpaper | Remove the coarse scratches from the 320-grit paper. | Keep the surface wet to prevent clogging and get a smoother cut. |
| 3 | 800-Grit Sandpaper | Refine the surface further, preparing it for polishing. | Your goal is a uniform, hazy finish with no deep scratches visible. |
| 4 | 1200+ Grit Sandpaper | Erase all sanding marks for a pre-polish smooth surface. | The smoother it is now, the less compounding you'll have to do. |
| 5 | Cutting Compound | Remove the sanding haze and bring out the initial gloss. | Use a wool pad and keep the buffer moving to avoid burning the gelcoat. |
| 6 | Fine Polish | Eliminate swirl marks and create a deep, wet-look shine with marine polish. | Switch to a soft foam finishing pad for the best results. |
| 7 | Marine Wax/Sealant | Protect the repair and lock in the high-gloss shine. | Apply with a fresh, clean applicator pad and buff off by hand. |
Start the machine polishing with a cutting compound on a wool or firm foam pad. This will power through the final sanding haze and really start to bring out the gloss. I like to work in small, two-foot by two-foot sections, always keeping the buffer moving so I don't burn the gelcoat.
After compounding the area, switch to a finer polish on a soft foam finishing pad. This is what gets rid of any swirl marks and brings out that deep, wet look we're all after.
The final, and absolutely crucial, step is protection. Apply a high-quality marine wax to seal your work from the elements, protect it from UV rays, and lock in that incredible shine. Your boat gelcoat repair is now complete, invisible, and ready to hit the water.

Common Questions About Boat Gelcoat Repairs
Even with the best guide in hand, a few questions always seem to pop up once you get started on a hands-on project like this. Let's walk through some of the most common issues people run into with boat gelcoat repairs. Getting these details sorted out can be the difference between a seamless patch and a job you have to do all over again.
Can I Apply New Gelcoat Over Old Boat Paint?
This is a question I hear all the time, and the answer is a hard no. You absolutely cannot apply gelcoat directly over paint. Gelcoat is a type of polyester resin, and for it to work, it must create a chemical bond with the surface underneath—either the boat's original fiberglass or a properly prepped layer of existing gelcoat. Paint creates a barrier that makes this bond impossible.
If you try to skim over this step, the repair is guaranteed to fail. It's not a matter of if, but when it will peel, flake, and chip right off. You'll be left with a bigger mess than you started with. You have to sand every last bit of that paint off until you’re down to a clean, solid surface before you even think about applying gelcoat. It’s a non-negotiable step for a repair that's going to last.
My Gelcoat Repair Color Is Slightly Off. What Can I Do?
Nailing a perfect color match is probably one of the toughest parts of the job, especially if you're working on an older boat where the hull has been faded by years of sun. Even a slight mismatch can make an otherwise perfect repair stick out like a sore thumb.
If you find the color is just a little bit off, the first thing to try is compounding and polishing. Go over both the patch and the area around it. Sometimes, just blending the gloss and texture is enough to trick the eye and make the difference almost disappear.
Still looks off? Your next move is a gelcoat tinting kit. These kits give you a set of pigments that you can mix into your base gelcoat to fine-tune the color.
Expert Tip: Don't just slap your new mix on the hull. Mix a tiny test batch and spread it on a piece of cardboard or another scrap. Let it cure completely to see the true final color. It’s a small extra step that can save you the headache of sanding off a bad match.
What Is the Difference Between Gelcoat Paste and Liquid Gelcoat?
The big difference here is viscosity—basically, how thick it is. It helps to think about it this way:
- Gelcoat Paste: This stuff has a thick, peanut-butter-like consistency. That thickness is exactly what you want for filling deeper gouges, chips, or any repairs on vertical or overhead spots where you don't want it running all over the place.
- Liquid Gelcoat: This is much thinner, almost like paint. Its main use is for spraying over large areas, like if you're refinishing a whole section of the hull, or for filling in very fine, shallow scratches.
For the vast majority of DIY boat gelcoat repairs—the typical dings and chips you get from bumping a dock—a gelcoat paste repair kit is almost always going to be the easier and more effective tool for the job.
For all the essential tools and supplies to tackle your next project with confidence, trust Better Boat. From repair kits to premium waxes and polishes, we have everything you need to keep your vessel in pristine condition. Explore our full range of boat care products today.


