


A Guide to Boat Trailer Bearing Replacement
A complete boat trailer bearing replacement is a job every boat owner should know how to do. It’s a straightforward process: you’ll pull the old bearings and races from the wheel hub, and then install a new, freshly greased set. This isn’t just routine maintenance; it’s critical for preventing a catastrophic failure on the road, especially since water exposure is so tough on these parts.
Why Ignoring Your Trailer Bearings Is a Costly Mistake
Have you ever heard a faint grinding noise from your trailer or felt a bit of a wobble when you shake the tire? That’s not just a minor quirk—it's your trailer's way of screaming for help. Trust me, ignoring these signs is one of the most expensive mistakes a boat owner can make. What starts as a simple, preventable fix can quickly turn into a trip-ruining disaster.
The main culprit here is water. Think about it: every time you launch and retrieve your boat, your hot wheel hubs get dunked into cool water. This creates a vacuum that pulls moisture right past the seals. If you're a saltwater boater, the problem is even worse. Saltwater is incredibly corrosive and just chews through the precision-engineered steel surfaces of your bearings.
The Real-World Consequences of Neglect
Putting off a bearing replacement isn't a gamble; it's a guarantee of eventual failure. And the fallout is much bigger than just being stuck on the side of the road.
- Catastrophic Wheel Failure: A seized bearing can lock up, causing the entire wheel assembly to rip away from the trailer. At highway speeds, this is a terrifying scenario that endangers you and everyone else on the road.
- Expensive Axle Damage: Once a bearing disintegrates, the hub grinds directly against the spindle. This often damages the spindle beyond repair, turning a simple bearing job into a much more costly full axle replacement.
- Trip-Ruining Breakdowns: A failed bearing means your trip is over. You're left stranded, often miles from home, looking at towing bills and emergency repair costs that are far more expensive than a set of new bearings.
Key Takeaway: Being proactive about replacing your boat trailer bearings isn't just about maintenance. It's about safety, peace of mind, and protecting your investment. The time and money you spend on new bearings are a drop in the bucket compared to the cost and danger of a failure on the road.
Your first line of defense is regular inspection. After a drive, carefully touch the hub—if it’s scorching hot, that's a red flag. You can also jack up the wheel and check for excessive play or wobbling. Making this a habit is a cornerstone of our essential boat trailer maintenance tips.
To help you spot trouble early, here's a quick guide to the most common symptoms of failing bearings.
Symptoms of Failing Trailer Bearings
This table breaks down what to look (and listen) for. Catching these signs early can save you a world of hurt.
| Symptom | What It Means | Recommended Action |
|---|---|---|
| Grinding or Rumbling Noise | The rollers inside the bearing are damaged and are no longer moving smoothly. This is a classic sign of internal wear. | Stop towing immediately. This bearing is on the verge of failure and needs immediate replacement. |
| Excessive Wheel Wobble | When you jack up the trailer and shake the wheel, it feels loose. This indicates significant wear and excessive clearance. | Replace the bearings as soon as possible. The excessive play puts stress on other components. |
| Visible Grease Leakage | You see grease splattered on the inside of your wheel or on the hub. This means the rear seal has failed, allowing water in and grease out. | Inspect the bearings for water intrusion and damage. Replace the bearings and the seal. |
| Overheating Hub | The wheel hub is significantly hotter than the others after a short drive. This is caused by excessive friction from a failing bearing. | This is a critical warning. The bearing is likely about to seize. Pull over and let it cool, then proceed with extreme caution to a safe place for replacement. |
Paying attention to these signs is crucial because the life of a boat trailer bearing is brutally short.
Understanding the Lifespan and Failure Rate
The harsh environment boat trailers operate in means their bearings have a much shorter life than those on a typical utility trailer. Consistent dunkings, especially in saltwater, can easily cut their lifespan in half through aggressive corrosion and wear.
It's a widespread problem. Marine service experts often report that roughly 30% of boat trailers that come into their shops show clear signs of damaged or worn bearings. This just goes to show how common this issue really is and why staying on top of it is so important.
Gathering the Right Tools and Parts for the Job
Starting a boat trailer bearing replacement without having all your tools and parts lined up is like heading to the boat ramp without the drain plug. It’s a surefire recipe for frustration. A little prep work turns what feels like a major chore into a smooth, satisfying project.
You’ll need the obvious stuff, of course—a trailer jack, foot plate, sturdy jack stands, and a lug wrench. But for this particular job, a few specialized tools really make the difference between doing it and doing it right.
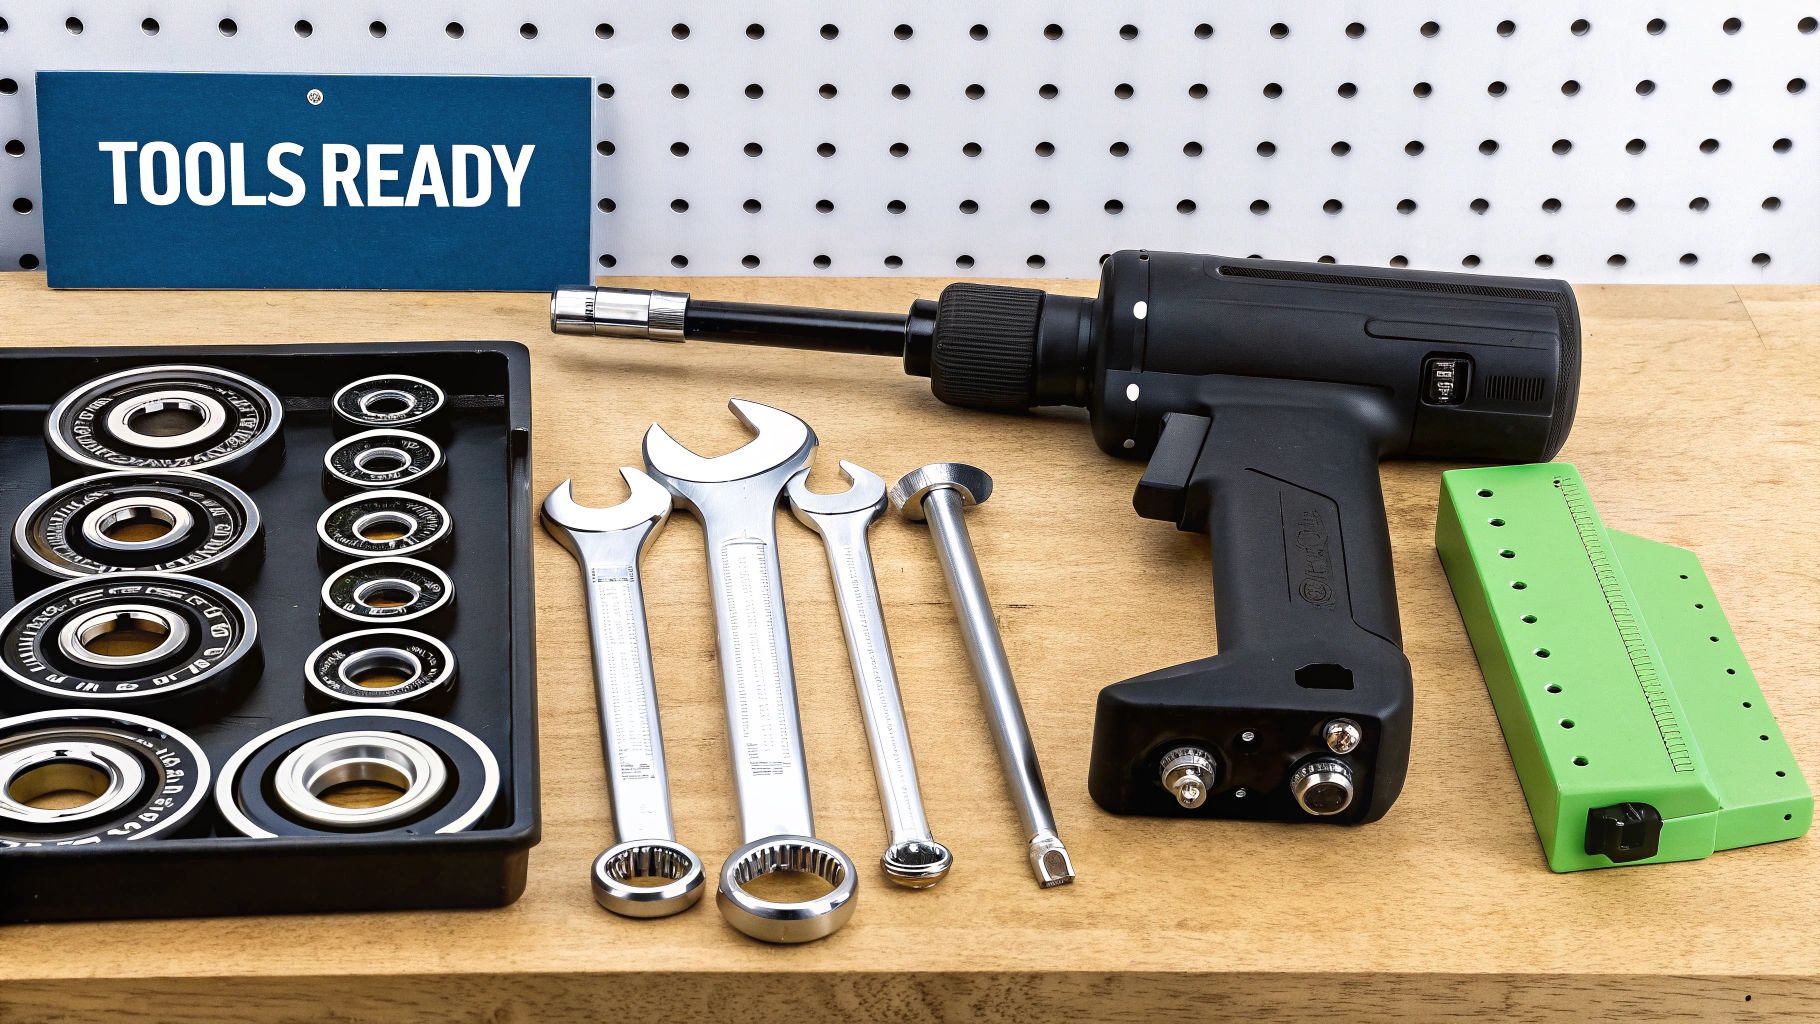
Your Essential Tool Checklist
Before you even think about putting a jack under that trailer, make sure you have these items laid out and ready to go:
- Bearing Race and Seal Driver Set: I can't stress this enough—this is non-negotiable. Trying to tap in a new race with a random socket is the fastest way to damage the race or, even worse, the hub itself. A proper driver set ensures the race goes in perfectly straight every single time.
- A Quality Tub of Marine-Grade Grease: Don't cheap out here. Marine grease is engineered with special additives to fight off water and corrosion, which is exactly what a boat trailer needs. Standard automotive grease just can't handle the constant exposure to water and will break down, leaving your bearings vulnerable.
- Snap Ring Pliers: Take a quick look at your hubs first. If you see snap rings holding things in place, these specialized pliers are the only way to get them off without a headache and a lot of swearing.
- Brass or Steel Punch: You'll need a good punch to carefully knock out the old bearing races from inside the hub.
- Rubber Mallet and a Sizable Hammer: The mallet is perfect for gently seating the new grease seal and dust cap without denting them. The bigger hammer is what you’ll use with your punch to persuade the old races to come out.
I’ve seen it happen too many times: someone tries to save a few bucks by skipping the right tools. Trust me, a $30 race driver set is a much smarter investment than a $200 hub replacement because you gouged the inside of your hub with a socket.
Finding the Correct Replacement Parts
Getting the right bearing kit is absolutely critical. Order the wrong size, and your project is dead in the water until the right parts show up. The most foolproof way to get it right is to pull a wheel and get the numbers directly off the old bearings.
The part numbers are usually stamped right onto the metal edge of the bearing and its corresponding race. You'll need to wipe off the old grease and probably use a flashlight to read them, but those numbers are your golden ticket. With them, you can confidently order a matching kit, which should always contain:
- Inner Bearing and Race
- Outer Bearing and Race
- Grease Seal
- Cotter Pin
These components work in a brutal environment. The entire bearing market, a massive industry valued at around USD 121 billion in 2023, is always pushing for tougher, longer-lasting parts for harsh settings like ours.
This has led to huge improvements, like stainless steel bearings and advanced grease seals that do a much better job of preventing water intrusion—the number one killer of trailer bearings. If you're curious, you can explore more about these industry advancements and how they benefit us on the water.
A Practical Walkthrough of the Replacement Process
Alright, with your tools and parts laid out, it's time to get your hands dirty. This is where all that prep work really starts to matter. We'll go through this step-by-step, starting with safely getting the trailer in the air and finishing by getting those old, worn-out components out of the hub.
First things first: safety. Before you even think about jacking up the trailer, grab your wheel chocks. Secure the wheels on the opposite side of the trailer, both in front of and behind the tire. This is non-negotiable; it stops the trailer from taking a trip on its own while you’re working.
Now, find a solid, flat spot on the trailer's frame for your jack. A critical mistake I see people make is jacking on the axle tube itself—don't do it! Axles can and will bend under that kind of focused pressure. Once the wheel is off the ground, immediately slide a jack stand underneath the frame and lower the trailer onto it. Never trust a jack alone.
Taking Apart the Hub Assembly
With the trailer secure, go ahead and remove the lug nuts and pull the wheel off. Just set it aside for now. What you’re left with is the hub assembly. Grab a flathead screwdriver and carefully pry off the dust cap. This will expose the heart of the assembly: the castle nut and its cotter pin.
Getting the hub off the spindle is pretty straightforward, but you need to pay attention to the small stuff.
- Yank the Cotter Pin: Take your needle-nose pliers, straighten out the bent legs of the cotter pin, and pull it straight out.
- Unscrew the Castle Nut: Now you can spin the castle nut right off. You’ll see a spindle washer behind it. I always keep a magnetic tray handy for these little pieces—it's way too easy to lose them in the grass or a messy garage.
- Pull the Hub: With the nut and washer off, the hub should slide right toward you. Be prepared; the outer bearing often comes along for the ride, so have a hand ready to catch it before it hits the ground.
Once the hub is off, take a second to give the spindle a good look. Wipe it down with a clean rag. You're looking for a smooth, silver surface. If you see any deep scratches, gouges, or bluish discoloration from overheating, your job just got a lot bigger. A damaged spindle means you’re not just replacing bearings; you’re replacing the spindle, too.
Getting the Old Bearings and Races Out
With the hub on your workbench, it's time for the real work: evicting the old parts. Flip the hub so you're looking at the back and use a seal puller or a sturdy screwdriver to pry out the rear grease seal. Behind it, you'll find the inner bearing. Go ahead and pop that out.
The bearing races are a different story. They’re pressed into the hub and won't come out without a little persuasion. This is where your punch and hammer earn their keep.
My Two Cents: Don't just wail on one spot trying to knock the race out. You'll just get it jammed in there crooked. Instead, work your way around the race in a star pattern, tapping it evenly from the opposite side through the hub. A little patience here will save you a world of frustration.
Here you can see exactly how to use a punch to drive out a stubborn, old bearing race—a make-or-break moment in any replacement job.
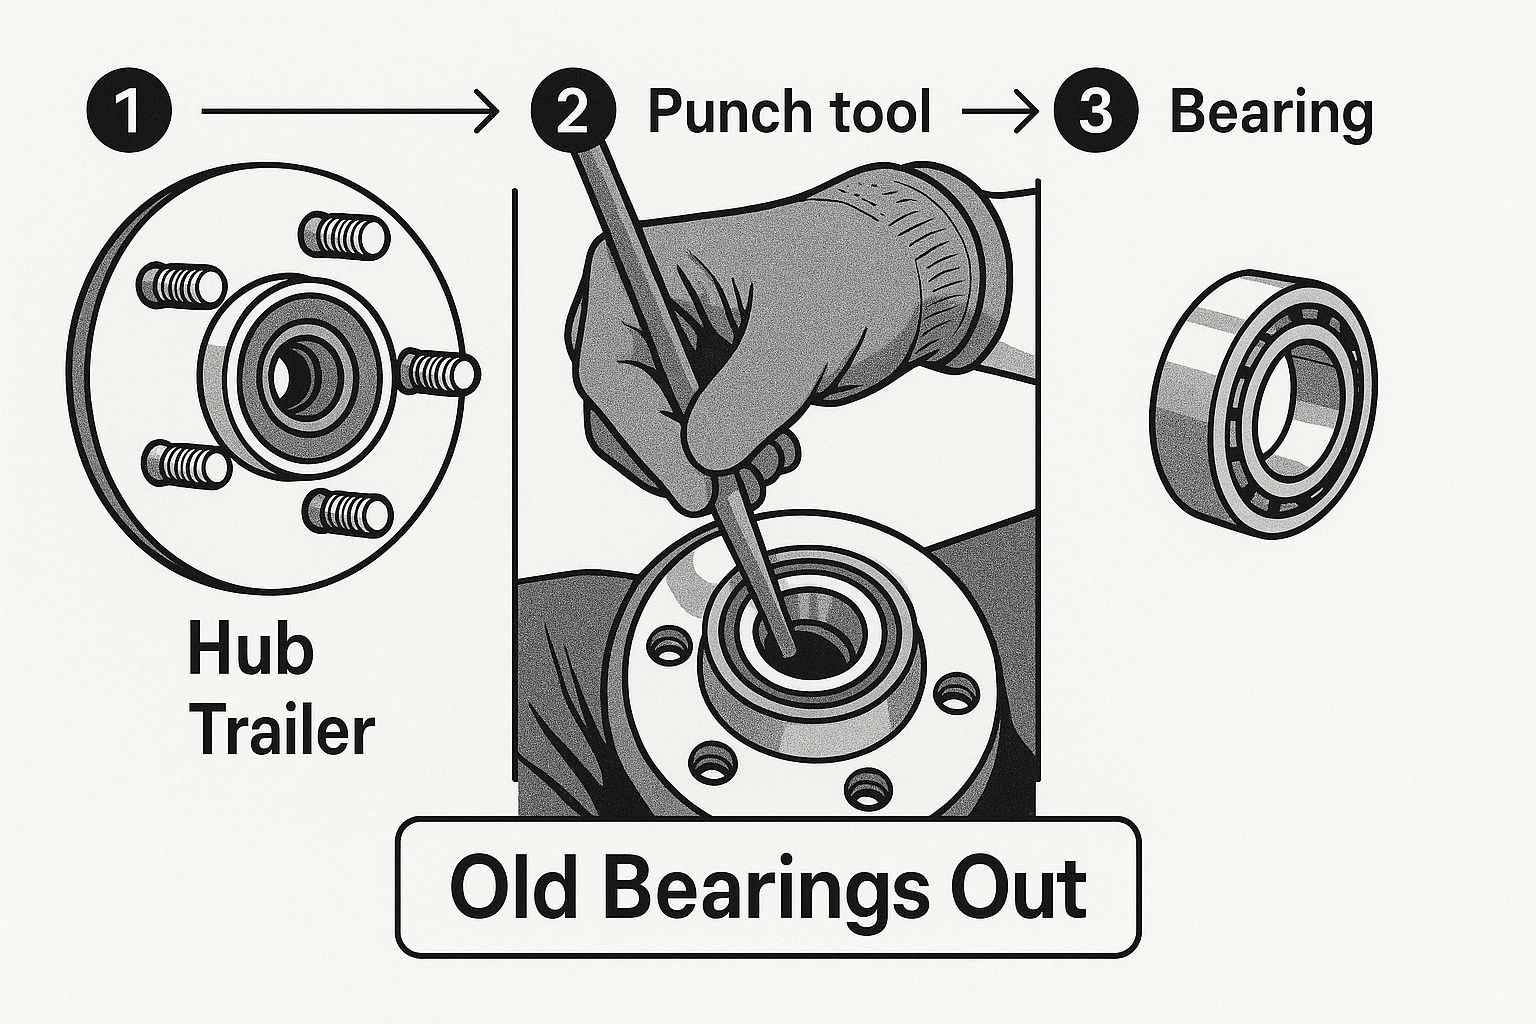
This shot captures that precise action needed to remove the old component cleanly without gouging or damaging the inside of the hub.
Cleaning and Prepping for the New Parts
Once the old races are out, the hub is finally empty. Now comes the most important, and often most overlooked, step: a deep clean. Grab a good degreaser and a pile of clean rags and get every last speck of old, gritty grease out of there. Any leftover metal shavings or grime will destroy your new bearings in short order.
When you're done, the inside of that hub should be spotless. This gives you a perfect surface to install the new components and ensures they seat properly. We've successfully cleared the way for a reliable, long-lasting installation, setting the stage for what comes next: carefully seating the new races and packing the new bearings to get your trailer ready for countless more trips to the water.
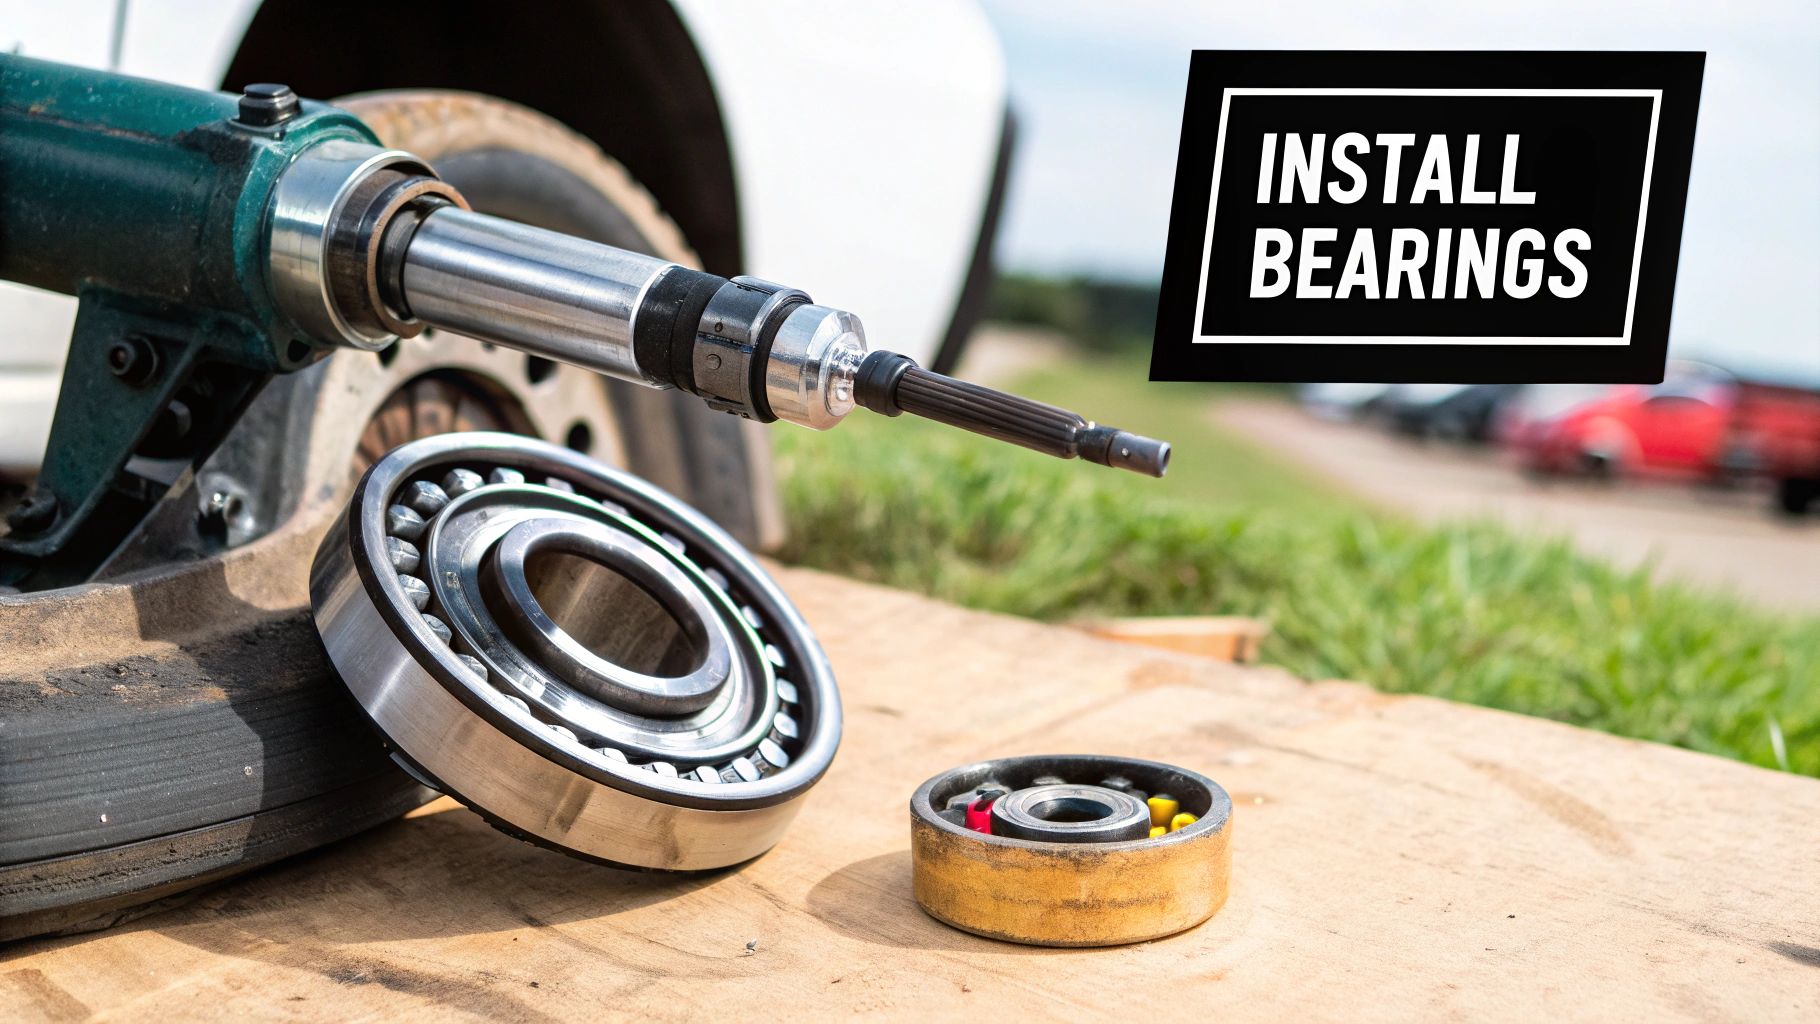
Putting It All Back Together: Installing and Adjusting the Hub
Alright, you've done the dirty work. The old parts are gone, the hub is spotless, and you're on the home stretch. This final part—getting the hub back on and dialed in perfectly—is where a good job becomes a great one. It’s the difference between a repair that lasts for years and one that sends you back to the drawing board next season.
First, grab your clean hub and gently slide it back over the spindle. Don't force it. The last thing you want to do is nick the spindle threads or damage that new inner race you just seated. Just guide it on smoothly until it rests flush against the spindle's shoulder.
With the hub in place, slide the freshly packed outer bearing on, followed by the spindle washer. Make sure the flat side of the washer is facing the bearing.
Getting the Preload Just Right
Now for the part that trips up a lot of people: setting the bearing preload. This is less about brute force and more about feel. The common mistake is to just crank down on the nut with all your might, but that’ll cook your new bearings in no time.
Start by threading the castle nut onto the spindle by hand. Grab your channel-lock pliers or a large wrench and begin tightening it, but here's the trick: as you tighten, keep spinning the hub with your other hand.
This motion is critical because it helps fully seat the bearings into their new races and eliminates any hidden slack. Keep tightening until the nut feels snug and you notice a little bit of drag when you spin the hub.
Once you feel that resistance, back the nut off about a quarter of a turn. The hub should now spin freely again, maybe with two or three rotations before stopping.
Expert Tip: The sweet spot you're aiming for is a tiny amount of "free play." The best way to check this is to grab the hub (or the tire, once it's on) at the top and bottom and give it a good wiggle. You should feel just a hint of movement—we're talking about 1/8 to 1/4 of an inch of play at the outer edge of the tire. Too tight, and the bearings will overheat. Too loose, and they'll get hammered to pieces on the road.
Now, you need to lock it in. Find the slot in the castle nut that lines up with the cotter pin hole in the spindle. If it’s not perfectly aligned, always tighten it just a hair more to the next slot. Never loosen the nut to align the hole.
The Final Touches and Safety Checks
With the hole and slot aligned, slide a new cotter pin through. Don't reuse the old one. Use your needle-nose pliers to bend one leg of the pin over the end of the spindle and the other leg back snugly against the nut. That little pin is the only thing keeping your wheel from coming off, so make sure it's secure.
The last piece of the puzzle is the dust cap or bearing protector. Position it over the hub's opening and use a rubber mallet or a hammer with a block of wood to gently tap it into place. Work your way around the edge to seat it evenly and avoid denting it.
That's it! Now you can put the wheel back on, torque the lug nuts to the manufacturer's spec, and lower the trailer off the jack. You've successfully completed a full bearing replacement.
Smart Maintenance to Protect Your New Bearings
Alright, you've put your tools away, but don't call the job done just yet. A successful bearing replacement is only as good as the care you give it afterward. Think of those first few miles as a break-in period for your handiwork.
After your next short haul to the ramp, find a safe place to pull over. Carefully put your hand on the hub. It's normal for it to be warm to the touch, but it should never be scorching hot. If it's too hot to keep your hand on it, that's a classic sign your bearing preload is too tight and creating way too much friction.
Long-Term Care and Inspection
To keep from doing this job again anytime soon, you'll want to get into a simple inspection routine. It's a small habit that will save you from a massive headache later on.
Before every trip, just give the tire a firm shake. You shouldn't feel much side-to-side wobble. That tiny bit of play you set during the installation—about 1/8-inch at the tire's edge—is what you want. Anything more than that is a signal that something is starting to loosen up.
A lot of us swear by bearing protectors, which you probably know as Bearing Buddies. These clever, spring-loaded caps take the place of your standard dust cap. They let you add grease with a grease gun, which keeps positive pressure inside the hub. This is a huge help in keeping water out when you're launching and retrieving your boat.
Pro Tip: The idea behind a bearing protector isn't to cram the hub full of grease until it can't hold any more. You're just trying to maintain a slight outward pressure. Add just enough grease to see the spring-loaded piston rock a little bit. If you overfill it, you risk blowing out the rear seal, and then you've just created a whole new mess to fix.
Troubleshooting Common Post-Installation Issues
Even when you're careful, things can go sideways. Let's say during the disassembly, you find the spindle is scored or damaged. Stop right there. Putting new bearings on a bad spindle is a waste of time and money; they'll just fail in short order. At that point, the spindle needs professional repair, or you'll have to replace the whole axle.
It's also worth noting that safety standards are getting tighter. With 15.7% of the U.S. population using trailers for boating and other water activities, regulators are cracking down. More areas now require regular inspections to prevent failures on the highway, and skipping these checks can lead to fines. You can dig into the specifics by reviewing the latest research on the boat trailer market.
This kind of proactive maintenance is every bit as critical as your seasonal prep. For a full rundown on getting your boat ready for the off-season, take a look at our guide on how to winterize a boat and protect your entire investment.
A Few Common Questions
Even with a step-by-step guide in hand, it's natural to have a few questions pop up. Tackling a critical component like your trailer's bearings for the first time can feel a bit daunting. Let's run through some of the most common questions I get from other boaters.
How Often Should I Really Be Replacing My Bearings?
There’s no magic number here, because it all comes down to how and where you use your trailer.
If you’re dunking your trailer in saltwater, you have to be more aggressive with maintenance. I'd recommend a full inspection every single year and plan on a complete boat trailer bearing replacement every 2-3 years. This keeps you ahead of the inevitable corrosion. For freshwater-only boaters, you can usually stretch that out to about 3-5 years.
But honestly, the calendar is less important than what the bearings themselves are telling you. The best way to know is to get your hands dirty. Before the season kicks off, jack up each wheel and give it a good shake. Any side-to-side wobble is a red flag. Spin the wheel and listen. A smooth hum is fine, but any kind of grinding or rumbling means it's time for a replacement, no matter how long they've been in there.
My Two Cents: Don't just follow a schedule. The real condition of your bearings is what matters. One bad seal after a long trip can wreck a brand-new set. Regular, hands-on checks are your best defense against getting stranded.
Can I Get Away With Reusing the Old Races if They Look Fine?
I get this question a lot, and my answer is always a hard no. You absolutely have to replace the races when you install new bearings.
Think of it this way: bearings and their races wear in together, creating a perfectly matched set over thousands of rotations. An old race might look smooth, but it has a microscopic wear pattern that fits the old bearing perfectly.
Putting a new, pristine bearing against that worn surface is a recipe for disaster. It will cause rapid, uneven wear and lead to a much quicker failure. It's a classic shortcut that just creates more work later.
What's the Real Difference Between Grease Hubs and Oil Bath Hubs?
For most of us with recreational boats, we're dealing with grease-packed hubs. They're filled with a thick, marine-grade grease that's designed to resist water. They're pretty straightforward for DIY work and are quite forgiving. If you have a small seal leak, you might lose a bit of grease, but it's not going to cause an instant, catastrophic failure on the side of the highway.
Oil bath hubs are the big guns, usually found on heavy-duty commercial rigs. They use a fluid gear oil for lubrication inside a totally sealed hub. The lubrication is fantastic, but they don't have the same margin for error.
If a seal gives out, the oil can leak out fast, and the bearings can fail just as quickly. For the average boater, grease hubs are the more practical and manageable choice. This same mindset of proactive maintenance applies to getting your boat ready for the off-season, which you can read about in our guide to winterizing a boat for cold weather care.
At Better Boat, we're all about giving you the quality gear and solid advice you need for safe, hassle-free trailering. From the right marine grease to full hub kits, you can find everything you need to do the job right at https://www.betterboat.com.


