


Clean Marine Vinyl The Definitive Guide
If you want to properly clean marine vinyl, you need a game plan that goes beyond a simple wipe-down. We're talking about specialized care to fight back against the constant assault of sun, salt, and moisture. Get this right, and you’ll preserve the vinyl's flexibility, sidestep expensive reupholstering jobs, and protect your boat’s overall value.
Why Your Marine Vinyl Needs Special Care
Think of your boat's vinyl as high-performance gear, not just another seat cover. It's engineered to survive in a harsh environment, and if you neglect it, you’ll run into predictable—and totally avoidable—problems that tank your boat's look and feel.
The fallout from improper care shows up fast. Pull your boat out of storage after a damp winter, and you might find stubborn mildew blooming in the seams. Just one summer of intense sun can leave your seats looking chalky, faded, and feeling brittle when you sit down. And trust me, these aren't just cosmetic issues.
The Real Cost of Neglect
Once marine vinyl loses its suppleness, it gets prone to cracking and tearing. What starts as a tiny split can quickly become a huge, ugly rip that sends you straight to a professional upholsterer—and that’s a bill nobody wants to see. Proactive care is all about preservation. It’s about keeping the material’s integrity intact to avoid those costly repairs down the road.
On top of that, the condition of your upholstery has a direct line to your boat’s resale value. A boat with pristine, well-kept vinyl will always fetch a higher price than one with faded, cracked, or mildew-stained seats. It’s a clear signal to any potential buyer that you took meticulous care of your vessel.
This need for durable materials is exactly why the marine vinyl market is growing, pushed by the boom in recreational boating. Its built-in resistance to tears, water, and abrasion is essential for preventing rot in the harsh marine world. If you're curious, you can dive into the details on the marine vinyl market from Grand View Research.
Setting the Stage for Success
The core idea behind effective marine vinyl care is simple: use the right tools for the job. Harsh household chemicals, abrasive scrub pads, or all-purpose cleaners can strip away the vinyl’s protective topcoat, which just fast-forwards its decline.

The right cleaner for the job
Boat Interior Vinyl Cleaner
A dedicated pH-neutral marine vinyl cleaner lifts dirt, sunscreen, and salt spray without stripping the vinyl's protective topcoat. This is the foundation of every step that follows in this guide.
Using a dedicated, pH-neutral marine vinyl cleaner isn't just a suggestion—it's the bedrock of a maintenance routine that protects your investment for years to come.
When you adopt a gentle but consistent cleaning approach, you're setting yourself up for a lasting finish. This isn't just about getting things clean; it's about conditioning and protecting the material so it stays a durable and good-looking part of your boating experience.
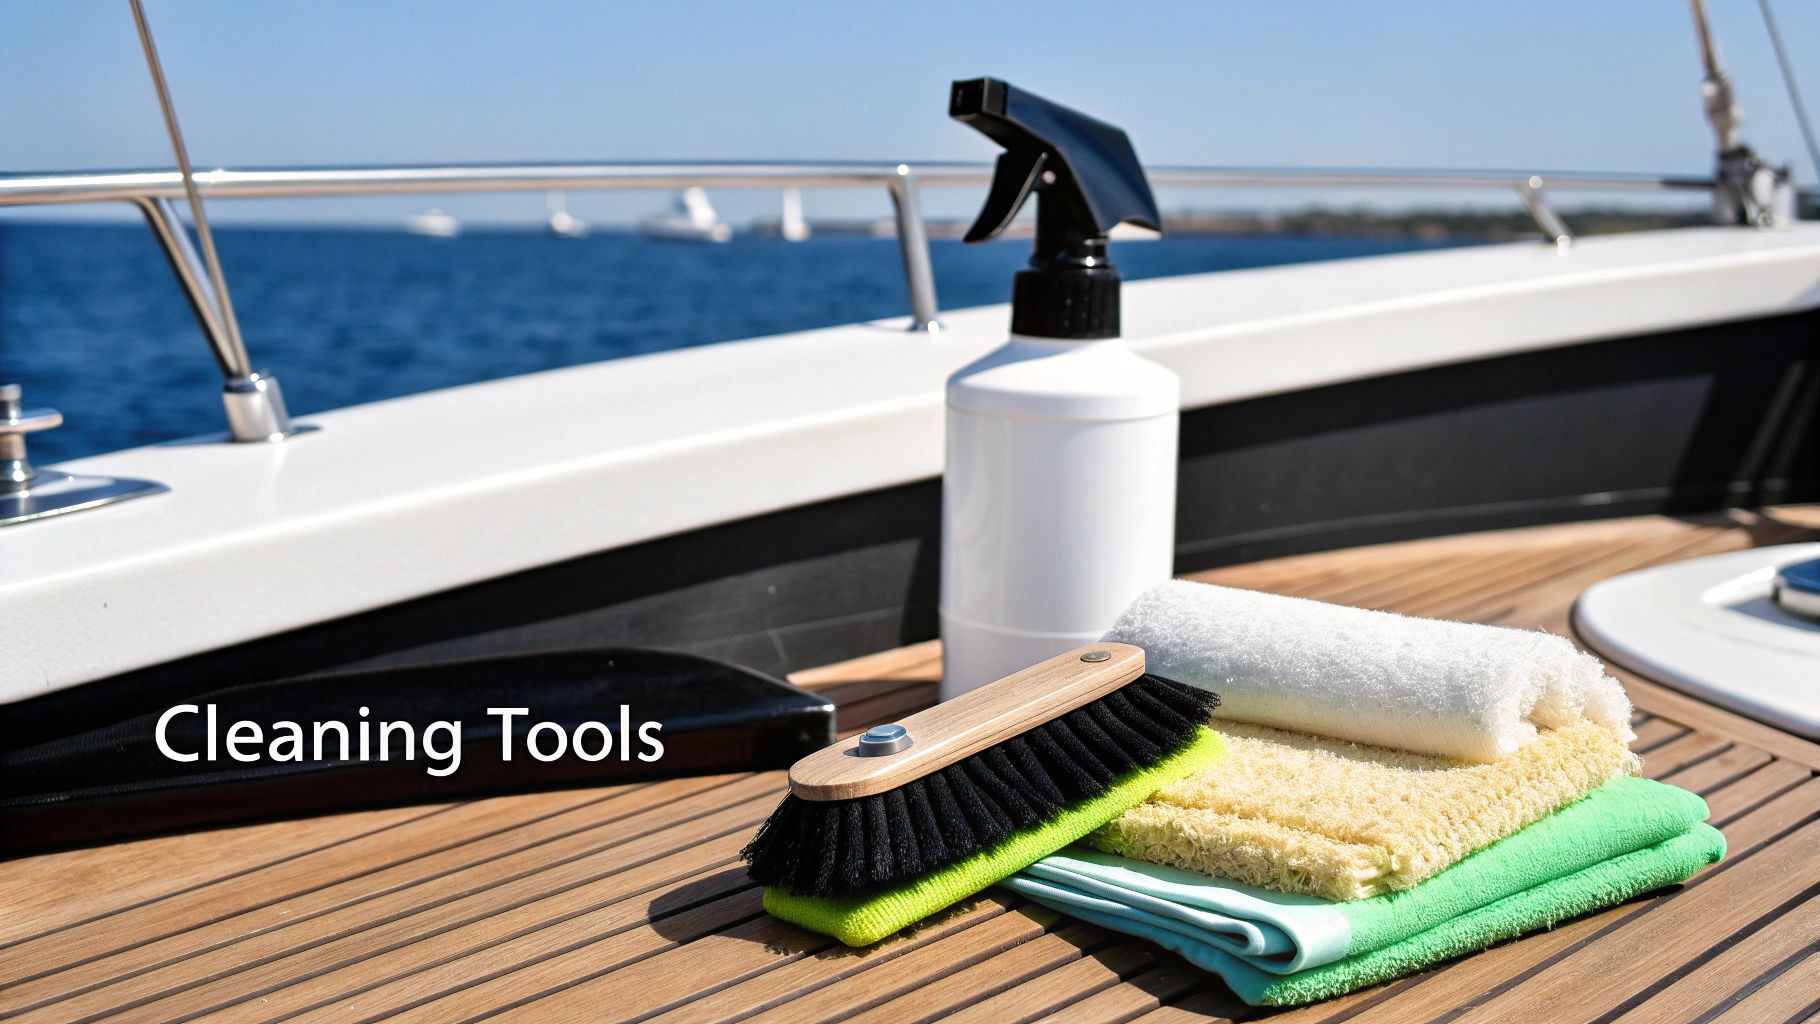
Building Your Vinyl Cleaning Arsenal
Before you even think about scrubbing, let's talk about tools. Getting the right gear together before you start cleaning your marine vinyl is the difference between a quick, satisfying job and an afternoon of frustration. T
his isn't about grabbing a random sponge from under the sink; it's about putting together a dedicated kit that will protect your boat's upholstery and leave it looking sharp.
When you have the right arsenal on hand, you can work smarter, not harder, and avoid causing any accidental damage.
The absolute most important piece of your kit is a good, pH-neutral marine vinyl cleaner. I can't stress this enough: using household chemicals is the single fastest way to destroy your boat’s seats.
Sure, products with bleach or ammonia might look like they're obliterating that mildew stain, but they're incredibly harsh. They'll strip away the vinyl’s protective topcoat, which is your first line of defense against the sun and sea. That chemical assault is what leads to premature fading, drying, and eventually, a spiderweb of ugly cracks.
Choosing Your Core Cleaning Tools
Once you have the right cleaner, you need the right applicators. Your goal is to agitate and lift all that dirt, sunscreen, and salt spray without scratching or scuffing the vinyl. This is a common mistake I see all the time—someone uses a brush that's way too stiff and leaves permanent marks all over their cushions.
Here’s what you really need in your primary toolkit:
- Soft-Bristle Brushes: Grab a couple of brushes with soft, synthetic bristles. They're perfect for working the cleaner into the textured grain of the vinyl to lift out embedded grime without being abrasive. A smaller detail brush is also a lifesaver for getting into tight seams and around stitching.
- Microfiber Towels: A big stack of clean microfiber towels is non-negotiable. Their fibers are super soft and absorbent, making them perfect for wiping away the cleaner and, crucially, for drying the surface completely. A dry surface is a happy surface that won't grow new mildew.
- Two Buckets: This is an old pro trick that makes a huge difference. Use one bucket for your soapy water and a second one for clean rinse water. This simple system stops you from dipping a dirty towel back into your cleaner and just spreading grime around. You get a genuinely clean finish this way.
Remember, the goal is to lift the gunk off the vinyl, not grind it further in. Gentle, steady agitation with the right tools always beats aggressive scrubbing with the wrong ones.
A well-stocked cleaning kit isn't just about making the job easier—it's one of the best forms of preventative maintenance you can do.
To make things crystal clear, I've put together a quick cheat sheet on what to use versus what to run away from when you clean marine vinyl.
Essential vs Damaging Cleaning Agents for Marine Vinyl
This table is your quick reference guide. On one side, you have the safe, effective tools of the trade. On the other, the common household items that will silently sabotage your boat's upholstery.
| Recommended Agent | Why It Works | Agent to Avoid | Potential Damage |
|---|---|---|---|
| pH-Neutral Marine Cleaner | Gently lifts dirt and stains without stripping protective layers. | Bleach or Ammonia | Strips vinyl's topcoat, causes yellowing, and degrades stitching. |
| Soft-Bristle Brush | Agitates grime in vinyl texture without scratching the surface. | Stiff or Abrasive Brushes | Scratches and permanently mars the vinyl surface, creating dull spots. |
| Microfiber Towels | Absorbent and non-abrasive for safe cleaning and drying. | Rough Terry Cloths | Can be too abrasive and may leave behind lint that sticks to the vinyl. |
| Fresh Water | Safely rinses away all cleaning residue to prevent dirt attraction. | "Magic" Erasers | Acts like fine-grit sandpaper, removing the vinyl's finish and texture. |
Sticking to the "Recommended" column will save you a world of headaches and keep your vinyl looking new for years to come.
The Deep Cleaning Process From Start To Finish
With your cleaning supplies in hand, it's time to get to work and restore your marine vinyl's fresh, clean look. This isn't about brute force or aggressive scrubbing; it’s a smart, methodical approach that breaks down grime, lifts out tough stains, and leaves a perfect finish without causing any damage.
Think of it as hitting the reset button on your boat's upholstery, especially after a long season of being exposed to the elements.
This whole deep-cleaning method is a simple, repeatable flow.
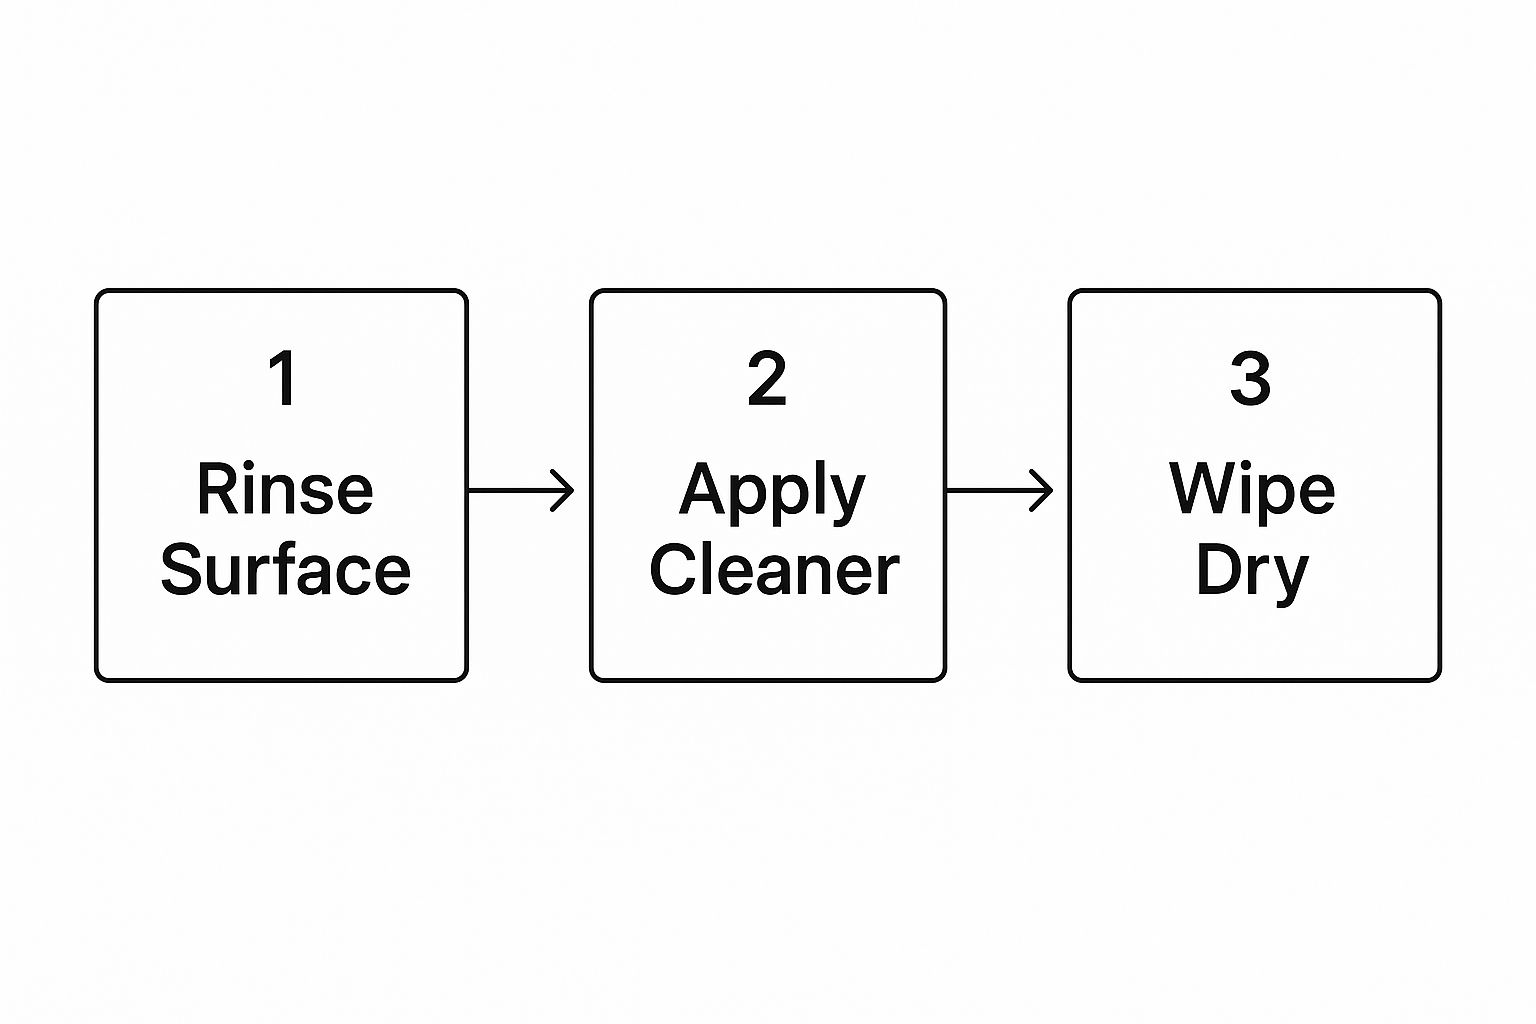
This visual really drives home the main principle of a good deep clean: it’s just a straightforward sequence of rinsing, cleaning, and drying. The key is that each step is just as important as the last.
Phase One: Prepping The Surface
Before you even think about spraying on a cleaner, your first move is to get rid of all the loose stuff. Grab a soft-bristle brush or even a shop vac with a brush attachment and go over every inch of the vinyl. You're trying to clear out all that surface-level dirt, sand, dried salt, and the inevitable crumbs that have gathered in the seams and corners.
Trust me, skipping this initial sweep is a mistake. If you don't, you’ll just be grinding all that abrasive debris right into the vinyl as soon as you start scrubbing. It's a quick step that prevents tiny scratches and makes your cleaner work way more effectively because it can tackle the embedded grime directly.
Phase Two: The Cleaning Application
Alright, you're ready to clean. If you happen to be working in direct sunlight, do yourself a favor and move the boat or the cushions into the shade. This simple trick keeps the cleaner from evaporating too quickly, which is a common cause of that sticky residue nobody wants.
Start by lightly misting a section of the vinyl with fresh water. Then, spray your dedicated marine vinyl cleaner, like Better Boat's Vinyl Cleaner, evenly across that dampened area. Now, let it sit for a minute or two. This "dwell time" is absolutely critical—it gives the formula a chance to penetrate and break down the stubborn stuff like sunscreen residue, body oils, and old drink spills.
Using your soft-bristle brush, gently work the cleaner into the surface using small, overlapping circles. This motion is perfect for lifting dirt out of the vinyl's texture without being too harsh. For a deeper dive into different methods, check out our guide on the 3 easy ways to clean vinyl seats on your boat for more pro tips.
Pro Tip: I always recommend working in manageable sections, maybe two-by-two feet at a time. This ensures you can thoroughly rinse and dry each area before the cleaner has a chance to dry on the surface. That’s the secret to avoiding streaks.
Phase Three: The Critical Rinse
Once you've scrubbed a section, it's time for the rinse. Don't rush this part; it’s just as crucial as the cleaning itself. Any cleaner residue you leave behind will become a magnet for fresh dirt, meaning your seats will get grimy again in no time.
You can use a hose with a gentle spray nozzle or just a bucket of clean water and a fresh microfiber towel to rinse the area completely. Make sure you flush out all the seams and stitching, because that's exactly where soapy residue loves to hide.

Phase Four: Drying For A Perfect Finish
Last but not least, never let your marine vinyl air-dry. I’ve seen it a hundred times: air-drying almost always leads to water spots. More importantly, it can leave moisture trapped deep in the seams, creating the perfect breeding ground for mildew.
Grab a clean, dry microfiber towel and wipe down every surface until it’s completely dry to the touch. Pay extra attention to all the little crevices and the underside of cushions. This final, thorough wipe-down is your insurance policy against mildew and the key to getting that spotless, professional-looking result.
Conquering Stubborn Stains, Mildew, and Grime
Let’s be real—sometimes, a simple wash just isn't going to cut it. Every boater eventually comes face-to-face with those infuriating stains that seem to materialize out of thin air. You know the ones I'm talking about: the dreaded black mildew spots after winter storage, or that accidental ink streak from a pen that went rogue.
When you're dealing with these, your routine wipe-down isn't the answer. You need a more focused strategy.
This is where specialized products become your best friends. I’ve seen too many boat owners try to blast away grime with harsh household chemicals, only to cause permanent damage to their vinyl. A dedicated formula is designed to attack the stain itself without eating away at your upholstery.
Battling Mildew the Right Way
Mildew is the public enemy number one for marine vinyl. Those little black and gray spots aren't just ugly; they're a fungus that can root itself deep into the material's pores. If you let it sit, it becomes a nightmare to remove.
Picture this: you pull off your boat cover after a long, damp winter and see a bloom of black spots across a back cushion. Your first instinct might be to reach for a bleach spray, but that’s a huge mistake. Bleach will absolutely weaken the vinyl and can even degrade the stitching holding your seats together.
A much safer and more effective method is using a mildew stain remover made specifically for marine environments.
Apply a product like Better Boat's Mildew Stain Remover directly onto the spots. Let it sit and work its magic for a few minutes, then gently scrub with a soft brush before giving it a good rinse. Patience is key here—let the product do the heavy lifting for you.
If you're staring down a serious mildew situation, check out our complete guide on winning the impossible battle against boat mildew for some more advanced techniques.
Tackling Common Stains Safely
Beyond mildew, you're going to encounter all sorts of other spills. From greasy sunscreen smudges to ink marks, each one requires a specific, vinyl-safe approach. Whatever you do, never use abrasive scrubbers or harsh solvents—they can permanently scar the surface.
Here’s a quick-hitter guide for some common culprits:
- Grease and Oil: Fresh stain? Hit it with a little cornstarch right away to soak up the oil. If it's already set in, a mild solution of dish soap and warm water worked in with a soft cloth is your best bet.
- Ink Marks: Isopropyl alcohol on a cotton swab can often lift ink. But always test it on a hidden spot first. Dab it gently; never rub, or you'll just spread the stain.
- Food and Drink Spills: For messes like ketchup or soda, a simple mix of mild soap and water usually does the trick if you get to it quickly.
Addressing Fading and Discoloration
The sun is another relentless foe. Over time, those powerful UV rays break down the vinyl, causing it to fade and look tired. While you can't magically reverse years of sun damage, you can stop it in its tracks and bring back some of that original luster.
A thorough deep cleaning followed by a quality UV protectant is the only real way to shield your vinyl from more harm. This focus on durability is a huge driver in the marine upholstery world.
The global marine vinyl market was valued at around USD 357.06 million in 2023 and is projected to hit USD 512.55 million by 2032. That growth is largely thanks to the demand for tough, UV-resistant materials on yachts and other vessels.
By using the right products and techniques, you can knock out these stubborn issues and keep your marine vinyl looking incredible season after season.
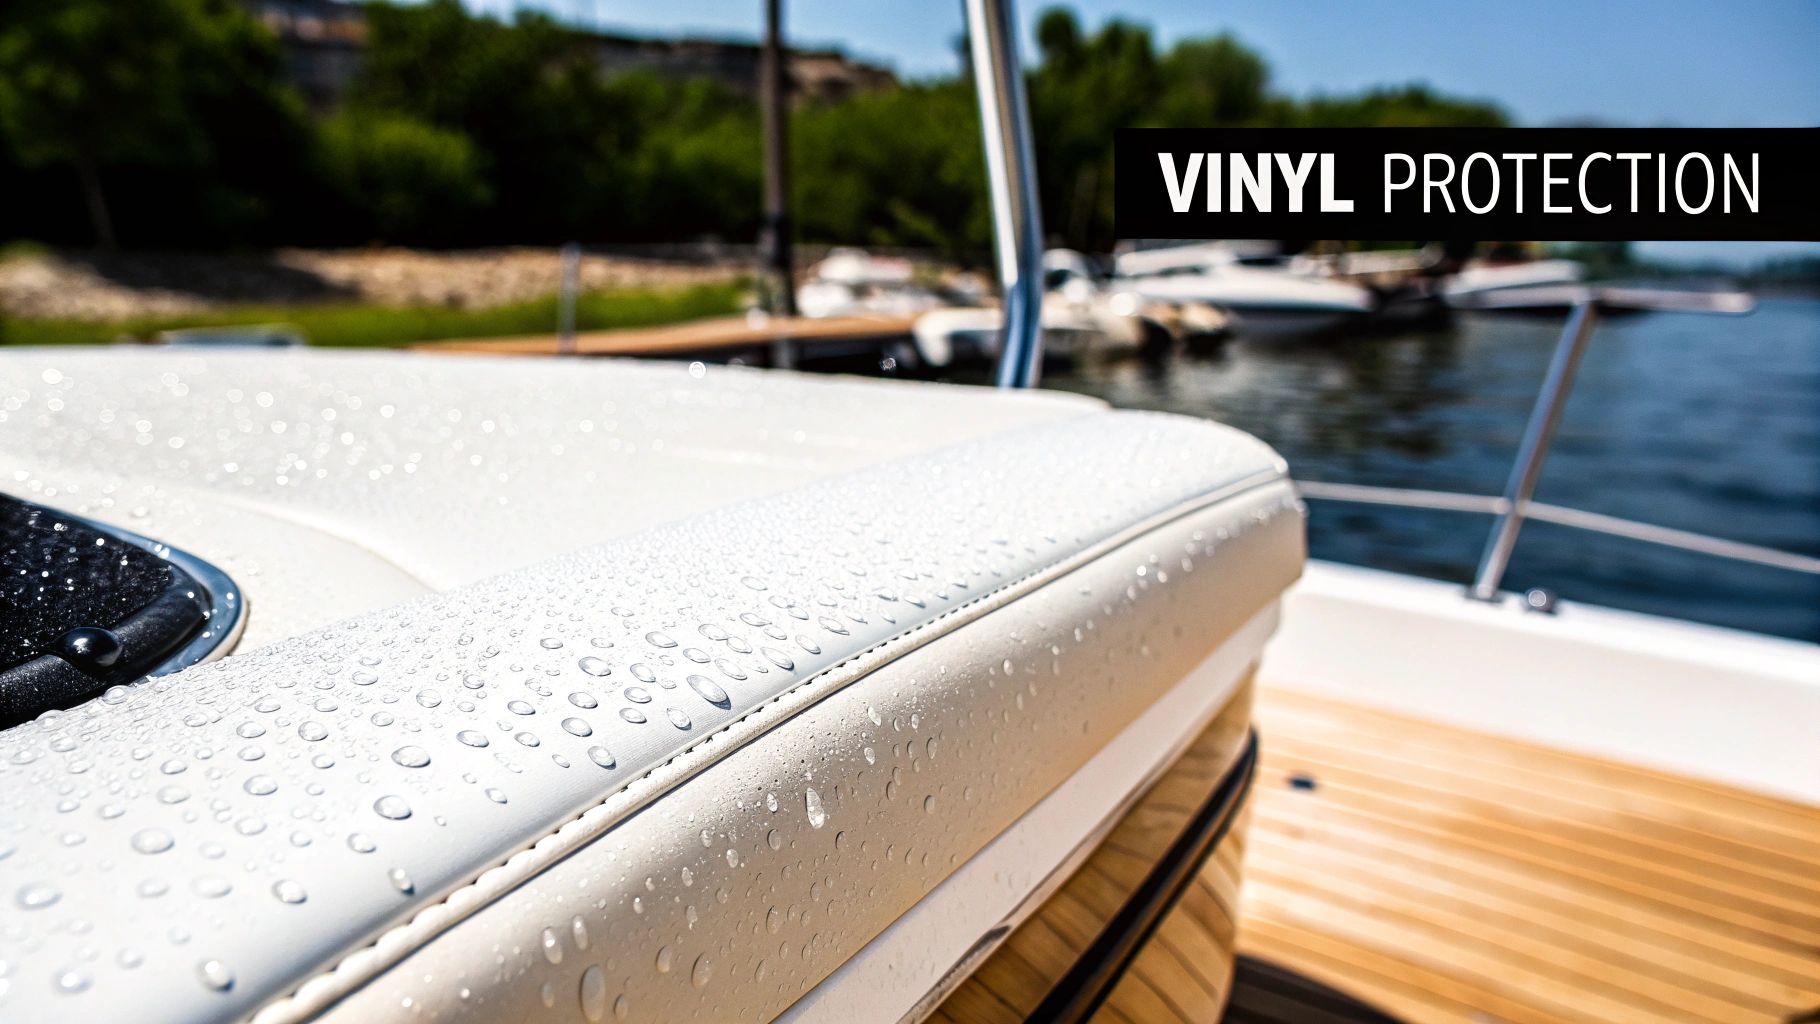
Applying A Protective Shield For Long-Term Defense

Lock in your clean with protection
Boat Interior Vinyl Protectant
The Boat Interior Vinyl Protectant forms a UV-blocking barrier that slows fading and keeps the vinyl supple between cleanings. Applying it right after a thorough clean gives it the best surface to bond to.
Getting your vinyl seats sparkling clean is a great feeling, but all that hard work can disappear in just a few weeks if you skip the final, most important step. The real secret to keeping your marine vinyl looking new isn’t just the cleaning—it’s what you do afterward to protect it.
Think of a high-quality UV protectant as invisible armor for your upholstery. This barrier does more than just add a nice sheen; it actively repels water, resists new stains from sunscreen or spilled drinks, and fights off the sun's brutal UV rays. That sun exposure is the number one reason boat seats fade, crack, and get that chalky finish over time.
How To Apply Your Vinyl Protectant
Applying the protectant is straightforward, but taking your time is crucial for getting that even, long-lasting coverage. If you rush it, you’ll end up with a streaky, blotchy finish that actually attracts dirt.
First things first: double-check that your vinyl is perfectly clean and bone dry. If you apply a protectant over any leftover dirt or moisture, you’re just sealing it in, which is a perfect recipe for mildew.
Once you're good to go, just follow these simple guidelines:
- Spray a Light, Even Mist: Grab a quality marine-grade protectant, like our Better Boat UV Protectant, and mist a light coat over a small section of vinyl.
- Wipe and Spread: With a clean, dry microfiber towel, gently spread the product across the surface. Use overlapping motions to make sure you don't miss a single spot.
- Buff It Out: Grab a second, completely clean microfiber towel and lightly buff the area to pick up any excess product. This is what prevents that sticky, greasy feeling and leaves you with a professional, non-slip finish.
The goal is to leave a microscopic layer of protection, not a thick, oily film. A little bit of product goes a long way. The final buff is the key to getting that perfect, non-greasy feel under your hands.
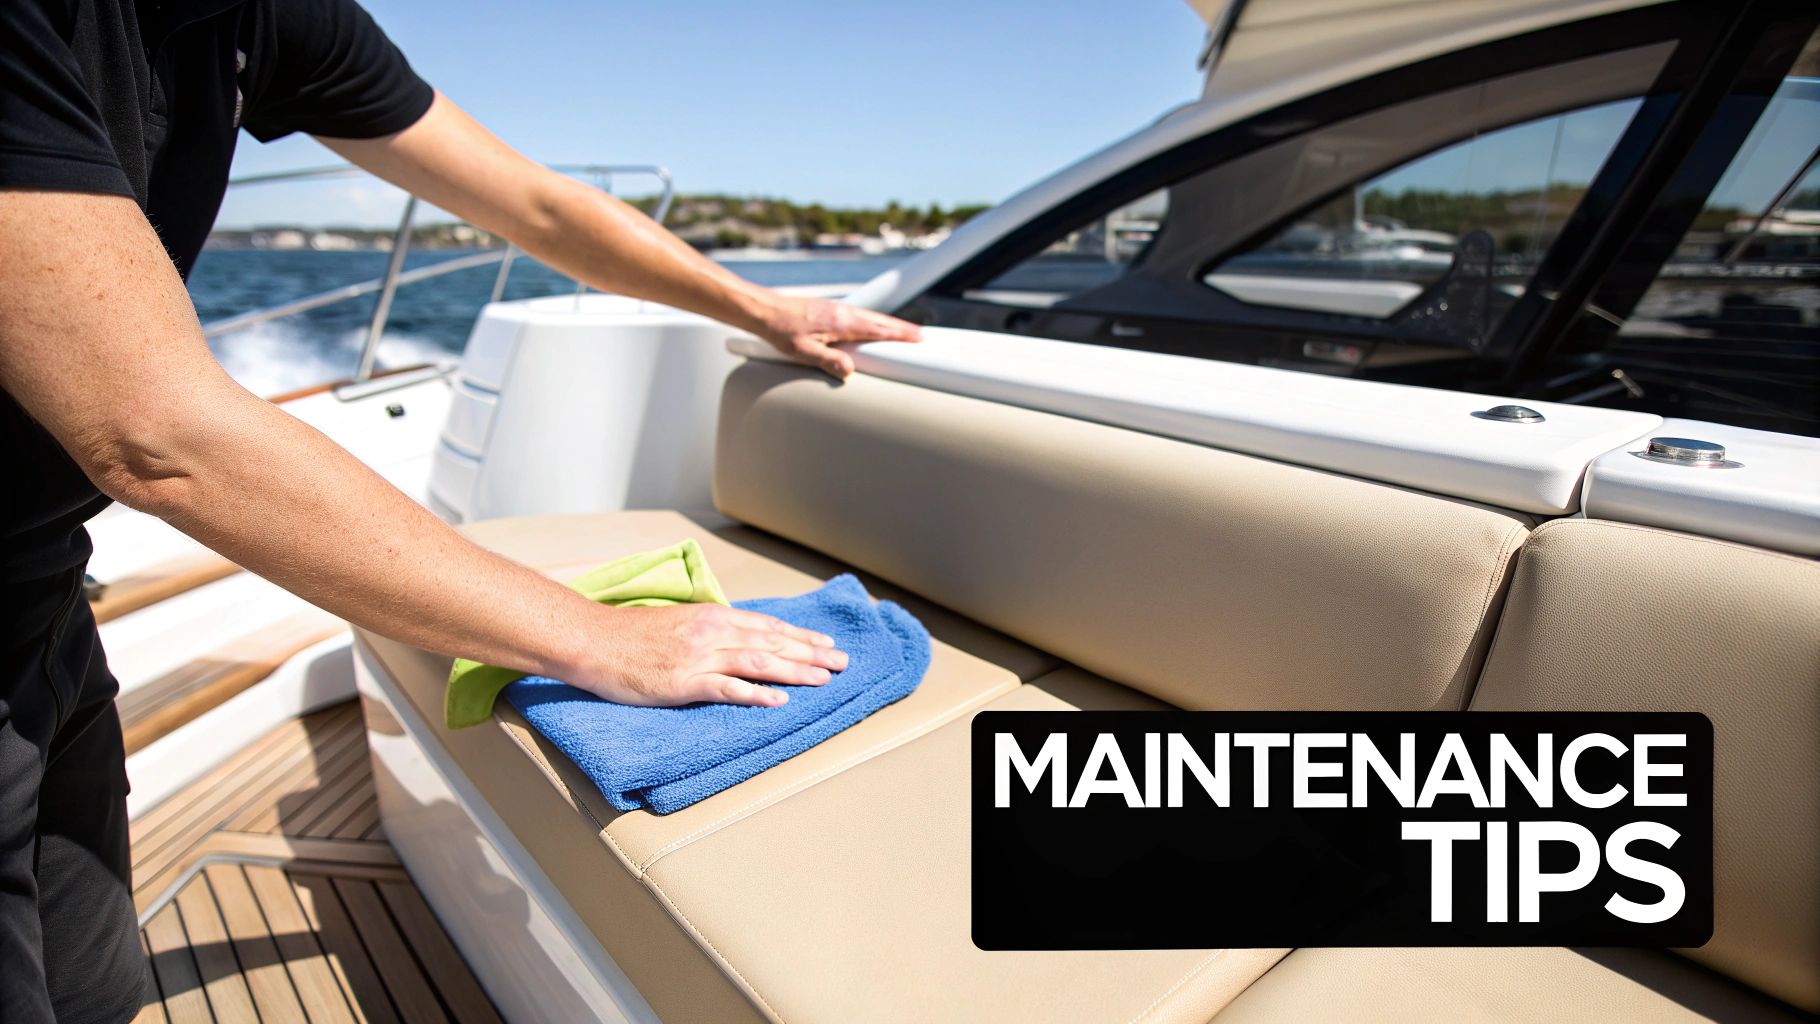
Creating A Maintenance Schedule
Protection isn't a one-time job; it's a regular part of your boat care routine. For most boaters, reapplying a UV protectant every 3-4 months during the season is enough to provide solid defense against the elements.
Consistent care is what keeps marine vinyl from breaking down. It's no surprise that the demand for durable, weather-ready materials is booming. The global marine vinyl market hit USD 0.91 billion in 2024 and is expected to climb to USD 1.3 billion by 2031. It’s a vital material in the boating world.
Making this a habit turns protection from a chore into one of your most powerful maintenance tools. To see how this step fits into the bigger picture, take a look at our complete guide to marine vinyl cleaner and restoration.
Common Marine Vinyl Cleaning Questions
Even with the best game plan, questions always come up. Marine vinyl isn't the same stuff you have on your patio furniture at home, and treating it the same way can lead to some expensive regrets.
A lot of boaters ask if they can use a few household tricks to handle tough stains. It’s definitely tempting, but that kind of shortcut can backfire and cause permanent damage to your upholstery. Let's tackle some of the most common questions we get from boaters just like you.
Can I Use A Magic Eraser On Boat Seats?
Let me be direct: this is a hard no. I know, a Magic Eraser feels like it can solve any problem, but on marine vinyl, it's a disaster waiting to happen.
That "magic" comes from its structure, which is essentially a super-fine abrasive—like sandpaper for your walls. When you scrub your boat seats with it, you're literally sanding off the protective top coat. This not only dulls the finish but also opens the vinyl up to UV damage and future stains. Just don't do it.
How Often Should I Apply A UV Protectant?
When it comes to the sun, consistency is everything. For most boaters who are out on the water seasonally, a fresh coat of a quality marine UV protectant every 3-4 months is a solid routine.
Now, if you're in a high-intensity sun spot like Florida or Arizona—or if your boat is always uncovered—you need to be more aggressive. Bumping that up to every 6-8 weeks is the best thing you can do to stop fading and cracking before it starts.
What Is The Best Way To Clean Stitched Areas?
Stitching is where dirt goes to hide and where mildew loves to get its start. The trick is to be gentle but persistent. An old toothbrush or a small detail brush is your best friend here.
Instead of spraying cleaner directly on the seam, which can soak the threads, spray it onto your brush. Gently work the brush along the stitching to coax out all that trapped grime. After you rinse, press a clean, dry microfiber towel firmly into the seam to soak up any lingering moisture. This is a critical step to keep mildew from forming deep inside the cushion.
Ready to give your vinyl the serious protection it needs? The products from Better Boat are made specifically for the harsh marine environment. They’ll keep your seats clean, protected, and looking sharp all season long.


