


A Complete Guide to Cleaning Teak Wood
Of all the materials on a boat, teak is a legendary classic. But cleaning teak effectively takes more than just a bit of elbow grease. It’s a process of working with the wood, protecting its natural oils and dense grain, not against them.
When done right, you can completely reverse that weathered, silvery-grey look from the sun and salt, bringing back the wood’s beautiful honey color and, more importantly, ensuring it stays structurally sound for years.
Quick answer: how to clean teak wood on a boat
Clean teak wood by rinsing first, applying a teak cleaner/brightener system with the grain, scrubbing gently with teak-safe tools, rinsing thoroughly, then letting the wood dry before oiling or sealing. Avoid pressure washers and generic harsh cleaners; teak is durable, but the surface grain can be damaged quickly.
Fast teak cleaning path
| Teak condition | Best next step | Better Boat path |
|---|---|---|
| Gray, dirty, or uneven teak | Clean and brighten before deciding whether to seal. | Teak Cleaner and Brightener |
| Freshly cleaned teak | Let it dry fully before oiling or sealing. | Microfiber cloths for drying standing water |
| Clean teak you want to keep warm-toned | Apply sealer/oil after cleaning, brightening, rinsing, and drying. | Teak Sealer Oil |
| Teak with mildew staining nearby | Treat mildew as a stain issue, then continue with teak-safe cleaning. | Mildew Stain Remover for mildew spots |
Why Proper Teak Care Is So Important
Teak's durability is why you see it on the decks of the finest boats and high-end outdoor furniture, but it's not invincible. The best way to think about your teak is as a long-term investment. Its real value isn't just in how it looks the day it's installed, but in its longevity—and that comes down to how you maintain it.
Your teak’s biggest enemies are the constant barrage of UV rays, saltwater spray, and the sneaky growth of mildew. Together, these elements are notorious for stripping the wood of its protective oils. This is what causes that familiar grey patina, which is a common misunderstanding. Many people think it’s a sign of distinguished aging, but it’s actually the first red flag of weathering that can lead to much bigger problems down the line.
Protecting More Than Just Looks
When you set out to clean your teak deck, you're doing a lot more than a quick cosmetic touch-up. You are actively preserving the health of the wood itself. If left to its own devices, teak can become brittle, stained, and eventually susceptible to rot.
A professional approach to cleaning isn't just about restoring color. It’s a critical maintenance task that stops the slow degradation of the wood, extending its life and protecting the value of your boat or furniture.
It's no surprise that the demand for quality teak care products is on the rise. The teak cleaner market was valued at around USD 1.2 billion and is on track to more than double by 2033. This boom is fueled by teak’s growing use in boat building and premium outdoor furniture, where durability is non-negotiable. You can see the full breakdown of these market trends in this detailed report.
The Value of Professional Techniques
Using the right methods and products, like the ones we've developed here at Better Boat, makes all the difference. It's the gap between a temporary fix that looks good for a week and a lasting restoration. The real goal is to lift away the grime and reverse the weathering without damaging the wood's delicate grain.
There's a reason teak has such a celebrated reputation on the water, which you can read more about in our guide on why teak is a preferred wood for boats. By treating teak care as a fundamental part of boat ownership, you’re making sure your deck or furniture remains a point of pride for seasons to come.
Gearing Up To Clean Your Teak
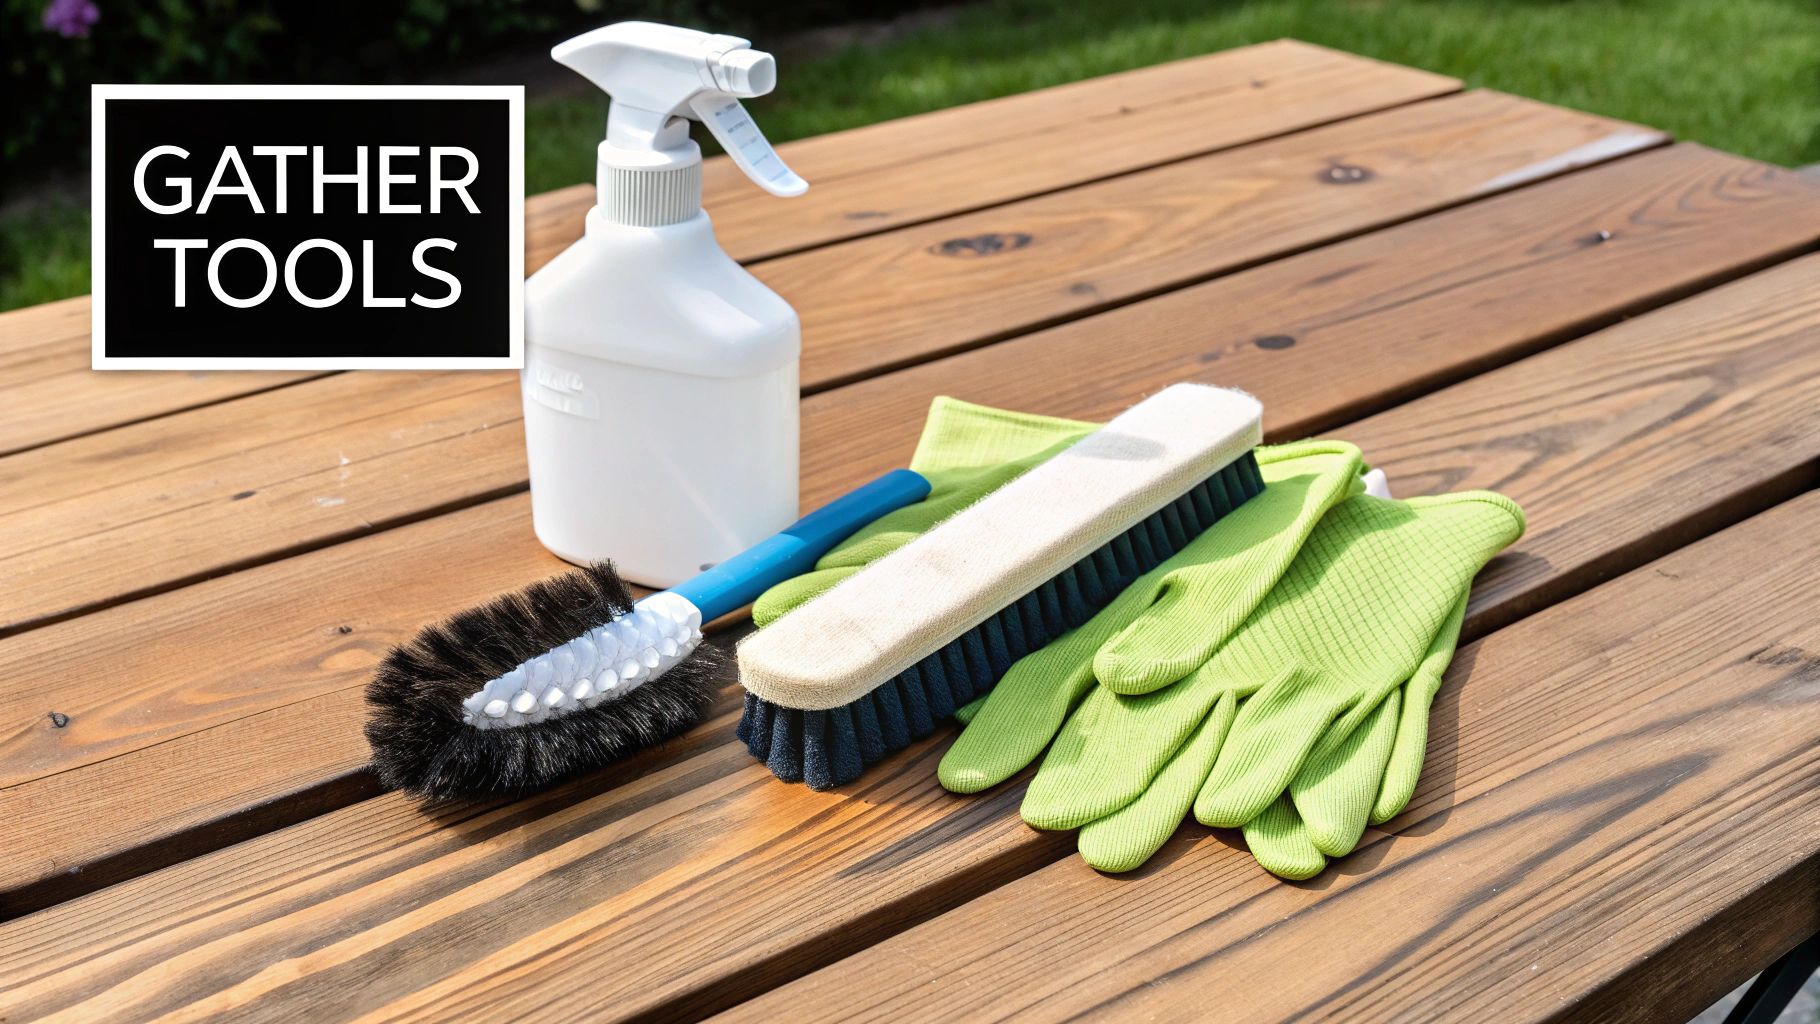
Before you even think about getting your teak wet, the most important thing you can do is get all your gear in one place. Trust me, having everything you need within arm's reach is the secret to turning what looks like a big job into a smooth and straightforward process.
It’s just like prepping your ingredients before you start cooking. A little organization up front helps you avoid those common slip-ups that can accidentally damage that beautiful wood you're trying to save.
Picking the Right Cleaner for the Job
Your choice of cleaner is probably the biggest decision you'll make in this whole process. What you need really depends on the state your teak is in right now.
- One-Part Cleaners are your best bet for routine upkeep and teak that's only lightly weathered. If the wood just looks a bit tired or has some surface-level dirt, a single-step product is all you need for a quick refresh.
- Two-Part Teak Cleaner Systems are the heavy hitters you bring in for a full-blown restoration. When your teak has turned that stubborn, silvery-grey color or is covered in mildew and deep stains, this is what you need. The first part is a potent cleaner to lift out all that embedded grime, and the second is a brightener that brings back teak’s natural, warm honey color. For a true before-and-after transformation, a teak cleaner and brightener system is the way to go.
While you're at it, it can be helpful to check out some of the best cleaner for wood cabinets available, as many of the same care principles apply to different types of wood around your home and boat.
Your Essential Teak Cleaning Toolkit
Getting your toolkit right is just as important as the cleaner you choose. The right tools protect the wood; the wrong ones can cause irreversible damage to the soft grain. Before we get into the nitty-gritty, let's lay out everything you'll need.
| Item | Recommended Type | Why It's Essential |
|---|---|---|
| Teak Cleaner | One-part or two-part system | The one-part is for maintenance; the two-part is for deep restoration and brightening. |
| Scrub Brush | Soft-bristle, synthetic | A stiff brush will scratch and damage the wood grain. Soft bristles clean effectively without harm. |
| Buckets | At least two | One for your cleaning solution and one for clean rinse water to avoid cross-contamination. |
| Rags or Sponges | Microfiber cloths | Perfect for applying solutions and wiping surfaces clean without leaving lint behind. |
| Safety Gear | Gloves and eye protection | Teak cleaners can be strong. Always protect your skin and eyes from splashes. |
With these items ready to go, you’ve set yourself up for a successful cleaning day.
The Tools and Applicators You Can't Skip
Beyond the cleaner, the tools you use make all the difference. Using the wrong brush or, even worse, a power tool can do more harm than good, permanently damaging the soft grain of the teak.
I’ve seen it happen too many times: someone reaches for a pressure washer thinking it’s a quick fix. That high-pressure jet of water might seem effective, but it will absolutely gouge the wood, strip its natural protective oils, and leave behind a fuzzy, splintered mess that’s a nightmare to fix.
Instead, stick to the basics that work with the wood, not against it.
A soft-bristle brush is non-negotiable. You need something with soft, synthetic bristles that can get into the grain and scrub away the dirt without scratching the surface. You'll also want at least two buckets—one for your cleaner and one filled with fresh water for rinsing. A few clean microfiber rags are also great to have on hand for wiping things down.
And of course, safety first. Teak cleaners are powerful, especially the two-part systems, so always wear gloves and eye protection. With this simple kit, you’re ready to clean your teak like a pro and get results that will protect your investment for years to come.
A Practical Guide to Reviving Your Teak
Alright, you've got your tools ready, so it's time to get your hands dirty and bring that weathered teak back to life. Restoring teak isn't a one-and-done job; it's a process with three distinct phases: Cleaning, Brightening, and Protecting. Each step builds on the last, and following the sequence is what gets you that professional, long-lasting finish we're all after.
Think of it this way: whether you're staring down a mildew-stained boat deck that has seen far better days or just hoping to spruce up some patio furniture, this is the proven path to success.
This quick visual breaks down the first few moves you'll make to get the surface ready for a deep clean.
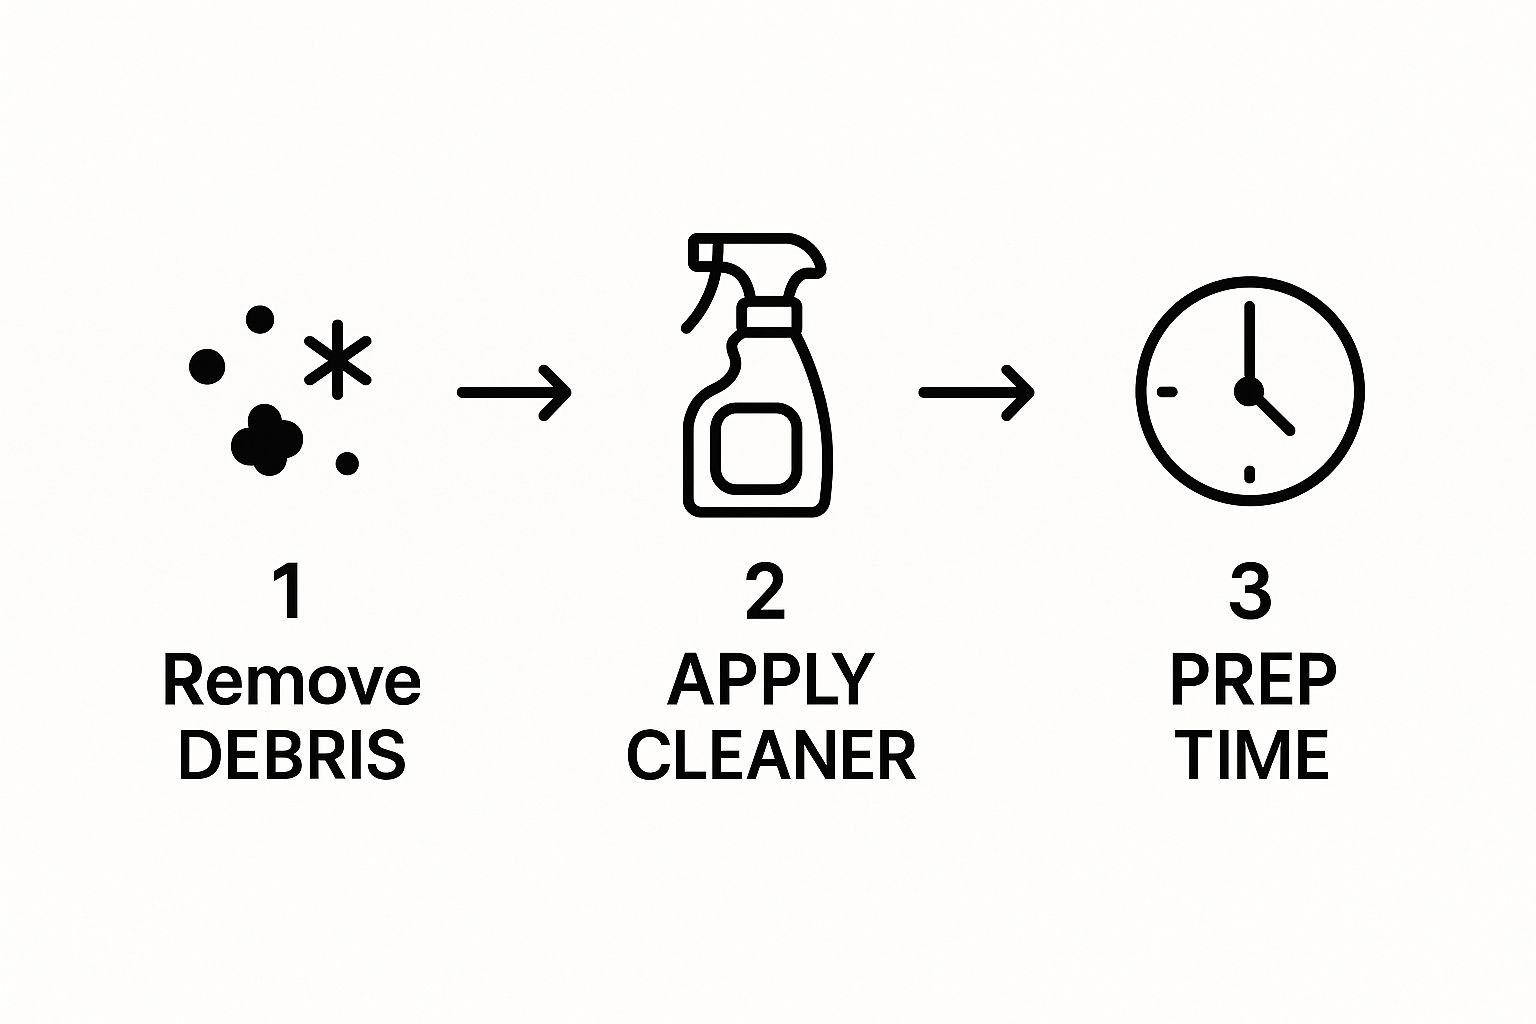
As you can see, the real work starts before any product even touches the wood. A little prep goes a long way.
The Initial Cleaning Phase
First things first, you've got to deal with all that surface-level grime. Before you even think about opening a bottle of cleaner, give the teak a good rinse with fresh water. This simple pre-soak loosens up the dirt and makes your cleaner work that much better.
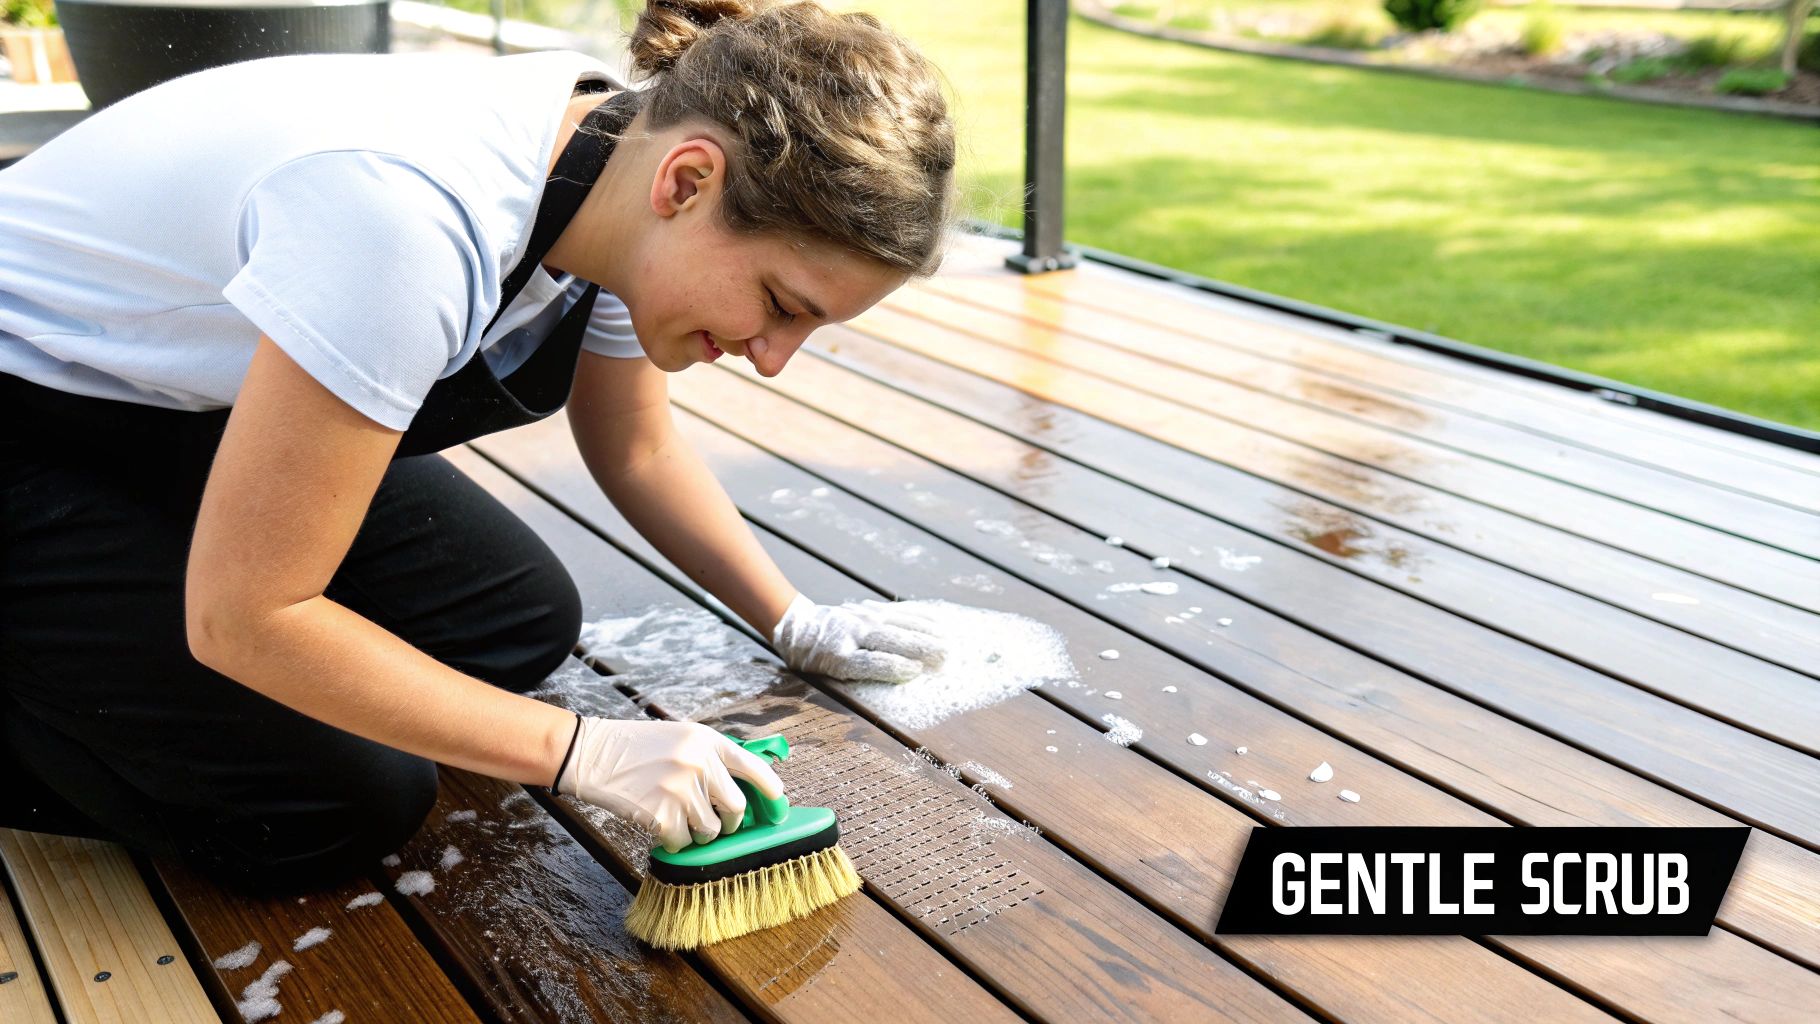
With the wood damp, it's go-time. If your wood is looking seriously tired and grey, our two-part Better Boat Teak Cleaner and Brightener is your best bet. Start with Part 1, the cleaner itself. Grab a sponge or a soft cloth and apply it evenly across the entire surface.
Now, let it sit for about two to three minutes. This is a crucial step. It gives the cleaner time to work its way into the grain, lifting out all that deep-set dirt, grey oxidation, and any old, failed oils. Just be sure not to let it dry, especially if you're working in the sun.
Next, pick up your soft-bristle brush. Here’s the golden rule for cleaning teak wood: always scrub with the grain. Never go against it. Scrubbing across the grain will rough up the soft wood fibers and can leave fine scratches. Use gentle but firm pressure, and you’ll see the gunk start lifting away almost instantly.
Brightening for That Golden Glow
After a good scrub, it's time for the second phase: brightening. Honestly, this is the step that separates a decent cleaning job from a fantastic one. The teak brightener, which is Part 2 of our kit, actually does two jobs at once.
First, it neutralizes the powerful cleaner from Part 1, stopping the chemical reaction and making sure no residue gets left behind. Second, it reverses the greying from oxidation, bringing back those beautiful, warm honey tones that make teak so desirable.
Apply the brightener the same way you did the cleaner—spread it evenly and let it sit for a few minutes. You don't need to scrub hard this time; a light pass with the brush is all it takes. Then, give the whole area a very thorough rinse with plenty of fresh water until you're sure all traces of the products are gone.
This brightening step is the secret sauce for achieving that rich, vibrant color. If you skip it, the wood will look clean but often pale and washed-out. It’s what truly restores that classic, luxurious teak appearance.
Let the teak dry completely before you even think about the next step. Depending on the humidity and sun, this could take anywhere from a few hours to a full day. Be patient.
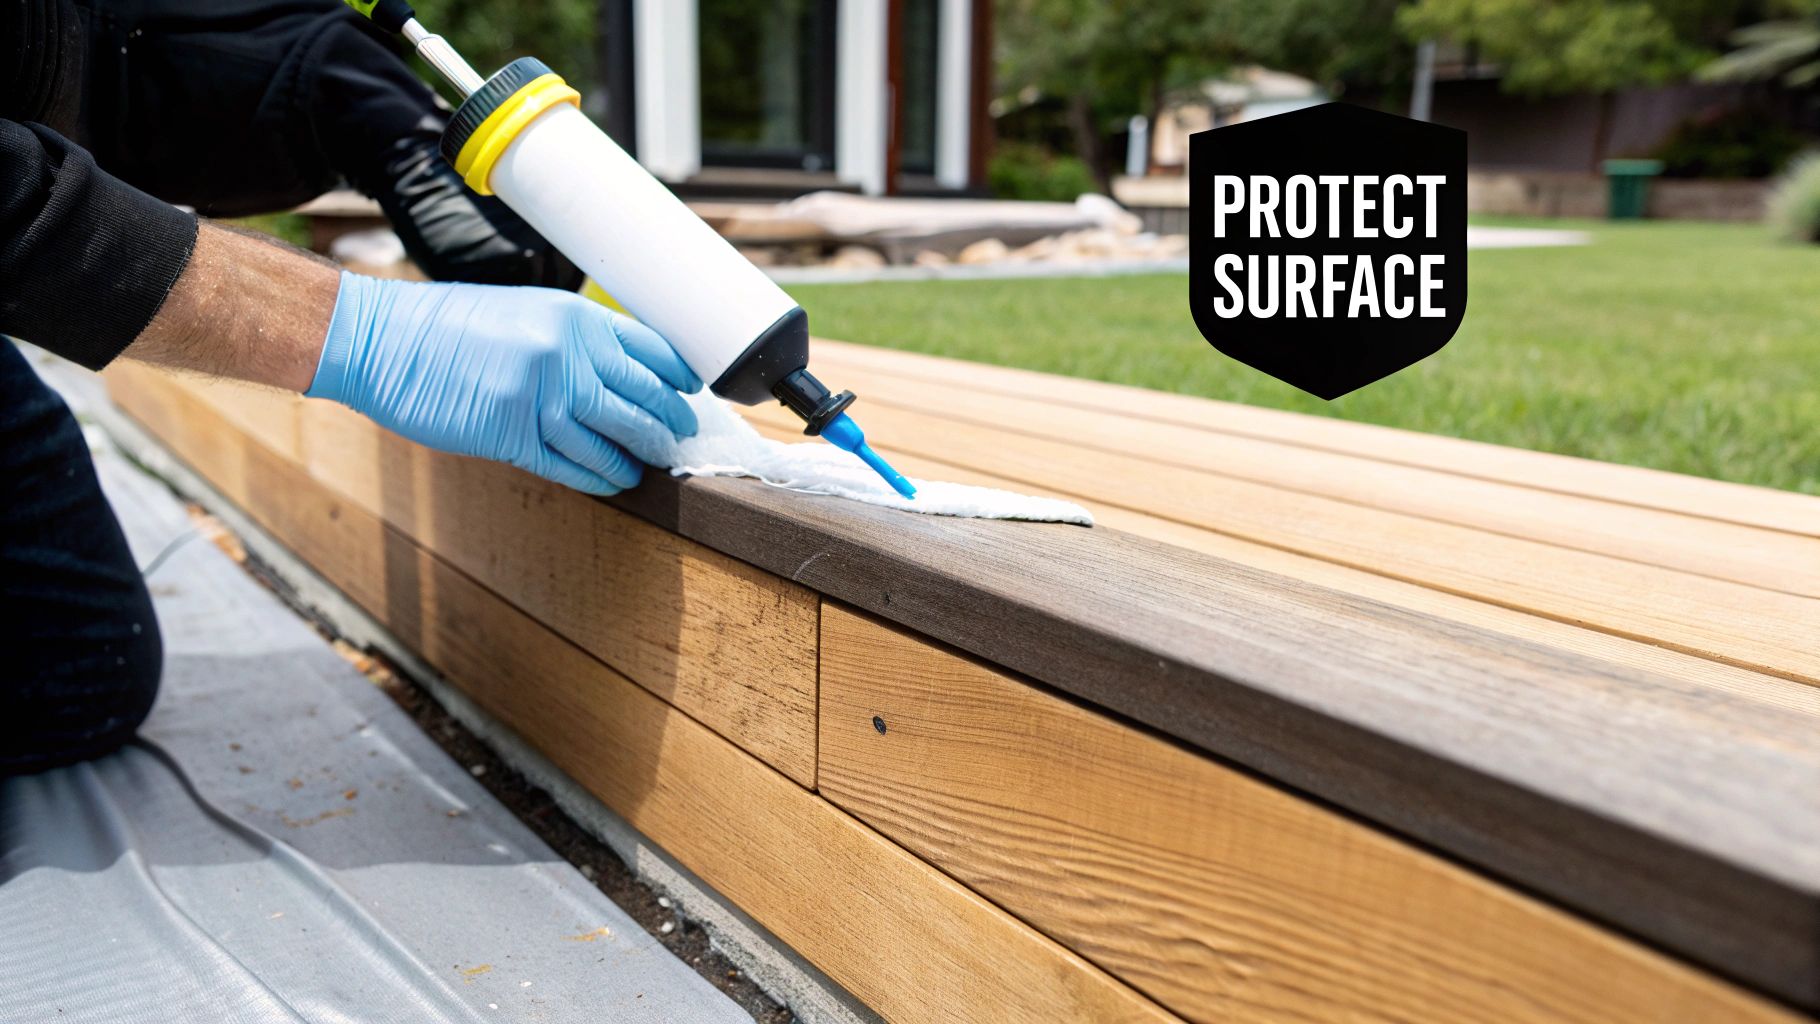
Protecting Your Restored Wood
Okay, your teak is now clean, bright, and bone-dry. The final step is to protect all your hard work so it stays looking great. You have two main routes you can go down here: teak oil or a teak sealer.
- Teak Oil: This option penetrates deep into the wood, nourishing it from the inside out and really enriching its color. It gives you a classic, natural finish but expect to reapply it every few months to keep up the protection.
- Teak Sealer: This product creates a protective barrier right on the surface of the wood. It offers much longer-lasting protection against UV rays and moisture, often good for a full season or more. It's definitely the lower-maintenance choice.
The right one for you really boils down to the look you prefer and how much time you're willing to put into maintenance. For a deeper dive into this, check out our complete guide to caring for teak on your boat.
And while teak has its own set of rules, many of the core ideas from general wood floor restoration can give you great insight into bringing any tired wood surface back from the brink. By sticking to these three phases—Clean, Brighten, and Protect—you can absolutely get your teak looking as good as new.
Expert Tips for a Professional Finish
 Getting the basics right is one thing, but this is where we get into the details that separate a decent job from a truly professional one. After years spent detailing boats and bringing furniture back to life, I’ve picked up a few tricks of the trade. These are the small but critical techniques that make all the difference.
First things first: always test your cleaner on a hidden spot. I can't stress this enough. Find an inconspicuous area—like the underside of a chair or inside a boat locker—and do a quick patch test. This little bit of prep work ensures the product plays nicely with your specific piece of wood before you go all-in on the entire surface.
Work Smart, Not Hard
Pay attention to your surroundings when you start cleaning. If you can, always work in the shade or wait for a cool, overcast day. Working in direct sunlight is a recipe for disaster; it causes the cleaning solution to dry way too fast, leaving behind streaks and splotches that are a real pain to fix.
This brings me to another key principle: a 'less is more' approach.
It's easy to think that scrubbing harder means cleaning better. But teak is a fairly soft wood, and getting too aggressive with a brush can chew up the grain, leaving it with a fuzzy texture and wearing it down prematurely. A soft-bristle brush and a gentle touch are all you need.
The Finishing Touches
Let the cleaner do the work for you. Give it a few minutes to soak in and dissolve all that built-up grime before you even think about scrubbing. A little patience here goes a long way in preserving the wood's integrity for years to come.
Once the cleaning and brightening steps are done, the final rinse is more important than most people realize.
- Rinse Like You Mean It: Spend a little extra time rinsing with fresh, clean water. You want to remove every last trace of residue. Any leftover cleaner or brightener can mess with how well your teak oil or sealer bonds to the wood.
- Wipe It Down: After the final rinse, grab a clean microfiber cloth and wipe away any standing water. This simple step helps the teak dry more evenly and prevents annoying water spots from forming.
This careful approach gives you the perfect canvas for your protective coat, which means a far more durable and beautiful result.
The global demand for high-quality teak furniture really highlights how important this kind of care is. The market was valued at around USD 8.5 billion in 2023 and is only expected to keep growing. Teak’s popularity comes from its legendary durability—and that durability is best maintained with careful, periodic cleaning. You can learn more about the expanding teak furniture market on dataintelo.com.
By adding these pro tips to your routine, you’re doing more than just cleaning your teak. You're performing a proper restoration that will protect your investment.
Keeping Your Teak Beautiful All Year
So, you’ve put in the work and brought back that gorgeous, honey-gold glow to your teak. Awesome. The last thing you want is to have to do that whole restoration project all over again next season. The good news? You don’t have to.
Keeping that look is way easier than getting it back. We’re not talking about endless scrubbing, just a smart, simple routine that locks in the beauty of your hard work.
The key is knowing the difference between a quick cleanup and a full reapplication of your sealer or oil. A little prevention now saves a ton of elbow grease later. Spilled some red wine on the patio table? Blot it up fast. Just got back from a day on the water? A quick rinse to get the saltwater off does wonders. These little things stop minor messes from becoming deep, stubborn stains.
Your Maintenance Plan Depends on Where Your Teak Lives
Think about it: a boat deck getting blasted by salty air and sun is going to need a different kind of love than a patio set in a calm, dry climate. You have to tailor your routine to the environment.
- For Boats and Marine Teak: Salt is the enemy. After every trip out on the water, give your teak a thorough fresh-water rinse. This washes away salt crystals that would otherwise dry out and damage the wood fibers over time.
- For Patio and Outdoor Furniture: A simple weekly dusting and a wipe-down with a damp cloth usually does the trick. You might need to be a bit more attentive during high-pollen seasons or right after a big rainstorm.
Don’t look at maintenance as another chore. It’s your insurance policy for all that hard work you just did. Five minutes of care now can easily save you five hours of heavy-duty restoration next year.
Taking this proactive approach is more popular than ever. As more people get into boating and deck-out their outdoor living spaces, nobody wants to look at dirty, mildew-covered surfaces. This has fueled a demand for effective, responsible products. In fact, the market for eco-friendly teak cleaners is growing as more people look for better ways to care for their investment.
Knowing When It's Time to Re-Oil or Reseal
A freshwater rinse is perfect for day-to-day upkeep, but your protective finish will eventually need a refresh. How often depends entirely on the product you used and how much sun, salt, and rain your teak gets.
If you went with a teak oil, you might need to apply a fresh coat every 3-6 months to keep that rich, deep color. A quality sealer, however, can often last a full year or even longer.
The best way to tell? The water test. See if water still beads up on the surface. When you notice it starting to soak into the wood instead of sitting on top, that’s your cue. It’s time for a maintenance coat.
For these quick touch-ups, you don't need the whole three-step kit. A high-quality teak cleaner/brightener is useful for quick touch-ups when the wood is ready for a maintenance clean.
Common Questions About Teak Care
Even when you've got a solid plan, a few questions always seem to pop up in the middle of a project. Let's run through some of the most common ones we get about cleaning teak wood. Getting these answers straight will give you the confidence to get a fantastic result every single time.
Can I Use a Pressure Washer on My Teak?
It's so tempting to pull out the pressure washer and blast away the grime in a fraction of the time. But we strongly advise against it. Teak is a surprisingly soft wood, and that intense, focused jet of water can easily gouge the surface.
You'll do more than just leave marks, though. High pressure strips away the wood's natural protective oils and can raise the grain. This leaves you with a fuzzy, splintered mess that’s a real pain to smooth out. For a safe and effective clean, you really have to stick with a soft-bristle brush and some good old-fashioned elbow grease.
Should I Use Teak Oil or a Teak Sealer?
This is easily one of the most frequent questions we hear. The right answer really comes down to the look you're after and how much time you're willing to put into maintenance.
- Teak Oil gives you that classic, warm finish by penetrating the wood and enriching its natural color. The trade-off is that it offers less protection from the elements and you'll likely need to reapply it every 3-6 months.
- Teak Sealer is different—it forms a protective barrier right on top of the wood. This gives you a much longer-lasting defense against UV rays and moisture, often lasting a full season or even longer.
So, if you want that traditional, rich look and don't mind the upkeep, oil is a great choice. But if you prefer a "set it and forget it" approach for the year, a sealer is the way to go.
What Is a Two-Part Teak Cleaner?
When you start shopping for products for cleaning teak wood, you'll see one-part and two-part systems. A one-part cleaner is a single solution, and it’s perfect for routine upkeep or cleaning teak that’s already in pretty good shape.
A two-part teak cleaner system is the heavy-hitter you bring in for a true restoration. Part 1 is a powerful cleaner that gets in deep to strip away all that gray oxidation, ground-in grime, and old, failed oils. Part 2 is a brightener that neutralizes the cleaner and brings back that beautiful, golden honey color.
If your teak is looking gray, weathered, or stained, a two-part cleaner is almost always the best choice for bringing it back from the brink.
For every job, from a light touch-up to a full-blown restoration, Better Boat has the pro-grade products you need to protect your investment and keep your teak looking its absolute best.
Explore our complete collection of teak care solutions at BetterBoat.com


