


How to Clean Boat Seats for Lasting Results
If you want to keep your boat seats looking sharp, it's pretty simple: give them a quick rinse with fresh water and some gentle soap every week. Then, set aside time for a deeper clean once a month using a proper marine-grade cleaner. Trust me, this little bit of effort is your best defense against long-term damage from sun, salt, and mildew. It protects your investment and makes sure your boat is always ready for guests.
Why Regular Boat Seat Cleaning Is Non-Negotiable
 Your boat’s upholstery is constantly under attack. Between corrosive saltwater spray, harsh UV rays, and the usual spills and grime, the marine environment is incredibly tough. Ignoring this is a mistake that can get expensive, fast.
Keeping your seats clean is more than just about looks; it's a core part of boat maintenance. When you let things slide, you’re inviting mildew to grow in the stitching, letting salt eat away at the finishes, and allowing sunlight to bake the material until it gets brittle and cracks. A proactive cleaning routine stops this decay before it even gets a foothold.
The Problem with Common Mistakes
I've seen it a hundred times: a boat owner grabs a household cleaner like bleach or an all-purpose spray, thinking it'll do the trick. Unfortunately, these products usually cause more harm than good. They can strip the protective topcoat right off your vinyl, dry out leather, and weaken fabric fibers. Before you know it, you're looking at a huge reupholstering bill.
Key Takeaway: The real goal isn't just to wipe away dirt. It's about preserving the material itself. Using the right tools and cleaners designed specifically for marine use is the only way to get a deep clean without causing a lot of unintended damage.
Establishing a Winning Routine
A consistent cleaning schedule is the secret sauce here. Ask any boating maintenance pro, and they'll tell you to rinse vinyl boat seats with fresh water and wipe them down with a gentle soap at least once a week. You’ll also want to do a more intensive cleaning monthly, since airborne dust and grime settle on your seats even when the boat is just sitting at the dock.
This guide will walk you through a straightforward process that works for any material you might have:
- Durable Vinyl: This is the most common material you'll find, and it requires a gentle but effective approach.
- Delicate Leather: Leather needs specific cleaners and conditioners to keep it from drying out and cracking.
- Woven Fabric: The key here is to clean without soaking the material, which would just encourage mildew to grow.
While every boat has its own unique challenges, many general upholstery cleaning principles still apply. Getting a handle on these basic techniques will give you the confidence to maintain your boat's interior like a seasoned professional.
Assembling Your Boat Seat Cleaning Toolkit
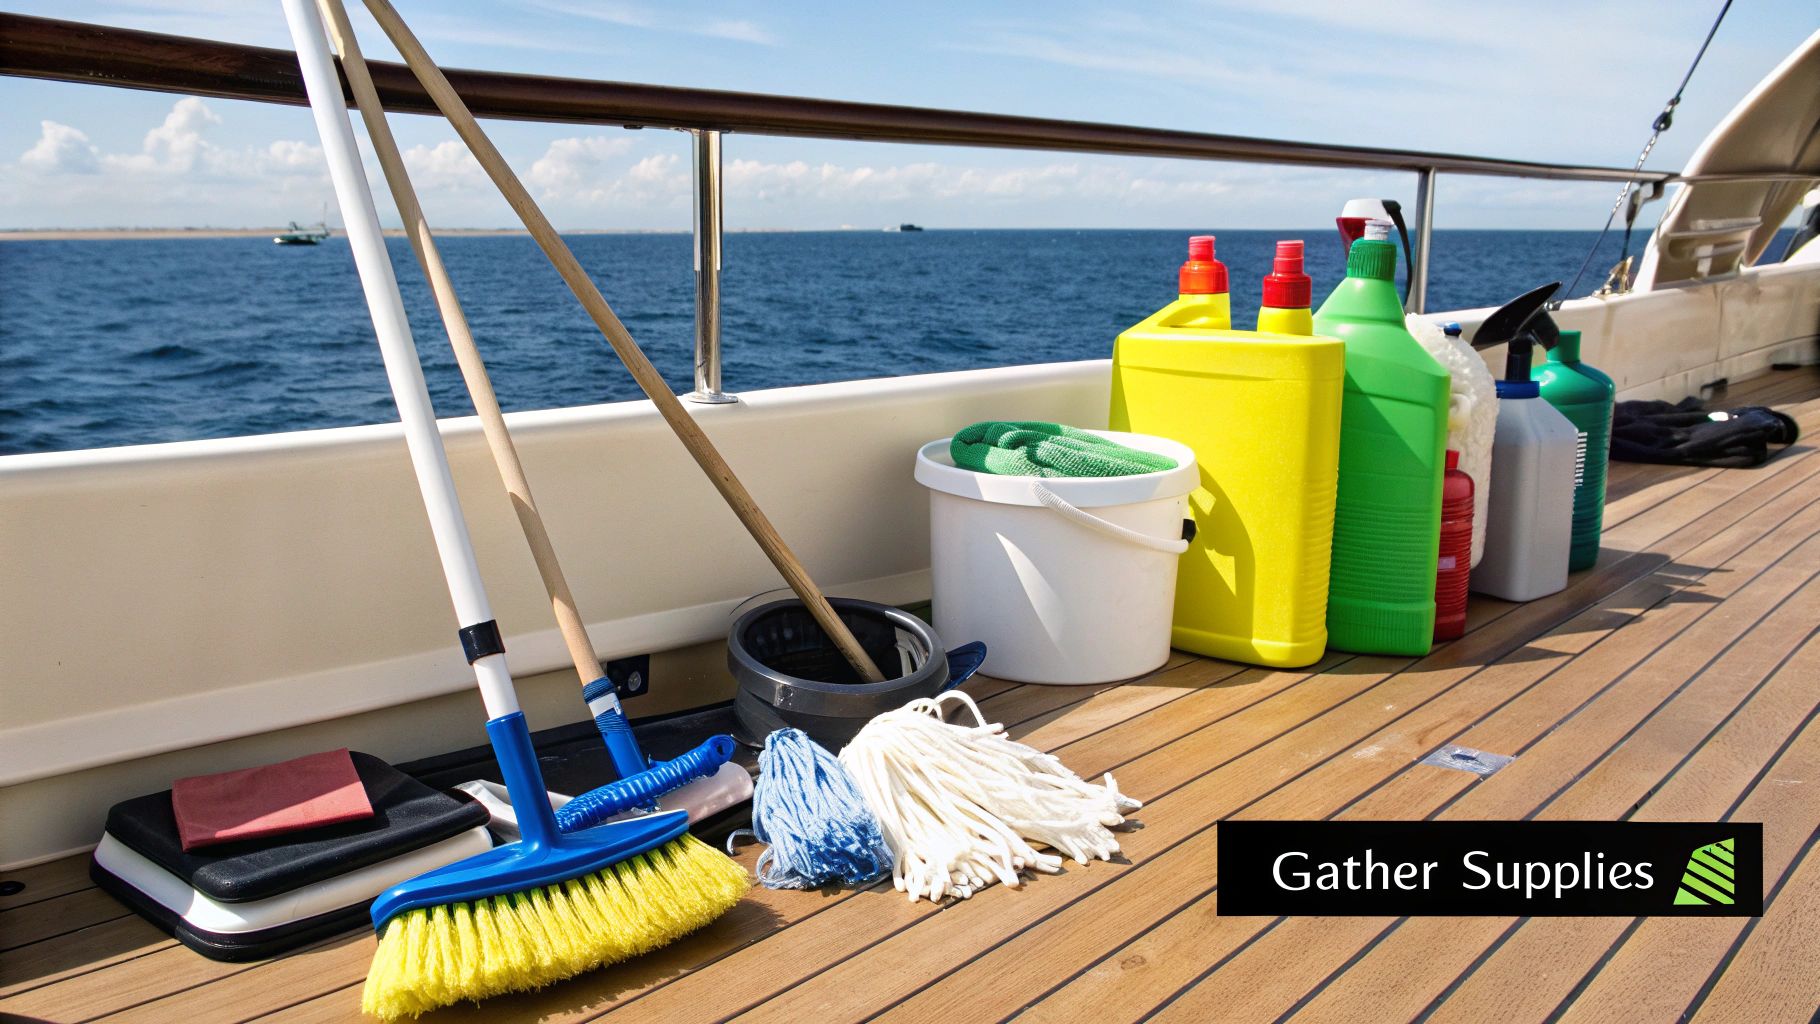 Before you even think about scrubbing, let’s talk about your gear. Having the right tools on hand is what separates a frustrating afternoon from a truly satisfying job. I’ve seen it time and time again—the right equipment makes all the difference.
This isn't about buying the entire cleaning aisle. It’s about building a small, effective arsenal that gets the job done right without causing any harm to your upholstery. My philosophy is simple: use what works and what's safe.
The Essential Hardware
First things first, you need the right tools for the physical work. These are your workhorses, the items that will do the real heavy lifting of breaking up dirt and wiping everything clean.
- Soft-Bristle Brushes: These are absolutely non-negotiable. I've seen too many boaters scratch up their vinyl with stiff brushes. On the flip side, a brush that's too soft just moves the grime around. You need that perfect medium-soft bristle to agitate dirt effectively without a hint of damage.
- Microfiber Towels: Ditch the old t-shirts and paper towels. Seriously. Microfiber is king because it’s super absorbent and traps dirt without leaving lint all over your freshly cleaned seats. I always keep a big stack of clean, dry ones ready to go.
- Dedicated Buckets: A two-bucket system is a pro move. Use one for your soapy water and a second one for clean rinse water. It sounds simple, but it stops you from dipping a dirty towel back into your clean solution and smearing grime right back onto the vinyl.
Choosing the Right Cleaners
This is where a lot of well-intentioned boat owners go completely off track. Using household cleaners on your boat seats is a huge mistake. Products with bleach or ammonia are way too aggressive for marine-grade materials. They’ll strip the protective coatings, dry out the vinyl until it cracks, and can even eat away at the stitching over time.
Pro Tip: Stick to pH-neutral, marine-grade cleaners. They're formulated specifically to cut through saltwater, sunscreen, and fishy grime without being harsh on the delicate surfaces of your seats.
Your main weapon should be a solid, all-purpose boat seat cleaner. From there, it's smart to have a couple of specialized products for those inevitable, tougher problems.
- Marine Vinyl Cleaner: Marine vinyl cleaner will be your go-to for pretty much all your regular cleanups on vinyl seats.
- Dedicated Mildew Remover: When you see those stubborn black spots, you need something that works without brute force. A good mildew stain remover, like the one from Mary Kate, gets the job done without you having to scrub the life out of your vinyl.
- UV Protectant & Conditioner: This is the final, most critical step. After cleaning, you need to protect your work. A quality product like 303 Aerospace Protectant or Mothers VLR is essential. It not only restores a subtle shine but also lays down a protective barrier against the sun's harsh rays, which is the number one enemy of boat upholstery. A good protectant will make water bead up and roll right off.

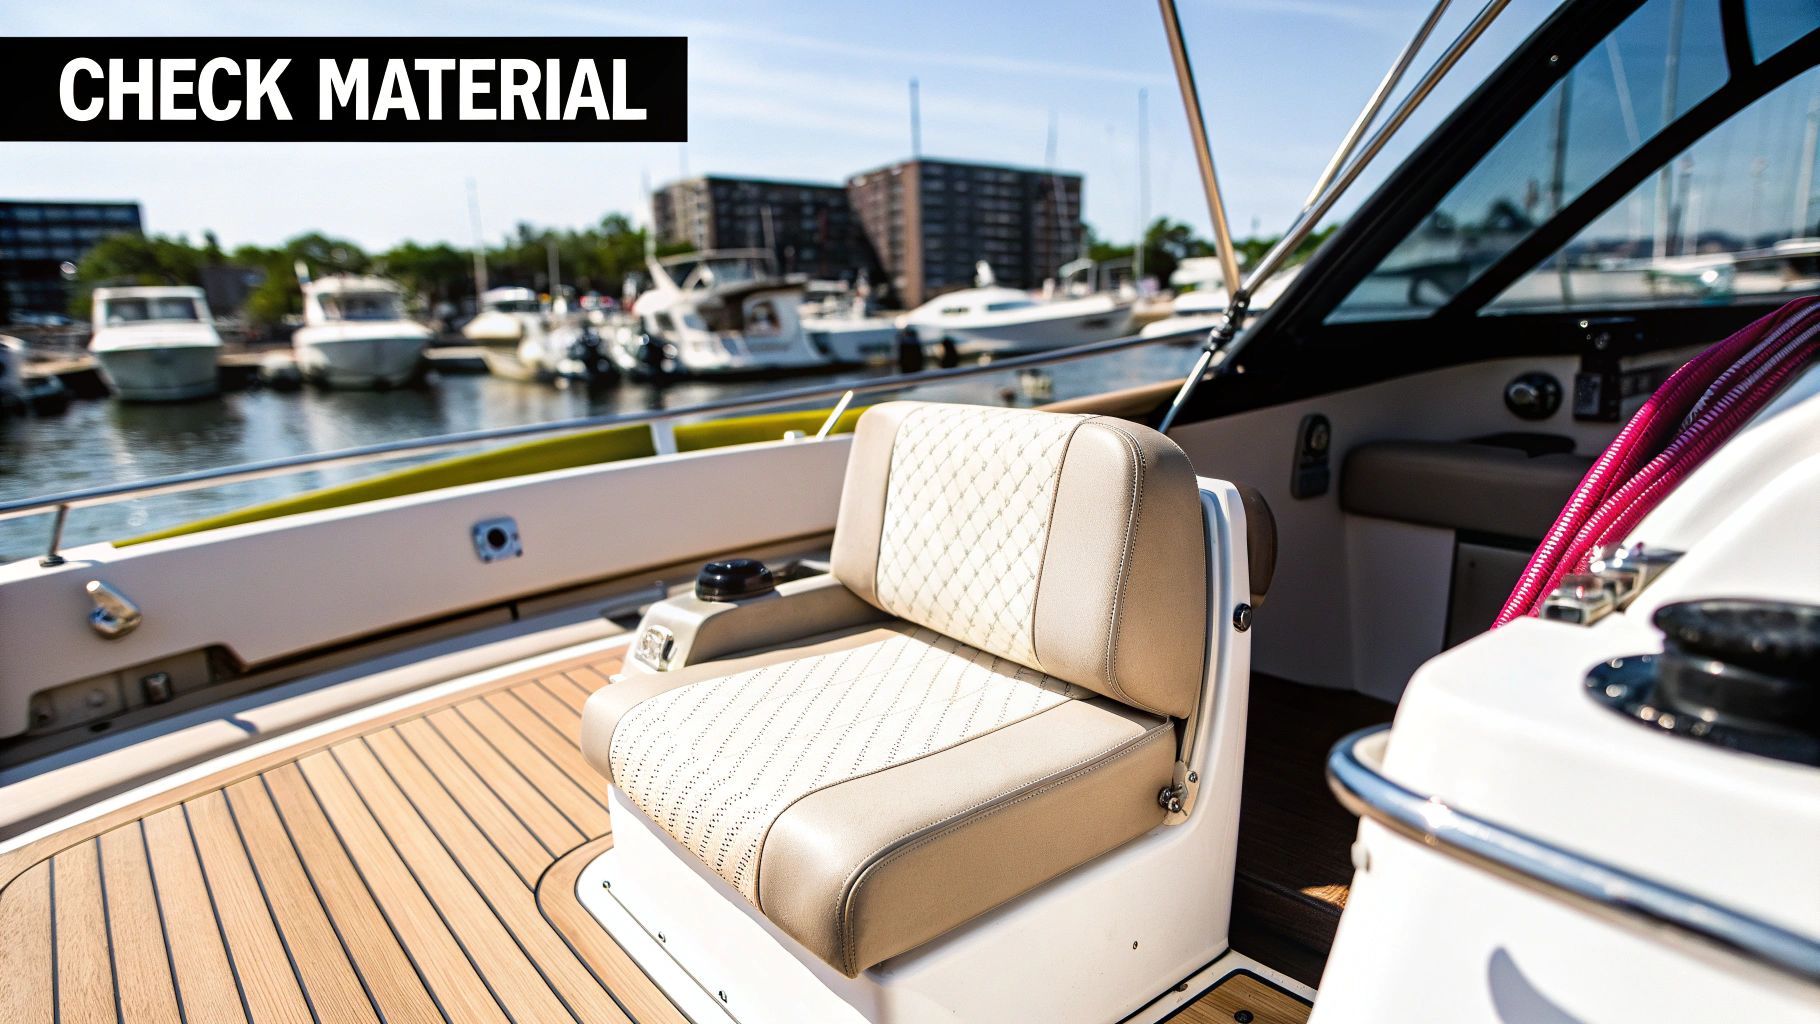
A Practical Guide to Cleaning Vinyl Boat Seats
There’s a good reason vinyl is the undisputed champ for marine upholstery. It’s tough, stands up to the elements, and is basically made for life on the water. But even the most resilient material needs a smart cleaning strategy to handle the constant assault from sun, salt, and everyday grime.
Forget about aggressive scrubbing. The real secret to getting your vinyl seats looking new again is a methodical approach that lifts away dirt without damaging the material itself.
Before you even think about grabbing a cleaner, the most critical step is the prep work. You have to get all the loose, dry debris off the surface first. This is non-negotiable. If you don't, you’re just grinding abrasive stuff like sand and salt crystals into the vinyl when you start cleaning, which can cause tiny scratches and wear over time.
This simple infographic breaks down exactly what to do first.
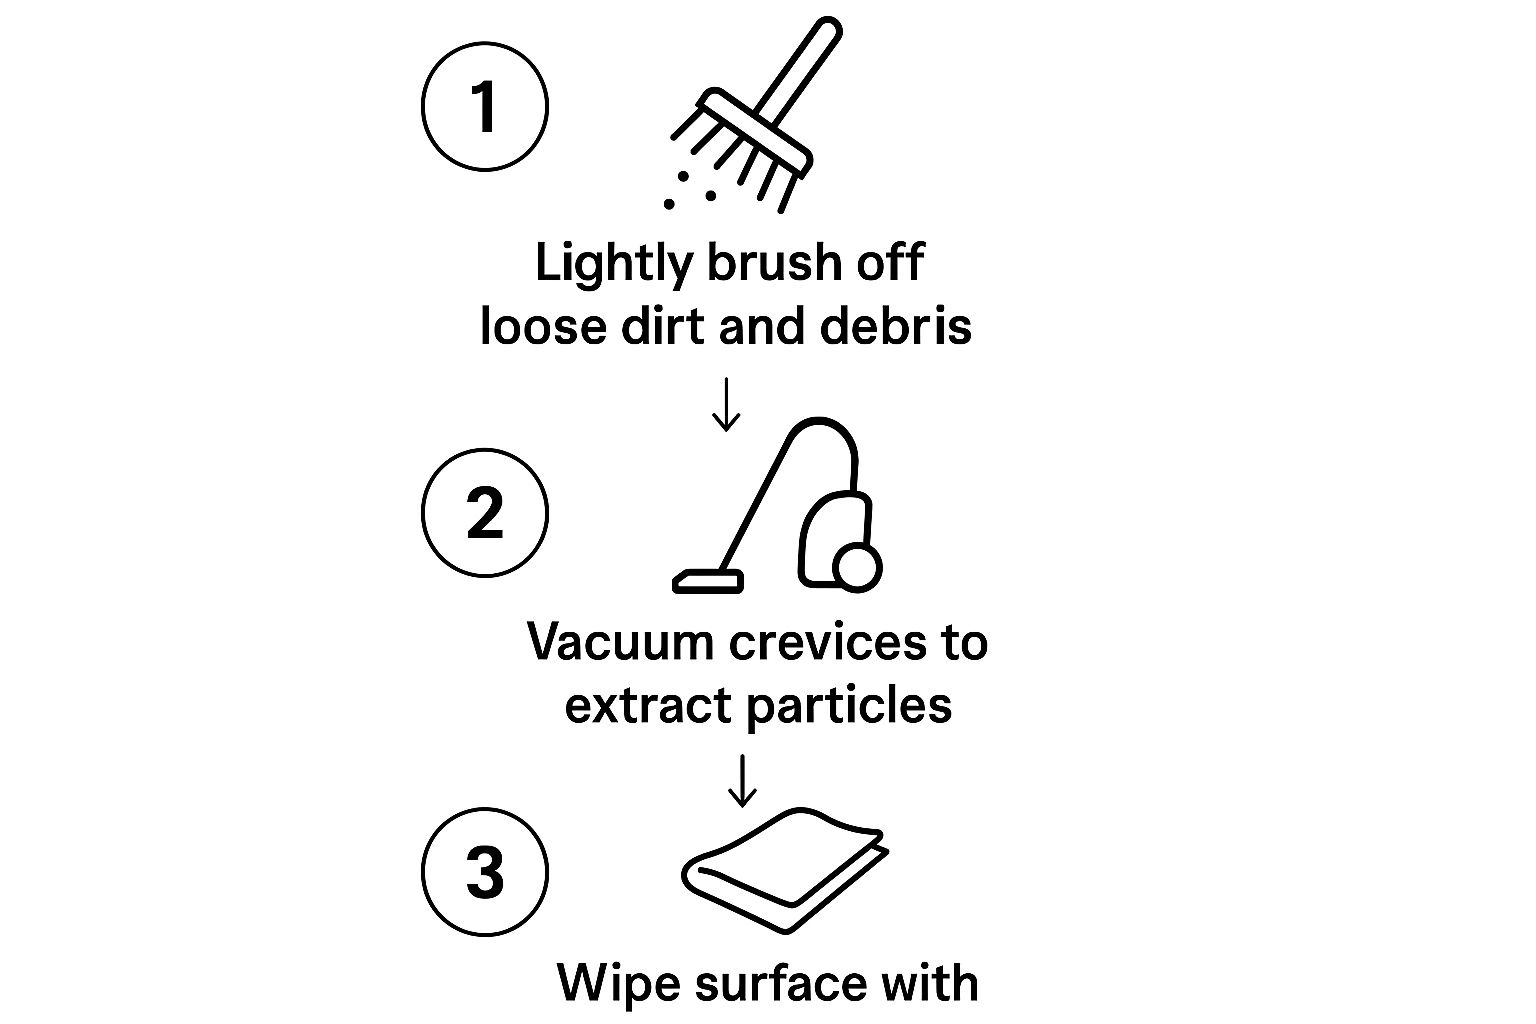
Following this sequence makes sure you clear away all those loose particles. It means your cleaning solution can go to work on the stubborn grime that’s actually stuck to the vinyl, making your job a whole lot easier.
Creating Your Cleaning Solution
With the surface prepped and ready, it's time to mix your cleaning solution. You don't need anything harsh. In my experience, a simple, gentle mixture is almost always the most effective for regular clean-ups.
- Start by filling a bucket with cool, clean water.
- Add a quality marine-grade vinyl cleaner, following the instructions on the bottle.
- If you’re in a pinch and don’t have a specialized cleaner handy, a few drops of mild dish soap will absolutely do the trick.
A quick tip: avoid using hot water. It can sometimes make the vinyl a bit more porous, which strangely makes it more susceptible to staining. The name of the game here is gentle but effective cleaning.
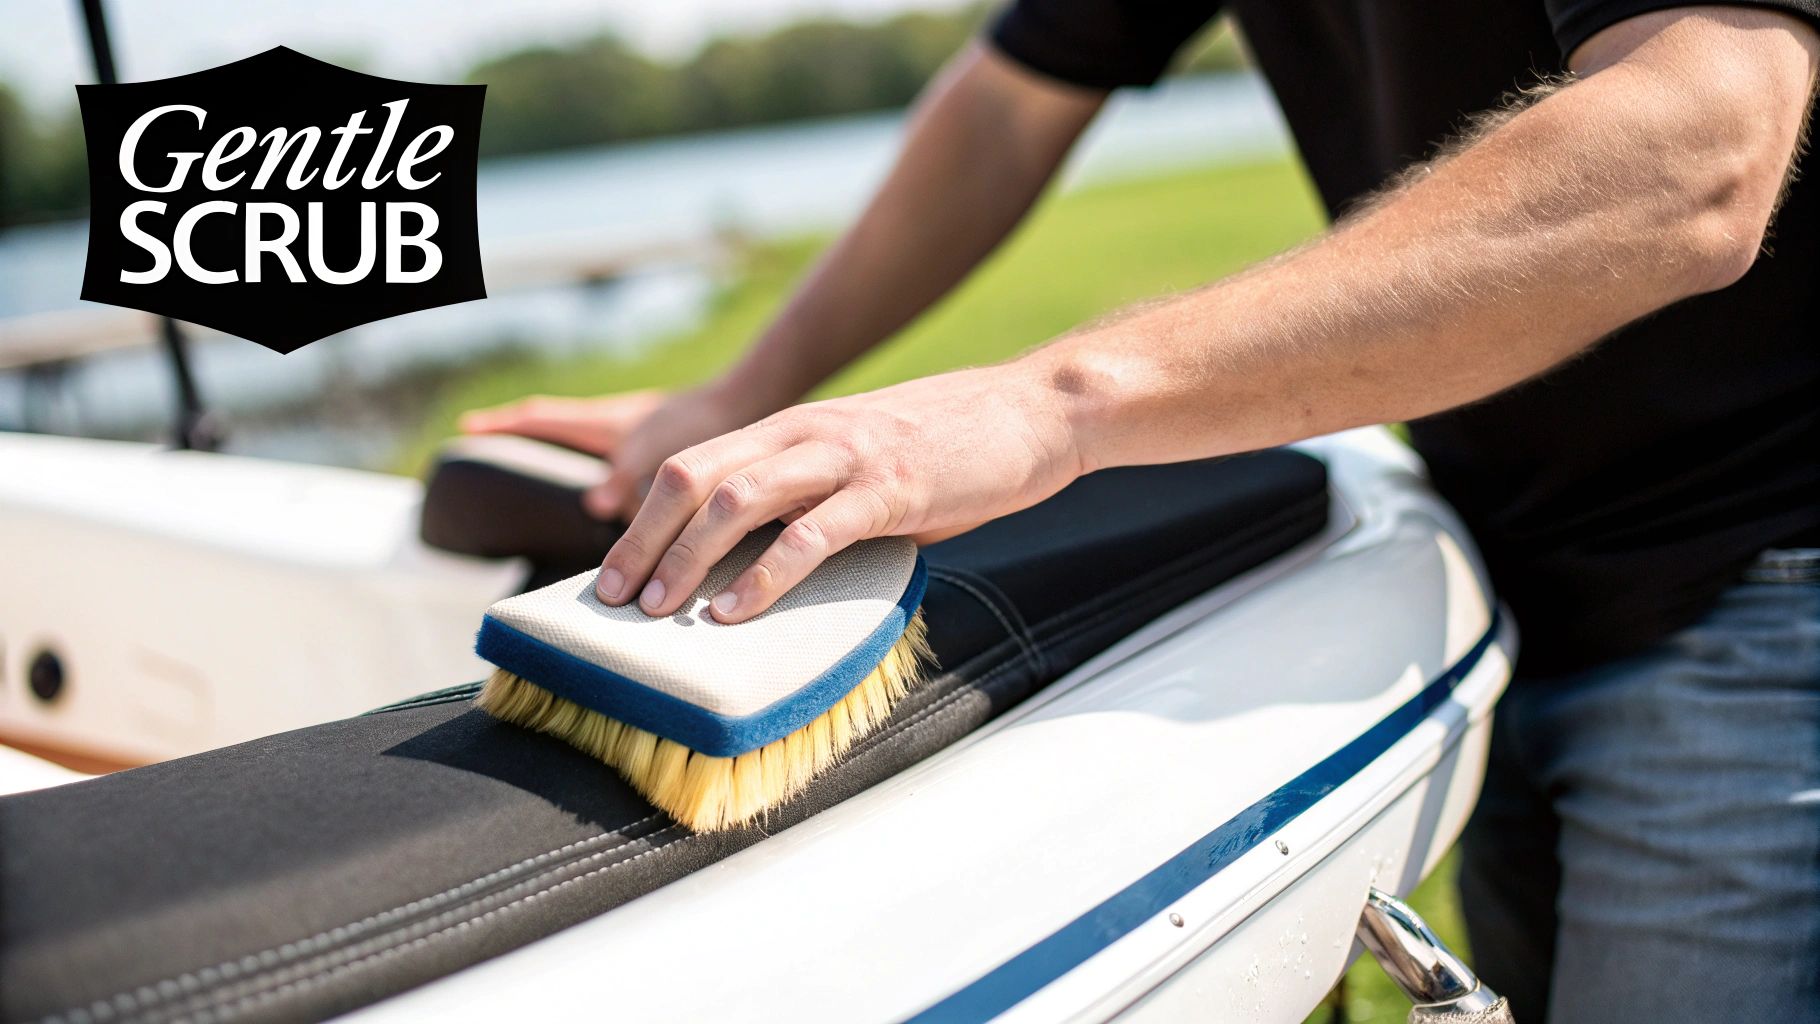
The Right Way to Scrub and Wipe
Now for the main event. Dip a soft-bristle brush into your bucket and start scrubbing the seats using small, circular motions. Use gentle pressure—you want the cleaner and the bristles to do the work, not brute force. The goal is simply to agitate and lift the embedded dirt out of the vinyl’s texture, not to scour the surface clean.
Make it a habit to work on one seat or one small section at a time. This is a pro move that prevents the soapy water from drying on the surface before you can wipe it off. Dried soap leaves behind a film that’s a real pain to remove and actually attracts more dirt later on.
My Two Cents: Pay extra close attention to the seams and welt cords. These little crevices are notorious for trapping dirt and creating the perfect breeding ground for mildew. A small detail brush or even an old toothbrush works wonders for getting into these tight spots.
After you've scrubbed a section, don't wait. Immediately wipe away the soapy residue with a clean, damp microfiber towel. Then, grab a second, completely dry microfiber towel to buff away any last bit of moisture. This two-towel method is the key to a perfect, streak-free finish every single time.
How to Handle Tough Stains and Mildew
Let's be real, sometimes a general cleaning just won't cut it for those really stubborn spots like mildew or ground-in sunscreen. For those, you need to bring in the specialists. While mild soap and water are great for routine care, you need the right product for specific problems.
For those ugly black mildew spots, a dedicated marine mildew remover is your best friend. Apply it directly to the stain, give it time to work its magic (check the label for how long), and then gently scrub and rinse it away. For greasy sunscreen stains, try dabbing a bit of your cleaning solution directly onto a microfiber cloth to lift the oily residue.
Dealing with stains is a huge part of boat ownership. To help you out, here's a quick cheat sheet for some of the most common culprits you'll find on your vinyl seats.
Vinyl Seat Stain Removal Cheat Sheet
| Stain Type | Recommended Cleaner | Application Tip |
|---|---|---|
| General Dirt & Grime | Mild soap and water or marine vinyl cleaner | Use a soft brush in circular motions. |
| Mildew & Mold | Dedicated marine mildew stain remover | Apply directly to spots, let sit for 5-10 minutes, then scrub gently. |
| Sunscreen | Diluted dish soap or vinyl cleaner | Dab onto the stain with a microfiber cloth; avoid rubbing it in further. |
| Ink or Pen Marks | Rubbing alcohol | Apply a small amount to a cloth and blot gently. Test on a hidden area first! |
| Food & Drink Spills | Clean up immediately with water and a clean cloth | For tougher stains like wine or berries, use a specialized stain remover. |
This table should give you a great starting point for keeping your seats spotless. Remember, the faster you treat a stain, the easier it is to remove.
For a deeper dive into protecting your seats year-round, check out our complete guide on the best practices to maintain vinyl boat seats.
Specialized Care for Fabric and Leather Seats
While vinyl is king in the marine world, plenty of boats feature fabric and leather seats for a touch of comfort and class. But you can't treat them like vinyl. These materials need a completely different game plan to keep them from getting ruined.
The single biggest mistake I see boat owners make is using their go-to vinyl cleaner on these more delicate surfaces. A cleaner that strips mildew off vinyl in seconds can just as easily strip the essential oils from leather or make the colors on your fabric upholstery bleed. You have to shift your mindset—and your cleaning supplies—to match.
Taming Fabric Upholstery
Fabric seats are great, but they can act like a giant sponge for every bit of dirt, spilled drinks, and moisture. The absolute number one rule here is to avoid soaking the fabric. When you oversaturate it, water gets down into the foam cushion. That's a recipe for deep-set mildew that you'll likely never get out.
Keep your cleaning efforts focused on the surface.
- Start with a Dry Run: Before any fabric protection liquid touches the seats, give them a thorough vacuuming with an upholstery brush attachment. This gets rid of all the loose sand, dirt, and cracker crumbs that would otherwise turn into a muddy mess.
- Act Fast on Spills: If someone spills a drink, grab a clean, dry cloth and blot the spot immediately. Don't rub! Rubbing just grinds the stain deeper into the fibers.
- Pick the Right Cleaner: For a real clean, you'll need a good marine fabric cleaner or a gentle upholstery shampoo. Follow the directions and apply the foam—not the liquid—with a soft-bristle brush. Work in small, manageable sections with a gentle scrubbing motion.
- Wipe, Don't Rinse: Forget hosing it down. Use a clean, damp microfiber cloth to wipe away the foam and all the grime it lifted. Then, go over it again with a dry cloth to soak up as much moisture as you can.
Crucial Tip: Always, always let your fabric seats air-dry completely before you put the boat cover on. Trapping even a little bit of dampness is asking for a major mildew problem down the road.
Preserving Leather Seats
Nothing says luxury like leather, but the sun and salt of the marine environment are its worst enemies. That combination is perfect for drying out the material, which leads to fading, cracking, and brittleness. Cleaning leather isn't about aggressive scrubbing; it's about gently cleaning and then putting moisture back in.
Think of it as a two-part system: clean, then condition.
First, you need a pH-balanced leather cleaner. Anything harsh will strip the natural oils right out of the hide. Put a small amount of the cleaner on a soft microfiber cloth (never spray it directly on the seat) and gently wipe the surface down.
Now for the most important part: conditioning. After the seats are clean, you must apply a high-quality leather conditioner with UV protectants. This isn't an optional step. It's what restores moisture, keeps the leather feeling soft, and builds a barrier against the sun's damaging rays. Use a new, clean cloth and work the conditioner into the leather with circular motions.
While the materials are different, seeing the proper techniques in action can be helpful. Our guide on how to clean vinyl seats via video can give you some context on careful application, even if you're using different products.
By tailoring your approach, you'll ensure your fabric and leather seats stay a point of pride on your boat, not a source of constant headaches.
Protecting Your Seats from Sun and Wear
Getting your boat seats looking brand new is one thing, but keeping them that way is a whole different ballgame. Cleaning gets rid of the immediate dirt and grime, but protection is what saves your upholstery from long-term damage and makes every future cleanup a breeze. Honestly, this final step is where you really protect your investment.
The biggest threat to your boat’s upholstery? The sun. Its ultraviolet (UV) radiation is relentless, slowly breaking down materials day after day. This is what causes vibrant colors to fade, vinyl to get brittle and crack, and leather to dry out. A quality protectant is like applying sunscreen to your seats—it creates an invisible shield to fend off that damage.
Applying a UV Protectant Spray
For this job, you absolutely need a dedicated marine UV protectant. I've tried a lot of products over the years, and some, like 303 Aerospace Protectant, are legendary for a reason. They're formulated specifically to block those harmful rays without leaving behind a greasy, slippery mess. I've also found it does a great job repelling water and minor stains, which is a massive plus.
Putting it on is easy, but a little attention to detail goes a long way.
First, make sure you're working on a freshly cleaned and completely dry surface. Applying protectant over dirt just seals it in.
Next, lightly mist the product over a small section of the seat at a time. You don't need to soak it; a fine, even layer is all you need.
Then, grab a clean, dry microfiber towel and immediately spread the product evenly across the surface. Once it's spread, flip the towel to a dry side and give it a final buff until it’s dry to the touch. This prevents streaking and ensures you get even coverage.
Key Insight: You're not aiming for a glossy, wet look. When applied correctly, a good protectant leaves a clean, factory-matte finish. If it looks and feels like new vinyl, you've done it right.
Try to get into the habit of doing this every 4-6 weeks during the main boating season. If your boat is constantly baking in the sun, you might want to do it a little more often.
Long-Term Maintenance and Seat Covers
Beyond just using sprays, a solid maintenance routine is your best defense. It's a hard lesson to learn, but using the wrong cleaner can be just as bad as not cleaning at all. Many all-purpose cleaners will strip away grime but also remove any existing protection, leaving the material wide open to damage. For a deeper dive, check out the expert advice on repairing boat upholstery from Boatlife.com.
To make it easy, here’s a simple schedule to follow:
- After Each Trip: Give your seats a quick wipe-down with a damp cloth. This gets rid of fresh salt spray and dirt before it has a chance to set.
- Once a Month: Do your deep clean and reapply your UV protectant. This keeps that defensive shield strong all season long.
Finally, if you want the ultimate protection, nothing beats a high-quality boat cover. A good cover blocks 100% of UV rays, keeps out rain and morning dew, and stops bird droppings and dirt from ever even touching the seats. It’s the single best thing you can do to extend the life of your upholstery and dramatically cut down on your cleaning time.

Common Questions on Boat Seat Maintenance
Even with the best guide, you're bound to run into questions once you're out on the dock, bucket and brush in hand. When it comes to cleaning boat seats, a few common problems seem to trip up even experienced boaters.
Let's tackle some of the most frequent questions I hear. Getting these answers straight will help you make the right call in the moment and avoid a costly mistake.
Can I Use Magic Erasers on My Vinyl Seats?
This one comes up all the time, and it sounds like a clever hack. But the answer is a hard no. Don't do it.
A Magic Eraser is basically a very fine abrasive, like a super-high-grit sandpaper. Sure, it might take off that stubborn scuff mark, but it does so by literally scraping away the top surface of your vinyl.
Using one will immediately dull the finish on your seats. Worse, it strips off the protective topcoat applied at the factory. This leaves the vinyl naked and exposed, leading to much faster dirt buildup and serious UV damage down the road. Stick with soft-bristle brushes and microfiber cloths—they're all you need.
How Do I Remove Stubborn Mildew Stains?
When you’ve got mildew spots that just laugh at your regular cleaner, it’s time to bring in a dedicated mildew stain remover. Products like Mary Kate Mold & Mildew Remover are formulated specifically for marine environments, so they're tough on stains but safe for your upholstery.
The real secret is to follow the product's directions to the letter. Most of the time, you'll spray it on, let it sit for a few minutes without scrubbing, and then gently wipe it away. Always test a new product on a small, hidden spot first just to be safe.
Of course, the best way to deal with mildew is to stop it before it starts. For a deep dive into prevention, check out our guide on winning the impossible battle against boat mildew to learn about ventilation and proactive treatments.
Is It Safe to Use Bleach-Based Cleaners?
Absolutely not. Putting bleach on your boat's upholstery is one of the worst things you can do. It's a harsh, alkaline chemical that will destroy marine-grade materials.
Here’s exactly why you need to steer clear of bleach:
- It Degrades Vinyl: Bleach attacks the plasticizers in vinyl, which is what keeps it soft and flexible. It will make your seats brittle and lead to cracking.
- It Damages Stitching: The thread holding your seat cushions together is just as vulnerable. Bleach will weaken and rot the stitching, causing your seams to split open.
- It Strips Protection: Any UV protectant on your seats, whether from the factory or a spray you applied, will be instantly removed by bleach.
Always choose pH-neutral cleaners made specifically for marine vinyl.
How Often Should I Apply a UV Protectant?
Consistent protection is the key to making your seats last. A good rule of thumb is to reapply a quality UV protectant spray, like Mothers VLR or 303 Aerospace Protectant, after every major cleaning.
For most boaters, this works out to about once every 4-6 weeks during the boating season.
However, if your boat lives uncovered in a high-sun state like Florida or Arizona, you’ll want to be more aggressive. In those conditions, applying it more frequently is cheap insurance against the intense sun that causes fading, drying, and cracking.
Keeping your boat in top condition is easier with the right supplies. Better Boat offers a complete line of premium, easy-to-use cleaning and maintenance products designed to protect your investment and keep your vessel looking its best. From our specialized cleaners and tools to our durable dock lines and safety gear, we have everything you need for a worry-free season. Explore our full range of solutions at https://www.betterboat.com.


