


How to Clean a Fiberglass Boat: Expert Tips for a Shine
Keeping a fiberglass boat looking its best isn't just about appearances—it's about protecting your investment from sun, salt, and everything in between. A good cleaning strategy is what separates a dull and weathered hull from one that gleams on the water, and it’s the key to preserving your gelcoat for many seasons to come.
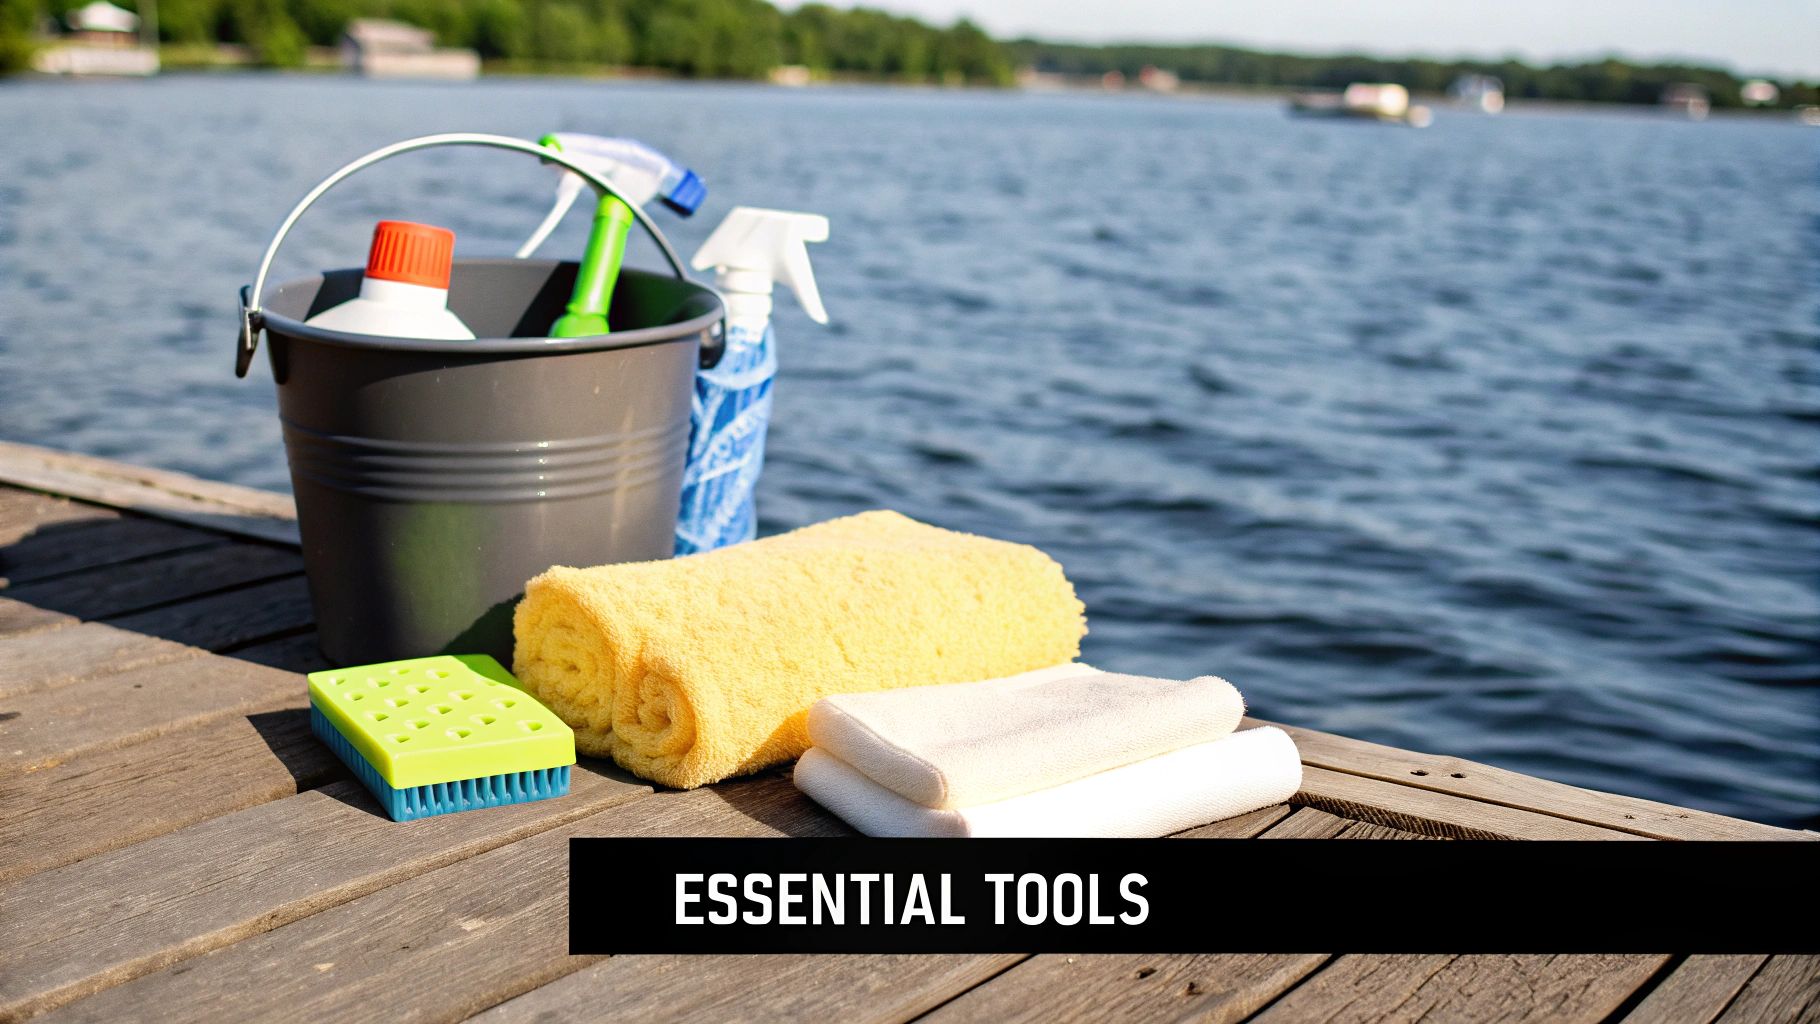
Think of this as your game plan. Knowing the big picture helps you gather the right supplies and tackle the job without any guesswork.
The whole process really boils down to a few key stages. When you understand the "why" behind each step, you'll avoid wasted effort and, more importantly, don't miss something critical—like skipping the boat wax after a deep clean and leaving your hull exposed. For more general tips that apply to any vessel, our guide on how to clean a boat is a great place to start.
The Three Pillars of Fiberglass Care
When we talk about how to clean a fiberglass boat, we’re really talking about three distinct phases: cleaning, restoring, and protecting.
- Cleaning: A big bottle of boat soap is your maintenance tool of choice for regular use. It’s all about getting the surface-level stuff off—the salt, dock grime, and bird droppings. You'll be doing this often.
- Restoring: This is where you tackle the tougher problems. Think oxidation that’s dulled the finish, stubborn waterline stains, or a faded gelcoat. Restoring involves boat polishes or compounds to bring that original shine back to life.
- Protecting: This is the final, non-negotiable step. You lay down a solid coat of marine wax or a polymer sealant. This becomes a barrier against harsh UV rays, salt, and other pollutants, making every future cleaning that much easier.
One of the most important things you can do happens before a single drop of boat soap hits the deck. Any seasoned boater will tell you to always start with a thorough freshwater rinse. Why? That initial spray washes away all the loose gritty stuff like salt crystals and dust. If you skip this, you’re just grinding those abrasive particles into your gelcoat when you start scrubbing.
I’ve seen it a hundred times: someone goes straight for the soap and scrub brush. They’re basically turning that loose grime into a fine-grit liquid sandpaper. Over time, that will absolutely dull your boat's finish. Always start with a completely wet, rinsed surface.
To help you visualize the workflow, here’s a quick breakdown of the cleaning process.
Boat Cleaning Stages at a Glance
This table sums up the essential stages for a full-on fiberglass cleaning. Each step builds on the last, taking your boat from grimy to gleaming while making sure it stays protected.
| Stage | Primary Goal | Key Action |
|---|---|---|
| Rinse | Remove loose debris and abrasive particles. | Thoroughly spray the entire boat with fresh water, from top to bottom. |
| Wash | Eliminate surface dirt, salt, and grime. | Use a quality marine boat soap and a soft-bristle brush, working in sections. |
| Restore | Correct oxidation, fading, and stubborn stains. | Apply a polish or rubbing compound to affected areas to revive the finish. |
| Protect | Shield the gelcoat from UV damage and future buildup. | Apply a high-quality marine wax or polymer sealant for a long-lasting barrier. |
Following these stages in order ensures you're not just cleaning your boat, but truly caring for it. This methodical approach will pay off with a vessel that not only looks fantastic but also holds its value.
Choosing the Right Tools and Cleaners
Walking into a marine supply store can be a bit intimidating with shelves packed with boat soap, rope, buoys, bumpers, and more. But getting a fiberglass boat clean really comes down to having the right stuff in your corner.
The biggest mistake I see boaters make is grabbing the wrong products. Using abrasive household cleaners or a brush that's too stiff can do a lot more harm than good, stripping your wax and leaving nasty scratches in the gelcoat.
The whole point is to work smarter, not harder. And that starts with having the proper gear from the get-go.
Brushes and Basic Tools
Your workhorse for general washing is going to be a long-handled, soft-bristled deck brush. This is what you'll use for most of the boat, as it lets you cover the big surfaces like the hull and deck quickly without messing up the finish.
Of course, some spots need a bit more persuasion. For those textured non-skid areas where dirt and grime love to camp out, you'll want a medium-stiffness brush. It’s got just enough grit to get the gunk out of the texture without being so aggressive it damages the surface.
A few other essentials will make your life a whole lot easier:
- Two Buckets: This is a classic trick for a reason. Use one for your soapy water and the other for clean water for rinshing. It stops you from just wiping dirty water back onto the boat.
- Microfiber Towels: You can't have too many of these handy towels. A big stack of microfiber towels is perfect for drying the boat to prevent water spots. They're also the best thing for applying polishes or waxes later on.
- A Good Hose Nozzle: Get a hose nozzle with an adjustable spray pattern. You'll want a gentle mist for rinsing off soap, but a more focused stream is great for blasting away stubborn dirt before you start scrubbing.
Selecting the Right Cleaners

Better Boat Premium Boat Soap Concentrate
For routine fiberglass washdowns, this is the pH-balanced Better Boat soap that fits the regular cleaning step without stripping protection.
Check availabilityThis is where things can go sideways fast. Your boat’s gelcoat is not the same as the paint on your car or the surface of your kitchen counter. It’s built to survive a harsh marine environment, and it needs cleaners that are up to the task.
The most common pitfall is reaching for something like dish soap. Sure, it'll clean, but it will also strip away every last bit of your protective wax, leaving the gelcoat naked and vulnerable to the sun's UV rays.
"Never underestimate the power of a pH-balanced boat soap. It’s formulated to break down salt and grime without compromising the wax you worked so hard to apply. It’s the foundation of a good cleaning regimen."
Your main cleaner should always be a high-quality, pH-balanced boat soap. For the tougher jobs, like that ugly yellow-brown "boat mustache" at the waterline or stains from wet leaves, you'll need something more specialized.
A dedicated hull cleaneror fiberglass stain remover is formulated to knock out those specific mineral and organic stains without being overly harsh. For a deeper dive into what products work best for different jobs, check out our complete guide on the best boat cleaners for effective maintenance.
And don't forget to protect yourself. A good pair of waterproof gloves will save your hands from getting raw from the cleaners and constant water, and safety glasses are a must. The last thing you want is a splash of chemical cleaner in your eye.
A Top-Down Guide to Deep Cleaning Your Boat
Alright, with your supplies gathered, it’s time to get down to the actual cleaning. The single most effective way to tackle a fiberglass boat is to work from the top down. Seriously. This simple strategy stops you from washing dirt and grime all over the areas you just scrubbed clean, saving you a world of rework and frustration.
Always start at the highest point—like the flybridge or hardtop—and make your way down from there.
It's just like washing a car. You wouldn't clean the wheels and tires first, only to spray soapy water and road grit all over them when you wash the roof, right? The same logic applies here. By starting high and ending with the hull, you let gravity do half the work for you.
Before you even grab the boat soap, though, a few prep steps make all the difference.
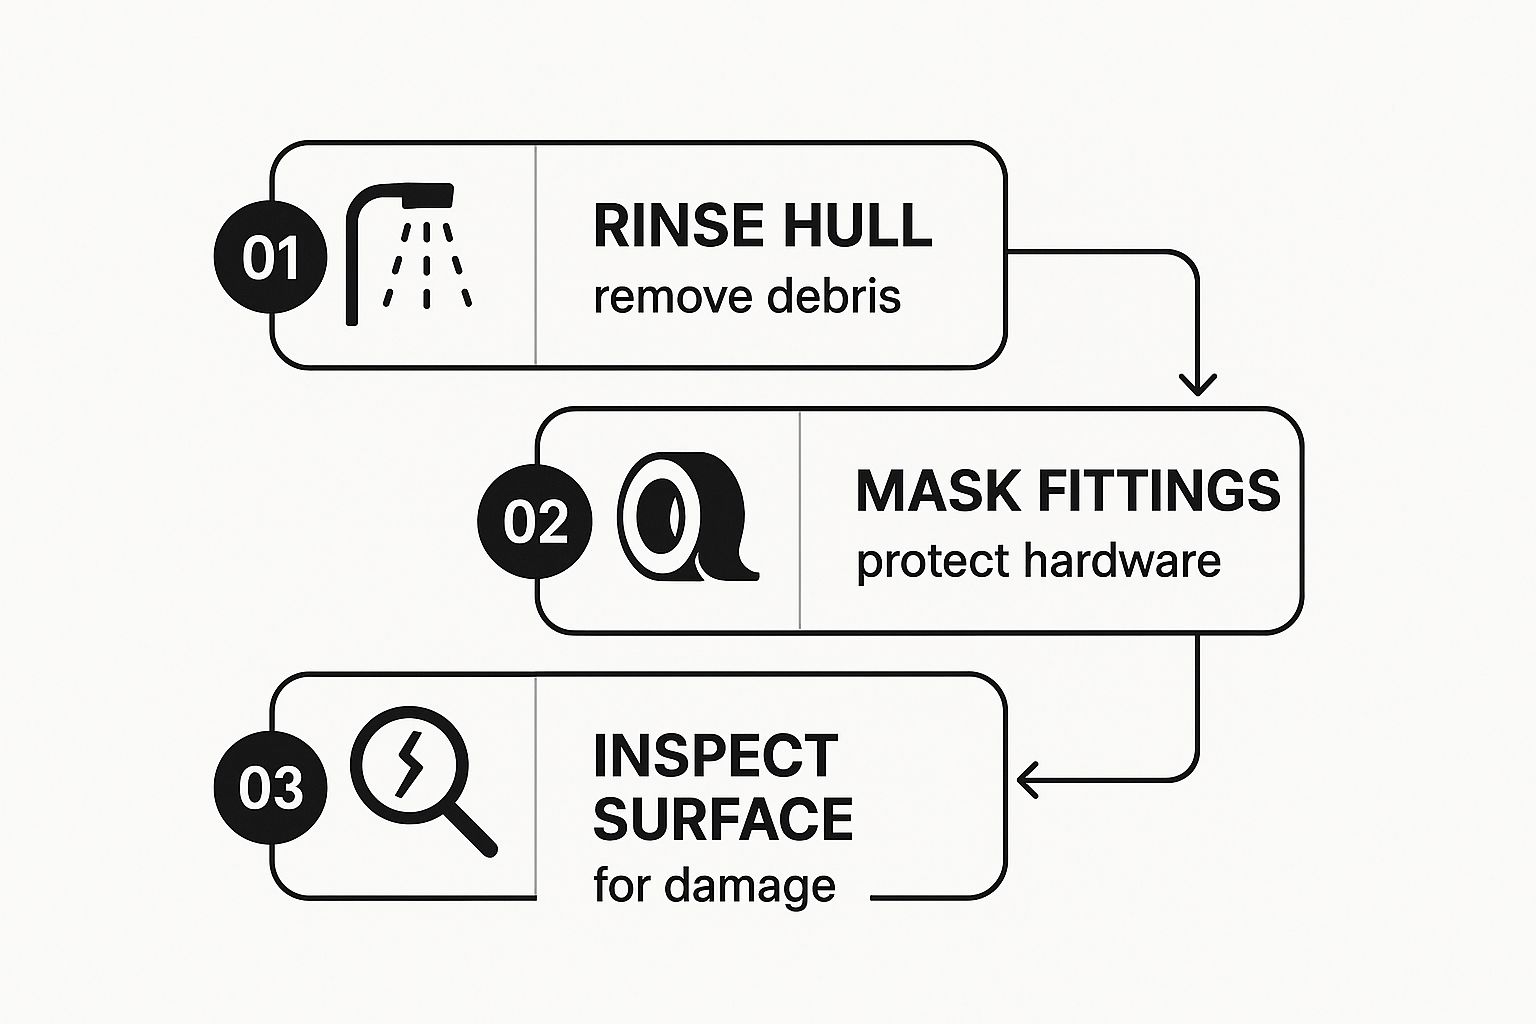
As you can see, a good pre-rinse is non-negotiable. It gets rid of any loose, abrasive gunk. From there, masking off sensitive hardware and doing a quick inspection for problem spots will set you up for a much smoother job.
Handling the Deck and Non-Skid Surfaces
Your boat's deck, especially any non-skid areas, is an absolute magnet for ground-in dirt, fish scales, and those stubborn scuff marks. These textured surfaces are fantastic for keeping your footing, but man, can they be a pain to get truly clean.
This is where your medium-stiffness scrub brush and a quality boat soap really shine. Mix your soap in a bucket according to the label and get a small section of the deck nice and sudsy.
Here’s a pro tip that’ll save you a headache: Work in small, manageable sections, maybe four-by-four feet at a time. This keeps the boat soap from drying on the surface before you can rinse it, which is crucial on a sunny day. Dried-on soap can leave a nasty film on your gelcoat that’s tough to remove.
Once an area is soaped up, get to scrubbing with that medium brush. Use gentle, circular motions to work the dirt out of that textured pattern. Rinse the section completely before you even think about moving on to the next one.
If you notice any lingering dark spots, you might need something a bit more specialized. Hidden moisture in these areas is a breeding ground for mildew. If you see tiny black specks, you’ll probably need to learn how to start winning the impossible battle against boat mildew to get rid of it for good.
Cleaning the Hull and Waterline

Better Boat Instant Boat Hull Cleaner
For yellowing, waterline stains, rust marks, and hull scum on fiberglass, this is the Better Boat cleaner that matches the stain-removal section.
Check availabilityWith the deck and topsides sparkling, it's time to focus on the hull. This is where you’ll run into some of the toughest customers, like that infamous "boat mustache"—the ugly yellowish-brown stain that loves to appear right at the bow's waterline.
Switch over to your soft-bristled brush for the hull's smooth gelcoat to avoid any risk of scratching. Using your two-bucket method, wash the hull in sections, again, always working from top to bottom.
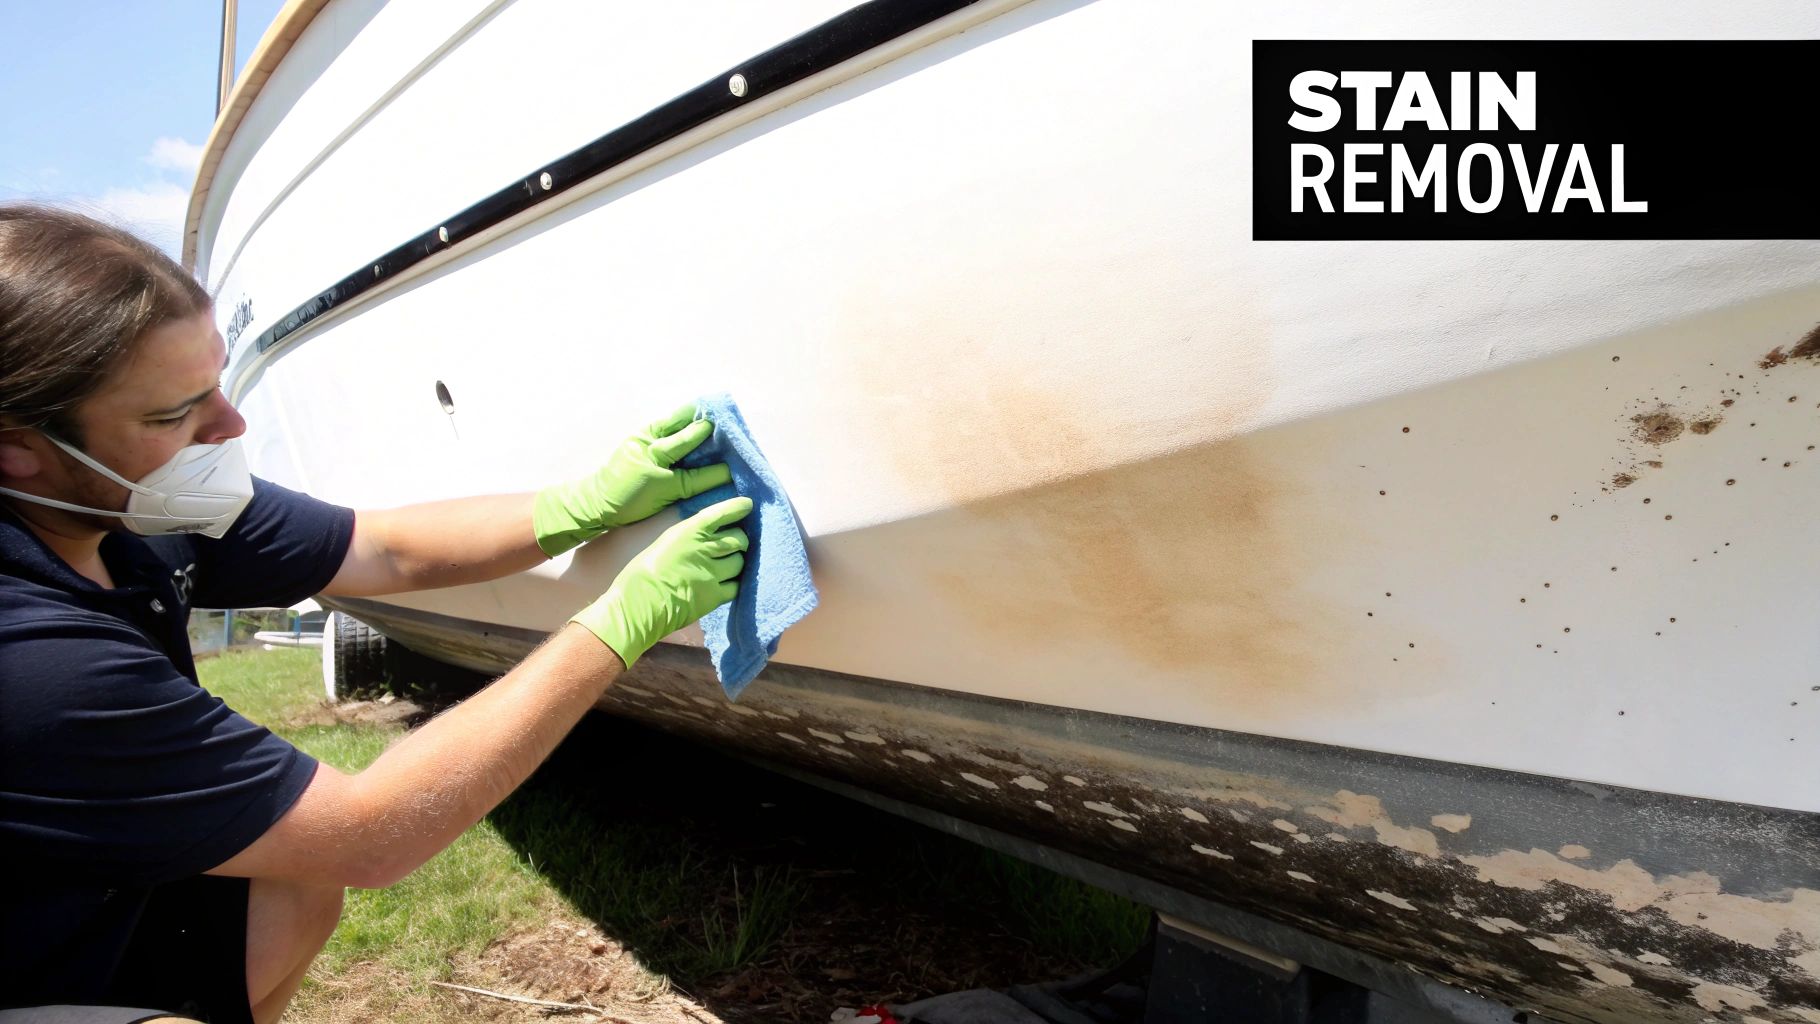
For the everyday grime, your regular boat soap will do the job. But for those more stubborn stains, you need to call in the specialists.
- Waterline Stains: That yellow-brown line is usually caused by minerals and organic gunk in the water. A good hull cleaner with oxalic acid works wonders here, chemically dissolving the stains without needing a ton of elbow grease.
- Black Streaks: These are almost always runoff stains from things like window frames, railings, or cleats. A dedicated black streak remover or even a dab of rubbing compound on a microfiber cloth can often make them disappear with very little effort.
For these tougher stains, apply the specialty cleaner right on the spot. Let it sit for a minute or two (follow the directions), give it a gentle scrub with your soft scrub brush, and then rinse it away completely. This targeted approach is the real secret to getting a hull that looks uniformly clean from bow to stern.
Restoring Your Gelcoat from Stains and Oxidation

Better Boat Marine Boat Rubbing Compound
For dull, oxidized fiberglass or gelcoat, this is the Better Boat compound that matches the restoration step in this section.
Check availability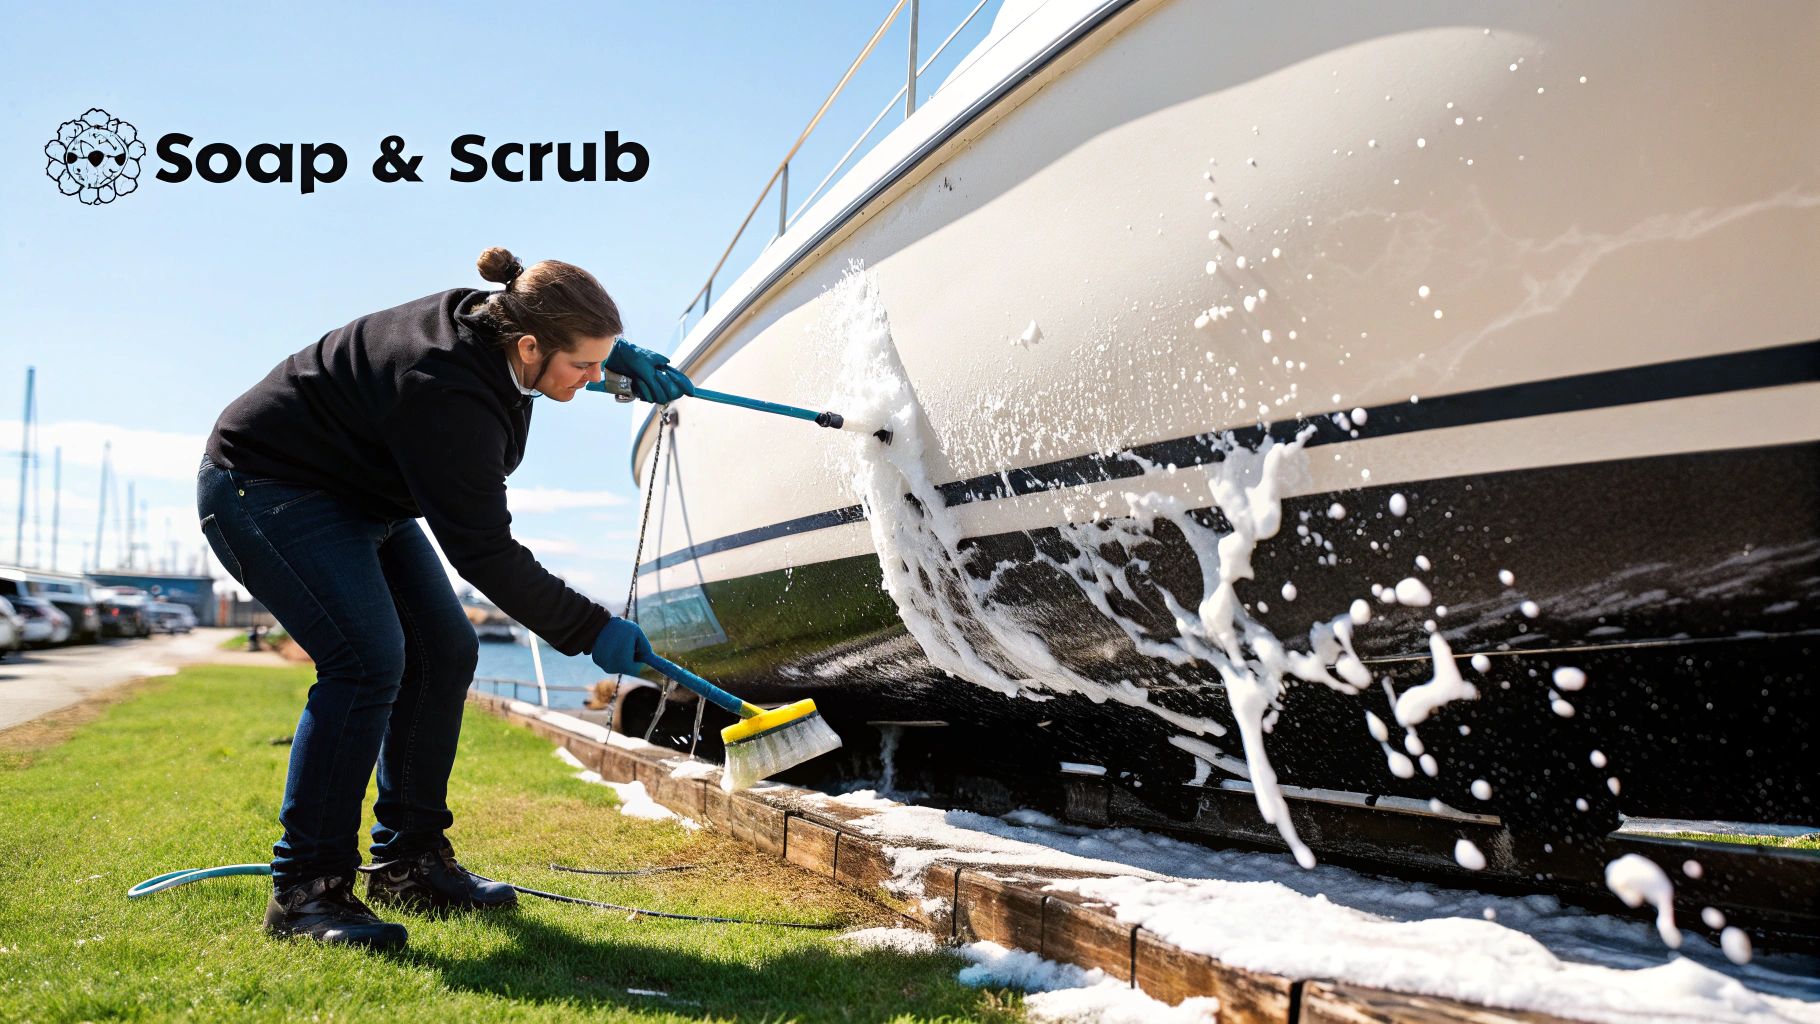
So you’ve given the boat a thorough wash, but something’s still not right. The finish looks a bit dull, maybe even tired. This is where the real magic happens. A good wash gets rid of the surface-level grime, but it won’t do a thing for deeper issues like stubborn stains or that chalky haze that's robbing your gelcoat of its shine.
That chalky film is called oxidation. Fiberglass is a tough material, but the gelcoat that protects it isn't bulletproof. Constant exposure to UV rays, saltwater, and humidity eventually breaks it down, making the surface porous. The result is that faded, dull look, especially on colored hulls. Getting this fixed is a non-negotiable part of properly cleaning a fiberglass boat.
Think of your gelcoat like your own skin. When it's healthy, it's smooth and glossy. After too much sun, it gets dry, damaged, and dull. Restoring the gelcoat is like exfoliating and moisturizing to bring back that healthy glow.
Identifying and Removing Oxidation
Not sure if you're dealing with oxidation? It's easy to check. If your boat’s color looks washed out or you can wipe your hand across the hull and see a chalky powder on your palm, you’ve found your culprit. It can range from a light, barely-there haze to a thick, almost white film that completely masks the true color underneath.
For anything from light to moderate oxidation, a quality rubbing compound is going to be your best friend. These products are filled with fine abrasives that gently scrub away the damaged, oxidized layer of gelcoat. It’s just enough to reveal the fresh, vibrant surface hiding below.
Before you grab a bottle, take a second to assess how bad the oxidation is:
- Light Oxidation: If it’s just a little hazy, start with a fine or light-duty rubbing compound. The goal is always to use the least aggressive product that will get the job done.
- Heavy Oxidation: For a hull that's seriously chalked up or faded, you'll need a heavy-duty or coarse compound to cut through that thicker layer of damage.
You can certainly apply rubbing compound by hand using a microfiber pad, but trust me, an orbital buffer will save your back and an incredible amount of time, especially on larger boats. Work in small, manageable sections, about two-by-two feet at a time. Apply steady, even pressure and you'll see the gloss start to come back.
Pro Tip: After hitting the hull with a heavy compound, it's always a good idea to follow up with a finer polish. This extra step buffs out any micro-swirls left by the compound and really refines the surface to a mirror-like shine, prepping it perfectly for a protective coat of wax.
Tackling Specific Stubborn Stains
Besides the overall dullness from oxidation, you'll almost always run into specific, isolated stains that a general compound won't touch. Trying to muscle these out with more scrubbing is a great way to damage your gelcoat. Instead, you need to use the right tool for the right job.
Common Culprits and Their Solutions
Here are a few of the usual suspects and how to send them packing:
| Stain Type | What It Looks Like | How to Fix It |
|---|---|---|
| Black Streaks | Dark, ugly lines running down from windows, cleats, or other fittings. | Use a dedicated black streak remover. Just apply it directly to the streak, give it a gentle wipe, and rinse. |
| Rust Marks | Those tell-tale orange or brown stains, usually from metal hardware. | An oxalic acid-based hull cleaner is your go-to. The acid chemically dissolves the rust, no hard scrubbing needed. |
| Leaf & Tannin | Yellowish-brown stains left behind by wet leaves or runoff from trees. | A fiberglass stain remover (often called an FSR) works wonders on these organic stains. |
| Bird Droppings | Etched-in white or dark spots that seem impossible to remove. | Clean them off immediately if you can. For set-in stains, a mild polish or rubbing compound can gently buff out the blemish. |
For any of these specific problems, just apply the specialized cleaner right on the stain. Let it work its magic for a minute or two (always check the label), then give it a light scrub with a soft cloth before rinsing it all away. This targeted approach is way more effective and much safer for your boat's finish.
Locking in the Shine with Polish and Wax
 You've put in the elbow grease with the cleaning and compounding, and your hull is looking sharp. Now for the final, critical phase. This is what separates a good-looking boat from a head-turner, and it's what protects all that hard work you just did.
Polishing and waxing is the one-two punch that creates a durable shield for your fiberglass. Skipping this step is a rookie mistake; your finish simply won't last against the elements.
A lot of boaters, even experienced ones, tend to use "polish" and "wax" like they're the same thing. They're not. Understanding the difference is key to getting a professional-grade result.
Polish for Gloss and Wax for Protection
Here's the easiest way to remember it: polishing corrects, and waxing protects.
A good marine polish is your secret weapon for that deep, wet-look shine. It contains very fine abrasives that are designed to smooth out the gelcoat surface, getting rid of any minor swirl marks or haziness left over from compounding. This is the step that really brings out the rich color and clarity of your hull.
Then comes the wax. A marine wax is purely a protective layer. It contains no abrasives at all. Its only job is to seal that perfectly polished surface from everything the water can throw at it. A high-quality boat wax, like our Marine Boat Wax with Carnauba, forms a tough barrier against damaging UV rays, salt, and grime. As a bonus, this protective layer makes your next wash-down a whole lot easier.
You wouldn’t put on sunscreen before exfoliating, right? The same logic applies here. The order is always: compound (if needed), polish to perfect the shine, and then wax to lock it all in.

Applying the Perfect Coat
Whether you're working by hand or with a buffer, the golden rule is thin is in. Slathering on a thick coat of polish or wax won't give you better protection. It just makes it a nightmare to buff off and leaves you with a streaky, uneven mess.
Here are a couple of proven techniques to get a flawless finish every time:
- Hand Application: Grab a clean microfiber applicator pad. Dab a small amount of product onto it and work it into a small section, about 2x2 feet. Use gentle, overlapping circular motions.
- Machine Application: If you're tackling a larger area, an orbital buffer with a soft foam finishing pad is your best friend. It saves a ton of time and effort. Just keep it on a low to medium speed setting and guide the machine in overlapping passes—let the buffer do the work.
Once the product dries to a haze (always check the bottle, but it's usually just a few minutes), it's time to buff. Use a dry microfiber towel to wipe it away to a brilliant shine. Make sure to flip the towel often to a clean side so you're actually removing the residue, not just smearing it around.
It's also worth noting that environmental awareness is rightfully becoming a bigger part of boat care. Even when we're talking about protective products, it's all part of the bigger picture of how we interact with our waterways.
Early studies have looked into the effectiveness of green boat cleaners on gelcoat while minimizing harm to aquatic life. To learn more, you can check out the findings of these "green cleaner" tests by the BoatUS Foundation.
To keep that protective layer going strong, you should plan to wax your boat at least twice a year—once before the season kicks off and again before you put it away for winter storage. If your boat lives in saltwater or gets blasted by intense sun all season, a mid-season re-wax is a very smart move.
Common Questions About Fiberglass Boat Care
Even when you have a solid game plan for detailing your boat, questions always pop up once you get your hands dirty. Knowing the right answers ahead of time can be the difference between a great-looking boat and a costly mistake.
We've been there. So, we've rounded up some of the most common questions we hear from fellow boat owners to give you clear, straight-to-the-point answers. Think of this as your on-the-fly troubleshooting guide to keep your project moving forward with confidence.
How Often Should I Really Clean My Boat?
This is the big one, and honestly, it all comes down to how and where you use your boat.
For the best long-term protection, you’ll want to do a full, deep clean at least twice a year. This means the whole nine yards—washing, polishing, compounding (if the hull needs it), and applying a fresh coat of wax. The ideal times are right before you launch for the season and right after you pull it out for storage.
But if your boat spends its life in a slip, especially in saltwater, you can't just wait six months. A quick freshwater rinse and a light wash-down with a proper boat soap every couple of weeks is non-negotiable. It’s the only way to stop salt and grime from eating away at your gelcoat.
Can I Just Use Dish Soap or Car Wash?
Please don't. Using household cleaners like dish soap is one of the most common—and damaging—mistakes a new boat owner can make. Those soaps are designed to strip grease and oil, which sounds good, but they also strip every last bit of protective wax right off your hull. This leaves your gelcoat completely exposed to the sun's UV rays and oxidation.
Always, always use a dedicated, pH-balanced marine boat soap. It's formulated to tackle salt and scum without compromising that protective wax layer you worked so hard to apply.
The difference is night and day. A proper boat soap lifts the dirt while preserving the protective barrier. Dish soap essentially resets all your hard work, leaving your gelcoat vulnerable from day one.
What Is the Real Difference Between Polish and Wax?
It's easy to see why people mix up polish and wax, but they do completely different jobs. Getting this right is the secret to a truly professional finish.
-
Polishing: Think of this as a corrective step. A good marine polish contains very fine abrasives that gently remove a microscopic layer of oxidized or damaged gelcoat. Its only job is to get rid of light scratches, swirl marks, and that dull, hazy look, restoring the surface's smoothness and gloss.
-
Waxing: This step is all about protection. A quality marine wax is non-abrasive. It seals the now-perfect surface you created with the polish, forming a tough barrier against UV rays, saltwater, and everyday dirt. The wax is what locks in the shine and makes it last.
Remember the order:
- Wash first
- Polish if you need to correct the surface
- Finish with wax to protect
How Do I Deal with Heavy, Chalky Oxidation?
If your gelcoat looks dull and feels chalky to the touch, you're dealing with heavy oxidation. A simple wash and wax won't fix it. It’s time to bring out the heavy-duty tools.
You'll need a heavy-duty rubbing compound made specifically for marine gelcoats. This is a job for an electric orbital buffer, preferably with a wool compounding pad, which has the bite needed to cut through the oxidation.
The key is to work in small, manageable sections, about 2x2 feet at a time. Keep the buffer moving and apply steady pressure until you see that deep gloss start to reappear. It's a workout, for sure, but the results are worth it.
Once you're done compounding, you'll need to follow up with a finer polish to remove any swirl marks left by the compound, and then seal your beautifully restored surface with a durable marine wax.
At Better Boat, we get it. Having products you can trust makes all the difference. As a family-owned American company, we’re passionate about creating premium, user-friendly cleaning solutions that protect your investment.
See how we can simplify your boat care routine by exploring our full line of products at https://www.betterboat.com.


