 Skip to content

Repairing Vinyl Seats Boat Your Complete Restoration Guide
Fixing up your boat’s vinyl seats is one of those projects that’s totally doable for a DIYer. Honestly, it usually just takes a few straightforward steps. The real secret to a repair that actually lasts is taking the time to figure out what kind of damage you're dealing with, and then cleaning the heck out of the area before you even think about patching it. Getting this prep work right is everything—it's what makes the difference between a seamless fix and a peeling mess a few weeks later.
Assess the Damage Before You Start Your Repair
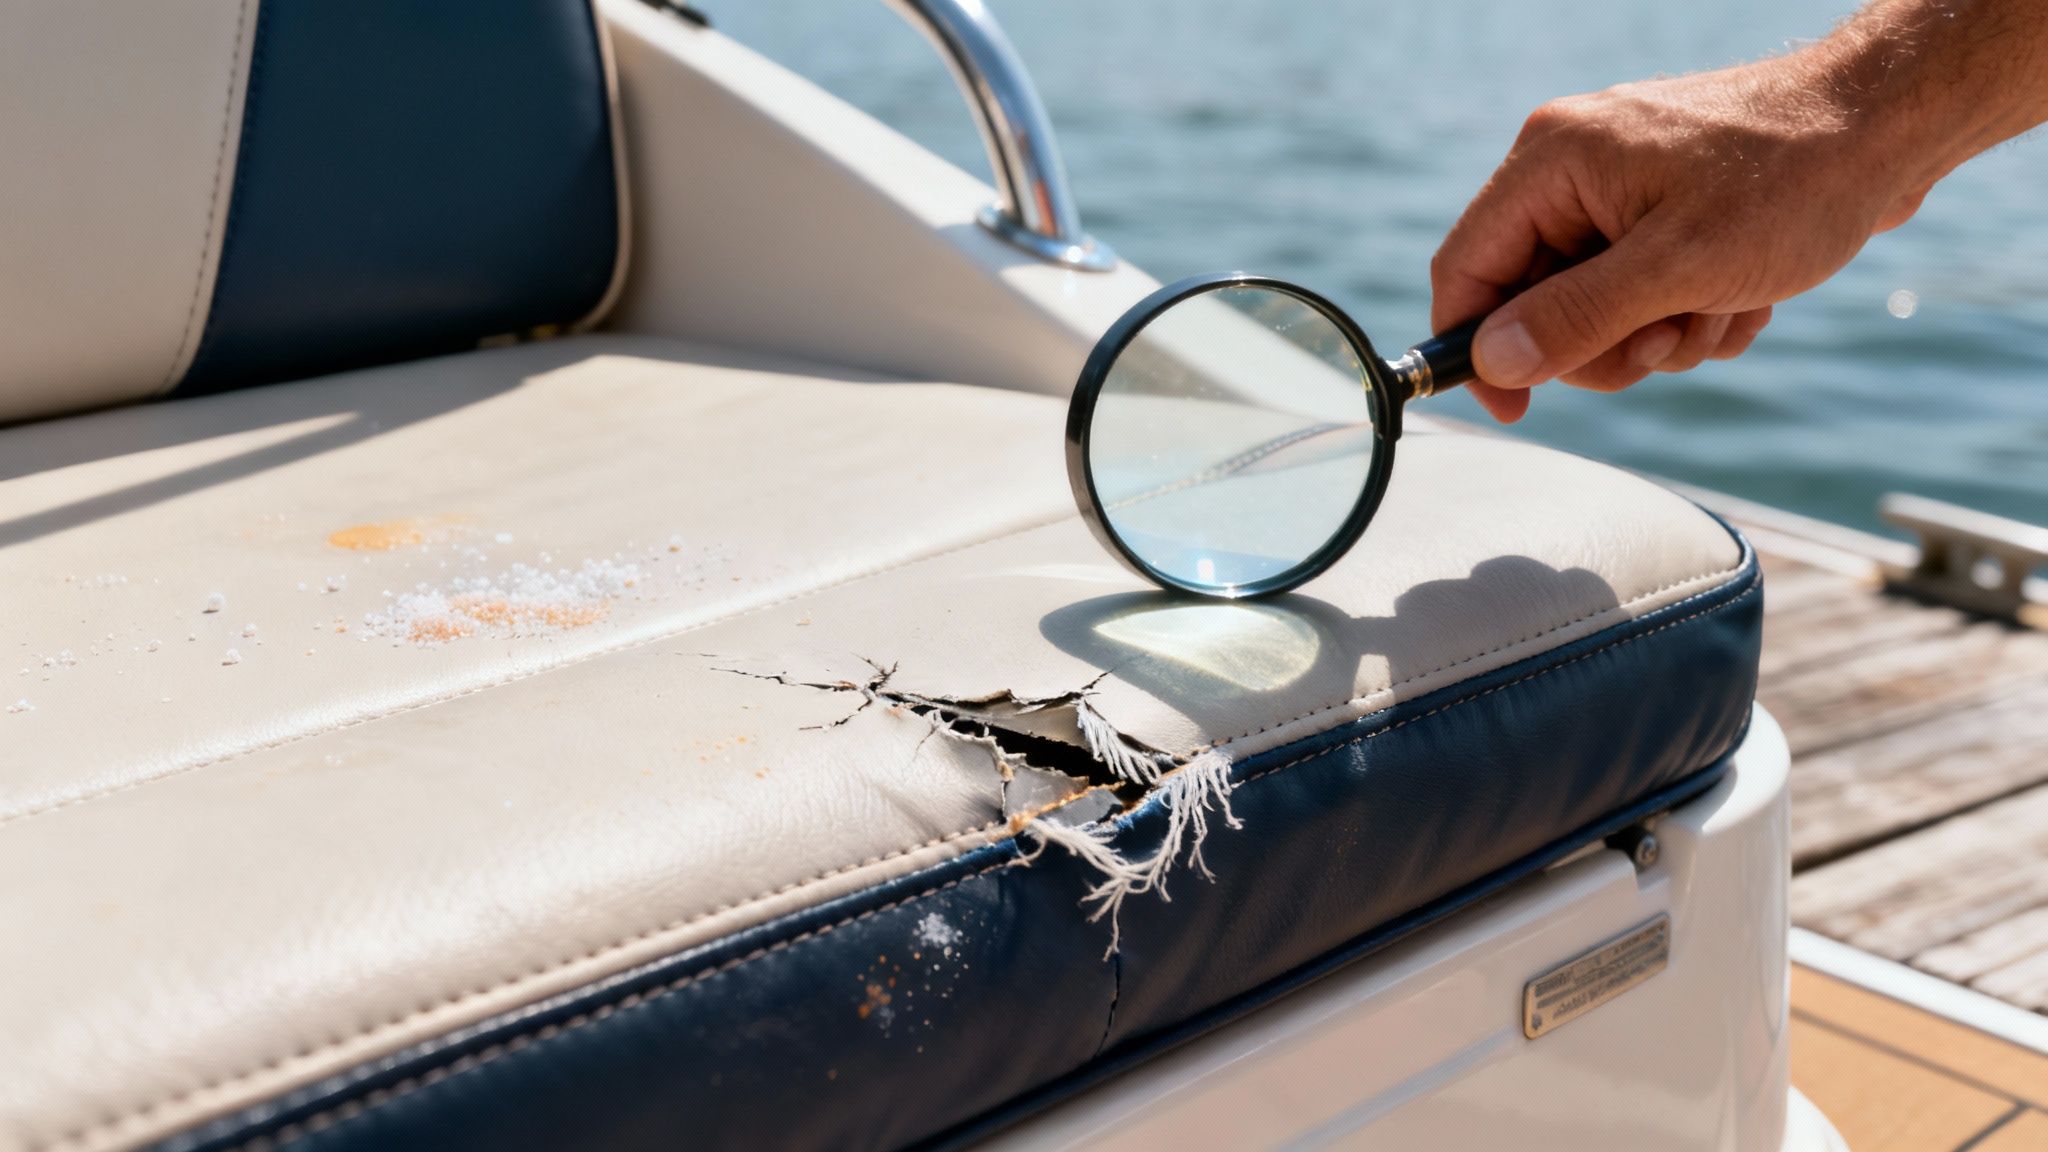
Before you tear open a repair kit, stop and play detective for a minute. A good, honest look at the damage will tell you if you're looking at a quick 30-minute job or a weekend-long project. Don't let a tiny tear turn into a headache; understanding the root of the problem is the first move toward a solid fix.
This little inspection saves you time, money, and a boatload of frustration down the line. It helps you see if you're just dealing with a surface scratch or if there are bigger gremlins at play, like soggy foam or rotting wood under the vinyl. A small rip is one thing; a split seam on a cushion that’s basically a sponge is a whole different beast.
The First Step Most Boaters Skip
The absolute most important thing to do before any repair is a thorough cleaning. I know, it's the boring part, but it's a non-negotiable step that so many people rush. Think about it: sunscreen, salt, body oils, and grime build up a film that stops adhesives and fillers from getting a proper grip.
A clean surface is the secret to a patch that doesn't peel up after a few weeks of sun and use. Trying to slap a patch on a dirty seat is the #1 reason DIY vinyl repairs fail. You'll just end up with a bigger, uglier mess to fix later.
Make sure you use a dedicated, pH-balanced cleaner made for marine vinyl. Stay away from harsh stuff like bleach or all-purpose household cleaners. They can dry out the vinyl by stripping its protective oils, making it brittle and leading to even more cracks.
Our Vinyl Cleaner is specifically formulated to safely remove grime without damaging your seats. This prep work truly sets the stage for a repair that'll look good and hold up all season.

Identifying the Real Problem
Get up close and personal with the damage. Is it a clean little puncture from a stray fishing hook, or a long, angry tear along a seam that gets a lot of stress? Are the stitches just old and rotten, or has the vinyl itself ripped away from the seam? Figuring this out helps you grab the right tools and use the right technique.
While you're at it, gently press on the vinyl around the damaged spot.
- Does it feel soft and squishy? That’s a classic sign the foam underneath is waterlogged.
- Does it feel crunchy or brittle? You might be dealing with rotting wood in the seat's foundation.
If you find these deeper issues, a simple vinyl patch isn't going to cut it. You're just putting a band-aid on a bigger problem. The moisture will keep causing trouble and will eventually destroy even the best surface repair. In these cases, you’ll need to pull the seat out to fix the foam and foundation before you even touch the vinyl.
Damage Assessment Quick Guide
To make it easier, here's a quick reference table to help you decide if a DIY fix is the right call or if you need to think bigger.
| Type of Damage | Recommended Action | DIY Feasibility |
|---|---|---|
| Small Puncture or Cut | Vinyl patch kit or liquid vinyl repair. | High - Perfect for a quick DIY fix. |
| Split Seam (Thread Only) | Restitch with marine-grade UV-resistant thread. | Moderate - Requires a heavy-duty sewing machine or hand-stitching skills. |
| Cracked/Brittle Vinyl | Liquid vinyl repair for small areas; full reupholstery for widespread cracking. | Low to Moderate - Small spots are manageable; large areas are a sign of bigger issues. |
| Tear with Damaged Foam | Remove vinyl, replace foam, then repair or replace vinyl. | Low - This is a more involved upholstery project, not a simple patch job. |
| Large, Jagged Tear | Sub-patch and liquid vinyl, but may require professional help for a clean look. | Moderate - Can be done, but difficult to make invisible. |
This chart should give you a good starting point. The goal is to tackle the repairs you can handle well and know when it's time to call in the pros or consider a full replacement. Fixing your own gear is a huge part of the boating lifestyle—in fact, the global marine seats market is projected to hit $1.9 billion by 2027, thanks in large part to boaters like us who prefer to refurbish rather than replace.
Getting Your Vinyl Repair Tools and Materials Together
Any successful DIY boat seat repair starts with having the right gear on hand before you begin. Trying to fix vinyl without the proper tools is a surefire recipe for frustration. When you take a few minutes to assemble your toolkit first, you turn a potential mess into a clean, professional-level fix you can be proud of.
Think of it like this: each item has a job to do. Skip one, and you risk a patch that peels off in a month or a filler that cracks under the sun. A well-stocked kit is your best shot at a repair that holds up to the harsh marine world of sun, salt, and constant use.
Start with a Spotless Surface: Cleaning and Prep
This is the absolute foundation of a lasting vinyl repair, and it's where most people go wrong. No adhesive, patch, or filler in the world will stick properly if it's applied over a layer of grime, sunscreen, or salt. Don't cut corners here.
- Premium Vinyl Cleaner: Grab a pH-balanced, marine-grade cleaner. Harsher household chemicals can strip the vinyl and make it brittle, but a dedicated formula is designed to lift contaminants without causing damage. Our Vinyl Cleaner is made for exactly this job.
- Detail Brush: A soft-bristled brush is perfect for getting the cleaner down into the vinyl's grain, lifting out the embedded dirt that a simple cloth just can't reach.
- Isopropyl Alcohol: Once you've cleaned the area, a final wipe-down with isopropyl alcohol on a lint-free cloth is the pro move. It removes any lingering cleaner residue and acts as a final degreaser, ensuring your repair materials get the strongest possible bond.
Nailing this cleaning stage is non-negotiable. For a deeper look at the best products and techniques, check out our guide on choosing the best boat vinyl cleaner.
Having the right supplies is more than just convenience—it's the difference between a repair that lasts a few weeks and one that holds strong for seasons. A perfectly clean, prepped surface is the secret ingredient to a bond that won't fail you.
Your Vinyl Repair Arsenal
With the seat clean and ready, it's time to gather the tools for the actual fix. What you'll need depends on the type of damage you're tackling, but a good kit should have you covered for most common issues.
| Tool/Material | Primary Use | Pro Tip for Success |
|---|---|---|
| Liquid Vinyl/Patch Kit | Filling punctures, small tears, and cracks. Most kits include color compounds to help you match. | A comprehensive kit is your best friend. The liquid vinyl is fantastic for small holes, while patches add crucial support for larger rips. |
| Color Matching Compound | Tints used to dial in the exact color of your seat's vinyl. | Always mix your colors in natural daylight for the most accurate match. Test on a hidden spot before you commit to the main repair. |
| Graining Paper | Transfers texture onto the repair, helping it blend in seamlessly with the surrounding vinyl. | Press the paper onto the semi-cured compound firmly but gently. It’s a small step that makes a huge difference in how it looks. |
| Heat Gun or Iron | Cures the liquid vinyl, creating a durable bond that stays flexible. | Use low, even heat. Overheating will scorch the vinyl, so keep the gun moving and always check the kit's instructions for the right temp. |
| Palette Knife/Applicator | For smoothly applying and spreading the liquid vinyl filler. | Apply thin, even layers. Building up the repair gradually gives you a much stronger and less noticeable fix than globbing it all on at once. |
| Backing Fabric | A small piece of canvas or cloth you slip inside a tear to provide support from underneath. | Cut the backing just a bit larger than the tear itself. This reinforces the area and stops the filler from sinking in as it cures. |
By getting these specific tools and materials ready to go, you're setting yourself up for a repair that not only looks professional but is built to last. This prep work ensures your seats will be ready for whatever your next boating adventure throws at them.
Executing Flawless Patch and Liquid Vinyl Repairs
Alright, you've got your tools laid out and the damaged area is spotless. Now for the satisfying part: the actual repair. The two most common ways to fix vinyl boat seats are with liquid vinyl for smaller punctures and a patch system for bigger tears. Each one takes a slightly different touch, but both can give you a nearly invisible, long-lasting result if you take your time.
The real goal here isn't just to cover up a hole. You're trying to create a bond that flexes with the seat and stands up to sun, salt, and people plopping down on it all season. Think of it less like slapping on a bandage and more like performing a small skin graft, blending the new material in with the old. That mindset is what separates a decent fix from a great one.
Mastering Liquid Vinyl for Small Punctures
Liquid vinyl is your best friend for those frustrating little holes—punctures from a stray fish hook, tiny nicks, or small burns. This stuff is pretty slick; it's a colored compound that fills the void and cures into a flexible solid that bonds directly with the vinyl around it.
Success with liquid vinyl is all about the application. Resist the urge to glob it all on at once. Instead, you'll want to apply the compound in thin, successive layers. Use a small palette knife or the little tool that came with your kit to carefully work the liquid into the puncture, making sure it fills every bit of the space. Let each layer set up a bit before you add the next one.
The real artistry in a liquid vinyl repair is in the texturing. Once that final layer of compound is on but still soft, press a piece of graining paper firmly onto the repair. This transfers the vinyl's texture right onto your patch, making it blend in beautifully with the rest of the seat.
After you've textured it, you'll need to cure the repair with heat. A heat gun on a low setting is perfect for this. The trick is to keep the gun moving constantly, about four to six inches from the surface, so you don't scorch the vinyl. You'll see the compound's appearance change slightly as it cures, usually becoming less glossy. Once it's fully cured, it will be tough, flexible, and ready for action.
This process—clean, apply, cure—is the key to any good vinyl seat repair.
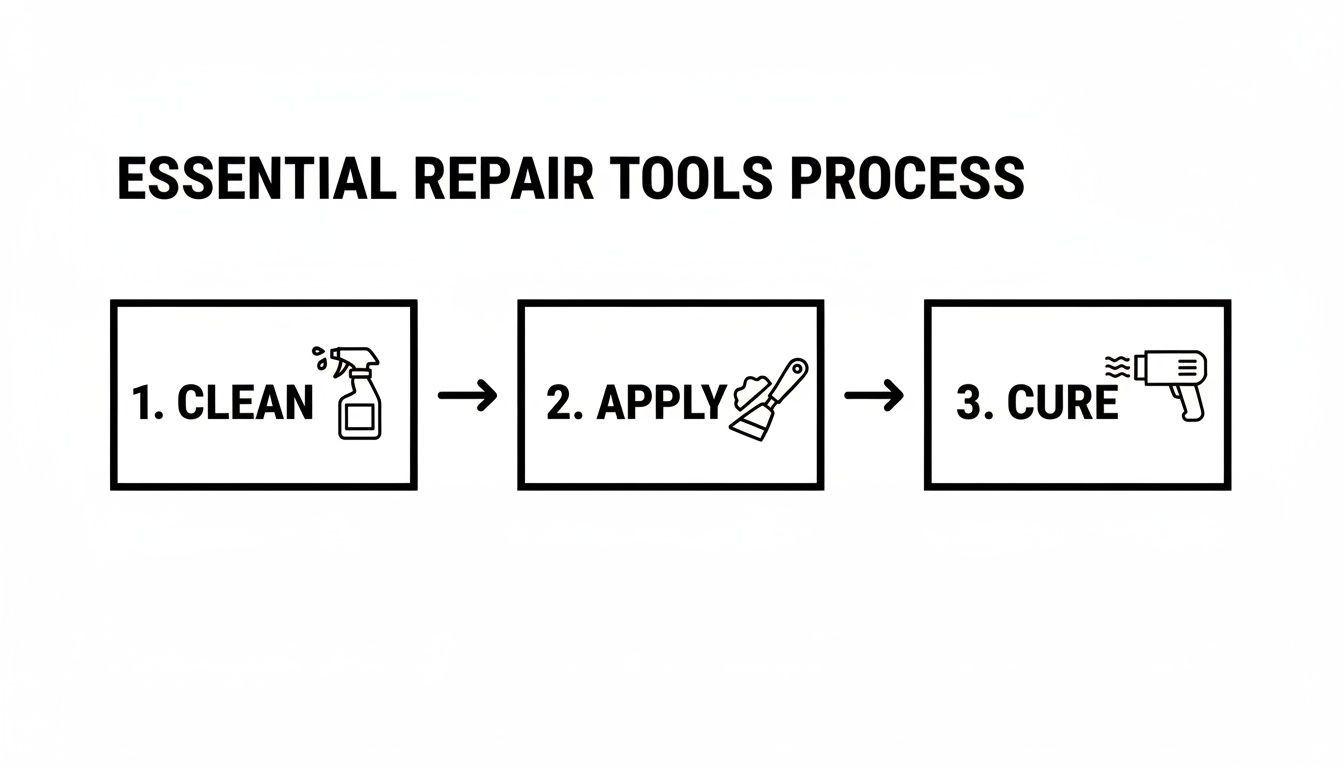
As you can see, a successful job depends on doing things in order. Cleaning, applying, and proper curing all work together to give you a result that lasts.
Handling Larger Rips with a Sub-Patch
For those bigger, more serious tears, a liquid vinyl filler just won't have the muscle to hold things together on its own. This is where a sub-patch, or backing fabric, is absolutely essential. It gives you the structural support needed to hold the edges of the tear together and stops the repair from splitting open again under stress.
First, cut a piece of backing fabric (canvas works great) so it's slightly larger than the tear. Using a palette knife or a pair of tweezers, carefully tuck this patch inside the tear, right underneath the vinyl. You'll have to work it in there, but make sure it lies flat and creates a solid foundation for the repair.
With that backing in place, you can apply your vinyl adhesive or liquid vinyl compound over the top. Use your palette knife to pull the edges of the tear as close together as you can over the sub-patch. Then, just like with a smaller repair, apply the compound in layers, finish with the graining paper texture, and cure it with the heat gun. The sub-patch makes all the difference, ensuring the fix is strong from the inside out.
For temporary, on-the-fly fixes or for reinforcing other marine fabrics, our durable Fabric Repair Tape is a great adhesive solution that can get you through a trip in a pinch.
More and more boat owners are tackling these fixes themselves. It's no surprise that the global marine upholstery vinyl fabric market was valued at around USD 240 million in 2024 and is expected to hit USD 357 million by 2032. This reflects a bigger trend of boaters buying repair kits and supplies to maintain their own vessels. You can read more about this shift on IntelMarketResearch.com.
Fixing Tough Problems Like Split Seams and Cracks
While patching a small hole is one thing, coming face-to-face with a long, split seam or a spiderweb of cracks can feel like a whole different level of trouble. It’s easy to look at that kind of damage and think your only option is an expensive trip to the upholstery shop.
But that’s not always the case. With the right approach, you can tackle these tougher repairs yourself and get a result that’s strong, durable, and saves you a ton of money. You just need to know what you’re up against. A split seam is usually a thread issue, while cracking is a sign the vinyl itself is in distress. Each problem needs its own game plan.
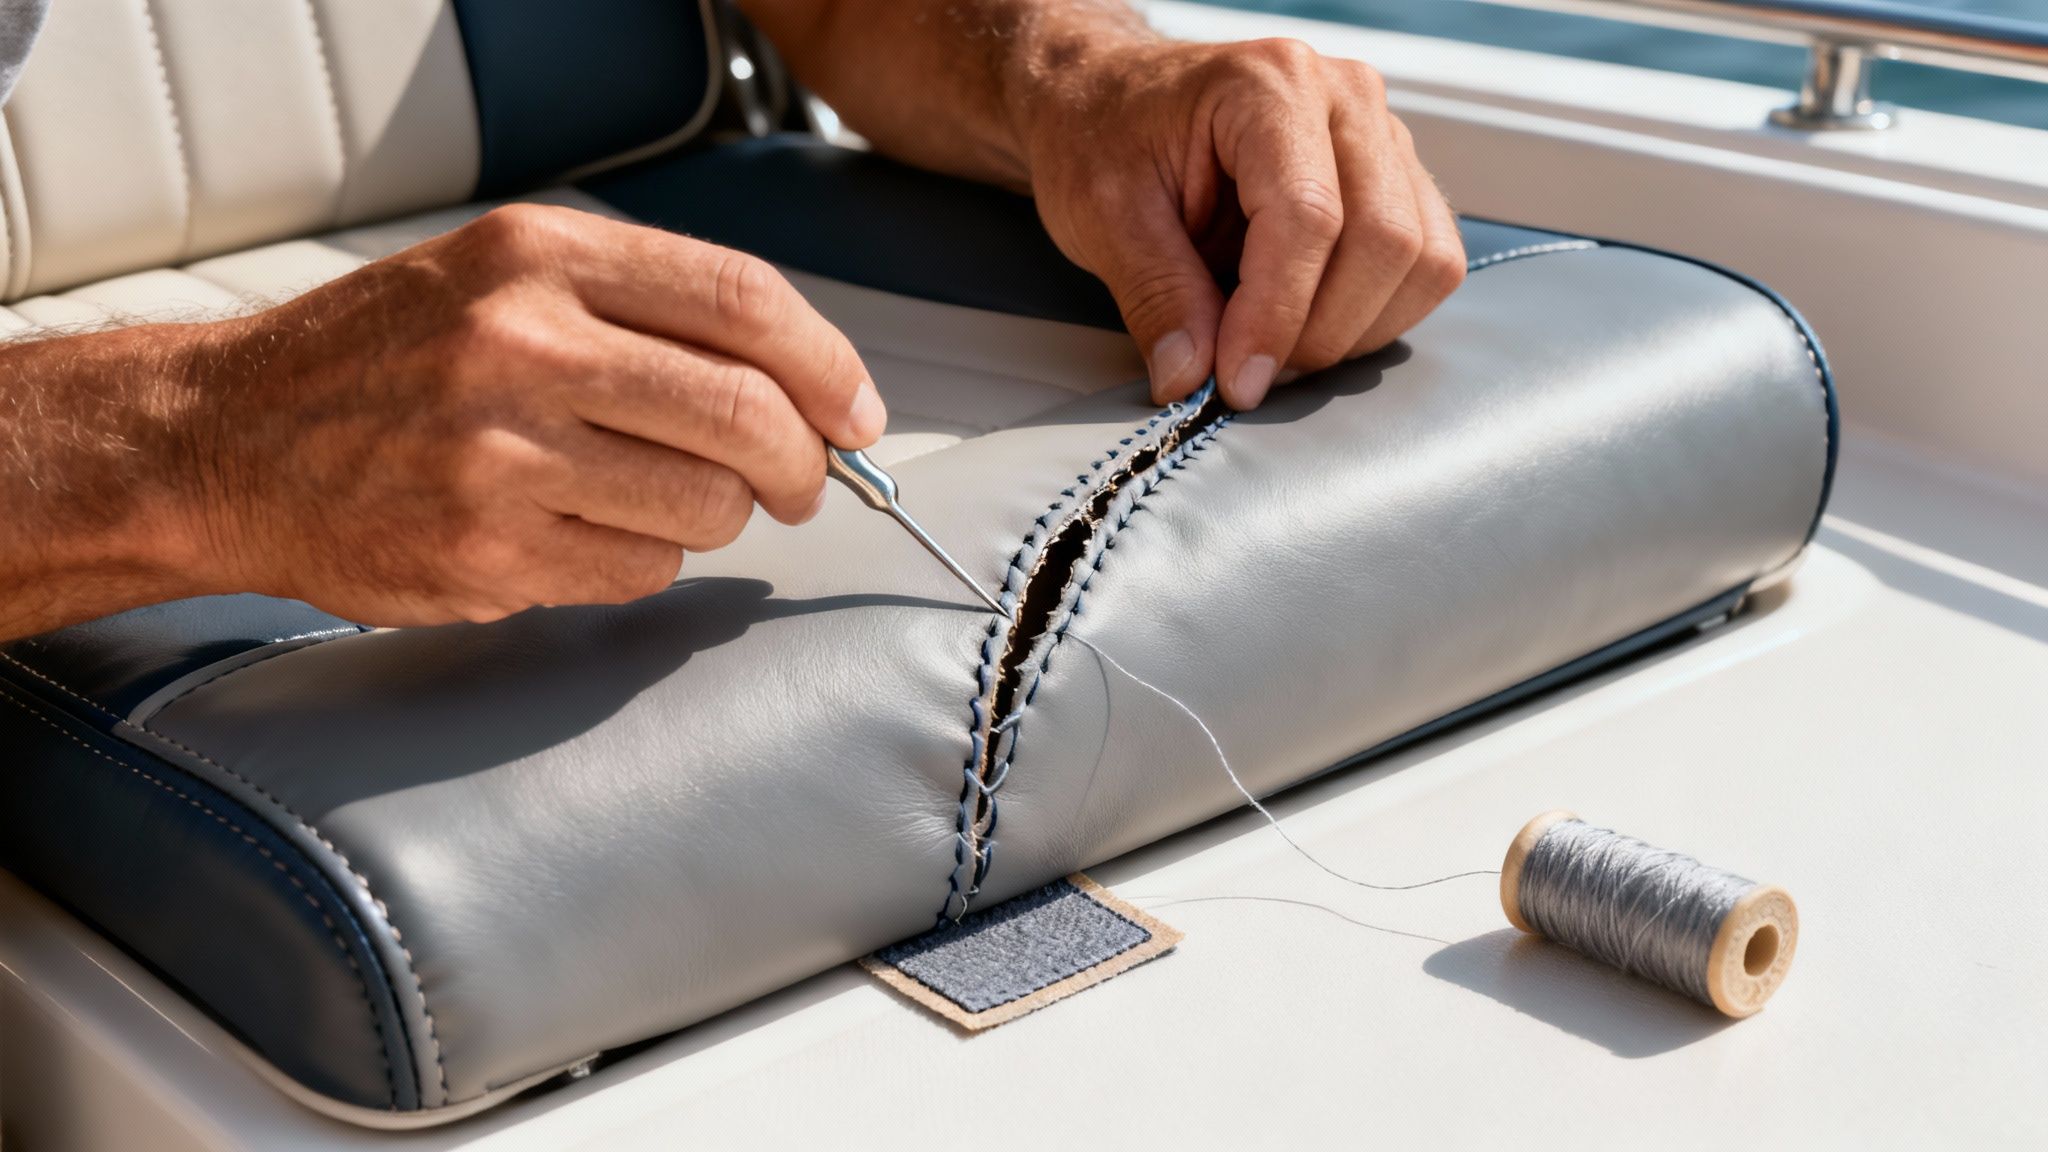
Restitching a Split Seam
Seeing a seam pop open is a classic issue on boat seats, especially in high-traffic areas. Before you panic, take a close look. Has the vinyl itself ripped apart, or has the thread just given up? Nine times out of ten, it's just a simple case of rotted thread, which is great news for a DIY repair.
To do this right, you'll need a couple of specific tools you might not have lying around:
- Curved Upholstery Needle: This is your secret weapon. Its shape lets you sew through the original stitch holes without needing to get behind the cushion.
- Marine-Grade UV-Resistant Thread: Don't even think about using regular thread from a sewing kit. It'll rot in a single season. You need heavy-duty polyester or nylon thread made for the marine environment.
- Pliers: A small pair of pliers gives you the grip you need to pull the needle through thick, tough marine vinyl.
First, clear out all the old, brittle thread from the seam. Once it's clean, use a sturdy lock stitch to hand-sew the seam back together, carefully following the factory holes. Take your time. This process creates a new seam that's often much stronger than the original.
Addressing Widespread Vinyl Cracking
Cracking vinyl is basically a cry for help. It happens when years of sun exposure bake the life right out of the material, making it dry and brittle. If the cracks are deep and widespread, it might be time to call it, but you can definitely save a seat with moderate "alligatoring" or surface-level spiderweb cracks.
This is less of a patch job and more of a restoration project. It all starts with a seriously deep cleaning. You have to get every bit of dirt and grime out of those tiny cracks, so a good cleaner and a soft-bristled brush are non-negotiable here.
Once the surface is spotless and completely dry, you can apply a flexible vinyl filler compound. This stuff is designed to fill the gaps while staying pliable, so it moves with the vinyl instead of cracking and falling out. Use a small palette knife to work it into the cracks, smoothing it over and wiping away any excess. Remember, several thin layers are always better than one thick, goopy one.
The most crucial step after filling the cracks is prevention. A deep conditioning treatment with a quality protectant is non-negotiable. This is less a repair step and more a vital preventative measure that restores pliability to the entire seat.
Finishing the job with a high-quality Vinyl Protector is absolutely essential. This isn't just a final wipe-down; it's the step that keeps the problem from coming right back. A good protectant rehydrates the vinyl, brings back that soft feel, and—most importantly—provides a powerful barrier against UV rays. Think of it like putting sunscreen on your upholstery to stop new cracks from ever forming.
This one-two punch of repairing the existing damage and then protecting the entire surface is the real secret to keeping your boat’s vinyl looking great for seasons to come.
Troubleshooting Common Vinyl Repair Issues
Even with the best instructions, sometimes things don't go exactly as planned. If you run into a snag during your repair, don't worry—it happens to everyone. Here’s a quick guide to some common frustrations and how to push through them.
| Problem | Likely Cause | How to Fix It |
|---|---|---|
| Patch won't stick or peels at the edges. | Surface wasn't clean enough; oil, dirt, or old protectant is blocking the adhesive. | Reclean the area thoroughly with an alcohol-based cleaner. Scuff the surface lightly with fine-grit sandpaper to give the adhesive more to grab onto. |
| Filler in cracks looks uneven or lumpy. | Applied too much filler at once, or it wasn't smoothed properly before drying. | Sand the high spots down carefully with fine-grit sandpaper. Apply another very thin layer of filler to even it out, focusing on a smooth finish. |
| Thread keeps breaking while stitching a seam. | Using the wrong type of thread (not marine-grade) or pulling too tight. | Switch to a dedicated marine UV-resistant polyester thread. Maintain even, firm tension, but don't try to pull it tight enough to tear the vinyl. |
| Color of the repair doesn't match. | Vinyl repair kits often require mixing colors; getting an exact match is tricky. | Test your color mix on a hidden spot first. Mix colors in natural daylight, and remember that the color may darken slightly as it dries. |
Remember, patience is key with any vinyl repair. Taking the time to diagnose the problem correctly and apply the fix methodically will almost always give you a better result than rushing through it.
Protecting Your Repair for Long-Term Durability
A good vinyl seat repair isn't just about how it looks the moment you finish—it’s about how it holds up through sun, salt, and countless fishing trips. You’ve done the hard part, but the job’s only half over. Now, your focus needs to shift from fixing damage to actively preventing it.
This is what separates a quick patch from a solution that lasts. A simple, consistent care routine will protect all that work you just put in and extend the life of your entire boat interior. It's the best way to keep yourself from doing this all over again next season.
Guarding Against the Elements
Your boat's biggest enemy? The sun. No question. Its relentless UV rays are constantly working to break down your vinyl's protective layers, making the material brittle, faded, and prone to cracking. This is exactly why a high-quality protectant isn't a "nice-to-have"—it's an absolute necessity.
Regularly applying a top-tier Vinyl Protector with powerful UV inhibitors is the single best investment you can make in your seats' future. Think of it as a heavy-duty sunscreen, forming a barrier that deflects harmful radiation and keeps the vinyl supple. This one step can dramatically slow down the aging process.
You wouldn't spend a full day on the water without sunscreen, so why leave your vinyl completely exposed? Consistent protection is what stops the very damage you just worked so hard to fix from happening again.
Beyond UV rays, simple physical protection makes a world of difference. A well-fitting boat cover is your first line of defense, shielding your seats from sun, rain, and bird droppings when you're docked. When it comes to the seats themselves, keeping water out is key. Looking into options for waterproof outdoor cushions can give you more ideas on how to shield your repaired vinyl from moisture and sun damage.
The Right Way to Clean and Maintain
Proper cleaning is just as important for preserving your seats as it is for prepping a repair. The goal is simple: remove the grime without stripping away the vinyl's essential plasticizers—the compounds that keep it soft and flexible.
Key Maintenance Habits:
- Use a pH-Balanced Cleaner: Stick with a dedicated marine Vinyl Cleaner. Harsh, all-purpose cleaners or anything with bleach will cause irreversible damage, leading to stiffness and premature cracking.
- Wipe Up Spills Immediately: Sunscreen, food, and drinks can bake into the vinyl and cause permanent stains. A quick wipe-down after each trip goes a long, long way.
- Address Mildew Promptly: The second you spot those little black dots, act fast. Using a safe but effective Mildew Stain Remover will kill the growth before it can cause deep, permanent discoloration or damage the vinyl itself.
This routine isn't just about appearances; it’s about protecting your investment. The whole reason we repair vinyl instead of replacing it is to save money, and that's only becoming more relevant. In 2023, the global marine vinyl market was valued at USD 340.8 million and is expected to climb to around USD 488 million by 2030.
With today's materials, a well-maintained repair can realistically extend your seat's life by 3–7 years. By adopting a proactive maintenance schedule, you ensure your boat's interior remains a source of pride, not a constant repair project.
Got Questions About Vinyl Boat Seat Repair? We've Got Answers.
When you're knee-deep in a project, questions always come up. It's just part of the process. Fixing up vinyl boat seats is a pretty common job for any boat owner, but that doesn't mean it's without its own little quirks. Let's tackle some of the most common questions we hear to get you through the tough spots and back to enjoying your boat.
Can I Get a Perfect Color Match for My Old Vinyl?
Getting a 100% perfect match on vinyl that’s been baked by the sun and blasted with salt for years? That's the holy grail of vinyl repair, and it's tough. The good news is that modern repair kits can get you so close that no one will ever notice the difference.
Most quality kits give you a range of color tints to mix your own custom shade. The real secret here is patience and lighting. Do your color mixing in bright, natural daylight—never under garage lights, which can throw the colors way off.
Pro Tip: Find a hidden spot to test your color mix. Think underneath the cushion or on a flap inside a storage locker. Put a tiny dab on, let it dry completely, and then see how it looks. The color can change a bit as it cures.
Start with the base color that looks closest and slowly add tiny drops of other tints until you’ve nailed it. Once you combine a near-perfect color with the right texture from a graining paper, the repair will be virtually invisible, especially after a good cleaning and a coat of UV protectant.
What’s the Best Temperature for a Vinyl Repair?
You'd be surprised how much the weather affects your repair. The sweet spot is a warm, dry day with low humidity. Try to work when the temperature is somewhere between 60°F and 80°F (15°C to 27°C).
A classic mistake is working in the blazing midday sun. If it's too hot, the repair compound will cure way too fast, leading to cracks and a weak bond. But cold weather is just as bad; the compound might never cure properly, leaving you with a sticky, soft patch that’s a permanent mess.
If you have to work outside, aim for the morning or late afternoon when the sun isn't so intense. Even throwing a tarp over the area for some shade can make a world of difference. A stable, moderate temperature is what you need for the chemicals in the adhesives and compounds to do their job right, giving you a repair that actually lasts.
My Vinyl Is Really Old and Brittle. Is It Even Worth Fixing?
That’s a judgment call, and it really comes down to the extent of the damage. If you’ve just got a few isolated cracks but the rest of the seat vinyl is still somewhat pliable, then yes, a repair is absolutely worth your time. You can fill those cracks with a flexible compound and follow it up with a serious conditioning treatment for the whole seat.
But if the vinyl is brittle everywhere—if it feels stiff all over and is starting to flake or has a web of cracks—you're looking at the end of its life. A patch in this situation is just a band-aid. The surrounding material is too weak to hold the repair, and you'll probably see new cracks pop up right next to your fresh patch. It might get you through the rest of the season, but full reupholstery is the only true long-term fix for that kind of widespread material failure.
How Do I Keep My Repair Patch From Peeling Off?
This is probably the biggest frustration with DIY vinyl repair, and the culprit is almost always the same thing: surface preparation. I'd bet that 99% of peeling patches happen because the surface wasn't truly clean, preventing the adhesive from getting a solid grip.
Before you even open a tube of adhesive or filler, you have to do a deep clean. Use a good marine vinyl cleaner to scrub away every trace of sunscreen, body oil, dirt, salt, and old protectant sprays. All that stuff creates an invisible film that blocks the repair material from bonding to the vinyl itself.
After you've cleaned it, do one final wipe-down with isopropyl alcohol on a lint-free cloth. This gets rid of any last bit of residue. One more tip: if you're using a physical patch, always round the corners. Sharp 90-degree corners are just asking to be caught and lifted. Take these prep steps seriously, and your repair will have a fighting chance to last for years.
At Better Boat, we know your boat’s interior deserves just as much attention as the engine. Our premium cleaning and protection products are made to help you get professional results. For a repair that lasts, start with a perfectly clean surface using our Vinyl Cleaner, and lock in that fresh look by shielding it from future sun damage with our Vinyl Protector.