


Your Ultimate Trailer Maintenance Checklist for 2025
Imagine this: you're halfway to your dream vacation spot, the boat or RV in tow, when disaster strikes. A blown tire, a seized bearing, or failing brakes can turn an adventure into a dangerous and expensive ordeal on the side of the highway.
The vast majority of these roadside nightmares are entirely preventable. The secret isn't luck; it's diligence. A comprehensive trailer maintenance checklist is the single most effective tool for ensuring safety, protecting your investment, and guaranteeing peace of mind on the road.
This isn't just about ticking boxes before a trip. It's about systematically inspecting the critical systems that keep your trailer and its precious cargo secure, transforming potential failures into routine fixes.
This process builds confidence and prevents catastrophic breakdowns. For a broader perspective on general vehicle upkeep, exploring comprehensive guides can provide invaluable insights into incorporating all essential vehicle inspection checklist items into your routine, covering more than just the trailer itself.
In this definitive guide, we will break down the seven essential inspection zones that every trailer owner must master. From the rubber that meets the road to the electrical signals that keep you visible, we'll provide actionable steps, expert tips, and a clear schedule to follow.
We will cover everything from tires and brakes to the often-overlooked suspension and frame integrity. Let's transform your pre-trip routine from a chore into a confidence-building ritual that keeps you rolling safely for years to come.
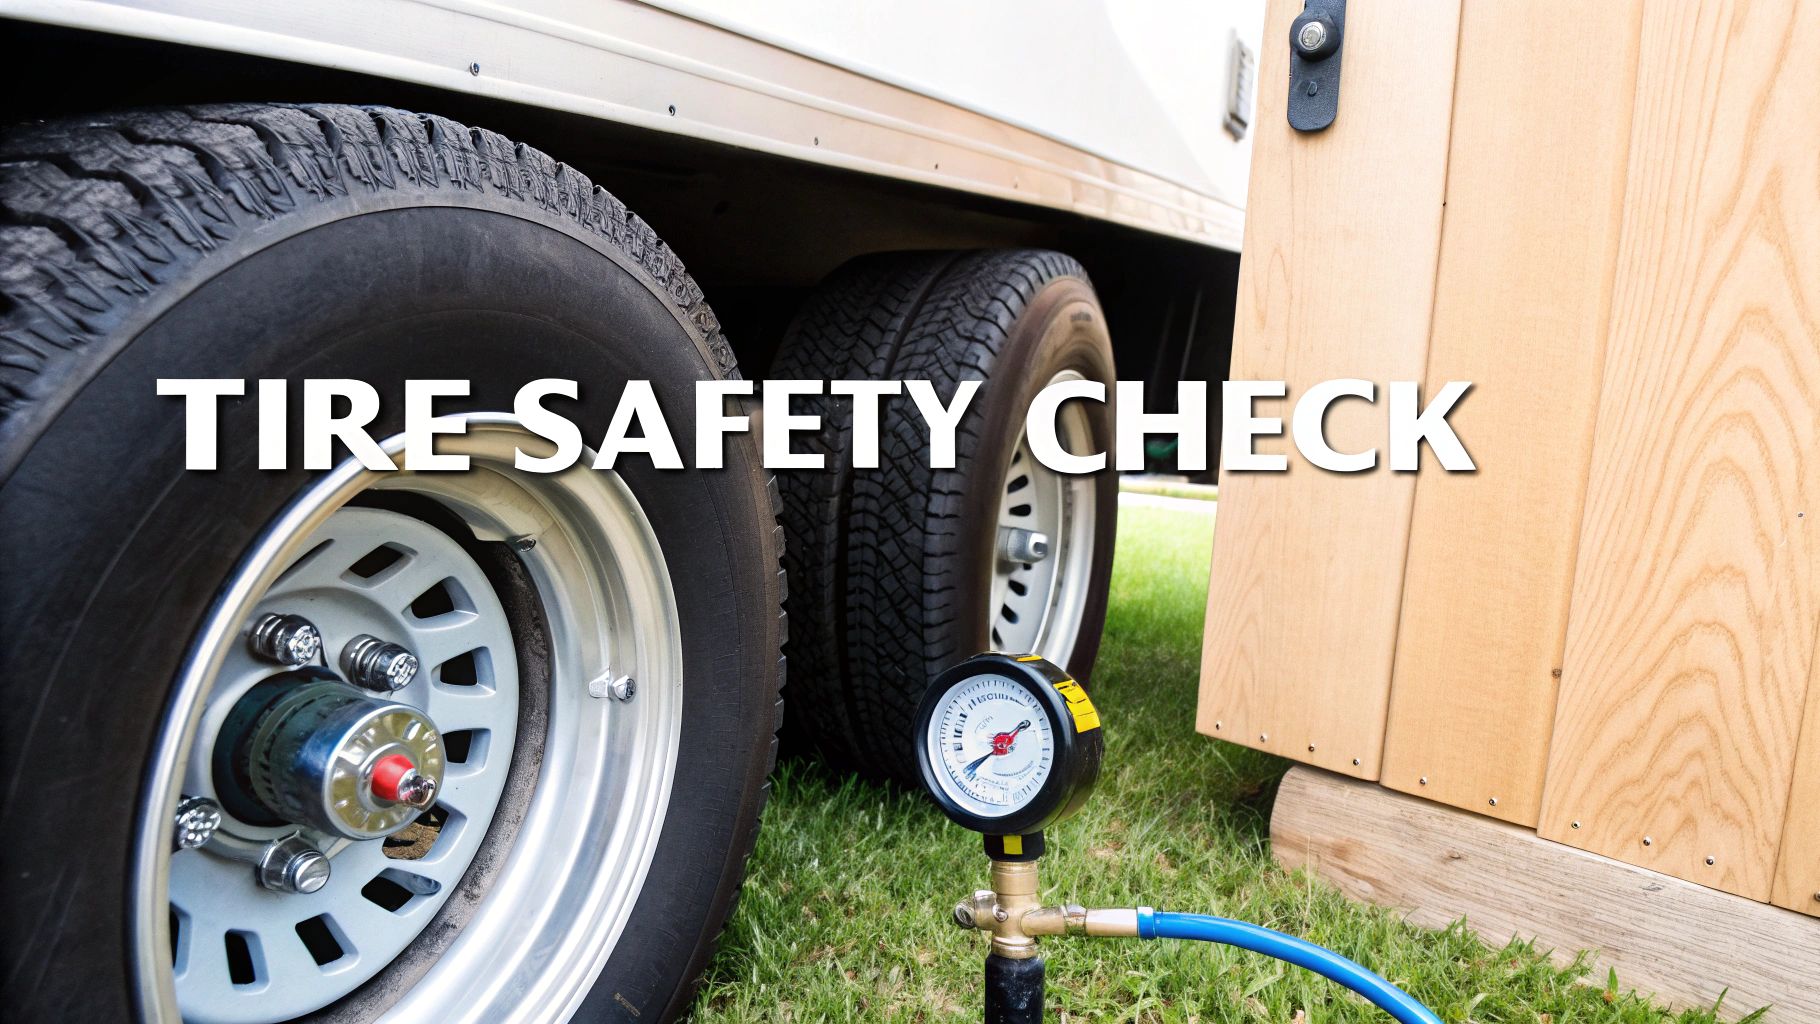
1. Tire Inspection and Maintenance
Your trailer's tires are the single most critical point of contact between your valuable cargo and the road. Neglecting them is not just a risk; it's an invitation for a roadside disaster. Tire failure is a leading cause of trailer-related accidents, making a thorough and consistent inspection process the number one item on any comprehensive trailer maintenance checklist. This goes far beyond a quick glance; it's a systematic check of pressure, tread, sidewall integrity, and age to ensure safety, improve fuel efficiency, and extend the life of your tires.
The importance of this step is validated by numerous real-world scenarios. For instance, many RV owners who start checking and correcting tire pressure before every trip report noticeable improvements in tow vehicle fuel economy.
On a commercial scale, trucking companies that implement daily tire checks have seen roadside breakdowns plummet. For recreational users, like boat trailer owners, a diligent pre-season tire check can be the difference between a smooth launch and a catastrophic failure on the way to the ramp.

Better Boat Marine Grease Tube 3oz or 14oz
For bearing service day, this is the Better Boat grease that fits trailer hubs, wheel bearings, and hitch-ball lubrication without sending readers to a generic search result.
Check availabilityKey Inspection Points
A proper tire inspection is a multi-step process. Follow this checklist before each trip for maximum safety:
- Tire Pressure: This is the most crucial daily check. Use a quality pressure gauge to check each tire, including the spare, when the tires are cold (before driving). Under-inflation is the primary cause of blowouts, as it causes excessive flexing and heat buildup.
- Tread Depth: Use a tread depth gauge or the classic "penny test." Insert a penny into the tread with Lincoln's head upside down. If you can see the top of his head, your tread is worn below 2/32 of an inch and the tire must be replaced immediately.
- Sidewall Condition: Carefully examine the inner and outer sidewalls for any cuts, cracks, bulges, or punctures. Ozone and UV exposure from the sun can cause dry rot, appearing as a web of fine cracks, which severely weakens the tire.
- Overall Wear: Look for uneven wear patterns. Wear on both edges indicates under-inflation, center wear suggests over-inflation, and wear on one side can point to alignment issues with your trailer's axle.
Key Insight: Many trailer owners forget that trailer tires, often designated as "ST" (Special Trailer), have stiffer sidewalls to handle heavy loads but are not designed for high speeds. Adhering to the speed rating printed on the tire's sidewall is just as important as maintaining pressure.
Proactive Tire Care Tips
Beyond pre-trip inspections, proactive maintenance can save you significant time and money.
- Heed the Calendar: Replace trailer tires every five to seven years, regardless of how much tread is left. The rubber compounds degrade over time, making older tires far more susceptible to failure.
- Invest in a TPMS: A Tire Pressure Monitoring System (TPMS) provides real-time data on your tires' pressure and temperature, alerting you to a potential issue long before it becomes a dangerous blowout.
- Don't Forget the Spare: Your spare tire is useless if it's flat or rotted. Ensure it is properly inflated, protected from the elements with a cover, and included in your regular age-based replacement schedule.
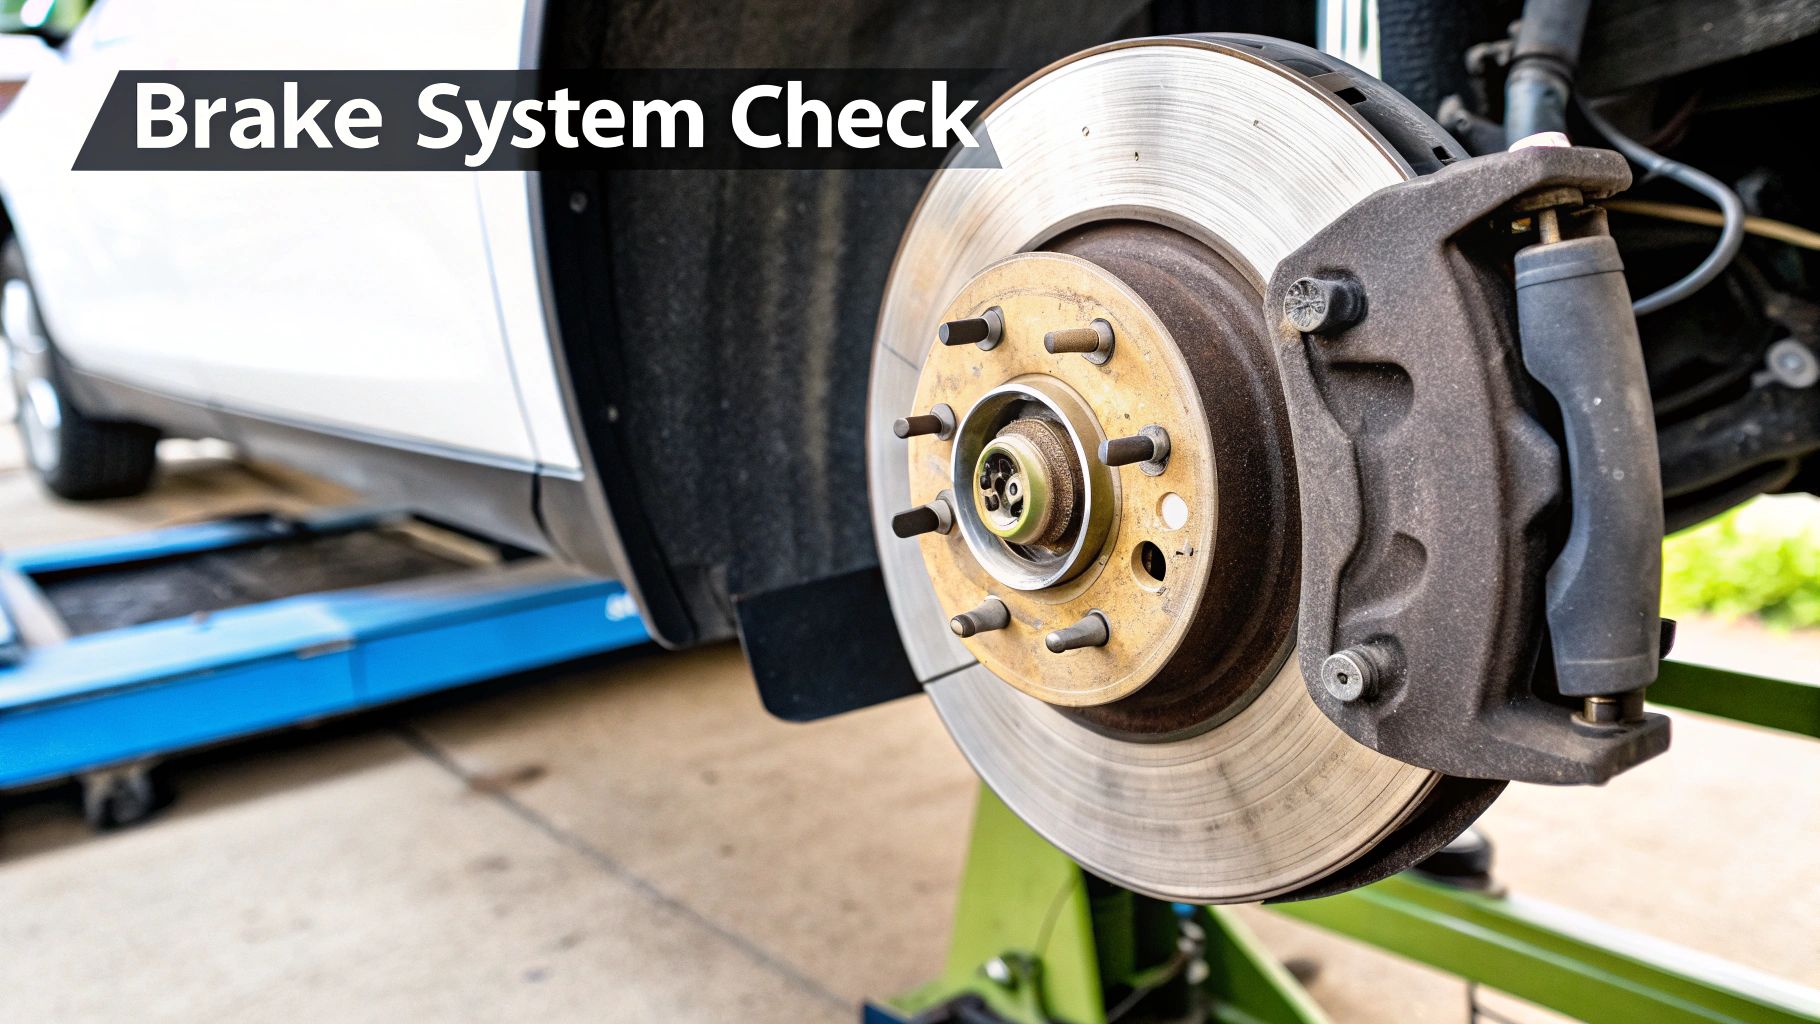
2. Brake System Inspection
While tires get you rolling, it’s the brake system that ensures you can stop safely and maintain control, especially when managing heavy loads or descending steep grades. A fully functional brake system is a non-negotiable component of any responsible trailer maintenance checklist.
Ignoring your trailer's brakes is a direct risk to your safety, your cargo, and everyone else on the road. A comprehensive inspection involves checking everything from the brake controller in your tow vehicle to the pads, drums, and hydraulic or electrical lines at the wheels, preventing catastrophic failures and ensuring legal compliance.
The critical nature of this system is proven time and again. For example, RV enthusiasts who test and adjust their electric brakes before tackling mountain passes prevent dangerous situations like brake fade or complete failure on long downgrades.
Construction companies that mandate monthly brake inspections on their equipment trailers significantly reduce the risk of on-site accidents. Likewise, a horse trailer owner who performs a brake check before every trip ensures their precious animals have a smooth, safe ride, free from the jarring stops that can result from poorly adjusted brakes.
Key Inspection Points
A thorough brake inspection is vital for safe towing. Use this checklist as part of your routine maintenance schedule:
- Brake Controller Test: Before each trip, test your brake controller. Most modern controllers (like those from Tekonsha) have a manual override lever or button. While rolling slowly in a safe area, activate it to confirm the trailer brakes engage independently of the tow vehicle's brakes.
- Pads, Shoes, and Drums/Rotors: Visually inspect brake components for wear. On drum brakes, check the thickness of the brake shoes. For disc brakes, check the brake pad material. Also, look for deep grooves, scoring, or heat-related cracks on the drums or rotors.
- Brake Lines and Fluid: For trailers with hydraulic brakes, inspect all lines for cracks, leaks, or kinks. Check the master cylinder's fluid level and ensure the fluid is clean; it should be replaced every 2-3 years as it can absorb moisture, leading to corrosion and reduced performance.
- Electrical Connections: Inspect the wiring from the trailer plug to the axles. Look for frayed wires, loose connections, or corrosion that could interrupt the signal to your electric brakes.
Key Insight: A common mistake is assuming the tow vehicle's brakes can handle the entire load. Federal Motor Carrier Safety Administration (FMCSA) regulations and state laws often require trailers over a certain weight (typically 3,000 lbs) to have their own braking system. Proper maintenance is not just good practice; it's a legal requirement.
Proactive Brake Care Tips
Staying ahead of brake issues is crucial for consistent and reliable stopping power.
- Adjust Brakes Regularly: Electric and drum brakes require periodic adjustment to compensate for wear. Plan to adjust them annually or every 12,000 miles to maintain optimal performance.
- Perform a Breakaway Test: Regularly test the breakaway system. Pull the pin on the breakaway switch; the trailer brakes should lock up immediately, powered by the onboard battery. This is your last line of defense if the trailer detaches.
- Listen to Your Brakes: Pay attention to new sounds. Grinding or squealing noises when braking are clear indicators that your brake shoes or pads are worn and need immediate replacement.
- Keep Tools Handy: A basic trailer tool kit should include a brake spoon or adjustment tool. This allows you to make minor adjustments on the road if you notice performance issues.
3. Bearing Inspection and Lubrication
Hidden inside your trailer's wheel hubs, the bearings are unsung heroes responsible for allowing your wheels to spin freely and smoothly. Neglecting them is a direct path to one of the most dangerous and damaging failures a trailer can experience: a seized wheel or a complete wheel separation at highway speeds.
Proper bearing maintenance, which involves regular inspection, cleaning, and repacking with fresh marine grease, is a non-negotiable part of any serious trailer maintenance checklist. It prevents catastrophic failure, ensures safety, and extends the life of your entire axle assembly.
The critical nature of this task is underscored by countless real-world situations. For travel trailer enthusiasts, a bearing failure in a remote location can mean days of waiting for parts and a ruined vacation. Commercial delivery companies that integrate bearing maintenance into their service schedules see a dramatic reduction in costly downtime and road service calls.
The most vigilant are often boat trailer owners, who understand that submerging hubs in water, especially saltwater, creates a high-risk environment for corrosion and contamination, making annual repacking essential. These are just some of the reasons why diligent bearing maintenance is critical, as detailed in many boat trailer maintenance guides.
Key Inspection Points
A proper bearing inspection requires more than just adding grease. Follow this process to ensure your bearings are in top condition:
- Feel and Listen: Before disassembly, jack up the trailer wheel and spin it by hand. It should rotate smoothly and quietly. Any grinding noise, roughness, or excessive wobble indicates an immediate problem.
- Visual Inspection of Grease: Remove the dust cap or bearing protector. The grease should look clean and have a consistent texture. If it appears milky, watery (a sign of water intrusion), or gritty, the bearings must be fully cleaned and repacked.
- Bearing and Race Examination: After carefully removing and cleaning the bearings, inspect the rollers and the race (the surface they ride on inside the hub) for any signs of pitting, discoloration from overheating (often a blue or brown tint), or visible wear.
- Seal Integrity: The rear grease seal is what keeps water and dirt out. Always inspect it for tears or damage during a bearing service and replace it every time you repack the bearings to ensure a perfect seal.
Key Insight: A common mistake is simply adding more grease via a zerk fitting on the hub. While this can help purge old grease, it does not replace a full inspection and can mask underlying problems like water contamination or a damaged bearing. There is no substitute for periodic disassembly, cleaning, and inspection.
Proactive Bearing Care Tips
Stay ahead of bearing issues with these proactive maintenance habits.
- Follow a Schedule: As a general rule, repack your trailer's wheel bearings annually or every 12,000 miles, whichever comes first. For boat trailers that are frequently submerged, this should always be done annually.
- Use the Right Grease: Not all grease is created equal. Use a high-quality, high-temperature lithium-complex grease. For boat trailers, a dedicated marine-grade grease is essential for its superior water resistance.
- Consider Bearing Protectors: Systems like Bearing Buddy replace the dust cap and use a spring-loaded piston to maintain slight, positive pressure inside the hub, which helps prevent water from entering during boat launch and retrieval.
- Keep Spares On Hand: Carry a spare set of bearings, races, and seals that fit your trailer. Having these parts on hand can turn a trip-ending disaster into a manageable roadside repair.
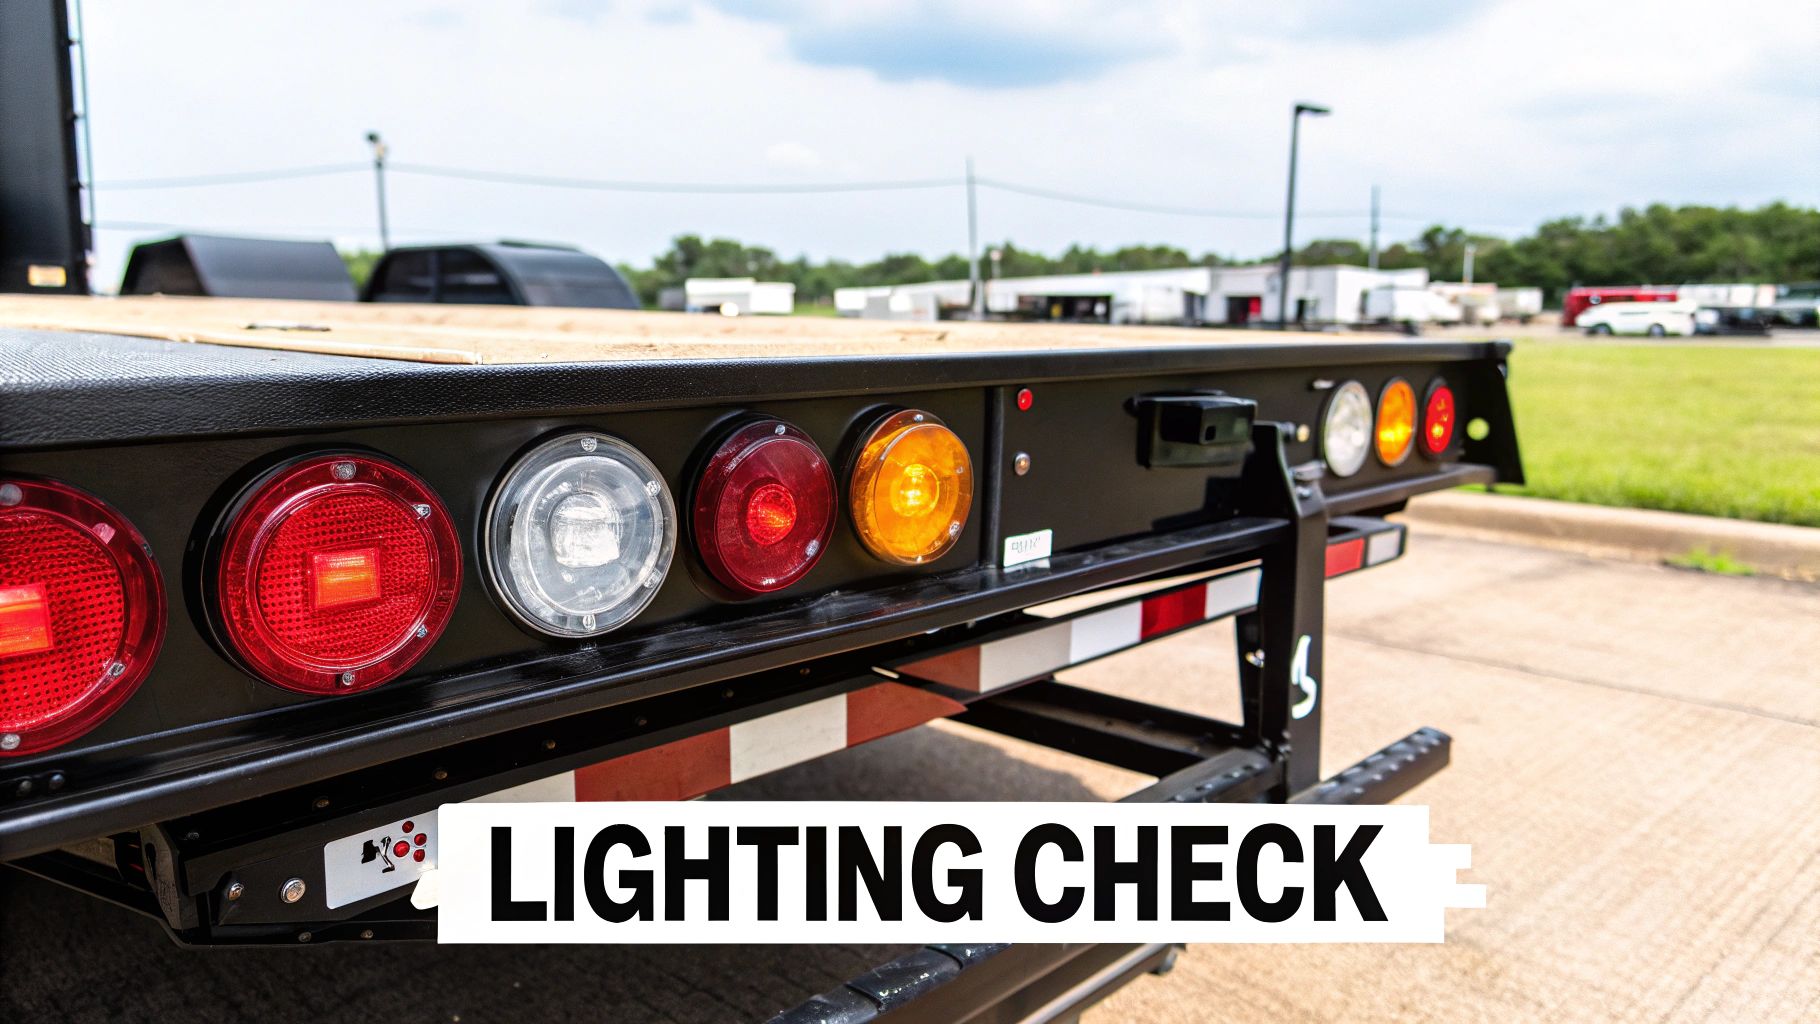
4. Lighting System Maintenance
Your trailer's lighting system is its primary communication tool on the road, signaling your intentions to other drivers. A non-functional brake light or turn signal isn't just a minor inconvenience; it's a serious safety hazard that can lead to collisions, especially at night or in poor weather.
Maintaining a fully operational lighting system is a non-negotiable legal requirement and a cornerstone of any responsible trailer maintenance checklist. This involves a regular check of all lights, wiring, and connections to ensure you are visible and predictable to everyone sharing the road.
The practical benefits of diligent lighting checks are clear across all types of trailer use. For example, RV owners who upgrade to modern LED lighting systems often report fewer electrical issues and brighter, more reliable performance. Utility trailer operators who implement a simple pre-trip light check routine significantly reduce their risk of traffic citations and roadside stops.
Boat trailer owners, in particular, benefit from investing in fully sealed, waterproof LED systems, which prevent the constant corrosion and failure common with traditional incandescent bulbs in saltwater environments. If you're looking for robust options for marine environments, you can learn more about specialized boat lighting systems to find the perfect fit.
Key Inspection Points
A comprehensive light check is fast and simple. Hook up your trailer to the tow vehicle and follow this checklist before every departure:
- Brake Lights: Have a partner stand behind the trailer and confirm both brake lights illuminate brightly when you press the brake pedal.
- Turn Signals: Activate the left and right turn signals individually, checking that the corresponding lights on the trailer are flashing correctly.
- Running/Tail Lights: Turn on your vehicle's headlights to engage the running lights. Walk around the trailer to ensure all tail lights and side marker lights are lit.
- Wiring Harness: Visually inspect the wiring from the tow vehicle plug to the trailer. Look for any frayed wires, cracked insulation, or loose connections that could cause a short. Ensure the cable has enough slack for turns but won't drag on the ground.
Key Insight: Most trailer lighting problems originate not at the bulb, but at the grounding point. A poor ground connection can cause lights to work intermittently or not at all. Always ensure the ground wire is securely fastened to a clean, paint-free spot on the trailer frame.
Proactive Lighting Care Tips
Going beyond basic checks will ensure your lighting system is reliable for years to come.
- Upgrade to LEDs: Modern LED (Light Emitting Diode) lights are brighter, last tens of thousands of hours longer, draw significantly less power, and are more resistant to vibration than old-school incandescent bulbs.
- Use Dielectric Grease: When connecting the wiring plug or replacing a bulb, apply a small amount of dielectric grease to the metal contacts. This prevents corrosion and ensures a solid electrical connection, especially in damp climates.
- Carry a "Lights-Out" Kit: Keep a small kit with spare bulbs (if not using LEDs), fuses, a basic wire stripper, and some electrical tape in your tow vehicle. This can turn a trip-ending problem into a quick five-minute fix.
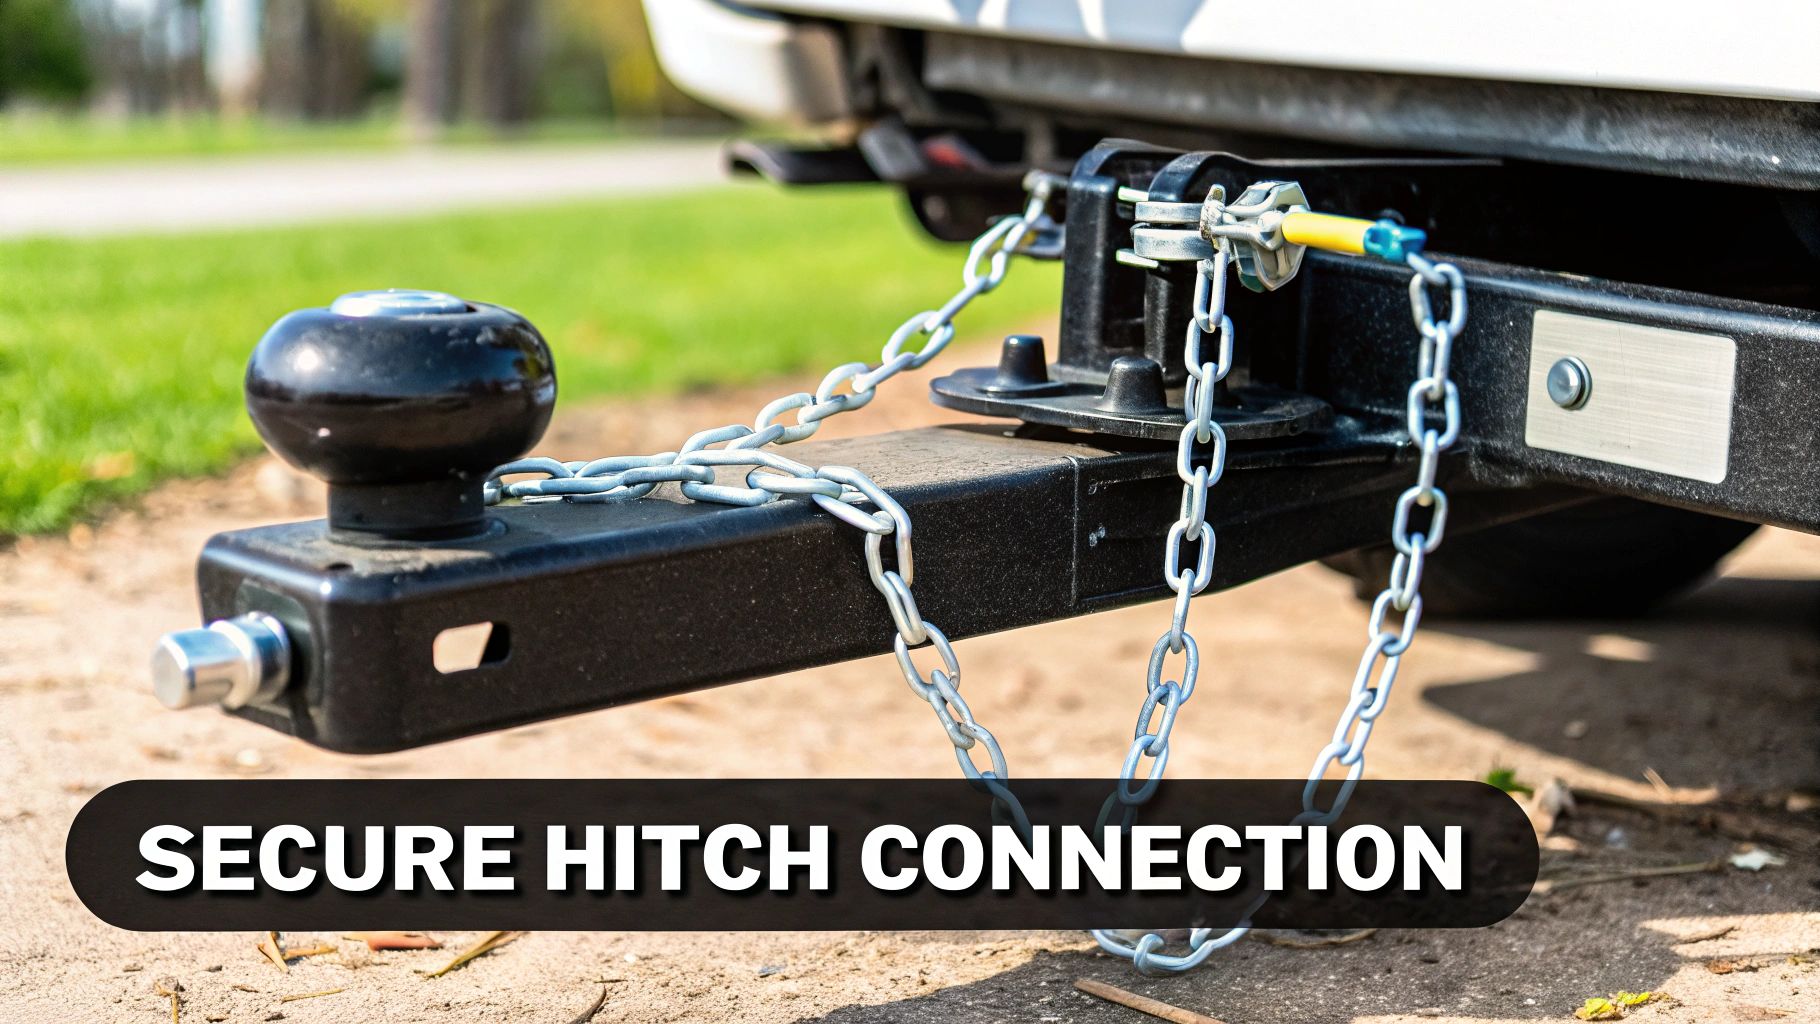
5. Hitch and Coupling System Inspection
The trailer hitch and coupling system is the vital, load-bearing handshake between your tow vehicle and trailer. A failure at this connection point is one of the most terrifying and dangerous scenarios a driver can face. Proper inspection and maintenance of the coupler, hitch ball, safety chains, and emergency breakaway system are therefore non-negotiable elements of any responsible trailer maintenance checklist.
This isn't just about a visual check; it's a hands-on process of verifying fits, testing mechanisms, and ensuring every component can handle the immense forces of towing, braking, and turning.
The real-world importance of this step is undeniable. Travel trailer owners who regularly maintain their weight distribution hitches, like those from Equal-i-zer or Blue Ox, report significantly reduced trailer sway and a more stable, confident towing experience.
For boat owners, a properly adjusted and lubricated coupler ensures a secure connection for a smooth launch, preventing the trailer from detaching on a steep ramp. For those hauling livestock, a functional breakaway system is a critical last line of defense, capable of stopping a detached trailer and preventing a much larger tragedy.
Key Inspection Points
A comprehensive hitch system check involves several critical components. Perform these checks before every single trip:
- Coupler Mechanism: Inspect the trailer's coupler for any cracks, bending, or excessive rust. Operate the latching mechanism to ensure it moves freely and locks securely onto the hitch ball. The fit should be snug with no slop or play.
- Hitch Ball and Mount: Verify the hitch ball is the correct size for your coupler (the size is stamped on both). Check that the ball is tightened to the manufacturer's torque specification and shows no signs of excessive wear or cracks. Ensure the hitch mount itself is securely pinned in the receiver.
- Safety Chains: Examine your safety chains for any stretched or broken links, cracks, or significant corrosion. When attached, they should be crossed under the coupler in an "X" pattern and have just enough slack to allow for sharp turns without dragging on the ground.
- Breakaway System: If your trailer has electric brakes, test the emergency breakaway switch. Pull the pin from the switch; this should activate the trailer's brakes immediately. You can confirm this by trying to pull the trailer forward slightly. Remember to re-insert the pin fully after the test.
Key Insight: The tongue weight of your trailer is a critical safety factor managed at the hitch. It should be 10-15% of the total loaded trailer weight. An incorrectly loaded trailer with too little or too much tongue weight can lead to dangerous sway or loss of steering control. Always check your tongue weight after loading your cargo.
Proactive Hitch and Coupler Care
Regular maintenance will extend the life of your equipment and provide peace of mind on the road.
- Consistent Lubrication: Apply a light coat of automotive grease to the hitch ball and the internal moving parts of the coupler mechanism. This reduces friction and wear, preventing the components from seizing up.
- Breakaway Battery Health: The small battery that powers your breakaway system needs to be tested and charged regularly. Test its charge quarterly and replace it according to the manufacturer's schedule, typically every one to two years.
- Mind the Ratings: Never exceed the weight ratings stamped on your hitch, hitch ball, or coupler. These components are engineered for specific loads, and overloading them is a direct path to failure. For an in-depth guide on hookup procedures, you can learn more about towing tips on betterboat.com.

6. Suspension System Maintenance
The suspension system is the unsung hero of your trailer, silently absorbing road shock, distributing weight, and ensuring your trailer tracks smoothly behind your tow vehicle. A neglected suspension not only leads to a jarring ride but can cause accelerated tire wear, component failure, and even stress fractures in the trailer's frame. Proper inspection and upkeep of leaf springs, equalizers, and shocks are fundamental to any trailer maintenance checklist, protecting your cargo, your tires, and the structural integrity of the entire unit.
The value of diligent suspension care is clear across different applications. For instance, RV owners who upgrade to heavy-duty shackles and wet bolts often report a significant reduction in interior cabinet doors popping open on rough roads. Similarly, equipment trailer operators who routinely inspect leaf springs prevent costly downtime from broken springs under heavy loads, ensuring they can reliably transport machinery to job sites. For boat owners, replacing worn-out bushings helps the trailer track true, preventing sway and making long highway drives to the lake safer and less stressful.
Key Inspection Points
A healthy suspension system works in harmony. Inspect these components together, ideally while the trailer is jacked up for tire or bearing service, to get a clear picture of its condition.
- Leaf Springs: Visually inspect each spring pack for cracks, breaks, or "fanned out" leaves, which indicate a broken center pin. Check for signs of excessive rust or flattening, as this means the springs have lost their arch and load-carrying capacity.
- Equalizers and Hangers: On multi-axle trailers, the equalizer is the pivoting component that distributes the load between axles. Check it for cracks or elongated bolt holes, which signal excessive wear. Inspect the hangers welded to the frame for cracks or bending.
- Bushings and Bolts: These are the most common wear items. Look for deteriorated or missing plastic or bronze bushings inside the spring eyes and equalizer. Worn bushings will cause metal-on-metal contact, leading to rapid wear of the bolts and spring eyes.
- Shock Absorbers (if equipped): Check for any signs of leaking hydraulic fluid, dented housings, or broken mounts. A leaking shock is no longer effective at dampening road vibrations.
Key Insight: Uneven tire wear is often the first symptom of a suspension problem. If you notice one tire wearing much faster on the inside or outside edge than others, it's a strong indicator of a worn-out spring, a bent axle, or other suspension component failure that needs immediate attention.
Proactive Suspension Care Tips
Staying ahead of suspension wear prevents larger, more expensive failures down the road.
- Follow a Lubrication Schedule: If your trailer has grease fittings (zerks) on its suspension pivot points, lubricate them according to the manufacturer's schedule. This simple act drastically extends the life of bushings and bolts.
- Upgrade for Your Usage: If you frequently haul heavy loads or travel on poor roads, consider upgrading to a more robust system. Heavy-duty shackle kits, wet bolt kits (which are greaseable), or even systems from brands like Dexter Axle or Lippert can dramatically improve durability and ride quality.
- Keep Detailed Records: Log all suspension maintenance, from greasing to component replacement. This history is invaluable for diagnosing future issues and provides a clear record of the trailer's upkeep.
- Clean and Inspect: After trips, especially in salty or grimy conditions, rinse the suspension components. This helps prevent corrosion and makes it easier to spot cracks or damage during your next inspection.
7. Frame and Structural Inspection
The frame is the literal backbone of your trailer, providing the strength and rigidity necessary to carry its load safely down the road. While tires and bearings get frequent attention, the frame itself is often overlooked until a serious problem develops.
A thorough structural inspection is a critical part of any trailer maintenance checklist, as it prevents catastrophic failures that could lead to complete loss of cargo, the trailer itself, and potentially cause a severe accident. This isn't just a quick look; it's a detailed examination for corrosion, stress cracks, and damage that ensures the entire unit remains sound.
This step is crucial for all trailer types, from heavy-duty equipment haulers to recreational boat trailers. For example, commercial operators who implement annual frame inspections, often adhering to Commercial Vehicle Safety Alliance (CVSA) standards, can identify and repair stress fractures before they lead to a dangerous structural collapse on a job site.
Likewise, boat trailer owners who meticulously wash their frames after every saltwater launch and treat any emerging rust can dramatically extend the trailer's service life, preventing the frame from literally rusting away from the inside out.
Key Inspection Points
A comprehensive frame inspection requires getting up close and personal with your trailer. Use a good flashlight and a wire brush to clean dirty or suspect areas.
- Weld Examination: Pay close attention to all weld points, especially where cross members meet the main frame rails and at suspension mounting points. Look for fine, hairline cracks extending from the weld, which are classic signs of metal fatigue and stress.
- Corrosion Check: Systematically inspect the entire frame for rust, particularly on the underside and in crevices where moisture collects. On steel frames, look for bubbling paint and flaking rust. On aluminum frames, check for white, powdery oxidation, especially around steel fasteners.
- Straightness and Damage: Stand back and look down the length of the main frame rails to check for any bowing, sagging, or twisting. Also, inspect for any dents, gouges, or bends from impacts with curbs or road debris.
- Fasteners and Components: Check that all bolts and fasteners securing components like axles, fenders, and jacks to the frame are tight and free of excessive corrosion.
Key Insight: Many frame failures begin in hard-to-see areas. Pay special attention to the tongue area where it joins the main frame, as this is a high-stress point. Tapping along the frame with a small hammer can also help identify areas of internal rust; a solid "ring" is good, while a dull "thud" can indicate compromised metal.
Proactive Frame Care Tips
Maintaining your trailer’s structural integrity is an ongoing process, not a one-time check.
- Wash It Regularly: This is especially critical for boat trailers or those used in winter where road salt is prevalent. A thorough washing removes corrosive agents that accelerate rust and degradation.
- Treat Rust Immediately: Don't let small rust spots fester. Use a wire brush to remove the loose rust, treat the area with a rust converter, and then prime and paint it to seal out moisture.
- Avoid Overloading: Adhering to your trailer's Gross Vehicle Weight Rating (GVWR) is the single best way to prevent undue stress that leads to frame fatigue and cracks.
- Document with Photos: Take detailed photos of your frame, especially key weld areas, during your annual inspection. This creates a visual history that makes it easier to spot changes or developing cracks year over year.
Trailer Maintenance Checklist Comparison Table
| Maintenance Type | Implementation Complexity 🔄 | Resource Requirements ⚡ | Expected Outcomes 📊 | Ideal Use Cases 💡 | Key Advantages ⭐ |
|---|---|---|---|---|---|
| Tire Inspection and Maintenance | Moderate - Needs frequent checks | Basic tools (pressure gauge, tread tool); TPMS helpful | Improved safety, fuel efficiency, tire life | RVs, commercial trucks, boat trailers | Prevents blowouts, improves fuel economy, extends tire life |
| Brake System Inspection | High - Technical knowledge required | Specialized tools, possible professional service | Safe stopping, compliance, reduced brake wear | Heavy towing, downhill driving, horse trailers | Ensures safe braking, avoids failures, legal compliance |
| Bearing Inspection and Lubrication | High - Specialized tools and care | Grease, bearing protectors, some expertise | Prevents wheel failure, reduces friction | Boat trailers, travel trailers, commercial delivery | Avoids catastrophic failures, extends bearing life |
| Lighting System Maintenance | Low to Moderate - Basic electrical skills | Bulbs (LED/incandescent), wiring tools | Legal compliance, improved visibility | All trailer types, especially night/adverse conditions | Ensures visibility, reduces citations, inexpensive |
| Hitch and Coupling System Inspection | Moderate - Requires proper adjustment knowledge | Lubricants, tools for adjustment | Prevents disconnection, stable towing | Travel trailers, boat trailers, horse trailers | Prevents accidents, improves stability, provides backup safety |
| Suspension System Maintenance | Moderate to High - Some technical knowledge | Inspection tools, lubrication | Better ride quality, stability, prolonged parts | Heavy load trailers, RVs, equipment trailers | Improves stability, prevents tire wear, extends trailer life |
| Frame and Structural Inspection | High - Requires structural knowledge | Inspection tools, possible welding/professional repair | Maintains trailer integrity, prevents failures | Heavy duty trailers, boat trailers, horse trailers | Prevents catastrophic failure, extends lifespan, safety ensured |
From Checklist to Confidence: Owning Your Trailer's Safety and Longevity
This comprehensive guide transforms the seemingly daunting task of trailer upkeep into a manageable, empowering routine. By moving beyond a simple glance-over, you transition from being just a trailer operator to a truly confident and prepared owner. The detailed steps outlined in this trailer maintenance checklist are not merely suggestions; they are the fundamental building blocks of safety, reliability, and long-term value for your critical equipment.
Each check you perform, whether it's the simple act of verifying tire pressure or the more involved process of inspecting your brake actuator, is a direct investment in preventing costly breakdowns and, more importantly, ensuring the safety of yourself and others on the road.
The journey from checklist to confidence is built on consistency. It's about turning these individual tasks into a seamless, scheduled ritual. The initial effort of learning to inspect wheel bearings or test your lighting system pays dividends for years to come, replacing roadside anxiety with the calm assurance that comes from knowing your equipment is in peak condition. This proactive approach is the single most effective way to extend the life of your trailer and protect the valuable asset it carries.
Key Takeaways for Proactive Trailer Ownership
Mastering this checklist involves embracing a new mindset. Instead of viewing maintenance as a chore, see it as an integral part of your adventure. Here are the core principles to carry forward:
- Frequency is Non-Negotiable: The difference between a well-maintained trailer and a potential failure often comes down to regular inspections. Adhering to the recommended intervals for pre-trip checks, monthly inspections, and annual deep dives is paramount.
- Corrosion is the Enemy: For boat owners in particular, the battle against corrosion is constant. Saltwater submersion accelerates the decay of metal components, from frame welds to brake lines and electrical connectors. Diligent rinsing after every saltwater use and the application of corrosion inhibitors are your best defenses.
- Listen to Your Trailer: Your trailer communicates through sounds and performance. A new squeak from the suspension, a slight pull from the brakes, or a flicker in a tail light are all early warnings. Investigating these signs promptly can prevent a minor issue from escalating into a major, trip-ending failure.
- Documentation Creates Clarity: Keep a simple log of your maintenance activities. Note the dates you greased your bearings, rotated your tires, or replaced brake pads. This record not only helps you stay on schedule but also provides a valuable history of the trailer's condition, which is incredibly useful for troubleshooting and enhances resale value.
Your Action Plan: Turning Knowledge into Habit
True mastery comes from application. Don't let this guide become just another bookmarked article. Take these immediate, actionable steps to integrate this knowledge into your routine:
- Schedule Your First Deep Dive: Block out 2-3 hours on your calendar within the next month to perform a full, top-to-bottom inspection using this checklist as your guide. This will establish a baseline for your trailer's current condition.
- Assemble Your Maintenance Kit: Gather the essential tools and supplies mentioned throughout this article. Having a dedicated kit with a tire pressure gauge, grease gun, lug wrench, and basic electrical testers makes routine checks faster and more convenient.
- Print and Laminate a Pre-Trip Checklist: Create a condensed version of the most critical pre-tow checks (tires, lights, coupler, safety chains). Laminate it and keep it in your tow vehicle's glove box as a physical, can't-miss reminder before every single trip.
By embracing this structured approach, you are doing more than just maintaining a piece of equipment. You are building a foundation of reliability that allows you to focus on the destination, not on the fear of what could go wrong along the way. This is the ultimate benefit of a thorough trailer maintenance checklist: it grants you the freedom to tow with complete peace of mind, knowing you’ve done everything right to ensure a safe and successful journey.
For every aspect of trailer care and on-the-water success, from heavy-duty tie-down straps and marine-grade wiring to the best boat cleaning supplies, Better Boat has you covered. Our family-owned business is dedicated to providing premium, boater-tested products that enhance safety and simplify maintenance. Explore our full range of solutions at Better Boat and equip yourself for worry-free adventures.


