


Winterizing a Boat: Essential Tips for Cold Weather Care
Properly winterizing a boat is all about protecting its engine, plumbing, and other critical systems from the brutal effects of freeze damage and the problems that pop up during long-term storage. The process involves draining every drop of water, adding a quality marine-grade antifreeze, stabilizing the fuel, and prepping the entire boat to avoid a mountain of costly repairs come springtime.
Why Winterizing Your Boat Is a Critical Investment
Let's get one thing straight: winterizing your boat isn't just another chore to tick off your end-of-season list. It's arguably the single most important act of asset protection you'll perform as a boat owner. Skipping this process or cutting corners is a high-stakes bet against Mother Nature—a bet you will eventually lose.
Too many boaters think winterizing is just about pouring some pink stuff into a tank and calling it a day. The reality is much more involved. It's a systematic defense against the destructive force of freezing water, the quiet corrosion of bad fuel, and the creeping invasion of moisture and mold.
The Real-World Consequences of Neglect
Picture this: a bit of water left in your engine block. As the temperature drops below freezing, that water expands with incredible power, easily cracking the heavy cast metal of the block. This isn't a minor fix. A cracked engine block is a catastrophic failure, often meaning a complete—and very expensive—engine replacement.
And it’s not just the engine. Any water hiding in plumbing lines, water heaters, or pumps will do the same thing, leading to burst pipes and shattered plastic housings. Often, you won't even spot this damage until you're de-winterizing in the spring, which then leads to hidden leaks, widespread water damage, and a nasty mold problem throughout your cabin and bilge.
The risks are far from just theoretical. In fact, improper winterization is a leading cause of severe off-season damage. It's a preventable problem that sidelines countless boaters and empties their wallets each and every year.

Beyond Freeze Damage
Ice isn't the only enemy lurking during storage. Untreated gasoline starts to break down in just a few months, turning into a sticky, gummy varnish that wreaks havoc on your fuel system. It will clog fuel lines, filters, and delicate injector components, leading to rough starts, poor performance, and a big bill for a fuel system overhaul.
This idea of protecting investments is a core principle for any valuable asset. For items you might take off the boat, this includes securing valuables in climate-controlled environments to prevent damage from extreme temperature swings and humidity. The same logic applies directly to protecting your boat’s sensitive components over the winter.
A Small Investment for a Huge Return
The financial argument for thorough winterization is a slam dunk. Marine industry data consistently shows that a shocking 70% of engine failures during the winter can be directly traced back to insufficient antifreeze protection and failing to stabilize the fuel. A few hours of your time and a modest spend on the right supplies can literally save you thousands of dollars in repairs down the road.
To help you get your priorities straight, let's break down the most critical systems you need to tackle and the risks you're running if you don't.
Winterization Priority Checklist
This table highlights the absolute must-do tasks for winter storage. Ignoring any of these is asking for trouble when boating season rolls around again.
| System/Component | Primary Winterization Goal | Risk of Neglect |
|---|---|---|
| Engine Block & Cooling | Prevent water from freezing and expanding. | Cracked engine block, damaged manifolds. |
| Fuel System | Prevent fuel degradation and condensation. | Clogged injectors, carburetor gum-up. |
| Plumbing & Water Systems | Remove all water from lines, tanks, pumps. | Burst pipes, cracked pump housings. |
| Interior & Upholstery | Control moisture and deter pests. | Mold, mildew, foul odors, pest damage. |
Focusing on these key areas ensures your boat will be safe, sound, and ready for launch day instead of stuck in the repair yard.
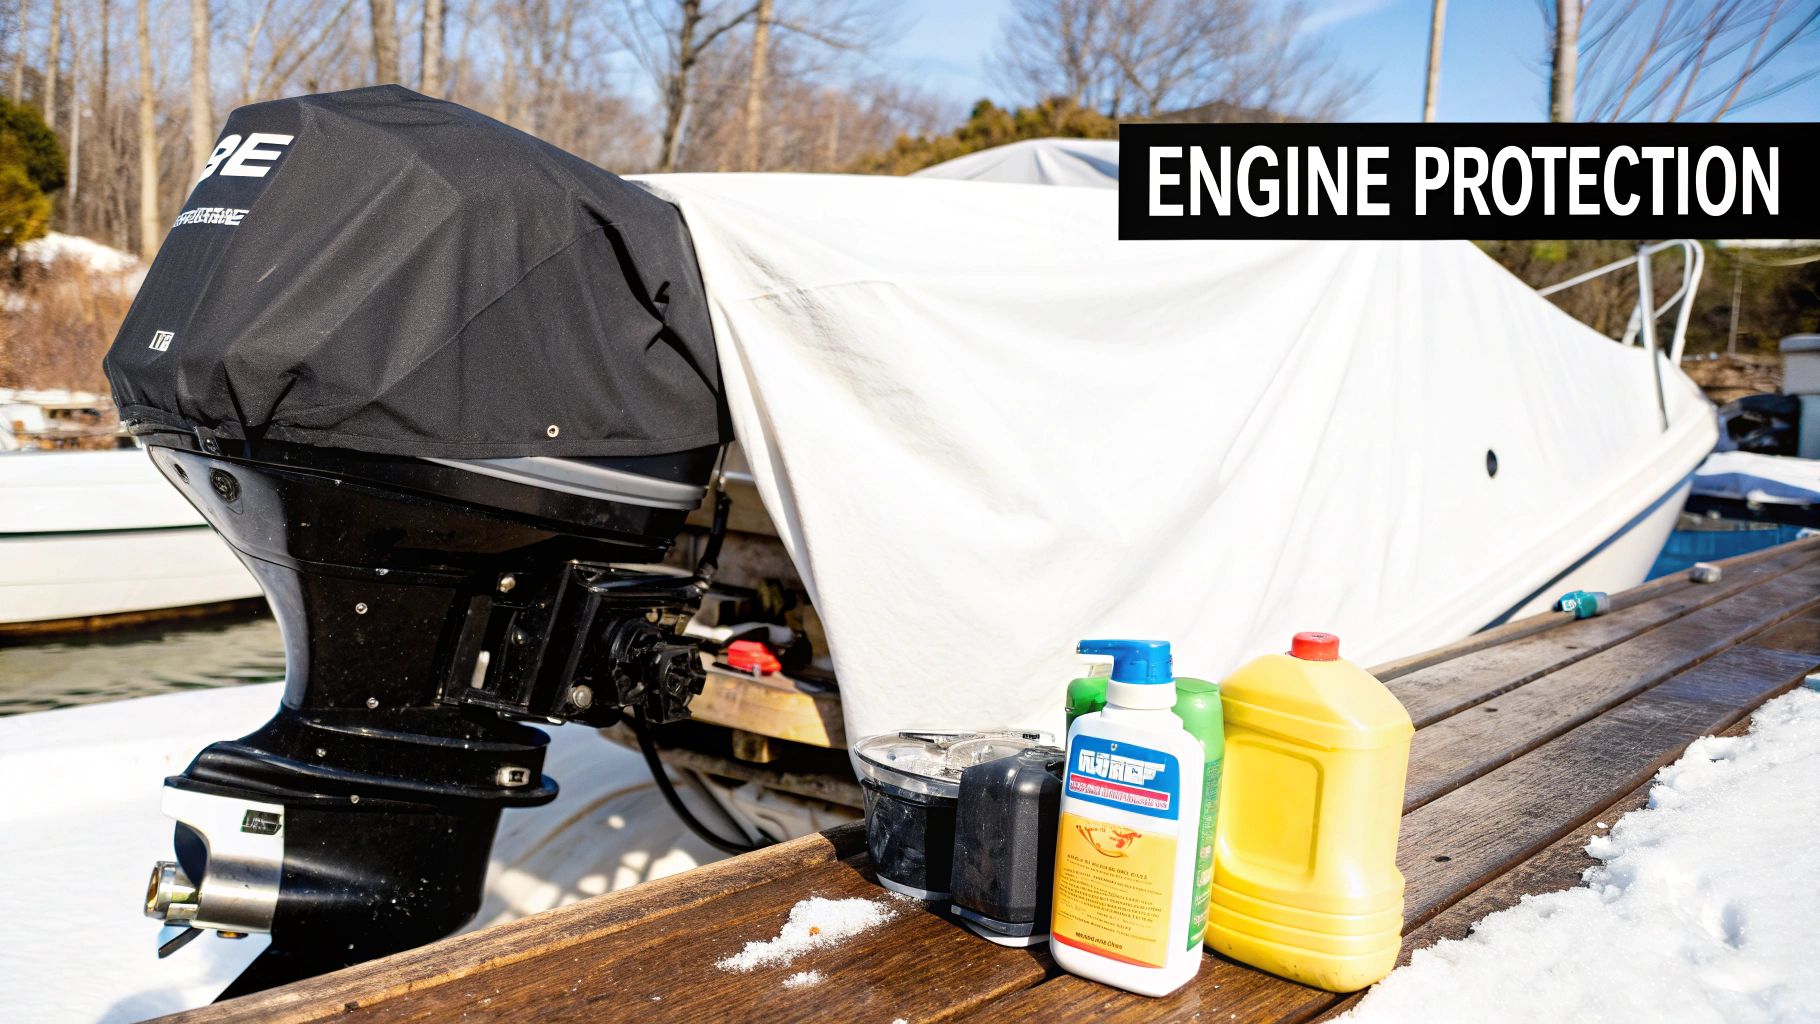
Protecting Your Engine and Fuel System
If your boat has a heart and soul, it’s the engine and fuel system. These are also the most complex and expensive parts to fix, so getting this part of the winterization process right is non-negotiable. Trust me, a single shortcut here can lead to a cracked engine block or gummed-up fuel lines, turning your spring launch into a season-long repair nightmare.
The mission is simple: get every last drop of water out so nothing can freeze and expand, and make sure the fuel you leave in the tank doesn’t turn into varnish. The exact steps change a bit depending on whether you have an inboard, outboard, or sterndrive, but the core principles are the same for all of them.
Stabilizing Your Fuel for Long-Term Storage
Before you touch anything else, deal with the fuel. Today's gasoline can start going bad in as little as 30 to 60 days. As it breaks down, it creates a sticky gunk that will happily clog your fuel lines, filters, and injectors. On top of that, condensation can form inside a half-empty tank, introducing water into your fuel—a perfect recipe for corrosion and a rough-running engine.
The fix? Fill your fuel tank to about 95% capacity. This leaves very little room for air, which dramatically cuts down on condensation.
With the tank full, pour in a quality marine fuel stabilizer, following the manufacturer's ratio. Don't eyeball it; adding too little is a common mistake that leaves your fuel system vulnerable.
This next part is critical. Don't just dump the stabilizer in and call it a day. You have to run the engine for a good 10-15 minutes. This pulls the treated fuel through the entire system—the lines, the pump, the injectors—ensuring everything is coated and protected.
Flushing and Draining the Cooling System
Fuel's handled. Now it's time to focus on the cooling system, which is ground zero for freeze damage. While every engine is a little different, the goal is always the same: replace any raw water with marine-grade antifreeze.
Outboard Engines
Outboards are usually the easiest of the bunch. They’re designed to drain themselves completely when you tilt them down, making the job pretty straightforward.
- Flush with Freshwater: First, hook up a set of "earmuffs," or outboard motor muffs, or use the built-in flushing port to run fresh water through the engine. This clears out all the salt, sand, and other gunk from the internal passages.
- Drain Completely: Once flushed, disconnect the hose and tilt the motor all the way down. Let it sit for a few minutes. Gravity will do the heavy lifting, pulling out every last drop of water.
- Fog the Engine: While the engine is running on that stabilized fuel, spray fogging oil into the air intakes. Keep spraying until the engine sputters and stalls. This coats the cylinders and internal parts with a protective film of oil to prevent rust while it sits.
Inboard and Sterndrive Engines
These engines are a different beast because they don't self-drain. Water can get trapped in the engine block, manifolds, and heat exchangers, so you have to be more hands-on. For a deep dive into these specific engine types, this guide on how to winterize a boat engine is a great resource.
The basic process involves draining all the water out first, then running antifreeze through the entire system.
The Antifreeze Circulation Process
Let's be clear: never, ever use automotive antifreeze (the green stuff) in your boat. That ethylene glycol is extremely toxic to marine life. Always use a non-toxic propylene glycol antifreeze made for marine engines, which is usually pink or blue.
To get it circulated, you’ll need a few things:
- A five-gallon bucket
- At least two or three gallons of marine antifreeze
- A hose that you can connect to your engine's raw water intake
First, close the raw water intake valve (the seacock) and disconnect the hose from it. Stick the end of that hose into your bucket of antifreeze. Now, start the engine. It will begin sucking the antifreeze out of the bucket. Watch the exhaust port, and as soon as you see the colored antifreeze spitting out, you're done. Shut the engine down immediately. The system is now protected.
Seeing how the different lines are drained really drives home how important it is to be thorough. Any water left hiding in a hose is a potential crack waiting to happen.
Changing the Oil and Filters
One of the most common rookie mistakes is waiting until spring to change the oil. You want to do it before you put the boat away for the winter. Over the season, your oil has collected all sorts of nasty stuff—water, acid, carbon. Letting that sludge sit in your engine all winter is a great way to corrode bearings and other critical parts.
An oil change now gets all those contaminants out and leaves your engine’s internals bathed in clean, protective oil for the long layup. It’s a simple job that adds years to your engine’s life.
While you've got the tools out, it's the perfect time to replace your fuel filters, too, especially the main fuel-water separator. Kicking off the next season with fresh filters is one of the best things you can do for reliability.
Winterizing Your Plumbing and Water Systems
While the engine usually gets all the glory during winterization, ignoring your boat’s plumbing is a surefire way to court disaster. Think about it: anywhere water can sit—tanks, pipes, pumps, even the water heater—is a burst pipe just waiting for a freeze.
This isn't a job you can rush. Simply pouring in some antifreeze and calling it a day is a recipe for a nightmare. A single cracked fitting can turn into a major leak when you de-winterize. Imagine discovering that problem when you turn on the pump for the first time in spring, flooding your cabin and kicking off a nasty battle with mold. Let's do it right.
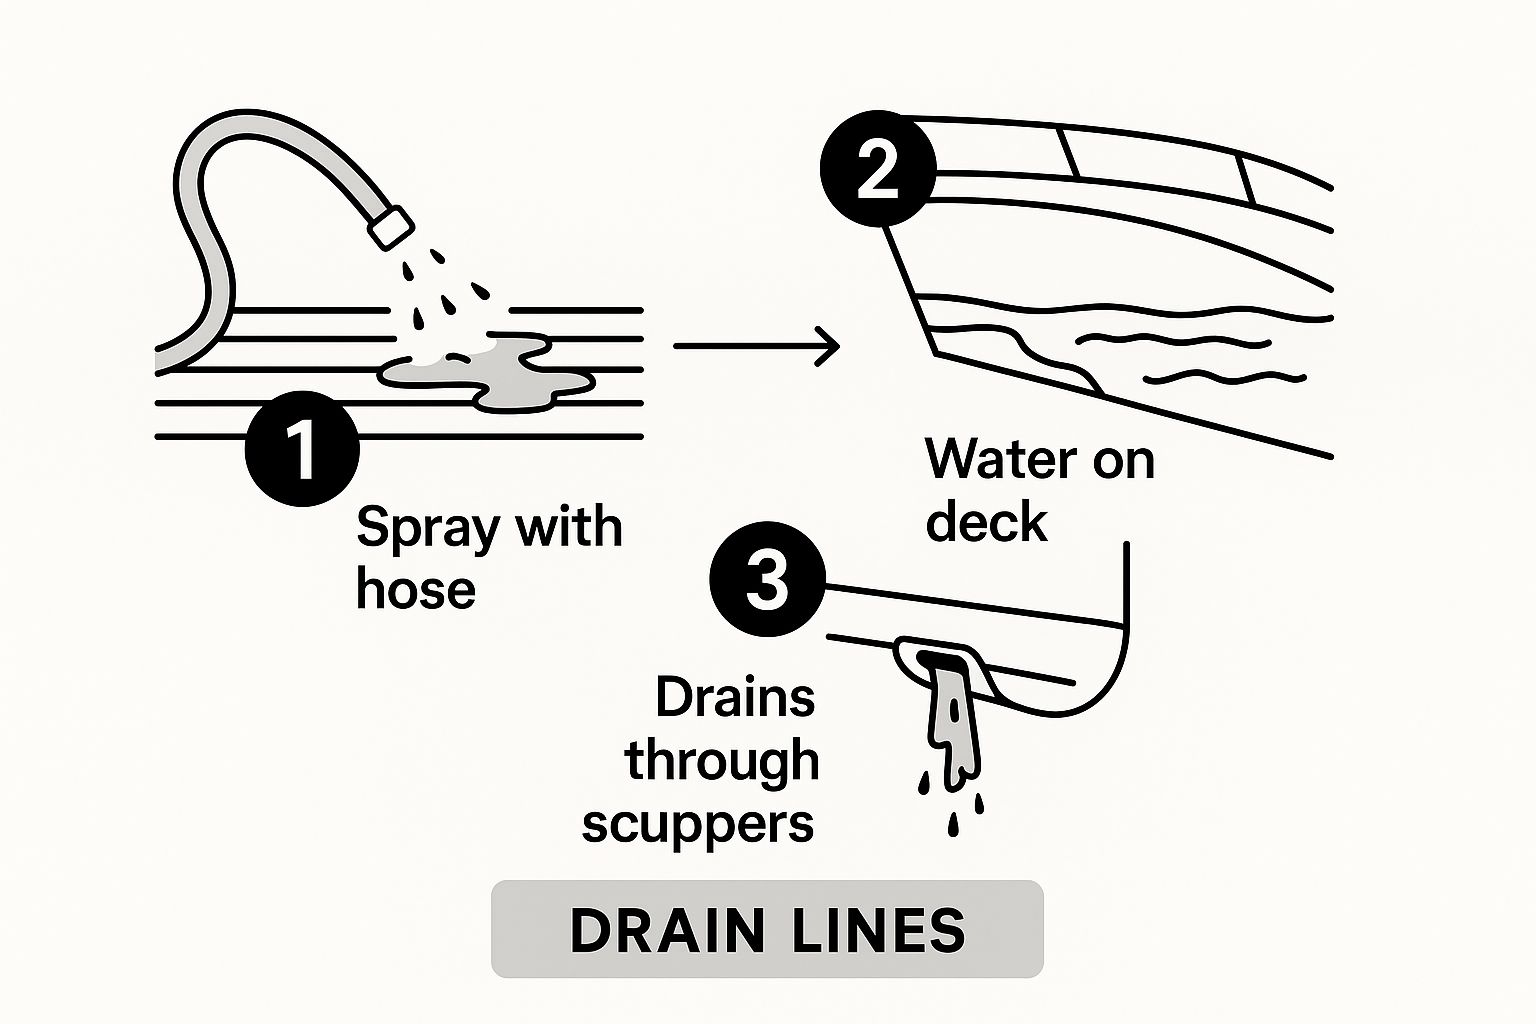
Draining the Freshwater System
First things first: you have to get every last drop of water out. Your freshwater system is a whole network, and every piece of it needs to be completely empty before antifreeze goes in.
Start by opening the drain on your freshwater tank and let it empty out. As it’s draining, flip on the freshwater pump and open every single faucet—galley sink, head, and don't forget any showers in the cockpit or on the transom. This purges most of the water still hiding in the lines.
Let the pump run until it’s just spitting air, then kill the power. You don’t want to run it dry for too long, as that’s a great way to fry the pump’s impeller. Also, make sure to drain your hot water heater; it will have its own drain plug or valve.
Pro Tip: After draining your water heater, bypass it completely. Most heaters have an inlet and outlet hose. You can disconnect them from the tank and join them together with a simple connector. This trick saves you from pumping 6-10 gallons of antifreeze into an empty tank, which saves both time and money.
Circulating Non-Toxic Antifreeze
Once the system is dry, it’s time for the pink stuff: non-toxic RV & marine antifreeze. Double-check that you're using a propylene glycol-based product that's rated safe for potable (drinking) water systems. You never, ever want to use automotive antifreeze in your plumbing.
You have two main ways to get the antifreeze flowing:
- Pour it into the Freshwater Tank: This is the straightforward approach. Just pour a few gallons of the pink antifreeze right into the empty tank.
- Use a Bypass Kit: This is the more efficient method. You install a bypass hose on the inlet side of your water pump, which lets you suck antifreeze straight from the jug. It’s faster and saves you from having to flush the big tank come springtime.
With your antifreeze source hooked up, turn the water pump back on. Go to each faucet, one by one, starting with the one furthest from the pump. Turn on the hot and cold taps until you see a solid pink stream. Repeat this for every sink, shower, and washdown hose. If you have a freshwater-flush toilet, run it until you see pink there, too.
Addressing Other Water Systems
Your main plumbing isn't the only system holding water. These other areas are easy to forget but just as prone to freeze damage.
Sanitation Systems
Your head and holding tank need their own winter prep. After you’ve had the holding tank properly pumped out, pour antifreeze into the toilet bowl and flush it a few times. This protects the pump, the lines, and what’s left in the tank. For electric macerator toilets, running the antifreeze through is crucial to protect the pump mechanism.
Livewells and Raw Water Washdowns
These systems pull water from outside the boat, so they absolutely must be drained. Disconnect the intake hose right at the seacock and let all the water drain into the bilge. Once it's empty, you can pour a little antifreeze into the pump and just bump the switch for a second to circulate it, protecting the pump housing and impeller from the cold.
By carefully working through every component that holds water, you’re doing more than just winterizing a boat—you’re setting yourself up for a stress-free launch next season. A boat with no leaks and fully working plumbing is the best reward for an afternoon of thorough work.
How to Prepare Your Boat's Interior and Exterior
While sorting out the engine and plumbing is the technical heart of any winterizing project, skipping the hull and interior is a rookie mistake. It can lead to some nasty surprises and permanent damage come springtime.
Winter storage is brutal on a boat's surfaces—grime, salt, moisture, and pests can wreak havoc if you don't put up a strong defense. This part of the job is all about a deep clean, followed by protecting and sealing your vessel against the elements.
A sparkling clean boat isn't just for show; it's your first line of defense. Things like salt, algae, and bird droppings are surprisingly acidic and will literally eat away at your gelcoat and paint if left to sit all winter.
You'll want to start with a thorough, top-to-bottom scrub of the deck and hull. Grab a quality marine boat soap and a medium-bristle brush to get off all the grime from the season. Pay extra attention to the waterline, as that's where marine growth and scum lines are always the most stubborn.
Once your boat is completely clean and bone-dry, applying a protective coat of high-quality marine wax is the single best thing you can do to fight off moisture, UV rays, and dirt. Think of it as armor for your gelcoat.
This layer creates a barrier that sheds water and stops grime from getting a foothold, which makes the spring cleanup so much easier. While you're at it, it's worth checking out some broader expert winter vehicle protection strategies, since many of the same principles for guarding against harsh weather apply here, too.
Safeguarding the Cabin and Interior Spaces
Next, let's move inside. The cabin is basically a playground for the three biggest winter threats: mold, mildew, and pests. Your mission is to make the interior as uninviting as humanly possible for these unwelcome guests.
Start by getting everything out that can hold moisture or attract critters. This part is absolutely non-negotiable.
- All Fabrics: This means cushions, life vests, towels, curtains—anything textile needs to come ashore. If you have the means, wash them before storing them in a dry, climate-controlled spot.
- All Food Items: And I mean every last crumb. Go through all the lockers and the galley for canned goods, dry snacks, and even spices. One forgotten bag of chips is an open invitation for mice and insects.
- Electronics and Valuables: If you can, take out expensive marine electronics like GPS units and fish finders. The extreme cold and potential for dampness are not their friends.
With the cabin completely empty, give it a meticulous cleaning. Wipe down every single surface, from the countertops to the bulkheads, with a good cleaner that has a mildew-fighting agent. Vacuum every nook and cranny, getting deep into lockers and under bunks to suck up any lingering dirt or food particles.
The Battle Against Moisture
Moisture is, without a doubt, the number one enemy of your boat’s interior during storage. A damp, sealed-up cabin is the perfect breeding ground for mold and mildew, which will absolutely ruin your upholstery and create a musty smell that's almost impossible to get rid of.
A common mistake is to seal the boat up tight, thinking you're keeping the elements out. In reality, you're trapping moisture in. Proper ventilation is just as important as a good cover.
To win this fight, you need to strategically place moisture-absorbing products all through the cabin and any other enclosed spaces. You can use commercial products like Dri-Z-Air or DampRid, or even large desiccant bags. Put them in the main cabin, the forward V-berth, and inside any large lockers. This simple step makes a huge difference.
Properly preparing the exterior and interior is more than just a cleaning chore; it's a critical part of your whole winterization strategy. The numbers don't lie. Boats that are winterized correctly can extend the usable life of their engines and other key components by 20% or more. This is a big deal when you consider that the average cost to fix freeze damage in a marine engine can run anywhere from $3,000 to $7,000, all depending on your boat and engine type.
Final Touches: Batteries, Electronics, and Covering
You’ve tackled the engine, flushed the plumbing, and secured the cabin—you're officially on the home stretch. But don't coast just yet. These last few jobs are what truly separate a decent winterization from an exceptional one that guarantees a hassle-free spring launch.
We’re going to cover your boat’s electrical nervous system—the batteries and electronics—before getting into the nitty-gritty of choosing and setting up the perfect winter cover. Skimping here can lead to dead batteries or a collapsed cover, which can cause just as many headaches as a frozen engine block.
Securing Your Boat's Batteries
One of the most common—and costly—mistakes I see is boaters simply disconnecting their batteries and hoping for the best. A battery left on a cold boat will slowly self-discharge all winter. Once it's dead, it can freeze solid, often cracking the case and leaving you with a useless brick in the spring.
The best practice is always to pull the batteries from the boat entirely. Before you unhook anything, snap a quick photo of the wiring with your phone. Trust me, you'll thank yourself when you're reconnecting everything months later.
Once they're out, give the terminals a quick scrub with a wire brush to get rid of any corrosion. Then, find them a good home for the winter. A cool, dry place like a basement or temperature-controlled garage is ideal. Just make sure to store them on a piece of wood or plastic, never directly on a concrete floor.
The gold standard of battery care is connecting them to a smart trickle charger or a battery maintainer. These handy devices monitor the charge level and only deliver a small current when needed, keeping the battery perfectly topped off without the risk of overcharging. This simple step can easily double the lifespan of your expensive marine batteries.
Protecting Sensitive Marine Electronics
Your pricey marine electronics—the chartplotter, fish finder, and VHF radio—were not designed for the harsh cycle of freezing temperatures and damp winter air. Condensation is the enemy here; it can form inside the units and lead to corrosion on delicate circuit boards.
If your electronics are on bracket mounts, the solution is easy: take them home. Disconnect the units, carefully coil the cables, and store them somewhere safe and climate-controlled.
For flush-mounted electronics that are a pain to remove, your best defense is moisture control. Make sure the boat is properly ventilated and think about placing a desiccant bag or two near the helm to soak up any ambient dampness.
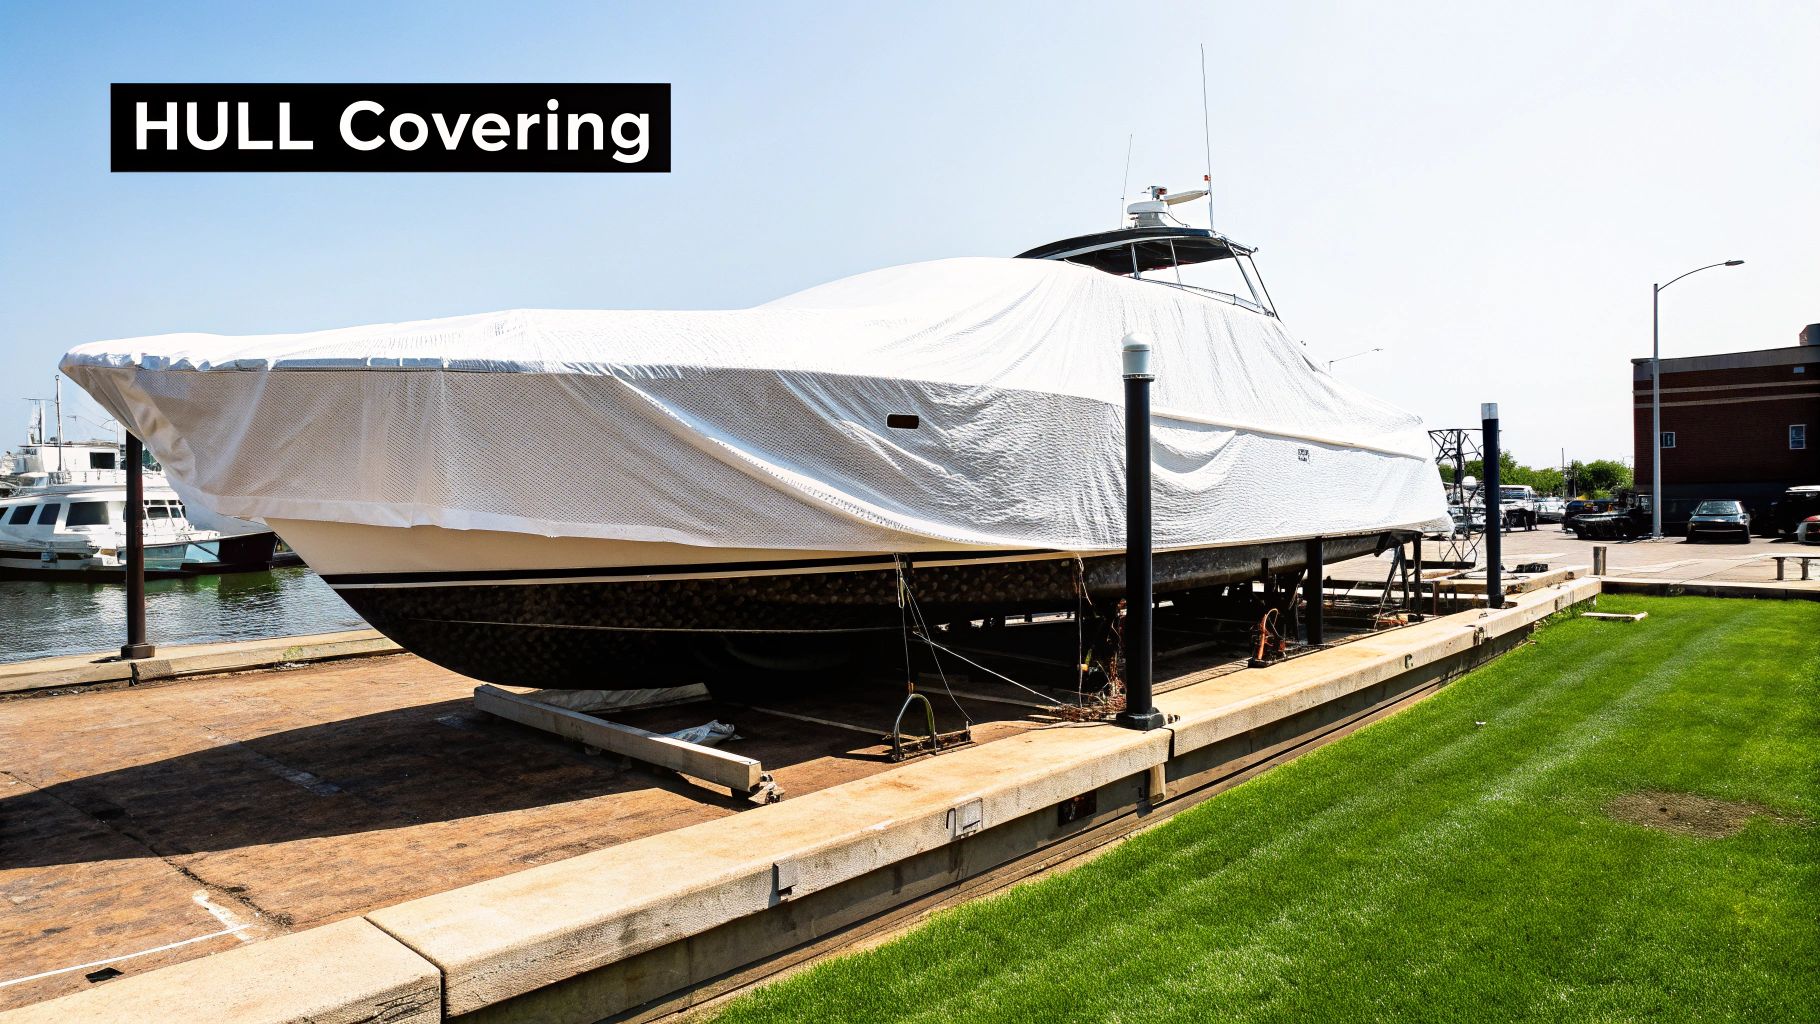
Choosing the Right Winter Cover
The final piece of the puzzle is the cover. Its job is twofold: keep the nasty stuff like snow, ice, and rain out, while still allowing air to circulate to prevent moisture from getting trapped. A bad cover choice can mean returning to a boat filled with snow or a cabin that’s become a petri dish for mold and mildew.
Let’s break down your main options.
| Cover Type | Pros | Cons | Best For |
|---|---|---|---|
| Custom Canvas Cover | Reusable, breathable, durable. | High upfront cost, requires storage. | Owners who want a long-term, reusable solution. |
| Shrink-Wrap | Drum-tight fit, sheds snow and water perfectly. | Single-use, creates plastic waste, requires professional installation. | Maximum protection in harsh climates with heavy snow. |
| Generic Tarp | Inexpensive and widely available. | Prone to tearing, pooling water, and chafing the gelcoat. | A budget option for mild climates with careful setup. |
Setting Up Your Cover for Success
No matter which cover you go with, proper support is non-negotiable. Without it, your cover will inevitably sag and collapse under the weight of snow or heavy rain. You need to build a frame that creates a pitched "tent" shape, eliminating any flat spots where precipitation can collect.
A simple frame made from PVC pipes or 2x4 lumber works great. The goal is to create a strong center ridgepole running the length of the boat, held up by support posts. When you drape the cover over this frame, it creates steep angles that will shed snow and water like a champ.
Finally, make sure the cover is well-ventilated. Trapped moisture is your enemy. You can buy specialized vents that install directly into shrink-wrap or custom covers. If you're using a tarp, you can create small gaps at the bow and stern to promote airflow—just be sure they won't let rain or snow blow in. For more ideas on getting your boat ready for the off-season, check out these 10 boat maintenance tips and checks for the winter season.
By following these final steps, you're completing a truly thorough process of winterizing a boat. Your vessel will be protected from stem to stern, ready for another season of adventure as soon as the weather breaks.
Your Boat Winterization Questions Answered
Even when you’re armed with a detailed checklist, putting your boat to bed for the winter can spark a lot of "what-if" moments. It's totally normal to have questions. After all, one small oversight can lead to some seriously expensive damage come springtime. We’ve pulled together some of the most common questions we hear from boat owners, with clear, practical answers straight from our years of experience.
This isn't just about ticking boxes; it's about getting why you're doing each step. That knowledge is what helps you make smart calls, sidestep common blunders, and feel confident your boat is truly protected.
Can I Use Automotive Antifreeze in My Boat?
Let me be blunt: this is a hard no. You should never pour automotive antifreeze, which is usually ethylene glycol, into your boat's engine or plumbing. While it certainly stops things from freezing, it's incredibly toxic. If it gets into the water, it's an environmental nightmare—a single gallon can poison thousands of gallons of water and devastate aquatic life.
On top of that, your marine engine and drinking water systems have seals and gaskets that aren't built to handle the harsh chemicals in car antifreeze. Using it is a fast track to damaged components.
Always, always use a non-toxic propylene glycol antifreeze that's specifically labeled for marine engines and potable water systems. The pink stuff is your best friend here. Grabbing the wrong jug is an expensive—and environmentally irresponsible—mistake to make.
Do I Need to Winterize in a Heated Garage?
Keeping your boat in a heated garage is an excellent first line of defense, but it’s not a get-out-of-jail-free card. Winter storms have a nasty habit of knocking out power, sometimes for days. If that happens, your heated garage is suddenly just a very cold garage, and your boat is left completely unprotected in freezing temps.
Think of it as an insurance policy. The heat is great, but a full winterization gives you total peace of mind.
Even if you're storing it in a heated space, you should, at a bare minimum, still tackle these critical jobs:
- Stabilize the fuel to stop it from degrading and to prevent condensation.
- Change the engine oil to get corrosive gunk out before it sits all winter.
- Pull the batteries and keep them on a trickle charger to preserve their health.
A full winterization means your investment is safe, no matter what the power grid decides to do.
Should the Fuel Tank Be Full or Empty?
This is a classic dockside debate, but there’s a clear winner. For winter storage, the best move is to fill your fuel tank to about 95% capacity.
Here's why: An empty or partially full tank is mostly full of air. As the temperature swings up and down all winter, that air expands and contracts, sucking in moisture. This condensation creates water in your fuel, which is a perfect recipe for rust, corrosion, and major engine headaches.
By filling the tank almost to the brim, you leave very little room for air, which dramatically cuts down on condensation. Once it's full, add your marine fuel stabilizer and run the engine for 10-15 minutes. This pulls the treated fuel all the way through the lines, carburetor, and injectors, protecting the entire system.
Is It Better to DIY or Hire a Professional?
This really comes down to three things: your comfort level with a wrench, the tools you have on hand, and how complex your boat is. There are good reasons to go either way.
-
DIY Winterizing: Taking it on yourself can save you a good chunk of change, and it's a fantastic way to get to know your boat inside and out. If you're mechanically savvy and enjoy the work, it can be a really rewarding project. But the stakes are high. One forgotten drain plug or the wrong antifreeze mix can easily lead to a repair bill in the thousands.
-
Hiring a Pro: If you're a new boater, have a more complicated boat with multiple engines, or you're just pressed for time, paying a certified marine tech is a smart investment. They’ve got the experience and specialized tools to get it done right and fast. Plus, many marinas and shops will guarantee their work, giving you an extra layer of security. This is also a great choice if you plan on doing any cold weather boating, as a pro can offer advice tailored to your specific setup.
Ultimately, you have to be honest with yourself about your skills and time. Proper winterization is one of those jobs that's too important to leave to chance.
At Better Boat, we provide all the premium supplies you need to tackle the job with confidence, from fuel stabilizers to non-toxic antifreeze. Protect your investment with products trusted by over a million boaters. Explore our full range of cleaning and maintenance solutions at https://www.betterboat.com.


