


A Guide to Aluminum Boat Primer Paint
When it comes to painting an aluminum boat, the best foundation you can lay is an epoxy-based, two-part primer. Think of it as creating an incredibly strong, non-porous shield for your hull. This isn't just about making the paint look good; it's about fundamentally protecting your investment from the harsh marine world.
Getting the primer right is the single most important step for a durable, long-lasting finish that won't peel or fail you.
Why Priming Your Aluminum Boat Is a Non-Negotiable
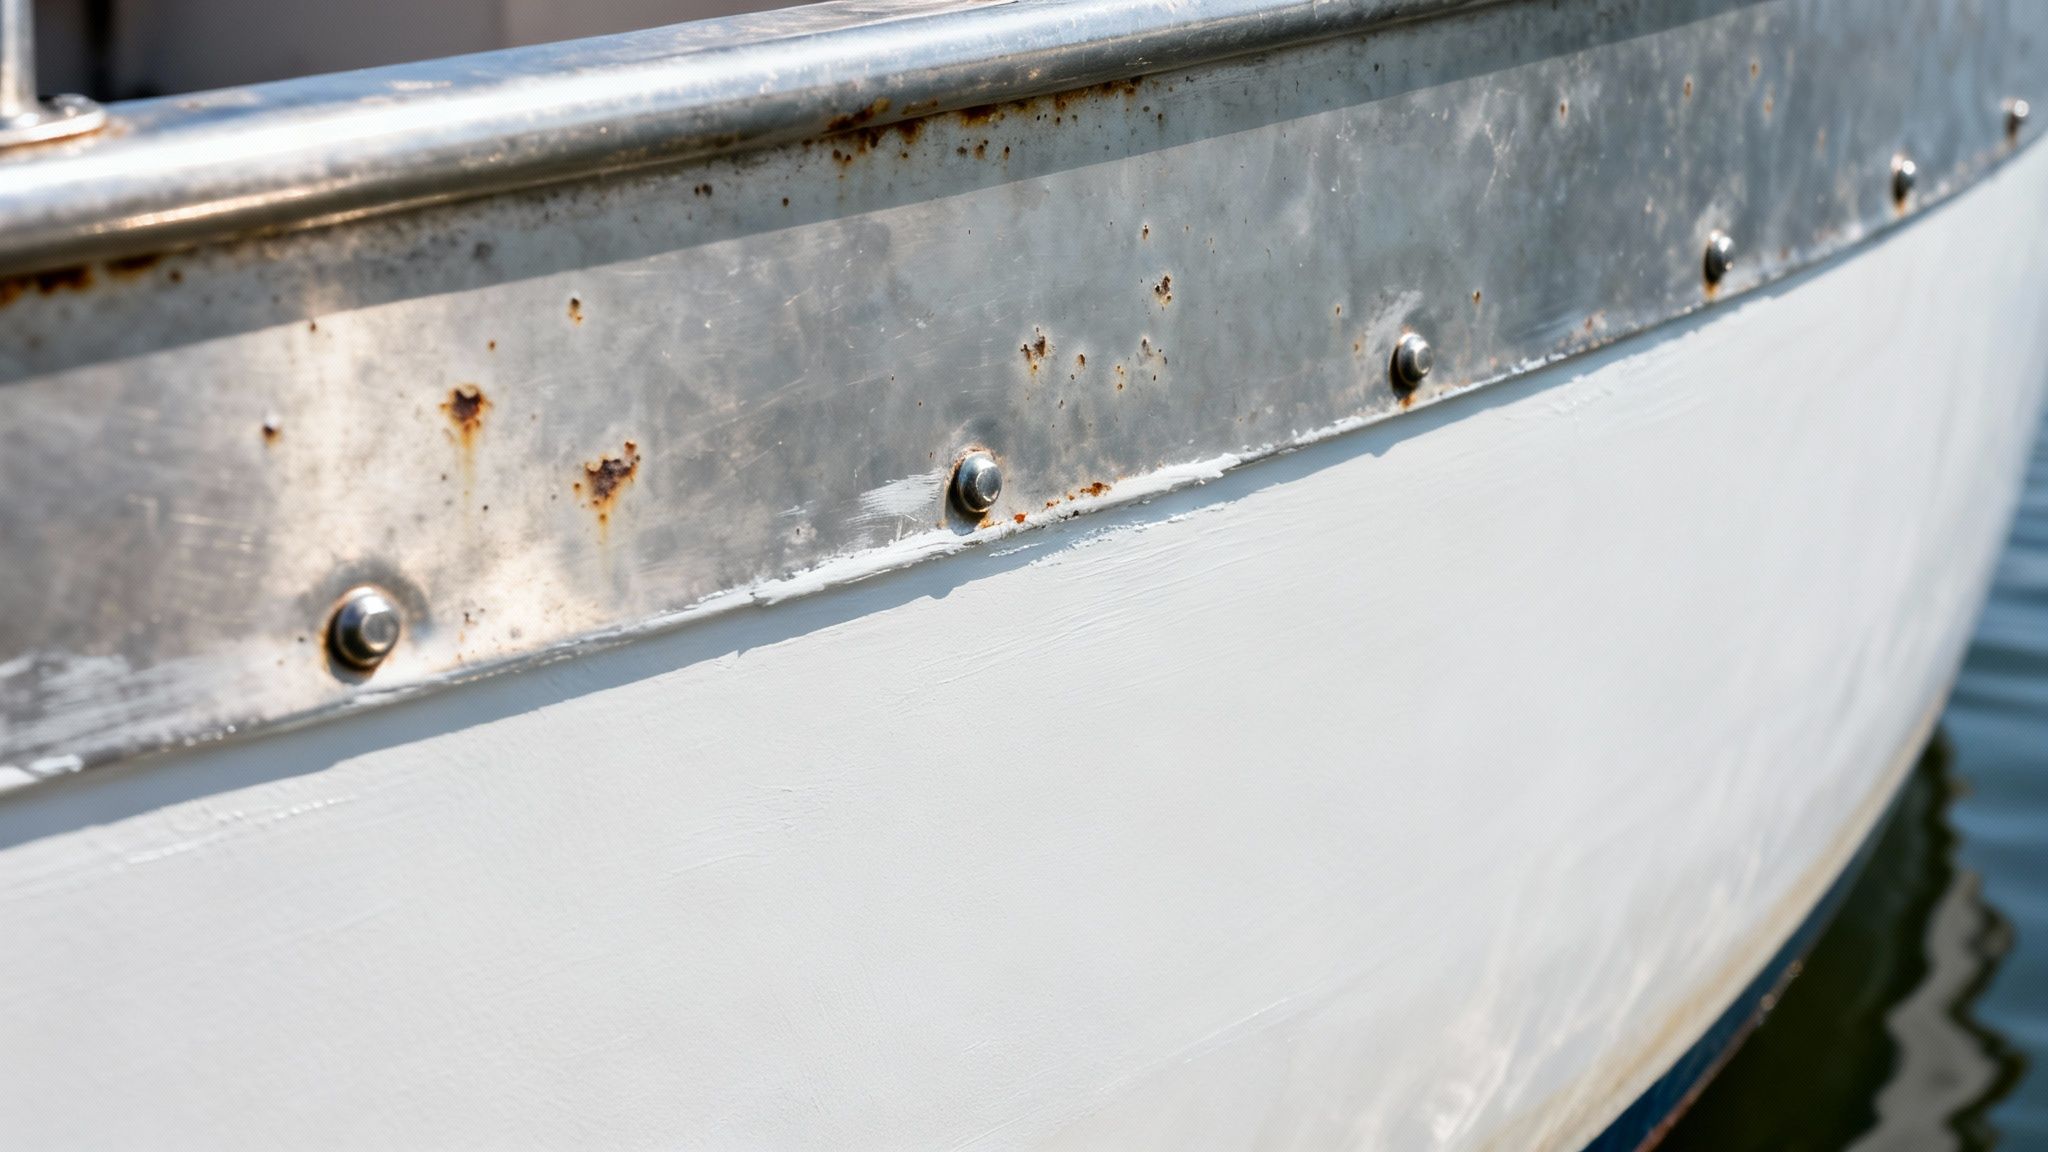
It’s easy to think of aluminum boats as indestructible. They don't rust like steel, right? While that's true, they fall victim to their own brand of destruction: oxidation and, even worse, galvanic corrosion. This is especially true in saltwater, where an electrochemical reaction can literally eat holes in your hull.
Here's the deal with bare aluminum: the moment it hits the air, it forms a thin, protective layer of aluminum oxide. This layer provides a little bit of defense, but it's nowhere near tough enough for a marine environment.
More importantly, it’s a terrible surface for paint to grab onto. Any topcoat you apply directly to it is destined to peel and flake off, leaving you right back where you started.
The Science of a Good Bond
A quality aluminum boat primer paint handles two critical jobs at once. First, it chemically etches itself into the metal, creating a tenacious grip that a topcoat could never achieve on its own. Second, it forms a waterproof barrier, completely isolating the aluminum from the water and stray electrical currents that speed up corrosion.
This barrier is your number one defense against galvanic corrosion. This happens when you have different metals—like stainless steel screws or a bronze thru-hull fitting—touching the aluminum in saltwater. The water acts as an electrolyte, turning your boat into a giant battery.
Key Takeaway: The primer isn't just a base coat; it's an active anti-corrosion system. It works as a dielectric shield, stopping the small electrical currents that cause aluminum to corrode around other metal parts. Skipping this is one of the most common—and costly—mistakes a boat owner can make.
What Happens When You Skip Primer
Picture this: you've just bolted a shiny new stainless steel cleat onto your unprimed aluminum jon boat. As soon as it hits saltwater, a natural battery forms between the cleat, the hull, and the water.
Because aluminum is the "less noble" metal in this scenario, it becomes the anode and starts sacrificing itself. You'll soon see pitting and weakening around the cleat as the aluminum corrodes away.
A proper primer creates an insulating layer that breaks this destructive circuit. This is why a simple "paint job" is never enough for an aluminum boat. The right foundation is everything, and that foundation is a dedicated marine primer. It's a fundamental step on any solid boat maintenance checklist for a reason.
Ultimately, a properly primed hull doesn't just look better—it holds its structural integrity and value for years to come.
How to Choose the Right Primer for Your Boat
Picking the right primer for an aluminum boat can feel like you're trying to decipher a foreign language. You walk into the store and see shelves loaded with zinc-based primers, strontium chromates, and two-part epoxies. It's enough to make your head spin. But getting this choice right is absolutely critical—it's the foundation for a lasting paint job and, more importantly, a healthy hull.
The secret is matching the primer's specific talents to your boat's environment and what you expect from the finish. They aren't all the same. Each type strikes a different balance between fighting corrosion, gripping the metal, and playing nice with whatever topcoat you choose.
Understanding the Main Primer Types
Let's break down the big three you'll find in the marine world. Each one has a specific job, and knowing what they do is the first step to making a smart decision. The core principles here are pretty universal, whether you're prepping a jon boat or learning about painting aluminum siding.
- Zinc-Based Primers: You'll often see these called zinc chromate or zinc phosphate. They work through what’s known as sacrificial protection. Tiny zinc particles in the primer basically "take the bullet," corroding before your aluminum hull even thinks about it. They do a solid job, especially for boats that spend most of their time in freshwater.
- Strontium Chromate Primers: These are similar to their zinc-based cousins but use strontium chromate as the secret ingredient to stop corrosion. They’re well-known for their fantastic adhesion and are a really dependable, all-around choice for general marine use.
- Epoxy Primers: Now we're talking about the heavy hitters. A two-part epoxy primer doesn't just inhibit corrosion; it creates a rock-solid, non-porous, waterproof barrier that completely seals the aluminum off from the elements. This physical shield is incredibly tough, giving you the best possible protection against saltwater, scrapes, and dings.
There's a reason these specialized coatings are a big deal. The global market for aluminum coatings, which includes these marine primers, was valued at a whopping USD 2,675 million back in 2021 and is only expected to climb. That number tells you just how vital these durable, corrosion-fighting solutions are in the tough marine world.

Aluminum Boat Primer Comparison
To make this even clearer, let's put these primers head-to-head on the factors that really matter for an aluminum boat. The right choice for a small fishing skiff that only sees calm lake water is going to be very different from what an offshore beast needs to fend off constant saltwater spray.
| Primer Type | Corrosion Resistance | Adhesion | Topcoat Compatibility | Best Use Case |
|---|---|---|---|---|
| Zinc-Based | Good | Very Good | Wide Range | Freshwater boats, general use, areas with less exposure. |
| Strontium Chromate | Very Good | Excellent | Good with most marine paints. | A solid all-around choice for both fresh and saltwater. |
| Two-Part Epoxy | Excellent | Superior | Best with epoxy or polyurethane topcoats. | Saltwater environments, high-wear areas, below the waterline. |
As you can see, a high-performance, two-part epoxy really pulls away from the pack with its superior protection. While the other primers are good, an epoxy creates a truly bulletproof barrier. It’s the go-to for pros and anyone whose boat lives in saltwater or gets put through its paces.
Pro Tip: Always, always look for a "two-part" or "two-component" epoxy system. This means you mix a base resin with a hardener right before you apply it. This kicks off a chemical reaction that creates a finish far tougher and more resilient than any single-part product could ever hope to be.
Why We Recommend an Epoxy System
For the vast majority of aluminum boat projects, a two-part marine epoxy primer is simply the best way to go. Its incredible grip comes from chemically bonding to the prepped aluminum, creating a foundation that’s practically welded to the metal. This bond is so tough it shrugs off peeling, chipping, and blistering, even when it's submerged 24/7 or baking in the sun.
Even better is its barrier protection. Imagine shrink-wrapping your hull in a layer of ultra-durable plastic—that's what epoxy does. It completely blocks water from ever touching the aluminum, which stops galvanic corrosion dead in its tracks. If you want to dive deeper into how these powerful coatings work, be sure to check out our guide to choosing epoxy resin for your boat.
When you invest in a quality epoxy primer, you aren't just getting ready to paint. You're making a smart investment in the long-term health and structural integrity of your boat.
Mastering Surface Prep for a Flawless Finish
Talk to any seasoned marine pro about their secret to a paint job that lasts, and they'll all tell you the same thing: it isn’t about the paint—it’s about the prep. A staggering 90% of a successful finish is locked in before you even crack open a can of primer. Think of this stage as your playbook for creating the perfect canvas, one that ensures the primer bites hard and your topcoat looks fantastic for years to come.
Rushing or skipping this foundational work is the number one reason primer jobs fail. It doesn't matter how high-tech your aluminum boat primer paint is; it simply can't stick to a surface that's oily, grimy, or oxidized. The mission here is simple: get down to clean, raw aluminum that’s ready to grab onto that critical first coat.
Deep Cleaning and Degreasing the Hull
Your first move is to wage war on every last trace of contamination. Your boat's hull has seen it all, from engine oil and exhaust film to algae and caked-on salt deposits. Every bit of that gunk forms a barrier that will stop your primer dead in its tracks.
Start with a solid pressure wash to blast away any loose dirt and marine growth. Once that's done, follow up with a serious scrub-down using a dedicated marine-grade degreaser or a quality boat soap. These cleaners are specifically designed to slice through stubborn grease and oil without leaving behind any residue that could mess with adhesion.
Don't be afraid to put some real elbow grease into the stubborn spots with a coarse-bristle brush from our boat brush kit. You're aiming for a surface that is squeaky clean and totally free of any oily film. When you're satisfied, give the whole boat a thorough rinse to wash away all the soap and lifted grime, then let it dry completely.
Creating a Mechanical Profile with Sanding
With the hull clean and dry, it's time to create what we call a "mechanical profile." Bare aluminum is naturally smooth, and that smoothness is the enemy of a good paint job. Your primer needs a textured surface to physically grip, and sanding is how you give it one.
The most efficient way to get this done is with a dual-action (DA) sander using 80 to 120-grit sandpaper. This grit range is just right—aggressive enough to scuff up the surface and knock off any light oxidation, but not so coarse that you leave deep gouges that will telegraph through your final paint job.
Work methodically in sections, making sure you hit every single square inch of the aluminum. The goal is a uniform, dull, and slightly rough finish across the entire boat. And please, wear your safety goggles and a dust mask or respirator. Aluminum oxide dust is no joke.
The Two-Rag Method: Here's a pro tip for the final wipe-down before priming. Use two clean, lint-free rags. Lightly dampen the first one with a solvent wipe or denatured alcohol and wipe down a small section. Immediately—before the solvent flashes off—follow behind with the second, dry rag to pick up any loosened residue. This technique ensures you're actually removing contaminants, not just spreading them around.
Understanding Chemical Treatments
Sometimes, especially with an older or heavily oxidized boat, just sanding isn't quite enough. This is where chemical treatments, like acid etching washes, can be a game-changer. These products use a mild acid to chemically "etch" the aluminum, creating an even better profile for the primer to bond with.
Think of it as microscopic sanding. An acid etch wash gets deep into the pores of the metal and creates a perfect, uniform anchor pattern for the primer. It's an extra step, for sure, but if your boat is going to live in a harsh saltwater environment, it builds an unparalleled foundation for your entire paint system. Just be sure to follow the manufacturer’s instructions to the letter, as these products require careful handling and a thorough rinse.
Once the final cleaning is done, the surface is pristine. If you decide you actually prefer the protected raw metal look, you can explore other options. We cover that in detail in our guide where you can learn how to polish an aluminum boat.
This process flow chart helps visualize the key decisions you'll make when picking the right primer system.
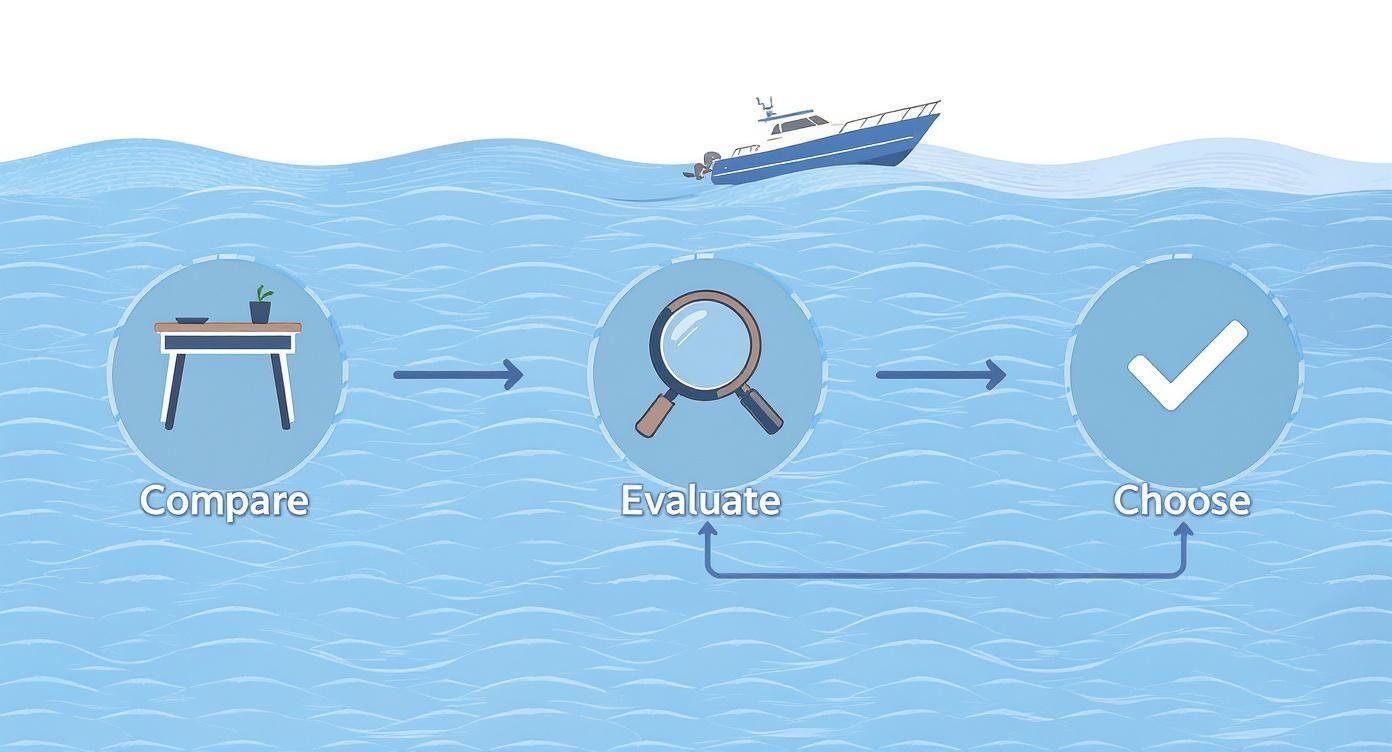
As the diagram shows, a great result comes from comparing your options, evaluating what your boat really needs, and then making a confident choice.
Now for the final, and maybe most critical, rule of surface prep: timing. The moment you have clean, bare, etched aluminum, it starts oxidizing again on contact with the air.
You absolutely have to get that first coat of primer on as soon as the surface is prepped and dry—ideally within a few hours. This ensures you're bonding to pure metal, not a brand-new layer of invisible oxide.
Applying Aluminum Boat Primer Like a Pro
Alright, your surface is prepped and ready to go. This is where all that tedious sanding and cleaning starts to feel worth it. Now it's all about technique and transforming that bare aluminum into a perfectly protected canvas for your topcoat.
The first big decision is how you'll get the primer onto the boat. Whether you choose to brush, roll, or spray, each method has its place. The goal is a professional-grade finish that doesn't just look great but also holds up season after season.
Choosing Your Application Method
There's no single "best" way to do this. It really comes down to a trade-off between speed, the final look, and your own comfort level with the tools.
- Brushing: For getting into tricky spots, nothing beats a brush. Think welds, rivets, and tight corners. It gives you the most control. Just be sure to use a quality natural bristle brush so you don't end up picking hairs out of your wet primer.
- Rolling: When you hit the big, flat areas like the hull sides or bottom, a roller is your best friend. It strikes a great balance between speed and a smooth finish. The trick is to use a high-density foam roller designed for solvents. A standard nap roller will leave a texture you'll regret when it's time to sand.
- Spraying: This is how the pros get that flawless, uniform finish in the shortest amount of time. The catch? It requires more gear, like an HVLP spray gun, and a whole lot of prep work to mask off everything you don't want primer on. Good ventilation is an absolute must.
Honestly, most experienced folks end up using a mix of techniques. They'll often "cut in" the tough areas with a brush and then quickly follow up with a roller or sprayer on the main surfaces to get a nice, even coat while everything is still wet.
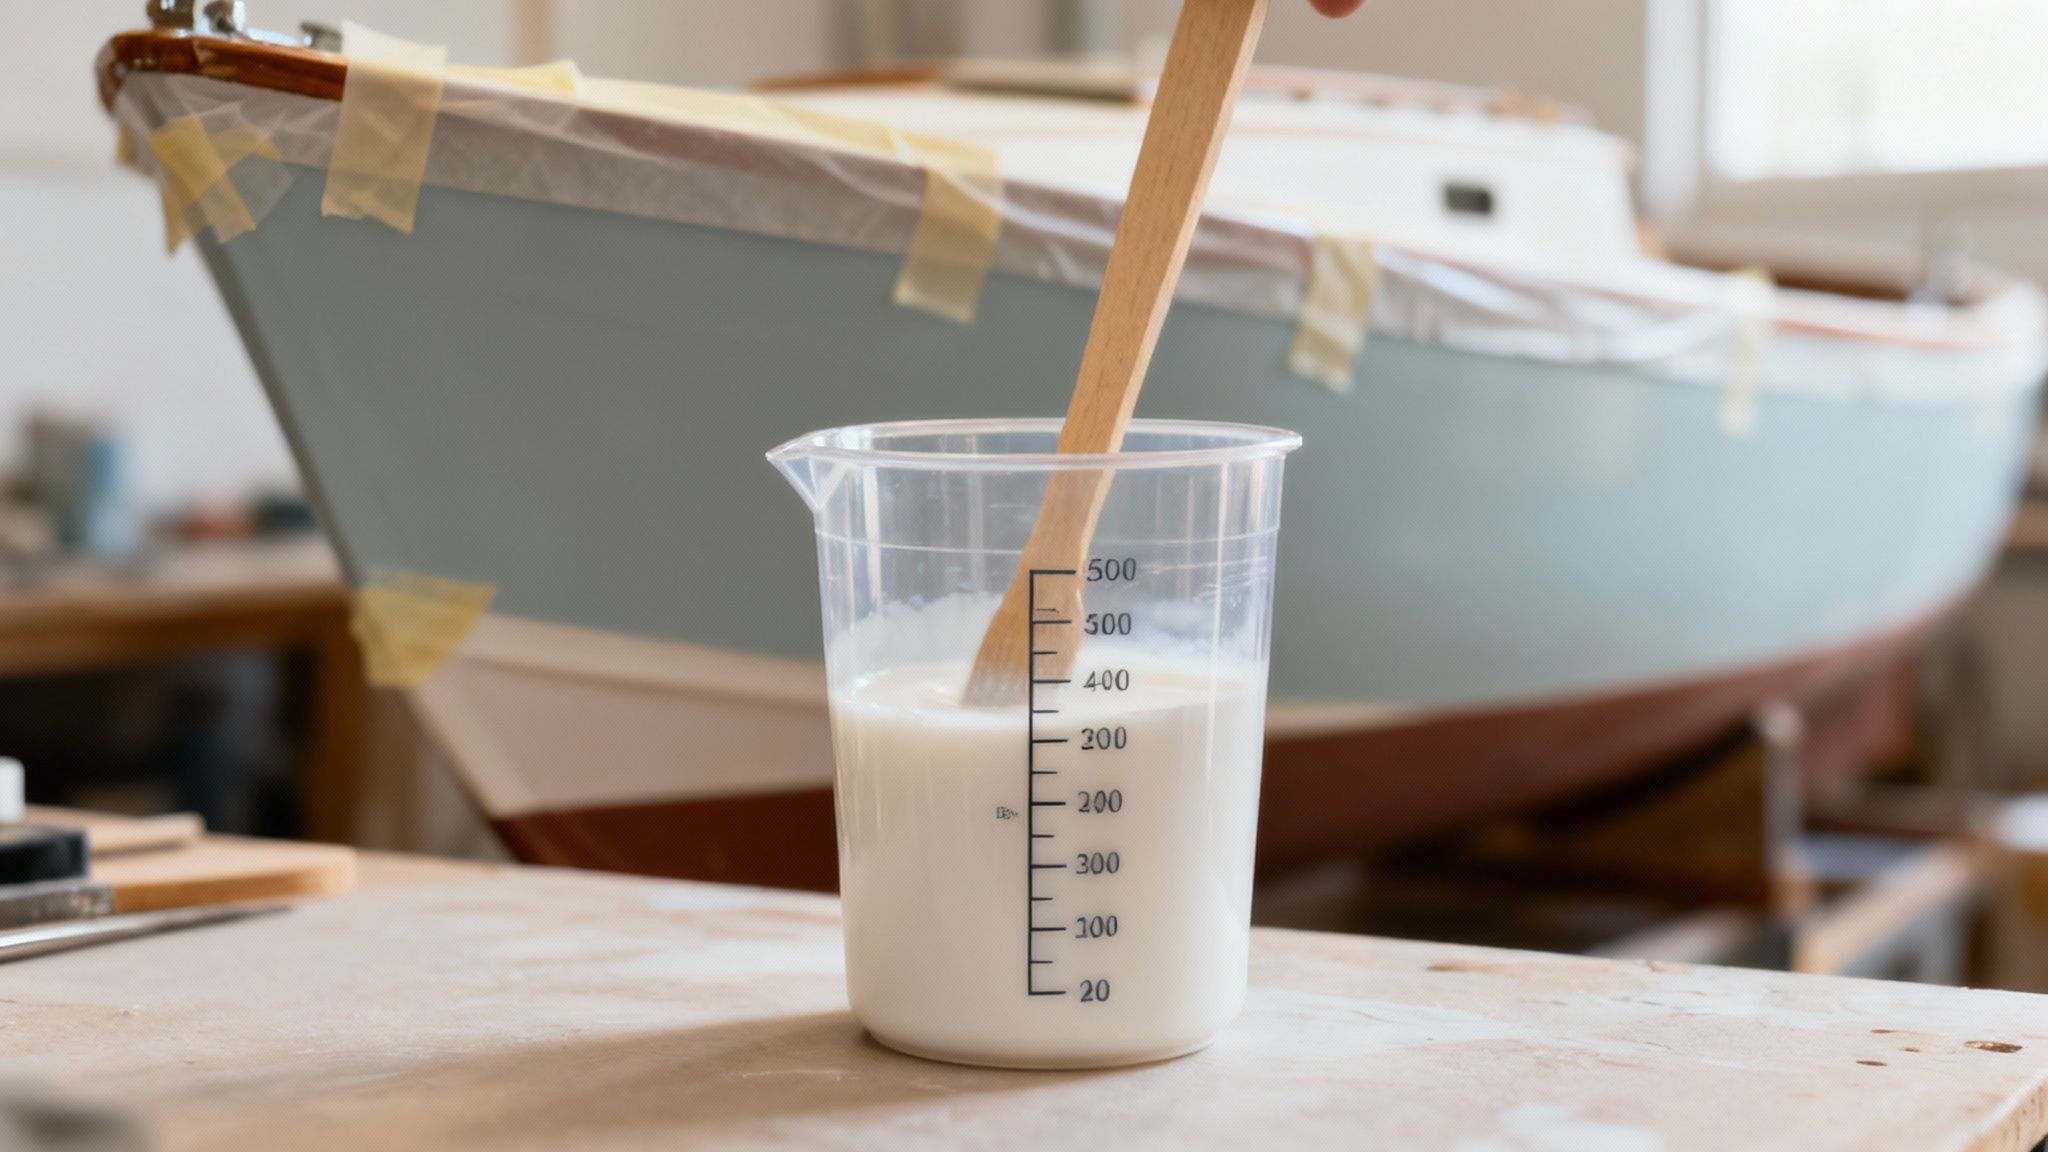
Mixing and Recoat Windows
If you've gone with a two-part epoxy primer, mixing is something you cannot afford to get wrong. These primers cure through a chemical reaction, and if your ratio of resin (Part A) to hardener (Part B) is off, you'll end up with a sticky mess that never fully hardens.
Always use separate cups and sticks for each part before combining them in a third container. Stir it like you mean it for at least two or three minutes, making sure to scrape the sides and bottom of the can.
Crucial Tip: Keep a close eye on two things listed on the can: "pot life" and "recoat window." Pot life is how long you have to work with the primer before it starts setting up in your mixing bucket. The recoat window is the critical timeframe when you can apply a second coat (or the topcoat) without having to sand again. Miss that window, and you'll be back with the sandpaper to scuff the surface for the next layer to stick.
Achieving the Correct Film Thickness
The entire protective power of your primer comes down to how thick it is. This is measured in "mils," which is just a fancy way of saying one-thousandth of an inch.
- Too Thin: A coat that's too light won't create a strong enough barrier against moisture. It basically defeats the whole purpose of priming.
- Too Thick: Laying it on too heavy can cause its own set of problems, like improper curing, trapped solvents that lead to bubbles, and an uneven finish.
Check the technical data sheet for your primer—it will tell you the target wet film thickness (WFT) you're aiming for. A cheap wet film gauge is a great little tool to have. You can use it as you go to make sure you're applying just the right amount of product for maximum protection. Getting these details right is a core part of the job, which we cover more in our complete guide on how to repaint an aluminum boat.
The demand for high-quality, corrosion-fighting coatings is huge. In fact, the global market for marine paints is expected to grow at a compound annual growth rate (CAGR) of 5.15% between 2025 and 2030. It just goes to show how vital good primer is for protecting boats against saltwater and sun.
By being methodical with your tools, respecting the product's instructions, and controlling your application thickness, you're doing more than just painting. You're engineering a durable shield that will keep your hull in great shape for years to come.
Troubleshooting Common Primer Problems
Even when you do everything by the book, sometimes a primer job just doesn't go your way. Don't sweat it. Pretty much every common issue you’ll run into is fixable, and more importantly, it’s a lesson for next time. Knowing how to read the signs and fix the problem is what turns a frustrating project into a successful one.
From peeling patches to weird-looking bubbles, every flaw tells you something about what went wrong. The trick is learning to diagnose the issue and apply the right fix. Let's walk through some of the most common headaches you might face with your aluminum boat primer paint and get them sorted out.
Fixing Peeling and Flaking Primer
This is probably the most common—and most disheartening—problem. When you see primer lifting or flaking off, the cause is almost always the same: bad surface prep. It’s a sure sign the primer never got a solid mechanical or chemical grip on the aluminum.
Think of it like trying to stick tape to a dusty floor; it’s just not going to hold. Slapping another coat over the peeling spot won't work. You have to go back to the beginning for that specific area.
Here’s how to tackle it properly:
- Strip it Back: Use a scraper and sandpaper to get rid of all the loose, peeling primer. Feather the edges so they blend smoothly into the areas where the primer is still holding strong.
- Deep Clean the Metal: Once the failed paint is gone, hit the exposed aluminum with a good degreaser. This will clear out any hidden grease or contaminants that likely caused the failure in the first place.
- Re-Prep the Surface: Get back in there with 80-120 grit sandpaper to rough up the bare metal. This creates that all-important texture for the new primer to bite into.
- Prime it Right: After a final wipe with solvent, re-apply your primer, making sure to follow the manufacturer's instructions to the letter.
Dealing with Blistering and Bubbles
Finding blisters or bubbles under a fresh coat of primer is a real gut punch. This is usually caused by trapped moisture or solvents trying to push their way out from under the paint film. It can happen if you paint on a humid day, if the hull wasn't bone-dry after washing, or if you rushed the second coat before the first one had time to flash off.
To fix this, you’ll have to pop the blisters, sand the whole area smooth, and make absolutely sure the surface is dry before you try priming again. Always, always check the weather—high humidity is the enemy of a good paint job.
Proper application is everything. It's so critical that the global marine coatings market was valued at about USD 6.54 billion in 2025, with North America leading the charge. The long-term durability of aluminum boat primer paint is a huge part of that market, which just goes to show how vital this step is. You can discover more insights about the marine coatings market and its growth online.
Avoiding Fish Eyes and Contamination
"Fish eyes" are small, round craters that appear in wet primer, and they look exactly like their name suggests. This is a classic sign of surface contamination, usually from silicone, wax, or oil. Even a tiny, invisible speck of silicone from a car wax used nearby can absolutely ruin your finish.
Your best defense here is a squeaky-clean workspace and meticulous prep. Use that two-rag solvent wipe method we talked about earlier to make sure you're lifting contaminants off the surface, not just smearing them around.
Unfortunately, if fish eyes do show up, there's no easy fix. You have to let the primer cure, sand the contaminated spot back down to bare metal, give it another deep clean, and start over.
Common Questions About Aluminum Boat Primers
Even after you’ve got the main steps down, a few questions always seem to pop up right when you’re ready to crack open a can of primer. Let's tackle some of the most common ones we hear from boat owners getting ready for an aluminum boat primer paint job.
Can I Apply Topcoat Directly Over Primer?
This is a big one, and the answer is all about timing. It comes down to what painters call the "recoat window." Most two-part epoxy primers have a specific timeframe—usually a few hours to a full day—where the primer is firm enough for another coat but hasn't fully hardened.
Painting inside this window is the goal. It creates a powerful chemical bond between the primer and the topcoat, effectively fusing them into one layer. If you miss that window, the primer will cure into a slick, non-porous surface. At that point, you'll have to lightly scuff the entire boat with fine-grit sandpaper (220-320 grit) to give the topcoat something to physically grab onto.
Expert Tip: Always shoot for applying your first topcoat within the primer's recoat window. This "hot coating" method gives you a superior bond that’s far more durable and chip-resistant than just relying on sanding.
How Many Coats of Primer Do I Need?
For just about any aluminum boat project, two thin, even coats of primer is the sweet spot. The first coat is the most important; it's the one that really bites into the etched aluminum and creates that solid foundation.
A second coat makes sure you have a complete, unbroken film with no thin spots or tiny pinholes. This is absolutely critical for creating a waterproof barrier that will prevent corrosion. Piling on more than two coats is almost never a good idea. It can lead to a film that's too thick, which can cause problems with curing or make the finish brittle down the road.
Can I Use Automotive Primer on My Aluminum Boat?
It's tempting, especially if you have a can sitting in the garage, but using automotive primer on a boat is a major gamble. Car primers are built for a totally different world. They don’t have the specialized anti-corrosive ingredients or the tough barrier properties needed to fight off constant moisture, salt, and galvanic corrosion.
Using a non-marine primer is one of the quickest ways to guarantee your paint job will fail. You have to stick with a primer that’s specifically made for marine use on aluminum. The chemistry is fundamentally different because it’s engineered to handle life on the water.
What Is the Ideal Temperature for Priming?
Most marine primers, especially the two-part epoxies, are a bit picky about their environment. You’ll get the best results when the temperature is somewhere between 60°F and 80°F (15°C to 27°C) with moderate humidity.
- Too Cold: Priming in the cold slows the chemical curing process way down. This can result in a weak finish that never really achieves its full hardness or protective qualities.
- Too Hot: High heat makes the solvents in the primer flash off way too fast. This can mess with the flow, leaving you with brush marks and a poor bond because the primer didn't have time to properly soak into the surface.
Before you start, always check the product's technical data sheet for its specific temperature and humidity recommendations.
For every challenge your boat faces, from initial prep to the final shine, Better Boat provides the professional-grade solutions you need. Our range of marine cleaning and maintenance products is designed to deliver outstanding results, ensuring your investment is protected season after season. Equip yourself with the right tools for the job by exploring our complete collection at https://www.betterboat.com.

