


Clear Coating a Boat for a Professional Finish
Think of a clear coat as invisible armor for your boat. It’s way more than just a trick to get a glossy, wet look; it's a critical shield standing between your boat's hull and the elements that are constantly trying to break it down.
Without it, you're leaving your vessel vulnerable to its two biggest enemies: the sun and the sea.
Why Clear Coating Is Your Boat's Best Defense
Applying a clear coat is probably the single most effective thing you can do to protect your boat's finish from UV rays, saltwater corrosion, and general wear and tear. This barrier locks in your boat’s color and helps maintain its structural integrity, which significantly boosts its long-term value and saves you from costly repairs down the road.
Shielding Against UV and Saltwater Damage
Ultraviolet radiation is just relentless. Day in and day out, it degrades your boat's gelcoat or paint. This process, called oxidation, is what causes that chalky, faded look you see on older, neglected boats. A good clear coat has UV inhibitors that absorb and reflect these harmful rays, keeping the vibrant color and deep gloss underneath looking sharp for years.
At the same time, saltwater is incredibly corrosive. It chews through metal fittings, eats away at fiberglass, and makes wood rot faster. A clear coat creates a non-porous, waterproof barrier that stops saltwater from ever touching the hull's surface. This is a core tactic in https://betterboat.com/blogs/news/fighting-salt-corrosion-on-boats and protecting every part of your vessel.
The Financial and Aesthetic Payoff
Honestly, investing in a proper clear coat job is one of the smartest moves a boat owner can make. The yacht coatings market, estimated at USD 4.27 billion in 2024, is proof that owners are demanding better protection. This simple, proactive step can save you thousands in future repairs, like having to re-gelcoat a faded hull or fix pitted fiberglass.
A well-maintained, glossy finish doesn't just look impressive at the dock; it directly translates to a higher resale value. When it comes time to sell, a boat with a pristine finish will always command a better price than one showing signs of environmental wear.
The idea of using a liquid membrane for protection isn't just for boats. If you want to understand the basic protective properties of a clear coat, it can be helpful to see how other coatings, like an elastomeric roof coating, work in completely different situations. It all comes back to the same principle: a protective barrier isn't a luxury—it's essential maintenance.
Choosing the Right Clear Coat for Your Vessel
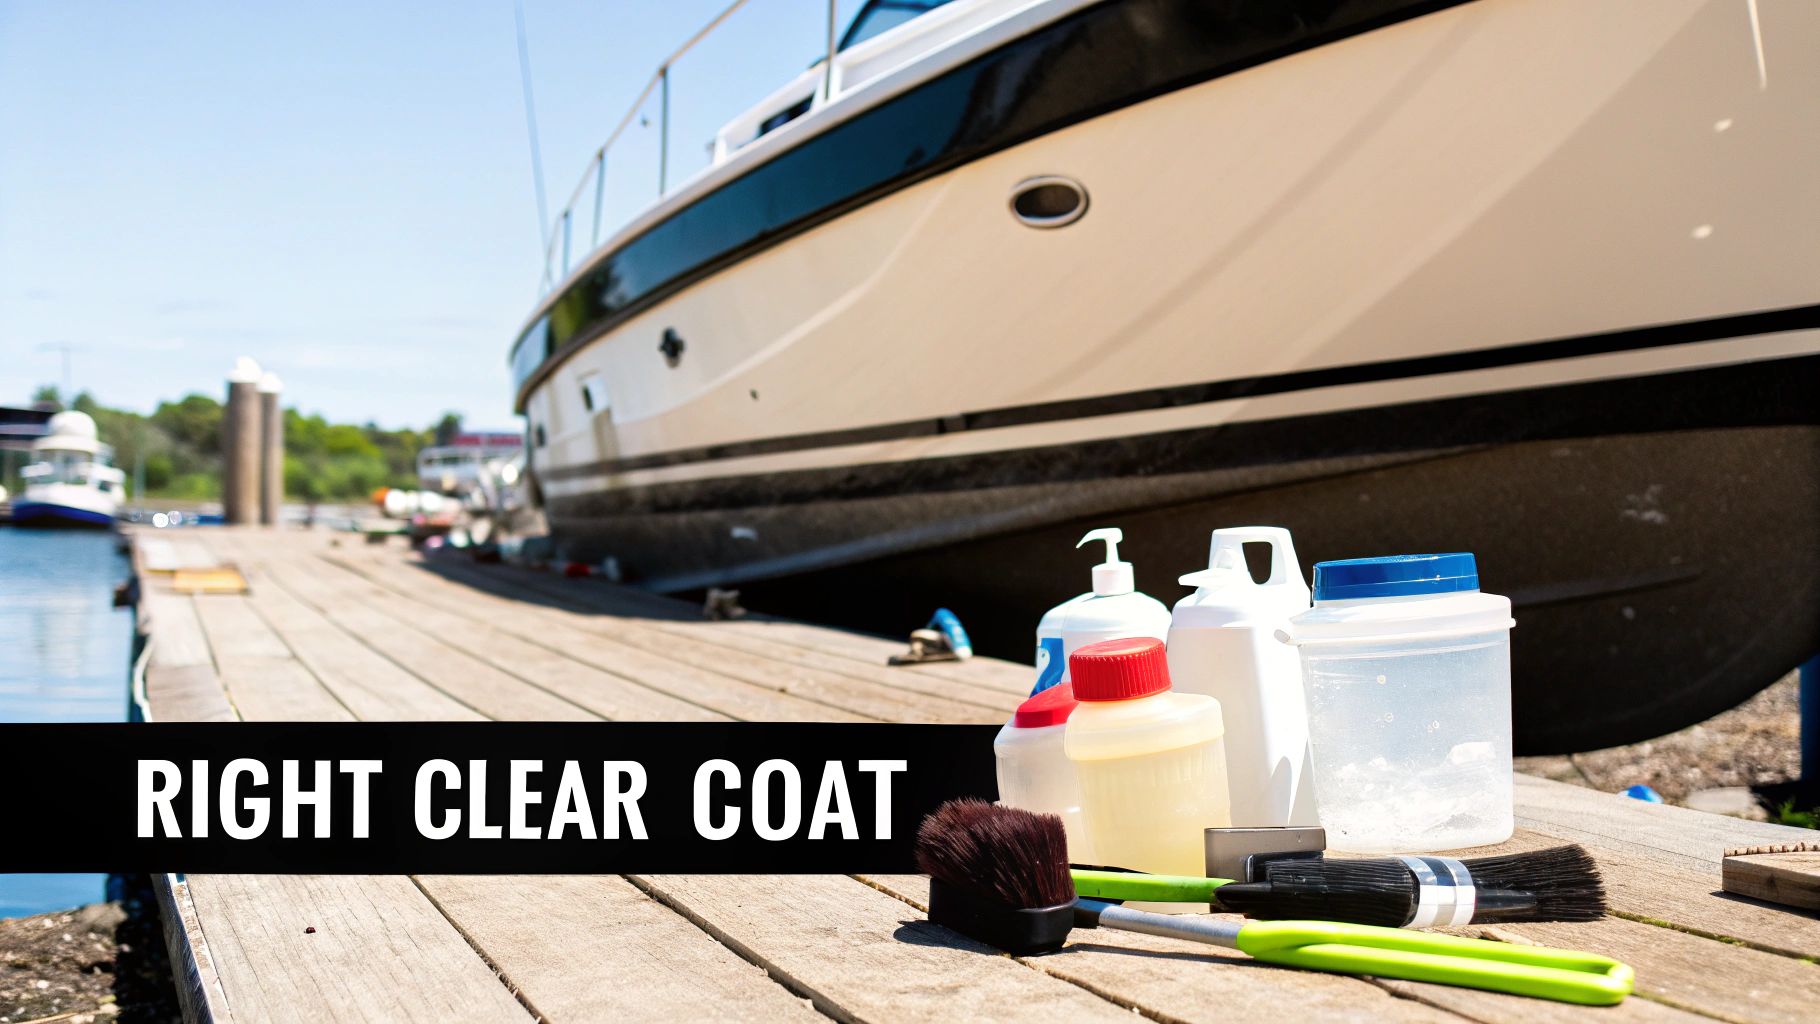
Picking the right clear coat for your boat is about more than just grabbing a can off the shelf at the marine supply store. The best finish really depends on what your boat is made of, how you use it, and frankly, how much time you're willing to spend on upkeep.
A classic wooden runabout has entirely different needs than a modern fiberglass center console. Your choice of coating should absolutely reflect that. The decision usually boils down to three main contenders: traditional spar varnish, tough two-part polyurethanes, and the newer ceramic coatings. Each has its own pros and cons, so let's get into what makes them tick.
Comparing the Main Types of Clear Coats
To make the right call, you have to know your options. Think about your boat—is it a gleaming aluminum pontoon that sees a lot of sun, or a vintage wooden cruiser that needs to breathe? The answer will point you toward the right product.
- Spar Varnish: This is the old-school, tried-and-true choice, especially for wooden boats. It’s oil-based and packed with UV inhibitors. Its biggest advantage is its flexibility; it expands and contracts with the wood, which is crucial for preventing cracks. The trade-off? It requires more love, often needing a couple of refresher coats each season to keep up its protection and deep luster.
- Two-Part Polyurethane: Think of this as the heavy-duty workhorse for fiberglass and painted surfaces. You mix a resin with a hardener, kicking off a chemical reaction that cures into an incredibly hard, durable, and abrasion-resistant shield. It offers far better UV protection and gloss retention than varnish but is less flexible and much trickier to apply correctly.
- Ceramic Coatings: These are the new kids on the block in the marine world. They are liquid polymers that chemically bond with your boat's gelcoat or paint. This creates an ultra-slick, hydrophobic surface that sheds water and grime like a champ, making cleanup a breeze. While they provide excellent gloss and UV protection, they don't offer the same level of scratch resistance as a thick polyurethane coating.
To help you visualize the differences, here’s a quick comparison of the most common clear coat types. Use this to find the best match for your boat's needs and your maintenance style.
Marine Clear Coat Comparison
| Coating Type | Durability | UV Resistance | Application Difficulty | Best For |
|---|---|---|---|---|
| Spar Varnish | Good | Good | Moderate | Wooden boats, trim, and brightwork that require flexibility. |
| Two-Part Polyurethane | Excellent | Excellent | High | Fiberglass, painted surfaces, and high-wear areas needing maximum protection. |
| Ceramic Coating | Good | Excellent | Moderate to High | Gelcoat and painted surfaces for superior gloss, UV protection, and ease of cleaning. |
Each of these options has a place in a boater's toolkit. Your job is to pick the one that aligns with your boat's material and your long-term goals for its appearance and protection.
Matching the Coat to Your Boat Material
The single most important factor is the material of your hull. It’s a bad idea to put a flexible spar varnish on a rigid fiberglass hull, just as using a rock-hard polyurethane on a wooden boat that needs to expand and contract can lead to ugly cracks down the line.
A classic wooden Chris-Craft, for example, will almost always look and perform its best with a high-quality spar varnish. The warmth and depth it adds are second to none, and its flexibility is essential for the wood's natural movement.
For a high-performance fiberglass speedboat, a two-part polyurethane is the undisputed champion for its rugged, high-gloss finish that can handle the abuse of high speeds and constant use.
Choosing the right clear coat is a crucial investment in your vessel's longevity and appearance. With the global marine coatings market projected to hit USD 10.20 billion by 2032, it's clear the industry recognizes how vital these protective layers are for reducing maintenance costs and extending a boat's operational life. Discover more insights about the marine coatings market.
What about aluminum boats, like pontoons or fishing skiffs? They have their own needs. Specialized clear coats are available that bond directly to the metal, preventing the chalky oxidation and staining that can make untreated aluminum look old and tired.
These products seal the porous surface, creating a smooth finish that makes it harder for algae and marine gunk to get a foothold. Polyurethanes and even epoxies can be great choices here; for more detail, you can explore our ultimate guide to choosing epoxy resin for your boat.
Flawless Surface Preparation Secrets
Anyone who’s spent time around boats—whether as a pro detailer or a weekend warrior—will tell you the same thing: a mirror-like finish is 90% prep and only 10% application. This is the one place you absolutely cannot cut corners. Rushing this stage is the #1 reason a DIY clear coat job goes south.
Think of it this way: you wouldn't paint your house without scraping off the old peeling paint and cleaning the walls first. It’s the same idea here, but a botched job on your boat is a much more painful—and expensive—mistake. Good prep is the foundation for everything to come, creating a surface the clear coat can really bite into.
The Critical Deep Clean
First things first, you've got to get that hull surgically clean. We're talking about stripping off every last bit of old wax, salt, grime, and any other gunk that's built up over the seasons. These contaminants are bond-breakers, and if you leave any behind, your new clear coat is destined to bubble or peel right off.
Grab a high-quality marine degreaser or a dewaxing solvent and follow the directions to the letter. Work in small, manageable sections, and don't be afraid to use a little elbow grease. For fiberglass hulls, a really thorough wash is key. If you need a refresher, check out our guide on how to clean a fiberglass boat for a detailed walkthrough.
You have to get this right. A quick spray-down isn't a deep clean. The surface needs to be completely free of any waxes or oils for the clear coat to have a fighting chance. There are no shortcuts here.
The Art of Sanding for a Perfect Base
Once the hull is spotless, it's time to break out the sandpaper. The goal isn't to be aggressive; it's to create a uniform, finely scuffed-up surface that gives the clear coat something to mechanically grip onto. A glossy, smooth surface is just too slick for the coating to adhere properly.
This infographic lays out the basic game plan for getting your prep work done right.
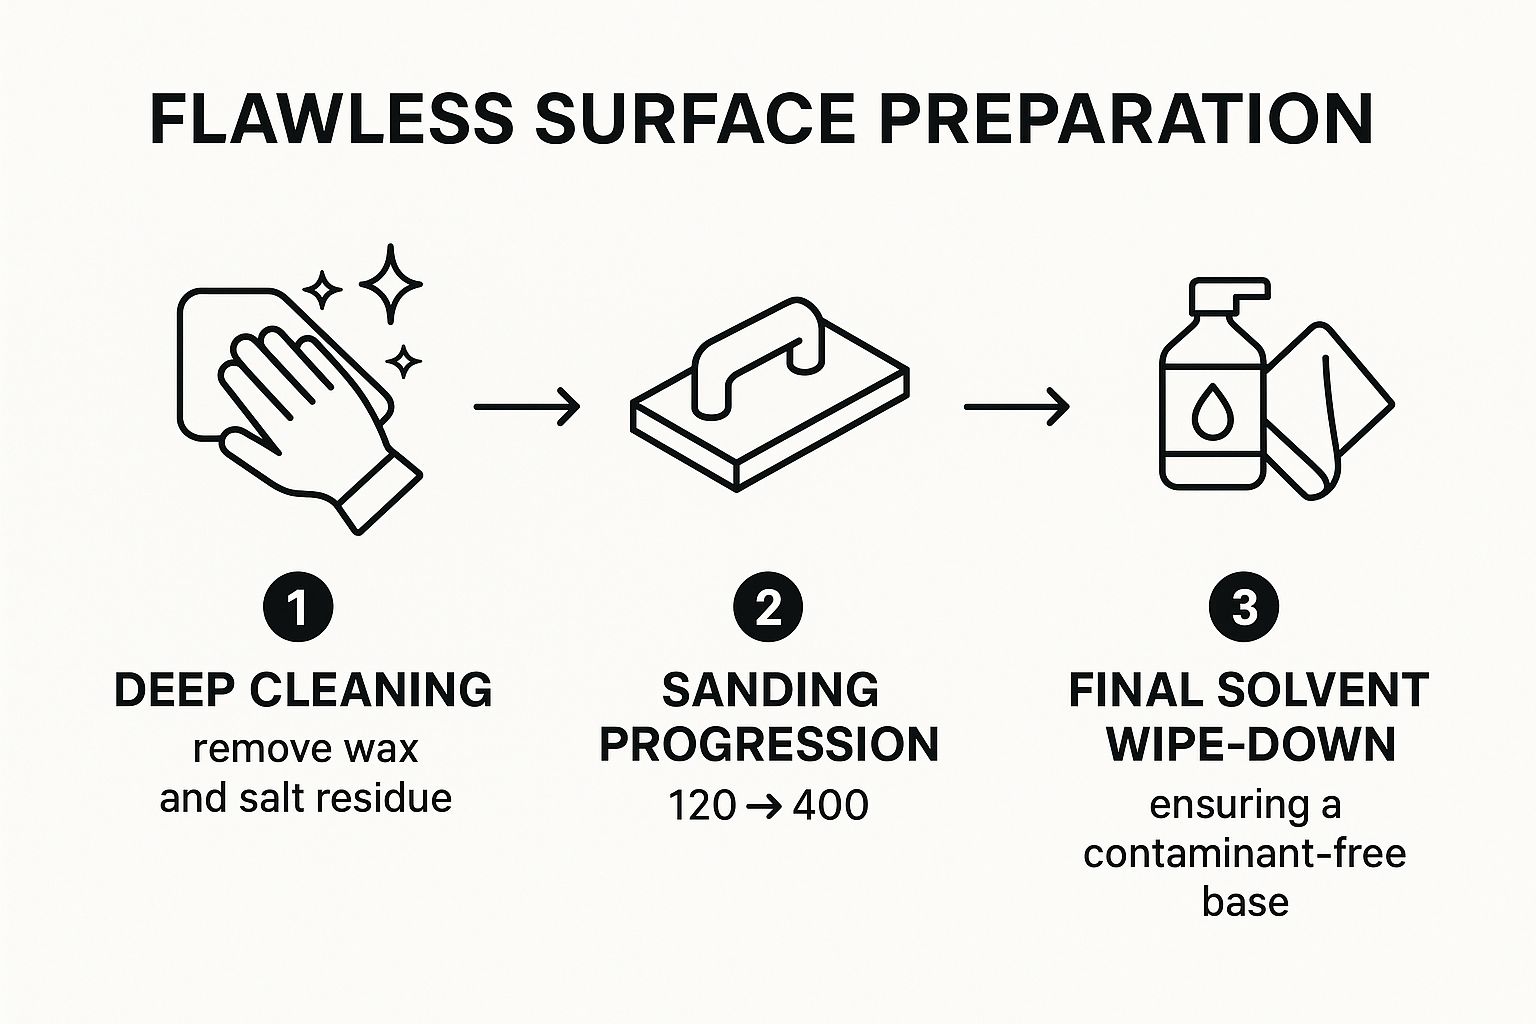
As you can see, it’s a logical process. Each step builds on the last, from the deep clean to the final wipe-down, setting you up for a flawless finish.
For a standard fiberglass or gelcoat hull, your sanding progression will look something like this:
- Initial Pass: Start with 120-grit paper. This will knock down any minor imperfections and take care of any lingering oxidation.
- Refining the Surface: Next, switch to 220-grit. This step smooths out the scratches left by the 120-grit, creating a much finer surface.
- Final Polish: Finish up with 320 or 400-grit paper. This leaves you with a perfectly smooth, consistent base that’s ready for your clear coat.
Always use a sanding block or a random orbital sander. Trying to sand by hand without a block is a recipe for an uneven finish with low spots. You're aiming for a consistent, dull haze across the entire hull.
Final Masking and Solvent Wipe
You're on the home stretch of prep now. Carefully tape off everything you don't want coated—hardware, trim, thru-hulls, you name it. Use high-quality painter's tape and masking paper. Taking your time here pays off, because crisp, clean lines are what separate an amateur job from a professional one.
The very last thing you'll do before mixing your clear coat is one final wipe-down. Use a lint-free cloth lightly dampened with a surface prep solvent—check what the clear coat manufacturer recommends. This quick wipe removes any lingering sanding dust and kills any static, ensuring the surface is absolutely pristine for application. This is your final quality check.
Mastering Your Application Technique
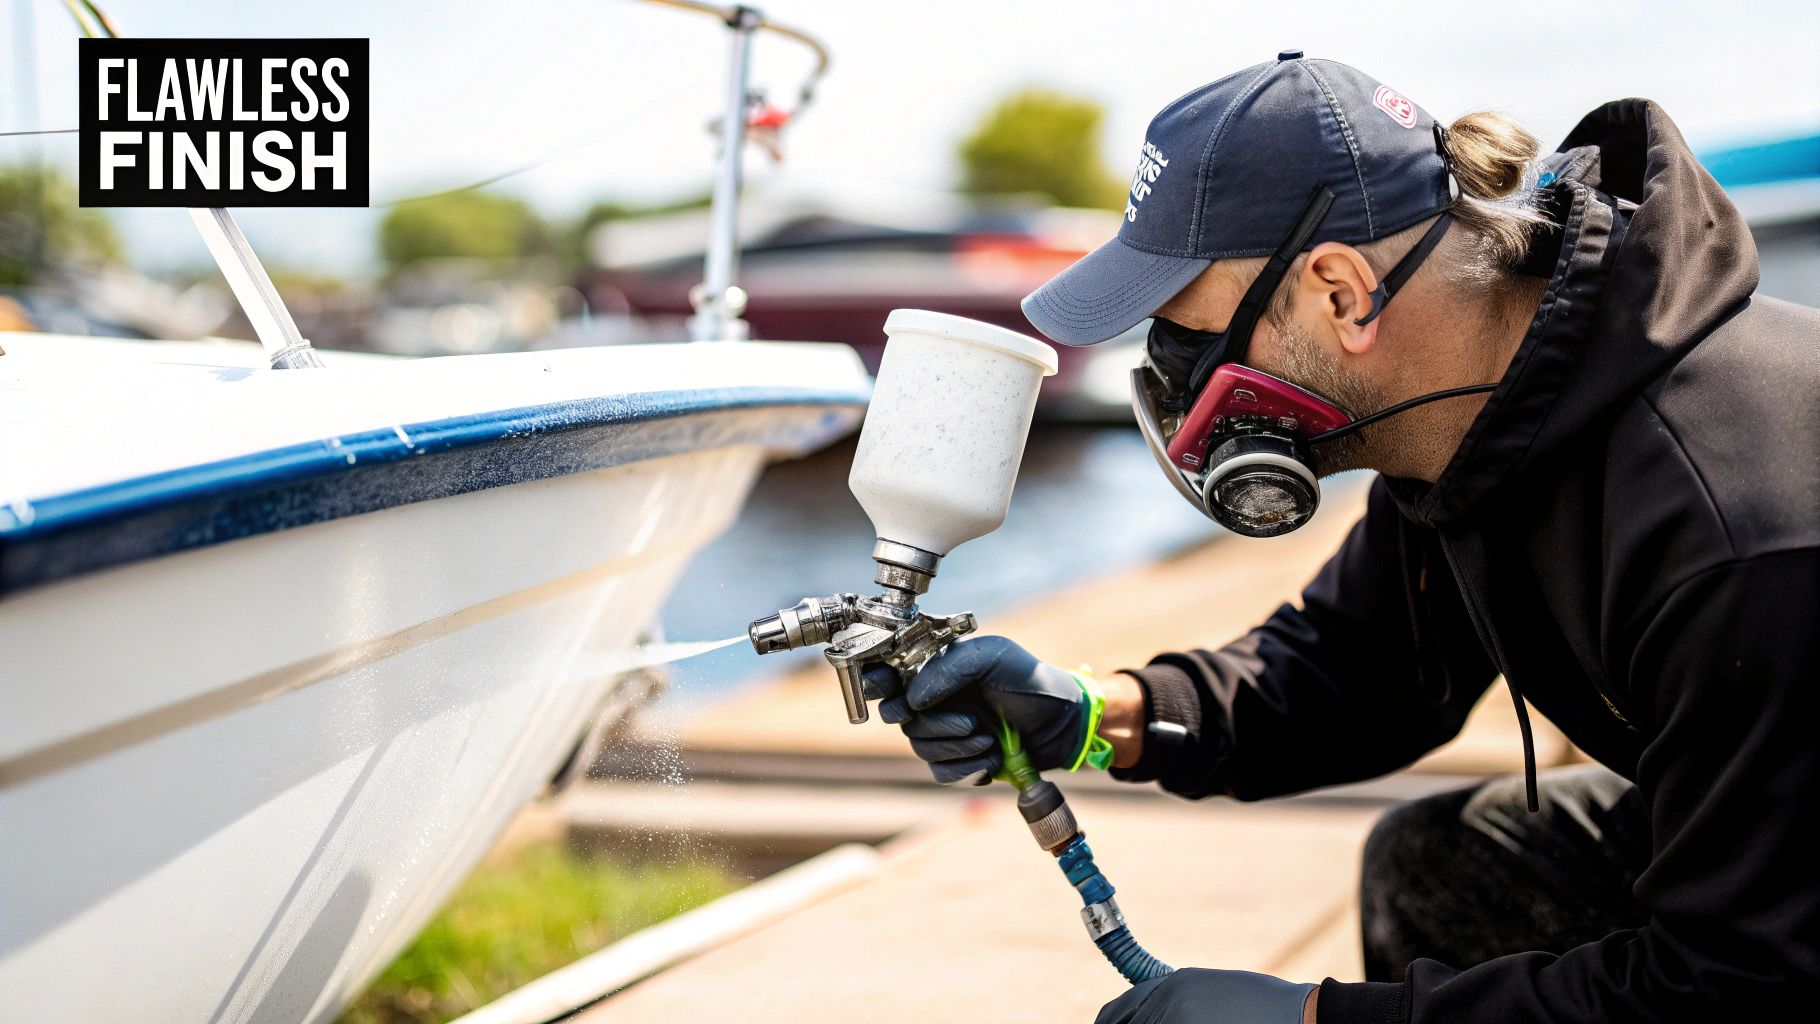
Alright, this is where all that prep work really starts to shine. You’ve got a perfectly prepped surface, and now it’s time to lay down a finish that will make your boat the envy of the marina. The real trick to avoiding those classic frustrations—drips, ugly bubbles, and uneven patches—is all about your method, a steady hand, and keeping one eye on the weather.
You've got two solid options here: the traditional "roll and tip" method or going all-in with a high-volume, low-pressure (HVLP) spray gun. Neither one is inherently better; it really comes down to your setup, skill level, and the kind of finish you're chasing.
The Classic Roll and Tip Method
This is a time-honored technique for a reason. It's fantastic for DIYers because you can get a finish that looks darn close to sprayed-on without dropping cash on expensive equipment. It's easiest with two people on larger hulls, but you can definitely pull it off solo on smaller jobs.
Here's how it works:
- The Roller: One person lays down a thin, even layer of clear coat using a high-quality foam roller that's rated for solvents. Don't try to cover the whole boat at once—work in manageable sections.
- The Tipper: Right behind the roller, a second person takes a premium badger-hair or foam brush and lightly drags just the tip of the bristles across the wet finish. This simple move is what smooths out roller marks (stipple) and pops any bubbles, leaving you with that glass-like surface.
The absolute golden rule here is to maintain a "wet edge." This just means the edge of the area you just coated needs to stay wet as you move to the next section. If it starts to tack up, you’ll get nasty lap marks where the new coat overlaps the semi-dry one.
Spraying for a Factory Finish
If you have the gear and a bit of experience, an HVLP spray gun is the ticket to a truly professional, mirror-like finish. It turns the clear coat into a super-fine mist, letting you build up incredibly thin, even layers. The trade-off? It takes more skill to avoid sags and runs, and you absolutely need a clean, controlled space to keep dust from ruining your hard work.
No matter which method you choose, remember that temperature and humidity are your co-pilots. Trying to clear coat in direct sun or on a sticky, humid day is just asking for trouble. The sweet spot is usually between 60-80°F (15-27°C) with low humidity.
If you remember one thing, make it this: Multiple thin coats are always, always better than one thick one. A heavy coat traps solvents, which means it will stay soft, look cloudy, and never quite cure properly. Thin coats are how you build depth, clarity, and rock-solid durability.
Sanding Between Coats for Ultimate Depth
Want that deep, liquid-gloss look you see on show boats? The secret is sanding between coats. Once a layer is fully cured (check the manufacturer's directions), you’ll want to lightly scuff the entire surface.
Grab some 320-400 grit sandpaper and gently knock down any tiny imperfections or dust nibs. This isn’t about heavy-duty sanding; you’re just creating a micro-scratched surface that gives the next coat something to bite into for perfect adhesion.
This layering process is especially critical for newer technologies like ceramic coatings. There's a reason the marine ceramic coating market is projected to hit $250 million by 2025—boaters want that next-level gloss and protection. You can read up on the trend in this report on marine ceramic coating market growth. Achieving that look is all about a flawless, layered application.
After each sanding session, wipe everything down with a tack cloth to pick up every last speck of dust. Then, you're ready for your next coat. Stick with this process, and you'll build a shine that's not just beautiful but incredibly tough.
Curing and Post-Application Care for a Lasting Shine
That moment the final coat of clear rolls off your roller or leaves the spray gun feels like the finish line, but hold on—the most critical phase is just beginning. What comes next, the curing process, is where all your hard work pays off. This is where the liquid clear coat undergoes a chemical transformation, hardening into that tough, glossy shell you're after.
It's easy to get this part wrong. There’s a huge difference between a coat that’s dry to the touch and one that is fully cured. Your hull might feel dry in a matter of hours, but it can take days, sometimes even weeks, to reach its absolute maximum hardness. Rushing this stage is the number one way to ruin an otherwise perfect finish.
Understanding the Curing Process
Patience truly is a virtue here. As the clear coat cures, it's essentially cross-linking its molecules to form a protective matrix. During this time, it's incredibly vulnerable. You absolutely have to shield your boat from the elements—rain, morning dew, and harsh, direct sunlight are the enemy for at least the first 72 hours. Always double-check the manufacturer's specific guidelines, as they can vary.
To really nail this, you need to understand curing timelines for this type of coating. This knowledge keeps you from making common mistakes, like throwing a boat cover on too soon. That can trap solvents trying to escape, leaving you with a soft, marred finish.
A freshly applied clear coat is at its most delicate. Any unwanted moisture can cause it to cloud up or "blush," while too much heat can bake imperfections right into the surface. Give it the time and protection it needs to cure into a rock-solid barrier.
Long-Term Maintenance for a Flawless Finish
Once your clear coat has had plenty of time to fully cure, a little upkeep will keep it looking showroom-fresh season after season. The whole point is to protect the protective layer you just spent all that time applying.
Here are a few simple habits to get into:
- Gentle Washing: Ditch the harsh detergents. Always wash your hull with a pH-neutral, non-abrasive boat soap and a soft wash mitt designed for marine finishes. Aggressive soaps will strip away the gloss and any protective waxes you apply later.
- Protective Waxing: After a few months, applying a high-quality marine wax is a great move. It adds another layer of UV protection and boosts the hydrophobic properties, so water beads right off. Think of it as a sacrificial layer that takes the daily abuse so your clear coat doesn't have to.
- Prompt Touch-Ups: If you get a minor scratch or a chip from a rogue dock encounter, deal with it quickly. A small touch-up now prevents water from creeping under the clear coat, which can cause peeling and lead to much bigger headaches down the road.

Common Questions About Clear Coating a Boat
Even with the best game plan, questions always pop up when you're laying down clear coat for the first time. Getting a handle on these common hang-ups can be the difference between a project you regret and a finish that looks like it came from a pro. We've rounded up the questions we hear most often to give you some clear, straightforward answers.
This isn't just theory; it's advice pulled from years of seeing what works—and what definitely doesn't—out on the water. Nailing these details means your hard work pays off with a shine that lasts.
How Many Coats of Clear Coat Does a Boat Need?
There’s no magic number here; the right amount of coats depends entirely on the product in your hands. For most modern two-part polyurethanes or those slick new ceramic coatings, a good target is 3 to 5 thin coats. That’s usually enough to build up a tough, protective layer without it getting too thick or brittle.
Now, traditional spar varnish is a whole different ballgame. If you're working with fresh or newly stripped wood, you could easily be looking at 6 to 8 coats to get the depth and UV protection you really need.
Always, and I mean always, read the manufacturer's technical data sheet. These folks have tested their products inside and out, and their recommendations are your roadmap to success. Sticking to their guidelines is the single best thing you can do for a durable, long-lasting finish.
Can I Apply Clear Coat Over an Old Finish?
This is a big one, and the answer hinges on a brutally honest look at your boat's current condition. If the existing finish is in fantastic shape—and by that, I mean zero peeling, cracking, or chalkiness—then you can probably get away with it. You'll need to thoroughly scuff sand the surface to give the new coat something to bite into, then apply a compatible clear over the top.
But the second you spot any sign of failure, the plan has to change. If that old finish is compromised in any way, shape, or form, it has to come off. All of it. Right down to the original surface.
Trying to put a beautiful new clear coat over a failing foundation is just asking for trouble. The new coat is destined to fail right along with the old one underneath, and you'll have wasted a ton of time and money.
What Is the Ideal Weather for Applying Clear Coat?
The weather will make or break your project. You're looking for a "Goldilocks" day: not too hot, not too cold, and definitely not humid. The sweet spot for most marine clear coats is low humidity with temperatures somewhere between 60-80°F (15-27°C).
Working in direct, hot sun is one of the worst mistakes you can make. It forces the solvents to evaporate way too fast, a phenomenon called "flash drying." This traps bubbles and leaves brush marks that are impossible to get out. On the flip side, high humidity can sneak moisture into the curing film, leaving you with a cloudy, blushed finish.
Your best move is to work in a shaded, well-ventilated spot on a calm, mild day.
For all the essential supplies you need to achieve a professional-grade finish, from prep materials to application tools, trust Better Boat to deliver quality you can count on. Explore our full range of boat care products at https://www.betterboat.com.


