


How to Apply Teak Oil for a Professional Finish
Applying teak oil the right way boils down to three critical stages: prepping the wood thoroughly, applying thin and even coats, and—the part everyone forgets—letting it fully cure.
Get these right, and you’ll do more than just protect the wood; you’ll bring its natural grain to life, guarding it against moisture and sun damage. It’s the go-to finish for everything from weathered patio furniture to salty marine woodwork for a reason.
Your Guide to a Perfect Teak Oil Finish
Think of applying teak oil less as a chore and more as an investment in the life and look of your wood. The whole point isn’t to build up a thick, plastic-like film on the surface. Instead, you're replenishing the wood's own natural oils from the inside out, restoring that rich, warm glow it had when it was new.
This deep-down penetration is what makes teak oil special. It gives you a finish that flexes with the wood, meaning it won’t chip or peel like a varnish.
Understanding the "why" behind each step makes all the difference.
- Surface Preparation: This is the foundation for everything. You can't skip it. Proper cleaning and a light sanding open up the wood's pores, which is essential for letting the oil soak in deep and even.
- Controlled Application: The secret here is less is more. Apply thin layers and, most importantly, wipe away all the excess. If you don't, you'll end up with a sticky, tacky mess that attracts every speck of dust in the vicinity.
- Proper Curing: This final, patient stage allows the oil to harden within the wood fibers. This is what creates that durable, protective barrier that keeps your wood looking great.
This natural approach to wood care is catching on. In fact, the global teak oil market was valued at $140 million in 2024, and it's only expected to grow as more people look for sustainable ways to care for their wood pieces. You can read more about this growing market trend.
And if you’re looking to round out your finishing skills, diving into some cabinet finishing fundamentals can give you a broader perspective that applies to all sorts of woodworking projects.
Quick Teak Oil Application Checklist
For a quick reference, here's a breakdown of the process. Think of this as your cheat sheet to getting a professional-looking finish every time.
| Stage | Key Action | Why It Matters |
|---|---|---|
| Preparation | Clean with a teak cleaner and lightly sand with fine-grit paper. | Opens wood pores for maximum oil absorption and a smooth finish. |
| Application | Apply a thin, even coat of teak oil with a lint-free cloth. | Prevents a blotchy, uneven appearance and ensures the oil penetrates. |
| Excess Removal | Wipe off all excess oil after 15-30 minutes. Do not let it dry on the surface. | Avoids a sticky, dust-attracting surface that never fully hardens. |
| Curing | Allow the piece to cure for at least 24-48 hours in a dry, well-ventilated area. | Lets the oil harden within the wood, creating a durable, protective layer. |
Following these key stages ensures you’re not just coating the wood, but truly nourishing it from within for a lasting, beautiful result.
Choosing Your Tools for a Flawless Application
Let's be honest, the right gear can make the difference between a project you’re proud of and one that just feels… frustrating. Before you even think about cracking open that can of teak oil, let’s get your toolkit sorted. A little prep work here will pay off big time with a smooth, professional-looking finish.

The right scrubbing tool
Stainless Steel Scrub Set for Teak Decks with Handle
Agitating the cleaner into teak grain takes a brush that is stiff enough to work the surface without gouging the wood. This stainless steel scrub set is sized specifically for teak decks and the handle keeps you off your knees.
First up, the oil itself. You'll see "teak oil" on a lot of labels, but it's more of a marketing term than a single specific product. Most are a mix of linseed or tung oil, mineral spirits, and a bit of varnish.
For anything that lives outside—patio furniture, boat railings, you name it—look for a teak oil sealer formula with UV inhibitors. That’s your best defense against sun damage. If you’re working on an indoor piece, a simpler blend that leans heavily on pure tung oil will give you a gorgeous, durable finish.
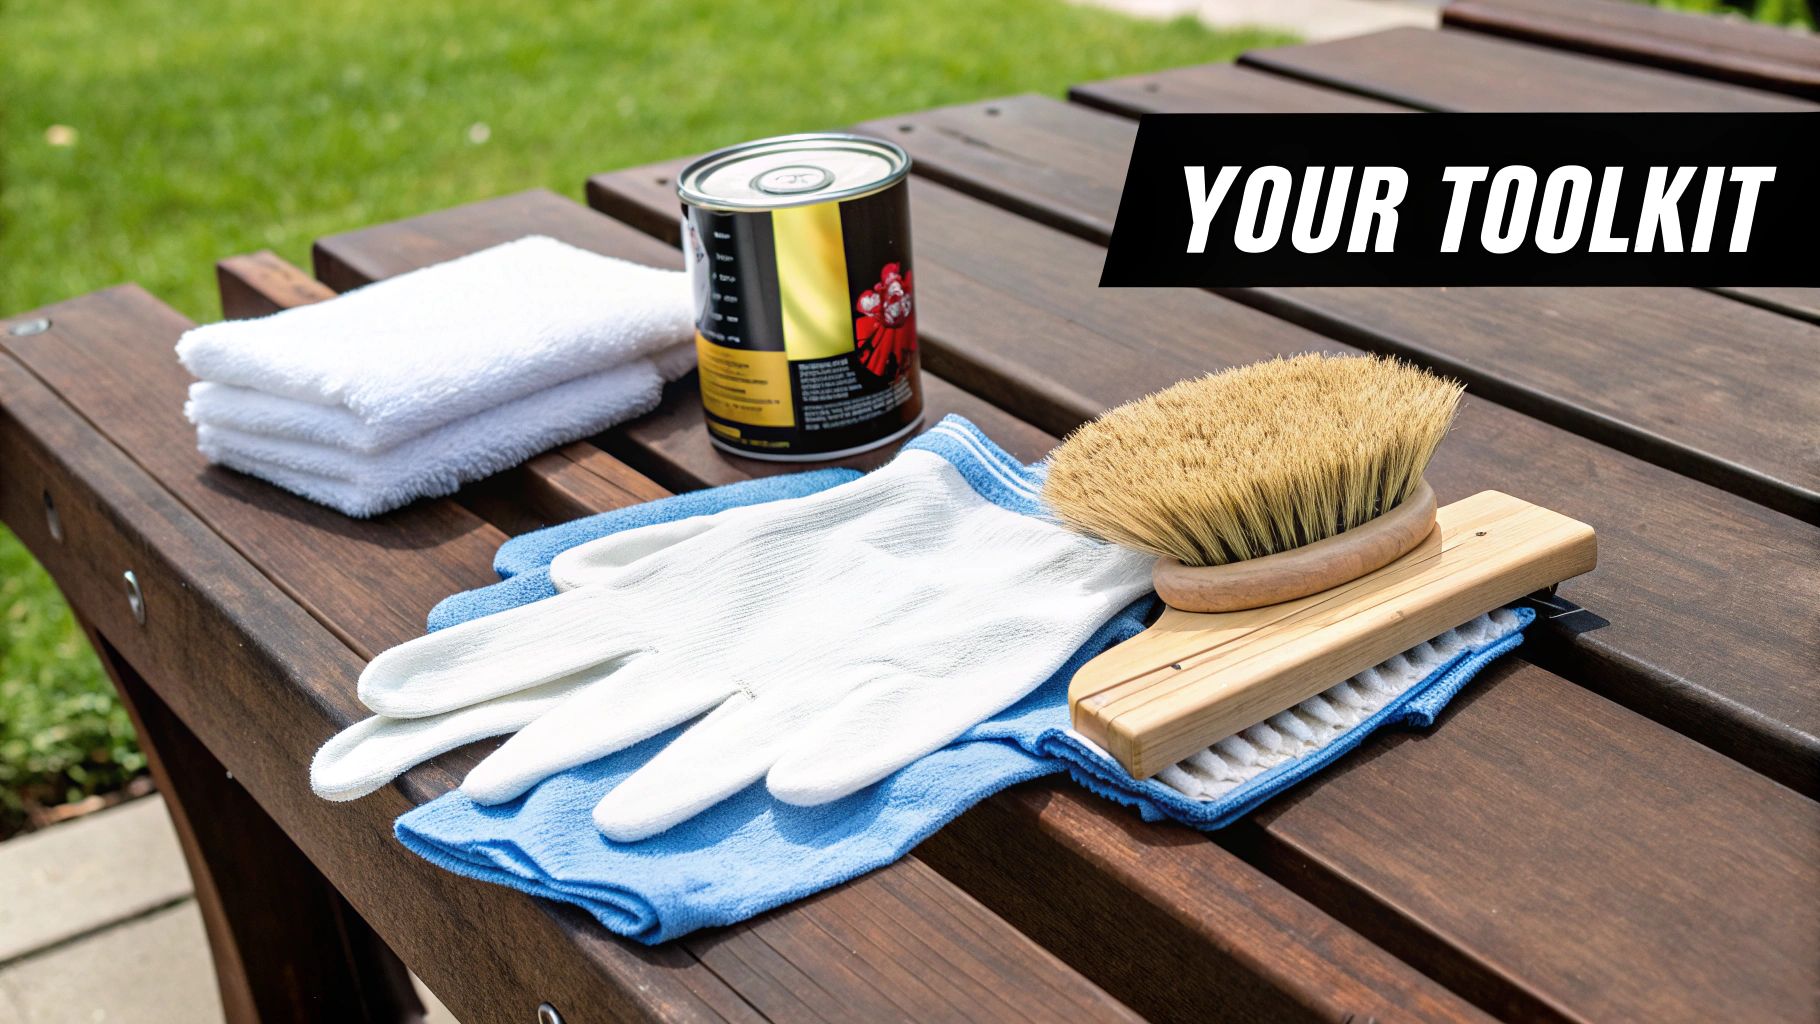
Your Essential Application Kit
You don’t need a whole workshop full of tools for a perfect application, but every item on this list has a job to do. Think of this as avoiding mistakes before they even happen.
- Lint-Free Cloths: This is one area you can't cut corners on. An old t-shirt or paper towels might seem fine, but they'll shed tiny fibers that get trapped in the finish, ruining that smooth surface you're after. Grab some microfiber cloths or dedicated shop rags instead.
- Natural-Bristle Brush: Got any tricky spots? For detailed carvings, tight joints, or the corners on a chair, a brush is key to getting the oil into every nook and cranny. Natural bristles are softer and just seem to hold and release oil better than synthetics.
- Nitrile Gloves: Teak oil can be a pain to clean up and can irritate your skin. A good pair of gloves will keep your hands clean and protected from start to finish.
- Mineral Spirits: This is your secret weapon for clean-up. Have a small can and a clean rag ready to go. You can instantly wipe up any drips or spills before they have a chance to set and stain nearby surfaces.
Pro Tip: Don't forget your safety gear. Fumes from teak oil can be pretty strong, so always work in a well-ventilated space. Outside is best, but a garage with the big door wide open works great too.
One last thing. As you gather your supplies, remember that a great finish starts with a clean surface. For boat decks or furniture that's been out in the elements for a while, a tool like a specialized stainless steel scrub set for teak can be a lifesaver for getting rid of that deep-down grime before you apply the first drop of oil.
Preparing the Wood for Maximum Oil Absorption
A professional-grade teak oil finish is built long before you ever open the can. Think of it like painting a wall; you wouldn't just slap a coat of paint over dirt and expect a smooth result. The same idea applies here, and honestly, getting the wood ready is the one step that separates an amateur finish from one that looks great and lasts for years.
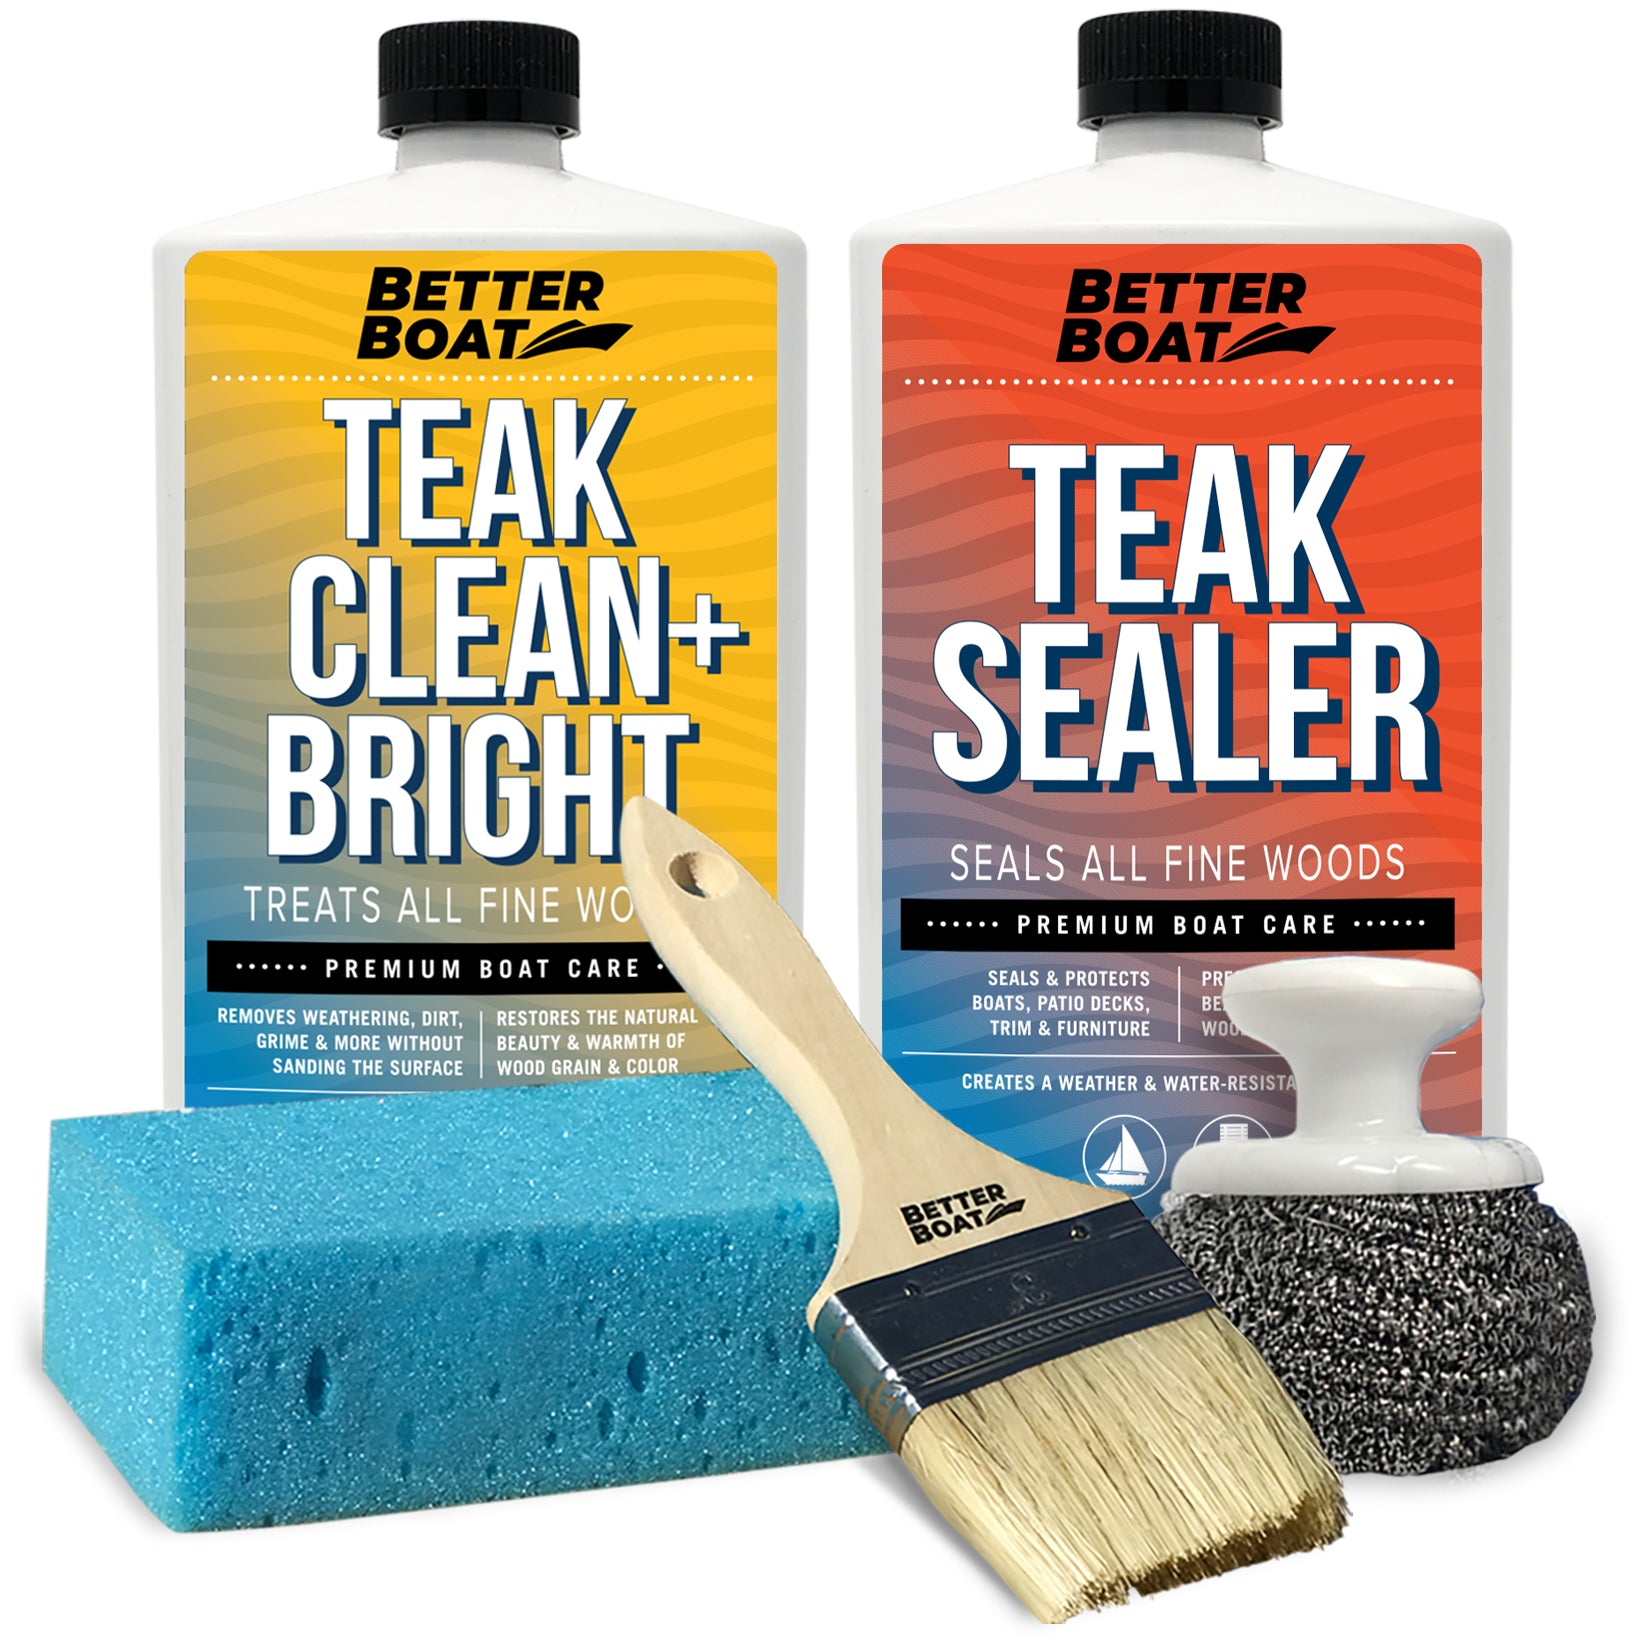
Clean before you oil
Teak Cleaner and
Proper prep starts with a dedicated teak cleaner that strips salt, grime, and grey oxidation so the oil penetrates evenly. The Teak Cleaner and Brightener handles this step on its own, or grab the full set if the wood also needs a brightening pass.

The first job is a deep clean. Over time, outdoor teak furniture and boat trim get covered in a tough layer of dirt, sunscreen residue, mildew, and that classic silvery-gray oxidation.
All this grime actively blocks the oil from soaking into the wood fibers where it belongs. Using a dedicated teak cleaner is your best bet to cut through this buildup without harming the wood itself. For a deeper dive, check out our guide on properly cleaning teak wood.
Sanding to Open the Wood Pores
Once the wood is completely clean and—this is important—bone dry, it's time for the most critical part of the prep work: sanding. We’re not talking about aggressively reshaping the wood here. The goal is to gently scuff up the surface to open up the wood's pores, which makes a massive difference in how deeply the teak oil can penetrate.
This infographic really drives home the point of doing the prep work right.

As you can see, something as simple as sanding with the grain is what creates that perfect canvas for the oil.
For this task, 220-grit sandpaper is your best friend. It’s fine enough to create that ideal receptive surface without leaving any noticeable scratches. A word of caution: always sand in the direction of the wood grain. If you go against it, you’ll create cross-grain scratches that become glaringly obvious the second the oil hits them. You’ll know you’re done when the wood feels consistently smooth to the touch all over.
This isn't just about looks. Marine maintenance studies have shown that a multi-coat oil application on properly prepped wood can improve its lifespan by up to 40%. You can discover more insights about the teak oil market and its effectiveness.
The final, absolutely non-negotiable step before you even think about applying oil is getting rid of all the dust. After sanding, a fine layer of sawdust will be covering everything. Grab a tack cloth or a microfiber rag lightly dampened with mineral spirits and wipe down every single surface. I mean it—every speck of dust you leave behind will get trapped in the oil, creating a gritty, imperfect finish. Take your time here. Your patience will absolutely be rewarded.
Mastering the Teak Oil Application Technique
With your wood perfectly prepped, it's time for the main event—the actual application. This is where your patience and technique will pay off with a beautiful, long-lasting finish. Rushing this stage is exactly what leads to that dreaded sticky, uneven mess that so many people struggle with.

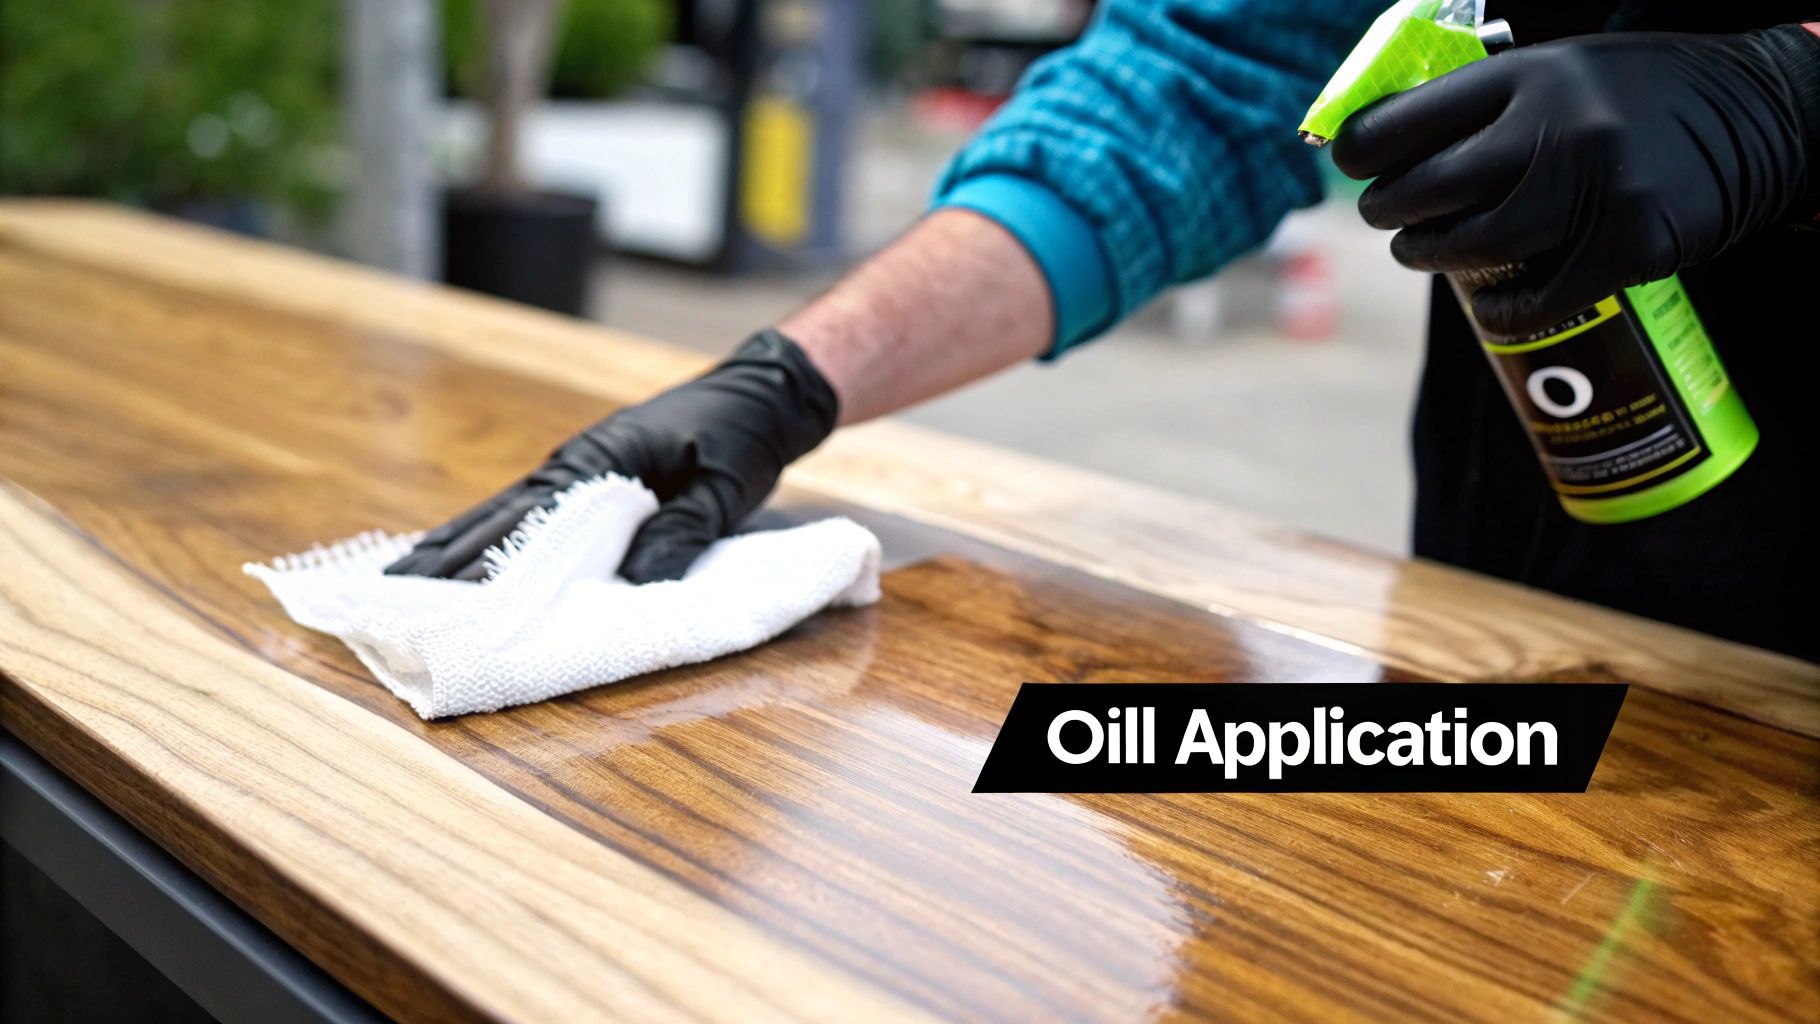
Apply the oil itself
Teak Sealer Oil
This is the step that calls for the actual product, and Teak Sealer Oil is formulated to penetrate deeply rather than sit on the surface, which is exactly what this technique is designed to achieve.
Grab your lint-free cloth and pour a small amount of teak oil onto it, never directly onto the wood. This simple habit gives you much better control over where the oil goes. Start wiping the oil onto the surface in a generous, even layer, making sure you’re always moving in the same direction as the wood grain.
For a flat tabletop, this is pretty straightforward. On more complex pieces like a detailed chair leg, I find it's best to use a brush to dab oil into the tight corners and crevices first. Then, you can follow up with your cloth on the larger, smoother areas for a consistent look.
Wiping Off the Excess Oil
Once the first coat is on, the clock starts ticking. You need to give the oil some time to soak into the wood's pores. The sweet spot is usually between 15 and 30 minutes. You'll actually see the oil start to penetrate, with some areas looking thirstier than others.
Now for the most important step in the entire process: you must wipe off every bit of excess oil. Grab a clean, dry, lint-free cloth and thoroughly buff the entire surface. Your goal is a surface that feels almost dry to the touch, not oily or wet. Any oil left sitting on top of the wood won't cure properly and will inevitably turn into a tacky, dust-grabbing film.
The wood can only absorb so much oil in one go. Wiping away the excess isn't just about cleaning up; it’s a critical part of the curing process that allows the oil inside the wood to harden correctly.
Applying Subsequent Coats
For most projects, a single coat just won't cut it for proper protection. After wiping down that first coat, you'll need to wait before applying the next one. How long you wait really depends on the specific product you're using.
Thankfully, modern solvent blends have cut the traditional wait times down significantly. What used to be a 48-hour wait can now be as little as 12 hours. If you're curious, you can learn more about how environmental regulations have influenced these formulas.
A good rule of thumb is to wait until the surface is completely dry to the touch, which could be anywhere from 4 to 12 hours. Apply the second coat just like the first: wipe on a thin layer, wait 15-30 minutes, and then meticulously wipe off all the excess.
So how many coats are enough? Most projects look and feel best with two to three coats. You'll know you're done when the wood stops absorbing the oil as readily and keeps a uniform, satin sheen even after you've buffed it dry. That's the sign your wood is fully saturated and the finish is complete.
Curing and Maintaining Your New Teak Finish
Applying that final coat of teak oil feels like the end of the race—but the real work happens next. Curing is the process that turns the liquid oil into a tough, protective layer inside the wood.
This chemical dance—oil molecules meeting oxygen—polymerizes to form a resilient barrier. In other words, patience is part of the recipe.
Most pieces will feel dry on the surface within a few hours, but they won’t be ready for regular use until the oil fully hardens. Plan on 24 to 48 hours in a dry, well-ventilated spot, out of rain and morning dew. In sticky, humid weather, extend that to 72 hours before you start daily wear and tear.
Keeping The Finish Looking Great
Once cured, teak glows with warmth and depth. Protecting that glow is mostly about simple checks and quick top-ups.
When the wood starts to look thirsty or a splash of water soaks in instead of beading on the surface, you know it’s time for a maintenance coat. Thankfully, it’s just a thin wipe-on layer—no sanding back to bare wood.
If your teak lives outdoors or on a boat, you know how relentless sun and salt can be. For marine-specific tips, see our guide on using teak oil for boats.
Maintenance Schedule Guideline:
- Indoor Furniture: Refresh with a light coat every one to two years, or whenever it starts to look dull.
- Outdoor Furniture & Decks: Aim for at least one maintenance coat each spring. In extreme sun or rainy climates, consider a quick top-up every six months.
A simple cleaning followed by a thin maintenance coat is all it takes to keep that protective finish deep and rich. Small rituals like these pay off with years of beautiful, well-guarded teak.

Got Questions About Applying Teak Oil?
Even when you follow the steps, a few curveballs can pop up when you're oiling teak. It happens. Let's walk through some of the most common questions and clear up any confusion so you can get that perfect, professional-looking finish every time.
One of the biggest mix-ups I see is the whole teak oil vs. tung oil debate. Here's the deal: "Teak oil" isn't actually from the teak tree. It's almost always a custom blend of either linseed or tung oil, mixed with varnish resins and mineral spirits to help it soak into dense woods like teak and dry faster.
Pure tung oil, on the other hand, is the real deal—a 100% natural oil that hardens into an incredibly tough, waterproof shield for your wood. The catch? It takes much longer to cure and can get tacky if you're not careful with the application.
What to Do When Things Go Wrong
A sticky finish is, without a doubt, the number one headache people run into. The good news is it has a single, simple cause: you left too much oil on the wood. When you slop it on and don't wipe off every last bit of excess, the oil on the surface can't get the oxygen it needs to cure properly, leaving you with a gummy mess.
Fixing it is straightforward. Just grab a clean, lint-free cloth, dampen it with a little mineral spirits, and gently wipe down the entire tacky surface. This will dissolve that uncured top layer. Let the wood dry out completely, and then you can decide if it needs one more very thin coat—and this time, wipe it all off.
Your wood will tell you when it's had enough to drink. Once you apply a coat and the oil just sits on the surface for a few minutes instead of soaking in, the wood is saturated. Anything more is just asking for a sticky situation.
Another question that comes up a lot is how often to re-oil, especially for outdoor furniture that’s battling the elements. For pieces living outside in the sun and rain, a good rule of thumb is to plan on a fresh maintenance coat every 6 to 12 months.
Honestly, the wood is your best guide. When it starts looking a little dry and faded, or when you notice water isn't beading up on the surface anymore, it's time. A quick clean followed by a single fresh coat of oil is all it takes to bring back that rich color and protection.
At Better Boat, we've got all the premium teak care products you need to protect your investment and keep your boat looking sharp. Explore our collection of teak and wood care solutions today.


