


How to Clean Boat Seats Vinyl: Easy Tips to Keep Them Fresh
To properly clean your vinyl boat seats, you'll need a solid marine-grade vinyl cleaner, a soft-bristle brush, and a few clean microfiber towels. The basic process is a gentle scrub, a good rinse to get all the residue off, and a final dry. But really, the secret is focusing on proactive care to stop sun and moisture from causing long-term damage in the first place.
Why Proactive Vinyl Care Is a Must
Before you even think about grabbing a brush, let’s get one thing straight. The real enemy of your boat's interior isn't just one bad stain—it's neglect. Day in and day out, your vinyl seats are getting hammered by UV rays, salt spray, moisture, and the inevitable sunscreen smudge.
Thinking of cleaning as a smart, preventative strategy is way more effective than going to war with a scrub brush once a year.
This little shift in mindset takes you from damage control mode to long-term preservation. A simple, consistent routine is what stops that nasty grime and mildew from setting in and permanently ruining your upholstery.
The Real Cost of Ignoring Your Seats
Letting your vinyl go doesn't just make your boat look dingy; it physically breaks down the material. The sun is a huge culprit here. It destroys the vinyl’s plasticizers, which is what makes them soft and flexible. The result? They get stiff and, eventually, start cracking.
Moisture is the other silent killer. It creates the perfect breeding ground for mold and mildew, which can worm their way deep into the foam cushions, leading to a much bigger problem than just surface stains.
This is exactly why a quick, regular cleaning is so critical. Marine care pros will tell you to rinse your vinyl seats with fresh water and wipe them down with a mild solution at least once a week, with a more thorough cleaning once a month. A simple habit like this prevents grime from getting embedded in the vinyl's pores, which makes future cleanups a breeze. You can dive deeper into this by exploring more tips for maintaining vinyl boat seats.
The goal isn’t just to make the seats look clean for a weekend on the water. It's about keeping the material itself healthy to save yourself from a costly and frustrating reupholstering job down the road.
Honestly, a few minutes of care after each trip will save you hours of back-breaking work later. Once you understand the common threats, maintenance becomes a quick and satisfying part of packing up, ensuring your seats look brand new for years to come.
Assembling Your Vinyl Cleaning Toolkit
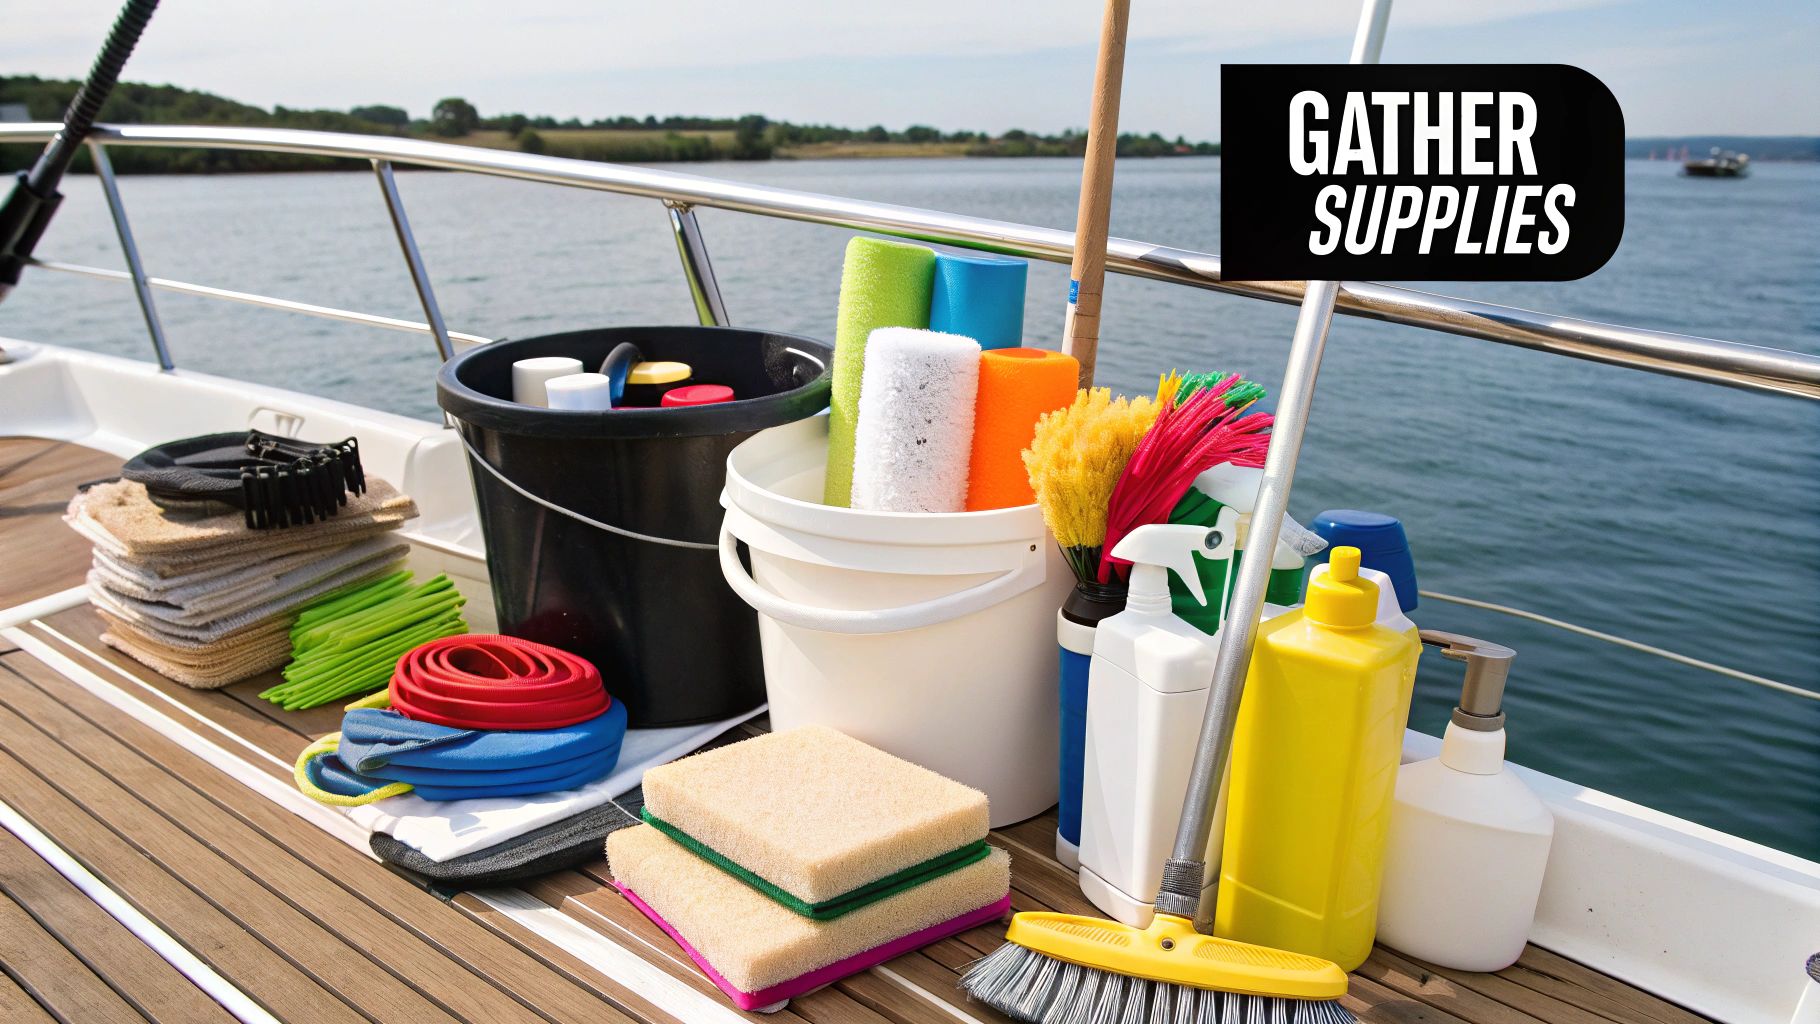
Knowing how to clean vinyl boat seats is one thing, but having the right gear on hand before you start is what really separates a frustrating afternoon from a professional-grade result. I’ve seen it a hundred times: someone tries to improvise with household items and ends up doing more harm than good.
Think of this as setting up your workstation for success. A well-stocked toolkit means every part of the job gets done right, from the initial scrub to that final, protective wipe-down. It keeps you from taking shortcuts, like grabbing a kitchen sponge that’s way too abrasive or a cleaner loaded with harsh chemicals.
Your Essential Cleaning Arsenal
Your vinyl care kit doesn't need to be complicated, but every single item serves a critical purpose. The whole point is to lift dirt, sunscreen, and grime without stripping the vinyl's sensitive top layer. Using the wrong tool can easily introduce tiny scratches that dull the finish and, ironically, trap even more dirt down the line.
Here’s exactly what you need to have ready to go:
- A Marine-Grade Vinyl Cleaner: This is absolutely non-negotiable. A dedicated product like Better Boat's Vinyl Cleaner is pH-balanced to dissolve oils, sunscreen gunk, and salt spray without fading the color or damaging the protective coating.
- Soft-Bristle Brush: The key here is balance. The bristles need to be firm enough to get into the vinyl's grain but soft enough that you're not scratching the surface. A medium-soft brush is pretty much perfect for gently working the cleaner in.
- Microfiber Towels: You’ll want at least three of these. One for working in the cleaner, a second for rinsing with fresh water, and a third, bone-dry one for the final wipe. Microfiber is fantastic because it's super absorbent and won't leave lint all over your clean seats.
Pro Tip: I like to color-code my microfiber towels—say, blue for cleaning, green for rinsing, and white for drying. It’s a simple system that prevents cross-contamination. You definitely don't want to accidentally wipe away fresh cleaner with a towel you just used for rinsing.
Supporting Tools for a Flawless Finish
Once you have the core items, a few extra tools will make the whole process smoother and more effective. These supporting players help you manage your workspace and apply products with a bit more precision, which always leads to a better outcome.
Think about how you'll manage your water and cleaner. A bucket is essential for rinsing your cloths, and a simple spray bottle gives you a much more controlled, even application of your cleaning solution. This helps prevent oversaturating the seams, which can trap moisture inside the cushions—a primary cause of mildew.
By getting everything together first, you create an efficient workflow. It turns a chore into a simple, repeatable maintenance routine, and your seats will definitely thank you for it.

A Practical Cleaning Method for Pristine Seats
Alright, you've got your cleaning arsenal ready to go. Now, let's put it to work. The real secret to getting your vinyl seats looking like they just came from the factory isn't about brute force or harsh chemicals. It's all about technique—a smart, repeatable process that lifts the grime without damaging the vinyl itself.
A common mistake I see boat owners make is dousing their seats with cleaner right off the bat. This is a huge no-no. It can turn loose sand, salt crystals, and other gritty bits into a liquid sandpaper, creating micro-scratches that will dull your vinyl's finish over time.
Instead, you should always start with a dry pre-clean. Grab your soft-bristle brush and a vacuum with a brush attachment. Take a few minutes to gently go over every inch of the seats, paying close attention to the seams and crevices where dirt loves to hide. This simple first step is the key to preventing accidental damage down the line.
Mastering the Cleaning Application
Once you've vacuumed up all the loose debris, it's time to mix your cleaning solution. Getting the cleaner-to-water ratio right is crucial; it ensures the solution is effective without being wasteful or too harsh for the material.
The visual guide below breaks down the simple three-step process for a perfectly balanced mix.

As you can see, it's incredibly straightforward to hit that ideal 1:10 cleaner-to-water ratio. This gives you a solution that's tough on grime but gentle on your vinyl.
With your solution mixed, the trick is to work in small, manageable sections. I find a two-by-two-foot area is about perfect. This keeps the cleaner from drying on the surface before you’ve had a chance to work it in, which can leave a sticky film that just attracts more dirt.
Lightly mist your chosen section. Don't soak it—a fine, even layer is all you need. Then, let it sit for about a minute. This is where the magic happens. That dwell time gives the active ingredients a chance to break down stubborn stuff like sunscreen residue, body oils, and ground-in dirt. For a deeper dive into different methods, our guide on how to clean boat seats has some great additional tips.
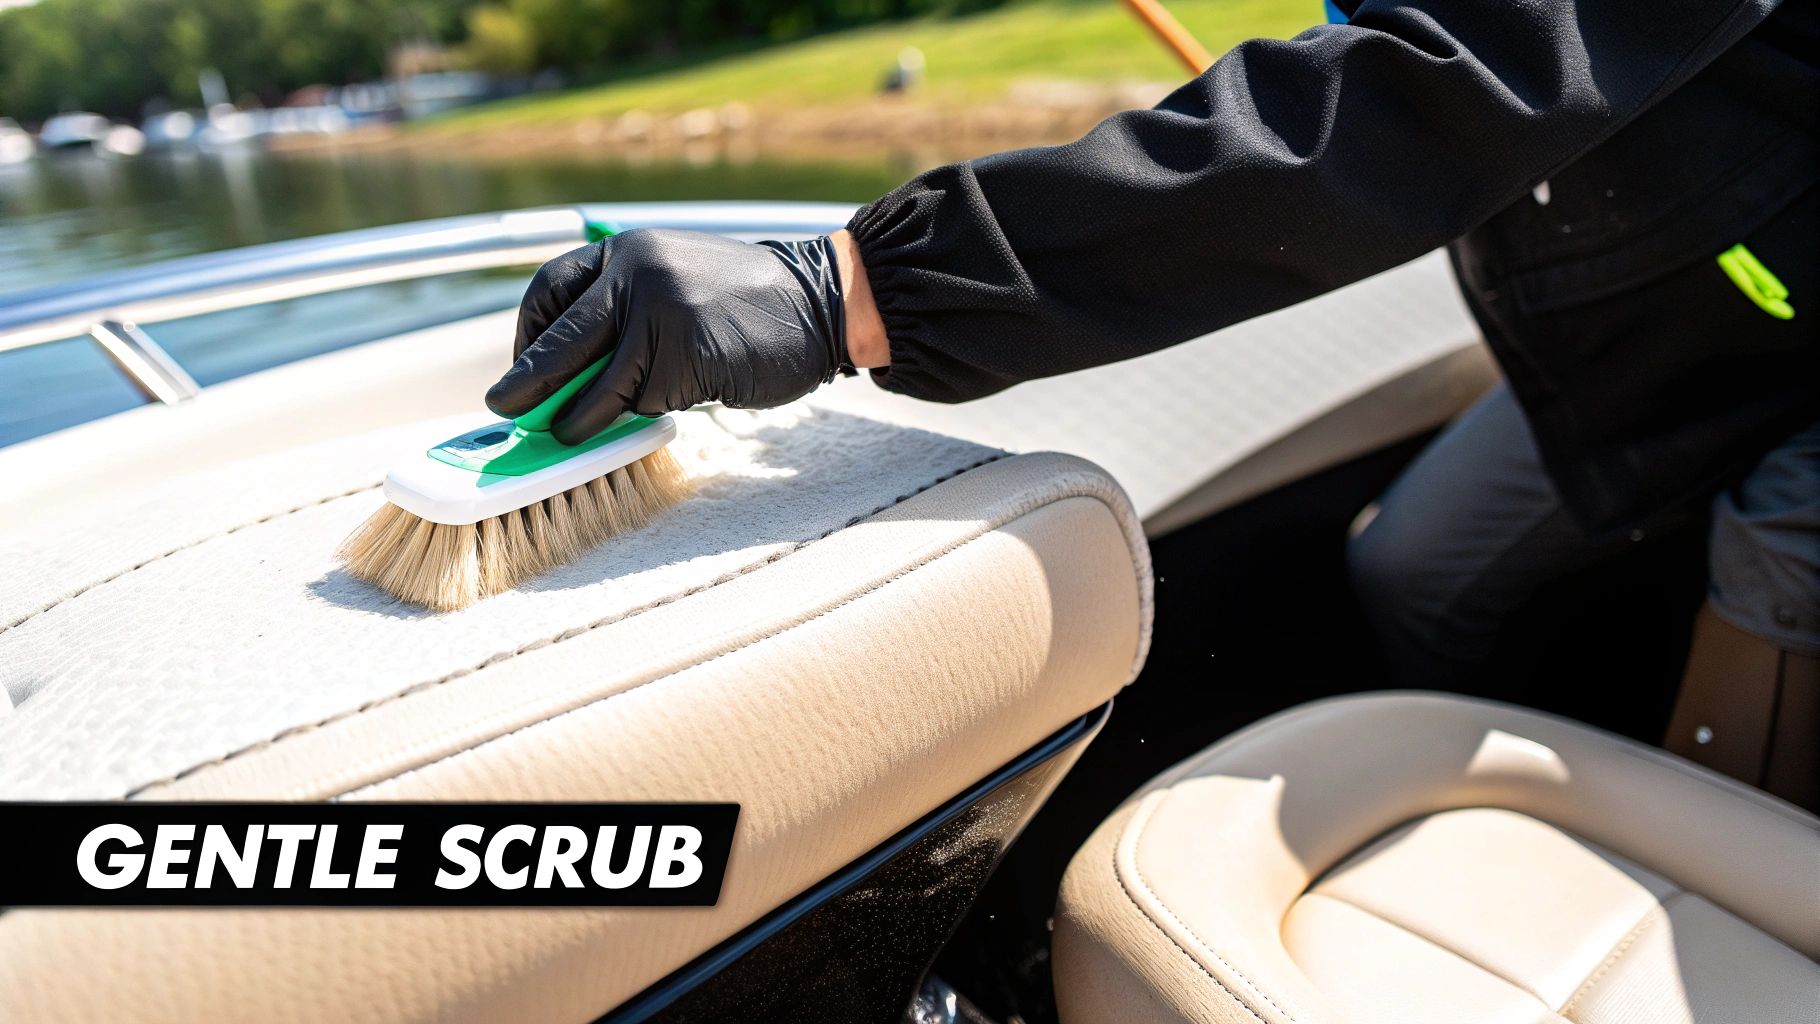
The Agitate, Wipe, and Dry Method
After letting the cleaner dwell, it's time to agitate. Using your soft-bristle brush, work the solution into the vinyl with light, overlapping circular motions. This helps pull the grime out of the material’s grain without being abrasive. You’ll start to see the dirt lifting away almost immediately.
Next, grab a clean, damp microfiber cloth and wipe the area down thoroughly. You're not just wiping off the cleaner here; you're removing all the suspended dirt with it. Make sure you get every last bit of residue.
Leaving even a thin film of cleaner behind can make your seats feel tacky and become a magnet for fresh dirt and dust. A complete, residue-free rinse is the hallmark of a professional-level clean.
Finally, take a third, completely dry microfiber towel and buff the section dry. This last step removes any remaining moisture, which prevents water spots and stops dampness from seeping into the seams—a leading cause of mildew growth.
Once you’ve finished one section, just move on to the next and repeat the process. This methodical approach ensures every inch of your vinyl gets the same treatment, leaving you with a uniform, pristine finish across all your boat's seating.
How to Erase Stubborn Vinyl Stains
Even if you’re meticulous with your weekly wipe-downs, stubborn stains are just part of owning a boat. One minute you’re doing some routine work and a dropped tool leaves a grease smear; the next, a wet beach towel has bled dye all over a pristine white cushion. And of course, there are those infamous black dots of mildew that seem to appear out of nowhere after a humid spell.
When this happens, the first instinct for many is to panic and grab the harshest cleaner under the sink. Don't do it.
The real secret to beating these tough spots is precision. Using the right product for the specific problem saves you from aggressive scrubbing that can wear down the vinyl's protective topcoat, which only leads to bigger headaches later on.
Identifying and Tackling Common Blemishes
Different stains have different chemistries, and knowing what you’re up against is half the battle. For instance, those dreaded pinkish stains that sometimes appear aren't on the surface at all. They're actually caused by a specific bacteria, Streptoverticullium reticulum, which produces a dye from within the vinyl. No amount of surface scrubbing will fix that.
Likewise, the common grey or black spots are mildew colonies that are literally feeding on moisture trapped deep in the vinyl's pores. A generic cleaner just won't cut it for these deep-set issues.
Here’s a quick rundown of how to approach the usual suspects:
- Mildew and Mold Spots: For these dark, speckled stains, you need a dedicated mildew stain remover. Apply it directly to the spots and let it sit for the recommended time—this is key to killing the spores. Then, a gentle agitation with a soft brush before wiping clean should do the trick.
- Sunscreen and Oil Grime: These often show up as a yellowish or grey film that feels slick. A quality vinyl cleaner is usually enough, but you might need to let it soak for a few minutes to really break down those stubborn oils before you start scrubbing.
- Dye Transfer: If a colorful shirt or a cheap pool noodle has left its mark, you need to act fast. Lightly blot the area with a cloth dampened with isopropyl alcohol. But always, always test it on a hidden spot first to make sure it doesn't mess with the vinyl's color.
Remember, the golden rule is to always use the least aggressive method that gets the job done. Start with your go-to vinyl cleaner and only bring out the specialized treatments if the stain puts up a fight. This simple approach will do wonders for preserving the life of your upholstery.
We've put together a quick guide to help you identify and treat the most common stains you'll encounter on your boat seats.
Common Vinyl Stain Troubleshooting Guide
This table is your quick-reference cheat sheet for figuring out what that ugly spot is and how to get rid of it.
| Stain Type | Appearance | Recommended Action |
|---|---|---|
| Mildew | Small, speckled black, gray, or dark green dots | Use a dedicated marine mildew stain remover. Let it dwell to kill spores, then gently scrub. |
| Sunscreen/Lotion | Oily, yellowish, or greasy film | Apply a quality vinyl cleaner. Let it sit for a few minutes to break down oils before wiping. |
| Dye Transfer | Faint coloration from clothing, towels, or gear | Act quickly. Blot with a cloth dampened in isopropyl alcohol (test on a hidden area first). |
| Rust | Orangey-brown stains, often from snaps or hardware | Use a mild acid-based cleaner like lemon juice or white vinegar. Rinse thoroughly. |
| "Pink Stain" | Blotchy pink or reddish discoloration | This is bacterial. Unfortunately, it's often permanent as it's inside the vinyl. Prevention is key. |
| Grease/Oil | Dark, greasy smears from tools or food | A quality marine degreaser is best. Apply, agitate with a detail brush, and wipe clean. |
Keep in mind that with any of these treatments, a thorough rinse with fresh water afterward is non-negotiable to remove any chemical residue.
A Targeted Strategy for Stubborn Marks
When your regular cleaner fails, it’s time to switch from a broad-spectrum approach to a targeted attack. Instead of spraying down the entire cushion, apply a small amount of the right stain remover directly onto the spot itself.
Grab a detail brush or even an old toothbrush and work the product into the stain using small, circular motions. This focuses all the cleaning power right where you need it without over-exposing the surrounding vinyl to harsh chemicals. It's a similar focused approach you'd take for greasy buildup on other parts of your boat, like when cleaning a non-skid boat deck easily.
Once the stain is gone, make sure you rinse the area completely with a clean, damp cloth and then dry it. This last step is crucial—it removes any leftover residue and helps the treated area blend back in, leaving your seat looking uniform and spotless.
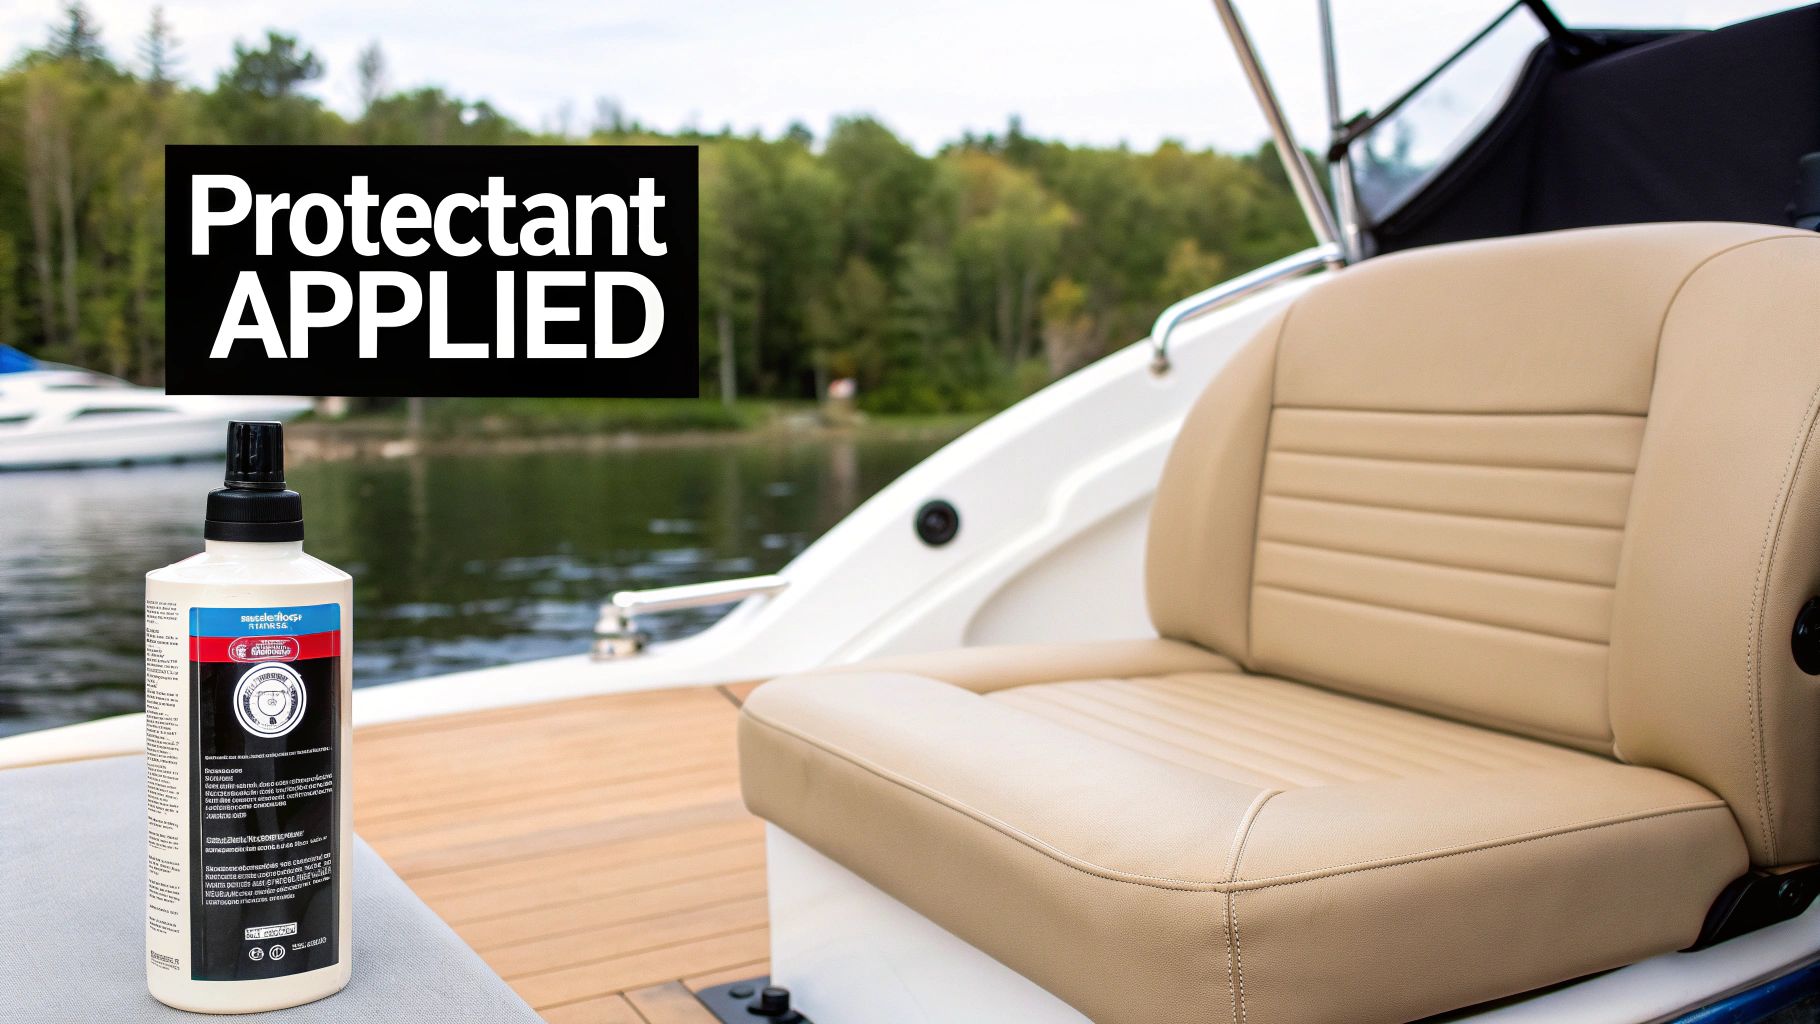
Locking In the Clean with Long-Term Protection
Getting your vinyl boat seats looking brand new is a great feeling, but the job's not quite done. The final—and I’d argue most critical—step is making sure they stay that way. Cleaning gets rid of the gunk that’s there now; protection is what stops it from coming back and prevents the elements from causing permanent damage.
Think of this step like applying sunscreen to your upholstery. A quality marine UV protectant spray acts as a barrier, deflecting the sun's harsh rays that are the number one enemy of vinyl, causing it to fade, get brittle, and eventually crack. This shield doesn't just preserve the color and flexibility, it also makes your next cleanup a whole lot easier.
This is where you switch from just cleaning up messes to proactively preserving your investment, which pays dividends for your boat's long-term value.
Applying Your Vinyl Protectant Shield
Putting on the marine vinyl protectant is simple enough, but you'll want to pay attention to get an even, effective coat. Make sure your seats are completely clean and bone-dry to start. It's also best to work in the shade or on a cooler, overcast day—this keeps the product from evaporating too fast before it can properly bond with the vinyl.
Just like with the cleaner, lightly mist the protectant over a small, manageable section. Grab a clean microfiber applicator pad or towel and gently work the product into the vinyl using overlapping circular motions. You’re aiming for a thin, uniform layer, not a thick, greasy mess.
Let the product sit and soak in for a few minutes. Then, take a second clean, dry microfiber towel and give the surface a light buff. This step is key—it removes any excess product and leaves you with a non-greasy, satin finish that isn't slippery to the touch.
Cultivating Protective Habits
Beyond the bottle, a few simple habits can make a huge difference in how your vinyl holds up. Honestly, preventative care is the easiest thing you can do to extend the life of your seats and cut down on how often you need to do a deep scrub. To put it in perspective, some studies show that constant, unprotected sun exposure can slash a vinyl's life expectancy by as much as 70%. You can get more insights on preventing marine vinyl damage from chicmarine.com.
Try to work these simple routines into your boating life:
- Always Use a Boat Cover: This is non-negotiable. When you’re docked or storing the boat, a good cover is your vinyl’s best friend against sun, rain, bird droppings, and everything else.
- Ensure Seats are Dry: Never, ever cover your boat if the seats are even a little damp. Trapping that moisture is a surefire recipe for stubborn mildew growth.
- Remove Wet Gear Promptly: Don’t just toss wet towels, life vests, or fishing gear on the cushions and forget about them. This traps moisture and can even cause dyes from the fabric to transfer onto your vinyl.
By pairing a quality protectant with some smart habits, you're creating multiple layers of defense. It's a simple system, but it's the one that ensures your vinyl stays soft, vibrant, and resilient, season after season.
Common Questions About Cleaning Vinyl Boat Seats
Even the most seasoned boaters run into questions when it comes to keeping their vinyl seats looking fresh. Having the right answers handy can save you from costly mistakes that can seriously shorten the life of your upholstery.
We've pulled together some of the most common questions boat owners ask us. Getting clear, straightforward advice is the best way to feel confident tackling any cleaning job that comes your way.
Can I Use a Magic Eraser on My Vinyl Boat Seats
This is a big one. It's tempting to grab a magic eraser for a stubborn scuff, but using one on marine vinyl is a risky move. Those erasers are essentially a super-fine sandpaper. They work by being abrasive.
While they might lift the stain, they'll also strip away the vinyl's protective top layer. This leaves the material looking dull and makes it a magnet for future stains and UV damage. If you absolutely have to use one on a tiny spot, be incredibly gentle and follow it up immediately with a quality vinyl protectant. Otherwise, stick with soft-bristle brushes.
How Often Should I Deep Clean and Protect My Seats
How often you need to get down to business really depends on how much you use your boat and where it lives. A quick wipe-down with fresh water after every trip is a fantastic habit to get into. For a more thorough cleaning with a proper marine vinyl cleaner, you should plan on doing it at least once a month during the season.
When it comes to the full deep clean and protectant routine, aim for 2-3 times a season. Do it once when you de-winterize, once around mid-summer, and a final time before you put the boat away for the winter. If your boat bakes in the sun all day, hitting it with a UV protectant every 4-6 weeks is a smart move to keep that vinyl shield strong.
Knowing what not to use is just as important as knowing what to use. The wrong product can cause irreversible damage, leading to cracking, fading, and costly repairs.
What Cleaners Should I Absolutely Avoid on Marine Vinyl
Stay far, far away from anything containing bleach, ammonia, or harsh solvents. These chemicals are the mortal enemy of vinyl. They'll dry it out in a hurry, causing it to become brittle, crack, and fade. They can also eat away at the stitching that holds your beautiful seats together.
On that same note, skip any abrasive powders or scrubbers like stiff-bristled brushes or steel wool. They'll leave permanent scratches on the surface. Always reach for a cleaner that's specifically formulated for marine vinyl—this ensures it's pH-balanced and won't do more harm than good.
My Vinyl Seats Have Small Cracks Can I Still Clean Them
Yes, you can and you definitely should. The main concern with cracked vinyl is letting moisture get down into the foam cushion. Once mold and mildew take hold in there, it's a nightmare to get out.
The key is to work carefully. Instead of spraying cleaner all over the seat, apply it directly to your cloth or soft brush to control the amount of liquid. Be gentle around the cracked areas so you don't make them worse.
After cleaning, the single most important step is getting the seats 100% dry. Use a dry towel to pat them down and then let them air out completely. Once they're totally dry, a good vinyl repair kit can seal up those small cracks and stop them from spreading.
Keep your boat looking its best with our full line of marine-grade cleaning supplies. From our gentle yet effective Vinyl Cleaner to our powerful Mildew Stain Remover, Better Boat has everything you need to protect your investment. Shop our collection and see the difference for yourself at betterboat.com.


