


How to Replace Boat Trailer Bearings
Replacing your boat trailer bearings isn't nearly as intimidating as it sounds. It's a fundamental piece of trailer maintenance that involves jacking up the trailer, pulling the wheel and hub, cleaning everything up, and installing new, properly greased bearings.
Getting this right is the difference between a smooth trip to the ramp and a disastrous, trip-ending breakdown on the side of the road. Once you get the hang of it, you'll be able to tackle this job with confidence, ensuring your wheels spin freely and safely every time you tow.
Why Ignoring Your Trailer Bearings Is a Recipe for Disaster
Picture this: You're finally on the way to the lake for a perfect day on the water, boat hooked up and ready to go. Then, out of nowhere, you're stuck on the shoulder of a busy highway with a wheel that's completely locked up. This isn't just a hassle; it's a dangerous and costly situation that is almost always preventable.
The culprit? Neglected boat trailer bearings. These small, unassuming parts are arguably the single most common failure point on any boat trailer. Ignoring them is a surefire way to ruin a good day.
The number one enemy of your trailer bearings is water. Every single time you launch and retrieve your boat, those hot hubs get plunged into cool water. This temperature difference creates a vacuum effect that actively sucks moisture right past the seals. It's a problem in freshwater, but it's an absolute catastrophe in saltwater, where corrosion takes hold in the blink of an eye.
The Real-World Consequences of Neglect
Once water breaches the grease seal, it immediately contaminates the lubricant, turning that smooth, protective grease into a milky, gritty sludge. This contaminated gunk does more harm than good, failing to protect the metal surfaces.
Rust starts to form on the precision-engineered rollers and races, which ramps up friction and generates a ton of heat. From there, it's a vicious cycle that always ends in total bearing failure. This can show up in a few ugly ways:
- Wheel Seizure: The bearing gets so hot it literally welds itself together, locking the wheel solid.
- Hub Separation: In a true worst-case scenario, the entire wheel and hub assembly can break clean off the axle.
- Axle Damage: A failed bearing can easily gouge and destroy the axle spindle, turning a simple bearing job into a much more expensive axle replacement.
This isn't some rare fluke. Marine mechanics often report that around 30% of boat trailers that come into their shops show signs of damaged or badly worn bearings. It's an incredibly common problem. You can explore more about this common issue on boat trailers and its prevention.
"A well-maintained bearing is silent and cool. A failing bearing screams for help with noise and heat. Learning to listen is the first step in avoiding a roadside disaster."
Spotting Trouble Before It Starts
Luckily, failing bearings almost always give you some warning signs before they completely let go. Knowing what to look for, listen for, and feel for is your absolute best defense.
A quick inspection before you head out can be the difference between a great weekend and a call to a tow truck. Catching a problem in the driveway is infinitely better than discovering it on a busy interstate. Here’s a quick rundown of what to keep an eye out for.
Warning Signs of Failing Boat Trailer Bearings
This table breaks down the key symptoms that your bearings are on their way out. If you notice any of these, it's time to investigate immediately.
| Symptom Type | What to Look For or Listen For | What It Means |
|---|---|---|
| Auditory | A grinding, rumbling, or squealing noise coming from the wheels, especially on turns. | The rollers or races inside the bearing are likely pitted, rusted, or have lost their lubrication. |
| Visual | Grease splattered on the inside of the wheel rim or on the trailer frame. | The rear grease seal has failed, allowing grease to escape and water to potentially enter. |
| Physical | The hub feels excessively hot to the touch after a short drive (warmer than a coffee cup). | This indicates extreme friction inside the bearing, a sign of imminent failure. |
| Physical | The wheel has noticeable side-to-side wobble or "play" when you rock it. | The bearings are worn out and no longer hold the hub tightly on the spindle. |
Paying attention to these simple cues is the core of proactive maintenance. It’s the cheapest insurance policy you can have for your boat trailer.
Assembling Your Toolkit for a Flawless Repair
 Jumping into a boat trailer bearing replacement without the right gear is like trying to navigate without a compass. You might get there eventually, but it’s going to be a frustrating and potentially damaging journey.
Having all your tools and parts laid out ahead of time transforms this job from a roadside nightmare into a straightforward garage project. It’s the difference between a quick, satisfying fix and a trip-canceling delay because you have to run to the auto parts store covered in grease.
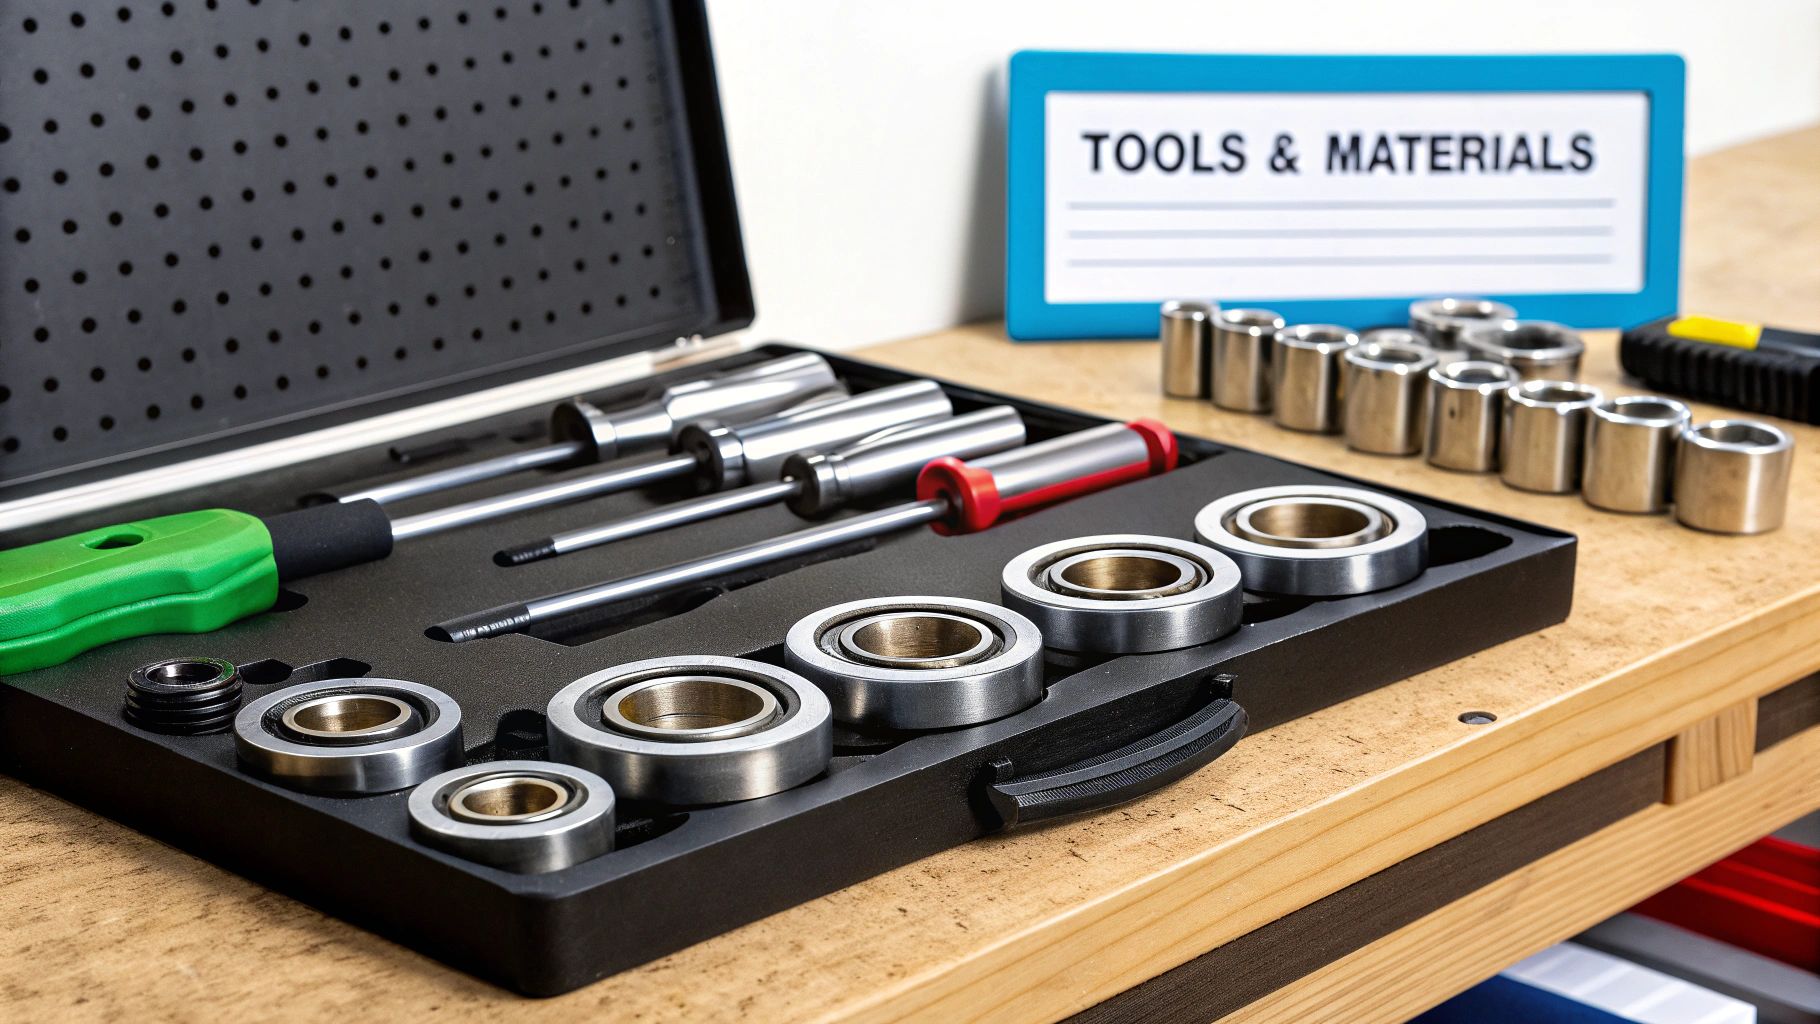
Essential Tools for the Job
This isn't just a generic shopping list. Each one of these tools has a specific purpose that makes the process smoother, safer, and prevents you from wrecking the new parts you're about to install.
- Jack and Jack Stands: This is non-negotiable. Never, ever trust a trailer jack alone to hold the weight of your trailer. Once it's lifted, get those sturdy jack stands underneath the axle for safety.
- Lug Wrench: You’ll need this to get the wheel off, of course.
- Channel Locks or Large Pliers: Perfect for grabbing and twisting off the dust cap and pulling out the old cotter pin.
- Socket Set and Wrench: This is for removing the castle nut that holds the entire hub assembly on the spindle.
- Hammer and Punch (or a sturdy flathead screwdriver): You'll use this to carefully tap out the old bearing races from inside the hub. Go slow and steady here.
- Bearing Race and Seal Driver Kit: This is what the pros use, and for good reason. While you can sometimes get away with using a large socket that matches the race diameter, a dedicated driver kit ensures the race goes in perfectly straight without marring the surface. An angled race is a recipe for premature bearing failure.
Parts and Supplies You Cannot Skip
Having the right parts on hand is just as critical as having the right tools. There's nothing worse than getting the hub completely disassembled only to discover you bought the wrong size bearing kit.
Identifying Your New Bearing Kit The easiest way to get the right parts is to find the number stamped directly onto your old bearings and seal. If they’re too rusted or worn to read, you'll need a digital caliper to measure the inner diameter of the bearings and the outer diameter of the seal. Any auto parts store can match you with the correct kit using those measurements.
Get a complete kit. Your best bet is always a full kit that includes the inner and outer bearings, the inner and outer races, a new grease seal, and a new cotter pin. Whatever you do, never reuse an old cotter pin. They're designed for a single use and can easily snap if you try to re-bend them.
The Right Grease Makes All the Difference For this job, standard automotive grease just won't cut it. You absolutely need a high-quality, marine-grade grease. This stuff is specifically formulated with additives that provide superior water resistance and corrosion protection—critical features when your hubs are constantly getting dunked at the boat ramp.
A reliable marine grease gun is a smart investment, not just for this job but for ongoing maintenance. It lets you apply grease cleanly and effectively, especially if you have bearing protectors.
Finally, make sure you have plenty of shop towels and a can of brake cleaner on hand. Getting the hub and spindle spotlessly clean is essential for a successful installation. You don't want any old grime contaminating your fresh grease and new bearings.
Breaking Down the Hub Assembly
 Alright, with your tools and new parts laid out, it’s time to get your hands dirty. We’re moving from prep work to the real deal: taking apart the hub to get to those old bearings. The trick to keeping this job stress-free is to be safe and methodical.
First, we’ll get the trailer properly secured. Then, we’ll walk through taking the wheel and hub apart, piece by piece. Just follow along, and you'll have the old components out and ready for a good look-over in no time.
Safely Lifting and Securing Your Trailer
Before you even think about touching a lug nut, let’s talk safety. This is non-negotiable. Start by chocking the wheels on the opposite side of the trailer—this is your first line of defense against it rolling away.
Find a solid, level spot for your jack and place it under the trailer's axle. Get it as close to the wheel you're working on as you can without it being in your way.
Once the tire is completely off the ground, immediately slide a jack stand under the axle for support. Gently lower the trailer's weight onto the stand until it’s holding firm. Seriously, never get under a trailer that's only held up by a jack. A jack can fail, and the consequences are severe. If you want a deeper dive into this, you can review our guide on how to install a trailer jack and wheels for more safety pointers.
With the trailer secure on the stand, grab your lug wrench, remove the lug nuts, and pull the whole wheel and tire assembly off. Set it aside so you have a clear shot at the hub.
Popping the Dust Cap
The first thing you’ll see is the dust cap (sometimes called a bearing protector). Its only job is to keep gunk and water away from your outer bearing. They can be wedged in there pretty tight, so a little patience goes a long way.
Take a flathead screwdriver or a small pry bar and find the tiny gap between the cap's lip and the hub. Give the end of the screwdriver a few gentle taps with a hammer. Work your way around the circle, tapping bit by bit. You’re trying to “walk” it out evenly, not pry it off from one spot, which will just bend the cap out of shape.
Removing the Cotter Pin and Castle Nut
Once the cap is off, you’re looking at the end of the axle spindle, a castle nut, and a cotter pin. That cotter pin is a simple but critical part; it snakes through a hole in the spindle and locks into the castle nut's notches, physically stopping the nut from ever backing off.
Pro Tip: Never, ever reuse an old cotter pin. They’re a one-and-done item. Once you bend them, they become brittle and weak. Your new bearing kit comes with a fresh one, so don't be afraid to destroy the old one to get it out.
Use your needle-nose pliers to straighten out the bent legs of the pin. Once it’s mostly straight, you should be able to pull it right out. If it’s a rusty, stubborn mess, just grab some wire cutters, snip the head off, and pull the two halves out separately.
With the pin gone, the castle nut should spin off easily. Behind it, you'll find a thick, notched washer—the spindle washer. Slide that off, too.
Sliding the Hub off the Spindle
This is the satisfying part. Grab the hub assembly with both hands and give it a firm, straight pull toward you. The entire thing should slide right off the axle spindle.
Just be ready: the outer bearing is loose in there and will probably fall out as you pull the hub off. Try to catch it so it doesn't hit the ground.
Set the hub down on your workbench with the backside facing up. You'll see the inner bearing and grease seal are still pressed into the back of the hub—we'll get those out next. For now, take a minute and lay out all the parts you just removed on a clean rag in the exact order you took them off:
- Dust Cap
- Cotter Pin
- Castle Nut
- Spindle Washer
- Outer Bearing
This little organizational trick is a game-changer. It gives you a visual checklist for reassembly, making it almost impossible to forget a part or put things back in the wrong order.
Cleaning and Prepping the Hub for New Bearings
Once you have the old hub assembly off the spindle, you’re going to be looking at a greasy, grimy mess. This next part—the deep cleaning and preparation—is arguably the most critical step in the whole process. If you rush this or cut corners, you’re just guaranteeing your brand-new bearings will fail prematurely.
It’s just like painting a house; you wouldn’t just slap a fresh coat over dirty, peeling paint and expect it to stick. You need a surgically clean surface for the new components to seat properly and do their job. We're aiming for spotless, both inside the hub and on the axle spindle.
This visual guide shows the fundamental disassembly steps that come right before the deep cleaning we’re about to dive into.
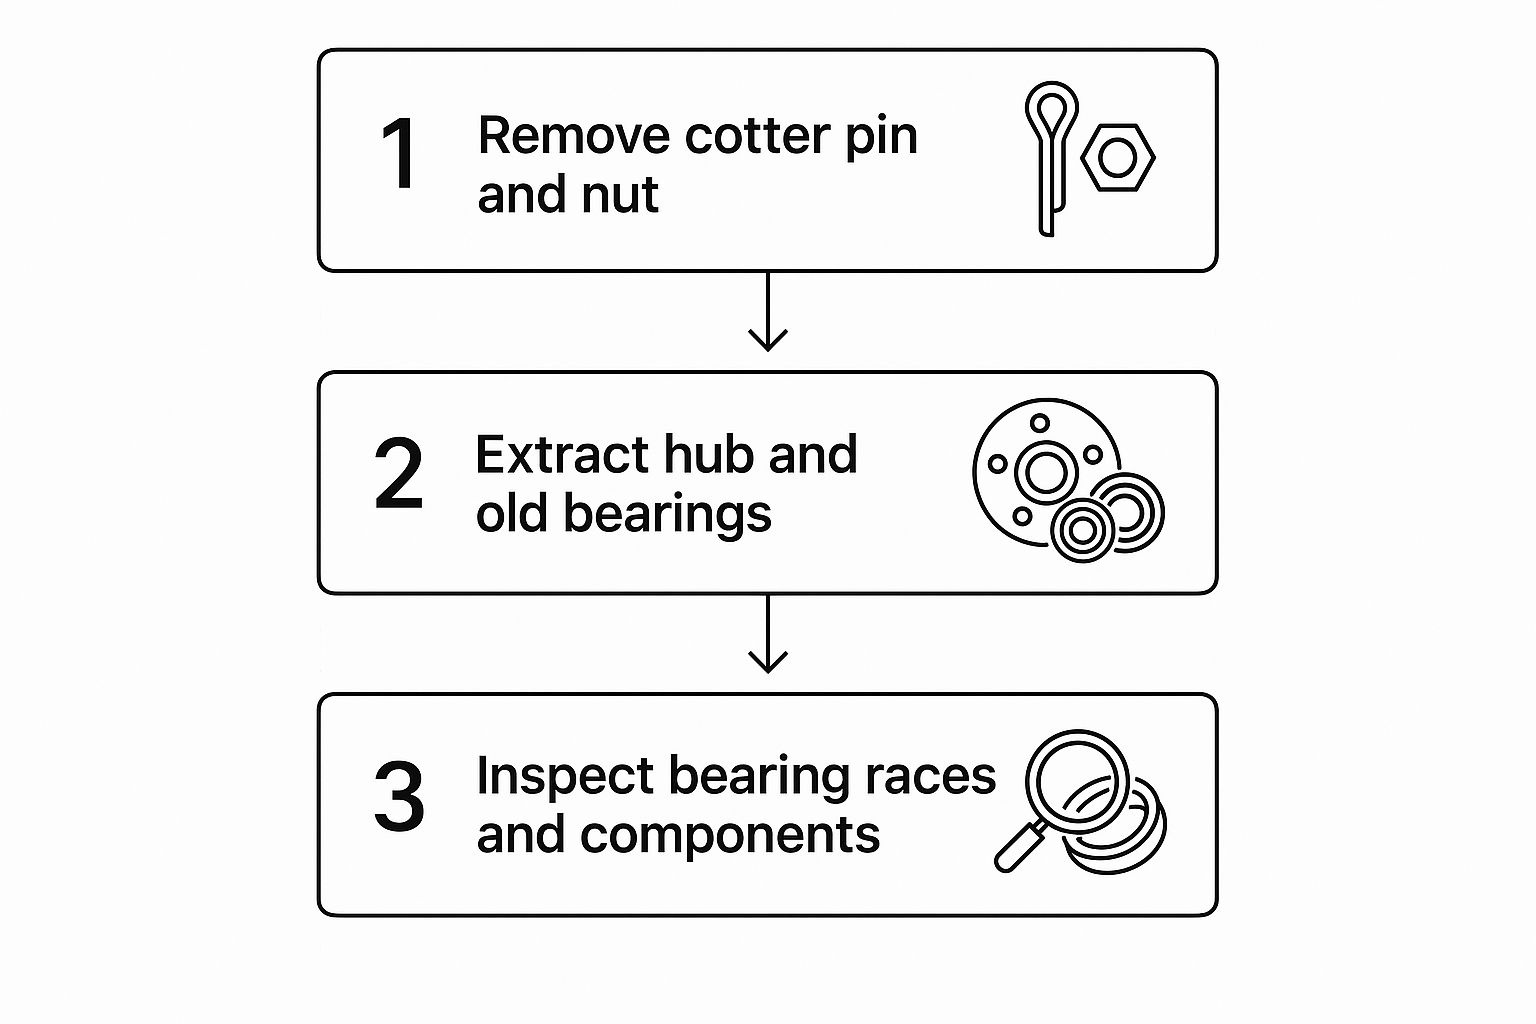
This workflow really drives home the importance of a methodical approach, which sets you up for a successful inspection and cleaning of every single part.
Removing the Inner Seal and Bearing
First things first, let's get that old inner grease seal and inner bearing out of the back of the hub. They're pressed in, so they won't just fall out on their own.
- Lay the hub face down on a solid workbench. You want to be looking at the back, where the grease seal is located.
- Stick a block of wood under the hub. This gives you a stable base and protects the lug studs from getting damaged while you work.
- Now, grab a long punch or a heavy-duty, flathead screwdriver. You'll need to go in through the front of the hub to get to the back of the inner bearing.
- Place the tip of your punch on the inner lip of the old bearing and give it a few solid taps with a hammer. Then, move the punch to the exact opposite side of the bearing and do it again.
The idea is to "walk" the bearing and seal out together by alternating your taps from side to side. It usually only takes a few good whacks to pop them both out. Don't even think about reusing the old seal—it’s a one-and-done part and must always be replaced.
Knocking Out the Old Bearing Races
With the hub empty, look inside and you’ll see two smooth metal rings pressed into the casting. These are the bearing races, and they’re the surfaces your new bearings will roll against. This is non-negotiable: Always replace the races when you replace the bearings. They wear down together as a matched set.
Just like with the seal, your punch and hammer are the tools for the job.
- Peer inside the hub and look for the small notches located behind each race. These are there specifically to give your punch a solid edge to bite into.
- Start with the inner (larger) race. Seat your punch in one of the notches and give it a firm strike with the hammer.
- Move around the race, tapping from alternating sides to drive it out evenly. This prevents it from getting cocked sideways and stuck.
- Once the inner race is out, just flip the hub over and repeat the exact same process for the outer (smaller) race.
Patience is your friend here. If you get aggressive and rush, you can easily gouge the inside of the hub, which could cause the new race to sit crooked.
Sometimes things don't go as smoothly as planned. Getting old, rusted, or stubborn parts out can be a real headache. Here’s a quick troubleshooting guide for the common snags you might hit during disassembly.
Common Disassembly Challenges and Solutions
| Challenge | Common Cause | Recommended Solution |
|---|---|---|
| Seal or Bearing is Seized | Heavy rust or corrosion has fused the parts to the hub. | Apply a quality penetrating oil (like PB B'laster or Kroil) around the edges. Let it sit for 15-20 minutes, then try tapping it out again. Gentle heat from a propane torch on the hub around the race can also help expand the metal, but use caution. |
| Punch Keeps Slipping | The notches behind the race are worn down or filled with grime. | Use a wire brush to clean out the notches for a better purchase point. A brass punch is softer than the steel hub and is less likely to slip or cause damage. |
| Race is Coming Out Unevenly | Tapping too hard on one side without alternating. | Stop hammering. Use a block of wood to gently tap the high side back down until the race is level again, then resume with lighter, alternating taps. |
Getting these old parts out is often the toughest part of the job. Once they're clear, you're on the home stretch of the prep phase.
Achieving a Spotlessly Clean Hub
Now for the really satisfying part: the deep clean. Grab a can of brake cleaner and a good supply of shop rags. Liberally spray the inside of the hub cavity to dissolve all that old, gritty grease.
Use the rags to wipe out every last speck of sludge and metal shavings. Keep spraying and wiping until a fresh, clean rag comes out with absolutely no residue. Give extra attention to the machined surfaces where the new races will be seated. Any leftover debris will cause a misalignment.
Taking the time to get the hub interior perfectly clean isn't just for looks. It's the only way to ensure the new races seat perfectly flush and true, which is absolutely essential for the long life and smooth performance of your new bearings.
Prepping the Axle Spindle
With the hub clean and drying, turn your attention to the axle spindle. It’s probably caked in a nasty layer of old grease and road grime.
Spray your brake cleaner onto a rag—not directly onto the spindle—and wipe it down meticulously. You want every trace of the old lubricant gone. Once it’s clean, it’s time for a close inspection.
Run your finger over the smooth, machined surfaces where the inner and outer bearings actually ride. You’re feeling for any pitting, deep grooves, or any blueish discoloration, which is a tell-tale sign of overheating. Often, symptoms like uneven tire wear or a wobbly wheel can be traced back to a damaged spindle. If you find any significant damage, the spindle itself might need professional repair or even replacement. Many boaters share their experiences with these issues online, which can be a great resource. You can discover more insights about trailer bearing failure signs on sailzing.com.
Assuming the spindle is in good shape, your cleaning and prep work is officially done. You now have the perfect foundation ready for your new parts.
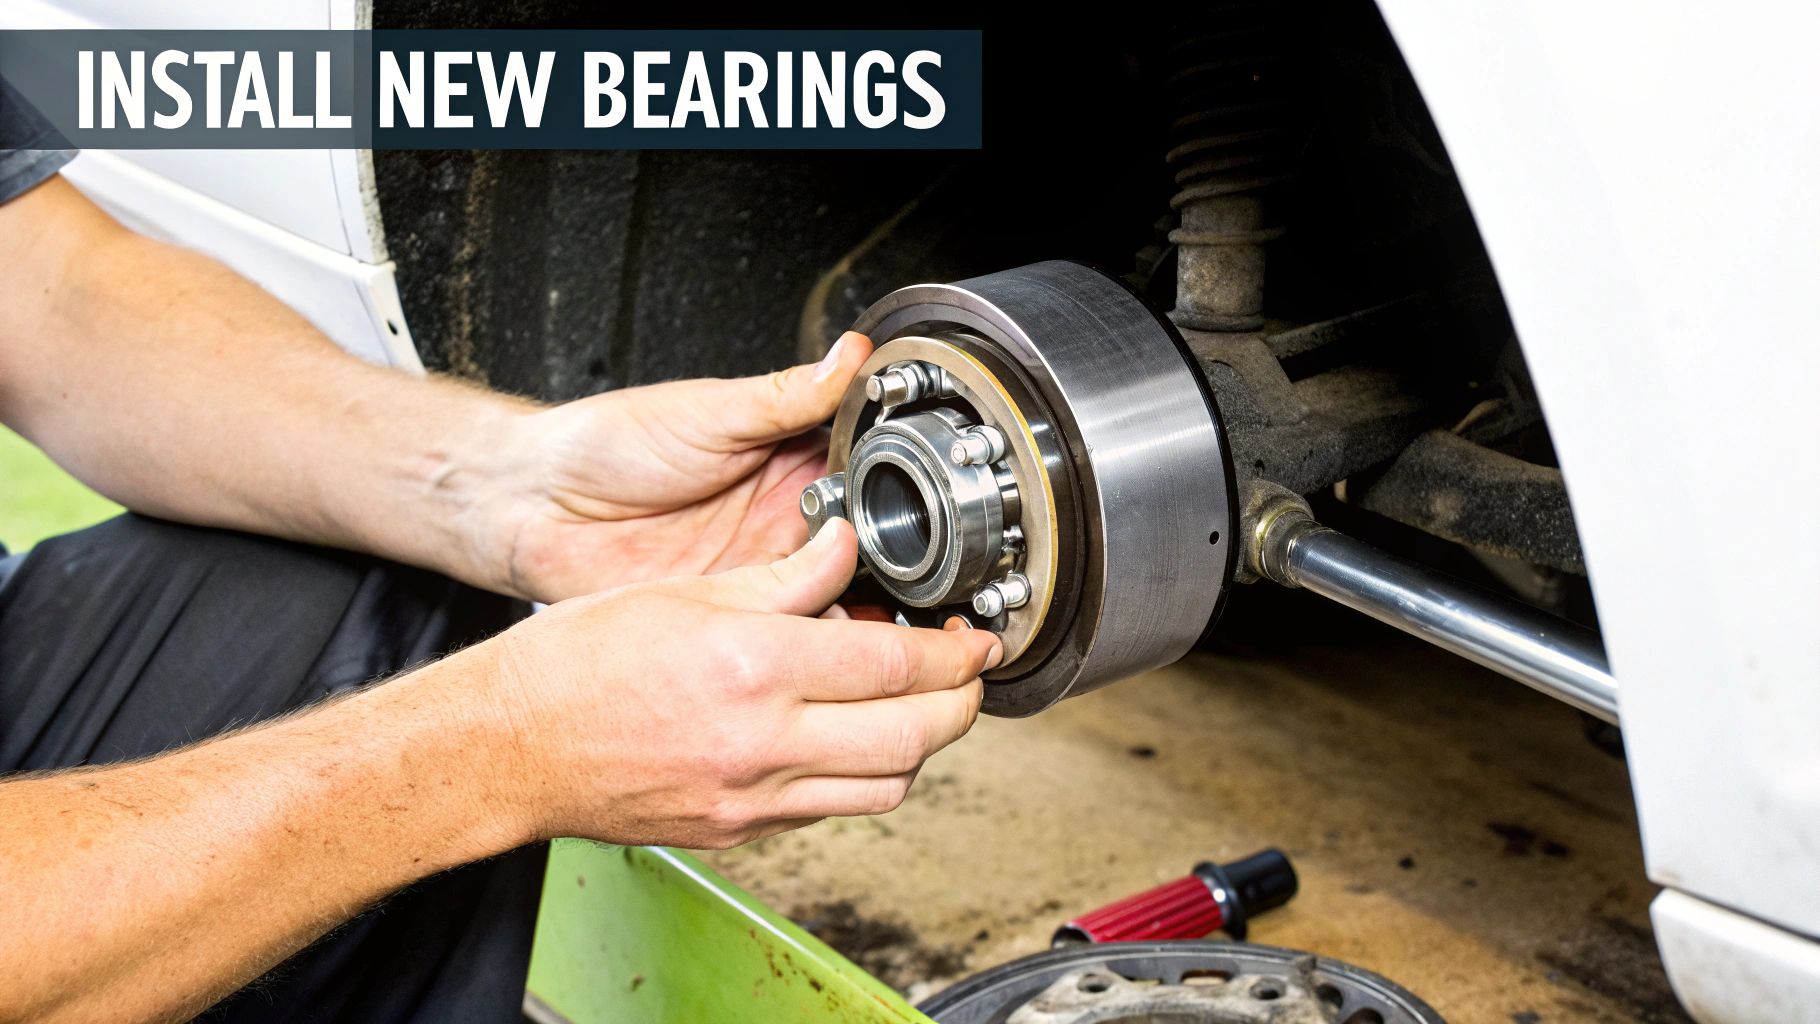
Installing New Bearings Like a Pro
Now that you've got your hub and spindle surfaces looking factory-new, it's time to put it all back together. This is where a little bit of patience and precision really pays off, ensuring your new boat trailer bearings will spin true for thousands of miles. We're not just throwing parts back in; we're seating each component correctly to guarantee everything is safe and built to last.
First, we'll get the new bearing races installed so they sit perfectly flush. Then, we’ll tackle what is arguably the most important—and most botched—part of the job: packing the new bearings with fresh, marine-grade grease. Nail this part, and you're well on your way to a professional-level install.
Seating the New Bearing Races
Getting the new races in requires a steady, even hand. A race that goes in crooked is a recipe for instant bearing failure, so this is no time to rush. You're aiming for the new race to sit perfectly square and flush against the shoulder deep inside the hub.
By far the best tool for this is a bearing race and seal driver kit. These kits have different-sized aluminum discs that match the race's diameter perfectly, letting you apply even pressure all around as you tap it in.
Don't have a dedicated driver set? No problem. The old race can become your tool. Just flip the old race upside down and set it on top of the new one. This gives you a safe surface to tap with your hammer without ever directly hitting and damaging the new race.
- Start with the inner (larger) race first. Get it started by hand in its seat inside the hub.
- Pick the right driver disc from your kit, or use the old race trick, and start tapping it in with a hammer.
- Don't just wail on one spot. Work your way around in a star pattern, using firm but controlled taps.
You'll need to use your ears here. At first, the taps will sound like a dull thud. As the race gets closer to being fully seated, that sound will change to a much sharper, solid "ring." That high-pitched ring is your cue to stop.
A fully seated race means zero gaps between its back edge and the hub shoulder. Run a pick or your finger around the inside to feel for it. Any gap at all, no matter how small, means it isn't seated all the way.
Once the inner race is home, just flip the hub over and do the exact same thing for the smaller, outer race.
The Art of Packing Bearings with Grease
This is it—the single most critical step for making your new bearings last. Just smearing some grease on the outside of the bearing does absolutely nothing for you. The real goal is to force grease deep into the roller cage until it pushes all the way through and oozes out the other side.
The old-school, hand-packing method is still the best way to do it without special tools. It’s messy, for sure, but it’s the only way to be 100% certain the job is done right.
- Scoop a big, golf-ball-sized glob of fresh marine-grade grease into the palm of your non-dominant hand.
- Take the new bearing (start with the bigger, inner one) and hold it in your other hand with the wide end facing your palm.
- Now, press the wide end of the bearing into the edge of your grease pile, using a firm, scooping motion.
- You're trying to force that grease up and into the gaps between the individual rollers.
- Rotate the bearing a little and do it again. Keep working your way all the way around the bearing.
How do you know when you're done? You'll see fresh grease start to "purge," or squeeze out, from the top (the narrower side) of the bearing cage. That's your visual proof that the bearing is completely packed. Once you see that, smear a light coat of grease over the outside of the rollers and set it down on a clean paper towel. Repeat the whole messy process for the smaller, outer bearing.
Final Hub Assembly and Installation
With your bearings packed and ready, you're on the home stretch.
First, wipe a thin layer of grease on the newly installed inner race inside the hub for some initial lubrication. Now, carefully place your fully packed inner bearing into that race.
Next up is the new grease seal. This little part is your main line of defense against water intrusion. Place the seal, metal side facing up (out), into the back of the hub. Use your seal driver kit or a flat block of wood to gently tap it into place until its outer edge is flush with the back of the hub. Go slow and be careful not to dent the seal's metal casing.
With the inner bearing and seal in, you can now carefully slide the entire hub assembly back onto the clean axle spindle. Push it all the way on until it bottoms out.
Now, take your freshly packed outer bearing and slide it over the spindle and into its race. Follow that with the spindle washer and then thread on the castle nut.
Setting the Perfect Bearing Tension
This final step is all about feel. You're setting the correct tension, or "preload," on the bearings, and it's a delicate balance. Too tight, and the bearings will overheat and fail in a hurry. Too loose, and the wheel will wobble, which also leads to premature wear and failure.
Here’s the tried-and-true method for getting it just right:
- Grab a wrench and tighten the castle nut while you spin the hub by hand. Keep tightening until you feel a bit of drag and the hub gets a little harder to turn. This step ensures the bearings are fully seated in their new races.
- Now, back the nut off about a quarter of a turn until it's loose again.
- Finally, retighten the nut using only your fingers. Snug it up until it stops. You shouldn't be able to tighten it any more with just hand pressure.
The hub should now spin freely with almost no resistance, but—and this is key—there should be zero side-to-side wobble or play. Give the hub a good wiggle to check. If it feels solid, line up the notches in the castle nut with the hole in the spindle and slide in a brand-new cotter pin. Bend the legs of the pin to lock it, tap your dust cap back on, and you're done.
Extending Bearing Life with Smart Maintenance
With your new bearings in, the hard part is officially over. Nicely done. Now, the goal is to shift from a one-time repair job to a simple, ongoing maintenance routine that keeps you from ever having to do this on the side of the road.
Turning this job into a regular habit is what separates a seasoned boat owner from a frustrated one. A few minutes of prevention are always better than hours of cure.
Get Proactive with Bearing Protectors
One of the smartest upgrades you can make for your trailer's hubs is a set of bearing protectors, which most people just call by the popular brand name, Bearing Buddy. These clever devices replace your standard dust cap with a spring-loaded housing you fill with grease.
That internal spring maintains constant, positive pressure inside the hub. This is huge. Not only does it keep the bearings swimming in fresh grease, but it also physically prevents water from getting sucked in when your hot hubs hit the cool water at the boat ramp.
There's a right way and a wrong way to fill them, though. Get this wrong, and you'll create a new problem.
Crucial Tip: When topping off a bearing protector, use a hand-pump grease gun. Add grease slowly until you see the inner piston just start to rock or move outward. If you pump too fast or add too much, you can build up enough pressure to blow out the rear grease seal—and that's a major failure waiting to happen.
A Smart Maintenance Schedule That Works
How often you need to check your bearings really comes down to where you boat. Saltwater is a whole different beast than freshwater and demands a lot more attention.
Here’s a simple schedule to keep you on track:
- Freshwater Boaters: Give your bearings a thorough inspection and re-greasing at least once per year. The easiest way to remember is to just make it part of your spring prep or winterization checklist.
- Saltwater Boaters: The salt is just brutal. You really need to be checking and re-greasing your hubs far more often. Plan on doing it every six months or after about 20-25 dunks in the salt, whichever comes first.
Sticking to a schedule like this is the core of good trailer maintenance. For a complete rundown of everything you should eyeball before hitting the road, our comprehensive trailer maintenance checklist will make sure nothing gets missed.
The Great Annual Repack Debate
You'll hear all sorts of opinions on how often you really need to do a full repack or replacement. Some folks will tell you they go years without touching them. And while that might work for some, the consensus from mechanics and marine pros leans toward a more cautious approach.
Boat trailers just don't see the kind of mileage a car does, so using miles as your guide is pretty much useless. Water intrusion is the real enemy here.
A yearly repack is the safest bet to catch any moisture or early signs of wear before they turn into a catastrophic failure on the highway.
Ultimately, nothing beats a quick, hands-on check. Before every single trip, make it a habit to put a hand on each hub to feel for excessive heat. Give the top of the tire a good shake to check for any wobble or play. These five-second checks are your best early warning system for a problem that could leave you stranded.


