


How to Wax a Boat: Tips for a Professional Shine
Let's get one thing straight: waxing your boat is so much more than a cosmetic touch-up. I've seen enough boats come and go to know it's one of the most critical investments you can make in your vessel's long-term health and performance.
Think of a high-quality marine wax as a protective shield, standing between your boat and the harsh marine environment, ultimately preserving its value and saving you from costly repairs down the road.
Why Waxing Your Boat Is a Non-Negotiable
Ever thought about skipping a wax job to save a bit of time? That's a classic mistake that can cost you dearly. Your boat’s gelcoat—that tough, outer resin layer giving it that beautiful glossy finish—is strong, but it's not invincible. Day in and day out, it's under constant assault from the elements.
The most relentless enemy? The sun. An unprotected gelcoat is a sitting duck for UV radiation, which triggers oxidation. That’s the chalky, faded look you see on neglected boats, and once it starts, it's a pain to reverse. A good marine wax is like applying high-SPF sunscreen; it deflects those harmful rays and keeps the finish looking vibrant and strong.
More Than Just a Shine
Beyond just blocking UV rays, a regular wax creates a slick, non-porous barrier that repels pretty much everything else the water can throw at you. I'm talking about corrosive saltwater, bird droppings, grime, and those stubborn water stains. A properly waxed hull is dramatically easier to clean—dirt and salt just rinse right off instead of bonding to the surface.
This protective layer really pays off in several key ways:
- Prevents Oxidation: It’s your front line of defense against the sun turning your vibrant gelcoat into a dull, chalky mess.
- Guards Against Corrosion: It creates a barrier that keeps destructive saltwater from eating away at your finish.
- Simplifies Cleaning: Grime and salt wash off with ease, which means less scrubbing and more time enjoying the water.
- Preserves Resale Value: A glossy, well-maintained hull is a huge selling point and tells any potential buyer that you took care of your vessel.
It's no secret that experienced boaters understand this. The global boat wax market was recently valued at an estimated $1.2 billion and is projected to climb to $1.8 billion by 2033. This growth is fueled by owners who get it: regular maintenance is fundamental to protecting their investment.
Ultimately, knowing how to wax a boat isn't just about achieving that mirror-like shine; it's just plain smart boat ownership. It’s a proactive step that genuinely extends your boat's life. Beyond just personal pride, you can see the benefits of a well-maintained vessel for marine experiences, where appearance and reliability are everything.
Ready to get started? We've put together a full guide on the entire process of waxing a boat that walks you through every step.
Assembling Your Boat Waxing Toolkit
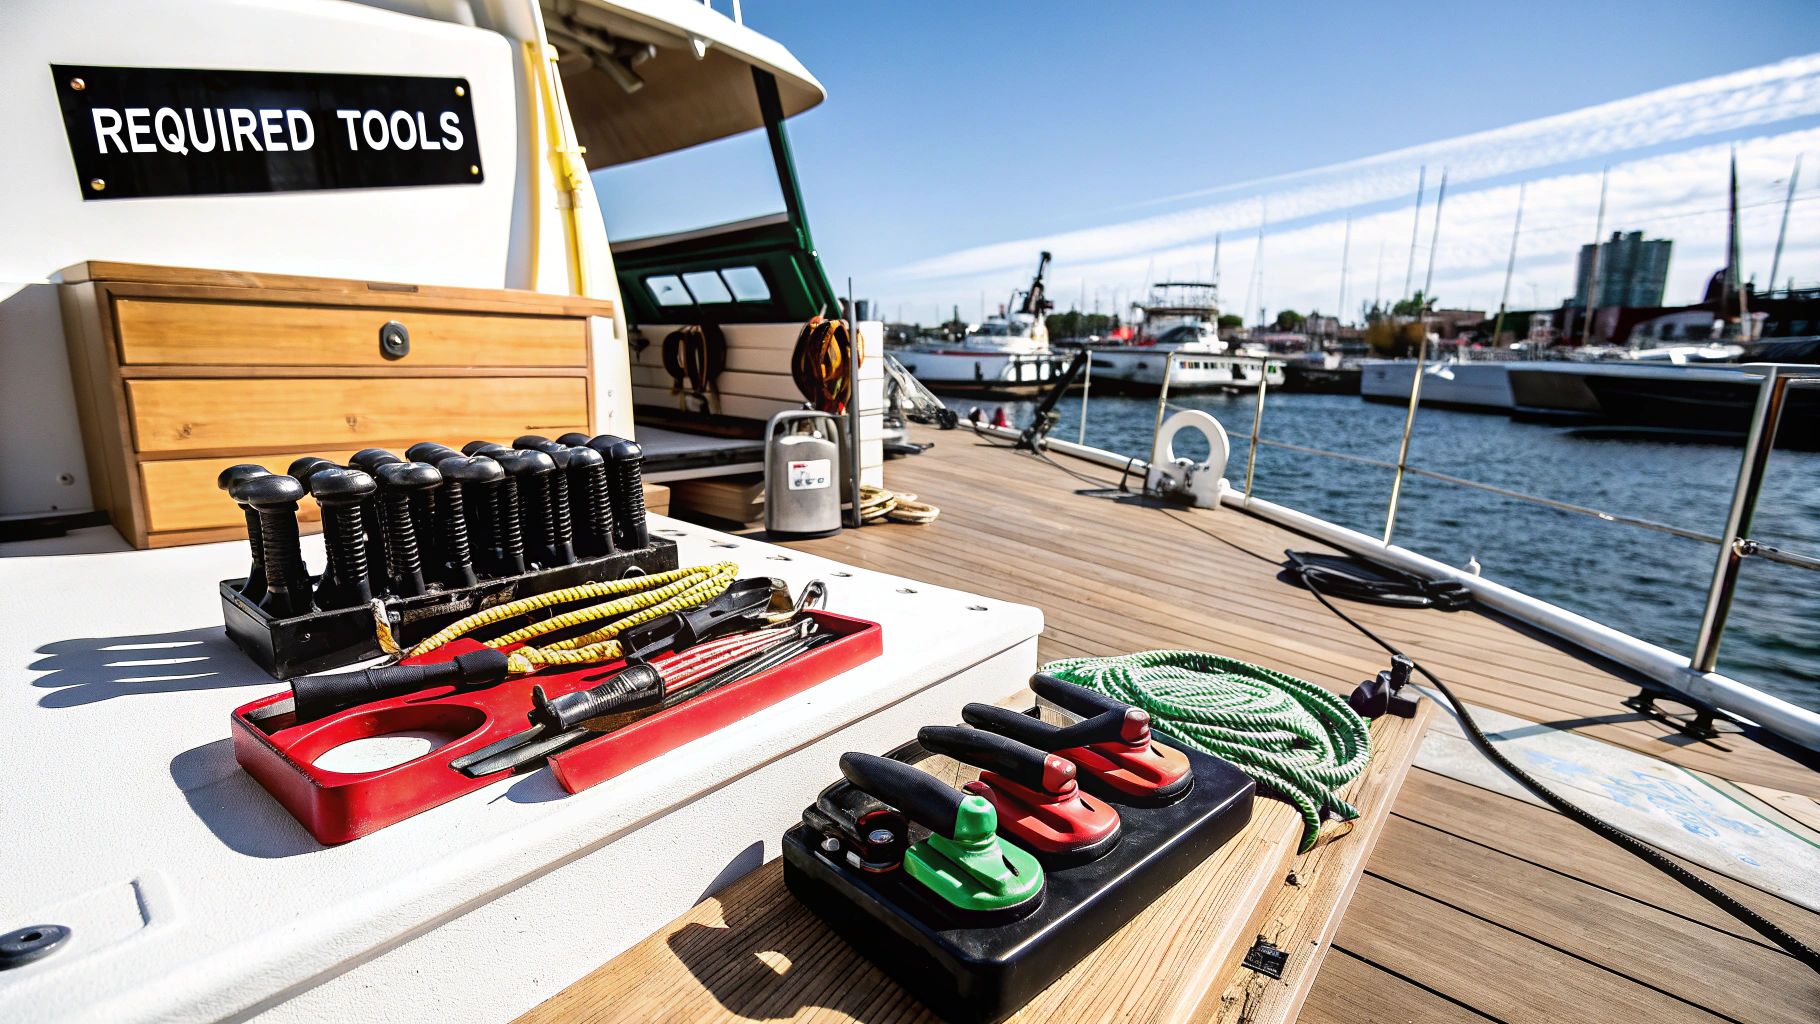 There's nothing worse than getting halfway through a job only to realize you're missing a crucial piece of gear. When it comes to waxing your boat, walking in unprepared is a surefire recipe for a long, frustrating day and a finish that’s anything but professional.
Getting your toolkit in order first is the secret. It transforms what feels like a massive chore into a series of manageable, satisfying steps. It's not just about having the tools; it’s about knowing what each one does and why it’s essential for getting that deep, "like-new" gloss on your hull.
Getting Down to Basics: Cleaning Supplies
Before a single drop of wax touches your hull, you need to start with a perfectly clean slate. And no, that doesn't mean grabbing the dish soap from the galley. That’s a classic rookie mistake. While it’s great for greasy pans, dish soap is way too harsh for your boat and will strip off any old wax, leaving the gelcoat naked and unprotected.
Instead, you need a few specific items designed for marine life:
- A Real Boat Soap: You'll want a pH-neutral formula, like Better Boat’s Boat Soap, which is tough on salt and grime but won’t damage your gelcoat or existing wax.
- A Soft Touch: A chenille microfiber wash mitt or cloth is your best bet for gently lifting away dirt without scratching the finish. For bigger jobs or stubborn scum lines, a long-handled, soft-bristle brush will be your back-saver.
- The Two-Bucket Method: This is a pro-level trick for a reason. One bucket is for your soapy water, the other for clean rinse water. Dipping your mitt in the rinse bucket before reloading with soap prevents you from rubbing old dirt right back onto the hull.

The Right Tools for Waxing and Polishing
Once the boat is sparkling clean and dry, it’s time to get down to the main event. Your approach here—by hand or by machine—will determine the tools you need.
Applying wax by hand gives you fantastic control, especially around tricky spots like decals and tight corners. For this, you’ll want a few high-quality foam applicator pads. They help you apply a thin, even coat without wasting product.
If you’re tackling a larger surface and want to save some elbow grease, an orbital buffer is a game-changer. It’s far more forgiving than a high-speed rotary buffer, which can easily burn right through your gelcoat in the wrong hands. Pair it with the right pad: a foam pad for applying wax or a wool pad if you need to cut through some heavy oxidation with a compound first.
My Two Cents: The biggest mistake I see people make is slathering on wax like they're frosting a cake. A thick coat doesn't add more protection—it just makes it a nightmare to buff off and wastes good wax. Thin and even is the only way to go.
Finally, stock up on microfiber towels. You can never have too many. Use different towels for different jobs: one set for drying the boat after the wash, another for wiping off compound or polish, and a final, pristine set just for buffing the wax to that perfect shine.
Getting your tools ready isn't just a preliminary step—it's half the battle. Here's a quick checklist to make sure you have everything you need before you start.
Essential Boat Waxing Toolkit
| Item | Purpose | Pro Tip |
|---|---|---|
| Boat Soap | Safely cleans gelcoat and fiberglass without stripping wax. | Choose a pH-neutral formula to protect your finish. |
| Two Buckets | Separates soapy water from rinse water to avoid reapplying dirt. | Label them "Soap" and "Rinse" to avoid mix-ups. |
| Wash Mitt & Brush | Gently lifts dirt from the surface. | Use the mitt for general washing and the soft brush for non-skid areas. |
| Orbital Buffer | Applies wax and polish evenly and efficiently. | A dual-action (DA) orbital is much safer for beginners than a rotary buffer. |
| Applicator Pads | For applying wax by hand or machine. | Have separate foam pads for compound, polish, and wax. |
| Boat Wax | Protects the gelcoat from UV rays, salt, and oxidation. | Carnauba offers a deep shine; synthetic sealants provide longer-lasting protection. |
| Microfiber Towels | For drying, removing residue, and buffing to a shine. | Don't cheap out! High-quality towels prevent scratches and buff more effectively. |
With these tools laid out and ready to go, you're set up for a smooth, efficient process that will leave your boat looking its absolute best.
The Critical Hull Preparation Process
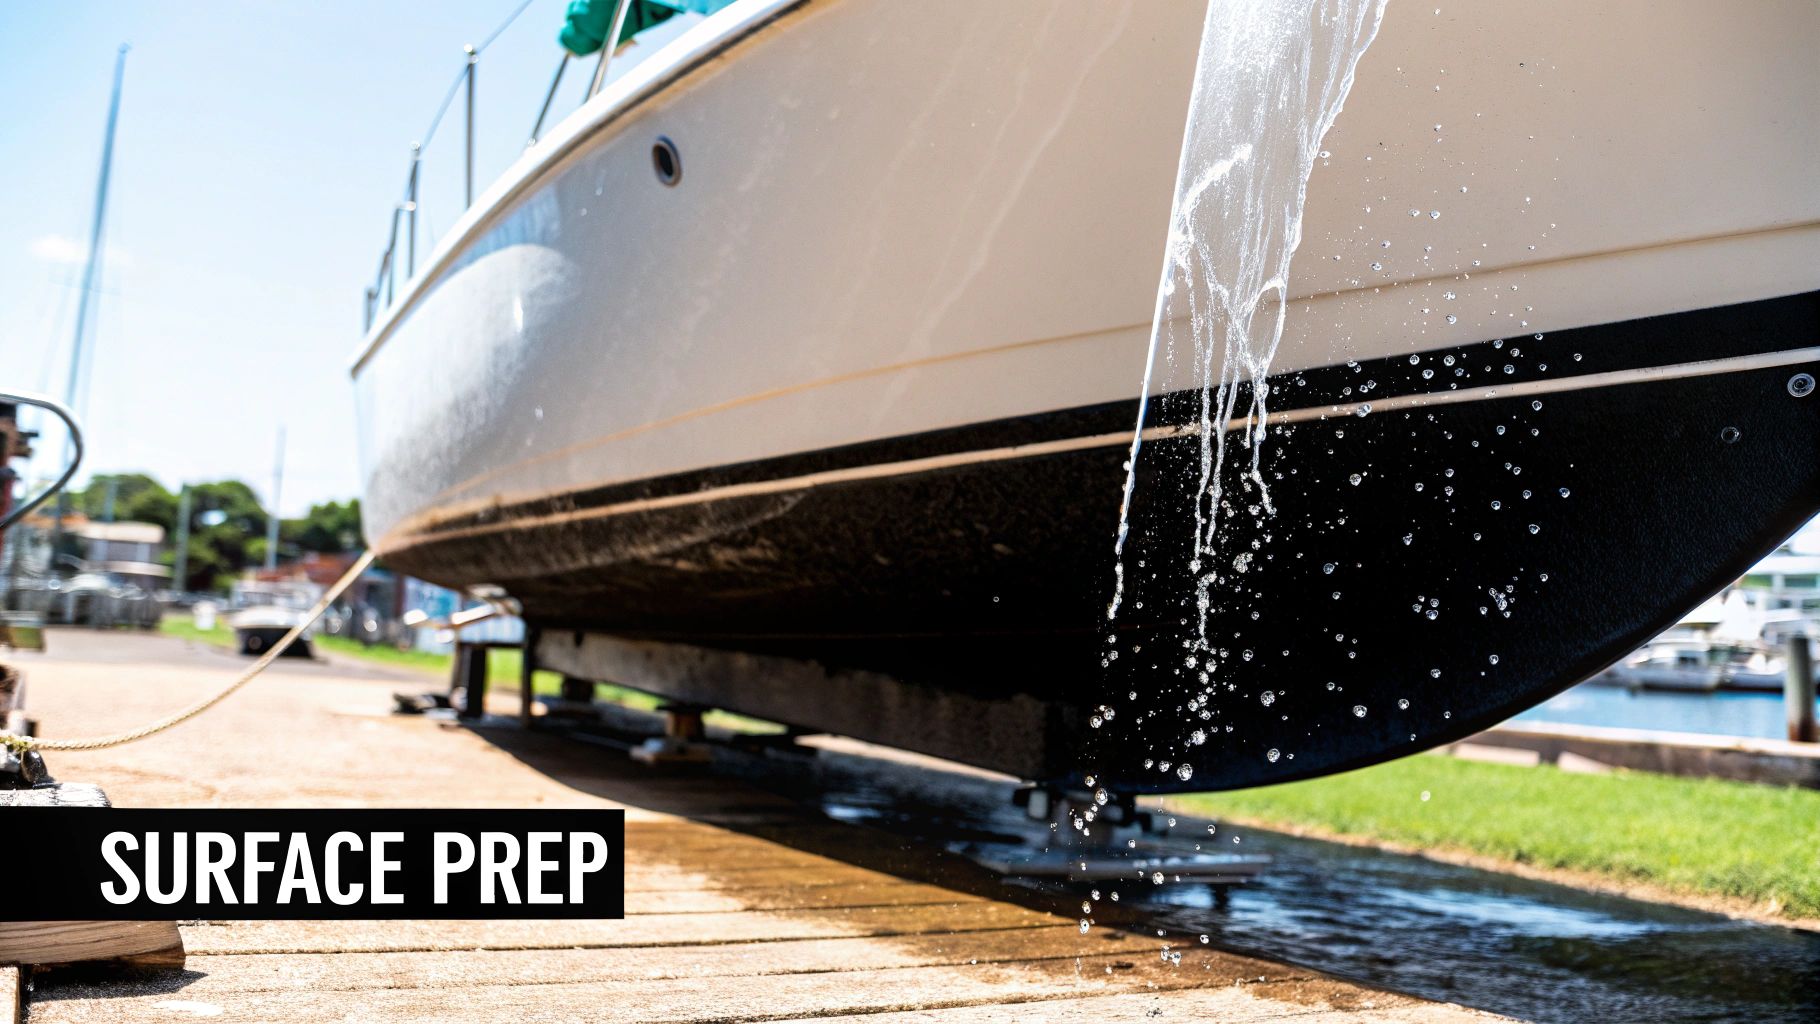
Let's be honest. Trying to get a mirror shine on a dirty hull is just a waste of a good afternoon. The hard truth is, that final showroom gloss you’re dreaming of is a direct reflection of the prep work you put in beforehand. This stage is non-negotiable—it really makes or breaks your entire waxing job.
Your first move is always a thorough wash. Your boat's hull is constantly battling salt spray, bird droppings, dirt, and all sorts of environmental grime. You simply can't wax over that stuff and expect good results. Grab a dedicated boat soap, not dish soap from the kitchen, to cut through that film without stripping away any existing wax.
Give the entire boat a top-to-bottom scrub. Pay special attention to the waterline, where scum and algae love to hang out. This initial wash clears away all the loose, surface-level gunk and gives you an honest look at what you're really working with.
Inspecting for Oxidation and Imperfections
With the hull clean, it's time for a close-up inspection of your gelcoat. Get right up on it and look carefully. Do you see a consistent, deep shine, or are there dull, chalky-looking patches? That chalkiness is oxidation, a common headache caused by UV rays breaking down the gelcoat's outer layer.
A quick way to check is to just run your hand over the surface. If you pull back a dusty, chalky residue on your fingers, you've got oxidation that needs to be handled. Applying a finishing wax directly over this will only seal in the dullness, giving you a disappointing finish that won't last. The goal is to protect a pristine surface, not trap a flawed one.
The single biggest mistake I see boat owners make is slapping a finishing wax directly onto an oxidized hull. It's like painting over rust—it might look okay for a week, but you haven't fixed the underlying problem. The oxidation will just keep eating away at the gelcoat underneath your brand-new wax.
Learning how to properly wax a boat means first learning how to prep it. This involves removing any oxidation with a polish or a cleaner wax before you even think about reaching for your final protective coat.
Tackling Oxidation and Surface Flaws
If your inspection turned up anything from moderate to heavy oxidation, you'll need to break out a polish or a rubbing compound. These products contain fine abrasives designed to gently buff away that dead, oxidized top layer of the gelcoat, revealing the fresh, glossy surface hiding underneath.
More and more boat owners are realizing this prep step is absolutely essential. The global boat cleaner market, which covers everything from soaps to waxes, was valued at around $3.16 billion in 2023. This number shows a growing understanding that proper maintenance is the key to protecting a vessel from UV rays and saltwater damage.
As you get ready to polish, keep a few pro tips in mind:
- Work in the Shade: Always try to clean and polish out of direct sunlight. The heat from the sun can make your products dry way too fast, leaving ugly streaks and making them a real pain to work with.
- Make Sure It's Bone-Dry: After washing, ensure the hull is completely dry before you start polishing or waxing. Any trapped moisture can prevent the product from bonding correctly to the gelcoat.
- Use the Right Tool for the Job: For very light oxidation, a good cleaner wax might be all you need. For more serious chalkiness, you’ll have to step it up to a dedicated polish or compound.
Once the oxidation is gone and the surface is smooth and shiny again, you’ve created the perfect canvas for your protective wax. For a more detailed walkthrough on this part of the job, be sure to check out our complete guide on how to clean a fiberglass boat.
Applying Wax by Hand Versus Machine
Alright, with your boat prepped and gleaming, we've made it to the best part of the job—laying down that protective, glassy coat of wax. This is where all that cleaning and polishing really pays off in a big way. How you get it on there, whether by hand or with a machine, really boils down to your personal preference, the size of your boat, and just how much elbow grease you're feeling up to.
Plenty of old-school boaters, myself included sometimes, still swear by the classic hand application. There’s a certain control and feel you get with it that a machine just can't replicate, especially when you're navigating around tricky spots like decals, hardware, and tight corners. It's a more personal process, a great way to get to know every inch of your hull's finish.
Mastering the Hand Application Technique
Applying wax by hand isn't rocket science, but a good technique is what separates a decent job from a truly stunning one. The real trick is to work systematically in small, manageable sections. I've always found a two-by-two-foot area is just about perfect. This keeps the wax from drying out too fast before you have a chance to buff it off.
Grab a clean foam applicator pad and dab a small amount of your wax—something like Better Boat's Marine Wax—right onto the pad. Now, work it onto the hull using small, overlapping circular motions. Think of it like you're coloring in a picture; you don't want to miss any spots.
The single most common mistake I see is people slathering on way too much wax. A thick coat doesn't give you more protection. It just wastes product and turns the buffing stage into a sweaty, frustrating nightmare. You're aiming for a thin, even layer that’s barely there. Trust me on this: less is more.
Once you finish a section, you just move on to the next one, making sure to slightly overlap the last one. This methodical approach is the secret to getting that seamless, consistent shine across the entire boat.
This visual guide breaks down the simple flow from application to buffing. Getting this right is the key to knowing how to wax a boat like a pro.
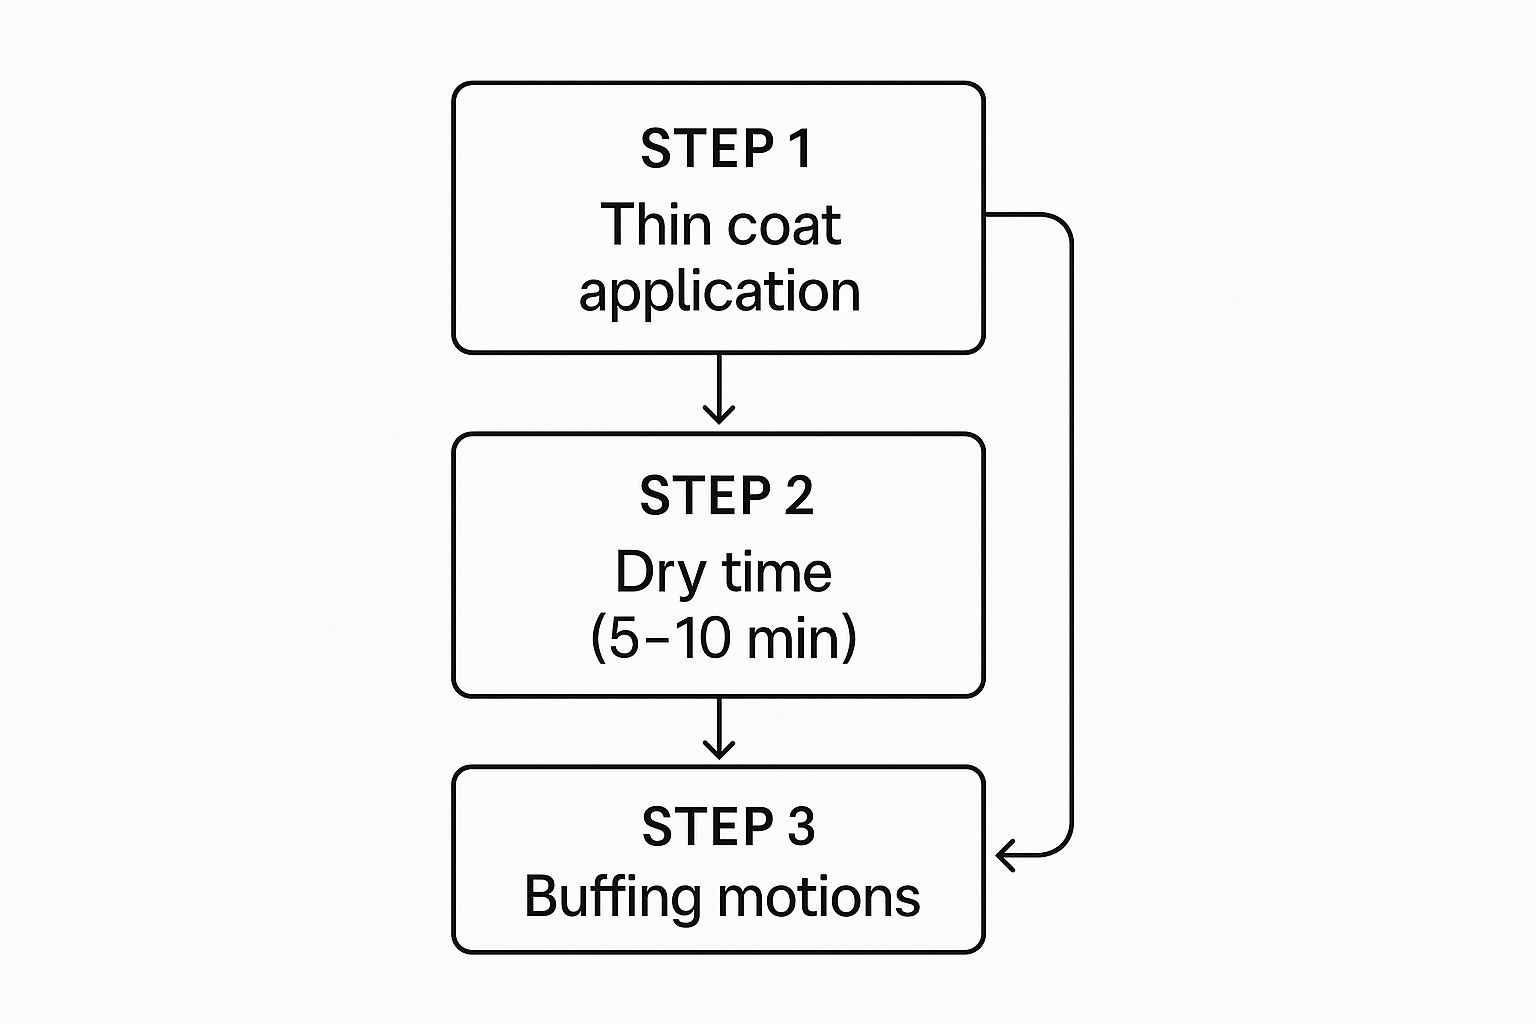
As the graphic shows, it’s a pretty straightforward process: apply a thin coat, let it dry to a haze, and then buff it off to bring out that incredible shine.
Using an Orbital Buffer for Efficiency
Now, if you're looking at a 30-foot hull, the thought of doing it all by hand can be daunting. This is where an orbital buffer becomes your absolute best friend. It slashes your application time and physical effort while delivering a professional, swirl-free finish that's hard to beat.
It's really important to use a dual-action (DA) orbital polisher. They're much more forgiving for us DIY folks than the high-speed rotary buffers the pros use, which can burn right through your gelcoat if you're not careful.
When you're applying wax, you'll want to pair the buffer with a soft foam finishing pad.
- Squeeze a few small, pea-sized dots of wax directly onto the pad.
- Crank your buffer down to its lowest speed setting.
- Gently press the pad against the hull before you switch the machine on. This little trick stops you from slinging wax all over the place.
- Work in those same two-by-two-foot sections, guiding the buffer in slow, overlapping passes—first side to side, then up and down.
That cross-hatch pattern is your guarantee for complete and even coverage. Just let the machine do the heavy lifting; there's no need to lean on it with a lot of pressure.
The All-Important Haze Test
So, how do you know when the wax is actually ready to be buffed off? This is where the simple but absolutely critical "haze test" comes into play. After you've applied the wax, just let it sit and dry for about 5-10 minutes, though this can change with the temperature and humidity. You'll see the surface go from wet and smeary to a dry, hazy film.
To see if it's go-time, gently swipe a small spot with your fingertip. If it smudges, it's still wet and needs a few more minutes. If it wipes away clean, revealing a glossy surface underneath, the wax has cured. It's ready for buffing. This is the moment you've been working toward!
The kind of wax you pick also makes a huge difference in how it performs and how long it lasts. The global wax market, which was valued at a whopping $10.456 billion in 2023, is seeing a massive boom in advanced synthetic waxes and polymer sealants, especially for marine use. These newer formulas offer way better durability and UV protection than some traditional carnauba waxes, meaning you can go longer between applications. You can dig into how wax technology is evolving if you're curious about the market trends shaping what we use on our boats.
Buffing and Maintaining Your New Shine
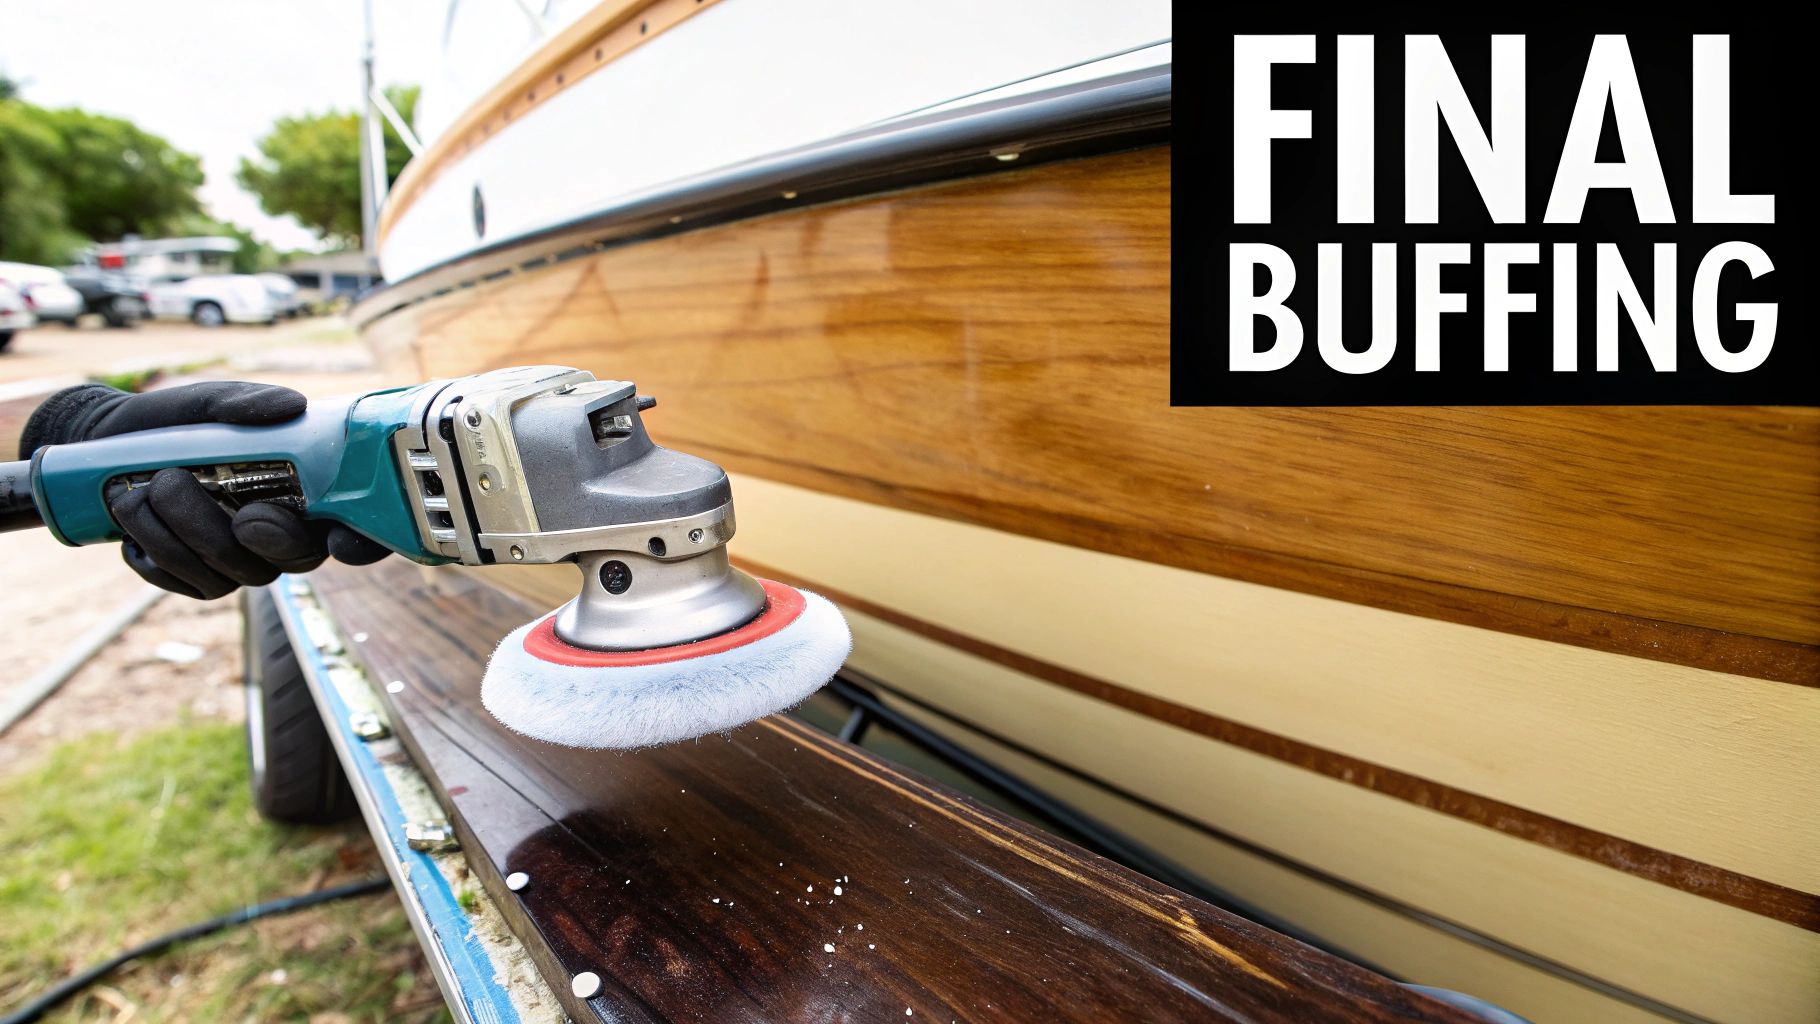
Alright, you've put in the hard work prepping and applying the wax. This is the moment of truth. The final buff is what takes that hazy, chalky layer of wax and turns it into a deep, liquid-like gloss.
This one step is often what separates a decent wax job from a truly spectacular one. And the secret isn't about elbow grease—it's all in the technique.
The goal here is to gently lift away the dried wax residue, not to grind it into your gelcoat. Grab a fresh stack of clean, dry, high-quality microfiber towels. Seriously, don't use old shop rags for this. Start buffing the very first section you waxed, using light, sweeping motions. You want to let the towel do the work.
The Art of the Flip
As you start buffing, you’ll notice the towel loading up with white wax dust pretty quickly. This is where a lot of people go wrong. If you keep using that same loaded-up towel, you're just rubbing abrasive dried wax right back onto your finish. That’s how you get those frustrating micro-scratches and swirl marks.
Here’s a pro tip that makes a huge difference: Fold your towel into quarters. Doing this gives you eight clean surfaces to work with on a single towel. Buff a small area, then just flip the towel over to a fresh, clean side.
Once all eight sides are caked with residue, it's time to grab a new towel. It’s a simple habit, but it’s the key to getting a flawless shine.
Your buffing motion should be light and deliberate. You're not scrubbing a pot; you are revealing a shine that's already there. The purpose is simply to remove the excess wax haze.
Sure, you’ll go through a few more towels this way, but the result is a professional-grade finish that genuinely protects your boat.
Keeping Your Shine for the Long Haul
Congratulations, your boat is probably looking incredible right now! But the job isn't quite done. A little bit of smart maintenance will dramatically extend the life of your hard work, keeping that shine looking great for months, not just weeks. Think of your new wax coat as a sacrificial layer—how you treat it determines how long it lasts.
A consistent care routine is the absolute best way to protect your new wax job.
- Freshwater Rinses: After every single trip, especially in saltwater, give your boat a thorough rinse with fresh water. This gets rid of corrosive salt crystals before they have a chance to eat away at your wax.
- Use the Right Soap: When it’s time for a proper wash, make sure you stick with a pH-neutral boat soap. Harsh detergents or, even worse, dish soap will strip that wax right off in a single wash, undoing all your hard work.
- Address Spills Quickly: Things like fuel, oil, or bird droppings can damage the wax and the gelcoat underneath. Wipe them up as soon as you spot them using a gentle cleaner.
These simple steps don’t take much time, but they are fundamental to preserving that protective barrier. For some more in-depth strategies, our guide on boat maintenance tips every owner should know is a fantastic resource.
Common Questions About Waxing a Boat
Even with the best game plan, questions always seem to pop up right when you're in the middle of a project. Getting the hang of waxing a boat is a hands-on process, and I've seen a few common uncertainties trip people up over the years.
Let's walk through some of the most frequent questions we get. This should clear up any confusion and get you back to work with confidence.
One of the first things people ask is about frequency: "How often do I really need to wax my boat?" There’s no single magic number, since it really depends on where your boat lives and how much you use it.
- For boats kept in the water in sunny, saltwater spots: You’re looking at 2-3 times per year. The tag team of intense UV rays and corrosive salt is incredibly tough on your gelcoat.
- For boats in freshwater or stored under a cover: You can usually get away with one solid wax job a year. Most people just roll it into their spring commissioning routine.
Honestly, the best way to know is to just watch your boat. When water stops beading up and starts to "sheet" off the hull instead, your wax barrier is wearing thin. That's your signal.
What If I Don't Have a Buffer?
This is another big one. While an orbital buffer definitely speeds things up, you can absolutely get a fantastic, professional-looking finish by hand. The real keys here are patience and elbow grease.
The trick is to work in small, manageable sections. This keeps you from getting tired and sloppy. Using a quality foam applicator pad is a must—it helps you lay down a thin, even coat without wasting product or creating thick spots that are a nightmare to buff off. It’s more about a consistent, steady technique than brute force.
The most important thing to remember is that a thin, even coat is always the goal. Slathering on a thick layer of wax doesn't add more protection—it just makes the buffing process about ten times harder and wastes good wax.
Can I Wax a Boat While It's in the Water?
Technically, you can wax the topsides and anything above the waterline, but I wouldn't recommend it. For the wax to bond properly and give you lasting protection, you need a completely clean and dry surface. That's almost impossible to guarantee when you're working from a wobbly dinghy or a dock.
A stray splash can re-wet the area you just dried, and it's much harder to apply consistent pressure. For the best, longest-lasting results, waxing your boat properly means doing it on the hard, where you can control the conditions and work safely and methodically.
Ready to give your boat the protection and head-turning shine it deserves? At Better Boat, we have everything you need, from our premium marine wax to professional-grade buffers and applicators, all designed to make your maintenance routine a whole lot easier. Explore our full range of boat care products.


