


Painting Boat Trailer: DIY Guide for a Perfect Finish
That peeling paint on your boat trailer is more than just an eyesore. It’s a bright red flag telling you that bigger problems are just around the corner. Giving your trailer a fresh paint job is one of the best things you can do for it—not just for looks, but as a critical investment in its safety and lifespan.
I'll walk you through the whole process, from grinding away the nasty rust to laying down that final, protective topcoat.
Why Bother Repainting Your Trailer? It's More Than a Pretty Finish
Think of your trailer's paint job as its armor. Every time you head out, it's getting blasted with road grime, saltwater, and harsh UV rays. Without that protective layer, the metal is exposed, and rust is inevitable. Before you know it, that small spot of corrosion can weaken the trailer's frame, turning a simple maintenance task into a major safety hazard on the highway.
It's a common problem. The North American market, led by the U.S., makes up a huge chunk of the global boat trailer industry—an estimated 42.5%. With so many of us relying on these trailers, staying on top of preventative maintenance like painting is just plain smart.
The Real Payoff of a New Paint Job
A fresh coat of paint does a lot more than just make your trailer look sharp again. A proper paint job is a functional upgrade.
- Stops Corrosion in Its Tracks: It creates a tough barrier that seals the metal off from moisture and salt.
- Boosts Resale Value: Let's be honest, a clean, rust-free trailer is way more attractive to a potential buyer.
- Improves Safety: You're protecting the most important parts—the frame, axle, and suspension—from failing due to rust damage.
- Makes Cleanup a Breeze: A smooth, sealed surface is so much easier to hose down after a long day on the water.
Expert Tip: Stop thinking of a repaint as an optional cosmetic fix. Treat it as a core part of your maintenance schedule. Doing so is the single best way to extend the life of your trailer and protect your investment.
Taking the DIY Route
Tackling this project yourself is incredibly rewarding. Not only do you save a good chunk of money, but you also get a hands-on understanding of your trailer's condition and what it needs. You’ll know every inch of it.
Painting your trailer is a completely manageable weekend project. And if you want to get a better handle on all your upkeep duties, our complete boat trailer maintenance checklist is a great resource. For those who just enjoy getting their hands dirty, you might find some inspiration from these various DIY project ideas for other projects, too.
Gathering the Right Gear for Your Trailer Paint Job
Before you even think about laying down that first coat of paint, you need to get your toolkit in order. Trust me, there's nothing worse than getting halfway through a project only to realize you're missing a critical piece of gear. A well-prepped workspace with everything on hand is the secret to a smooth, professional-looking finish.
Think of this part of the process as assembling your ingredients before you start cooking. We’re not just talking about paint and brushes; we’re talking about everything from safety gear to heavy-duty rust removal tools. Let’s break down what you’ll need to grab.
To make things easier, I've put together a comprehensive checklist. Take this with you to the hardware store to make sure you get everything in one trip.
Essential Supplies for Painting a Boat Trailer
| Category | Item | Pro Tip |
|---|---|---|
| Safety Gear | Respirator Mask | A must-have for paint fumes and metal dust. Don't skimp here. |
| Safety Gear | Safety Glasses/Goggles | Crucial for protecting your eyes from flying debris and paint spray. |
| Safety Gear | Heavy-Duty & Chemical-Resistant Gloves | Use heavy-duty for grinding and chemical-resistant for painting/cleaning. |
| Safety Gear | Coveralls or Old Clothes | Protects your skin and clothes from paint, dust, and chemicals. |
| Prep Tools | Angle Grinder with Wire Wheels & Flap Discs | The workhorse for stripping heavy rust and old paint. A game-changer. |
| Prep Tools | Drill with Wire Brush Attachments | Perfect for getting into tight corners and smaller areas the grinder can't reach. |
| Prep Tools | Sandpaper (Various Grits: 80, 120, 220) | For smoothing out grinder marks and feathering paint edges. |
| Prep Tools | Scrapers and Putty Knives | Handy for chipping off loose paint and scale. |
| Cleaning | Degreaser or Solvent Cleaner | Essential for removing all grease and contaminants before priming. |
| Cleaning | Clean Rags and Tack Cloths | You'll need more rags than you think. Tack cloths are for the final dust wipe-down. |
| Painting | Marine-Grade Epoxy Primer | This is the foundation. It provides adhesion and corrosion resistance. |
| Painting | High-Quality Marine Topcoat Paint | Choose a durable marine enamel or a two-part polyurethane for the best results. |
| Painting | Brushes, Rollers, or a Sprayer | High-density foam rollers give a smooth finish. A quality brush is needed for corners. |
| Painting | Painter's Tape and Masking Paper/Plastic | For protecting lights, wiring, bunks, and anything else you don't want painted. |
| Mixing | Mixing Sticks and Buckets | You'll need these for both primer and paint, especially if using two-part formulas. |
| Mixing | Epoxy and Paint Mixer | This drill attachment ensures a perfectly consistent mix for two-part paints. |
Having all these items ready to go will save you headaches and guarantee a much better final product. Now, let's dive into the specifics of a few key areas.
Don't Skip the Safety Gear
First things first: your health. When you start grinding metal and spraying paint, you're kicking up a nasty mix of particles that you absolutely do not want in your lungs or eyes. This isn't the place to cut corners.
Your bare minimum should be a quality respirator mask, not just a cheap dust mask. You also need safety glasses to shield your eyes from flying rust flakes and paint splatter. Grab some heavy-duty gloves for the messy prep work and a separate pair of chemical-resistant ones for when you're painting.
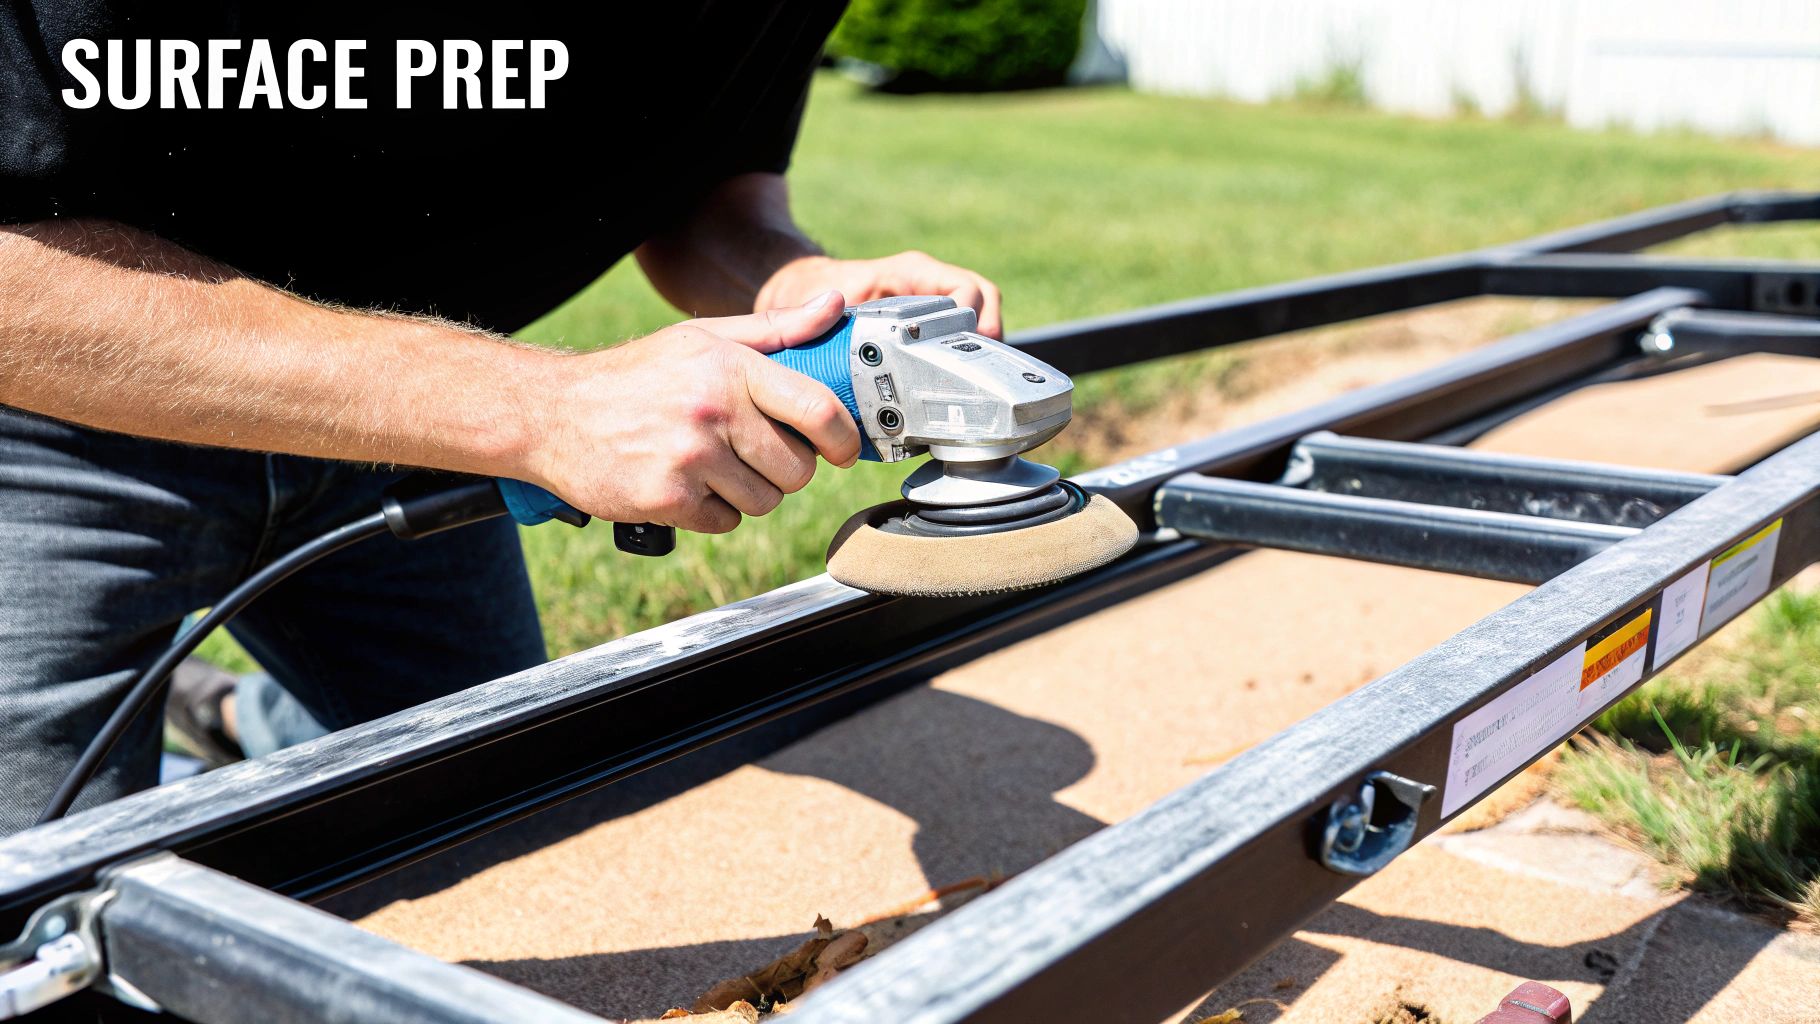
The Heavy Lifters: Surface Prep Tools
This is where the elbow grease comes in, and having the right tools makes all the difference between a frustrating chore and a satisfying task. The quality of your prep work will 100% determine how good the final paint job looks and how long it lasts.
An angle grinder fitted with a wire wheel or a flap disc is your best friend for blasting away scale and stubborn rust on the main frame. For the nooks and crannies where a grinder can't fit, a drill with a wire brush attachment will be your go-to. Once the heavy lifting is done, you'll need various grits of sandpaper to smooth everything out before you even think about priming.
A Quick Tip from Experience: When you're picking out a wire wheel for your grinder, know the difference. A knotted or twisted wheel is aggressive and chews through heavy rust like a champ. A crimped wheel is less harsh, making it better for lighter surface work where you don't want to gouge the metal.
Choosing Your Primer and Paint
This is probably the most critical decision you'll make in the whole process. That can of all-purpose enamel from the big box store? It’s not going to cut it. Boat trailers live a tough life, especially around saltwater, and they need coatings specifically designed for the marine environment.
Start with a solid foundation: a marine-grade epoxy primer. This stuff bites into the metal and creates a bulletproof barrier against corrosion. For your topcoat, look for a high-quality marine enamel or, for the ultimate in durability, a two-part polyurethane paint. These are formulated to stand up to brutal UV exposure, dings, and scratches.
And when it comes time to mix, especially if you're using a two-part system, getting the consistency right is key. A simple drill attachment like an epoxy and paint mixer can make this step foolproof, ensuring your paint is perfectly blended every single time.
Getting the Surface Ready for Paint
Let me tell you something I've learned from years of working on boats: the final look of your trailer's paint job is decided long before you even pick up a brush. A professional, long-lasting finish is 90% preparation and only 10% painting. This is the hard part, the grunt work, that makes all the difference between a job that lasts one season and one that lasts for years.
This whole process is about stripping the trailer down to bare metal, dealing with any rust, and giving the primer a clean, scuffed-up surface to grab onto. It’s not glamorous, but it’s absolutely the most important part of painting a boat trailer.
Strip It Bare
First things first, you need to get everything that isn't welded to the frame out of the way. This is a non-negotiable step. It not only keeps your components clean but gives you total access to every nook and cranny of the trailer frame.
Here's the usual list of things to pull off:
- Lights and Wiring: Unplug and label every wire. Trust me, it makes putting it all back together so much easier.
- Bunks and Rollers: Get those bunk boards and roller assemblies off. This is a perfect time to check them for rot or wear and decide if they need replacing.
- License Plate and Fenders: Simple to remove and they'll just be in your way.
- Winch and Jack: If you can, unbolt the winch stand and the tongue jack to get them clear.
A little tip from experience: Toss the nuts and bolts for each component into their own labeled zip-top bag. When you’re trying to reassemble everything a few days later, you’ll be glad you did.

Winning the War on Rust
With the trailer stripped down, it's time to go after the rust. Your weapon of choice will depend on how bad the corrosion is. For big, flaky patches on the main beams, nothing beats an angle grinder with a wire wheel or a flap disc. It chews through old paint and heavy rust in a hurry, getting you right down to clean metal.
Of course, a grinder won't fit everywhere. For those tight corners, inside the C-channels, or around the welds, you’ll need a drill with a wire brush attachment. It’s perfect for the detailed work in those tricky spots where moisture loves to hide.
This image lays out the basic flow from prep to priming—a good visual reminder of the path ahead.
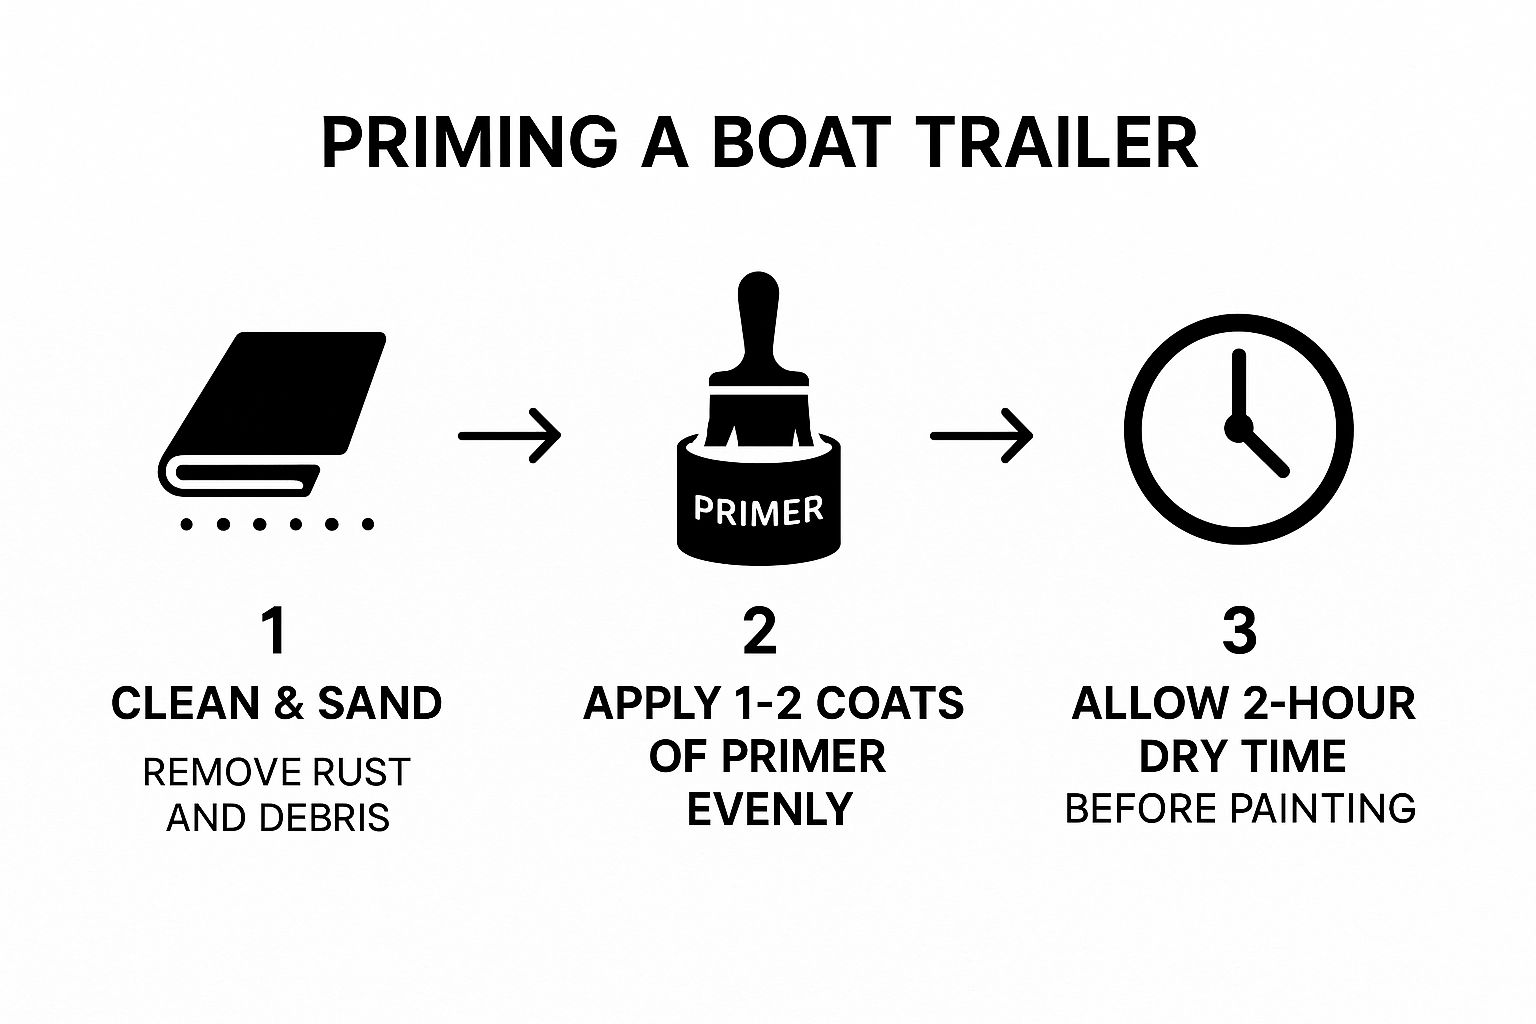
As you can see, cleaning and sanding aren't just suggestions; they are the foundation for a primer that will actually stick and protect the metal.
The Final Wash-Down
Once you’ve ground and sanded away all the rust, you're at the final, critical step before primer: a thorough degreasing. The metal might look clean to the naked eye, but it’s covered in fine dust, oil from your hands, and other gunk that will kill a paint job before it even starts.
Grab a good solvent-based degreaser and a big stack of clean rags. If you're working on an aluminum trailer, you absolutely need a specialized cleaner to properly etch the metal. Something like our aluminum cleaner that's designed for marine use is made specifically for this to give the primer maximum grip.
Wipe down the entire trailer frame, then do it again with a fresh rag. And then maybe one more time. Keep going until your rags come away perfectly clean. This is your last chance to guarantee the primer will bond correctly, so don't cut corners.
Properly maintaining trailers is a big deal. The global boat trailer market was valued at around USD 920 million in 2024, and it's on the rise. That's a lot of trailers that need to be kept in safe, working condition.
Now, let the prepped surface dry completely before you even think about opening that can of primer.
Time to Lay Down Some Color: Priming and Painting Your Trailer
Alright, the grunt work is over. With a clean, rust-free trailer in front of you, it’s finally time for the fun part—seeing your project come back to life. This is where all that scraping and sanding pays off, and you get to build up the protective layers that will keep your trailer looking sharp for years.
Think of this as a complete system. The primer grips the metal, and the topcoat protects the primer. If one fails, the whole job is compromised. Getting this part right is what separates a quick-fix from a long-lasting restoration.
The Foundation: Choosing Your Primer
Don’t skimp on the primer. It's your absolute first line of defense against future rust, and it’s what makes your topcoat stick. A cheap primer will fail, taking the expensive paint you put over it along for the ride. For a boat trailer, you really have two top-tier choices.
- Zinc-Rich Primer: This stuff is fantastic for steel trailers. It works by "sacrificing" itself—the zinc particles corrode before the steel does. This means it actively protects the metal even if the paint gets scratched down the line.
- Two-Part Epoxy Primer: This is my go-to for just about any trailer, steel or aluminum. It chemically cures into an incredibly hard, non-porous barrier that locks moisture out completely. It’s tough as nails.
For most people tackling this at home, a two-part epoxy primer is the best all-around choice. It provides a rock-solid base that just about any topcoat will adhere to beautifully. Just follow the mixing instructions to the letter; the chemical reaction is what gives it its incredible strength.
The Finishing Touch: Selecting a Tough Topcoat
The topcoat is what everyone sees. It provides the color, the gloss, and the final shield against UV rays, saltwater, and road grime. You need something that can handle being dunked in the lake and blasted by gravel on the highway.
A good marine enamel is a solid, user-friendly option. It’s a single-part paint, which makes it easy to apply with a brush and roller, and it dries to a durable, glossy finish. For the absolute best in durability and shine, a two-part polyurethane topcoat is the professional standard. It's a bit more demanding to work with, but the result is a finish as tough and brilliant as the gelcoat on a new boat.
My Personal Takeaway: If this is your first time painting a trailer, a quality marine enamel is more forgiving and will still give you a fantastic result. If you have spray equipment and some experience, the two-part polyurethane is worth the extra hassle for its incredible longevity.
The growing demand for trailers that can withstand harsh marine environments is a key factor in the global boat trailer market's growth. People are investing more in durable materials, and a quality paint job is a huge part of that equation. You can see more about boat trailer market trends on futuremarketinsights.com.
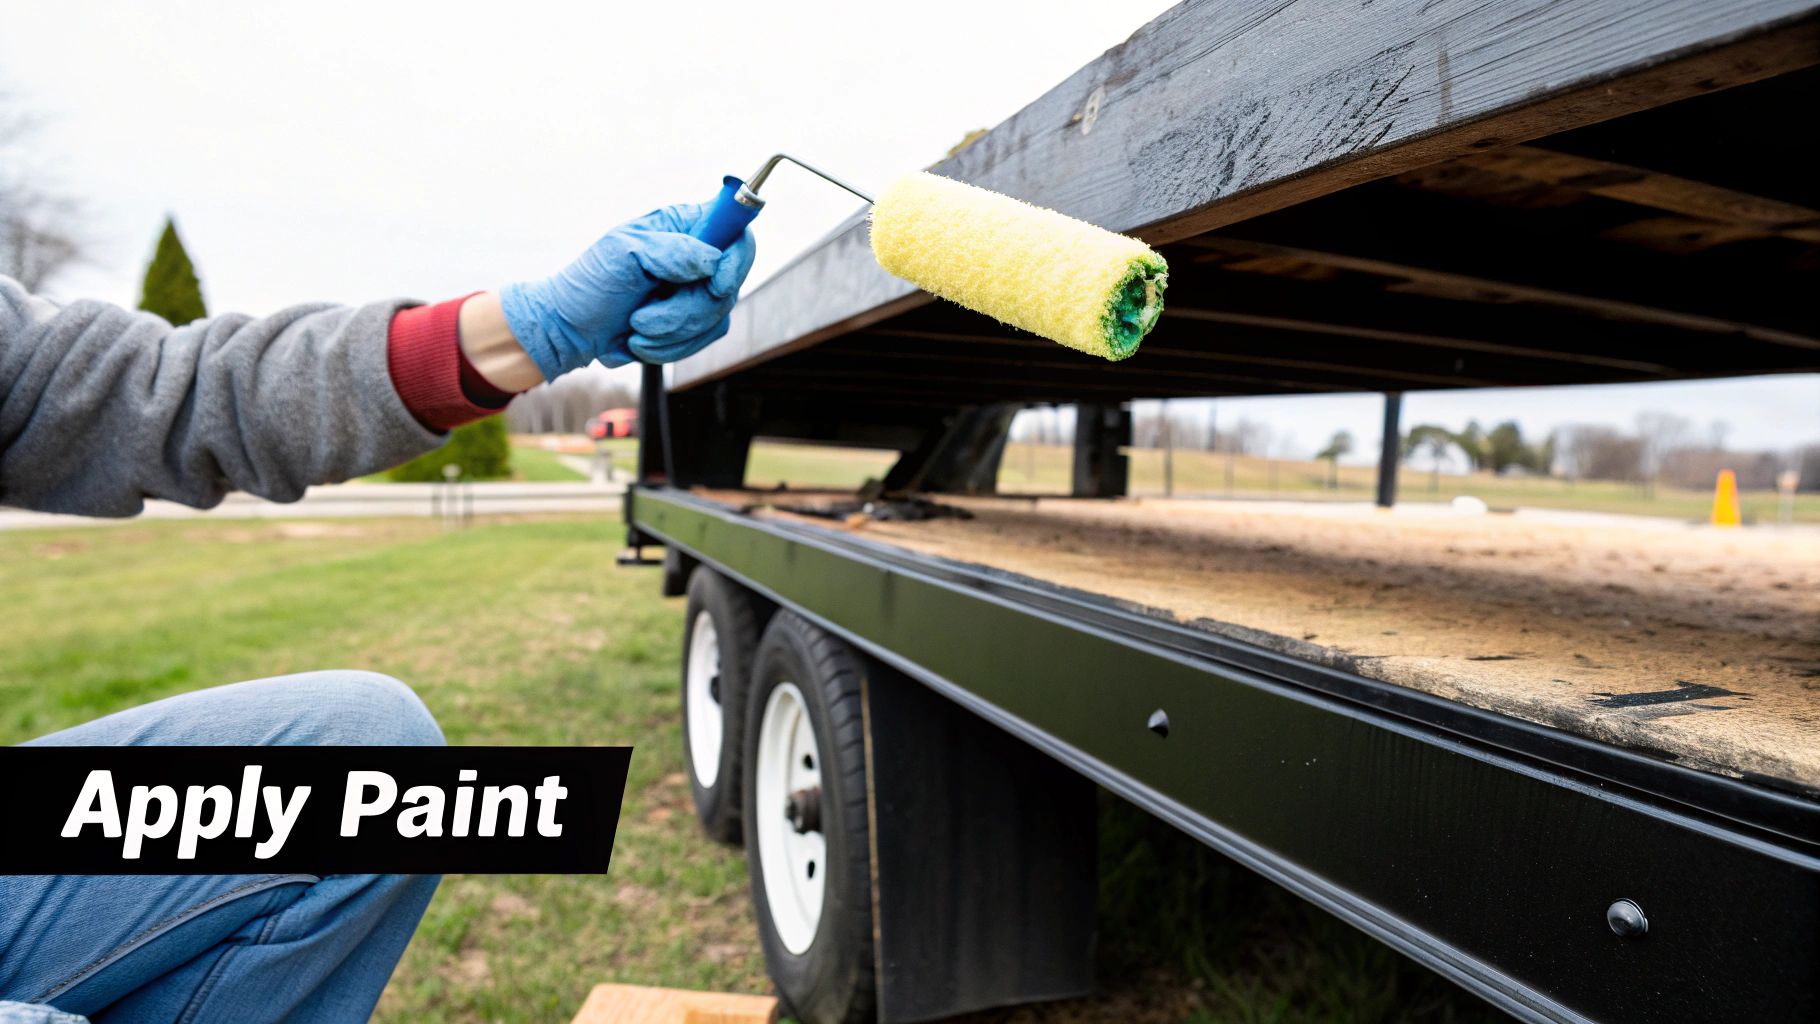
Application Methods: Spray, Roll, or Brush?
How you actually get the paint on the trailer makes a big difference. Each technique has its advantages, and the right one for you depends on your budget, your skills, and the kind of finish you're after.
| Application Method | Pros | Cons |
|---|---|---|
| Spraying (HVLP Gun) | Fastest way to cover large areas. Delivers the smoothest, most professional finish. | Expensive equipment, lots of masking required, and takes practice to avoid drips and runs. |
| Rolling | Great middle-ground. Decent speed with a good finish. Minimal equipment and less mess. | Can leave a slight "orange peel" texture. Tough to get into tight corners. |
| Brushing | Cheapest option. Gives you total control for cutting in and hitting small, complex areas. | Very slow. Can easily leave visible brush marks if you're not careful. |
Honestly, a combination of methods often works best. I like to use a brush to "cut in" all the welds, corners, and tight spots first. Then, I immediately follow up with a small, high-density foam roller on the flat sections. This combo gives you excellent coverage everywhere and a surprisingly smooth finish without the cost and complexity of a sprayer.
No matter which method you choose, the key is to maintain a wet edge. This just means you should always paint from the wet area you just finished into the dry, unpainted section. This simple technique is what prevents those ugly lap marks and ensures a smooth, uniform coat.
Letting It All Cure: The Final (and Most Important) Waiting Game
You’ve laid down that final, gleaming coat of paint. It looks fantastic, but don't even think about grabbing your wrench set yet. The next few days are just as critical as all the prep work you just did. This is where patience really pays off, and rushing is the single biggest mistake that can undo everything you've accomplished.
So, how long do you wait? It completely depends on the paint you used. A simple marine enamel might feel dry to the touch in a few hours, but it won't achieve its full, rock-hard durability for a week or more. If you went with a high-end, two-part polyurethane, you’re looking at a specific temperature window and a cure time that you absolutely cannot cheat.
I know the temptation is strong to start bolting bunk boards back on as soon as the surface isn't tacky. Fight it. Torquing down a U-bolt or sliding a heavy piece of hardware across semi-cured paint will tear it right off the metal. Give the paint the full time the manufacturer recommends. This is when the chemical magic happens—the paint cross-links and develops the toughness you need it to have.
Expert Tip: Don't confuse "dry time" with "cure time." Dry just means you won't leave a fingerprint. Cured means the paint has reached its maximum hardness and is ready for the abuse of launching and retrieving your boat.
Reassembly: Time for Some Smart Upgrades
Once the paint is fully cured and hard as a rock, it's finally time to put your trailer back together. But think of this as more than just reassembly. It's the perfect opportunity to upgrade a few key components. After all, you wouldn't put rusty old hubcaps on a brand-new car, so why put worn-out parts back on your beautifully restored trailer frame?
Here are a few upgrades I always recommend to people at this stage:
- Go All-In on LEDs: Ditch those old, unreliable incandescent trailer lights. A modern, fully sealed waterproof LED kit is a night-and-day difference. They're brighter, last practically forever, and you'll never have to fiddle with a burnt-out bulb on the side of the road again.
- New Bunk Carpets Are a Must: If your old bunk carpets were nasty, worn, or falling apart, replace them now. Fresh carpet not only looks a million times better, but it's also your boat hull's first line of defense against scratches.
- Lube Everything That Moves: Before you reinstall your winch, rollers, and tongue jack, give them a good cleaning and a fresh dose of marine-grade grease. A few minutes of lubrication ensures everything works smoothly when you're at the ramp.
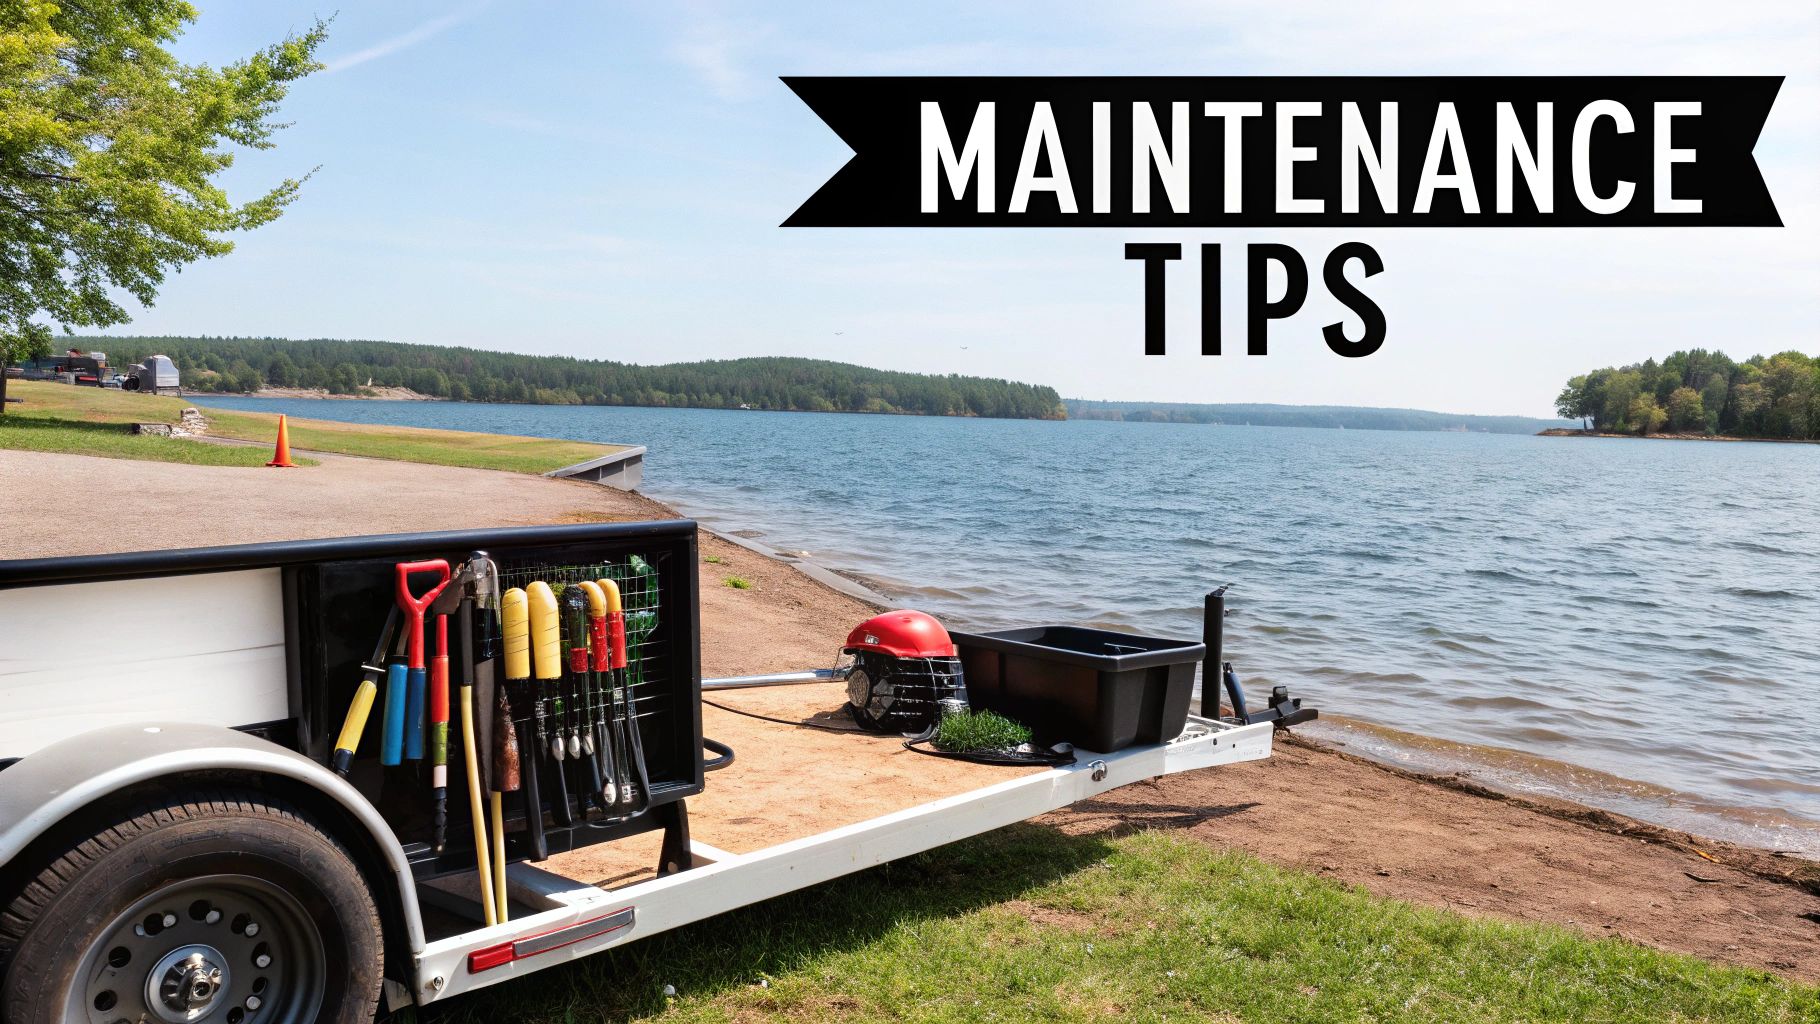
Keeping It Looking Good: A Simple Maintenance Routine
Your trailer looks brand new, and the goal is to keep it that way for as long as possible. You don't need a complicated schedule; just a couple of good habits will prevent that nasty rust from ever getting a foothold again.
The absolute #1 rule is to rinse the entire trailer with fresh water after every single dip in saltwater or even brackish water. Salt is the enemy. It's incredibly corrosive and will find any tiny weak spot. A thorough freshwater rinse is the simplest and most effective way to fight back.
Beyond that, get in the habit of doing a quick walk-around inspection once a year. Look for any new nicks, chips, or scratches in the paint, paying close attention to wear points like U-bolts and brackets. When you find one, clean it up and hit it with a little touch-up paint immediately. Sealing up those small breaches in the paint's armor will stop corrosion before it ever starts, keeping your trailer looking sharp for years down the road.
Got Questions About Painting Your Boat Trailer? We've Got Answers
Even when you've done all your homework, a project like this always throws a few curveballs. When you're in the thick of it, questions pop up, and unexpected issues can be a real pain.
Don't worry, though. Most of these problems have straightforward solutions. Let’s walk through some of the most common hurdles I've seen people face over the years. Getting these details sorted ensures all your effort pays off with a finish that actually lasts.
How Do I Paint Over a Galvanized Trailer?
This is probably the number one question I get. You can't just slap a coat of paint on a galvanized trailer and expect it to stick. That slick zinc coating is designed to resist corrosion, but it's also way too smooth and non-porous for standard paint to grab onto.
To get it right, you have to create a "profile" or texture for the primer to bite into.
Start with a serious cleaning. Use a good degreaser to get rid of every trace of oil, road grime, or anything else that could interfere with adhesion. Once it's spotless, you need to etch the surface. A light sandblasting is the pro-level method, but you can get great results at home by scrubbing it with an abrasive pad and either a specialized etching primer or even a simple vinegar solution.
After etching and rinsing, it's time for a primer that’s specifically made for galvanized metal. I’ve had the best luck with two-part epoxy primers; they create a bulletproof bond. Once that primer has cured, you can topcoat it with just about any quality marine paint, and it'll hold on for dear life.
Key Takeaway: Never, ever paint directly onto untreated galvanized steel. It will just peel off in sheets. The secret is the prep work: clean, etch, and then prime the surface properly to guarantee a bond that will last for years.
What’s the Best Weather for Painting?
The weather can make or break your paint job. Honestly, it’s one of the biggest factors in getting a professional finish. The perfect day for painting is warm, dry, and not too humid.
- Temperature: Check your paint can for the recommended temperature range, but a good rule of thumb is between 50°F and 90°F (10°C to 32°C). If it's too cold, the paint will take forever to cure properly. Too hot, and it can dry on contact, leaving ugly brush marks.
- Humidity: High humidity is your worst enemy. Any moisture in the air can get trapped under the paint film, causing a hazy finish, poor adhesion, or even bubbles. Try to paint when the humidity is below 60%.
- Sunlight: Painting in direct, blazing sun is a bad idea. The heat can cause the surface of the paint to "skin over" almost instantly. This traps solvents underneath, which can lead to blisters and bubbles later on.
How Do I Fix Drips, Runs, and Other Goofs?
Hey, mistakes happen to everyone. The trick is knowing how to fix them. If you spot a drip or run while the paint is still wet, you can sometimes gently feather it out with the very tip of your brush.
But if the paint has already started getting tacky, walk away. Trying to mess with it at this stage will only create a bigger mess. Let the paint cure completely, which might take a few days.
Once it's rock hard, you can sand the drip smooth using a fine-grit sandpaper (think 220-grit or higher). Carefully wipe away all the dust with a tack cloth, then apply a very light touch-up coat just to that spot.
And what about the inevitable bug that dive-bombs your perfect wet coat? Same advice: let it dry. Once it's cured, you can lightly sand the bug and the tiny crater it left behind, then touch it up.
For all the tools, cleaners, and accessories you need to get a professional finish on your trailer, trust Better Boat. From marine-grade epoxy to essential safety gear, we have everything to help you protect your investment. Explore our full range of boating supplies at https://www.betterboat.com.


