


Repairing Boat Gelcoat A Pro's Guide
That little chip in your boat’s gelcoat might seem like just a cosmetic issue, but it's a signal to take action. Properly repairing boat gelcoat is one of the most important things you can do to protect the actual structure of your hull.
Think of gelcoat as your boat's armor. It’s the first and best line of defense against water getting where it shouldn't and UV rays doing their worst. Ignoring those small cracks or chips can, and often does, lead to much bigger, more expensive headaches down the road.
Why Gelcoat Repair Is More Than Just a Pretty Fix
It's easy to dismiss a small spider crack or a gouge from a rough docking as something you'll get to "later." Many boat owners do. But that protective outer layer does a lot more than just give your boat its glossy, showroom shine.
Gelcoat is a non-porous resin that creates a watertight seal over the naturally porous fiberglass hull. When that barrier is broken—even by a tiny crack—water has an open invitation to seep in. This moisture gets trapped right between the gelcoat and the fiberglass, kicking off some serious problems that can compromise your boat's structural integrity and sink its value.
How Small Cracks Turn Into Major Damage
The jump from a minor blemish to a significant problem happens faster than most people think. Once water gets under the gelcoat, it can cause:
- Osmotic Blistering: Trapped water reacts with chemicals inside the fiberglass resin. This creates little acidic pockets that literally push the gelcoat outwards, forming those dreaded blisters.
- Fiberglass Delamination: If you're in a colder climate, any trapped water can freeze. When it expands, it forces the gelcoat and fiberglass layers apart, weakening the hull structure itself.
- Accelerated UV Degradation: Cracks expose the raw fiberglass underneath to direct sunlight. The sun's rays break down the resins and fibers, making that whole area brittle and weak.
A fix that could have been simple and inexpensive can quickly spiral into a repair job costing thousands. That’s why tackling gelcoat damage as soon as you spot it is one of the most crucial maintenance jobs you can do. For deeper damage that goes beyond the gelcoat, you'll need to know how to handle the fiberglass itself. We cover that in our detailed guide on how to repair cracked fiberglass.
The real goal of any gelcoat repair isn’t just to make it look good. It's to completely and permanently seal the hull, restoring that protective barrier to stop water intrusion for good. A truly seamless, invisible repair is the mark of a structurally sound one.
This isn't just my opinion; the whole marine industry is built on this principle. The pleasure boat gelcoat market was valued at around USD 1.2 billion and is on track to hit USD 1.8 billion by 2033. That growth highlights just how essential gelcoat is for both building and maintaining boats. Fixing gelcoat issues isn't just about appearances—it's a critical investment in your boat's health, longevity, and safety.
Identifying Common Types of Gelcoat Damage
Before you can fix the problem, you need to know exactly what you're looking at. Different types of damage have different causes and might need slightly different approaches.
Here’s a quick reference guide to help you identify what’s going on with your boat’s gelcoat.
| Damage Type | What It Looks Like | Most Common Causes |
|---|---|---|
| Stress Cracks (Spider Cracks) | Fine, web-like cracks radiating from a central point. | Hull flexing, impacts, overtightened hardware. |
| Chips & Gouges | Deeper damage where a piece of gelcoat is missing. | Dock rash, collisions with objects, dropping heavy items. |
| Crazing | A network of very fine, shallow cracks over a larger area. | Old, brittle gelcoat; excessive heat or UV exposure. |
| Osmotic Blisters | Bumps or bubbles on the gelcoat surface, often below the waterline. | Water penetrating the gelcoat and reacting with the resin. |
| Fading & Oxidation | A dull, chalky, or discolored appearance. | Long-term exposure to UV radiation and the elements. |
Take a close look at the damaged area and use this table to figure out what you're up against. A proper diagnosis is the first step toward a lasting repair.
Your Essential Gelcoat Repair Toolkit

Walking into a marine supply store without a game plan can feel a bit overwhelming. To get the job done right, you need the right gear from the get-go. Putting together a solid kit beforehand not only makes the work go smoother but is the first step toward a strong, invisible patch.
The right supplies are your best defense against common DIY failures, like a repair that stays tacky forever or starts peeling off after a few months on the water. Think of it as setting yourself up for success. Every item in your toolkit plays a key role in getting that durable, factory-like finish we're all after.
Core Materials For The Repair
First things first, let's talk about the absolute must-haves. These are the non-negotiable items that are the foundation of any gelcoat patch, whether you're fixing a tiny chip or a nasty gouge.
- Gelcoat Paste Repair Kit: This is the heart and soul of the whole operation. Grab a high-quality kit that comes with the gelcoat paste, a hardener (also called a catalyst), and maybe some coloring agents. You'll want to make sure it’s a "with wax" or "finishing" formula. This type has paraffin wax that floats to the surface during the cure, creating an air barrier so it hardens completely tack-free.
- Acetone: This is your best friend for surface prep. Acetone is absolutely critical for wiping down the repair area to get rid of any lingering wax, oils, or other gunk. If you don't, the new gelcoat just won't bond properly. Seriously, don't try to substitute this with other cleaners.
- Mixing Sticks and Cups: You'll need some clean, disposable cups and stir sticks for mixing the gelcoat and hardener. Getting the ratios right is the secret to a proper cure, so precision is key here.
Tools For Application And Finishing
Once you have your materials, you need the right tools to apply and shape the repair. Honestly, using the right applicators and abrasives is what separates a patch that sticks out like a sore thumb from one that looks truly professional.
Having a good set of tools means you can prep the damaged spot correctly and then feather in the new material so it blends seamlessly with the surrounding surface.
The secret to an invisible repair isn't just in the gelcoat itself, but in the meticulous sanding and polishing that follows. Rushing this stage is the most common mistake DIYers make.
For sanding, you'll need to work your way through a series of wet/dry sandpaper grits. A good place to start is 80-grit for initial shaping. From there, you'll move up through 220, 400, 600, and finally finish with 1000-grit or even higher to get that perfectly smooth surface.
Lastly, and most importantly, don't skimp on safety gear. A respirator with organic vapor cartridges, safety glasses, and chemical-resistant gloves are non-negotiable. You're working with chemicals that kick off some potent fumes, and your health should always be the top priority. Many of these essentials can also be found in a good general boat cleaning kit, which is always a smart investment to have on hand.

Prepping The Damage For An Invisible Repair
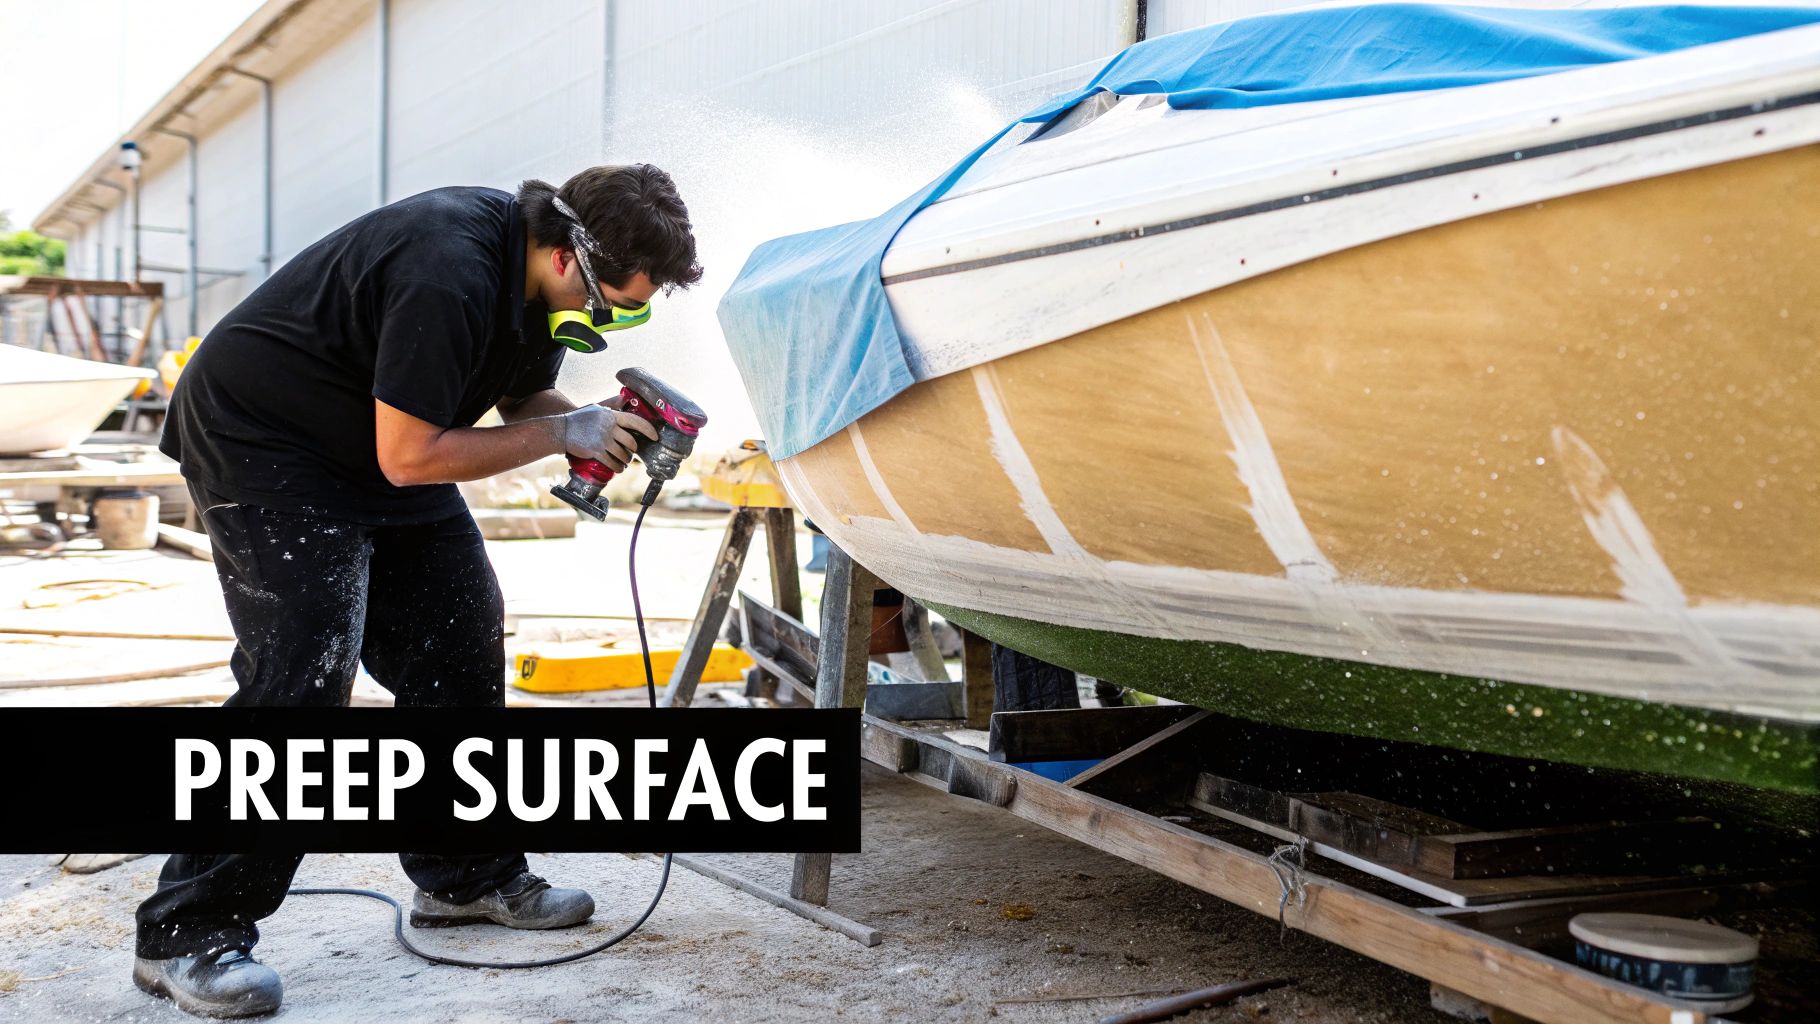
Here's a secret that separates the pros from the amateurs: a truly invisible gelcoat repair isn't made perfect during the final polish. It's earned right here, in the prep work. This is the stage where most DIY jobs fail, leaving behind a patch that sticks out like a sore thumb or, worse, fails entirely down the road.
Good prep is all about creating a permanent, structural bond between the new gelcoat and the old. You wouldn't try to glue something to a dirty, crumbling wall and expect it to hold, right? The same principle applies here. We need to carve out the perfect foundation for the new material, giving it plenty of clean surface area to grab onto.
Creating A Strong Foundation
First things first, you have to open up the damaged area to get down to clean, solid fiberglass and gelcoat. This is absolutely critical for small spider cracks and hairline fractures. Just slathering filler over a crack is a band-aid fix that’s doomed to fail—that crack will show up again.
The professional approach is to use a Dremel-style rotary tool with a V-shaped grinding bit. You want to carefully trace along the crack, grinding it out into a shallow, beveled trench. The goal is to make the groove wider at the surface than at the bottom. This “V” shape dramatically increases the surface area for the new gelcoat paste to lock into.
For bigger chips or gouges, use the same tool or even a sharp scraper to get rid of any loose, flaky gelcoat around the perimeter. Bevel the edges of the chip at roughly a 45-degree angle. This little detail prevents a hard, visible line from showing up when you sand the repair flush later on.
The Critical Cleaning Stage
Once the damage is ground out, the next step is completely non-negotiable: a deep clean with acetone. Waxes, old polishing compounds, and even the oils from your fingerprints will kill the adhesion of your repair. These contaminants act as a barrier, preventing the new gelcoat from forming a true chemical bond.
Soak a clean, lint-free rag with acetone and wipe down the entire repair area and the surface immediately around it. Don't be shy with it. I always use one rag for the first pass and then grab a fresh one for a final wipe to make sure I'm not just smearing contaminants around. You'll know it's clean when a final wipe with a fresh rag comes away looking spotless.
Pro Tip: Don't even think about skipping the acetone or trying to substitute it with rubbing alcohol or mineral spirits. Acetone is a powerful solvent that flashes off (evaporates) quickly, leaving behind a perfectly prepped surface that's ready to bond.
Masking For Clean, Professional Lines
Your final prep step is to carefully mask off the area surrounding the repair with high-quality painter's tape. This might seem trivial, but it serves two key purposes:
- It protects the good, undamaged gelcoat from getting scratched up during sanding.
- It creates a clean, defined workspace, making your cleanup way easier and helping to contain the gelcoat paste.
Apply the tape about a quarter-inch away from the beveled edge of your repair. This gives you a little bit of wiggle room when you apply and spread the paste. It’s small details like this that make the difference between a messy patch and a sharp, professional-looking job. Trust me, the effort you put into prep pays off big time in the final result.
Mixing And Applying Gelcoat Like A Pro
With your surface prepped and looking perfect, we've arrived at the most critical part of the job: mixing and applying the gelcoat. This is where the real magic happens, a bit of art mixed with a dash of science. Get this right, and you'll have a rock-solid, professional-looking repair. Get it wrong, and you could end up with a gummy mess that never cures or a brittle patch that cracks under pressure.
Getting the Mix Just Right
Getting the catalyst ratio right is completely non-negotiable. Most gelcoat pastes use an MEKP (methyl ethyl ketone peroxide) catalyst to kick off the hardening process. The rule of thumb is a 1% to 2% ratio by volume, but you absolutely must read the manufacturer's instructions for your specific product. They’re not just suggestions.
Keep in mind that temperature is a huge factor. You'll want to use a bit less catalyst on a hot, sunny day and a touch more when it's cool to give yourself a decent amount of working time.
Think of yourself as a chemist for a minute. Precision is everything. Squeeze out the amount of gelcoat paste you think you’ll need onto a clean mixing board—a scrap of cardboard or a plastic lid works great. Then, carefully add the catalyst drops according to the directions.
Now, stir like you mean it. You need to mix thoroughly for at least a full minute, making sure to scrape the sides and bottom of your mixing cup. The goal is a perfectly uniform color with no streaks. If you don't, you'll get soft, uncured spots that will completely ruin your hard work.
Take a look at this visual guide. It breaks down the core steps for a solid gelcoat mix.
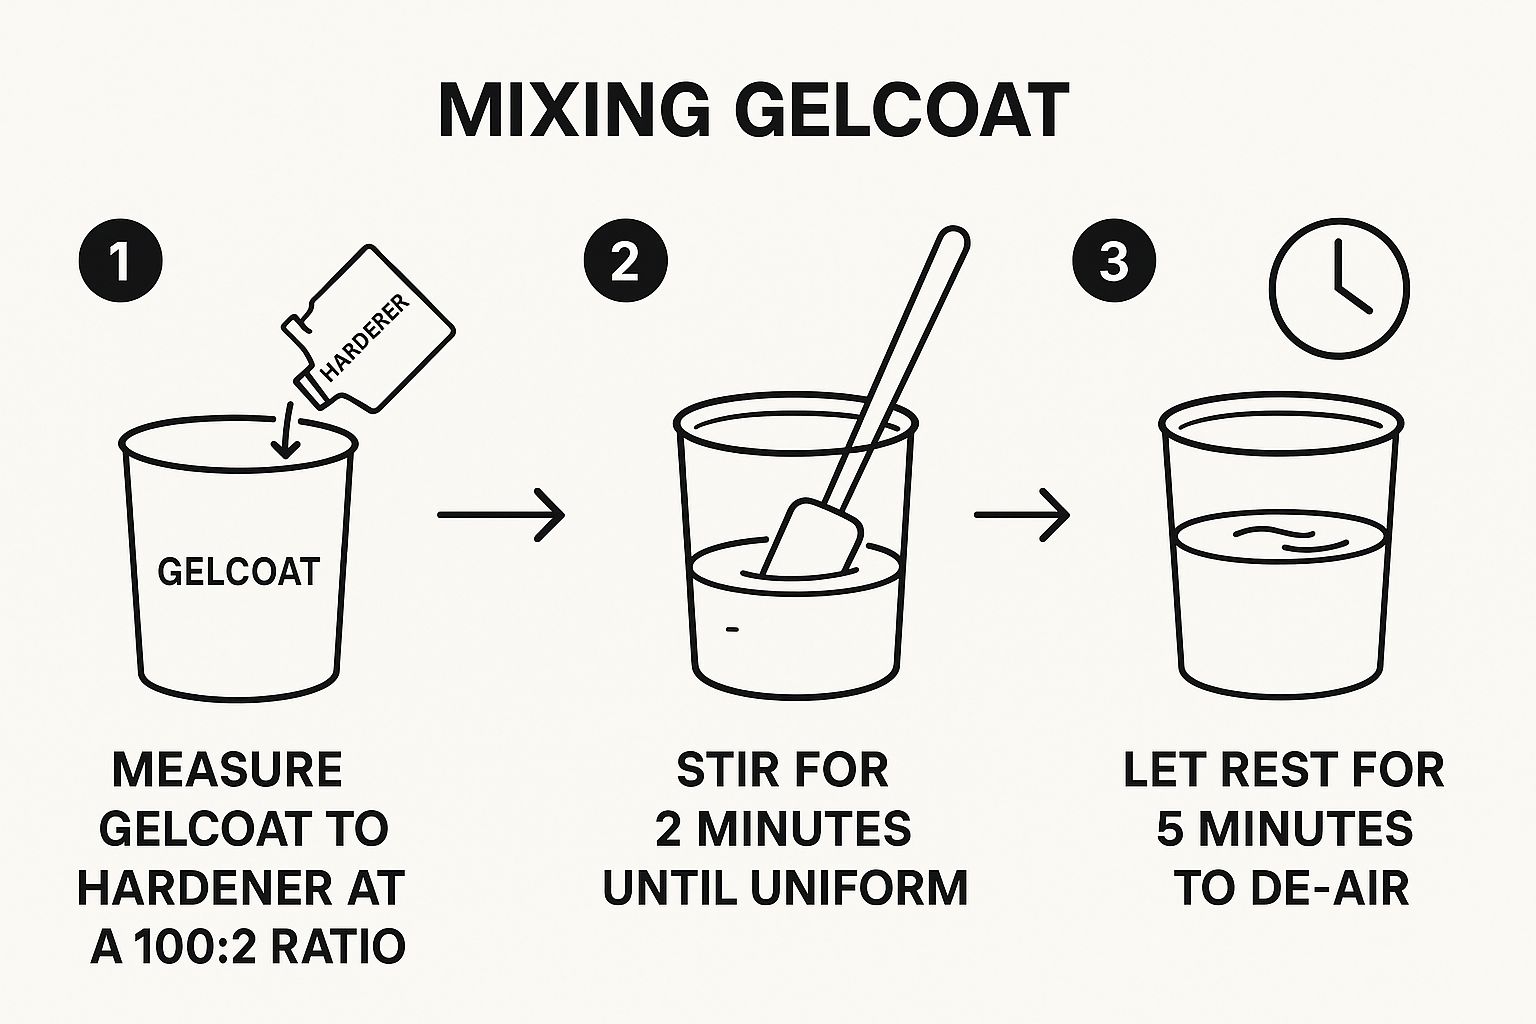
This simple flow—measure, mix, rest—is the foundation of a durable repair. It’s how you avoid the common pitfalls that lead to a weak or tacky finish.
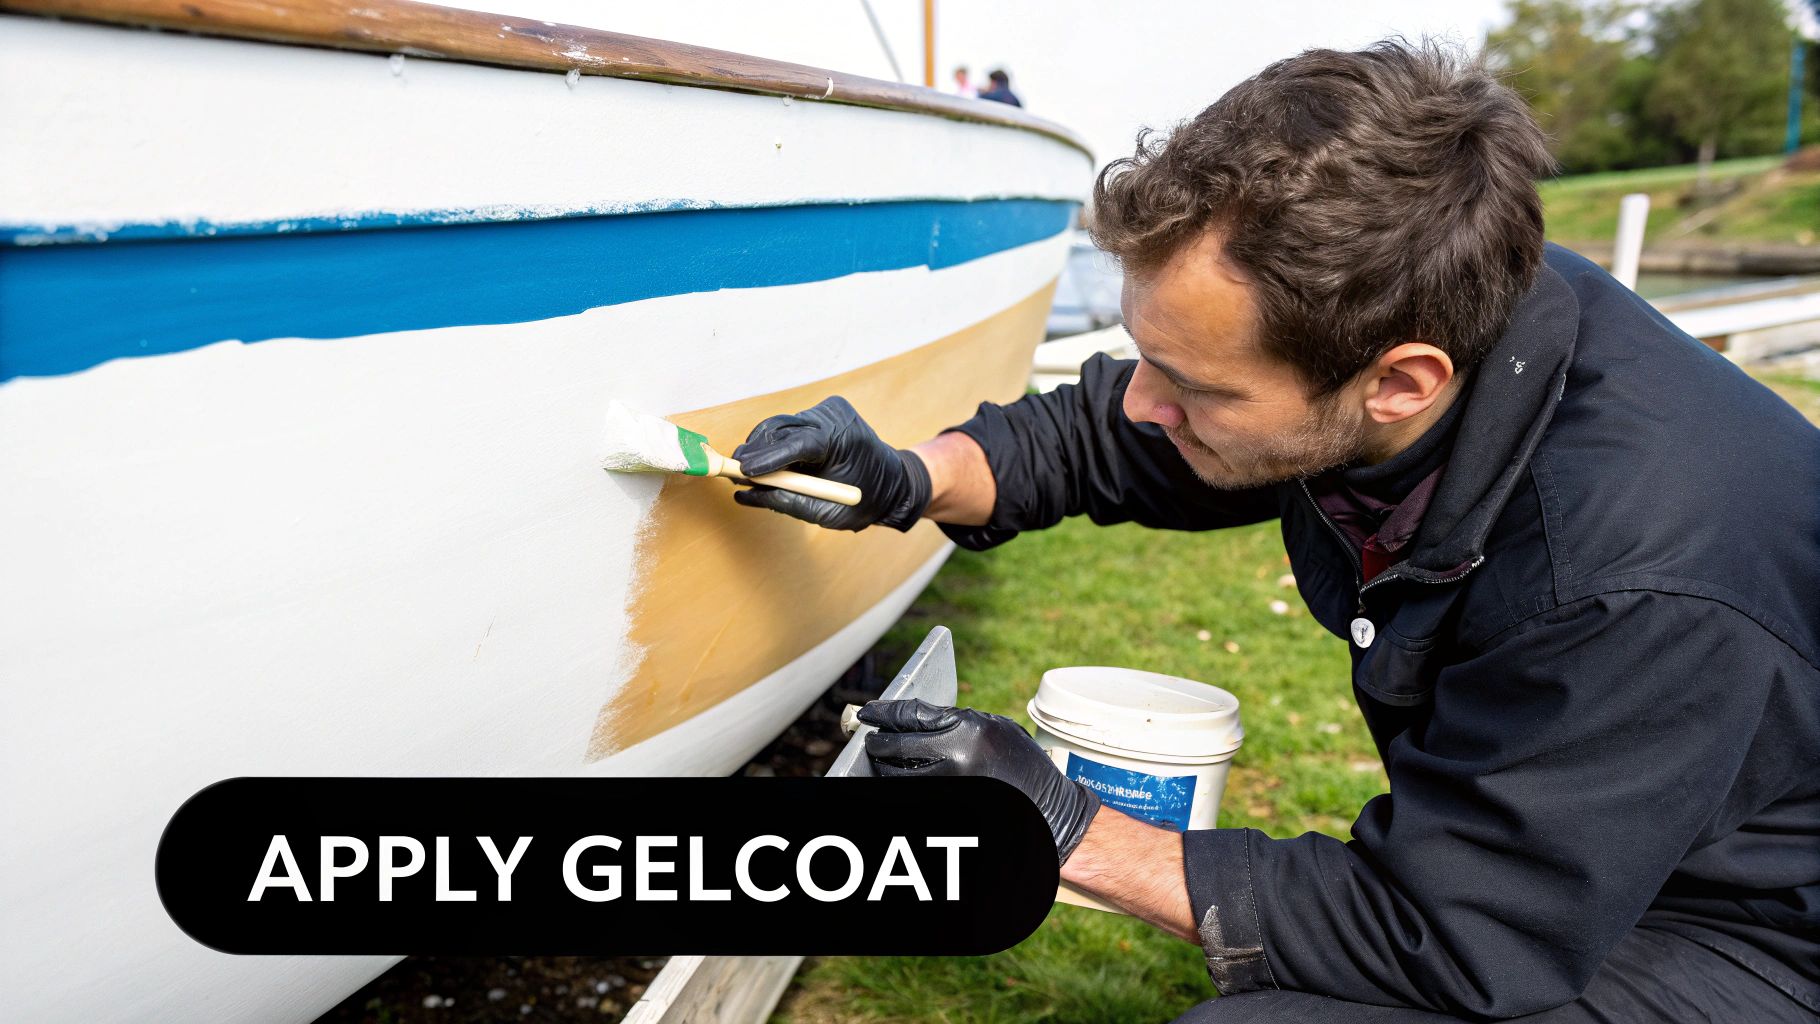
Applying the Gelcoat for a Seamless Finish
Once your gelcoat is mixed, the clock is ticking. You’ve probably got about 10-15 minutes before it starts to set up. Using a small plastic spreader, press the gelcoat paste firmly into the gouge you prepared earlier. The trick here is to force out any trapped air, which can create weak spots in the final repair.
Work the gelcoat in from different angles, ensuring it fills every nook and cranny of the beveled area. You'll want to slightly overfill the repair, leaving the paste sitting just a little proud of the surrounding surface. This is on purpose. Gelcoat shrinks a bit as it cures, and that extra material is what you'll sand down to get a perfectly flush, invisible finish.
Don’t be tempted to smooth it perfectly flat right away. A slight mound is your best friend when it’s time to sand, guaranteeing you won’t end up with a dip or low spot later.
Modern gelcoats are incredible, with formulas far more resistant to the blistering and cracking that plague boats in marine environments. When you're making a repair, you're not just fixing a cosmetic issue—you're restoring that vital protective barrier to keep your boat hull safe.
Dealing with dings and scrapes quickly is the best way to prevent them from turning into much more serious (and expensive) structural problems. If you're interested in the technology behind these materials, you can find more insights about the gelcoat market on SphericalInsights.com.
The Finishing Process For A Factory Shine
The cured gelcoat patch may feel rough and look slightly raised—that’s exactly what you want at this stage. The real magic happens in the final sanding and polishing, where patience transforms that dull bump into an invisible repair.
Rushing through these multi-stage steps is the most common reason a DIY fix still looks like a fix. Take your time to blend, refine, and polish for a seamless finish.
Leveling The Repair With Wet Sanding
Begin by knocking down the overfilled patch until it’s perfectly flush with the surrounding gelcoat. Wet sanding is your friend here—water carries away debris, stops paper clogging, and delivers a much smoother result than dry sanding.
Wrap 320-grit or 400-grit wet/dry sandpaper around a firm rubber or foam block. Using just your fingers leads to uneven pressure and a wavy surface.
• Keep both block and patch submerged in clean water
• Sand in gentle, circular motions until the high spot disappears
• Rinse the sandpaper often to maintain its cutting power
Refining The Surface For A Flawless Sheen
Now it’s time to erase the scratches from your initial pass. Progress through finer grits to methodically refine the surface.
- 600-grit: Removes deeper scratches left by 400-grit
- 800-grit: Develops a uniform, hazy finish
- 1000-grit (up to 1500-grit for pro-level smoothness)
By the end, the repair should feel silky to the touch, with a dull but even sheen. You’ve created the ideal canvas for final polishing.
Patience in wet sanding prevents scratches that no amount of polishing can hide.
Bringing Back The Gloss With Compounding And Polishing
With the surface perfectly prepped, switch to a variable-speed rotary or dual-action polisher (or roll up your sleeves for hand polishing on small spots).
- Apply a marine-grade rubbing compound to a wool or foam pad.
- Start at low speed to spread the compound, then bump up the RPMs and work in overlapping passes.
- Wipe away residue with a clean microfiber towel.
This compounding stage removes the finest sanding marks and brings out the initial shine. Next, swap to a fresh polishing pad, add high-quality marine polish, and repeat the overlapping passes. The result is that deep, wet-look gloss that makes your repair vanish.
Finish with a protective coat of wax. For step-by-step instructions, see our complete guide on how to wax a boat.
Common Questions About Repairing Boat Gelcoat
Even the most straightforward gelcoat repair can throw a few curveballs your way. Let's tackle some of the most common questions that pop up, so you can sidestep those rookie mistakes and get that perfect, invisible finish you're looking for.
How Do I Get a Perfect Color Match for My Boat?
This is, without a doubt, the biggest headache for most boat owners. Your hull has been sitting in the sun for years, which means it's almost certainly a few shades lighter than the day it left the factory floor. Getting that perfect match takes a bit of detective work.
Your best first move is to contact your boat's manufacturer. Give them your hull number, and they can often point you to the exact gelcoat you need or at least recommend a supplier. If that’s a dead end, your next best bet is a neutral gelcoat repair kit and a set of coloring pigments to tint it yourself.
Pro Tip: Never trust the color straight out of the can. Always mix up a small test batch and apply it to a piece of cardboard or scrap plastic. Let it cure completely before you hold it up to the hull for a comparison—the color can shift a bit as it hardens. If you're really struggling, a local marine supply shop can often custom-mix a batch for you if you bring them a small chip from the damaged area.
What's the Difference Between Gelcoat With Wax and Without?
Getting this right is absolutely critical for a successful repair. Gelcoat needs to be sealed off from the air to cure properly, and that's where the wax comes in.
-
Gelcoat with Wax: You'll often see this called a "finishing resin." It has a small amount of paraffin wax mixed right in. As the gelcoat starts to cure, that wax floats to the top, forming an airtight seal. This allows the gelcoat underneath to harden completely into a sandable surface. This is what you'll use for the final coat of almost any repair.
-
Gelcoat without Wax: This is known as a "laminating resin." It’s designed to stay a little bit tacky on the surface even after it cures. Why? That tackiness allows you to add more layers of gelcoat or fiberglass on top, creating a super-strong chemical bond between layers. It's the go-to for building up deep gouges that require multiple applications.
For the vast majority of scratches and chips you’ll be fixing, gelcoat with wax is what you need to get that hard, finish-ready surface.
Does Weather Affect Gelcoat Repair?
Oh, absolutely. Temperature and humidity are huge factors in how your gelcoat cures. Trying to do a repair on a scorching hot day or when it's damp and humid is just asking for a gummy, sticky mess that never fully hardens.
Most gelcoat products have a sweet spot for application, usually between 60°F and 80°F (16°C to 27°C). But don't take my word for it—always read the manufacturer’s instructions on the can for their specific recommendations.
Try to avoid working in direct, blazing sunlight. The intense heat can make the gelcoat kick off way too fast, trapping air bubbles and leading to a weak bond. High humidity is also your enemy, as it can mess with the chemical reaction. The perfect day for gelcoat repair is mild, dry, and in the shade.
At Better Boat, our mission is to make boat care simple and effective. We offer premium products and the expert guidance you need to protect your investment and keep your vessel looking sharp.
For everything from essential cleaners to professional-grade repair kits, check out our full collection at https://www.betterboat.com.


