 Skip to content

Replacing the Floor of a Boat: A Practical DIY Guide
That squishy, sinking feeling under your feet isn't just a minor annoyance—it's your boat sending up a major flare. When you feel a soft spot, it’s a critical warning that something’s wrong underneath. Ignoring it can lead to bigger, more expensive problems down the road.
Knowing When It's Time to Replace Your Boat Floor
Your boat’s floor, or deck, is a key structural element. It’s not just there to stand on; it provides rigidity and keeps the entire vessel safe and sound. But constant exposure to water, sun, and the general stress of being on the water takes its toll.
This isn’t some rare problem, either. The boat restoration market is booming, with a projected growth rate of 11.5% from 2022 to 2030. Marine surveys have found that over 60% of older boats have some form of plywood core rot from moisture. Sooner or later, it's a job most boat owners will face.
Spotting the Subtle Warning Signs
You don’t need X-ray vision to find a failing boat floor, but you do need to use your senses. The most obvious signs, like gaping holes, are easy. It's the subtle clues that help you catch the problem early.
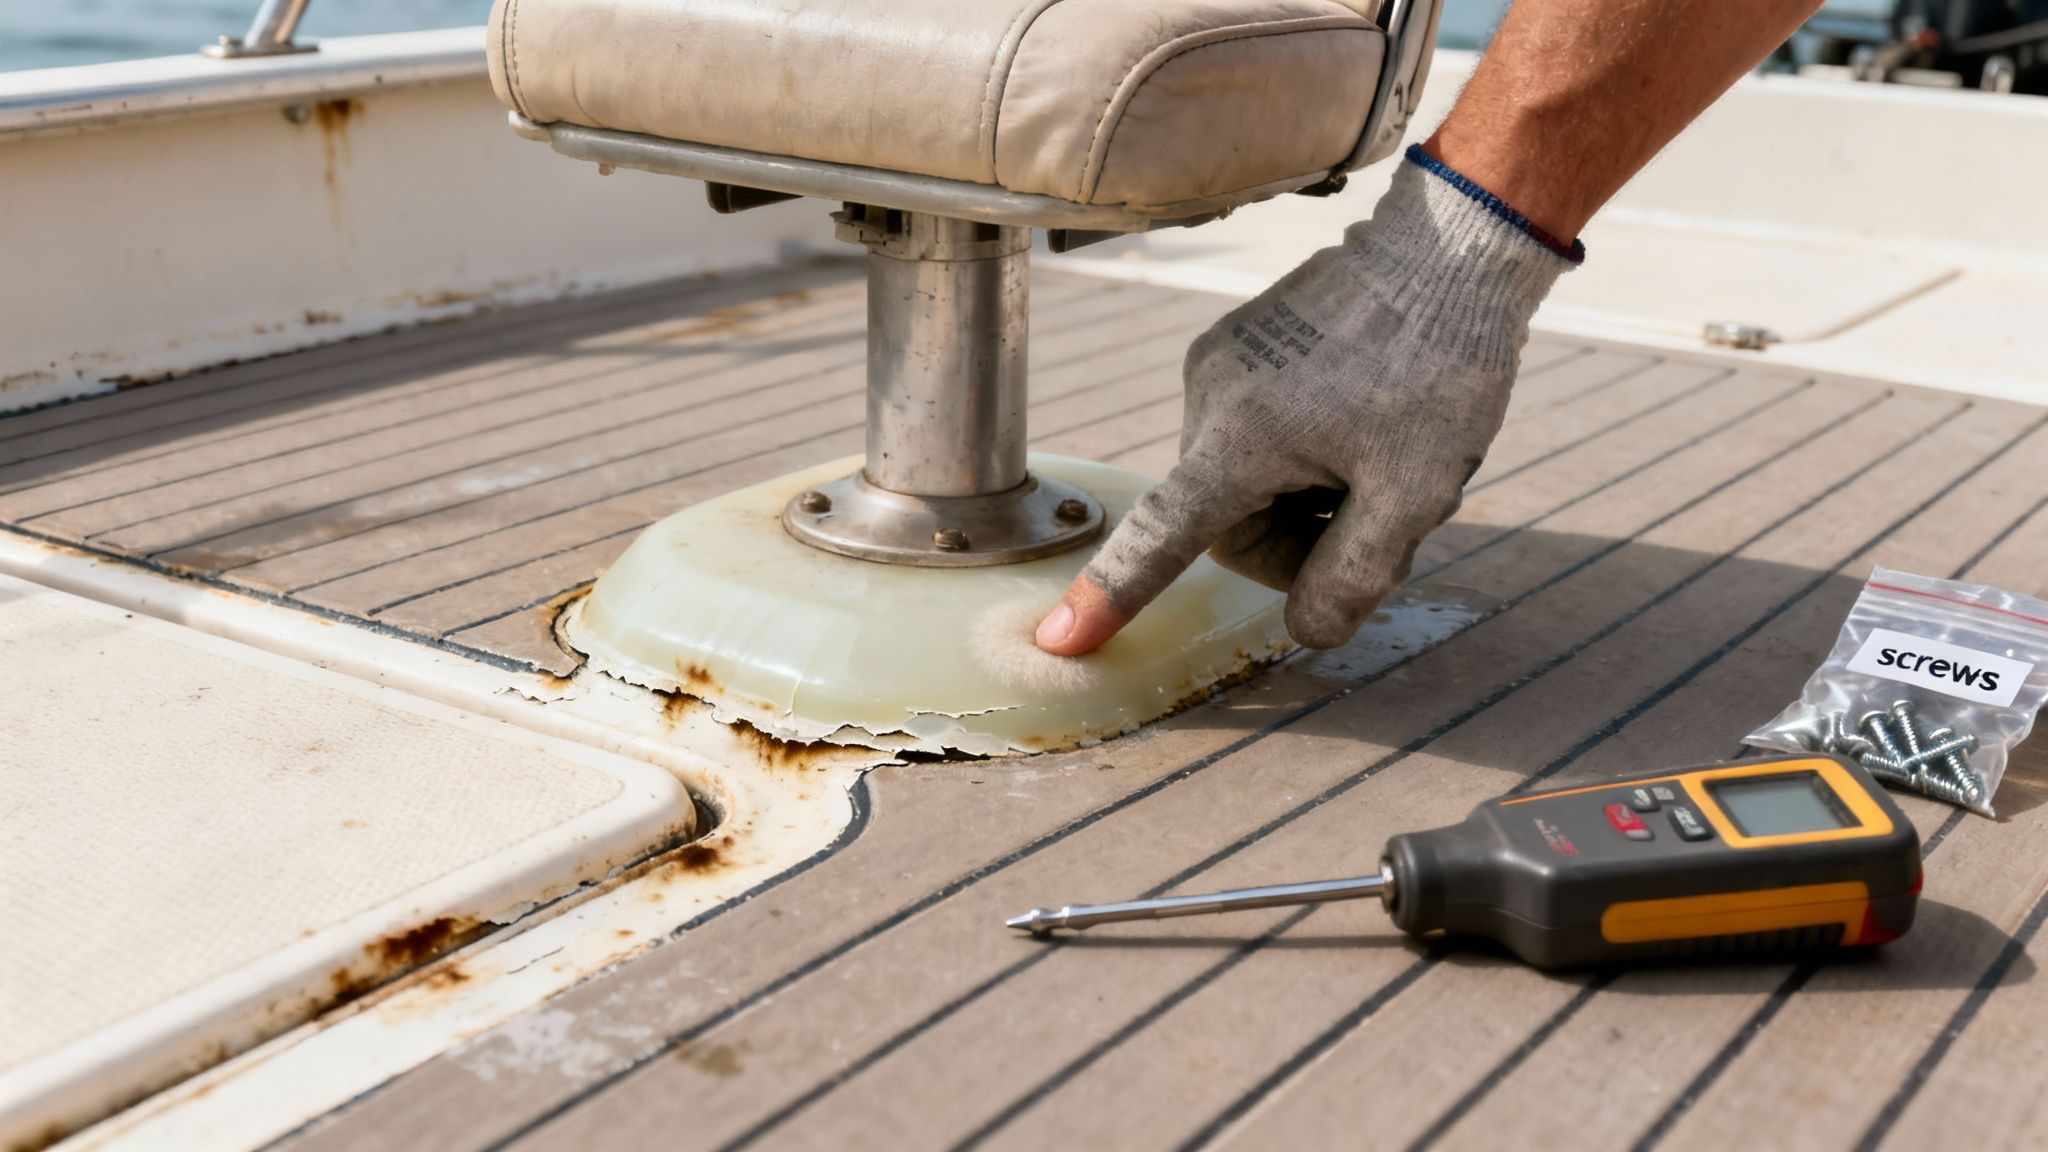
- The Feel Test: Walk every inch of your deck. Pay extra attention around seat pedestals, console mounts, and hatches—anywhere hardware is screwed in. Does it feel spongy? Is there any "give" under your weight? That's a classic red flag for a rotted core.
- The Sound Test: Grab a screwdriver and use the plastic handle to tap around the floor. A healthy, solid deck will give you a sharp, crisp sound. If you hear a dull thud, you've likely found a waterlogged or delaminated spot.
- The Smell Test: If you have a persistent musty or mildewy smell that just won't go away, no matter how much you clean, it’s a good bet moisture is trapped in the floor structure, causing rot. A powerful cleaner like our Mildew Stain Remover can eliminate surface odors, but if the smell persists, the problem is likely deeper.
A soft spot on a boat deck is like the tip of an iceberg. What you can feel is often a small symptom of a much larger, hidden problem with the underlying plywood and stringers. Addressing it early saves you from a much bigger headache later.
Visual Clues You Shouldn't Ignore
Once you've done your hands-on check, look for visual confirmation. Tiny, spiderweb-like cracks in the gelcoat, especially around screw holes or hatch corners, are stress cracks. They’re notorious for letting water seep into the core. Sealing these with our Marine Sealant & Adhesive can prevent further water intrusion, but the damage may already be done.
Also, keep an eye out for any water stains, bubbling paint, or general discoloration. These are dead giveaways that moisture has gotten past the outer surface and is causing trouble from within.
To get a better handle on your boat's floor situation, use this simple checklist. It can help you organize your findings and decide on the best course of action.
Boat Floor Health Checklist
| Symptom | What It Indicates | Severity Level |
|---|---|---|
| Spongy or soft spots | Rotted or water-saturated core material. | High - Immediate attention needed. |
| Dull thud when tapped | Delamination or waterlogged wood. | Medium to High - Investigate further. |
| Musty/mildew odor | Trapped moisture and active rot. | Medium - Find the source of the leak. |
| Visible water stains | Water intrusion has occurred. | Low to Medium - Monitor and find the leak. |
| Stress cracks in gelcoat | Weakened structure; potential water entry point. | Low - Seal cracks, but check for underlying damage. |
| Bubbling paint/fiberglass | Water is trapped between layers. | Medium - Indicates delamination. |
After running through this checklist, you should have a much clearer picture of your floor's health. If you've got symptoms in the "High" severity column, it's definitely time to start planning for a replacement.
While the materials are different, some principles from residential flooring can be useful. Familiarizing yourself with various hardwood floor replacement options can give you ideas about installation and material choices. Of course, the best strategy is always prevention. Keeping up with routine tasks is the key to avoiding major repairs, and our guide on boat maintenance tips to keep your vessel in tip-top shape is a great place to start.
Choosing the Right Materials for the Job
Okay, you’ve confirmed the floor has to go. Now comes what’s probably the single most important decision of the entire project: what you’re going to build the new one with. The materials you pick will determine everything—how long your new floor lasts, how much it weighs, how durable it is, and of course, how much you’ll spend. It's a classic balancing act between performance and budget.
This isn't a niche problem, either. The market for boat flooring is huge, expected to hit USD 2.07 billion by 2025. That's a lot of boaters tackling repairs, driven by a simple fact: floor rot is incredibly common, hitting an estimated one in three boats over ten years old.
The Foundation: Your Subfloor Core Options
Before you even think about the pretty stuff you'll walk on, you need to sort out the structural core. This is the backbone of your new deck. You really have two main paths to choose from: old-school marine plywood or modern composite panels.
Boat Flooring Material Comparison
Here's a side-by-side look at the most popular boat floor core materials to help you decide what's best for your project.
| Material | Pros | Cons | Avg. Cost/Sq. Ft. |
|---|---|---|---|
| Marine-Grade Plywood | Excellent strength-to-weight ratio, affordable, tried-and-true material. | Can rot if not perfectly sealed, heavier than composites, requires meticulous waterproofing. | $2.50 - $4.50 |
| Composite Panels (Coosa, etc.) | 100% waterproof and rot-proof, lightweight, extremely durable. | Significantly more expensive upfront, can be less forgiving to work with than wood. | $7.00 - $12.00 |
Ultimately, both are fantastic options when used correctly. It really comes down to your budget and how much "insurance" against future rot you want to buy.
Sealing the Deal: The Importance of Epoxy
This part is non-negotiable. Whether you go with wood or composite, a proper seal is everything. For composite panels, you're mainly sealing seams and edges. But for marine plywood, this step is the difference between a floor that lasts five years and one that lasts twenty.
This is where a high-quality marine epoxy becomes your absolute best friend. Don't just slap a coat on top. We're talking complete encapsulation with a product like our Better Boat Epoxy Resin, which creates an impenetrable shield around the wood.
That means coating the top, the bottom, every single cut edge, and even swabbing the inside of every drill hole before a screw goes in. It’s meticulous work, but it guarantees no moisture can ever find its way to the wood core.
If you want to really get into the weeds on this critical step, check out our deep dive on choosing the right epoxy resin for your boat. It’s worth the read.
The Finishing Touch: Surface Materials
With the structural part sorted and sealed, it’s time for the fun part—picking the surface you'll see and feel. This choice is all about aesthetics, comfort, and how you use your boat.
-
Marine Carpet: The classic choice. It's budget-friendly, feels great on bare feet, and does a nice job of hiding minor imperfections in the subfloor. The trade-off? It can hold moisture and dirt, so you'll need to be diligent about cleaning to prevent mildew.
-
Marine Vinyl: This has become a go-to for a reason, especially on fishing and utility boats. It's tough, waterproof, and super easy to clean. Plus, modern vinyl can look surprisingly good, with patterns that mimic everything from teak to diamond plate.
-
Non-Skid Paint/Coatings: This is your rugged, no-nonsense option. A good non-skid coating provides unbelievable grip, is incredibly durable, and is easy to touch up down the road. It's not as cushy as carpet, but for safety and utility, it's hard to beat.
-
EVA Foam Decking: You've seen this on high-end boats. It's the premium, modern choice known for being incredibly comfortable and offering amazing non-slip traction, even when soaked. It's lightweight and looks sharp, but it's definitely one of the pricier options on the list.
The Teardown Phase: Removing the Old Floor

Alright, you’ve picked your new materials, and now it’s time to get your hands dirty. The teardown is where the real work begins, and trust me, being methodical here will save you a world of headaches later on. Think of this less as a demolition derby and more like a careful deconstruction.
Before you even think about touching a screw, let's talk about safety and organization. You need a well-ventilated space—you'll be kicking up dust, fiberglass particles, and who knows what kind of mold. A good respirator, safety glasses, and some durable gloves are absolutely non-negotiable.
Prepping for a Smooth Removal
First things first: clear the deck. Every seat, the console, hatches, and all the hardware have to come off. This is one of those steps that really separates a smooth project from a chaotic mess.
As you pull each item, snap some photos of how it was installed, paying close attention to any wiring. Grab a box of zip-top bags and a marker. Every screw, bolt, and washer from each component goes into its own bag, clearly labeled. "Starboard Helm Seat Bolts" or "Forward Hatch Hinge Screws"—get specific.
This little habit adds maybe ten minutes to your teardown, but it saves you from the nightmare of staring at a giant pile of mystery hardware during reassembly.
Making the First Cut
With a clear deck, you can attack the old flooring. If it's covered in carpet or vinyl, that has to come up first. This can be a real workout, often calling for scrapers and a ton of elbow grease to break through years of old adhesive.
Once the subfloor is exposed, it's time to bring out the circular saw. Precision is everything here. You have to cut through the deck without slicing into the stringers—the structural "ribs" of your boat—that sit right underneath.
Set your circular saw blade's depth to be just a hair less than the thickness of the decking. This lets you cut through the floor without gouging the critical support structure. It’s always better to make a second shallow pass than to cut too deep on the first try.
Start by making long cuts down the middle of the gaps between the stringers. Then, make cuts across those to create manageable sections you can pry up and pull out.
The Template Trick: Your Secret Weapon
Now for a piece of advice that will make the installation phase about ten times easier: remove the old floor sections in the largest, most intact pieces you can. Resist the urge to smash them to bits with a sledgehammer.
Why? Because these old pieces are now the perfect templates for your new floor. By prying them up carefully, you preserve the exact shape, curves, and cutouts you need to replicate. You can lay them right on top of your new marine plywood or composite sheets and trace a perfect pattern.
This simple trick eliminates a ton of guesswork and complicated measurements, making sure your new floor panels will drop right into place for a snug, professional fit. As you pull each piece, label its location and orientation with your marker (e.g., "Port Side Bow - Top").
With the old flooring out, you’ll have a clear view of the stringers and hull. This sets you up for the next crucial phase: assessment and repair. And while you're at it, it’s never too early to think about your new surface finish. If you’re leaning toward a classic look, you can learn more about how to lay carpet in a boat in our dedicated guide.
Time to Face the Music: Assessing and Repairing Your Boat's Stringers
With the old floor ripped out, you're now staring at the literal backbone of your boat: the stringers. These are the structural ribs that give the hull its shape and strength, and what you find here will dictate the success of your entire project. This is a moment of truth, so don't rush it.
The best tool for this job is deceptively simple—a good, sturdy screwdriver. Methodically go over every single inch of the stringers, giving them a firm poke. A healthy stringer will feel rock-solid; the screwdriver tip will just bounce right off. If it sinks in, even a little, or you hear that sickening soft crunch, you’ve found rot.
Zero in on the usual trouble spots: low areas where water could have pooled, the spots around old screw holes, and especially the transom corners. These are prime locations for water to sneak in and start its dirty work. Any wood that feels spongy, looks dark and waterlogged, or crumbles under pressure must come out.
Grinding and Prepping for a Solid Bond
Once you’ve marked out the compromised sections, it's time for some surgery. Grab an angle grinder with a coarse sanding disc and get to work grinding away the old fiberglass that’s covering the rotten wood. You need to be aggressive here—remove all the old glass until you’re back to clean, healthy wood on both sides of the rotted area.
Proper prep is everything. If you skimp here, your repair will fail. After grinding, vacuum every last bit of dust and debris, then give the entire area a thorough wipe-down with acetone. This cleans off any lingering contaminants like oil or wax, ensuring your new resin gets a death grip on the old surface.
Fitting and Sealing New Stringer Sections
Use the old rotted wood you just tore out as a template to cut new sections. Marine-grade plywood is the classic choice, but modern composite materials are also a fantastic option. Your goal is a perfect fit—snug, but not so tight you have to hammer it into place.
Now for the most critical step in the entire stringer repair: waterproofing. Before that new wood gets anywhere near the boat, you have to seal it completely.
This isn't just about painting the topside. Every single surface of the new wood—top, bottom, and all the cut edges—needs at least two generous coats of Better Boat Epoxy Resin. This essentially mummifies the wood in a 100% waterproof barrier, making sure moisture can never get to it.
This level of prep is what separates a quick patch from a permanent, structural fix. There's a reason the market for boat restoration supplies is booming; in 2023, it was valued at USD 1.2 billion globally. A huge chunk of that is spent on repairs that could have been avoided with proper sealing from the start. Considering that up to 40% of a boat restoration budget can go to deck and floor work, investing in a top-shelf epoxy is the smartest money you'll spend.
Laminating for Lasting Strength
With your new wood sections perfectly sealed and fitted, it's time to bond them into the hull. Mix up a batch of thickened epoxy to a peanut-butter consistency, apply it to the hull where the new stringer will sit, and press the piece down firmly.
Next, you'll "tab" the new section to the old stringers and the hull using strips of fiberglass cloth soaked in epoxy resin. This is what truly integrates the repair.
- Cut several strips of fiberglass cloth. Make them wide enough to overlap onto the old stringer and the hull by at least a few inches on each side.
- "Wet out" the repair area with a thin coat of epoxy first.
- Lay your first strip of fiberglass over the seam, using a brush or roller to saturate it with resin. Work out every single air bubble.
- Keep applying layers, alternating the direction of the cloth's weave for maximum strength, until the new section is fully glassed in.
This process makes the new wood a seamless part of the boat's original structure. For a much deeper dive, our complete guide on how to properly handle a boat stringer repair walks you through every detail.
As a final belt-and-suspenders measure, think about applying a self-adhesive waterproof deck joist tape along the tops of the stringers before laying down the new floor. It’s an extra layer of moisture protection that can save you a lot of headaches down the road.
With your boat's foundation now rock-solid, you're ready to build that beautiful new floor.
Cutting and Installing the New Deck
Alright, with your boat's stringers solid as a rock, we can shift from tear-out to build-back. This is where the magic happens—turning those raw sheets of marine plywood or composite panels into a brand-new floor. Take your time here. Precision and patience are your best friends as you start to bring the structural heart of your boat back to life.
The smartest shortcut you have is using the old floor sections you pulled out earlier. Just lay those pieces directly onto your new sheets of marine-grade plywood or composite board and trace a perfect outline with a carpenter's pencil. Trust me, this trick saves hours of frustrating measurements and guarantees every curve fits your boat’s hull just right.
For the actual cutting, a jigsaw is your go-to for navigating all the curves, and a circular saw will power through the long, straight sections. Here’s a key piece of advice: always cut just a hair outside your traced line. You can always sand or shave off a little extra for that perfect, snug fit, but you can’t add wood back once it's gone.
The Non-Negotiable Step: Waterproofing
If you went with marine plywood, what you do next is the difference between a floor that lasts five years and one that lasts twenty. This is, without a doubt, the single most critical step in the entire process. Don't rush it and don't skip it. The goal is to create a completely impenetrable barrier against moisture.
This means you have to fully encapsulate every single piece of wood. It's not good enough to just paint the top and bottom. You need to coat every surface—top, bottom, and every single cut edge—with at least two generous coats of a high-quality marine epoxy. Our Better Boat Epoxy Resin is made for this, engineered to soak into the wood grain and cure into a rock-solid, 100% waterproof shell.
Pro Tip: Don't forget the drill holes. Before you drive a single screw, use a small brush or a cotton swab to coat the inside of every pre-drilled hole with epoxy. This simple move seals off the most common entry point for water, making sure that wood core stays bone-dry for years to come.
Speaking of a solid foundation, this diagram shows the basic flow for getting the stringers right before you even think about laying down the deck.
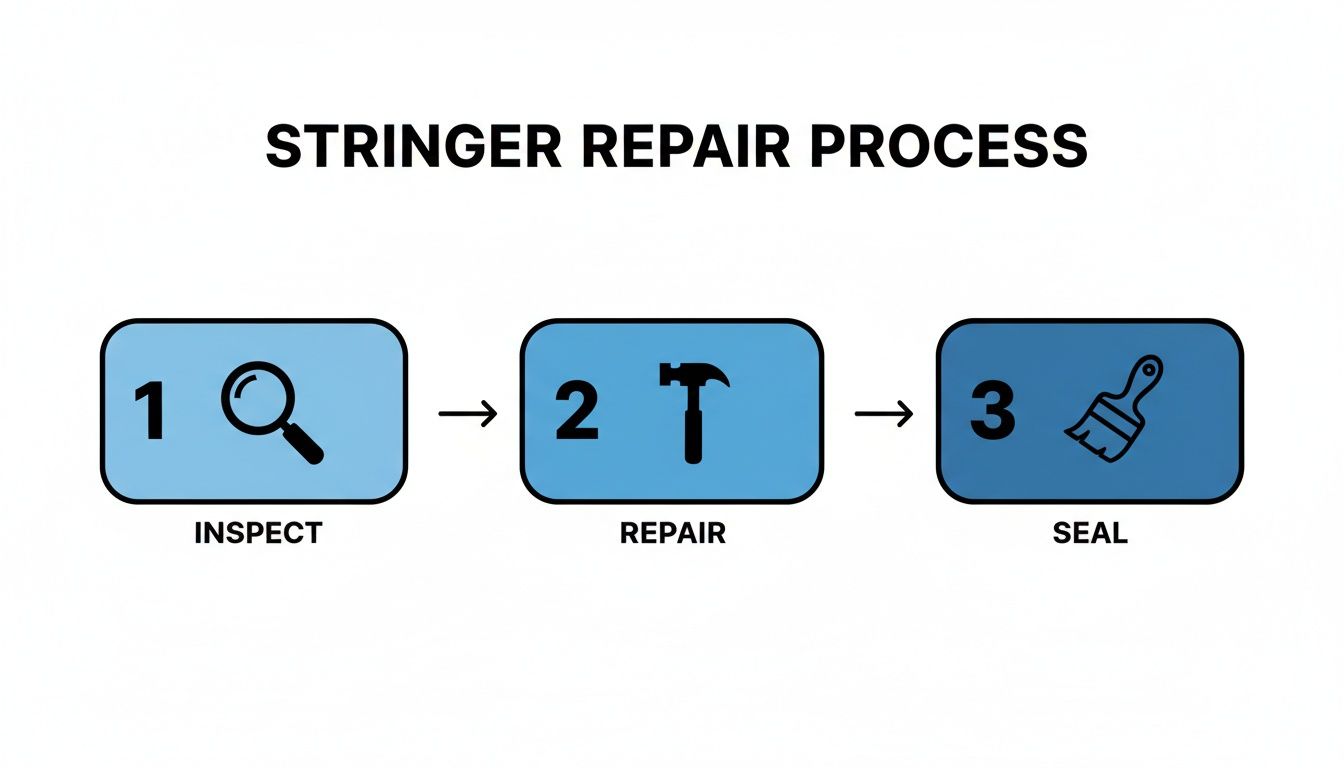
It’s a simple but vital sequence: a thorough inspection, a robust repair, and a complete seal. This is the bedrock of a long-lasting boat floor replacement.
Bedding and Fastening the New Panels
Once your new deck panels are cut, fitted, and completely sealed up, it’s time to lock them in place. Start by dry-fitting each piece one last time to make sure everything lines up perfectly.
With the fit confirmed, you'll "bed" the panels in adhesive. Run a thick bead of marine-grade adhesive sealant right along the tops of all the stringers. Our Marine Sealant & Adhesive is perfect for this. It does two things: it creates a monster bond between the floor and the structure, and it fills any tiny gaps to stop those annoying creaks and vibrations down the road.
Now, carefully lay each panel into place on the bead of adhesive, pressing down firmly to get solid contact. You're ready to fasten them down for good with high-quality stainless steel screws. Drive screws every six to eight inches along every stringer to lock the deck down tight, creating one solid, unified structure.
Unifying the Deck: Glassing the Seams
Your floor is in, but we have one last structural step to make sure it acts like one massive, monolithic piece. The seams between the individual panels need to be joined together with fiberglass.
The process is pretty straightforward. You'll grind a shallow taper along the edges where two panels meet and then lay strips of fiberglass cloth saturated in epoxy resin over the seams.
- Prep the Seam: Use an angle grinder to create a beveled edge on both sides of the seam. You're aiming for a shallow "V" groove.
- Apply a Base Coat: Brush a layer of Better Boat Epoxy Resin into that groove and onto the surrounding deck surface.
- Lay the Fiberglass: Place a pre-cut strip of fiberglass tape over the seam, making sure it’s centered in the groove.
- Saturate the Cloth: Use a brush to apply more epoxy, fully wetting out the fiberglass until it turns transparent. Use a squeegee to work out any and all air bubbles.
Once that cures, this fiberglass bridge makes the seams just as strong—if not stronger—than the rest of the floor. Your new deck is now a rock-solid, completely waterproof platform, ready for whatever final surface you choose to put on top.

Answering Your Boat Floor FAQs
Even with a step-by-step guide, you’re bound to have questions pop up once you're deep in the sawdust and epoxy. A full floor replacement is a major undertaking, so let's tackle some of the most common questions we hear from fellow boaters.
How Much Is This Going to Cost Me?
That's the million-dollar question, isn't it? The honest answer is that it's all over the map. The final number really boils down to your boat's size, the materials you pick, and whether you're paying a pro or doing it yourself.
For a typical 18-foot boat, a DIY job using basic marine plywood and carpet can start around $800. If you're going for the good stuff like premium composite panels and slick EVA foam decking, you could easily be looking at $3,000 or more. If you decide to hire it out, professional labor can add another $2,000 to $5,000 on top of that, depending on your local shop rates.
Here's a tip from experience: spending a little more on top-tier supplies upfront is the smartest way to save money down the road. Using a high-quality sealant like Better Boat Epoxy Resin might add a bit to the initial bill, but it's the best insurance you can buy against redoing this whole job in five years.
Can I Just Patch That One Soft Spot?
I get the temptation. It seems so much easier to just cut out a single rotten section and drop in a fresh piece. But trust me, this is almost always a band-aid on a bigger problem. A soft spot is just the symptom; the real issue is the moisture that caused it. That water has almost certainly wicked its way far beyond the area you can see or feel.
Patching one spot leaves weak points around the repair and does nothing to stop the hidden rot from spreading. For a repair that’s actually structurally sound, you need to replace the entire panel from stringer to stringer—or, more often than not, the whole deck. It’s the only way to be certain you’ve cut out all the compromised material for good.
What’s the Absolute Best Way to Waterproof New Plywood?
The gold standard here is total encapsulation in epoxy. I’m not just talking about rolling a coat on the top. The goal is to create a completely sealed, 100% impenetrable barrier that moisture can never find a way through.
Here’s how the pros do it right:
- Apply at least two generous coats of a quality marine-grade epoxy. Don't forget the underside and, most critically, all the cut edges of your new plywood panels.
- Seal every single fastener hole before you drive the screws. A small brush or even a cotton swab works great for coating the inside of each pre-drilled hole with epoxy.
This process might feel a little tedious, but it ensures there are absolutely zero pathways for water to get back to the wood core. This is single-handedly the most important thing you can do to prevent rot and make sure your new floor lasts.
How Do I Choose the Final Floor Covering?
Your choice for the top surface really comes down to three things: how you use your boat, your budget, and your personal taste. Each option has its own set of pros and cons.
- Marine Carpet: It's affordable, comfortable, and feels great on bare feet. The downside? It can hold moisture and dirt, so you have to stay on top of cleaning to keep mildew at bay.
- Marine Vinyl: This stuff is tough, totally waterproof, and a breeze to clean. It’s a perfect fit for fishing boats or any high-traffic vessel where messes are just part of the deal.
- Non-Skid Paint: A rugged, no-nonsense solution that gives you fantastic traction. It might not be the coziest surface, but for pure utility and safety, it’s tough to beat.
- EVA Foam Decking: This is the premium choice. It looks sharp, feels amazing underfoot, and offers incredible non-slip performance. It just comes with a higher price tag.
Think about how you spend your time on the water, and you'll find the perfect covering that not only looks great but also works for you.
At Better Boat, we're committed to providing the products and knowledge you need to tackle any DIY project with confidence. From our rock-solid epoxy resin to our full line of cleaners and accessories, we have everything to help you get the job done right. Explore our complete collection and get started on your next project today. Find all your essential boating supplies at Better Boat.