 Skip to content

Essential Winterize Boat Checklist for Safe Spring Launch
Think of your winterize boat checklist as your boat's best defense against the brutal trio of freezing temperatures, moisture, and long-term storage. A little methodical work now prevents the kind of heartbreak that comes from finding a cracked engine block, a ruined fuel system, or burst plumbing next spring. It’s all about protecting your investment so you're ready for a seamless launch when the weather turns.
Why Your Boat Needs a Winterization Plan
Let's be clear: winterization isn't just another chore on the list. It's a critical strategy to protect your investment. Skipping it is a gamble you don't want to take. When water freezes, it expands by about 9%, and that expansion creates an immense force that can easily crack a multi-thousand-dollar engine block or split plumbing wide open.
This isn’t just a theoretical problem—it's a nasty reality for too many unprepared boat owners every single spring. The frustration of discovering a catastrophic failure is bad enough, but it’s made worse by the lost time and money on repairs, often sidelining you for a huge chunk of the new boating season.
The Financial Sense Behind Winterization
A proper winterization plan is one of the smartest, most cost-effective things you can do for your boat. The small price of supplies like antifreeze, fuel stabilizer, and fogging oil is nothing compared to the repair bills you could be facing.
With U.S. consumer spending on boating hovering near $55 billion a year and roughly 230,000 to 240,000 new powerboats sold annually, there’s a massive community of owners who depend on seasonal maintenance. Ignoring this critical step can lead to repairs costing anywhere from a few hundred to many thousands of dollars—far more than the cost of prevention. You can dive deeper into U.S. boating market trends to see just how big the industry is.
A good winterization checklist does more than just stop things from breaking. It also:
- Preserves Resale Value: A boat with a clean bill of health and a documented history of proper winterization will always fetch a better price.
- Guarantees a Fast Spring Launch: Instead of dealing with surprise repairs, you can de-winterize and hit the water the first chance you get.
- Prevents Long-Term Corrosion: Simple steps like fogging the engine and changing the oil protect internal parts from rust and decay during the damp, cold months.
The old saying couldn't be more true here: An ounce of prevention is worth a pound of cure. Taking a weekend to follow a detailed checklist will save you from a spring full of headaches and invoices.
More Than Just Antifreeze
While protecting your engine and plumbing from a deep freeze is the main event, a complete winterization plan looks at the entire vessel. We're talking about cleaning the hull to prevent blistering, pulling all your electronics and valuables to shield them from moisture and theft, and picking the right cover to make sure your boat can breathe.
Every single step, from scrubbing the deck to greasing the fittings, adds to your boat’s longevity and your own peace of mind. By taking a thorough approach, you're not just parking your boat for the winter—you're setting it up for success for many seasons to come.
Prepping Your Boat For Off-Season Storage
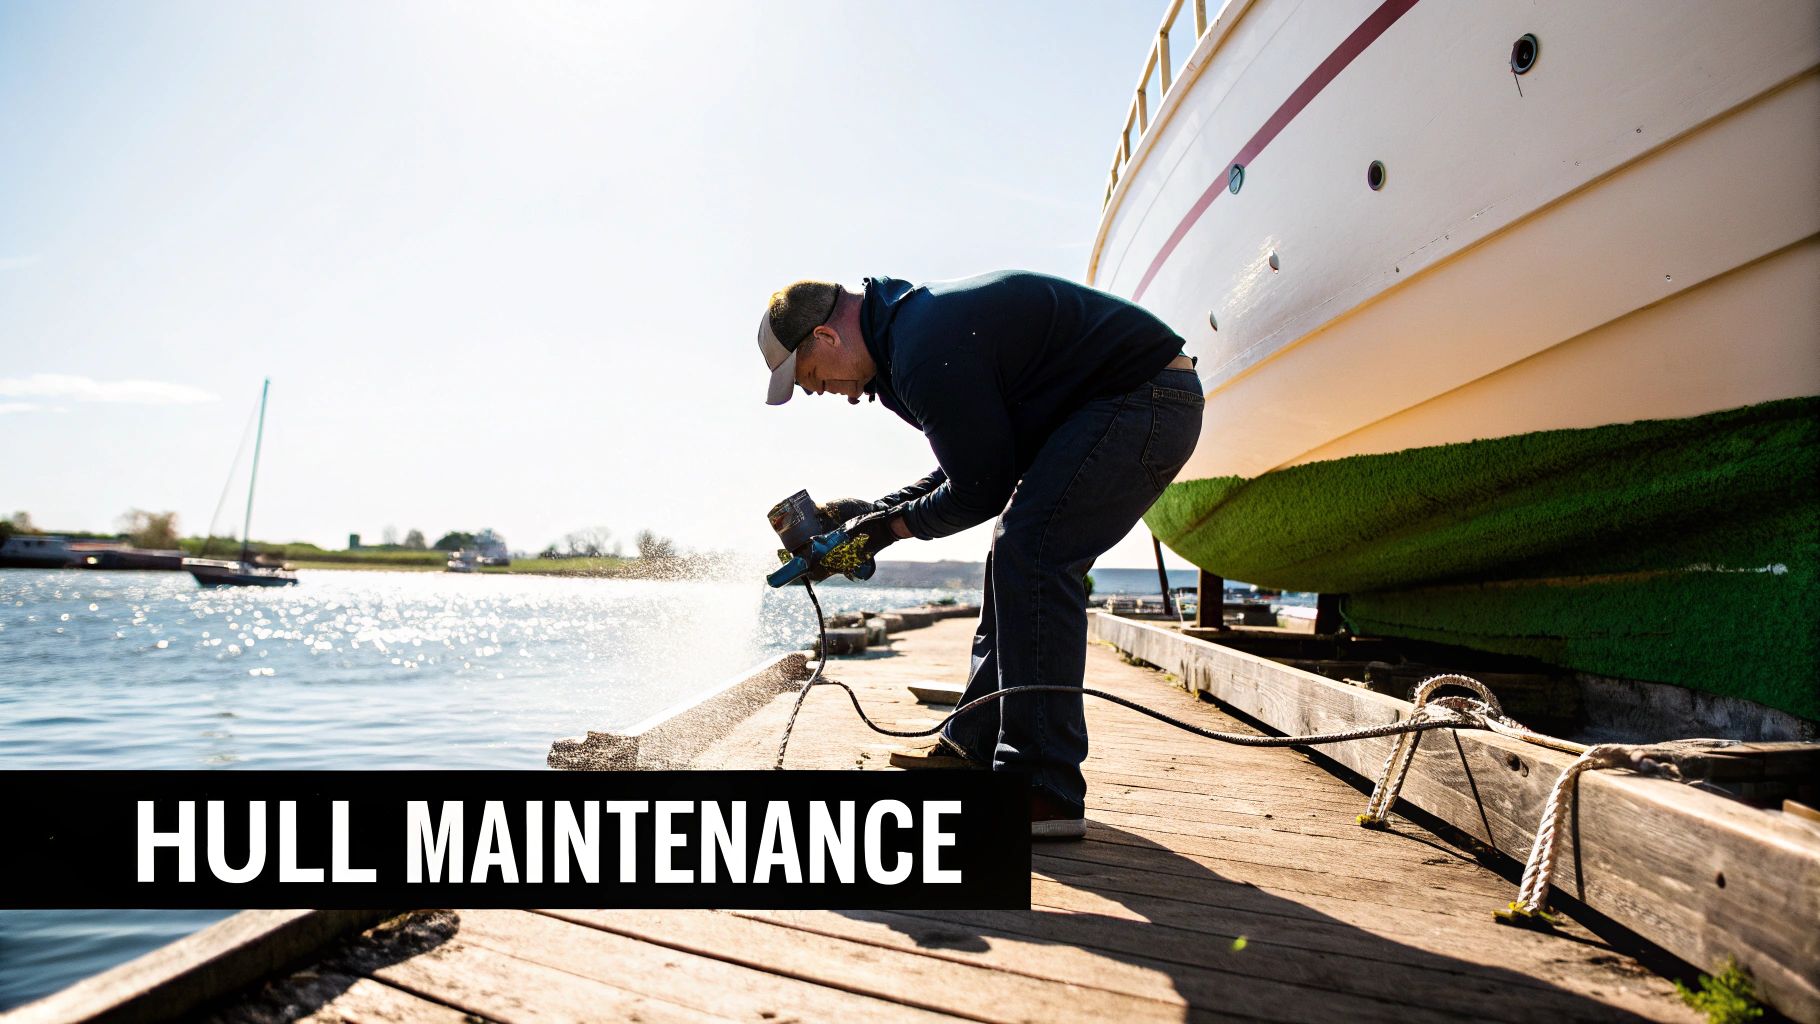
Before you even think about touching an engine hose or a fuel filter, the very first job on your winterization checklist is a top-to-bottom, no-holds-barred cleaning. I like to think of it as prepping the patient for surgery. A truly clean boat is your best defense against mold, mildew, rust, and stubborn stains that can set in over a long, damp winter.
Any salt, grime, or leftover marine growth on your hull or deck is just asking for trouble. Salt is notoriously corrosive; leaving it on your metal fittings all winter is a guaranteed way to find pitting and rust come springtime. Start with a good, powerful boat soap and a deck brush, and work your way from the highest point down.
Make sure you scrub off that "boat mustache" at the waterline and any barnacles or algae still hanging on to the hull. Once she's spotless, a fresh coat of high-quality wax is worth its weight in gold. It adds a crucial protective barrier against moisture, even when your boat is tucked away under a cover.
Clear the Decks and Cabin
Now it's time to shift your focus inside. Your boat is not a winter storage unit, and treating it like one is one of the most common—and costly—mistakes I see boat owners make. Moisture is the enemy, and it has a way of creeping into every single nook and cranny.
Leaving cushions, life jackets, and linens on the boat over winter is like leaving a welcome mat out for mold and mildew. By spring, they can be irreversibly damaged and need complete replacement.
Go through every locker, cabinet, and storage compartment. If it isn't bolted down, it needs to come off the boat for the season. This isn't just about protecting your gear; it's also about getting rid of potential hiding spots for pests.
Here’s a quick rundown of what absolutely has to go:
- All Textiles: This means cushions, towels, bedding, curtains, and especially life jackets (PFDs). Take them home where they can stay clean, dry, and mildew-free.
- Electronics: Grab any portable GPS units, VHF radios, fishfinders, or other sensitive electronics. The extreme cold can wreak havoc on screens and internal components.
- Safety Gear: Fire extinguishers, flares, and first-aid kits should be removed. Flares expire, and extreme cold can reduce the pressure and effectiveness of fire extinguishers.
- Food and Personal Items: Get every last snack, can, and bottle off the boat. Food is an open invitation for rodents and other pests that will happily chew through your wiring and upholstery for a winter home.
Final Interior Wipe-Down
Once the boat is completely empty, it's time for one last, detailed cleaning of the interior. Vacuum all the carpets and wipe down every single surface, from the vinyl seats to the fiberglass and wood trim. Using a dedicated marine vinyl cleaner and protector on your seats now can prevent them from cracking over the winter.
For a deeper dive into the entire process, our complete guide on winterizing a boat will walk you through every critical step.
Finally, clean out any refrigerators and freezers, and be sure to prop the doors open. This encourages air circulation and is the best way to prevent those musty, foul odors from developing. A clean and empty boat is a healthy boat, and doing this foundational work now sets you up perfectly for the more technical tasks ahead. Trust me, when you pull that cover off next spring, you'll be thanking yourself for not creating a massive cleanup project.
Protecting Your Engine and Fuel System
Alright, with the initial prep and cleaning behind us, it's time to get into the heart of the matter: your boat's engine and fuel system. I can't stress this enough—this is where the most crucial winterization steps happen. Cutting corners here is a surefire way to invite catastrophic failures, turning that first beautiful spring day into a miserable and wallet-draining trip to the repair shop.
Think of these next tasks not as a chore, but as the best mechanical insurance policy you can get for your vessel. We're going to walk through the hands-on jobs that protect these vital systems from the silent, creeping damage that the off-season can inflict.
This breakdown shows the choice you have: tackling the engine winterization yourself or calling in a pro. It lays out the average cost, time, and know-how needed for each path.
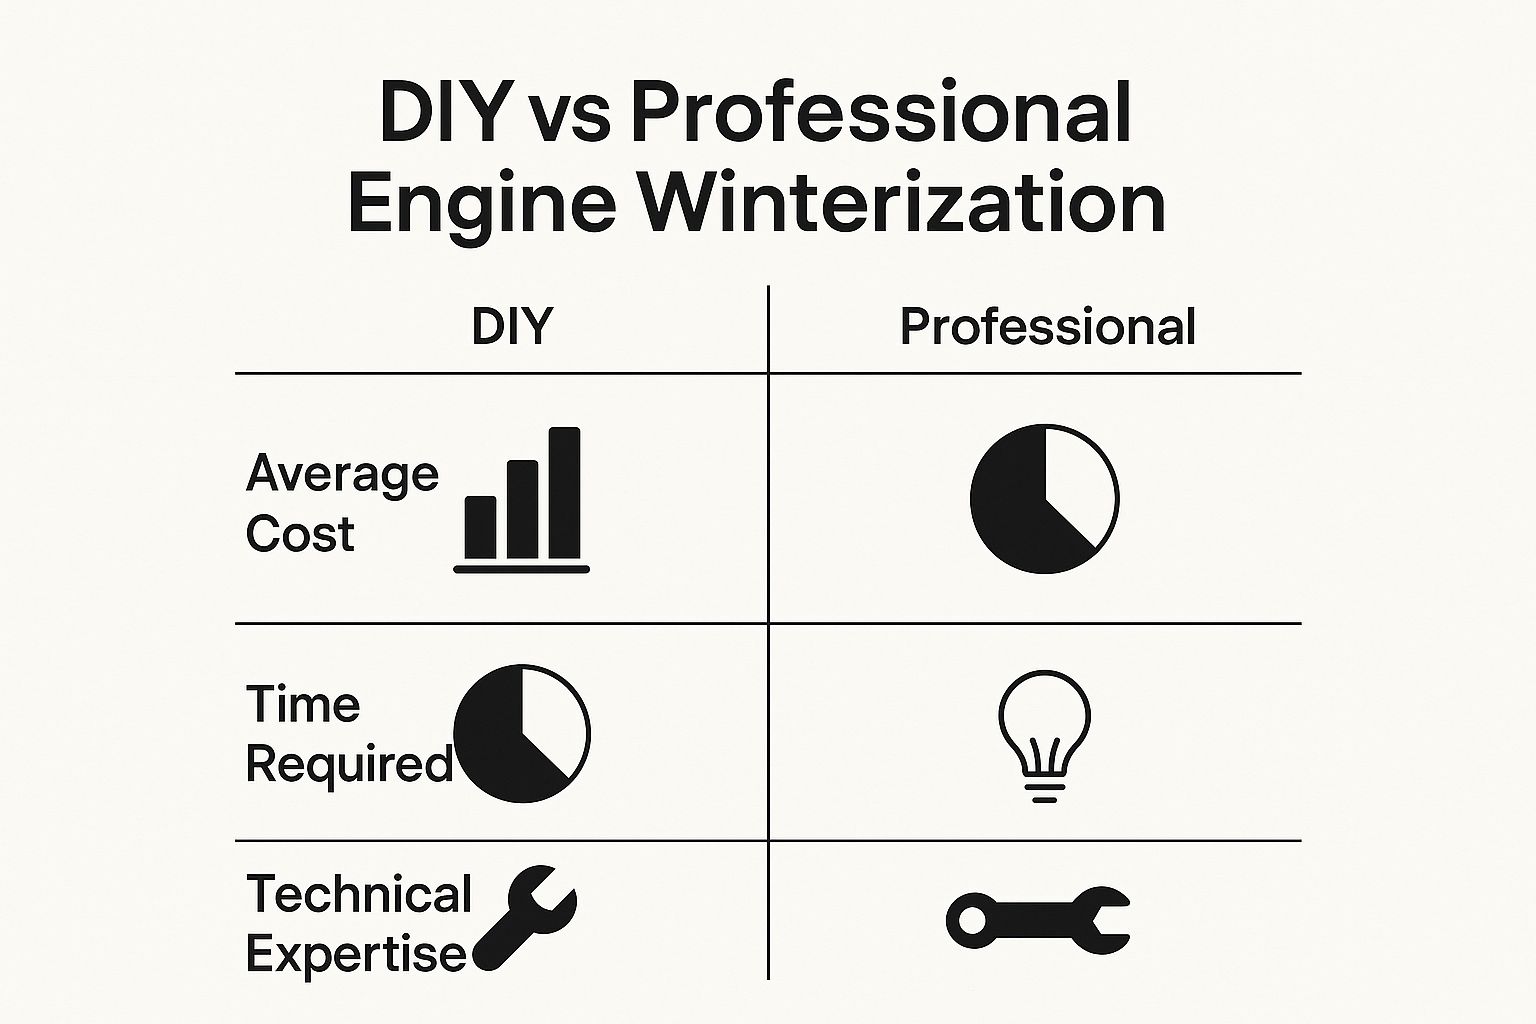
As you can see, going the DIY route can save you a good chunk of change, but it's going to demand your time and a decent level of mechanical confidence. Professional service, on the other hand, buys you convenience and peace of mind, but it comes at a premium.
Fortifying Your Fuel System
Let's start with the fuel, because it’s the root cause of so many springtime engine headaches. Today’s ethanol-blended gasoline can turn into a real nightmare if you just let it sit. The ethanol is hygroscopic, meaning it loves to attract water right out of the air. This can lead to "phase separation," where a destructive sludge of water and ethanol settles at the bottom of your tank, just waiting to get sucked into your engine.
Your best line of defense is a tank that's almost full of fresh, properly stabilized fuel. A full tank drastically reduces the air space where condensation can form. The sweet spot most old salts and fuel experts recommend is about 90% full. This leaves just enough room for the fuel to expand and contract as temperatures fluctuate without burping out the overflow.
After topping off, add a high-quality marine fuel stabilizer, following the manufacturer’s instructions for the right ratio. But don't just dump it in and walk away! You need to get that stabilized fuel circulated through the entire system. Run the engine for a solid 10-15 minutes—either in the water or hooked up to muffs—to make sure the treated fuel works its way through the lines, filters, and into the engine itself.
A common question I get is, "Why not just drain the tank?" The truth is, it's a bad idea. It's practically impossible to get every single drop out, and the residue left behind can still form varnish and gum up the works. A properly stabilized, nearly-full tank is the undisputed best practice in the marine world.
Changing the Oil and Filter
If you do only one thing for your engine, make it this: change the oil and filter before you store the boat, not after. Over a season on the water, your oil collects all sorts of nasty contaminants—water, acids, and other byproducts of combustion. If you let that sit all winter, those corrosive agents are free to etch away at bearings, cylinder walls, and other critical metal parts.
Leaving old, dirty oil in your engine for months is like leaving a wet, acidic sponge sitting inside it. You want clean, fresh oil clinging to all those surfaces, creating a protective shield against rust and corrosion.
Here's the rundown:
- Warm It Up: Run the engine for a few minutes first. Warm oil flows much more easily and keeps more of those nasty contaminants suspended so they come out with the oil.
- Pump It Out: Use an oil extractor pump through the dipstick tube to suck out all the old oil.
- Swap the Filter: Don't skip this. A new filter is essential for starting next season with a truly clean slate.
- Refill with Fresh Oil: Pour in the manufacturer-recommended grade and type of oil. Be careful not to overfill!
Flushing and Protecting the Cooling System
Your boat's cooling system is incredibly vulnerable to freeze damage. Any water left trapped in the engine block, manifolds, or hoses will expand with immense force when it freezes—enough force to crack solid metal. Simply draining the system isn't enough; adding antifreeze is the only way to guarantee protection.
For inboard and sterndrive engines, you need to circulate non-toxic propylene glycol antifreeze through the system. Under no circumstances should you use ethylene glycol (standard automotive antifreeze). It's incredibly toxic and a single spill can devastate marine life.
A popular method involves a 5-gallon bucket and a short hose. Connect the hose to your engine's raw water intake, fill the bucket with the "pink stuff," and fire up the engine. Let it draw the antifreeze from the bucket until you see pink fluid spitting out of the exhaust ports. That's your signal that the entire cooling system is filled and protected.
Inboard vs Outboard Engine Winterization Key Differences
While the core principles are the same, the specific actions for winterizing inboard/sterndrive engines and outboard motors have some key differences. It's crucial to know which steps apply to your setup.
Here's a quick comparison to highlight the main distinctions:
| Winterization Step | Inboard Engine Action | Outboard Engine Action |
|---|---|---|
| Cooling System | Flush with fresh water, then circulate non-toxic (propylene glycol) antifreeze through the entire system until it exits the exhaust. | Flush with fresh water using "muffs," then tilt the engine all the way down to allow all water to drain out completely. No antifreeze is needed. |
| Oil Change | Change engine oil and filter before storage. Sterndrives also require changing the gearcase oil. | Change the gearcase (lower unit) oil. 4-stroke outboards also require an engine oil and filter change. |
| Fogging | Spray fogging oil into the carburetor/intake while the engine is running until it stalls to coat internal components. | Disconnect the fuel line and spray fogging oil into each cylinder's spark plug hole after removing the plugs. |
| Storage Position | Engine remains in a level position within the boat. | Engine should be trimmed all the way down to the vertical position to ensure complete water drainage. |
Understanding these differences is key to doing the job right and avoiding costly mistakes. An outboard relies on gravity for drainage, while an inboard requires the protective fill of antifreeze.
Fogging the Engine for Internal Rust Prevention
The final protective step for the engine itself is "fogging." Fogging oil is an aerosol spray that you use to coat the engine's internal surfaces—cylinder walls, piston heads, valve seats—with a light, waxy film. This film is your defense against rust and corrosion forming on bare metal after the protective engine oil eventually drains away over the long layup.
To fog an engine, you'll spray the oil directly into the carburetor or air intake while the engine is running at a fast idle. You'll see the engine start to sputter and produce a thick cloud of white smoke; that's exactly what you want. Keep spraying until the engine chokes out and stalls. This ensures the entire combustion chamber is thoroughly coated. If you have an EFI engine, check your owner's manual for the specific procedure.
This one simple task acts as a powerful shield against the damp winter air, ensuring your engine's internals are as clean and pristine in the spring as they were on the last day of the season.
Securing Your Onboard Water Systems

While the engine usually gets all the glory, your boat’s plumbing is just as vulnerable to winter’s wrath. I've seen it happen: a single frozen pipe or a cracked water tank can lead to thousands in repairs and a waterlogged nightmare come spring. This part of your winterize boat checklist is your surefire plan to get every last drop of water out before it can freeze, expand, and wreak havoc.
The science is simple but brutal. When water freezes, its volume expands by about 9%. That expansion creates a massive amount of force—enough to easily split hoses, crack plastic tanks, and obliterate delicate pump parts. Properly winterizing these systems isn't just a suggestion; it’s a non-negotiable part of putting your boat away correctly.
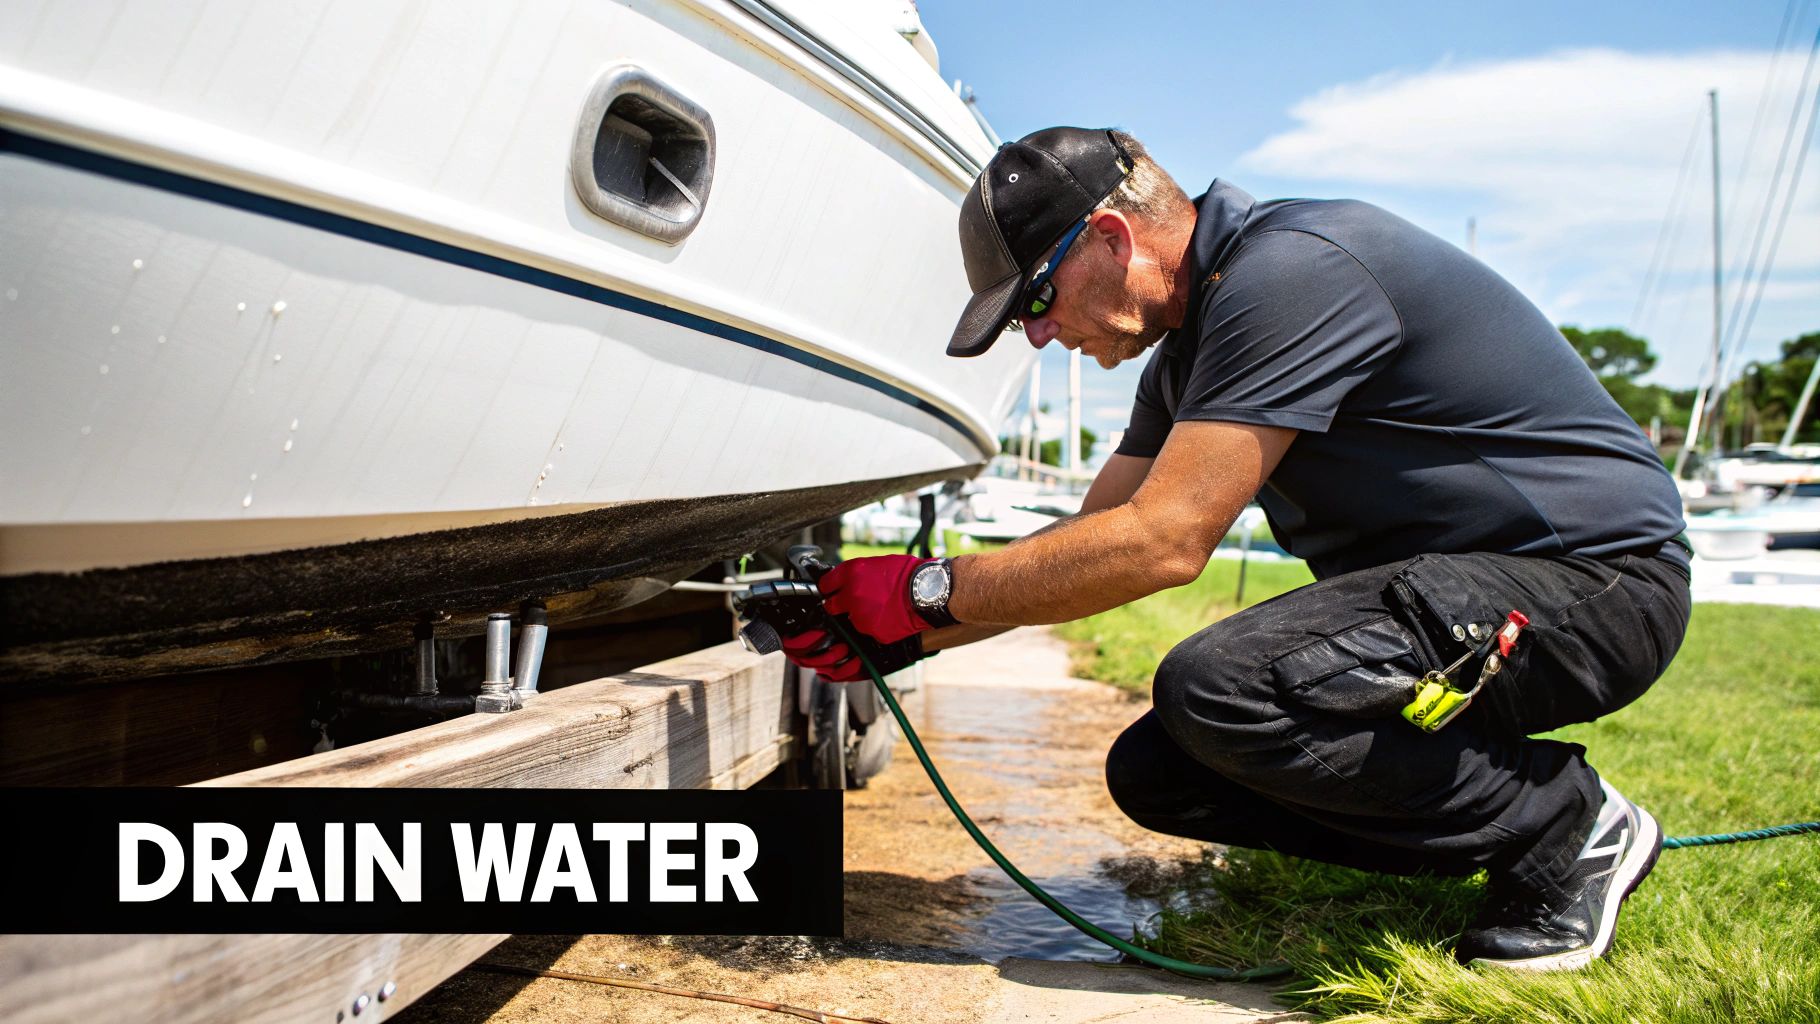
Draining and Flushing the Freshwater System
Your first mission is to evict every drop of water from the freshwater system. Get started by opening the drain valve on your main freshwater tank and letting it empty out completely. While that’s happening, open every single faucet—hot and cold—in the galley, the head, and any washdown nozzles you have. This helps break any vacuum and clears the lines faster.
Once the main tank is dry, don't walk away yet. The water heater is next on the list. Most marine water heaters have their own drain plug, and you absolutely have to drain it. Trapping water in there is a surefire recipe for a costly replacement. Many of us use a water heater bypass kit, which lets the antifreeze flow through the main plumbing without wasting it to fill the entire 6- or 10-gallon heater tank.
Bypassing your water heater is one of the smartest moves you can make. It can save you up to 10 gallons of antifreeze, which cuts down on both cost and the time it takes to get the job done.
Pumping Antifreeze Through the Lines
With the system totally drained, it's time to bring in the protection: non-toxic propylene glycol antifreeze. You'll see it called "the pink stuff" at any marine store. Never, ever use automotive (ethylene glycol) antifreeze in your plumbing. It's highly toxic and a serious health hazard if it ever contaminates your drinking water system.
To get started, pour several gallons of the pink antifreeze directly into your empty freshwater tank. Then, switch on your boat’s freshwater pump. I always start with the faucet that’s furthest from the pump. Turn on the cold water tap and just let it run until you see a solid, steady stream of pink fluid. Once you do, switch over to the hot water side and repeat.
Go through this process for every single water outlet on the boat:
- Galley sink (hot and cold)
- Head sink (hot and cold)
- Shower head (hot and cold)
- Transom shower or any washdown nozzles
This methodical approach ensures every inch of your plumbing is filled with antifreeze, leaving no hidden pockets of water behind to freeze and cause damage.
Winterizing the Head and Holding Tanks
Your marine toilet (the head) and its holding tanks are often an afterthought, but they are just as critical to winterize. The pumps, macerators, valves, and tanks in these systems are prime candidates for freeze damage.
First things first, get the holding tank pumped out completely at a designated station. Once it's empty, pour about a gallon of the non-toxic pink antifreeze into the toilet bowl and give it a few flushes. This circulates the antifreeze through all the important bits—the intake lines, the pump mechanism, and right into the holding tank, protecting everything along the way.
For a final bit of insurance, I like to pour a little more antifreeze directly down the shower and sink drains. This makes sure the P-traps are full, creating one last barrier against the cold.
Taking these steps, along with some thorough boat bilge cleaning and degreasing, will leave your vessel clean, dry, and secure for the offseason. When you follow this process, you can rest easy knowing your boat’s entire water system will survive the winter completely unscathed.
Winter Care for Modern and Electric Boats
 Boats today aren't just fiberglass and horsepower anymore; they’re floating technology hubs. We're talking sophisticated chartplotters, fishfinders, and even fully electric propulsion systems. This new wave of innovation means your old winterizing checklist needs a serious update. The traditional engine-focused tasks just don't cut it for these advanced systems, especially when it comes to batteries and sensitive electronics.
The whole boating industry is shifting, with more of us embracing tech and cleaner power. This has brought a ton of electric and hybrid boats to the water, all running on advanced lithium-ion batteries. While you get to skip some of the greasy engine maintenance, these boats have their own set of winter care rules, mostly centered around proper battery storage. You can actually read more about how boating industry trends are shaping boat care over at SalvageMarine.net.
Managing Electric Boat Batteries for Winter
On an electric or hybrid boat, that battery bank is the heart of the whole operation. It’s not like a simple lead-acid battery you just disconnect and forget. These lithium-ion power banks need careful management to protect their health and make them last. Leaving one fully charged or completely dead for months is a guaranteed way to kill its lifespan.
Pretty much every manufacturer will tell you the sweet spot for storing lithium-ion batteries is somewhere between 40% and 60% charge. This puts the least amount of stress on the battery’s internals, which is exactly what you want for preserving its capacity over a long, cold winter.
Never, ever store your boat's main lithium-ion battery at a 100% charge. A full charge keeps the battery in a high-stress state that can permanently knock down its total capacity. On the flip side, letting it drop below 20% can cause damage that’s just as irreversible.
The goal is to find that "just right" Goldilocks zone. Before you tuck the boat in for the winter, take the time to either run the battery down or charge it up to that middle range. If your boat is stored somewhere you can get to it, it’s a great idea to check the charge every month or two. A quick top-up might be needed if it’s self-discharged a bit.
Protecting Onboard Electronics from Cold and Moisture
It's not just about the main power system. Your boat is probably loaded with expensive electronics—chartplotters, multi-function displays, fishfinders, VHF radios—that all have sensitive components that absolutely hate extreme cold and condensation. You’ve got two main ways to tackle this.
Strategy 1: Remove and Store Indoors This is hands-down the safest bet for any electronics you can easily take off the boat.
- Bracket-Mounted Displays: It’s usually as simple as unplugging a few connections and unclipping the unit from its mount.
- Handheld Gear: This goes for your portable GPS and handheld VHF radios, too.
- The Payoff: Stashing them in a climate-controlled spot like your house or a heated garage is a bulletproof way to protect them from temperature swings and moisture.
Strategy 2: Protect in Place What about the flush-mounted gear that’s a real pain (or impossible) to remove? Here, your game plan shifts to preventing moisture at all costs.
- Use Your Covers: Always pop the factory sun covers back onto the displays. They're your first line of defense.
- Add a Desiccant: Grab a desiccant pack, like the silica gel pouches you find everywhere, and toss one inside the console near the electronics. It will soak up any ambient moisture that gets trapped under the boat cover.
- Ventilation is Key: Even with a good boat cover, you need airflow. Proper ventilation is critical to stop condensation from forming inside the console and wreaking havoc on your gear.
By tailoring your winterizing process to these modern systems, you’re making sure every piece of high-tech equipment, from the batteries to the displays, is perfectly preserved and ready to go next season.
Choosing the Right Boat Cover and Storage
Once you’ve gone through the effort of winterizing your boat’s internal systems, the last major hurdle is protecting it from the outside world. How and where you decide to store your boat for the winter are two of the most critical decisions you'll make, and they will directly impact its condition next spring.
You've got a few options here. Storing your boat at home is definitely the most budget-friendly path, assuming you have the space. The big plus is that you're in total control of security and can peek in on your vessel whenever you want. On the other hand, professional boat yards offer top-tier security and expert handling, but that service comes with a price tag. For many boaters, a covered or climate-controlled facility offers the ultimate peace of mind.
Selecting the Perfect Cover
This brings us to one of the most common debates among boat owners: custom canvas cover or professional shrink-wrap?
Shrink-wrap is fantastic for creating a drum-tight, waterproof shield that sheds snow and ice like a champ. The downside? It's a one-time-use product, and if it isn't ventilated perfectly, it can trap moisture. That’s a recipe for mildew.
A high-quality, custom-fitted canvas cover is a real investment that pays off over the long haul. It costs more upfront, but its breathability is a massive advantage. Good canvas allows moisture to escape, which seriously cuts down the risk of finding a science experiment growing on your upholstery and interior finishes come springtime. Just make sure the cover is well-supported so water can’t pool and cause it to sag.
No matter what kind of cover you go with, airflow is non-negotiable. A poorly ventilated boat becomes a greenhouse for mildew. Believe me, trapped condensation can inflict more damage over one quiet winter than a whole season out on the water.
To get the air moving, you'll want to:
- Install Vents: Add a few purpose-built vents to your cover. This creates a sort of chimney effect, letting damp, stale air out and fresh air in.
- Use Support Poles: A solid support system isn't just for holding up under heavy snow. It’s crucial for creating air gaps between the cover and your boat's deck.
- Add Dehumidifiers: It's always a good idea to place a few moisture-absorbing products, like desiccant buckets or bags, in the cabin and bilge to soak up any leftover ambient moisture.
These extra boat maintenance tips for the winter season can make a world of difference. A boat that's been properly covered and ventilated will come out of storage clean, dry, and ready for launch day.
Got Questions About Winterizing? We've Got Answers
Even when you have a solid checklist, questions always seem to pop up during the winterization process. That's perfectly normal. Getting the details right is what separates a smooth spring launch from a season of frustrating—and expensive—repairs. Let's tackle some of the most common things that trip boat owners up.
One of the biggest areas of confusion, and one of the most critical to get right, is antifreeze. I'll make this simple: never, ever use automotive (ethylene glycol) antifreeze in any part of your boat's engine or freshwater systems. It's incredibly poisonous to fish and other aquatic life. For all marine applications, you must use non-toxic propylene glycol antifreeze, which you'll usually see sold as "the pink stuff."
Picking the Right Pink Antifreeze
Now, not all pink antifreeze is the same. Grabbing the wrong bottle off the shelf can lead to a cracked engine block, which is about as disastrous as it gets. You’ll see two main types, and each has a specific job.
- -50°F (-46°C) Antifreeze: This is your go-to for the boat's freshwater and sanitation systems. It's what you'll use to protect sinks, showers, toilets, and all the associated plumbing.
- -100°F (-73°C) Antifreeze: This is a much stronger formula, and it's the only one you should use for your raw-water cooled engine. It offers a much wider safety margin for those deep-freeze temperatures that can easily crack an engine block or manifold.
Don't gamble with your engine. Always double-check the label and make sure you're using the -100°F solution for the most expensive piece of equipment on your boat.
"Can't I just drain the engine block instead of using antifreeze?" I hear this one all the time. While draining gets most of the water out, it's almost impossible to get every last drop. All it takes is a small, trapped pocket of water to freeze, expand, and cause a catastrophic crack. Antifreeze is the only way to be absolutely certain your engine is protected.
Another hot topic is fuel. Do you store the boat with a full tank or an empty one? The experts are pretty clear on this: fill your tank to about 90% capacity and treat it with a high-quality marine fuel stabilizer.
Leaving a tank nearly full minimizes the empty space where condensation can form. Water in your fuel is a major headache you don't want to deal with come springtime. Storing it empty is just asking for trouble, as the air and moisture can cause residual fuel to degrade, leaving varnish and gummy deposits throughout your fuel system.
For every tool and solution you need to tackle your winterization project with confidence, Better Boat has a complete lineup of premium, boater-friendly products. From our non-toxic antifreeze and fuel stabilizers to heavy-duty boat covers, we have everything to keep your investment safe. Check out our collections and get set for a worry-free winter at https://www.betterboat.com.
Related Posts

How to Clean Boat Hull Effectively | Expert Tips & Tricks

Your Guide to Teak Oil for Boats
