


Boat Bottom Paint Your Complete Guide to Hull Protection
Think of boat bottom paint as your hull's personal bodyguard. Its main job is to stop marine critters—like stubborn barnacles, algae, and slime—from making a home on the underside of your boat. This essential coating, often called antifouling paint, is your first line of defense against damage, and it even helps improve your boat's performance and cut down on fuel costs.
Why Boat Bottom Paint Is Your Hull's Best Defense
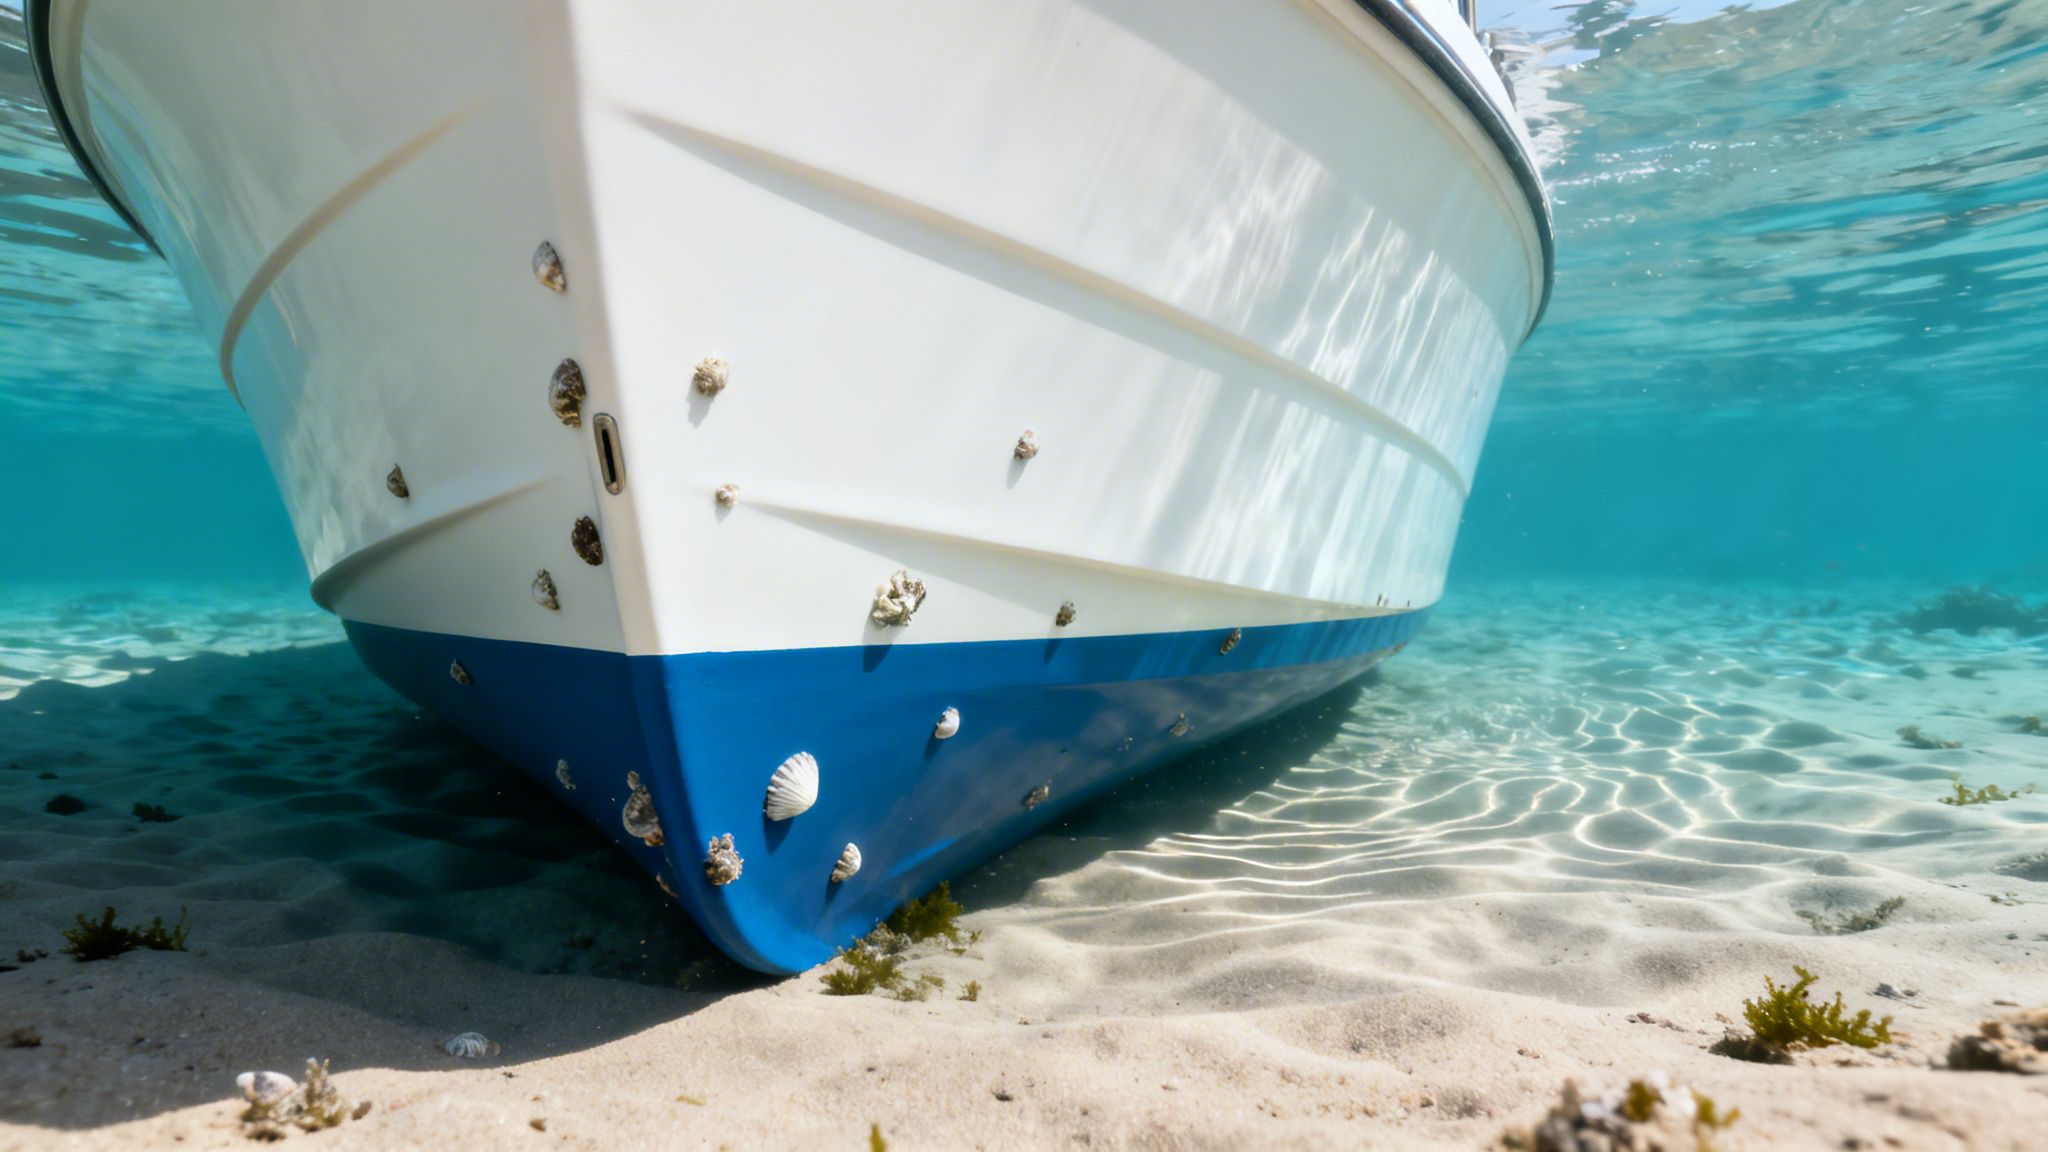
The second your boat touches the water, the battle begins. Tiny organisms are instantly drawn to submerged surfaces, creating a slick layer of slime. This slime is like rolling out the welcome mat for larger, more destructive marine life. This whole process is called biofouling, and it's a relentless assault on any unprotected hull.
This buildup isn't just an eyesore; it creates some serious headaches for your vessel's performance and long-term health.
- Increased Drag: A hull covered in barnacles and algae creates a massive amount of friction in the water, essentially acting like a parachute. This forces your engine to work much harder to push through, which sends your fuel consumption through the roof.
- Reduced Speed and Maneuverability: With the engine fighting all that extra resistance, you'll notice your top speed dropping. Your boat can also feel sluggish and less responsive at the helm.
- Potential Hull Damage: Some of these critters, especially barnacles, have rock-hard shells that can permanently scratch, pit, and damage your hull's gelcoat. If left alone, they can become a real nightmare to deal with. You can learn more about this in our guide on how to remove barnacles from your boat.
The Financial Impact of Biofouling
The numbers don't lie—using a quality boat bottom paint makes a ton of financial sense. Unchecked biofouling can ramp up a vessel's drag by as much as 60%, which can cause fuel costs to spike by a painful 20-30%. For the average boater, that adds up to a huge expense over a single season.
Properly applied antifouling paint is one of the smartest things you can do to protect your investment. Studies show a clean hull can slash fuel consumption by 5-10%, saving you hundreds of dollars a year while making sure your boat runs the way it's supposed to.
This isn't just a niche concern; the global boat antifouling paint market was valued at US$300 million in 2023 and is only expected to grow. It's a testament to how crucial this maintenance step is for boaters everywhere.
The Foundation of a Great Paint Job
At the end of the day, even the best paint is only as good as the prep work underneath it. A clean, smooth surface is absolutely critical for the paint to stick properly and do its job.
Kicking things off with a thorough cleaning using a quality boat soap and the right hull brushes ensures you get rid of all the grease, grime, and old residues. This is the one step you just can't skip if you want a durable finish that will defend your hull season after season.
Decoding The Main Types of Antifouling Paint
Choosing the right boat bottom paint can feel like trying to crack a code, especially with terms like "ablative" and "modified epoxy" getting tossed around. But it's simpler than you think. It all boils down to how the paint releases its secret weapon—biocides—to keep marine growth from making a home on your hull.
Think of it this way: some paints act like a tough, unyielding shield, while others work more like a snakeskin, constantly shedding their outer layer to stay clean. Each strategy has its place, and the best one for you depends on your boat, how you use it, and the waters you frequent. The two big players you'll run into are hard paints and ablative paints.
Hard Paints: The Durable Shield
Hard paints, also called modified epoxy or contact leaching paints, cure into a tough, armor-like finish on your hull. Imagine a porous sponge packed with biocide. As water flows over it, the biocide slowly "leaches" out, creating a hostile surface for barnacles and algae.
The biggest advantage here is durability. This stuff is tough. You can give it a good scrub with a brush or soft pad mid-season to knock off any slime and reactivate the surface without worrying about taking the paint off with it.
Hard paints are the clear winner in a few specific situations:
- High-Speed Boats: Powerboats and racing sailboats that slice through the water need a hard, slick finish that won't wear off from friction at high speeds.
- Frequently Trailered Boats: If your boat lives on a trailer, a hard paint can take the abuse from bunks and rollers far better than its softer cousins.
- Boats in Low-Fouling Waters: In areas with less aggressive marine growth, a hard paint can offer multi-season protection with just a light scrub now and then.
The one thing to keep in mind with hard paints is that while the biocide runs out over time, the paint itself stays put. After a few years of adding new coats, you'll get a thick buildup that eventually needs to be sanded all the way down before you can start fresh.
Ablative Paints: The Self-Polishing Solution
Ablative paints, often known as self-polishing paints, take a completely different—and frankly, pretty clever—approach. Instead of just releasing biocide, the paint itself wears away at a slow, controlled rate as your boat moves through the water.
It’s like a bar of soap that gradually dissolves with use. This constant erosion continuously exposes a fresh, potent layer of biocide, giving you consistent protection all season long. The self-polishing action means you never get that thick paint buildup, which makes your annual prep work a whole lot easier.
Ablative paint is the ultimate "set it and forget it" solution for many boaters. Its self-renewing surface provides reliable performance without the need for mid-season scrubbing, making it perfect for boats that live in the water.
This makes ablative paint the go-to for:
- Boats Kept in the Water: For sailboats and cruisers that stay in a slip or on a mooring all season, this kind of consistent, low-fuss protection is ideal.
- Boaters in High-Growth Areas: The constant exposure of fresh biocide is a powerful defense in waters where fouling is a major battle.
- Owners Seeking Easy Repainting: Since the paint wears away, your yearly prep is usually just a light pressure wash and a quick scuff-sand before applying a new coat. No more back-breaking paint stripping.
To make things even clearer, let's break down the key differences in a simple chart.
Comparing Your Boat Bottom Paint Options
Here’s a side-by-side look at the most common antifouling paint types to help you choose the best fit for your boat and how you use it.
| Paint Type | How It Works | Best Suited For | Key Advantage |
|---|---|---|---|
| Hard Paint | A hard, porous film slowly leaches biocides when in contact with water. | High-speed boats, trailered boats, boats in low-fouling areas. | Extreme durability; can be scrubbed without removing paint. |
| Ablative Paint | Wears away at a controlled rate as the boat moves, constantly exposing fresh biocide. | Boats that live in the water, cruising boats, areas with heavy fouling. | No paint buildup over time, making recoating much easier. |
| Thin-Film Paint | Creates an ultra-slick surface that marine growth can't attach to. | Racing sailboats and performance powerboats. | Minimizes drag for maximum speed and fuel efficiency. |
| Biocide-Free | Relies on physical properties, like a super-slick surface, to prevent fouling. | Boaters in environmentally restricted waters. | Environmentally friendly with zero biocide release. |
Ultimately, the best paint is the one that matches your boating lifestyle. A little homework now saves a ton of scraping later.
Specialized and Modern Options
Beyond the two main categories, you'll find other paints designed for specific jobs. Thin-film paints, for example, use slippery silicone or ceramic compounds to create a surface so slick that marine organisms just can't get a grip. These are a favorite among racers where minimizing drag is everything.
You'll also see a growing number of biocide-free coatings that rely on slickness or other physical properties to ward off growth. These are gaining traction with boaters in environmentally sensitive areas where traditional biocides are restricted.
This isn't just a small niche; the global antifouling paints market was valued at USD 10.0 billion in 2024 and is expected to hit USD 17.8 billion by 2033. It’s a huge deal because a fouled hull can spike a vessel's running costs by 15-25%. For decades, copper has been the king of antifouling, and for good reason—it works. Choosing the right paint isn't just about a clean hull; it's a major factor in your boat's performance and your wallet. You can explore more about these market dynamics and the impact of antifouling technology.
How To Choose The Right Paint For Your Boat And Waterway
Picking the right bottom paint for your boat isn't a one-size-fits-all kind of deal. Think of it more like playing matchmaker between a specific paint formula and your unique situation. When you get it right, you're rewarded with effective, long-lasting protection. Get it wrong? You'll be facing a frustrating season of scraping and dealing with premature paint failure.
To nail the right choice, you just need to run through a few key variables. It's like a simple diagnostic checklist for your boat's hull. Your answers will point you straight to the perfect paint, making sure you get every bit of performance and protection you paid for.

Your Boating Environment And Habits
First things first: where do you boat? The water itself is a massive factor. Saltwater is a much tougher playground for your hull, with far more aggressive marine growth than you'll find in freshwater. A paint that works wonders on a lake in Minnesota might give up the ghost in a matter of weeks in the warm, salty waters of the Florida Keys.
Next up, how do you use your boat? A high-performance speedboat that’s flying across the water every weekend needs a different kind of paint than a sailboat that bobs peacefully at its mooring for weeks on end. The movement of the boat through the water is actually a key part of how certain paints—especially ablative types—do their job.
This simple decision tree can help you see the most common choices based on how you use your boat and whether it lives in the water.
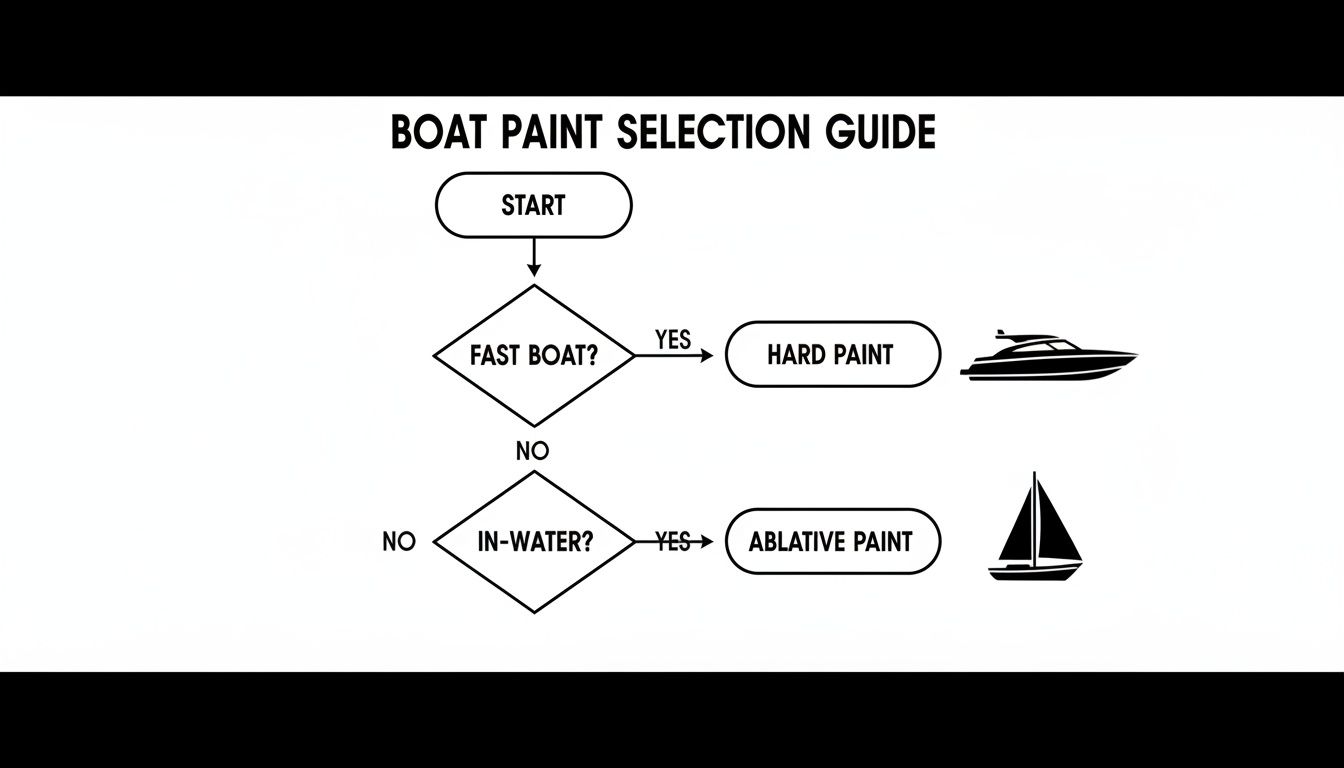
As the chart lays out, fast boats need hard paints that can handle the friction, while boats that are always in the water are usually better off with a self-polishing ablative paint.
Matching Paint To Hull Material
This one is non-negotiable. Your boat's hull material dictates your paint choice, period. What works perfectly on a fiberglass hull can cause catastrophic damage to an aluminum one. This is one area where you absolutely cannot afford to make a mistake.
Here’s a quick breakdown:
- Fiberglass: The most common material out there. It’s compatible with pretty much all types of bottom paint, whether they're copper-based or copper-free.
- Wood: Classic wooden boats also play nice with most bottom paints, but you have to make sure the hull is properly sealed and primed before you even think about painting.
- Aluminum: This is the big exception. Never, ever use a copper-based antifouling paint on an aluminum hull. The copper will react with the aluminum in a process called galvanic corrosion, which can literally eat holes right through the metal. You must choose a copper-free paint made specifically for aluminum.
Galvanic corrosion is an electrochemical reaction that happens when two different metals touch in an electrolyte, like saltwater. For an aluminum boat, this means copper-based paint acts like a battery that is actively destroying your hull.
If you have an aluminum boat, it’s critical to understand exactly how to protect it. You can get all the details in our complete guide to antifouling paint for aluminum boats.
Checking For Existing Paint Compatibility
Finally, unless you’re working with a brand-new boat or a hull that’s been stripped completely bare, you have to know what kind of paint is already on there. Slapping an incompatible paint over an old coat is a recipe for disaster. You’ll be looking at widespread peeling and flaking in no time.
The rule of thumb is that you can apply a soft, ablative paint over a hard paint (after a good sanding, of course), but you can never apply a hard paint over an ablative paint. The soft layer underneath will just wear away like it’s supposed to, taking your new, expensive hard paint right along with it. If you have no idea what's on your hull, the safest move is to sand it all the way down to the primer or gelcoat and start fresh.
While you're down there inspecting the old paint, you'll probably spot some small dings, scratches, or gouges. It’s crucial to deal with these before painting to get a smooth, durable finish. Our Epoxy Putty Stick is perfect for filling these little imperfections. It cures into a rock-hard, sandable surface that gives your new paint a solid foundation to stick to.
Applying Boat Bottom Paint Like A Pro
Alright, you’ve picked out the perfect paint. Now comes the hands-on part. Applying boat bottom paint can feel like a huge undertaking, but if you break it down into a few clear, manageable steps, it’s a seriously rewarding DIY project. Getting that professional-grade finish isn't about some secret skill—it’s all about patience and paying attention to the details.
The secret to a paint job that actually lasts isn't in that final, glossy coat. It's all in the prep work. This first stage is where the battle for durability is really won or lost. A clean, properly prepared surface gives the new paint something to bite into, forming a powerful bond with the hull that'll hold strong all season. Trust me, rushing this part is the single biggest mistake you can make.
Stage 1: The Critical Preparation Work
Prep is everything. Think of it like the foundation of a house; if it's weak, the whole structure is compromised. This phase is all about cleaning, sanding, and sometimes stripping away old, flaking layers of paint.
First up, give that hull an aggressive cleaning. You’ve got to get rid of every last trace of marine growth, slime, oil, and grime. A good pressure washer is your best friend here. Follow that up with a serious scrubbing using a quality detergent like our Boat Soap and a set of stiff Deck Brushes. This makes sure the surface is totally free of anything that could get between the hull and your new paint.
Once it's clean and bone dry, it's time to sand. The goal here is to "scuff up" the surface, creating thousands of microscopic peaks and valleys for the new paint to grip onto. Grab some 80-grit sandpaper and abrade the entire bottom. If you see any existing paint that's flaking or peeling, you'll need to scrape and sand those spots down to a solid, stable layer.
In some cases, where the old paint is just shot, a full strip-down might be the only way to go. For a deep dive into that bigger job, we've got a complete walkthrough in our article on how to approach boat bottom paint removal.
Stage 2: Safety First And Foremost
Antifouling paint is packed with potent chemicals designed to ward off marine life, and that stuff is just as nasty for you. Safety is not optional. The dust from sanding old paint can be loaded with heavy metals and biocides, and the fumes from fresh paint are toxic.
Before you even think about cracking open a can, gear up with the right Personal Protective Equipment (PPE):
- Respirator: A NIOSH-approved respirator with organic vapor cartridges is non-negotiable. It protects your lungs from both fumes and sanding dust.
- Goggles: You need full-seal safety goggles to keep dust and paint splashes out of your eyes.
- Gloves: Chemical-resistant gloves are a must to protect your skin from direct contact.
- Protective Clothing: A disposable coverall keeps all that contaminated dust and paint off your clothes and skin.
Stage 3: Priming And Masking For A Flawless Finish
With the hull prepped and your safety gear on, it’s time for the final touches before the paint goes on. Masking is what creates those crisp, professional-looking lines and protects things you don't want painted, like transducers and thru-hulls. Use a high-quality painter's tape to lay down a sharp waterline and cover any hardware.
Next up is priming. If you've sanded all the way down to bare gelcoat or fiberglass, applying a barrier coat is absolutely crucial. This epoxy primer seals the porous hull, preventing water from seeping in and causing osmotic blisters down the road. It’s a vital step for the long-term health of your hull.
The global marine paints market is huge for a reason—it's projected to hit USD 3.2 billion by 2032. But here's the kicker: industry data suggests that poor surface prep is the culprit behind an estimated 40% of all bottom paint failures. That turns a good investment into a total waste of time and money.
Stage 4: The Art Of Application
Now for the main event. Start by stirring the paint—and I mean really stirring it. The heavy biocides settle at the bottom of the can, so you have to mix them back in completely. A drill with a paddle mixer attachment is the best way to get this done right.
When it's time to apply, a short-nap roller (3/16” or 1/4”) is the tool for the job. It lays down a thin, even coat without creating a ton of texture. Use a paintbrush to "cut in" around your masked-off areas and any tight spots the roller can’t reach.
Work in manageable sections and apply the paint in thin, even coats. Make sure to overlap your roller strokes to avoid leaving lines or "holidays" (missed spots). Most paints require at least two coats for proper protection. Don't forget to hit high-wear areas like the leading edge of the keel and rudder with an extra coat.
Always, always follow the manufacturer's guidelines for drying times between coats and before you launch the boat. Rushing this step can mess with the paint's curing process and torpedo its effectiveness. For a broader look at general painting practices that can help improve your technique, it’s always good to expand your knowledge.
Maintaining Your Bottom Paint For Lasting Performance
Putting a fresh coat of bottom paint on your boat isn't the finish line—it's actually the starting gun for a season-long maintenance strategy. A little bit of attention is what separates a decent paint job from a great one, keeping that antifouling shield working hard from launch day all the way to haul-out.
The secret to success is knowing how to treat the specific paint you've chosen. What’s good for one type can be a disaster for another. This is especially true when it comes to any in-season cleaning, where hard and ablative paints need completely different game plans to stay effective.
How To Care For Your Paint During The Season
Your most important job is simply keeping an eye on things. Every few weeks, check out your waterline and what you can see just below it. You're scouting for the first signs of slime, algae, or the beginnings of hard growth like barnacles. How you react next is dictated entirely by your paint.
- Hard Paints (Modified Epoxy): These tough-as-nails coatings are built to be scrubbed. A light cleaning every few weeks with a soft brush or sponge is all it takes to wipe away any surface slime that might be blocking the biocides from doing their work. This simple action essentially "wakes up" the paint's antifouling power.
- Ablative Paints (Self-Polishing): Whatever you do, never aggressively scrub ablative paint. This paint is designed to wear away slowly, and scrubbing it is like throwing money overboard—you’ll just strip off the protective layers and shorten its life. Any light slime that appears will usually wash right off the next time you take the boat out.
The core principle is simple: hard paints need a gentle scrub now and then, while ablative paints are best left alone to do their thing. Getting this right is the key to getting the full lifespan and value out of your paint job.
Recognizing The Signs That It's Time To Recoat
No bottom paint lasts forever. As the season wears on, you'll need to watch for the tell-tale signs that your coating is getting tired. Catching them early saves you from a massive cleaning job later and makes your end-of-season prep a whole lot easier.
Keep an eye out for these warning signs:
- Visible Hull Patches: If you can see bare gelcoat or primer peeking through, the paint is gone. That spot has zero protection.
- Significant Marine Growth: A sudden bloom of barnacles or thick algae is a blaring alarm that the biocides are exhausted.
- Flaking or Peeling: If the paint is coming off in sheets, its bond with the hull has failed and a full recoat is definitely in your future.
For a deeper dive into keeping your hull clean, we've got some great tips in our article on how to properly clean a boat bottom.
The Annual Scuff-And-Recoat Process
For most of us, reapplying bottom paint is an annual ritual. The good news is, if your old paint is still in decent shape (no major flaking), you can skip the nightmare of completely stripping the hull and just do a simple "scuff-and-recoat."
Start by giving the hull a good pressure wash to blast off all the marine growth and any loose paint chips.
Next, you’ll need to sand the entire surface with 80-grit sandpaper. This roughs up the old paint just enough to give the new coat something solid to grab onto. Finally, wipe the whole thing down with a solvent to get rid of any dust and grime. For this final wipe, a set of high-quality, absorbent Microfiber Towels is perfect for ensuring the surface is spotless and ready for paint.
This straightforward yearly routine is the best way to guarantee your bottom paint performs its best, season after season.
Common Bottom Painting Mistakes And How To Avoid Them
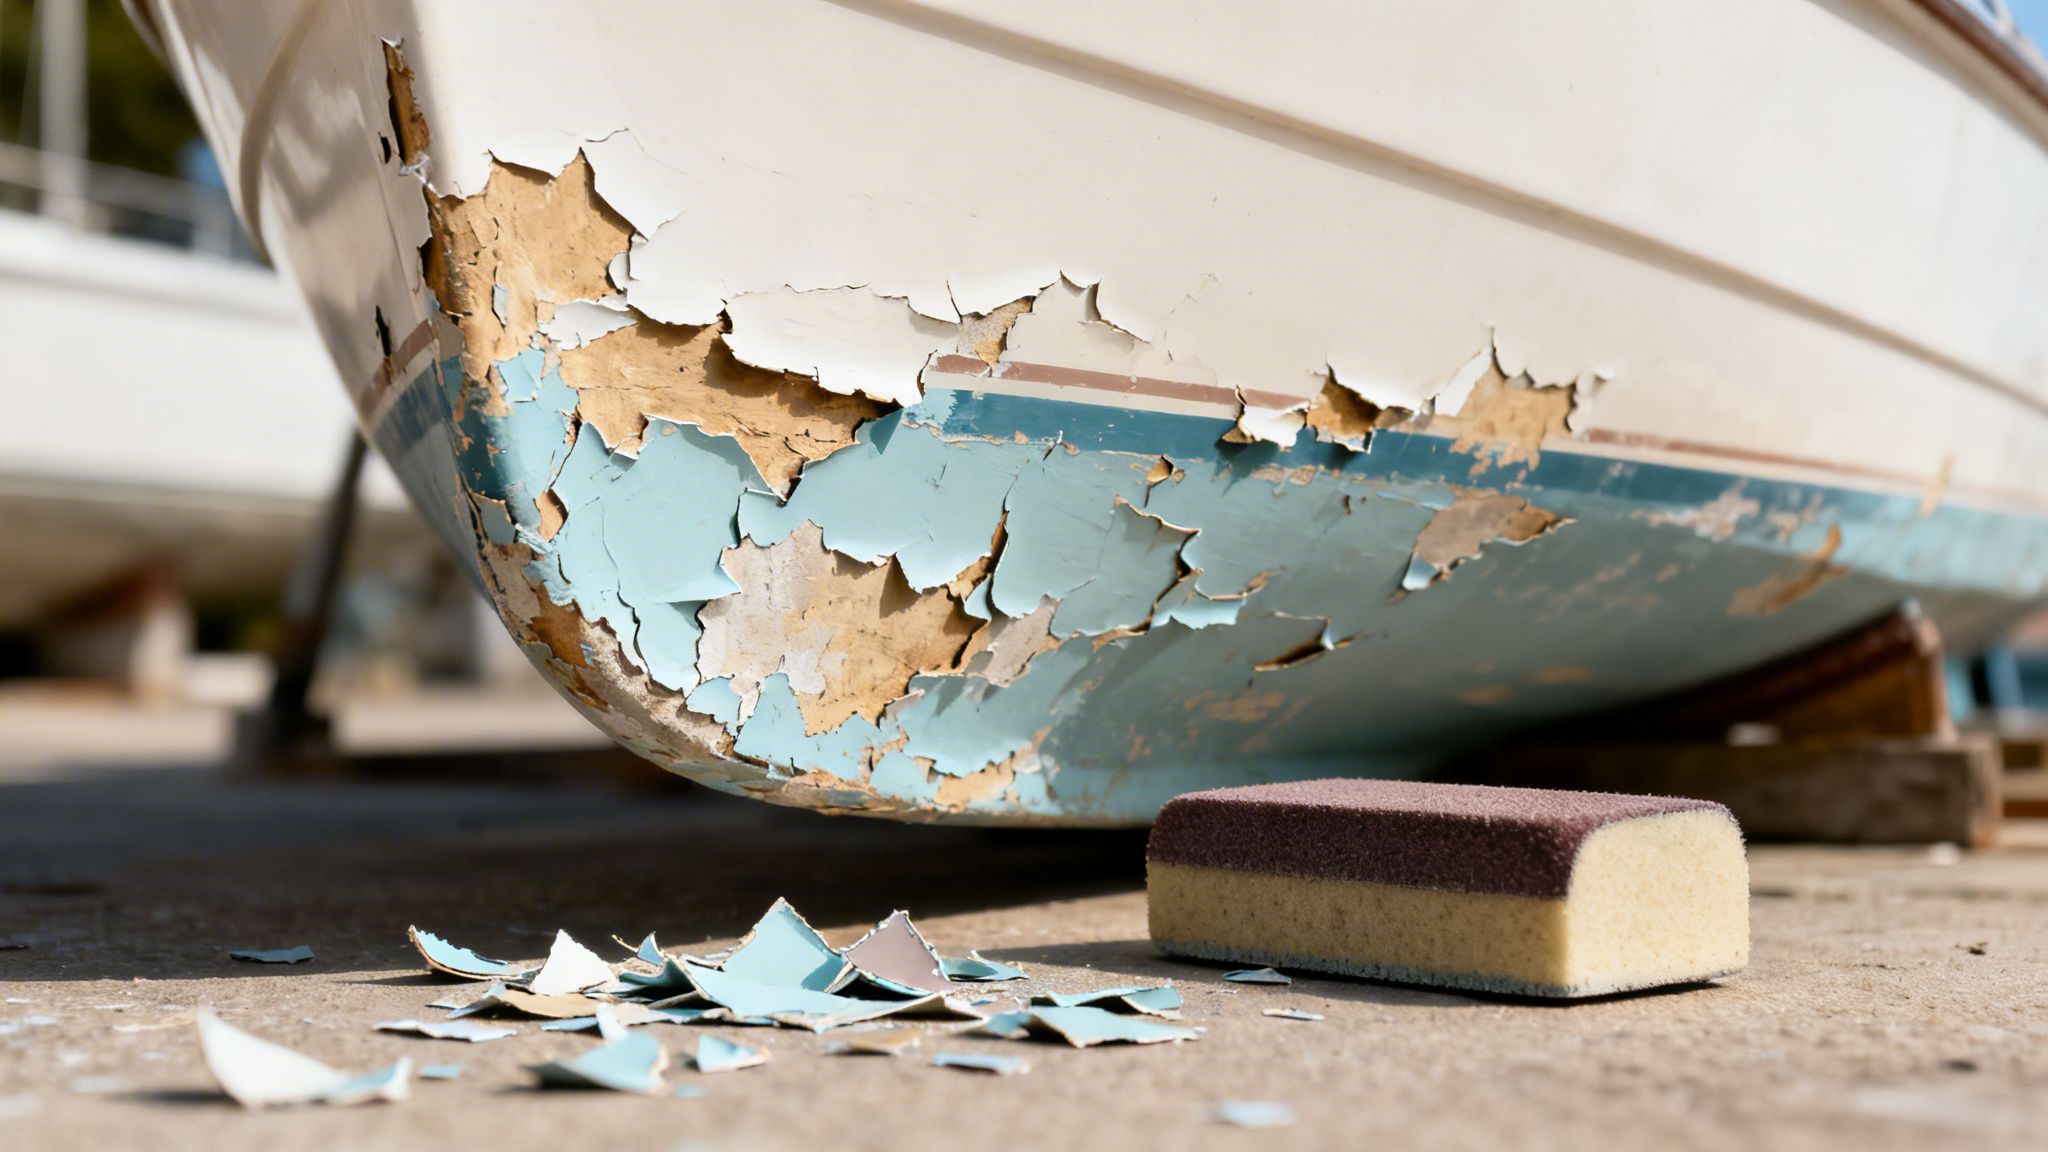
We've all seen it at the boatyard: a beautiful hull marred by peeling, flaking bottom paint. Learning from the most common pitfalls can save you a world of time, money, and pure frustration. Even with the best intentions, a few simple missteps can lead to a paint job that fails spectacularly, forcing you to do all that hard work over again.
Think of this as your troubleshooting checklist before you even start. Knowing what can go wrong is the best way to make sure everything goes right.
Mistake 1: Skimping On Surface Preparation
This is, without a doubt, the number one reason bottom paint jobs fail. Pouring expensive, high-tech paint over a dirty, waxy, or poorly sanded surface is like building a house on a foundation of sand. It just won't stick. The new paint has nothing to grab onto, and it's only a matter of time before it starts letting go.
- What Went Wrong: The hull wasn't completely stripped of oils, wax, and old grime. Flaky, loose paint wasn't scraped off, and the surface wasn't scuffed up enough to create a good "tooth" for the new paint to mechanically bond to.
- How To Fix It: You have to be meticulous here. Start with a pressure washer, then give the hull a serious scrub with a quality degreasing Boat Soap. Scrape off any loose paint chips until you’re down to a solid surface. Then, sand the entire bottom with 80-grit sandpaper until you have a uniform, dull finish. Wipe everything down with a solvent to clear off the dust before you even think about popping open that can of paint.
Mistake 2: Applying Incompatible Paint Types
Putting a hard paint over a soft, ablative paint is a classic blunder that guarantees a mess. The hard topcoat is rigid and brittle, while the ablative layer underneath is literally designed to wear away in the water. As that bottom layer erodes, it will take the new, incompatible paint right along with it, resulting in massive sheets of peeling paint.
- What Went Wrong: The new paint chemistry clashed with the old stuff, leading to a complete loss of adhesion.
- How To Fix It: You must know what's already on your hull. If you have no idea, the only surefire solution is to sand everything down to the barrier coat and start fresh. If you know for sure you have an ablative paint and want to switch to a hard paint, there are no shortcuts—you must remove the old ablative layer completely.
Mistake 3: Ignoring Weather And Overcoating Windows
Bottom paint is a chemical cocktail that’s extremely sensitive to temperature and humidity. Painting on a cold, damp day—or right before the temperature is set to plummet—can stop the paint from curing correctly. Just as important is the "overcoating window," which is the specific time you must wait between coats. Get it wrong, and you'll have adhesion problems.
A common scenario is slapping on a second coat too soon. This traps solvents from the first coat underneath, creating a weak, soft film that never truly hardens. On the flip side, if you wait too long, the first coat fully cures, and the second coat has nothing to chemically fuse with.
- What Went Wrong: The job was done in bad weather (too cold, hot, or humid), or the manufacturer's specific recoat times were ignored.
- How To Fix It: Plan your painting day around a clear, dry weather forecast. Always read the instructions on the paint can and follow the temperature, humidity, and overcoating times to the letter. When in doubt, it's almost always safer to wait a little longer between coats than to rush it.
Got Questions About Bottom Paint? We've Got Answers.
When it comes to boat bottom paint, a few questions pop up time and time again. Let’s clear the air on some of the most common ones so you can tackle the job with confidence and get back to what matters—enjoying your time on the water.
How Often Do I Need To Apply New Boat Bottom Paint?
For most boaters, you're looking at a repaint every 1-2 seasons. The real answer, though, depends entirely on the paint you’re using and the waters you frequent.
Ablative paints, the kind that wear away over time, are typically a once-a-season job, especially if you're in an area with aggressive marine growth. Hard paints can definitely stretch longer, but you might need to give them a good scrub now and then to keep them effective. Your boat will tell you when it's time—at haul-out, if you see a lot of stubborn growth or the hull peeking through, it's time for a fresh coat.
Can I Paint Over My Old Bottom Paint?
Most of the time, yes—but there's one golden rule you can't break. As long as the old paint is in decent shape (not chipping or flaking off), you can usually apply the same type of paint right over it after a good cleaning and a light scuff-sand.
Heads up: You can never apply a hard paint over an ablative paint. Think about it—the ablative layer is designed to slough off, and it will take that brand-new, expensive hard coat right along with it. If you're switching from ablative to hard, or if the old paint is failing, you've got to strip it all the way down to a fresh surface.
Is a Barrier Coat Really Necessary Under My Bottom Paint?
Think of a barrier coat as the ultimate insurance policy for your hull. This waterproof epoxy primer is an absolute must for new boats or any hull that's been stripped down to bare gelcoat. Its main job is to create an impermeable seal, stopping water from seeping into the porous hull and causing those dreaded osmotic blisters down the road.
While you don't need to reapply it for a simple scuff-and-recoat, a barrier coat is a critical long-term investment in your boat's health. It’s the single best defense for protecting the structural integrity of your hull, particularly for any boat that lives in the water for long stretches.
At Better Boat, we know a well-maintained hull is the foundation of every great day on the water. From the first scrub to the final polish, our family-owned company makes the high-quality cleaning supplies and accessories you need to do the job right. Check out our full lineup at betterboat.com to protect your investment and spend more time making waves.


