 Skip to content

Your Guide to the Ultimate Boat Cleaning Kit
A good boat cleaning kit isn't just a bucket of supplies; it's your first line of defense in protecting your boat's value and appearance. We're talking about a hand-picked collection of soaps, brushes, waxes, and tools designed specifically for the harsh marine world—from corrosive salt to relentless UV rays. Getting the right gear together from the start is the key to a simpler, more effective maintenance routine.
Building Your Essential Boat Cleaning Kit
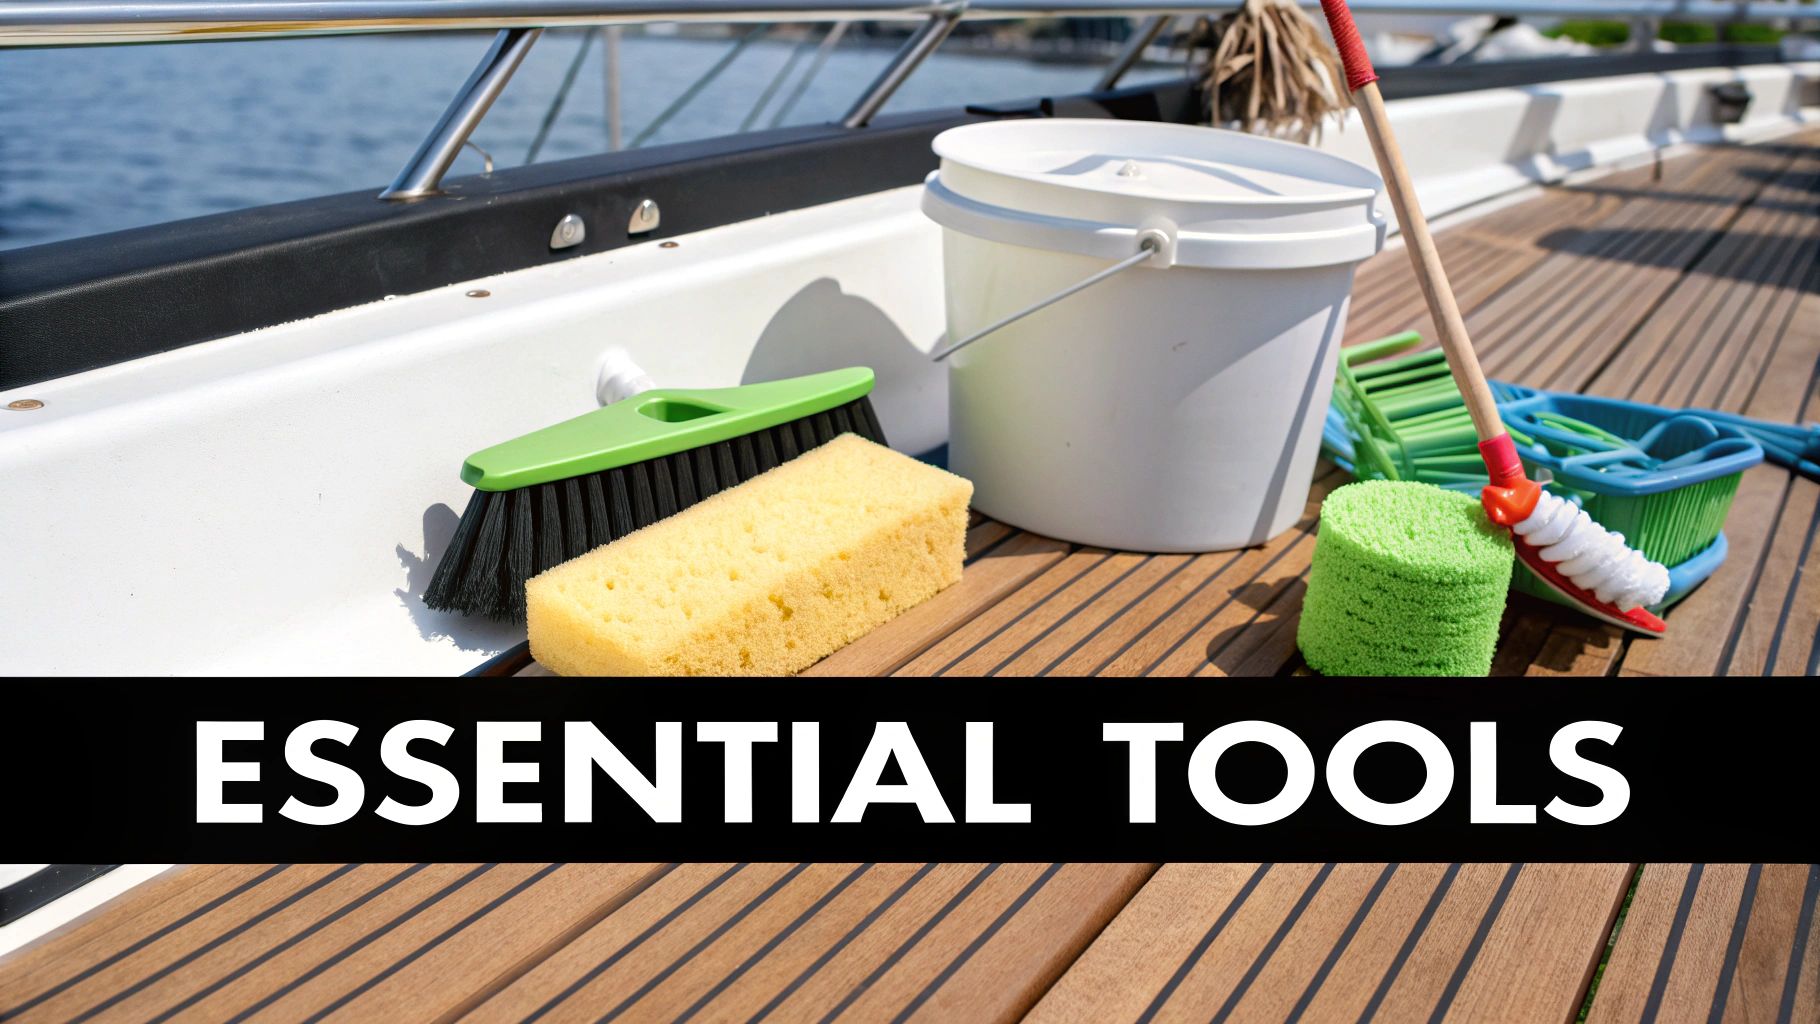
Putting together a dedicated boat cleaning kit is more than just grabbing some soap and a sponge; it's about building a strategic arsenal. A well-stocked kit saves you precious time and ensures you always have the right tool for the job. This prevents the kind of accidental damage that comes from using the wrong products, like household detergents that can strip your boat’s protective wax clean off.
Think of it as an investment that pays you back in your boat's longevity and resale value. There's a reason the global boat cleaner market was valued at $3.16 billion in 2023 and is expected to keep growing. More and more owners are realizing that purpose-built solutions are non-negotiable for proper marine care.
The Foundation of Your Kit
Every great toolkit starts with the fundamentals. For boat care, this means having a versatile selection of cleaners and applicators that can handle routine washes while being gentle on sensitive surfaces like gelcoat, vinyl, and canvas.
Here are the absolute essentials that should form the core of your kit:
- Marine-Grade Boat Soap: A pH-balanced soap is non-negotiable. Unlike dish soap, it lifts away grime without stripping the protective wax layer you’ve worked so hard to apply.
- A Set of Brushes: You'll want at least two—a soft-bristle brush for the hull and other delicate surfaces, and a medium-stiff one for tackling non-skid decks and stubborn dirt.
- Microfiber Towels & Chamois: These are critical for drying your boat without leaving behind frustrating streaks or tiny scratches. A high-quality chamois, in particular, works wonders on glass and smooth gelcoat.
Many of the core principles of vehicle care apply here, and you can get some great ideas from a well-made ultimate detailing supplies list, as many tools and product types translate perfectly to boating.
Before we dive into specialty cleaners, here’s a quick-reference table of the foundational items every boat owner needs.
Core Components for Your Boat Cleaning Arsenal
| Component | Primary Use | Pro Tip |
|---|---|---|
| Marine Soap | General washing of hull, deck, and topside | Look for a biodegradable, pH-neutral formula to protect wax and the environment. |
| Soft-Bristle Brush | Washing gelcoat, windows, and painted surfaces | Choose one with a telescoping handle to easily reach the entire hull from the dock. |
| Medium-Stiff Brush | Scrubbing non-skid decks and teak | A brush with a slightly smaller head gives you better control in tight corners. |
| Microfiber Towels | Drying, buffing, and applying products | Have a large, dedicated stack just for your boat to avoid cross-contamination with car waxes. |
| Buckets (x2) | Washing and rinsing | Always use the two-bucket method: one for soapy water, one for rinsing your wash mitt. |
With these items on hand, you're ready for 90% of your routine cleaning tasks.
Specialized Solutions for Tough Jobs
Beyond a basic wash, your kit needs products to tackle the specific problems that pop up in a marine environment. If you ignore these issues, you're looking at permanent stains, rust, and material breakdown down the road.
A common mistake is thinking one cleaner does it all. Specialized products are formulated to solve specific problems without causing collateral damage, which is key to long-term preservation.
Make sure to round out your kit with these targeted problem-solvers:
- Hull Cleaner: A dedicated hull cleaner has the acidic punch to dissolve waterline stains, algae, and that stubborn "river mustache" far more effectively than regular soap.
- Vinyl Cleaner & Protectant: Go for a two-in-one product that not only cleans your upholstery but also leaves behind a UV protectant. This is your best defense against cracking and fading seats.
- Metal Polish: To keep your stainless steel and chrome fittings gleaming—and to prevent ugly rust and pitting—a quality metal polish is a must. It restores the shine while adding a protective barrier against the elements.
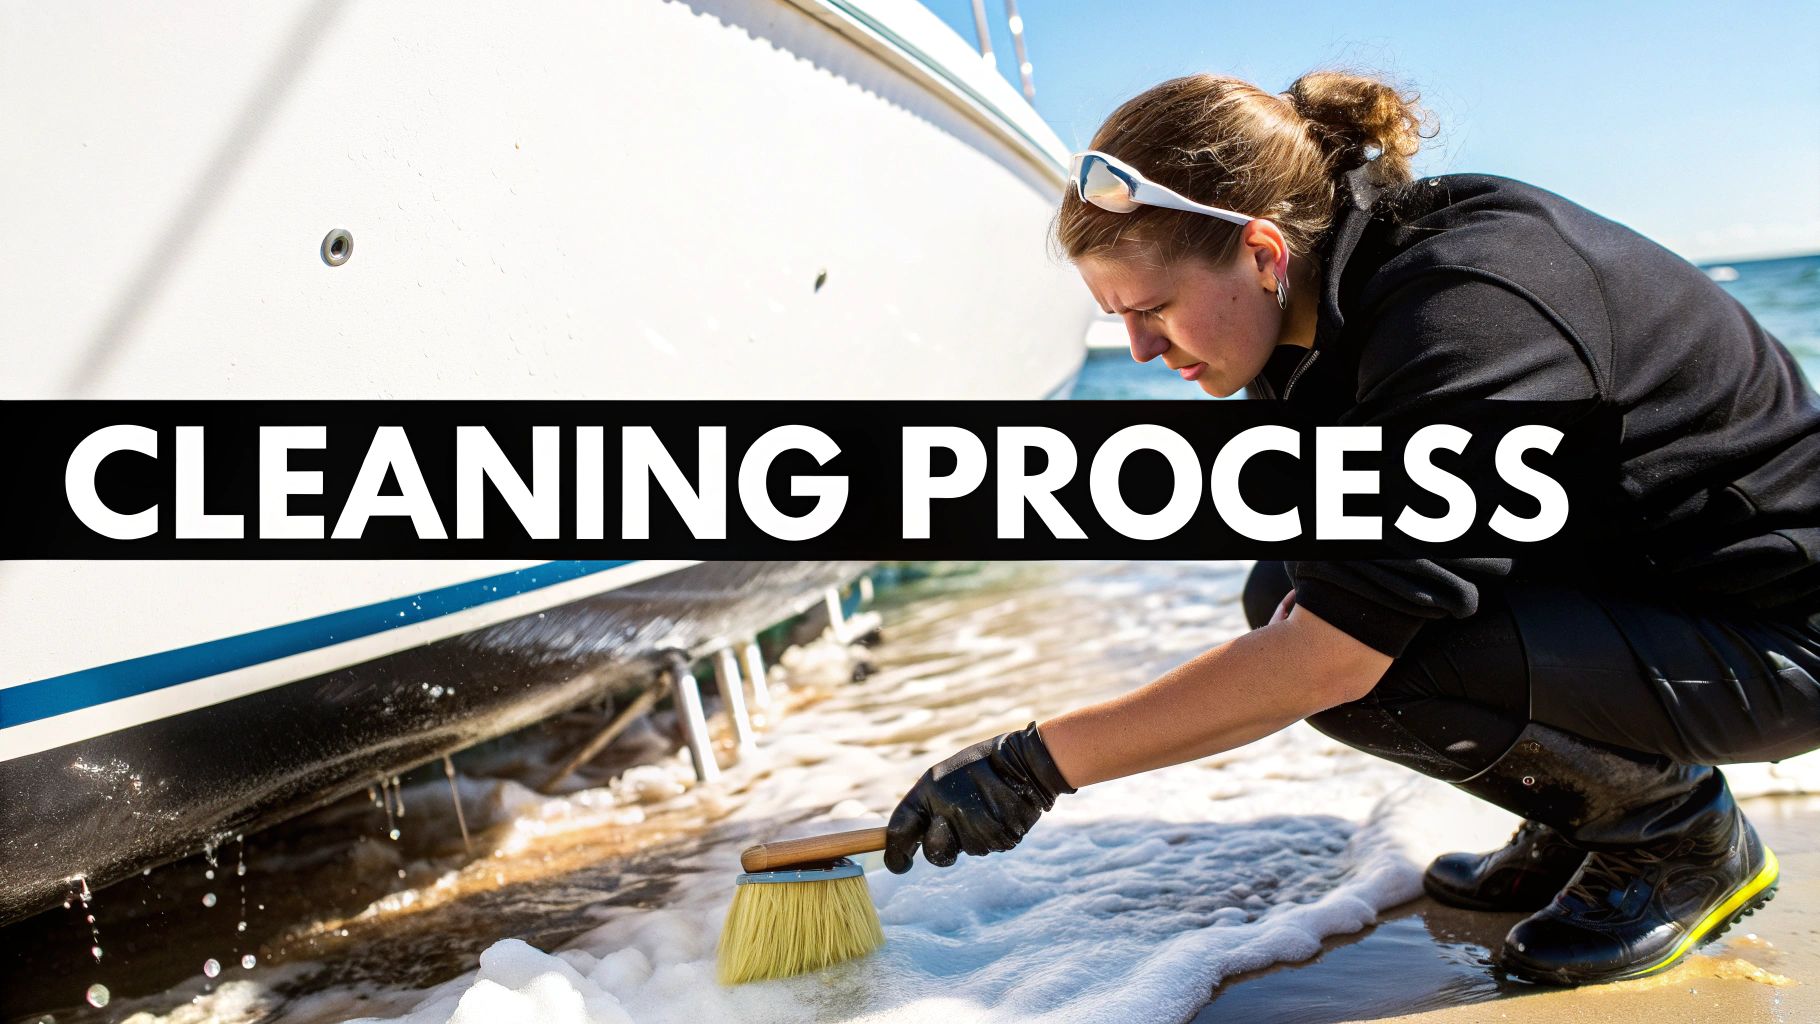
Mastering Hull Cleaning For Better Performance
Your boat's hull takes a constant beating from the water and everything in it. Keeping it clean isn't just about looking sharp at the dock; it’s one of the most practical things you can do for your boat’s performance. A smooth, gunk-free hull cuts through the water with less drag, which translates directly to better fuel economy and even a bit more top-end speed.
When it's time for a washdown, you'll need to grab the right tools from your boat cleaning kit. For general surface grime, a good marine soap and a brush will get the job done. But for the tough stuff—like that stubborn, yellowish-brown "waterline smile" or a coat of algae—you’ll need to bring out the big guns: a dedicated hull cleaner. These products are typically acid-based to make short work of stubborn organic growth and mineral buildup.
Choosing and Applying The Right Cleaner
What your hull is made of—fiberglass, aluminum, or painted—is the most important factor in choosing a cleaner. You absolutely have to check the product's label to make sure it’s safe for your boat's specific surface. Using the wrong stuff can etch a gelcoat or strip paint right off, leaving you with a much bigger problem than a dirty hull.
Once you have the right cleaner, try to work in a shaded spot. The sun will make cleaners evaporate way too fast, leaving you with streaks and reducing their cleaning power. A good rule of thumb is to apply the cleaner from the bottom up but rinse it from the top down. This prevents clean streaks from forming as the runoff cascades over dirty sections.
Pro Tip: If you're dealing with really baked-on stains, give the hull cleaner about 5-10 minutes to sit before you start scrubbing. This lets the active ingredients do the heavy lifting, saving you a ton of elbow grease.
A lot of the gunk on a hull is similar to what you'd find in a house, so understanding how to remove hard water stains can give you some extra insight, as many of the same principles apply.
A Clear Process For a Gleaming Hull
It’s no surprise that the market for effective hull cleaners is growing fast. What was estimated at around $500 million in 2025 is projected to skyrocket to nearly $2.5 billion by 2033. This just goes to show how seriously boat owners are taking hull maintenance.
This simple graphic lays out the core steps for a great result every single time.
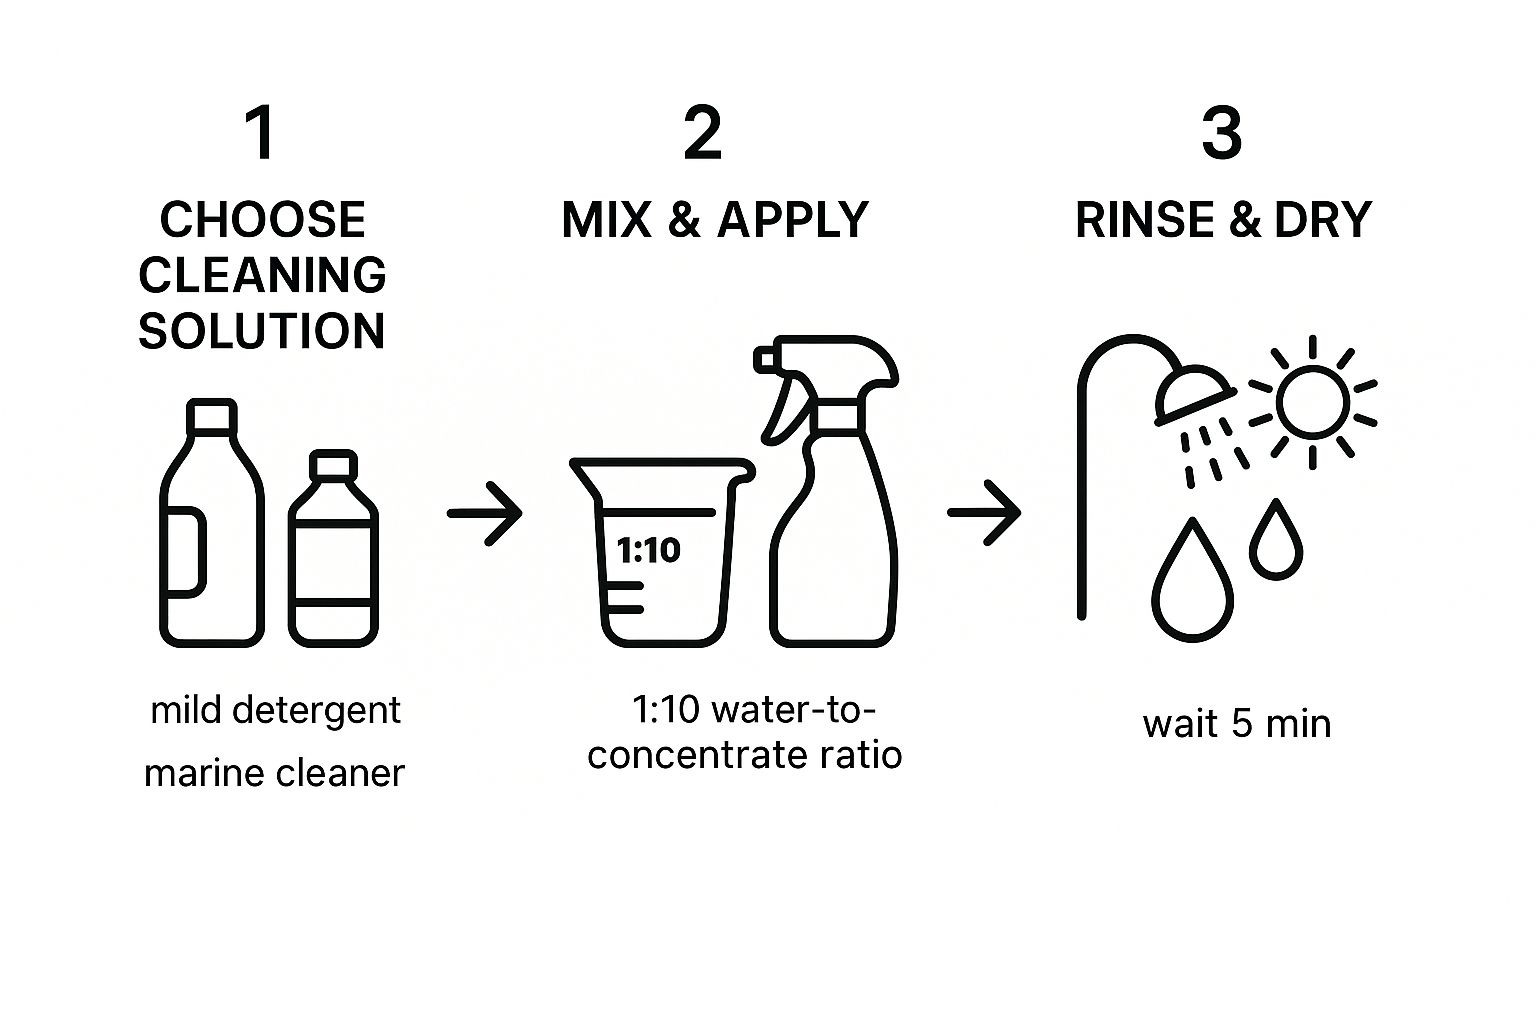
Following a methodical approach like this ensures you don't miss any spots and get that professional, consistent finish without wasting product or effort.
Remember, you're working with some pretty strong chemicals, so safety for yourself and the environment is key.
- Wear Protective Gear: Acidic cleaners are no joke. Always wear gloves and eye protection.
- Contain Runoff: Whenever possible, wash your boat on the hard. This lets you control the runoff and stop harsh chemicals from ending up in our waterways.
- Rinse Thoroughly: Once you're done scrubbing, give the hull a complete and total rinse to get every last bit of cleaner off. Any residue left behind can keep eating away at the surface.
Getting this process down isn't just about cleaning. It’s about actively protecting your investment and making sure your boat performs at its best. For an even deeper dive, you can check out our guide on how to clean a boat hull for more tips and tricks from the pros.
Bringing Your Deck and Hardware Back to Life
While a clean hull is key for performance, the deck and hardware are where you actually spend your time on the water. These surfaces take a serious beating from salt spray, punishing UV rays, and the constant scuff of shoes. It doesn't take long for a pristine space to turn into a grimy, stained mess.
This is why a complete boat cleaning kit has to include tools designed specifically for these high-traffic areas.
Think about it. After a great day of fishing, your non-skid deck is probably speckled with fish blood, dirt, and scuff marks. Your once-brilliant stainless steel railings might be showing those tell-tale freckles of rust. This isn't just about looks; letting this stuff sit can lead to permanent damage and some surprisingly costly repairs down the road.
Tackling Your Non-Skid Deck
Cleaning a non-skid deck is a whole different ballgame than cleaning smooth gelcoat. That textured surface that gives you such great grip is also incredibly good at trapping dirt. A standard soft brush just won't cut it—it'll glide right over the peaks and leave all the gunk behind in the valleys.
This is where a good medium-stiff deck brush from your kit becomes your best friend. Get it working with a quality non-skid deck cleaner, and those bristles can finally dig into the texture and lift out that stubborn, ground-in dirt. For the really common but tough stains, you'll need a more targeted game plan.
- Fish Blood & Grime: If you get to it while it's fresh, a simple deck cleaner and a good scrub will usually do the trick. For dried-on stains, you’ll probably need to reach for a specialized stain remover formulated to break down proteins without damaging the gelcoat.
- Rust Stains: These little orange spots often pop up from hardware fasteners or a forgotten fish hook. An oxalic acid-based rust stain remover is your silver bullet here. Just apply it to the stain, let it work its magic for a few minutes, and rinse. You’ll be amazed at how little scrubbing is needed.
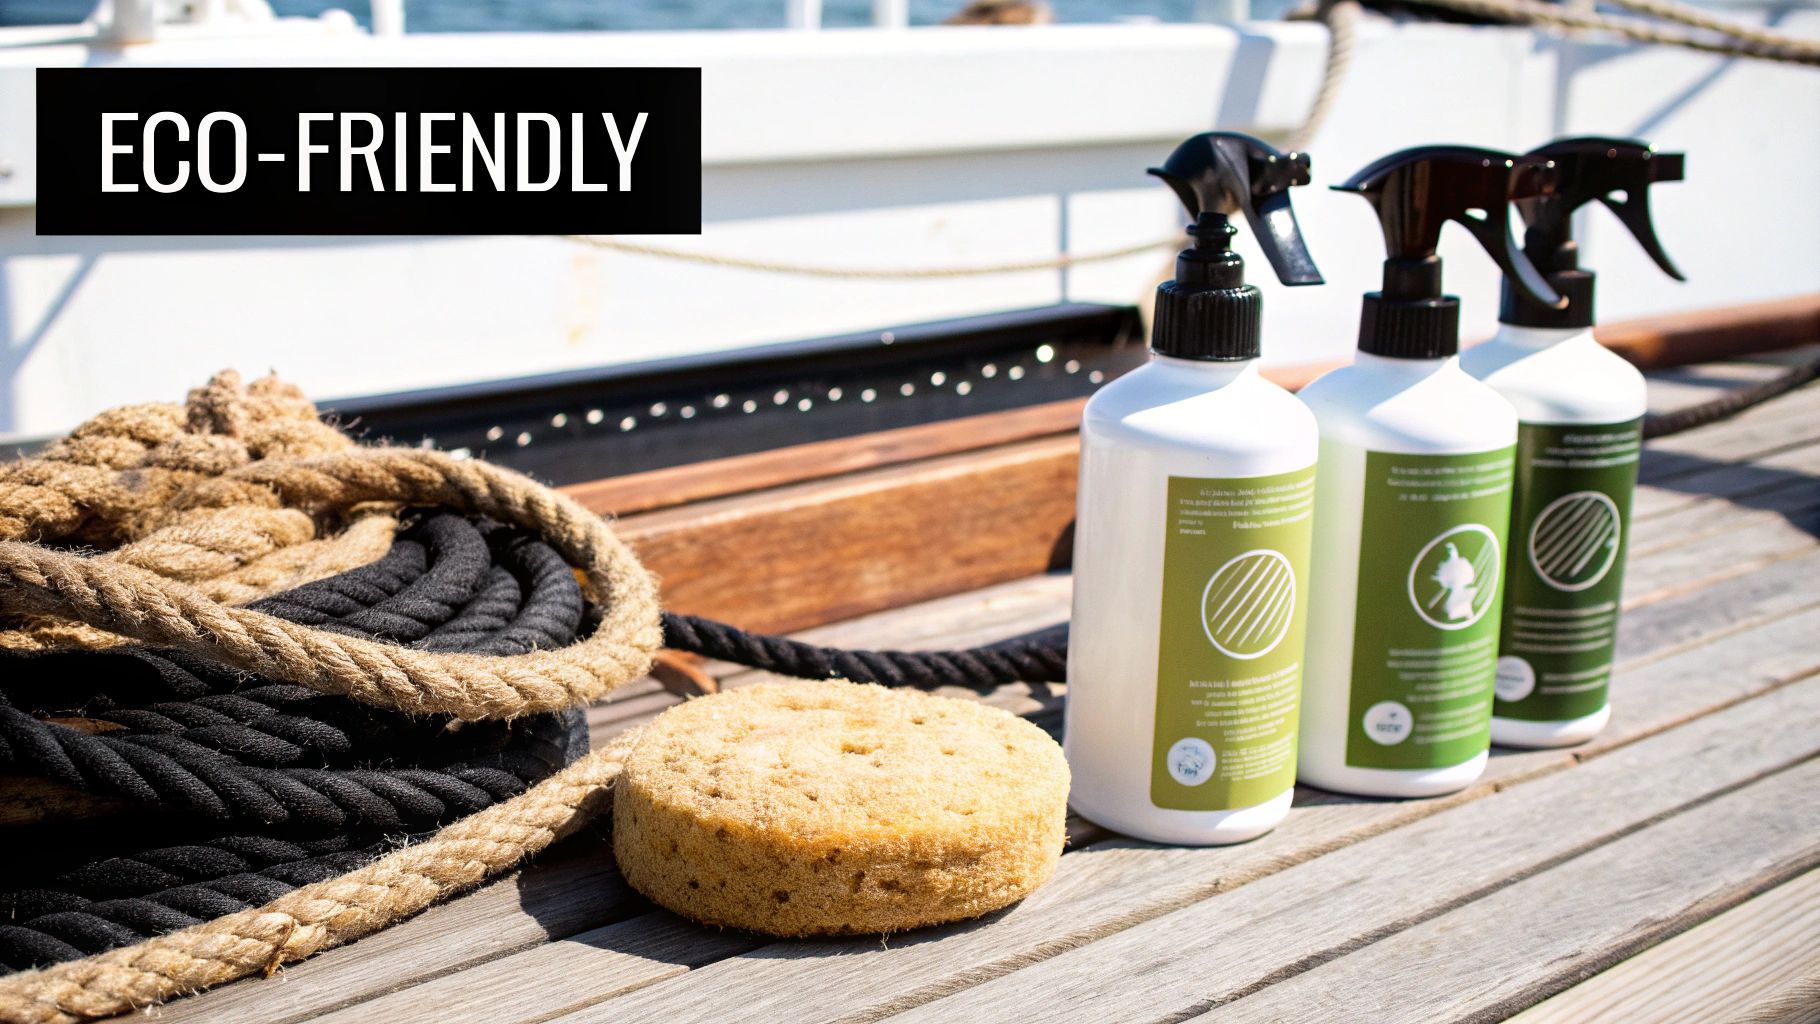
A quick but important note: When you're cleaning your boat on the water, remember that everything you use ends up in it. I always make a point to use biodegradable, phosphate-free cleaners to help protect the very environment we're out there to enjoy.
Polishing Metal and Cleaning Glass
The hardware and windows on your boat are like its jewelry. When they're dull, pitted, or streaky, the whole boat just looks older and neglected. Honestly, getting them to shine again is one of the most satisfying parts of any boat cleanup.
For your stainless steel and chrome, a dedicated metal polish is non-negotiable. It does more than just remove light surface rust and tarnish; it leaves behind a protective film that helps fight off future corrosion. Just put a little on a microfiber cloth and work it in until the shine comes back. For bigger jobs, a buffing ball on a drill can be a real lifesaver for your arms.
When it's time to clean your windows, whether they're glass or plexiglass, your number one enemy is ammonia. Never use a household glass cleaner like Windex on your boat. Ammonia is notorious for making plexiglass and other plastics cloudy and brittle over time.
Instead, grab the ammonia-free marine glass cleaner from your kit. For that perfect, streak-free finish, here’s a pro tip: use two microfiber towels. Use the first one with the cleaner to do the actual washing, and then use the second, completely dry towel for a final buff. This simple two-towel trick works every single time.
Revitalizing Interior Vinyl and Upholstery
A sparkling hull might turn heads at the dock, but the real test of a well-kept boat is the interior. Let's be honest, your boat's vinyl seats and cushions take a serious beating. They're ground zero for everything from greasy sunblock and spilled drinks to the dreaded spread of mildew in those damp, enclosed spaces.
If you let it go, you're not just dealing with an eyesore. You're looking at cracked, faded, and permanently stained upholstery that’s a pain to fix later.
The secret weapon here is the right vinyl cleaner from your boat cleaning kit. I'm not talking about some all-purpose spray from under the kitchen sink. You need a product specifically formulated for marine vinyl. These are designed to be tough on grime but gentle on the material and its stitching, unlike harsh household cleaners that can dry out vinyl and make it brittle.
The Process for a Deep Clean
First things first: grab a vacuum. Get all that loose dirt, sand, and old cracker crumbs out of the seams. This simple step prevents you from grinding abrasive junk into the upholstery when you start scrubbing.
Next, grab your marine vinyl cleaner and spray it generously over a manageable section, like a single seat cushion. Don't try to tackle the whole boat at once.
Let the cleaner sit for a minute or two. You need to give it time to work its magic and penetrate the grime. Then, using a soft-bristle brush or a microfiber towel, gently scrub the surface in small, circular motions. You’ll see the dirt start to lift almost immediately. Stubborn mildew spots might require a bit more elbow grease, but let the cleaner do the heavy lifting.
Once you’re satisfied, wipe the area down with a fresh, damp microfiber towel to pick up any leftover cleaner residue. Follow that up with a completely dry towel. Leaving vinyl wet is just asking for mildew to come right back.
For a complete play-by-play, check out our detailed guide on how to clean boat seats.
Protecting Your Upholstery from Future Damage
Getting the seats clean is only half the job. If you want them to stay that way, the most important step is applying a UV protectant. After your vinyl is clean and completely dry, treat it with a quality marine vinyl protectant. Think of it as sunscreen for your seats—it creates a barrier against the sun's rays that cause fading and cracking.
A good protectant does more than just block UV rays. It also helps repel water and stains, which makes your next cleanup a whole lot easier. It's like waxing your hull, but for your interior.
The demand for these products isn't just anecdotal. The market for boat vinyl cleaners is on track to hit $500 million in 2025 and is expected to keep growing. It's a clear sign that boaters understand how critical these specialized cleaners are.
When it comes to other fabrics inside your cabin, the principles are much the same. Many of the techniques used for marine vinyl are surprisingly similar to those for household fabrics. If you want to learn more, this guide on how to clean upholstery at home offers some great tips that translate well to the boat. A little consistent care goes a long way in keeping your boat's interior comfortable and inviting for years.
Applying Waxes and Sealants for Lasting Protection
After all that scrubbing and deep cleaning, your boat probably looks incredible. But don't pack up your supplies just yet—the job isn't quite finished. Cleaning gets rid of the grime, but it's the protective coat that preserves all your hard work and shields your boat’s gelcoat from the relentless beating of sun, salt, and environmental gunk.
Frankly, this final step is the most important one for protecting the long-term value of your boat.
Washing your boat without waxing it is like rinsing your camera after a day on the saltwater but not wiping it down. That corrosive salt residue just sits there, slowly eating away at the delicate parts. A good wax or sealant stops that damage before it can even start, creating a slick barrier that also makes your next cleanup a whole lot easier.
Choosing Your Shield: Waxes vs. Sealants
The product you choose from your boat cleaning kit really comes down to your goals, your boat's finish, and how much time you're willing to put in. Your two main options are traditional marine waxes and modern polymer sealants.
A high-quality marine wax, especially one containing carnauba, gives you an unmatched depth of gloss. It delivers that warm, wet look that so many boat owners absolutely love. For a true show-stopping shine, it's the classic choice.
Polymer sealants, on the other hand, are all about durability. These synthetic products are engineered to create a strong molecular bond with the gelcoat, offering much longer-lasting protection—often for an entire season—against harsh UV rays and oxidation. The shine might be a bit more sterile or "glassy" compared to wax, but their longevity is a massive win for busy boaters.
Your choice comes down to a simple trade-off: Carnauba wax often provides a deeper, richer gloss, but polymer sealants typically offer superior durability and UV protection, lasting months longer.
The Application Process for a Durable Finish
No matter which product you choose, proper surface preparation is everything. The gelcoat or paint must be perfectly clean, completely dry, and cool to the touch. Trust me, trying to apply wax or sealant in direct sunlight is a recipe for a streaky, hazy disaster. The product will bake onto the surface before you even have a chance to buff it off properly.
The key is to work in small, manageable sections, about two to three square feet at a time. This gives you enough time to apply the product and buff it off before it fully cures.
- Hand Application: Grab a clean microfiber or foam applicator pad. Apply a thin, even coat using overlapping circular motions. Remember, less is more here. A thick coat doesn't add more protection; it just wastes product and makes it a real pain to remove.
- Machine Application: If you have a larger boat, a dual-action (DA) polisher with a soft finishing pad will be your best friend. It’s a huge time-saver and ensures a much more uniform application, helping work the product deep into the gelcoat's pores.
After applying, you need to let the product haze over. Check the manufacturer's instructions, but this usually takes about 5-15 minutes. A great way to know if it's ready is the "swipe test." Gently swipe your finger across the surface. If it comes away clean without smearing, you're good to go.
Use a separate, clean microfiber towel to buff off the hazy residue, revealing that slick, glossy finish underneath. For a more detailed walkthrough, you can learn more about the specific techniques for how to wax a boat and get that professional-grade shine.
This last step doesn't just make your boat look fantastic; it creates a hydrophobic surface that beads water and repels dirt, protecting your investment for the whole season.
Got Questions? We’ve Got Answers
Even with the best boat cleaning kit in hand, you're bound to run into questions. I've been there. You want to make sure you're protecting your investment, not accidentally causing more harm than good. Let's tackle some of the most common questions I hear from fellow boat owners.
A big one is about using household products in a pinch. Can you just grab the dish soap from the galley? I strongly advise against it. Cleaners like dish soap are fantastic at cutting grease, which is exactly why they’re terrible for your boat—they'll strip the protective wax right off your gelcoat. This leaves the finish exposed to UV damage, which leads to oxidation and that chalky, faded look nobody wants.
And please, keep products with ammonia or bleach far away from your boat. They're incredibly destructive to marine materials. I've seen them discolor and weaken vinyl upholstery, eat through the stitching on cushions, and make plastics brittle and prone to cracking. Always, always stick with formulas made specifically for marine use.
How Often Should I Really Be Cleaning My Boat?
This is the million-dollar question, and the honest answer is: it depends. There’s no single schedule that fits every boat. The right frequency really comes down to a few key things:
- Where you boat: Saltwater is a different beast than freshwater. It's way more corrosive and requires a much more diligent cleaning routine.
- How often you use it: A boat that’s out on the water every weekend will obviously need more love than one that only gets used once a month.
- How it's stored: If your boat lives under a cover or in a garage, it’s shielded from the elements. One left out in the open? It’s taking a constant beating from sun and rain.
As a solid rule of thumb, give your boat a complete freshwater rinse after every single trip out on the water. This is non-negotiable if you're in saltwater. For a full-on detail—we're talking a thorough wash, polish, and a fresh coat of wax—plan on doing it at least twice a year. A great rhythm is to do it once when you're getting it ready for the season and again right before you put it away for winter.
I've learned over the years that consistent, light maintenance is far more effective than putting it off for one massive, back-breaking scrub-down. A quick rinse after each use stops salt and grime from baking onto the surface, which makes those big cleaning days so much easier.
What Are the Most Important Parts of My Kit?
If I had to strip my cleaning kit down to the bare essentials, what would I keep? It’s a tough question because every tool has its job, but two items are absolutely critical: a high-quality, pH-neutral marine soap and a durable marine wax or sealant. These two are the cornerstones of proper boat care.
The soap is your workhorse. It gets the boat clean by lifting away dirt, salt, and grime without stripping your protective coatings. The wax or sealant, on the other hand, is your boat’s armor. It creates that essential, long-lasting shield against the sun’s harsh rays and the corrosive effects of water.
Think of it this way: soap is your offense against dirt, and wax is your defense against the elements. If you neglect that defense, all your hard work cleaning will be short-lived, and your boat’s surfaces will start to break down much, much faster.
Ready to build the ultimate kit and keep your vessel looking pristine? Better Boat offers everything you need, from marine-grade soaps and waxes to specialized tools, all tested and trusted by over a million boaters. Explore our full range of premium boat cleaning and maintenance products at BetterBoat.com and protect your investment today.