


A Practical Guide to Epoxy Fiberglass Repair
When you're dealing with a crack, hole, or delamination in fiberglass, you need a fix that's not just a patch, but a permanent, structural solution. This is where an epoxy fiberglass repair comes in.
It's the go-to method for pros, combining a two-part epoxy resin with fiberglass cloth to create a bond that’s waterproof, tough as nails, and often even stronger than the original material. It’s the gold standard for marine, automotive, and just about any composite repair you can think of.
Why Epoxy Is Your Best Bet for Fiberglass Repair
Before you grab just any old adhesive off the shelf, it’s worth understanding why people who work with fiberglass day-in and day-out almost always choose epoxy. This isn’t about a quick fix; it’s about restoring the actual structural integrity of the piece. The magic is in epoxy's unique chemistry, which gives it real-world advantages that other resins just can't touch.
The biggest difference? Unlike polyester resin, which just kind of sits on the surface forming a mechanical bond, epoxy creates a powerful chemical bond. It digs in and grips the fiberglass fibers for dear life. This incredible adhesion means your repair becomes a seamless, integral part of the structure, not just a fragile patch stuck on top.
Unmatched Strength and Durability
One of the main reasons epoxy is king is its sheer toughness, which is critical when you're selecting robust construction materials for diverse climates.
Think about a common headache: a hairline stress crack on a boat deck. You could fill it with polyester resin, sure, but that stuff is brittle. It lacks the flexibility to handle the constant vibration and flexing a boat goes through. Before you know it, that crack is back. Epoxy, however, has fantastic flexural strength. It can move and bend with the boat, which keeps that crack from ever showing its face again.
This is exactly why a marine-grade epoxy resin is so crucial for boat projects, where every part is under constant stress from water pressure and movement.
Key Takeaway: Epoxy's ability to create a bond that is often stronger than the original fiberglass itself ensures a permanent solution. This eliminates the need for future re-repairs, saving you time and money down the road.
When it comes to fiberglass repair, the choice between epoxy and polyester resin is a common one. While both have their place, their performance characteristics are quite different. Here's a quick rundown to help you decide which is right for your project.
Epoxy vs Polyester Resin for Fiberglass Repair
| Feature | Epoxy Resin | Polyester Resin |
|---|---|---|
| Adhesion | Excellent chemical bond; sticks to almost anything. | Good mechanical bond; best for polyester-to-polyester. |
| Strength | Superior tensile and flexural strength. Very strong. | Good strength, but more brittle than epoxy. |
| Water Resistance | Excellent waterproof barrier. Very low absorption. | More permeable; can absorb water over time. |
| Shrinkage | Very low shrinkage (~1-2%). Less stress on the repair. | Higher shrinkage (~5-8%). Can cause print-through. |
| Cure Time | Slower, more controlled cure. | Faster cure, often with catalyst adjustment. |
| Cost | More expensive. | Less expensive. |
| Odor/Fumes | Low odor during mixing and application. | Strong, pungent odor (styrene). Needs good ventilation. |
Ultimately, while polyester has its uses (especially in new construction where cost is a major factor), epoxy's superior adhesion, strength, and water resistance make it the clear winner for high-quality, lasting repairs.
Superior Water and Chemical Resistance
Fiberglass repairs are rarely in a protected environment. They’re getting blasted by saltwater on a hull or exposed to road chemicals on a car body. Epoxy creates an incredible waterproof barrier, completely sealing out moisture that can lead to delamination and rot. This is a massive advantage over polyester resins, which are more porous and can actually absorb water over time, causing the repair to fail from within.
Epoxy’s dense, cross-linked molecular structure is what makes it so tough. It's no surprise the global epoxy resin market was valued at USD 13.38 billion and is expected to climb to USD 20.05 billion by 2032. That growth is almost entirely driven by its legendary adhesion and resistance to moisture and chemicals in demanding jobs.
Minimal shrinkage is the other secret weapon. As epoxy cures, it shrinks far less than polyester resin. For your repair, that means less stress is pulled on the bond line. This prevents tiny micro-cracks from forming and gives you a smooth, seamless finish that won’t pull away from the edges.
Gathering the Right Tools for the Job
Any pro will tell you that a top-notch epoxy fiberglass repair is won or lost before you even pop the lid on the resin. Seriously. Walking into this kind of project unprepared is a surefire way to end up with a frustrating, sticky mess and a weak patch that’s just going to fail on you later.
Think of it like setting up an operating room—every single tool has a critical job to do.
Interestingly, your most important gear has nothing to do with applying epoxy. It’s all about protecting yourself. You're going to be working with chemical fumes and sanding fiberglass, which kicks up nasty microscopic glass dust. This stuff is hazardous, so your personal protective equipment (PPE) is absolutely non-negotiable.
Essential Safety Gear
Your safety kit is the absolute foundation of a successful repair. Don't even think about getting started until you have these items ready to go.
- Respirator: You need a half-mask respirator fitted with organic vapor cartridges. This is crucial for protecting your lungs from chemical fumes. A simple paper dust mask is not enough and won't do a thing against the vapors.
- Safety Glasses or Goggles: An obvious one, but essential. You need to shield your eyes from chemical splashes and the debris that will be flying around when you start grinding and sanding.
- Nitrile Gloves: Nitrile holds up way better against these chemicals than latex does. Grab a big box; you’ll probably go through several pairs during the job as they get sticky or torn.
Once you’ve got your safety dialed in, you can start laying out the rest of your tools. The key is to have everything within arm's reach before you mix the epoxy. Once that clock starts ticking on its working time, you don't want to be scrambling to find a stir stick.
Pro Tip: Don't waste your money on fancy brushes. A pack of cheap, disposable chip brushes is your best friend here. They're perfect for stippling epoxy into the fiberglass cloth. Once the epoxy kicks, they’re toast anyway, so buy them in bulk and toss them without a second thought.
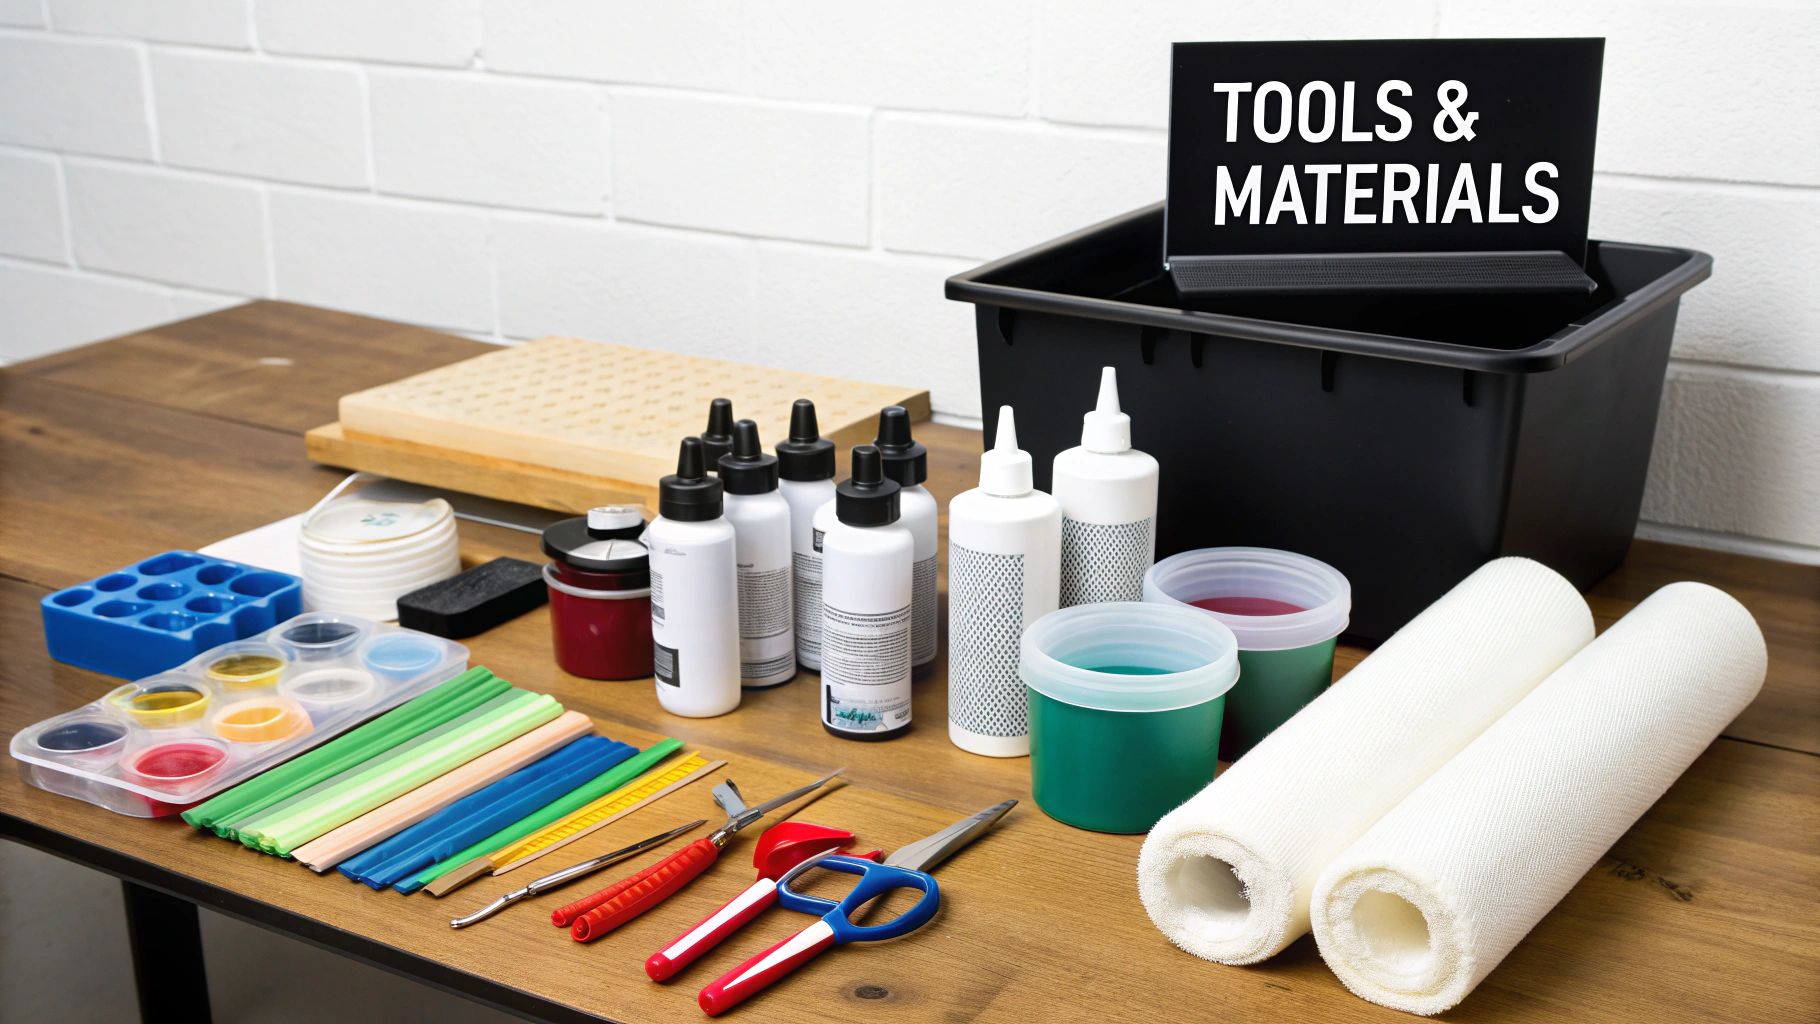
Your Repair Toolkit Checklist
Here’s a battle-tested list of what you'll need to pull off a clean, strong epoxy fiberglass repair. Having this stuff laid out and ready will make the whole process go a heck of a lot smoother.
- High-Quality Marine Epoxy: Go for a system with a slow or medium hardener. This will give you more working time, which is a lifesaver, especially if you're working in warmer weather.
- Fiberglass Cloth: The weight you need (like 6 oz or 10 oz) really depends on the repair. Heavier cloth means more structural strength, so choose based on how much beef you need to add back.
- Mixing Cups and Stir Sticks: Use graduated mixing cups. Getting the resin-to-hardener ratio perfect is absolutely vital for a proper cure. Don't eyeball it!
- Plastic Spreaders or Squeegees: These are essential for properly wetting out the cloth with resin and, just as importantly, for squeegeeing out the excess epoxy and any trapped air bubbles.
- Acetone: This is your go-to for the final wipe-down. It cleans and degreases the repair area right before you lay down the first bit of epoxy, ensuring you get a solid bond.
- Painter's Tape: Use it to mask off the surrounding area. It's a simple step that saves you a ton of cleanup by protecting the good finish from drips and sanding scuffs.
- Scissors: Get a good, sharp pair of scissors and dedicate them to cutting fiberglass. This stuff will dull blades in a hurry, so you don't want to use your good household shears.
Preparing the Surface for a Flawless Bond
If there's one step that separates a professional-grade epoxy fiberglass repair from one that fails in six months, it's this one: surface preparation. I've seen it time and time again. You can have the best epoxy money can buy, but if it has nothing clean and rough to grab onto, the bond is doomed from the start.
This is where you lay the entire foundation for a strong, invisible repair. Get this right, and everything else falls into place.
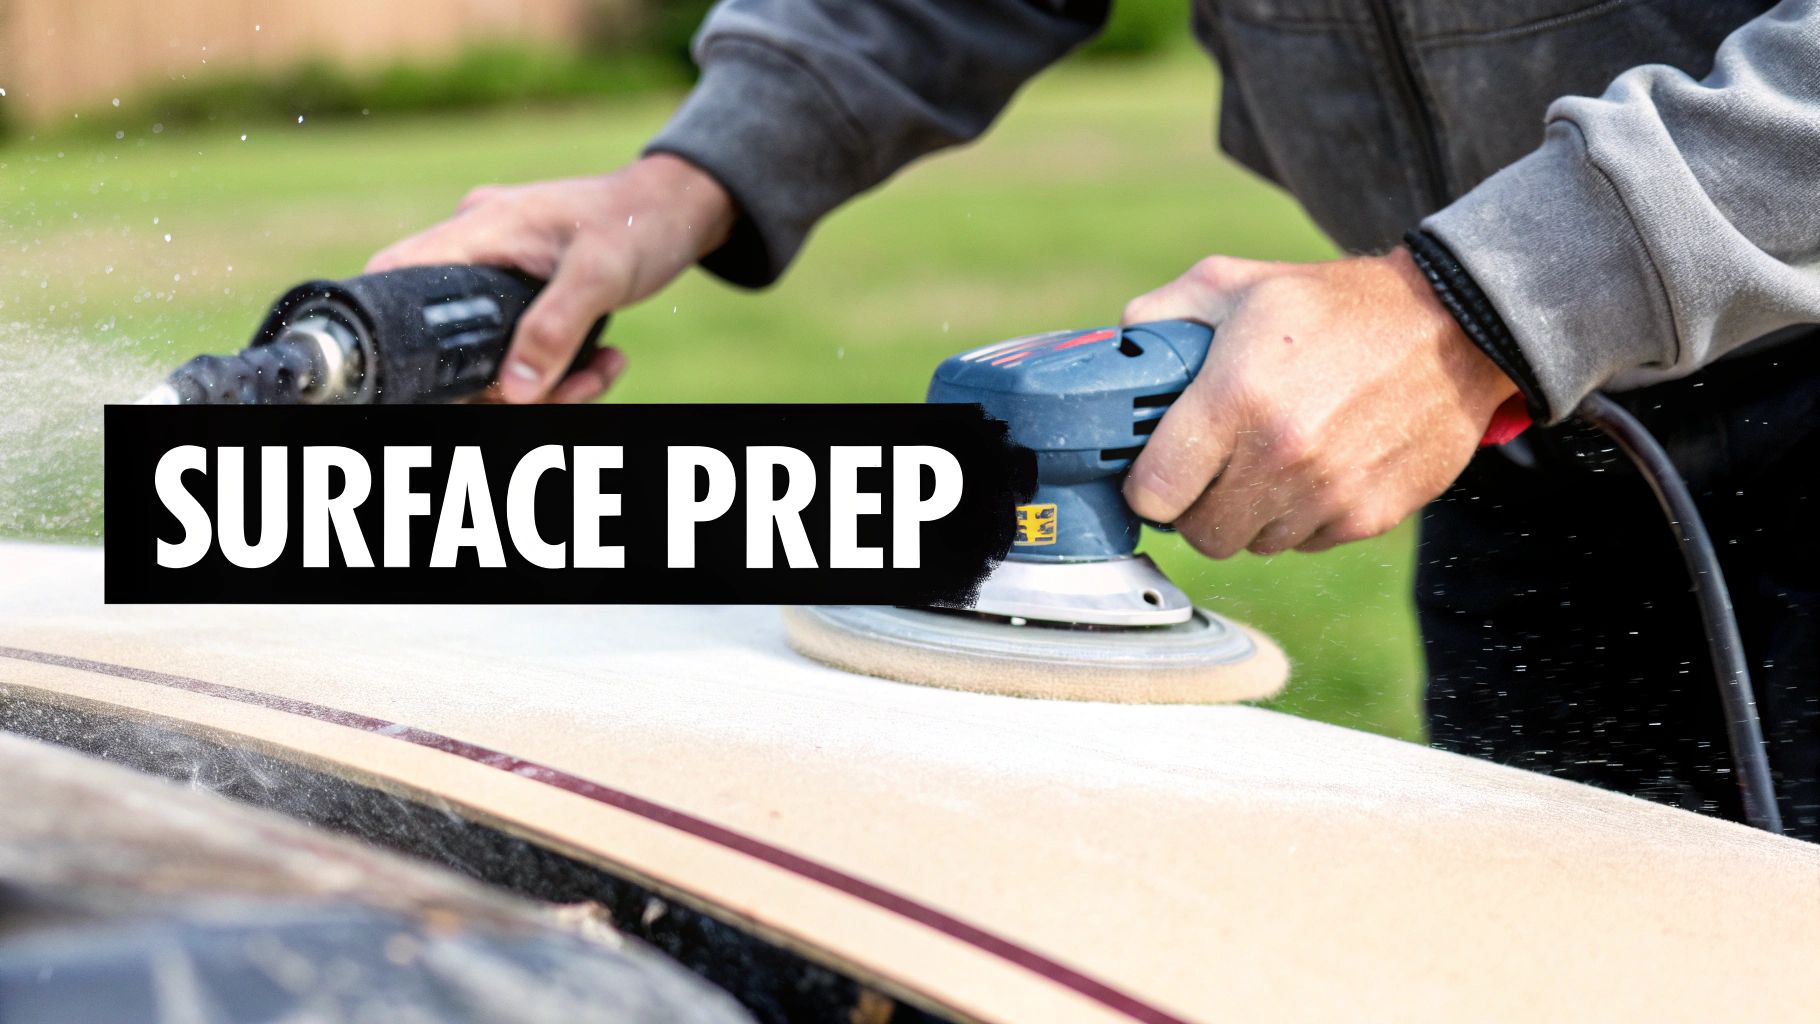
First things first, you need to get rid of any and all damaged material. Grab a grinder or an aggressive sander loaded with 36- to 80-grit paper and start carefully grinding away any cracked, delaminated, or sketchy-looking fiberglass. Don't be timid here; you absolutely have to get back to solid, healthy laminate.
Once you’ve cleared out the junk, it’s time to create a tapered, or "beveled," edge around the repair area. This is a non-negotiable technique for getting the strongest possible bond.
Creating the Perfect Beveled Edge
Let's say you're fixing a two-inch-wide gouge on a jetski hull. A good rule of thumb we use in the shop is a 12:1 ratio. For every inch of fiberglass thickness, you should grind the bevel back twelve inches. On a typical hull, this works out to a tapered edge that extends about 2-3 inches out from the actual damage.
This gentle slope does two critical things:
- It massively increases the surface area. This gives your new patch way more to adhere to, spreading the load out instead of concentrating it on one little edge.
- It allows for seamless layering. You're essentially creating a shallow dish that lets you build up new layers of fiberglass cloth, from largest to smallest, until the repair is perfectly flush with the original surface.
Grind carefully and aim for a smooth, consistent taper all the way around. The goal is to feather the edges so the transition is seamless. When you run your hand over it, you shouldn't feel an abrupt "step."
Expert Insight: Think of the bond like Velcro. The more hooks and loops you have (a larger, rougher surface area), the stronger the connection. A straight-edged hole offers minimal grip, but a wide, tapered bevel gives the epoxy thousands of microscopic anchor points to lock into.
The Final Clean and Tape
After all that grinding, the area will be covered in a fine layer of nasty fiberglass dust. This dust is your enemy. Even a tiny amount can prevent the epoxy from getting a good chemical grip. Start by thoroughly vacuuming the entire area.
Next, it’s time for a solvent wipe. Grab a clean, lint-free rag, dampen it with acetone, and wipe the surface down several times. It’s best to use one rag to wipe on and a second, clean rag to wipe off immediately after. Swap your rags out often to avoid just smearing contaminants around. For more pointers, check out our guide on how to properly clean a fiberglass boat before any repair work.
The very last step before you even think about mixing epoxy is to mask off the surrounding area. Use high-quality painter's tape to create a clean border about a quarter-inch outside your sanded bevel. This simple step protects the undamaged gelcoat from stray epoxy drips and sanding scuffs, saving you a massive cleanup headache later on.

Mixing and Applying Epoxy Like a Pro
With the surface perfectly prepped, we're diving into the most hands-on part of any epoxy fiberglass repair. This is where the magic happens. Working with epoxy is a bit like baking—it's a chemical reaction, and getting the recipe right is everything. Precision and timing are your best friends here. It might sound a little intimidating, but once you get the hang of it, the process is actually pretty straightforward.
If there's one place where a repair goes wrong, it's right at the beginning: the mix. That ratio of resin to hardener on the bottle isn't just a friendly suggestion; it's a non-negotiable chemical formula. Get it wrong, even by a little bit, and your epoxy might never fully cure, leaving you with a sticky, weak mess. Always trust your graduated mixing cups and measure by volume unless the instructions specifically say to go by weight.
Mastering the Mix
Once you've carefully measured out the resin and hardener into a clean cup, it’s time to mix. And I mean really mix. This is more than just a quick swirl with a stick.
- Scrape everything: As you stir with a flat stick, make it a habit to constantly scrape the sides and the very bottom of the cup. Unmixed resin or hardener loves to hide out in these spots.
- Give it time: A slow, deliberate stir for a solid two minutes is the goal. This ensures every molecule of resin finds a hardener molecule to bond with. Rushing this is the fastest way to get weak or tacky spots in your finished patch.
- Try the "Double Cup" method: For bigger or more critical jobs where you absolutely can't have any uncured spots, pour your mixture into a second, clean cup and give it another minute of mixing. This trick pretty much guarantees that any unmixed material clinging to the first cup gets fully blended in.
I've seen people try to speed things up by adding a little extra hardener. It seems logical, but it doesn't work that way. All it does is throw off the chemical reaction, resulting in a brittle repair that's likely to crack under stress. Curing is a chemical process, not a drying one, and it all comes down to that perfect ratio.
This graphic lays out the workflow for building up your layers of epoxy and fiberglass perfectly.
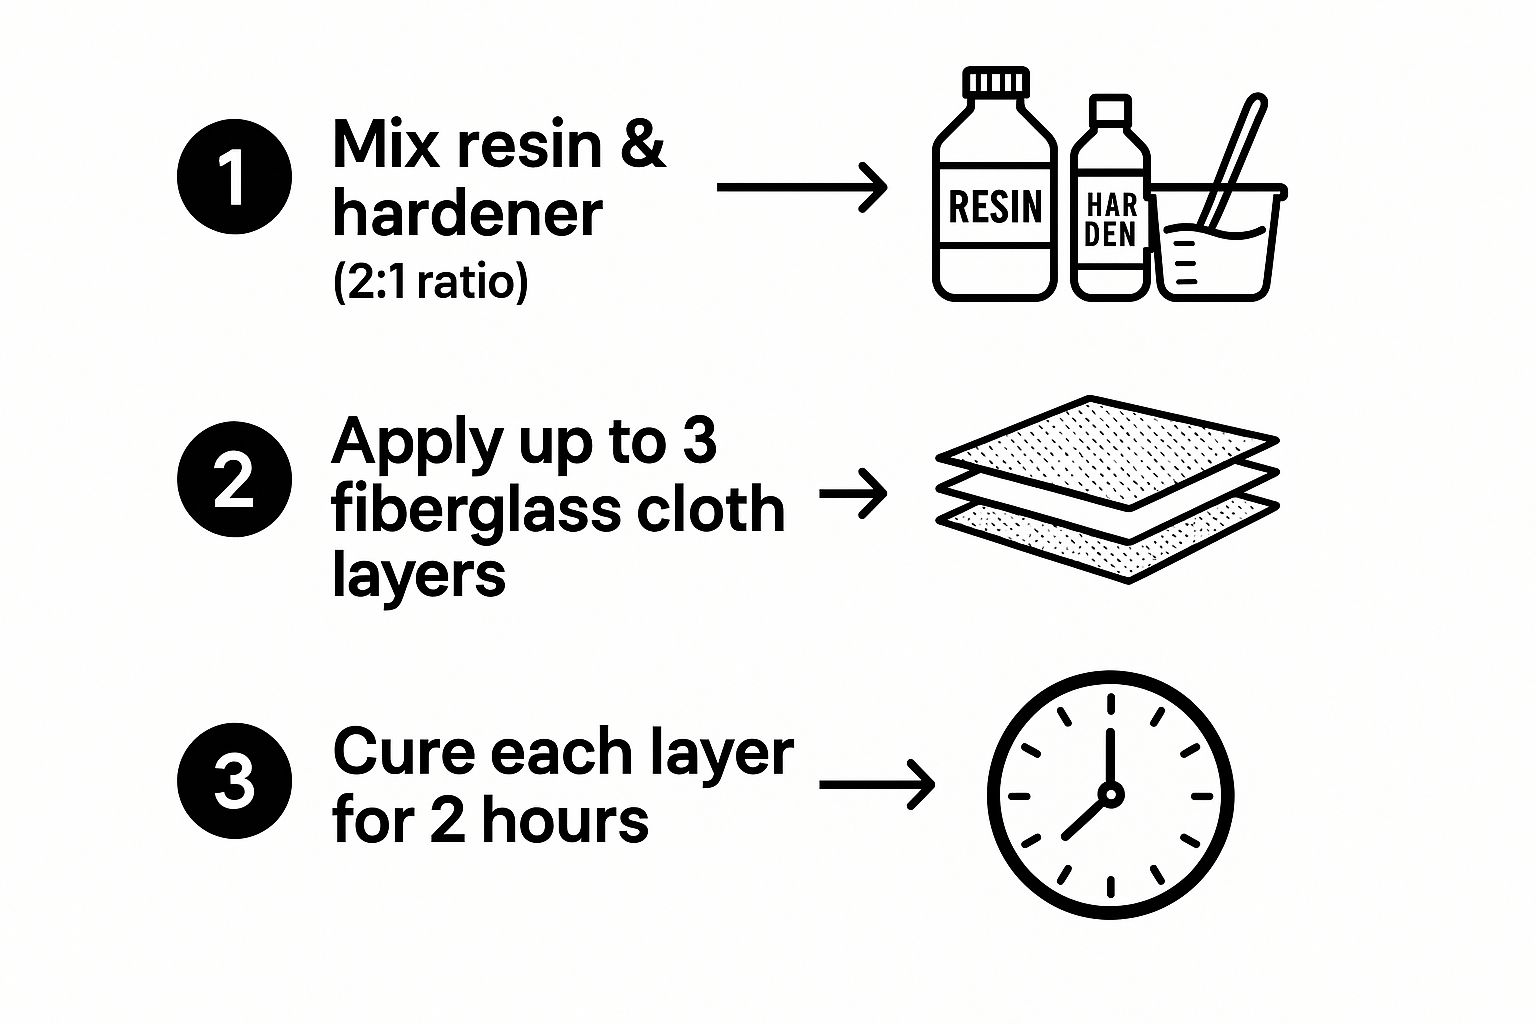
It’s a great visual reminder of the sequence: mix, apply a layer, add fiberglass, wet it out, and then repeat, letting it cure properly between applications to build a solid laminate.
Applying Epoxy and Wetting Out Fiberglass
As soon as your epoxy is mixed, the clock starts ticking on its "pot life"—the window of time you have to work with it before it starts to gel up. Your main goal now is to "wet out" the fiberglass cloth, which just means saturating it with epoxy until it goes from white to completely transparent.
Start by brushing a thin coat of your mixed epoxy directly onto the prepped repair area. Then, lay your pre-cut piece of fiberglass cloth down on top of the wet epoxy. Pour a bit more epoxy onto the center of the cloth. Using a plastic spreader or a small squeegee, work the epoxy from the center outwards. You'll see the cloth turn clear as it soaks up the resin—that's the sign you're doing it right.
The demand for these composite materials is exploding. The global fiberglass market was valued at around USD 17.82 billion and is only expected to climb. This is driven by industries that need the strength and resilience of fiberglass, which is why knowing how to do a proper repair is such a valuable skill.
For any repair that needs real structural strength, you’ll need more than one layer. Just repeat the process: lay down another piece of fiberglass over the first saturated layer and wet it out the same way. The real key to a pro-level job is getting all the air bubbles out. Use your spreader to firmly press down and squeegee out any trapped air. You'll also squeeze out excess resin, which just adds weight without adding strength.
For a deeper look into using epoxy resin for boat repair, where this layering technique is absolutely critical, we have a guide that covers it in more detail. A strong, bubble-free laminate is what separates an amateur patch from a professional repair.
Finishing and Fairing for an Invisible Repair
The heavy lifting is done, and your epoxy fiberglass repair is structurally sound. Now for the fun part—the artistry. This final stage is all about making that strong patch completely disappear. It’s a process of careful shaping and smoothing that blends the repair so perfectly you’ll forget it was ever there.
Before you even think about picking up sandpaper, that epoxy needs to fully cure. I know it’s tempting to jump ahead, but patience here is non-negotiable. The patch might feel hard to the touch after a few hours, but it hasn't reached its full strength or sandability yet. Sanding too early is a recipe for disaster—it’ll just gum up your paper and can ruin the finish you’re trying to create.
Most epoxy systems need a solid 24 hours at around 70°F (21°C) before they’re ready for sanding. Keep in mind, colder temps will slow this down considerably. A great old-school trick is the "thumbnail test." If you can't dent the epoxy by pressing your thumbnail into it with firm pressure, you're likely good to go.
The Art of Fairing the Repair
Once the epoxy has cured rock-hard, run your hand over the repair. You’ll probably feel that the area isn’t perfectly flush—it might be a little high or a little low compared to the surrounding surface. The process of leveling this out is called fairing, and it’s the secret to a truly seamless transition.
For this, you’ll want an epoxy-based fairing compound. These are basically just epoxy thickened with special, lightweight fillers that make them easy to spread and even easier to sand. Mix up a small batch of epoxy resin and hardener, then slowly blend in the fairing filler until you get a smooth, peanut-butter-like consistency.
Using a flexible plastic spreader, apply a thin, tight skim coat of the compound over the entire repair area. Your goal is to fill any low spots and feather the edges out well beyond the original patch. Use long, smooth strokes and don’t obsess over making it perfect on the first pass. That’s what sanding is for.
Pro Tip: Always apply several thin coats of fairing compound instead of trying to glob on one thick layer. Thick applications are a nightmare to sand evenly and can sometimes cure inconsistently. Let each layer cure completely before adding the next.
This kind of meticulous finishing work is absolutely critical in marine applications. The marine fiberglass resin market is a massive USD 2.86 billion industry for a reason—boats demand durable, corrosion-resistant solutions that can withstand a beating.
Proper fairing and finishing are what give a repair the longevity it needs in harsh sea environments. You can see more on the importance of these materials in the full marine fiberglass resin market research.
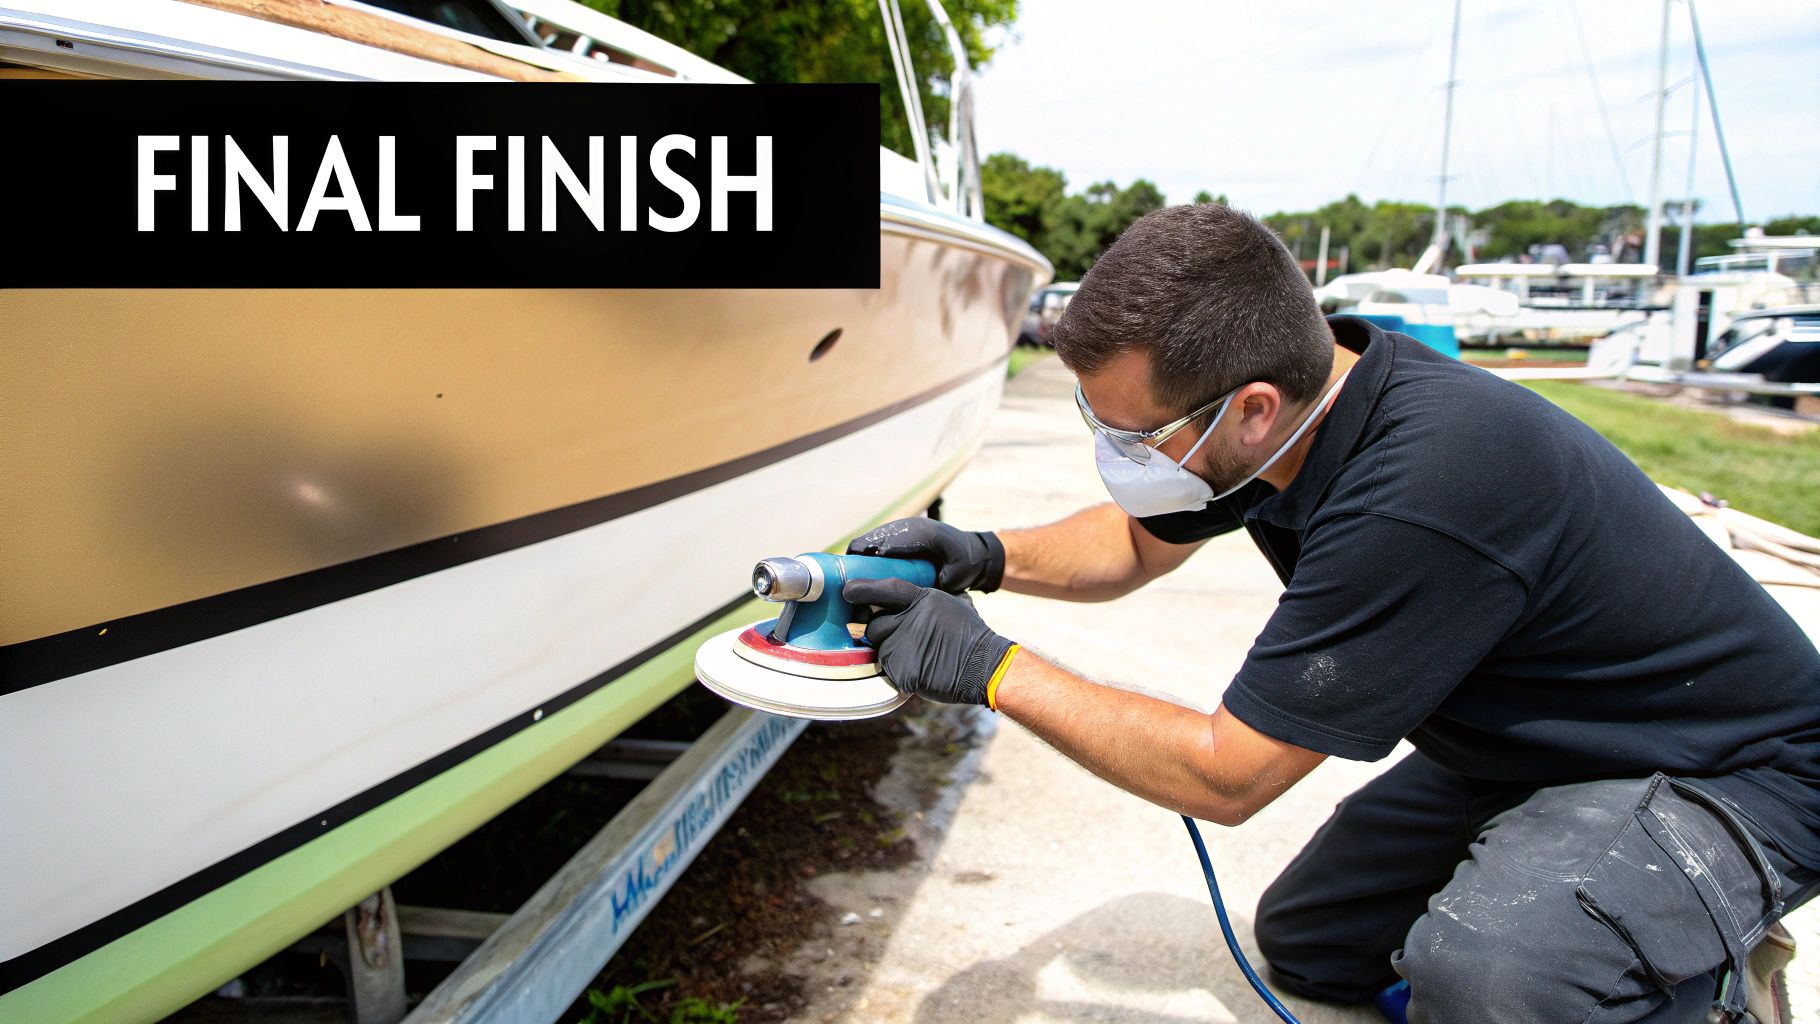
Sanding to a Glass-Smooth Finish
With the fairing compound fully cured, it's time to sand everything smooth. This is where you refine the shape of the repair until it's completely undetectable by both sight and touch.
Here’s a simple, field-tested sequence that will give you a flawless finish every time:
- Start with 80-grit sandpaper on a longboard or a rigid sanding block. Using a long, flat block is key here—it spans the high and low spots, leveling the entire area at once instead of creating new dips.
- Sand in a cross-hatch pattern. Work at a 45-degree angle in one direction across the repair, then switch to the opposite 45-degree angle. This technique is fantastic for knocking down high spots and leveling the surface evenly.
- Wipe and check your work constantly. After every few passes, wipe the dust away and run your hand over the area. Your fingertips are incredibly sensitive and can often feel subtle imperfections you can’t see.
- Step down to finer grits. Once the surface is perfectly level and smooth to the touch, switch to 120-grit and then 220-grit sandpaper to eliminate the scratches left by the coarser paper.
When you’re done, the entire repair should feel like glass and flow seamlessly into the original surface. Now you’ve got the perfect foundation for a high-build primer and a final coat of paint or gelcoat to make that repair truly invisible.
Got Questions About Your Epoxy Fiberglass Repair?
Even the most carefully planned epoxy fiberglass repair can leave you scratching your head. It’s completely normal for questions to come up, especially when you’re in the middle of a project. Here are a few straightforward answers to the issues we see pop up most often, helping you troubleshoot on the fly and get the job done right.
How Long Does Epoxy Fiberglass Repair Really Take to Cure?
This is probably the most misunderstood part of working with epoxy. The real answer depends entirely on the specific epoxy system you're using and, crucially, the temperature you're working in. While most epoxies feel solid to the touch within a few hours, they generally need a full 24 to 72 hours to reach their full, rock-solid structural strength.
Remember, epoxy curing is a chemical reaction, not just a drying process like paint. Heat is the accelerator here—it speeds things up. Cold, on the other hand, slams on the brakes and can even stop the reaction dead in its tracks. Always, always check the manufacturer’s technical data sheet. That’s your bible for specific guidelines on your exact product.
Can I Just Slap Epoxy Over Old Paint or Gelcoat?
For any repair that needs to be structurally sound, the answer is a hard no. You absolutely cannot. Epoxy needs to grab onto something solid, and that means a direct, mechanical bond with the raw fiberglass itself. You have to grind or sand away every last bit of old coating—paint, gelcoat, primers, you name it—until you hit clean, original fiberglass laminate.
Key Takeaway: Trying to save time by not removing old coatings is the number one reason we see repairs fail. Your brand-new patch will only be as strong as the old, flaky paint it's stuck to. It's a guaranteed weak point that will delaminate under any real stress.
What’s the Best Temperature for Working with Epoxy?
You're looking for the "sweet spot." For most marine epoxy systems, that's somewhere between 60-80°F (15-27°C). If you work in temperatures below that range, you risk the epoxy not cross-linking correctly. This leaves you with a repair that’s weak, brittle, and probably not even fully waterproof.
Go the other way—working in the sweltering heat—and you’ll run into a different problem. Your "pot life" (the time you have to work with the mixed epoxy) will shrink dramatically. The heat can kick off the reaction so fast it starts hardening in your mixing cup before you’ve even had a chance to spread it. If you can, always try to work in a temperature-controlled space for the most predictable and reliable results.
For all the tools, materials, and expert guidance you need to tackle any marine project, trust Better Boat to deliver professional-grade results. Explore our full line of epoxy and repair products at our online store.


