


Polishing Aluminum Boat: A Step-by-Step Guide for a Mirror Finish
Polishing your aluminum boat is the single best way to bring back that factory shine and guard it against the long-term damage oxidation loves to inflict. The whole process is pretty straightforward: you deep clean the surface, use specialized compounds to cut through the oxidation, and then lock it all in with a protective wax or sealant. This doesn't just make your boat look incredible—it actively shields the hull from corrosion and environmental wear.
Why Polishing Your Aluminum Boat Matters
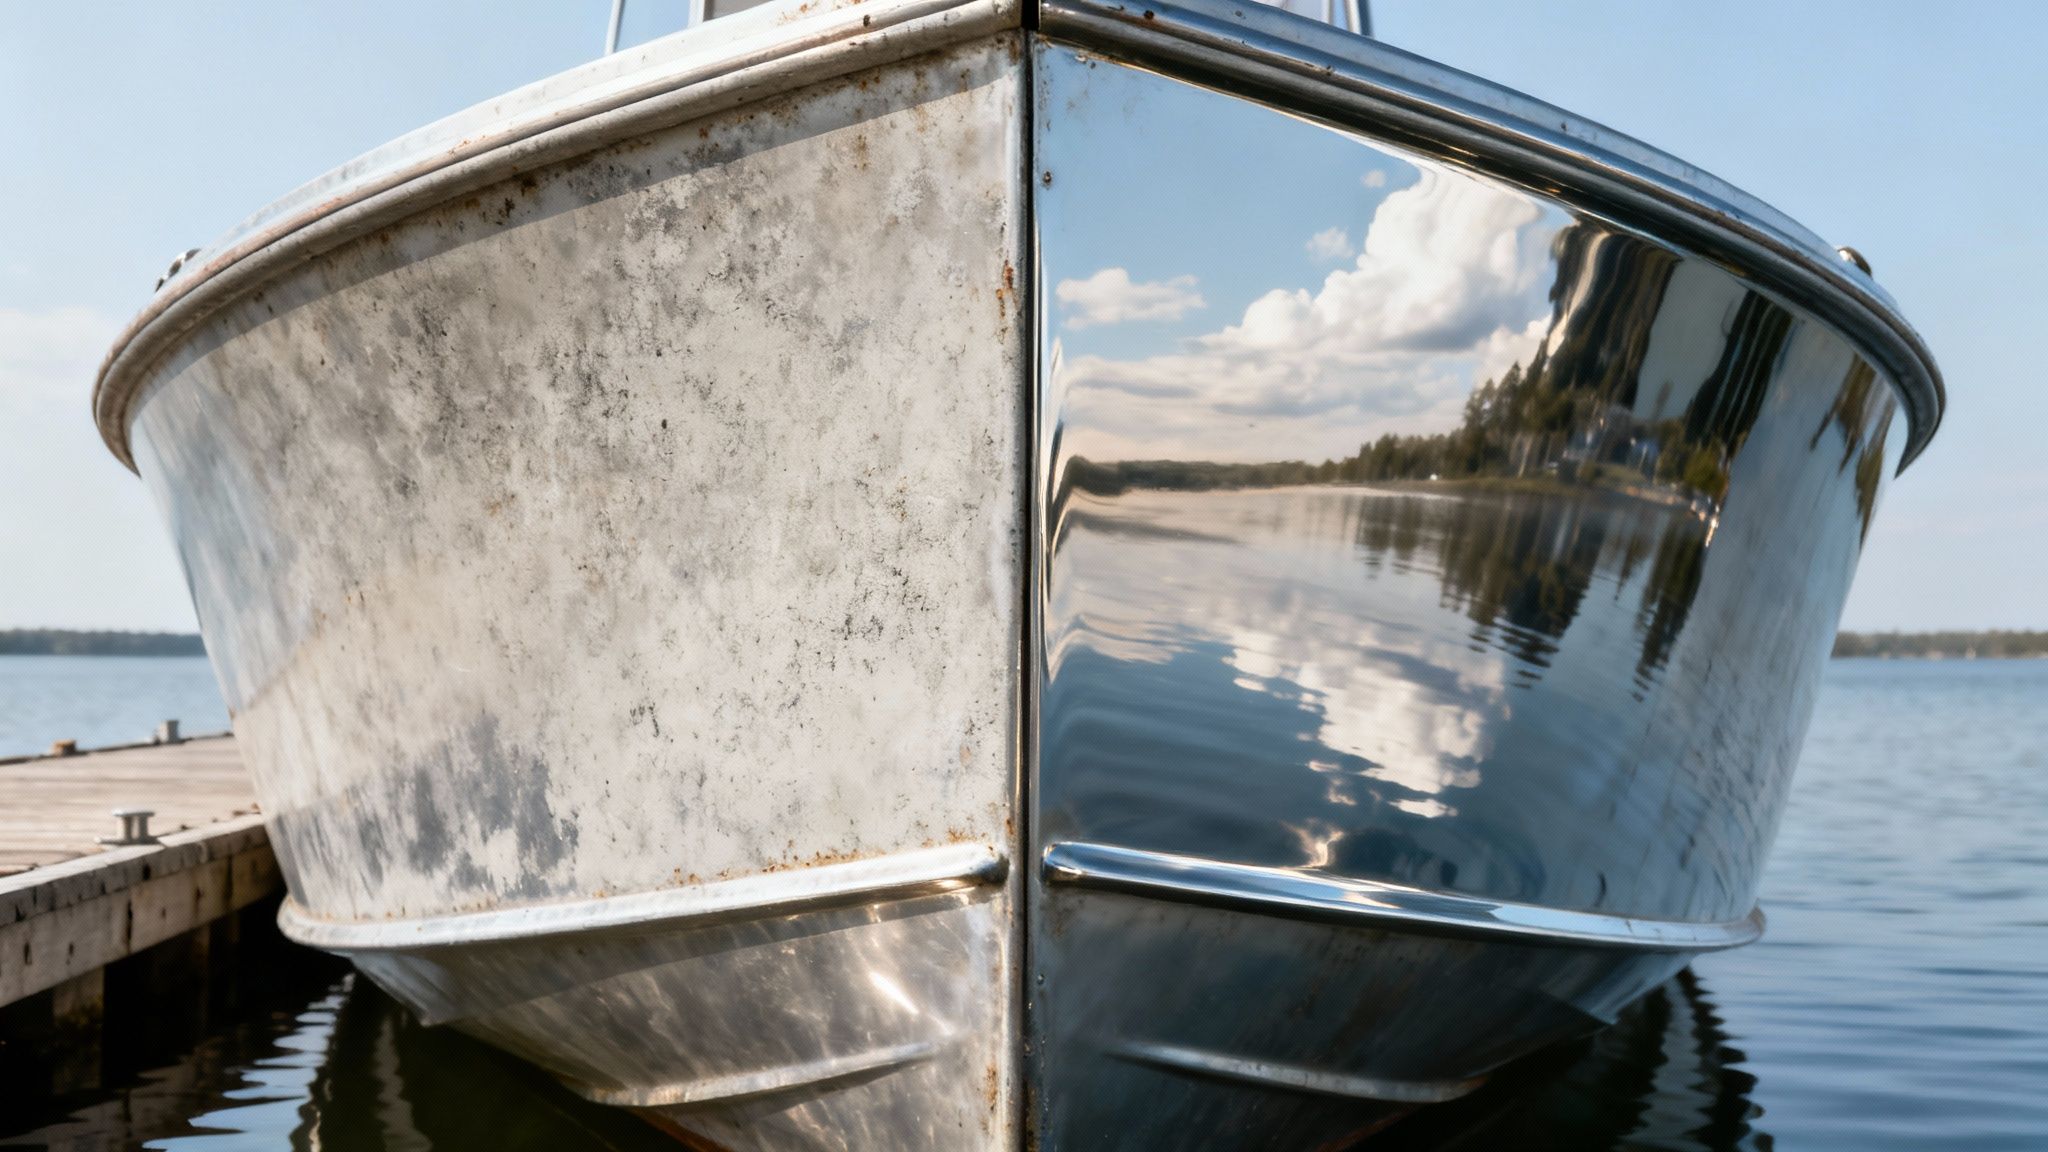
That chalky, dull finish you see on an aluminum hull isn't just an eyesore; it's a dead giveaway that oxidation is at work. It's a natural process that happens when aluminum meets oxygen and moisture, creating a rough, porous layer that becomes a magnet for salt and other gunk.
If you let it go, that oxidation can eventually lead to pitting corrosion, which actually eats away at the metal and compromises its structural integrity. So, polishing is far more than a cosmetic touch-up—it's one of the most important maintenance jobs you can do to protect your investment.
Beyond the Shine: A Smoother, Faster Hull
A freshly polished aluminum surface does more than just turn heads at the dock. The process actually smooths out microscopic imperfections on the hull, which cuts down on drag as your boat slices through the water. It's not a night-and-day difference, but you can see slight improvements in fuel efficiency and overall performance.
Creating a Protective Barrier
Here’s where the real magic happens. After you’ve put in the work to restore the metal's luster, applying a quality marine wax or sealant is the non-negotiable final step. This crucial layer is your boat's first line of defense against:
- Saltwater Corrosion: Salt is aluminum's number one enemy, and it speeds up corrosion like nothing else. A good sealant puts a barrier between the saltwater and the bare metal.
- UV Damage: Just like our skin, the sun's rays can cause aluminum to dull and degrade. A wax with UV blockers is basically sunscreen for your boat.
- Stains and Contaminants: A slick, protected surface makes it way harder for bird droppings, water spots, and grime to get a foothold, which makes your future cleanups a breeze.
When you take the time to polish your aluminum boat, you're actively extending its life and preserving its value. Think of it as proactive maintenance that helps you dodge costly repairs down the road.
Ultimately, getting into a regular polishing routine turns a tedious chore into a rewarding project that keeps your vessel in prime condition. For a deeper dive into protecting your boat from the elements, you can learn more about fighting salt corrosion on boats in our detailed guide.

The Essential Prep Work for a Flawless Finish
A truly professional polish starts long before you ever lay a buffer on the hull. We've seen it time and time again: skipping the prep work is the single fastest way to guarantee a disappointing result.
You can have the best polish on the market, but if you're trying to work on a dirty surface, all you're doing is grinding that grime right into the aluminum. This isn't just about getting it clean; it’s about creating the perfect canvas for that mirror shine you're after.
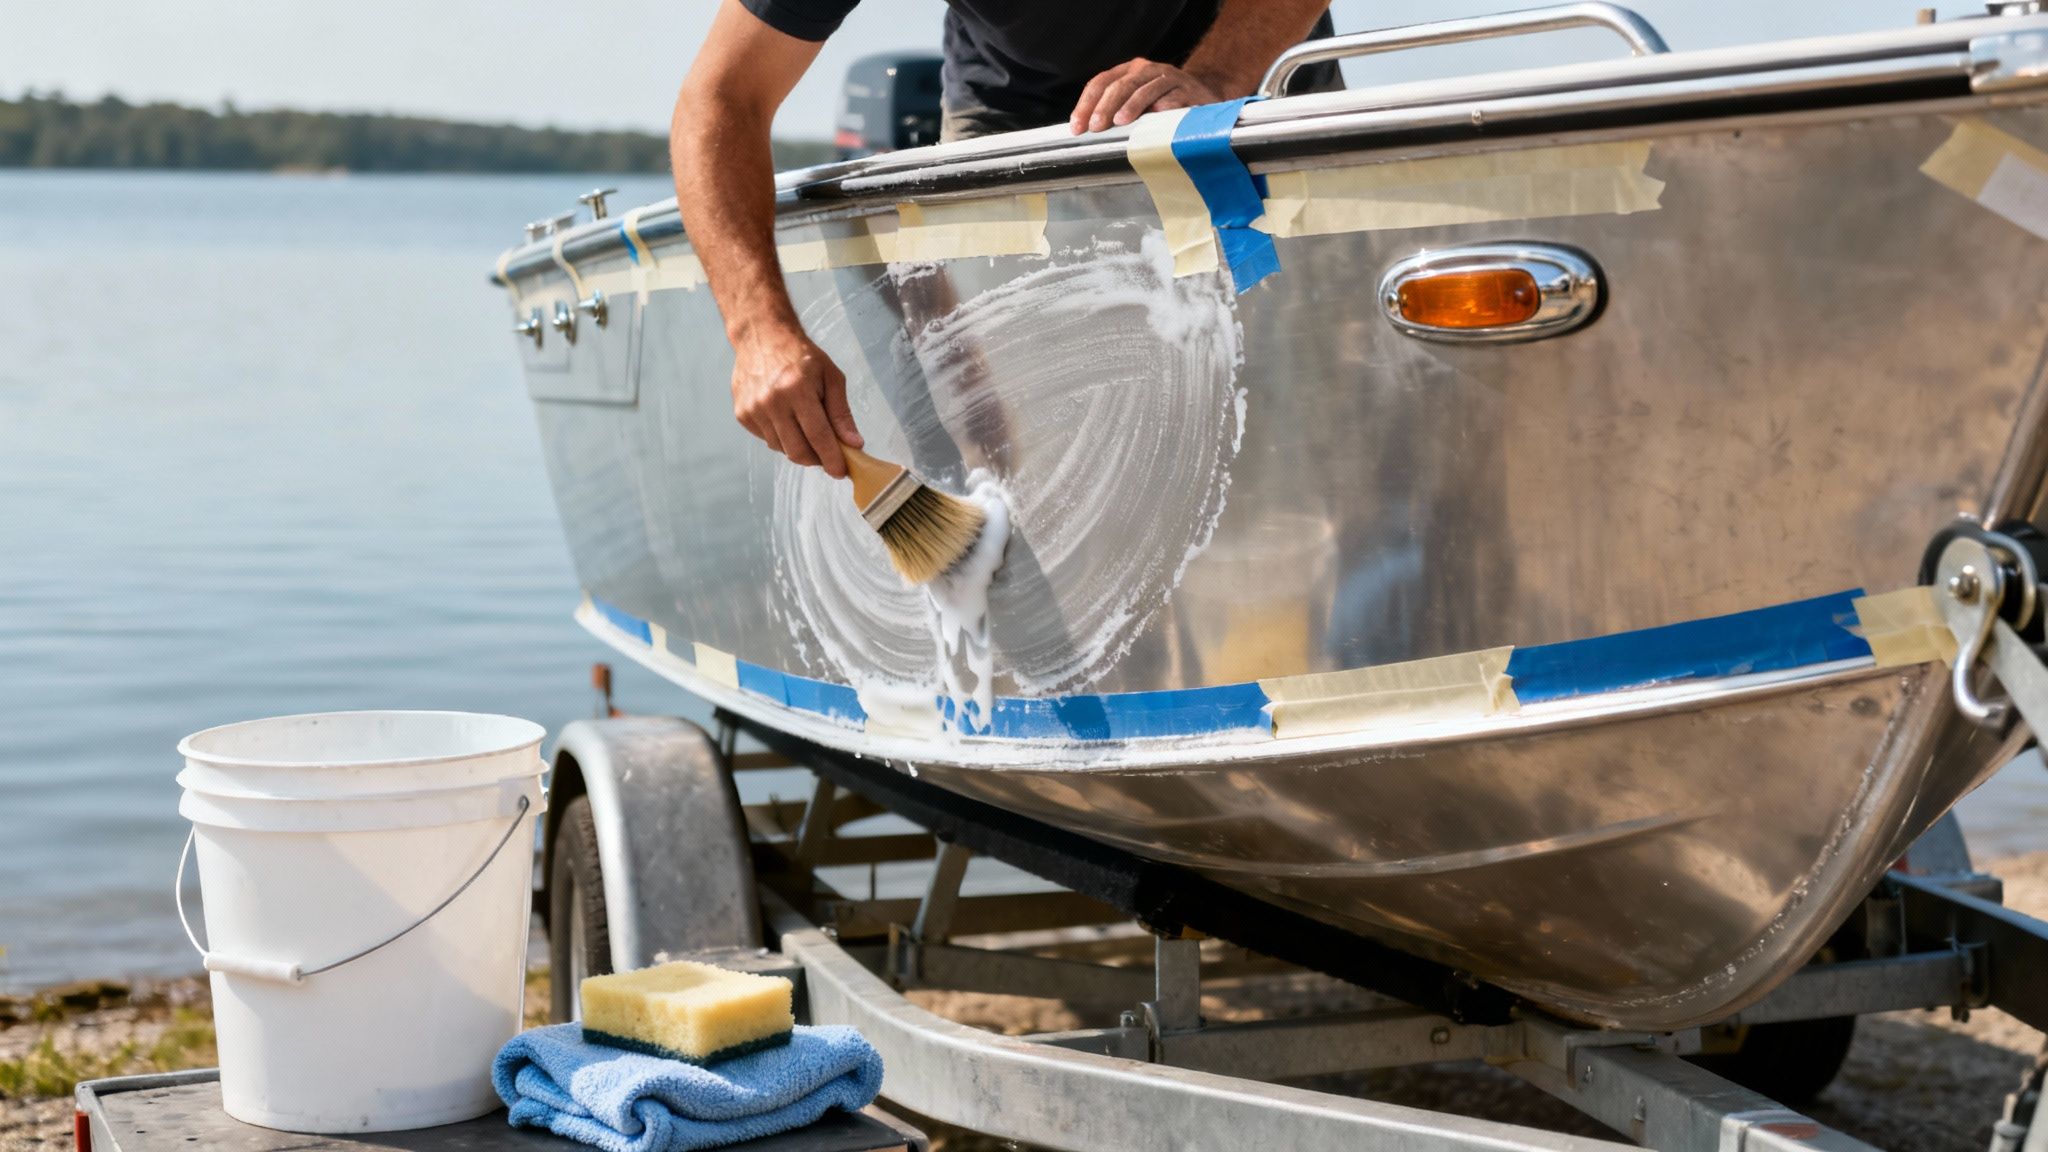
Starting with a Deep Clean
First thing's first: give your boat a complete rinse with fresh water. This knocks off all the loose dirt, salt, and other debris that can act like sandpaper under your brush. Only after that should you grab the soap.
Make sure you're using a high-quality, marine-safe soap designed to cut through stubborn grime without being too harsh on the boat's surfaces. We stand by our Better Boat Boat Soap because it’s tough enough to lift salt residue, bird droppings, and nasty waterline stains but is formulated to be gentle on aluminum.
Work in small, manageable sections. Use a soft-bristle brush to agitate the soap, lift all those contaminants, and then rinse it all away. Don't let it air dry—use clean microfiber towels to prevent water spots from ruining your hard work. For a deeper dive, check out our guide on how to deep clean an aluminum boat.
Inspecting the Hull and Removing Obstacles
With the hull sparkling clean, it’s time to play detective. Walk around the boat and run your hand over every inch of the surface. You're feeling for deep scratches, dings, or areas of heavy pitting that need extra attention.
When you find a spot, mark it with a small piece of painter's tape. This way, you won't forget where to focus during the compounding stage.
Now is also the perfect time to deal with any old, peeling decals or graphics you want gone. A quick blast with a heat gun or even a hairdryer will soften the adhesive, making them much easier to peel away. A dedicated adhesive remover will take care of any sticky gunk left behind.
Pro Tip: Don’t rush the inspection. Seriously. Identifying every little problem area now will save you from frustrating surprises later and is key to getting a uniform finish across the entire hull.
Masking for Precision and Protection
The final prep step before the real fun begins is masking. Polishing compounds are messy, and they can absolutely stain or damage non-metal surfaces like rubber trim, plastic components, and vinyl graphics.
Carefully apply high-quality painter's tape around these areas. This creates clean, sharp lines and protects them from getting scuffed or stained by the buffer.
Here’s a quick checklist of what to mask off:
- Rubber Trim and Seals: Cover all the rubber gaskets around windows, hatches, and rub rails.
- Plastic Fittings: Protect any plastic cleats, vents, or through-hull fittings.
- Antifouling Paint Line: Tape off the bottom paint to avoid scuffing it with the buffer.
- Navigation Lights and Hardware: Cover any hardware you don’t plan on removing and polishing separately.
Taking the time to properly clean, inspect, and mask your boat is what separates an amateur job from a professional one. It sets the stage for a successful polishing aluminum boat project that you'll be proud of.
Choosing Your Polishing Arsenal
Picking the right gear is half the battle when you're staring down a dull aluminum hull. Walk into any marine supply store and the sheer number of options can be overwhelming. But getting this part right will save you a ton of time, money, and sore muscles down the road. It all boils down to matching your tools to the actual condition of your boat.
The first big decision is whether you'll tackle this by hand or with a machine. While you can certainly polish small spots or do light touch-ups by hand, trying to do an entire boat this way is a recipe for exhaustion. You'll rarely get the even, professional-looking finish you're after.
For a job this size, a machine polisher isn't just a luxury—it's essential. It gives you the consistent speed and pressure needed to properly break down the polishing compounds, working them into the metal to achieve a level of shine that’s nearly impossible to get by hand.
Machine Polishers Explained
When it comes to polishers, you’ll run into two main types: rotary and dual-action (DA). A rotary polisher is a real workhorse, spinning on a single axis. This generates a lot of heat and cutting power, which is great for professionals but can be dangerous for beginners. It's surprisingly easy to burn right through the finish or leave deep, ugly swirl marks if you don't know what you're doing.
That’s why for most boat owners, a dual-action (DA) polisher is the way to go. A DA machine spins and oscillates in a random orbital pattern. This simple difference drastically cuts down on heat buildup and pretty much eliminates the risk of damaging the surface. It's far more forgiving, making it the perfect tool to get swirl-free, pro-level results without years of practice.
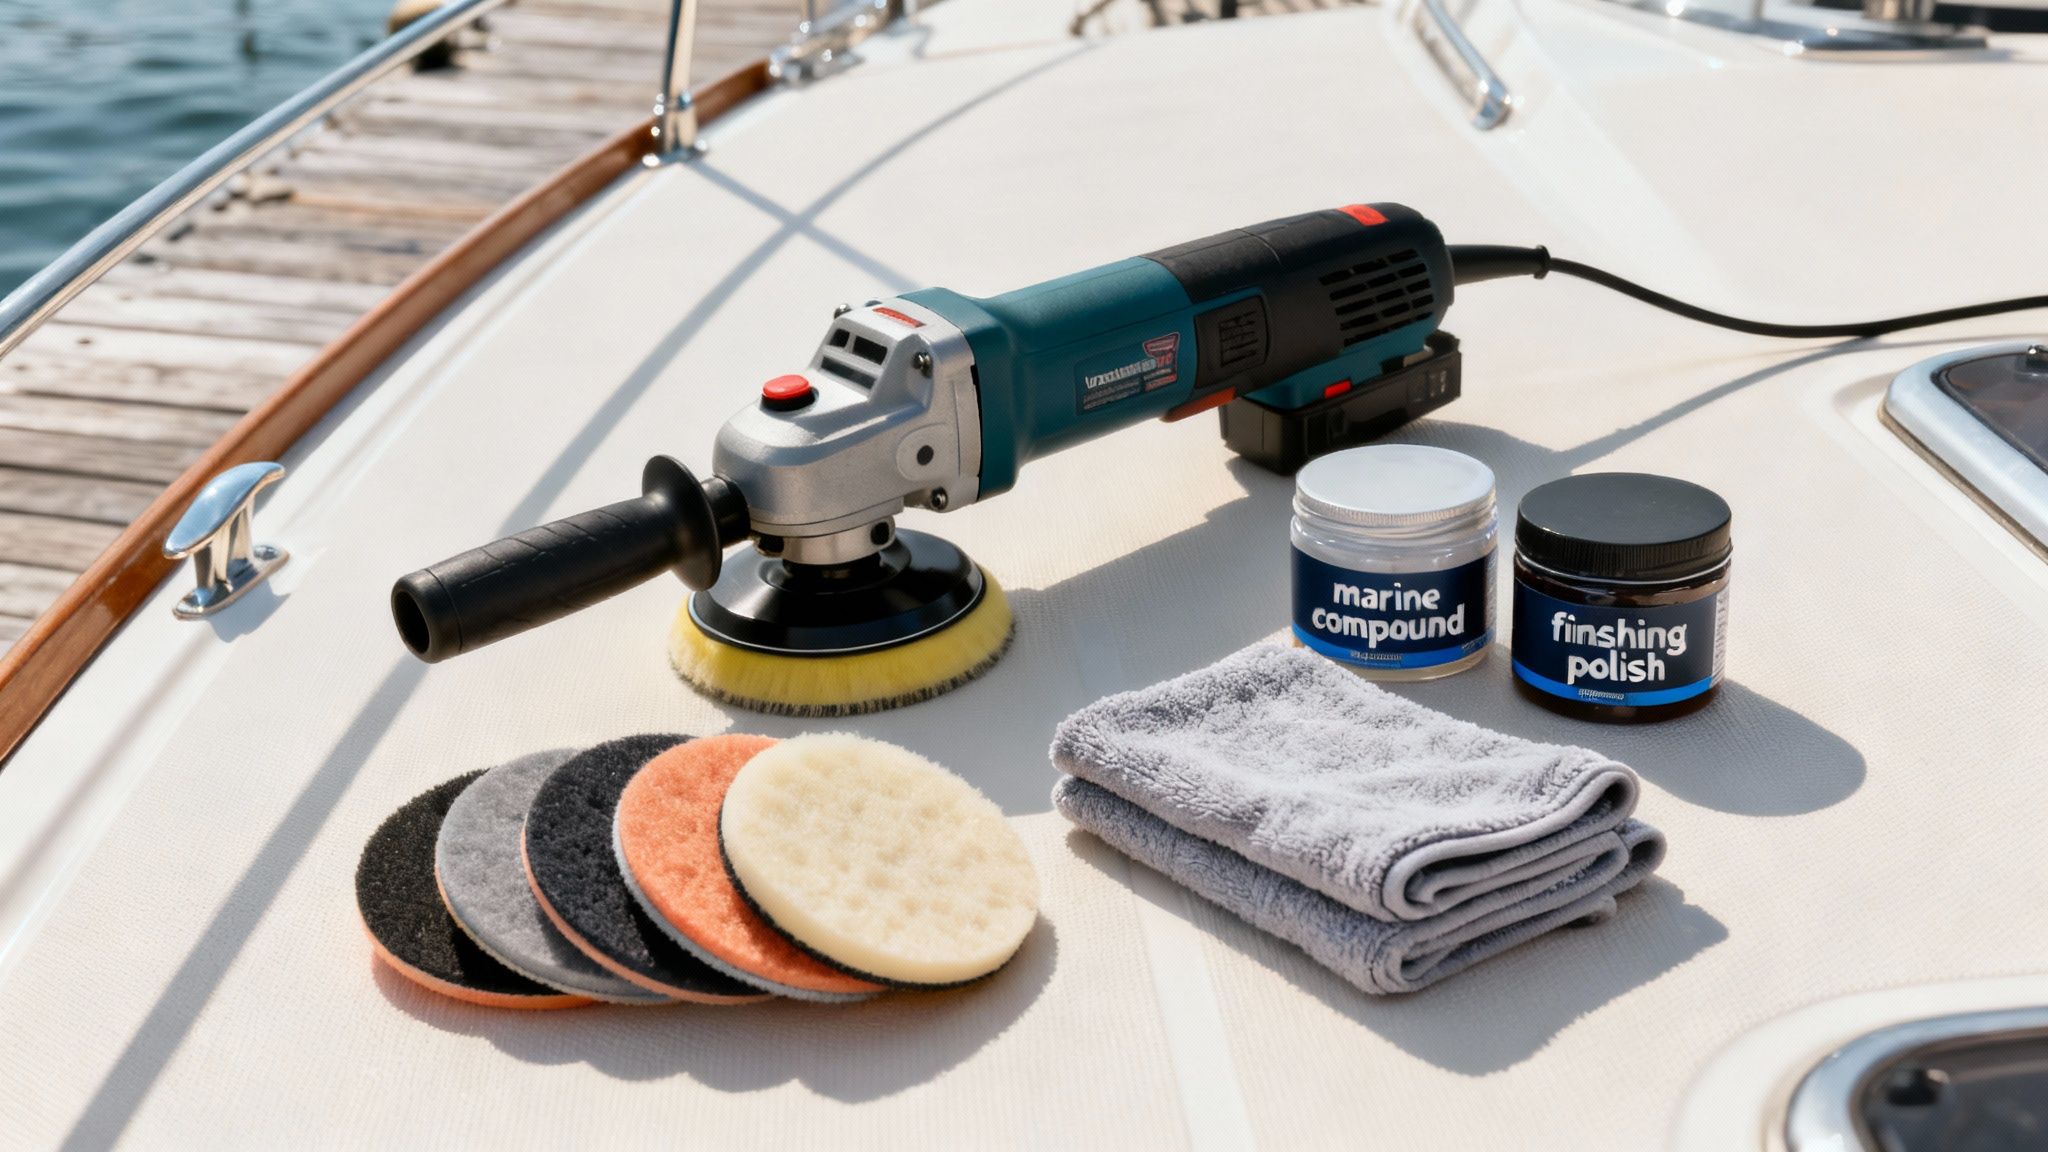
Selecting the Right Compounds and Polishes
It’s a common mistake to think "compound" and "polish" are the same thing. They're not. Think of them as liquid sandpaper, with each type having a different level of grit for a specific job.
- Cutting Compounds: This is the heavy artillery. These are the most aggressive products, designed to slice through heavy oxidation and remove light scratches, effectively leveling the surface. If your hull is looking chalky and neglected, you'll start here.
- Polishes: A polish is a much finer, less abrasive formula used to refine the surface after compounding. Its job is to clear up the faint haze and swirl marks left by the aggressive compound, which is what really starts to bring out that deep gloss. Our Better Boat Marine Polish is formulated to tackle the specific challenges of bare aluminum, cutting through oxidation to restore luster without being too harsh.
- Finishing Polishes (or Glazes): These are the finest of all. This is your final step to max out the clarity and get that true, mirror-like reflection everyone wants.
The golden rule is to always start with the least aggressive product that can get the job done. If your boat just has some light hazing, you can likely skip the heavy cutting compound and start with a medium polish.
Now, picking the right product is just as critical as the tool. For polishing an aluminum boat, you absolutely need products designed for the harsh marine environment.
Matching Your Polish and Pad to the Job
To really dial in your results, you have to pair the right liquid with the right polishing pad. Using a heavy cutting compound with a soft finishing pad won't do much, and vice versa. Here’s a quick guide to help you make the right choice.
| Hull Condition | Recommended Compound Type | Recommended Pad Type | Primary Goal |
|---|---|---|---|
| Heavy Oxidation, Pitting | Heavy-Cut Compound | Wool or Microfiber Cutting Pad | Aggressively remove defects |
| Moderate Oxidation, Dullness | Medium-Cut Compound/Polish | Foam Cutting or Polishing Pad | Restore shine, remove hazing |
| Light Haze, Minor Swirls | One-Step Polish | Foam Polishing Pad | Refine the finish, add gloss |
| Near-Perfect Finish | Finishing Polish or Glaze | Foam Finishing Pad | Maximize clarity and reflection |
Think of this table as your cheat sheet. Find the description that best matches your boat's current state, and you'll have the perfect starting combination of compound and pad to bring that aluminum back to life.
For a deeper dive into all the options out there, check out our complete guide on how to choose the best boat polishing compound. Remember, matching the right product and pad to your boat’s specific needs is the real secret to a flawless finish.
The Polishing Process: A Step-by-Step Breakdown
Alright, you've got a clean, prepped surface and your tools are ready to go. Now for the fun part—the transformation. This is where a little bit of patience and the right technique pay off in a big way, creating that deep, mirror-like shine you're after.
Forget about guesswork. Pros get those flawless, consistent results by following a system, and you can too.
The secret to a uniform, professional-looking finish is to break the job down into smaller, more manageable sections. Don't even think about trying to polish the entire side of the boat in one go. Instead, just focus on one 2x2 foot square at a time. This approach makes sure you're giving every single inch of that aluminum the attention it needs.
The Initial Cutting Stage
First up is the "cutting" phase. This is all about knocking down that chalky oxidation and leveling out the surface of the metal.
Grab your cutting compound and your wool or heavy-cut foam pad. Squeeze a few small, pea-sized dots of compound directly onto the pad.
Here's a crucial tip: before you even turn the polisher on, gently dab the pad across your 2x2 work area. This simple move "primes" the surface and stops the compound from slinging all over you and the boat the second the machine starts spinning.
Set your dual-action polisher to a medium speed, usually around a 3 or 4 on the dial. Start moving the polisher across your section using a cross-hatch pattern—go side-to-side, then up-and-down. Make sure you overlap each pass by about 50%; this is key for getting even coverage. Apply some firm, consistent pressure and just let the polisher and the compound do the heavy work.
Pro Tip: After you've made a few passes, stop the machine. Wipe the area clean with a good microfiber towel and hit it with a bright inspection light from a few different angles. This will instantly show you any lingering haze or oxidation you might have missed. Don't move on to the next section until this one looks perfect.
Refining for a Mirror Gloss
Once you've finished the cutting stage and all the oxidation is gone, you'll be left with a surface that's clean but probably a bit hazy or cloudy. Don't worry, that's completely normal. Now it's time to refine that finish and really bring out the gloss.
Switch over to a softer foam polishing pad and your finer marine polish. Do the same thing as before—apply a few small dots of polish, dab it around your 2x2 section, and then turn the machine on. For this step, you can often bump the speed up a bit, but back off on the pressure. Let it glide.
The goal here isn't aggressive removal; you're just burnishing the metal to a brilliant shine and clearing up any micro-marring left behind by the more aggressive cutting compound. Keep working the polish until it becomes almost transparent, then buff off the residue with a clean towel.
The Importance of a Clean Wipe-Down
I can't stress this enough: between the cutting and refining stages, a perfectly clean wipe-down is absolutely non-negotiable.
If you leave any leftover cutting compound on the surface, it'll get picked up by your finishing pad and you'll just be grinding new, tiny scratches right back into your hard work. This is where having a stack of quality microfiber towels is a game-changer.
We always recommend using our Better Boat Microfiber Towels for this. Their plush fibers are designed to trap and lift away those abrasive little particles without scuffing the fresh polish.
Use one towel to get the bulk of the residue off, then grab a second, completely clean towel for the final buff. This two-towel method ensures you have a perfectly clean slate before moving to the final polishing phase.
It might seem like a small detail, but it's one of those things that separates a pretty good result from a truly great one. It makes a massive difference in the final clarity and depth of the shine.
Locking In the Shine for Lasting Protection
After all that hard work, the last thing you want is for oxidation to creep back in. Leaving that freshly polished aluminum exposed is just asking for trouble. This final step—sealing the surface—is absolutely non-negotiable if you want to preserve that mirror finish you just achieved. A good sealant creates a durable shield that buys you months of shine before needing a touch-up.
Without a protective layer, the marine environment is ruthless. Salt, sun, and moisture will start dulling your boat's finish almost immediately. This is where a high-quality sealant or wax becomes your best friend, creating a tough, hydrophobic barrier that makes water and contaminants bead right off.
Applying Your Protective Sealant
The application process is simple enough, but you need to pay attention to the details. The real key here is to apply a thin, even coat. Slathering on a thick layer of product doesn't add more protection; it just makes it a nightmare to buff off and often leaves a streaky, uneven mess.
Just like you did when polishing, work in small, manageable sections. Put a small amount of your protectant on a clean microfiber applicator pad and spread it across the surface using overlapping circular motions. Let the product haze over according to the manufacturer's directions—this usually only takes a few minutes.
Once it's hazed, grab a separate, clean microfiber towel and buff the surface to a brilliant shine. Make sure you flip your towel to a clean side often so you're actually removing the residue, not just spreading it around. For a top-tier protective coat, we recommend our Better Boat Marine Wax. It's specially formulated with carnauba wax to provide a hard, glossy shell that stands up to UV rays and saltwater.
The visual below breaks down the core technique for the entire process, from putting the product on to the final wipe-down.
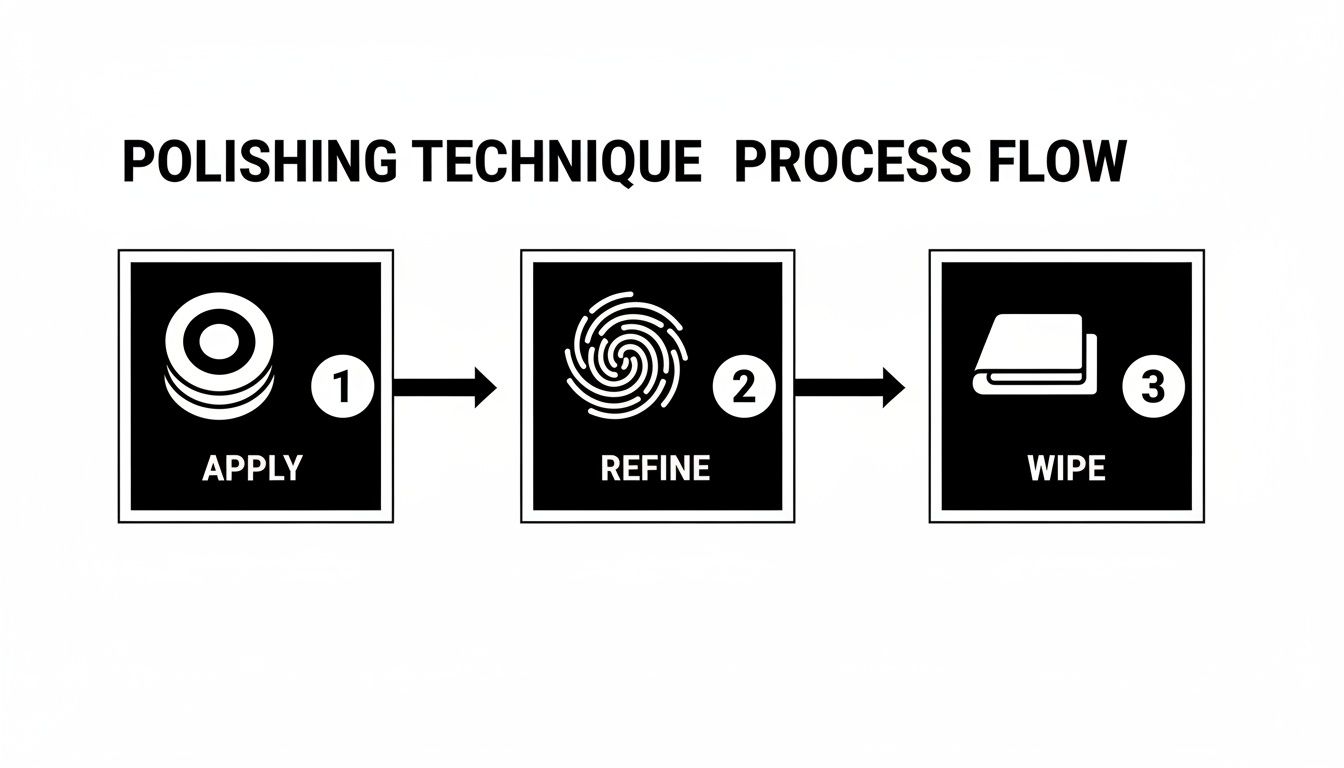
This simple three-stage approach—apply, refine, wipe—is your ticket to consistent, professional-looking results across the entire boat.
Establishing a Simple Maintenance Routine
Locking in the shine isn't a one-and-done job; it's all about smart, consistent upkeep. The global boat polish market is projected to hit USD 198 million by 2033, with recreational boaters like us making up a whopping 75% of that demand. Applying wax regularly can actually extend the life of an aluminum hull by up to 30% by preventing pitting corrosion.
A proper sealant does more than just protect the shine—it makes future cleanups a breeze. Instead of scrubbing away grime, you’ll often just need a quick rinse with fresh water after each trip to wash off the salt.
Here’s a simple routine that will keep your boat looking great:
- After Every Use: Give the hull a quick rinse with fresh water to get the salt off.
- Monthly: Wash the boat with a pH-neutral boat soap. This gets rid of any grime buildup without stripping away your protective wax layer.
- Every 3-4 Months: Reapply a fresh coat of marine wax or sealant. This is crucial for maintaining that protective barrier against the elements.
Stick to this schedule after polishing an aluminum boat, and you'll dramatically extend the life of your hard work. Your vessel will keep turning heads with minimal effort on your part.
Common Questions About Polishing an Aluminum Boat
Even the most detailed guide can't cover every question that pops up when you're elbow-deep in a project. Let's tackle some of the most common things people ask when polishing their aluminum boat. Think of this as the quick-and-dirty FAQ to get you unstuck and back to work.
Can I Polish an Anodized Aluminum Boat?
This one's a big deal, and the answer is a firm no—you can't use abrasive polishes on an anodized finish.
Anodizing is essentially a tough, protective coating baked onto the aluminum. If you hit it with an aggressive compound, you'll chew right through that layer, leaving the raw metal exposed and vulnerable to the elements.
If your anodized aluminum is just grimy, a gentle wash is all it needs. Grab a soft brush and a pH-neutral soap, like our Better Boat Boat Soap, to get it clean without causing damage. For very light oxidation, you'll need to find a non-abrasive cleaner made specifically for anodized surfaces.
How Often Should I Polish My Boat?
The right answer really depends on where you're doing your boating. The environment plays a huge role in how fast the shine fades.
- Saltwater Boaters: Plan on doing a full polish and wax once a year. Salt is brutally corrosive, and staying ahead of it is the only way to win.
- Freshwater Boaters: You can usually get away with a full polish every 18-24 months. The conditions are just a lot kinder to your aluminum.
No matter where you float your boat, applying a fresh coat of a quality marine wax every 3-4 months is non-negotiable. That simple step keeps the protective barrier strong and makes a world of difference in how long your polished finish lasts.
What If I Still See Swirl Marks After Polishing?
Seeing fine swirl marks after all that work can be frustrating, but don't sweat it. This is usually a sign that your last step was a bit too aggressive, either with the compound or the pad you used. It can also happen if you didn't get the surface perfectly clean between the cutting and polishing stages.
Don't panic—this is fixable. Just go back over the swirled areas with a finer finishing polish and a fresh, soft foam finishing pad. Use light pressure and slow, overlapping passes. You're gently burnishing the surface to erase those tiny scratches and bring back that flawless, mirror-like shine.
The pro tip to avoid this in the first place? Always use a separate, clean microfiber towel to wipe away residue after each step. This keeps the gritty particles from your cutting compound from getting dragged into your final polishing phase, which is a key part of the polishing aluminum boat process that separates a good job from a great one.
At Better Boat, we're all about making boat care simple and effective. As a family-owned business, we offer everything from premium cleaners and waxes to all the tools you need to get the job done right. Check out our collections and find what you need for your next project at https://www.betterboat.com.


