


A Practical Guide to Rebuilding an Outboard Motor
So, what does rebuilding an outboard motor actually entail? It means taking the entire engine apart, giving every component a thorough cleaning and inspection, and replacing anything that's worn out or busted. The goal is to bring the engine back to its original factory specs.
When done right, a rebuild can be a fantastic, cost-effective way to breathe new life into your motor, often giving you another decade of solid performance on the water. For a lot of us boaters, it’s a much more appealing (and rewarding) option than shelling out for a brand-new engine.
Deciding if Rebuilding Your Outboard Is the Right Call

Before you even think about grabbing a wrench, you've got to figure out if a rebuild is the smart play. This all comes down to diagnosing what’s wrong, crunching the numbers, and being honest with yourself about your mechanical skills. Let's be real: not every old motor is a good candidate for a second chance.
The first step is recognizing the red flags. Is your motor suddenly weak? Blowing a ton of smoke? Making some pretty scary knocking or grinding noises? Those are all classic signs of serious internal trouble.
A compression test is your best friend here. It's one of the most reliable ways to see what's going on inside. If you see a major pressure drop in one or more cylinders, that's a dead giveaway you're likely dealing with worn piston rings or damaged cylinder walls—perfect reasons to start a rebuild.
The Economics of Rebuilding vs Replacing
Let's talk money, because that's usually the driving force. A proper rebuild is an investment, sure, but it can easily add 10-15 years to your motor's life. You could end up saving up to 60-70% compared to buying a new engine, which can set you back anywhere from $5,000 to over $20,000. If you want to get into the nitty-gritty of the numbers, you can explore the data on outboard motor rebuild services.
A well-executed rebuild doesn't just fix a problem; it restores the heart of your boat. It’s a chance to understand your engine intimately and gain the satisfaction of bringing it back to peak performance with your own hands.
Is This Project Right for You?
Savings aside, you need to think about the commitment. Rebuilding an outboard takes patience, a clean place to work, and a step-by-step mindset. This isn't just a quick weekend job.
Throughout this guide, we're going to walk you through every single stage, from finding the right parts to that crucial final break-in period. If you're comfortable with detailed mechanical work and you're up for a challenge that pays off big time, this project can be incredibly satisfying.
And once it's done, you'll want to keep it running like a top. Regular upkeep is the best way to avoid another major failure, so be sure to check out our guide on outboard motor maintenance for tips on keeping your newly rebuilt engine in prime condition.
Setting Up Your Workspace, Tools, and Parts
Any successful outboard rebuild is built on a foundation of pure, simple organization. Before you even think about touching the first bolt, getting your workspace sorted out is the single most important thing you can do. Think of it as prepping a surgical suite for your engine—cleanliness and having a plan are non-negotiable.
This means finding a clean, well-lit corner of the garage where you can spread out without losing those small, absolutely critical components. A sturdy workbench is your new command center. You'll also need a bulletproof system for tracking every nut, bolt, and washer as it comes off the engine.
Many seasoned mechanics I know swear by the "ziplock bag and sharpie" method. It's simple: as you remove a group of fasteners, like the ones from the water pump housing, they go straight into a bag that you label immediately. This tiny bit of discipline pays off big time during reassembly, turning what could be a nightmare of mystery bolts into a straightforward process.
Gathering Your Essential Tools
Having the right tools ready to go is the difference between a frustrating weekend and a job well done. Sure, a basic mechanic's socket set is a start, but rebuilding an outboard requires a few specialized items to get the job done safely and correctly. You really don't want to be improvising with a hammer and a pry bar when what you need is a dedicated puller.
Before you get started, it's a good idea to lay out all your tools so you know exactly what you have. I've put together a handy checklist to make sure you're not caught off guard mid-project.
Essential Tools and Supplies for Your Outboard Rebuild
| Category | Essential Item | Purpose |
|---|---|---|
| Hand Tools | Mechanic's Socket & Wrench Set | For general disassembly and reassembly of most nuts and bolts. |
| Specialty Tools | Torque Wrench | Absolutely non-negotiable for tightening bolts to precise specifications. |
| Specialty Tools | Flywheel Puller | Required to safely remove the flywheel without causing damage. |
| Specialty Tools | Piston Ring Compressor | Safely compresses piston rings for installation into the cylinder block. |
| Specialty Tools | Impact Driver | Breaks loose stubborn, corroded bolts without stripping the heads. |
| Measurement | Feeler Gauges & Micrometers | Crucial for measuring clearances and wear on internal components. |
| Organization | Ziplock Bags & Sharpie | For labeling and organizing all fasteners as they are removed. |
| Safety | Safety Glasses & Nitrile Gloves | Protects eyes from flying debris and hands from grease/chemicals. |
| Safety | Class B Fire Extinguisher | A must-have for safety when working around fuel and flammable liquids. |
Having these items on hand from the get-go will make the entire process smoother and prevent unnecessary trips to the hardware store.
Pro Tip: Take pictures. Lots of them. Before you disconnect a wire, remove a bracket, or pull a component, snap a photo from a few different angles. This digital breadcrumb trail will be your best friend when you can't quite remember how something was routed or oriented.
Sourcing the Right Parts
Got your tools? Good. Now it's time to hunt down your parts. The serial number on your motor is the golden ticket here. You can usually find it on a small metal plate or sticker on the transom bracket. With this number in hand, you can order a complete rebuild kit or individual components with total confidence that they'll be a perfect match.
I can't stress this enough: always opt for high-quality, reputable parts. Saving a few bucks on a cheap gasket set or generic bearings is a classic false economy that can lead to catastrophic failure later on. Stick with OEM (Original Equipment Manufacturer) or trusted aftermarket brands known for their reliability in the harsh marine environment.
Don’t Forget About Safety
Working on engines means dealing with fuel, oil, and heavy parts, so safety has to be your top priority. Make sure your workspace is well-ventilated to avoid breathing in fumes from cleaners or any residual fuel. You should always have a fire extinguisher (Class B rated for flammable liquids) within arm's reach.
Safety glasses are a must, especially when you're using compressed air or dealing with springs and clips that have a habit of going airborne. A good pair of nitrile gloves will also save your hands from a world of grease and harsh chemicals. Taking these simple precautions ensures your project is not only successful but safe.
And speaking of doing things the right way, for routine maintenance down the road, having the proper gear like a reliable lower unit gear oil pump makes messy jobs cleaner, faster, and safer.
Alright, here’s where the fun really begins. With your workspace set up and your tools laid out, it's time to get into the heart of the engine. A successful teardown isn't about speed; it’s about being deliberate and organized. Trust me, following a system now is the secret to avoiding that dreaded pile of mystery parts and a world of frustration later.
Your main goal is to take the engine apart in a logical order, documenting everything as you go. Think of it like a reverse assembly line—the parts that went on last are the first to come off. This simple approach stops you from trapping components or having to backtrack, saving you time and preventing damage.
The entire rebuild hinges on a careful and well-documented teardown. This first stage sets the foundation for everything that follows.

This workflow isn't just a suggestion. Organization, documentation, and proper prep are absolutely essential for a smooth rebuild.

Starting With The Externals
Always start with the outermost components and work your way in. This usually means popping off the engine cowling first, which gives you clear access to the powerhead.
From there, move on to the fuel system. Disconnect the fuel lines, then remove the carburetor or fuel injectors. Set them aside somewhere safe and clean. You can bet some fuel will spill, so keep shop rags handy to catch any drips.
Next up is the electrical system. This is where your labeling system really pays for itself. Disconnect the spark plug wires, the main wiring harness, and any sensors. Those photos you took earlier will be a lifesaver, reminding you exactly how everything was routed through the engine bay.
Removing The Flywheel And Powerhead
Getting the flywheel off is a major milestone, but you absolutely need the right tool: a flywheel puller. Don't even think about prying it off with screwdrivers or hitting it with a hammer. That’s a guaranteed way to damage the flywheel or, even worse, the end of the crankshaft. Secure the puller, tighten the center bolt, and it should pop right off with a firm, satisfying clunk.
With the flywheel and electronics out of the way, you can now focus on separating the powerhead from the midsection. This just involves removing the series of bolts holding the engine block to the lower unit assembly. These bolts are often notoriously tight and corroded, so an impact driver or a long breaker bar will be your best friend here.
Real-World Tip: Stubborn bolts are a classic outboard problem. Before you risk stripping a bolt head, spray it with a good penetrating oil and let it soak for at least 30 minutes. A little bit of heat from a propane torch can also work wonders, but be extremely careful around any leftover fuel or oil.
Diving Into The Engine Block
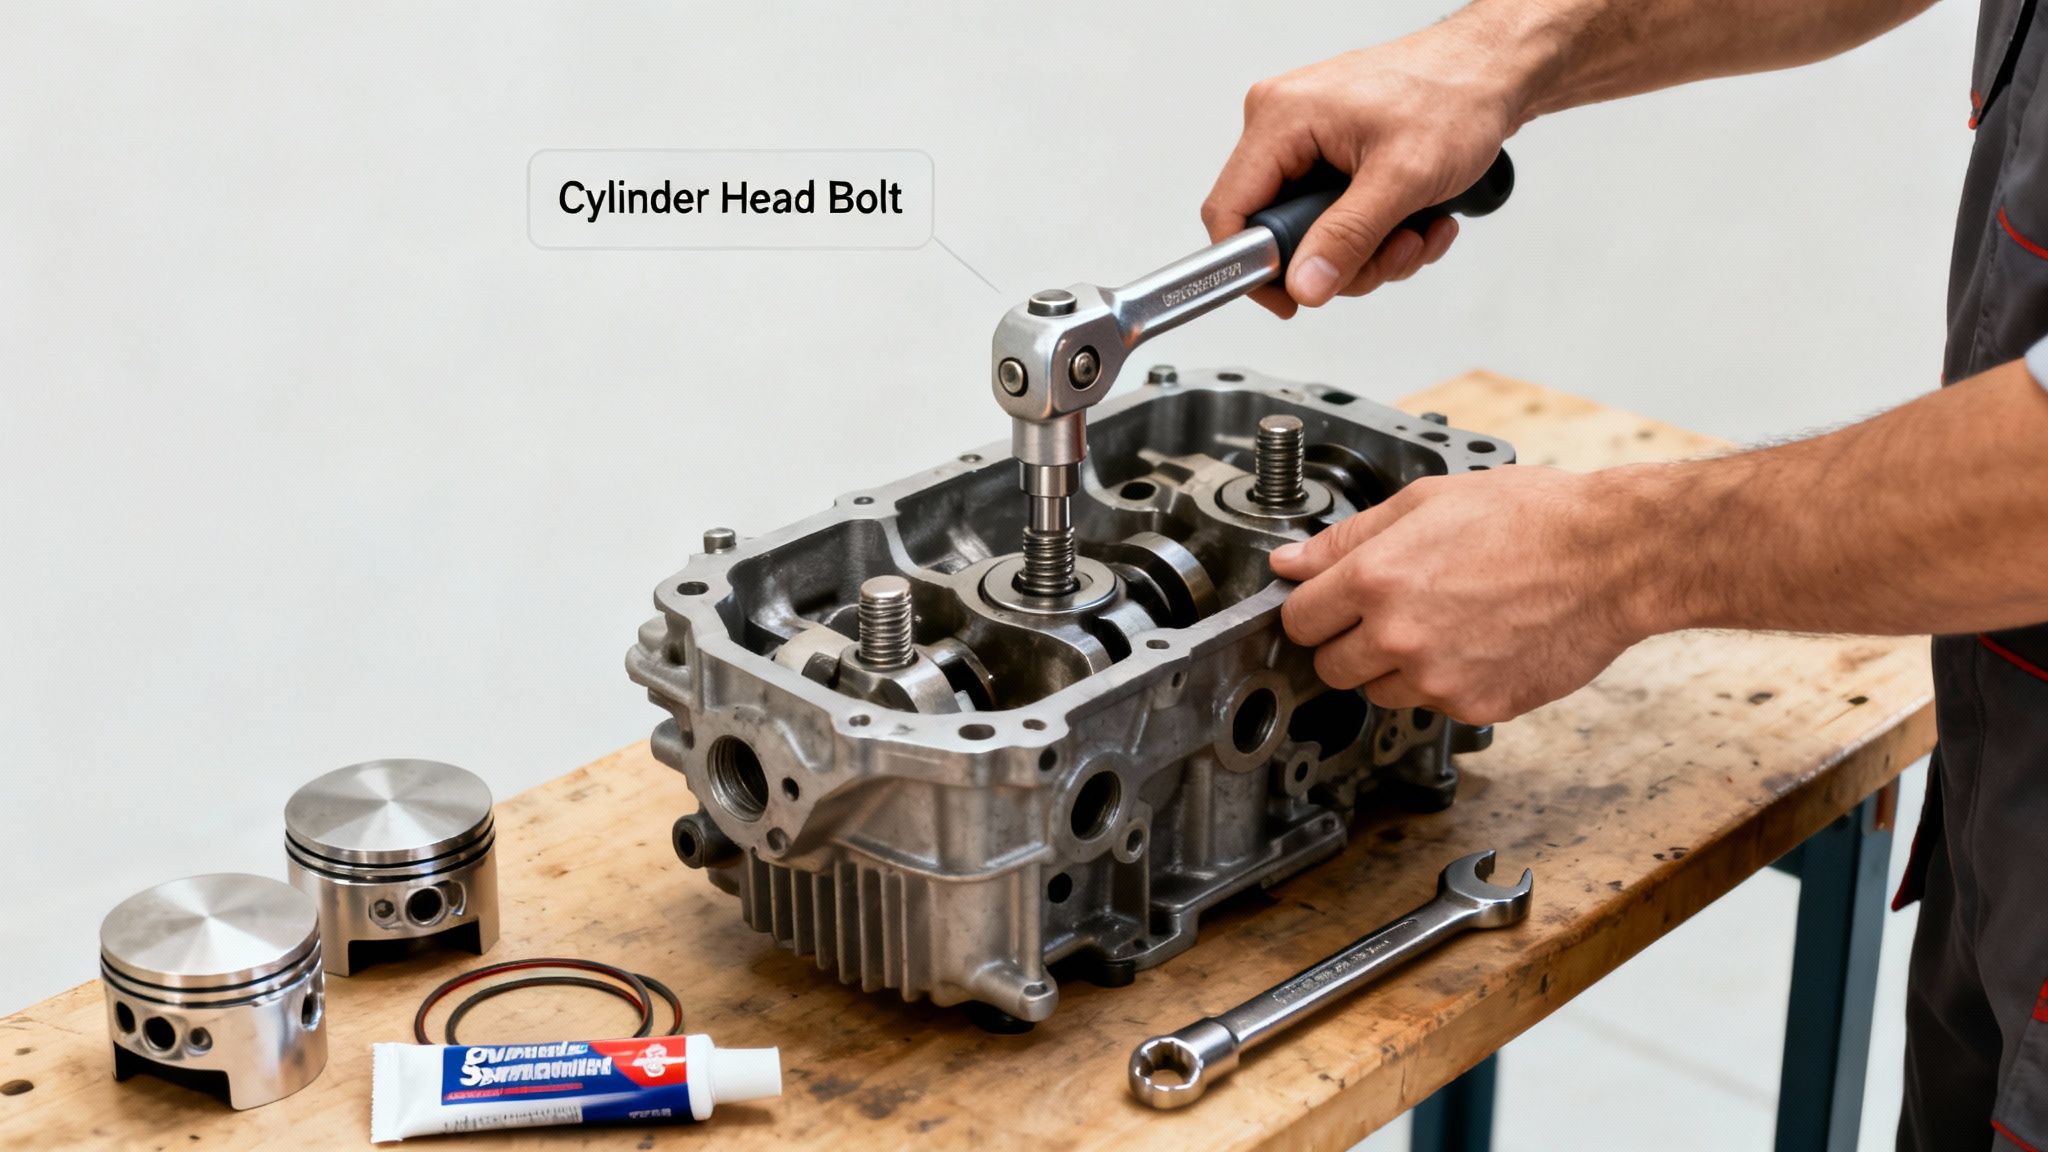
Once you have the powerhead on your workbench, the real internal surgery begins. This is the most intricate part of the job. Start by removing the cylinder head(s) to get your first look at the pistons and cylinders. Be gentle as you lift the head off to avoid scratching the mating surfaces on either the head or the block.
Now you can get to the pistons and connecting rods. Rotate the crankshaft so a piston is at the bottom of its travel. Carefully unbolt the connecting rod cap from the crankshaft journal, and make sure you keep the cap paired with its matching rod—they're a set. Gently push the piston out through the top of the cylinder. Do this for each cylinder, meticulously keeping each set of components organized.
Finally, the crankshaft comes out. Unbolt the main bearing caps in the sequence laid out in your service manual. Lift the crankshaft straight out of the block, taking care not to nick any of those precision-machined journal surfaces.
By now, you should have a completely bare engine block and a neatly organized collection of parts, all ready for the crucial cleaning and inspection phase.
Cleaning, Inspecting, and Preparing Components
Alright, your workbench is probably covered in meticulously organized parts. Now, the real work begins—the detective work. I can't stress this enough: this phase is the most critical part of the entire rebuild. What you find here will make or break your project. It's all about getting every single component spotlessly clean so you can see its true condition, then taking precise measurements to decide what's good, what's junk, and what needs a pro's touch.
Each part is coated in its own special blend of baked-on grease, carbon, and salt. You can't even think about measuring for wear until every surface is pristine. This isn't a quick wipe-down; it's a deep clean that uncovers the hidden story of your engine's life and what ultimately caused it to fail.
The Art of Degreasing and Deep Cleaning
Internal parts like the pistons, crankshaft, and the engine block itself need a serious degreasing session. A solvent tank is what the pros use, but a big utility sink and a high-quality, engine-safe degreaser can get the job done. Get in there with some stiff nylon brushes and scrub away years of grime from every last nook and cranny.
For the external parts—especially the powerhead casing and other painted pieces—you’ll want to be a bit gentler. The goal is to strip away the salt and grime without destroying the protective finish. Our Heavy Duty Boat Soap is perfect for this. It's tough on marine buildup but easy on surfaces, which helps prevent corrosion down the road.
Pro Tip: A can of brake cleaner and some compressed air are your best friends for cleaning out the small oil passages in the block and crankshaft. Any gunk left in there can starve your new bearings of oil, leading to catastrophic failure the moment you start it up.
Once everything is sparkling, lay it all out on a clean, safe surface like a large sheet of cardboard. This lets you visually inspect each piece and keeps anything from getting lost or damaged. It's also the perfect time to pull out those photos you took during teardown to make sure everything is accounted for.
Precision Inspection: Measuring for Wear
With the cleaning done, it's time to swap your scrub brushes for precision measuring tools. This is where you become a meticulous inspector. You'll be comparing the actual measurements of your components against the factory specifications listed in your service manual. Don't guess here.
- Cylinder Walls: First, just look. Run your fingernail down the cylinder wall. If you can feel any vertical scratches or scoring, that’s a red flag for debris or ring failure. Then, grab a telescoping bore gauge and a micrometer to measure the cylinder's diameter at the top, middle, and bottom. You're checking for "out-of-round" or "taper" wear.
- Pistons: Check the piston tops for any pitting, which is a sign of detonation. Look for scuff marks on the skirts or any visible cracks. Measure the piston diameter exactly where your manual tells you to, and make sure the ring grooves are clean and within spec.
- Crankshaft: Carefully inspect the bearing journal surfaces. You're looking for scoring, any blueish discoloration from overheating, or bits of embedded material. A micrometer is essential here to measure each journal and confirm the wear is within the service limit.
This detailed inspection process removes all the guesswork. You’ll know exactly what needs attention. You might find one cylinder is perfect while another is shot and needs to be sent to a machine shop. For a closer look at how regular maintenance can head off some of these problems, our guide on using salt removers for your engine has some great preventative tips.
Making the Call: Repair, Replace, or Machine
After your inspection, every part will fall into one of three buckets: good to go, needs to be replaced, or requires professional machine work. For example, a slightly warped cylinder head can often be "decked" (resurfaced) by a machine shop to make it perfectly flat again. On the other hand, a piston with a crack or a crankshaft with deep scoring is usually toast—it has to be replaced. Trying to save a critically failed part is just asking for another breakdown.
Let's be honest, a lot of rebuilds happen because of issues that could have been prevented. We see it all the time with Better Boat customers. Using our epoxy sealants and polishes can help fend off the corrosion responsible for 50% of rebuild triggers, potentially doubling the time between major services from 300 to 600 hours.
Many rebuilds—about half the market—are partial rebuilds focused on high-wear spots like exhaust tuning ports, which are clogged in 28% of two-strokes. A good cleaning and service there can restore efficiency to 85-90% of what it was from the factory. To dig deeper into these trends, you can read the full research about the outboard rebuild market.
When you're making these decisions, it's helpful to have a quick reference. Here's a table outlining common issues and what to do about them:
Common Wear Indicators and Solutions
This table is a handy guide for quickly identifying signs of wear on key components and deciding on the best course of action.
| Component | Sign of Wear | Recommended Action (Repair/Replace) |
|---|---|---|
| Cylinder Wall | Deep vertical scratches, out-of-round beyond spec | Machine (bore/hone) or replace block |
| Piston | Skirt scuffing, cracked ring lands, pitting | Replace |
| Crankshaft | Scored journals, heat discoloration (blueing) | Machine (grind/polish) if within spec, otherwise replace |
| Connecting Rod | Elongated big-end bore, signs of twisting | Replace (always replace in sets) |
| Cylinder Head | Warping (not flat), cracks between valves | Machine (deck/resurface) if minor, replace if cracked |
| Bearings | Pitting, scoring, embedded debris, copper showing | Replace (always replace all bearings) |
Remember, this is just a starting point. Always defer to the precise specifications in your service manual.
If your cylinder walls are worn but not gouged, they're perfect candidates for professional honing. This process creates a specific crosshatch pattern that helps new piston rings seat correctly and hold oil—absolutely vital for a long-lasting engine. Don't hesitate to lean on the expertise of a good automotive machine shop for these critical tasks. They have the tools and experience to do it right.
The Art of Precise Reassembly
After all that tedious cleaning and inspecting, you’ve finally made it to the best part of the job. This is the moment where all your careful organization pays off, and that pile of pristine parts starts to look like an engine again. Reassembly is a game of precision, patience, and sticking to the script.
Don't rush this stage. Every single component needs to be installed just so, with the right lubrication and tightened to exact specs. Your service manual and the photos you snapped during teardown are your best friends now—they'll guide you through each step and keep you from missing anything.
Installing Bearings and Piston Rings
Your journey back to a running engine starts deep inside the block. First up are the new main bearings for the crankshaft. They usually come in two halves; make sure they're perfectly clean, dry, and seated correctly in their saddles on the block and main caps.
Next, shift your focus to the pistons. Getting new piston rings on is a delicate operation. You’ll want a ring expander tool to gently work each ring into its groove. Pay close attention to the order and which way they face—they're definitely not interchangeable. Stagger the ring gaps according to the diagram in your manual to keep compression from leaking past.
With the rings on, it’s time to get the piston and connecting rod assemblies into the block. This job calls for a piston ring compressor. It's a slick little tool that squeezes the rings down tight, letting the piston slide smoothly into the cylinder bore without snagging.
Crucial Tip: Before you install any internal part, slather it with assembly lube. We're talking bearings, piston skirts, cylinder walls, and crankshaft journals. This stuff is critical—it protects all your new parts from scoring during the first few seconds of startup before oil pressure has a chance to build.
Placing the Crankshaft and Pistons
With the main bearings lubed and sitting pretty, carefully lower the crankshaft into the engine block. It should settle right into the bearing saddles without any fuss. Place the main bearing caps back where they belong—they are numbered and have directional arrows—and just get the bolts finger-tight for now.
Now, one at a time, you can insert the piston assemblies into their matching cylinders. I like to use the wooden handle of a hammer to gently tap the top of the piston, guiding it down until the connecting rod is ready to meet the crankshaft journal. Attach the rod cap, double-check its orientation, and snug up the bolts.
It's interesting how outboard design has changed. These days, partial rebuilds focusing on lower units or midsections are becoming more common among the 50 million boaters out there. These types of jobs make up about 55% of all outboard work, getting boats back on the water without a full engine teardown.
For instance, a huge number of rebuilds tackle water pump failures—marine surveys show this happens in 35% of outboards over five years old, usually just from a neglected impeller. You can dig into more details about these outboard service trends to see how targeted repairs are keeping people boating.
The Non-Negotiable Role of the Torque Wrench
Listen up, because this is the most important rule of reassembly: every bolt has a specific torque value. Don't guess. Don't go by "feel." Using a calibrated torque wrench is the only way to ensure fasteners are properly tightened. Too loose, and things will leak or shift. Too tight, and you risk stripping threads or warping expensive parts.
Your service manual will lay out a detailed torque sequence, especially for critical spots like the cylinder head and main bearing caps. It's almost always a multi-stage process done in a specific pattern to guarantee even clamping force. Follow it to the letter.
- Main Bearing Caps: Tighten them in the exact sequence specified.
- Connecting Rod Caps: Hitting the right torque here ensures proper bearing clearance.
- Cylinder Head Bolts: Follow that multi-pass, crisscross tightening pattern religiously. It's not a suggestion.
Ignoring torque specs is the fastest way I know to ruin hours of hard work. This one tool is what ensures the structural integrity and long life of your rebuilt engine.
Sealing the Deal with Gaskets and Sealant
A perfect seal is everything for preventing oil, water, and compression leaks. Always, always use the new gaskets that came in your rebuild kit. For some surfaces, like where the two halves of the crankcase meet, your manual might call for a specific liquid gasket sealant instead of a physical one.
When it comes to sealing against the harsh marine environment, using a product like our Marine Grade Sealant ensures a durable, waterproof bond that can withstand vibration and temperature extremes.
When using sealant, apply a thin, even bead exactly as instructed. Don't go crazy with it—any excess that squeezes into the engine can break off and clog up a critical oil passage. Once the sealant is on, assemble the parts right away and torque the bolts down.
Finally, you can reinstall the powerhead onto the midsection, reconnect the flywheel, and start routing all the electrical wiring and fuel hoses. This is another spot where your disassembly photos are invaluable. Constant cross-referencing ensures every wire, clip, and hose goes back exactly where it belongs, setting you up for a successful first start.
First Start and Engine Break-In Procedure
This is the moment of truth. All your hard work, patience, and precision have led to this first start. Before you even think about turning that key, though, a few final checks are absolutely essential. Rushing this final step is a classic mistake you don't want to make—it could jeopardize the long and healthy life you want for your newly rebuilt outboard.
First up, let's talk fluids. Double-check everything. This means fresh gear lube in the lower unit and, for a four-stroke, making sure it's filled with the correct amount of new engine oil. It's the perfect time for a quick refresher, and you can get the full rundown in our complete guide to a boat engine oil change. Make sure all your fuel lines are buttoned up tight with no leaks, and prime the system until the bulb is rock solid.
Most importantly, you need a constant supply of cooling water. Whether you’re using a big test tank or just a set of "muffs" hooked to a garden hose, never start the engine dry. Not even for a second. A new impeller can shred itself in moments without water, and you'll be right back to taking things apart.
Your Initial Startup Checklist
With your pre-flight checks done, you're ready to fire it up. Don't be surprised if the engine takes a few extra cranks to start; it's pulling fuel through the lines for the very first time. Once it roars to life, your only job is to watch and listen like a hawk.
The first thing to look for is a steady stream of water spitting from the "telltale" port. This is your visual proof that the water pump is doing its job. Let the engine idle and warm up for a few minutes while you scan every inch of it for any signs of fuel, oil, or water leaks.
The first few hours of operation are the most critical in an engine's life. The whole point of the break-in period is to let the new piston rings properly seat against the cylinder walls. This creates a perfect seal for maximum compression and performance down the road.
The Break-In Process
Having patience during the break-in is non-negotiable for anyone who's just rebuilt an outboard motor. Your specific service manual will lay out the exact schedule, but the general idea is always the same: run the engine at varied RPMs without ever putting it under a heavy load.
A typical break-in schedule looks a lot like this:
- First Hour: You'll want to vary the engine speed constantly, but never push it past half throttle. The key is to avoid holding a steady RPM for more than a couple of minutes at a time.
- Second Hour: Now you can open it up a bit more, increasing to three-quarters throttle for short bursts, but keep varying those RPMs.
- Hours 3-10: At this point, you can run the engine pretty normally, but still hold back from any sustained full-throttle operation.
Keep your ears open for any strange noises and an eye on the temperature gauge if you have one. After you've completed the full break-in period, it's a great practice to change the engine oil again (on a four-stroke) and give the gear lube a quick inspection for any milky appearance that signals water intrusion. This final check confirms your seals are holding tight and your engine is ready for years of reliable service on the water.
Common Questions About Rebuilding an Outboard Motor
Even with the best guide in hand, a few questions always pop up when you're staring down an outboard rebuild. It’s a big job, and it’s smart to have all the facts. Let's tackle the big ones so you can decide with confidence.
How Much Does Rebuilding an Outboard Motor Cost?
This is the million-dollar question, isn't it? The truth is, the cost can be all over the map. For a simple two-stroke, you might get away with a DIY rebuild kit that costs just a few hundred bucks.
On the other end of the spectrum, a complex V6 four-stroke that needs professional machine shop work and a laundry list of new parts could easily run into several thousand dollars. But here's the key takeaway: even a pricey rebuild often only costs 30-40% of what you'd spend on a brand-new motor.
How Long Does a Rebuild Take?
Time is another huge factor. A seasoned marine mechanic who's done this a dozen times might knock out a full rebuild in 20-40 hours of actual wrenching. That doesn't include the time spent waiting for parts to be delivered or for a machine shop to do its thing.
If this is your first time diving into an engine's guts, be realistic. It’s a good idea to double that estimate. You'll want to take your time, double-check your work, and meticulously document every step. Rushing is how expensive mistakes happen.
Should I Hire a Pro Instead?
There's no shame in calling in a professional. In fact, sometimes it's the smartest move.
You should seriously consider hiring a pro if:
- You don't have specialized tools like a cylinder bore gauge or a torque wrench that goes to spec.
- You lack a clean, organized, and well-lit workspace to tear down an engine.
- The technical complexity just feels overwhelming.
- The engine suffered catastrophic damage (like throwing a rod). In this case, a pro's diagnosis is critical to even know if a rebuild is a viable option.
Bringing an old outboard back from the dead is one of the most rewarding projects a boater can take on. To keep the rest of your boat looking just as good as your newly rebuilt motor, check out the full range of premium maintenance products from Better Boat. We have everything from tough hull cleaners to long-lasting protective waxes to keep your vessel in prime condition.


