


How to Use a Boat Spring Line for Perfect Docking
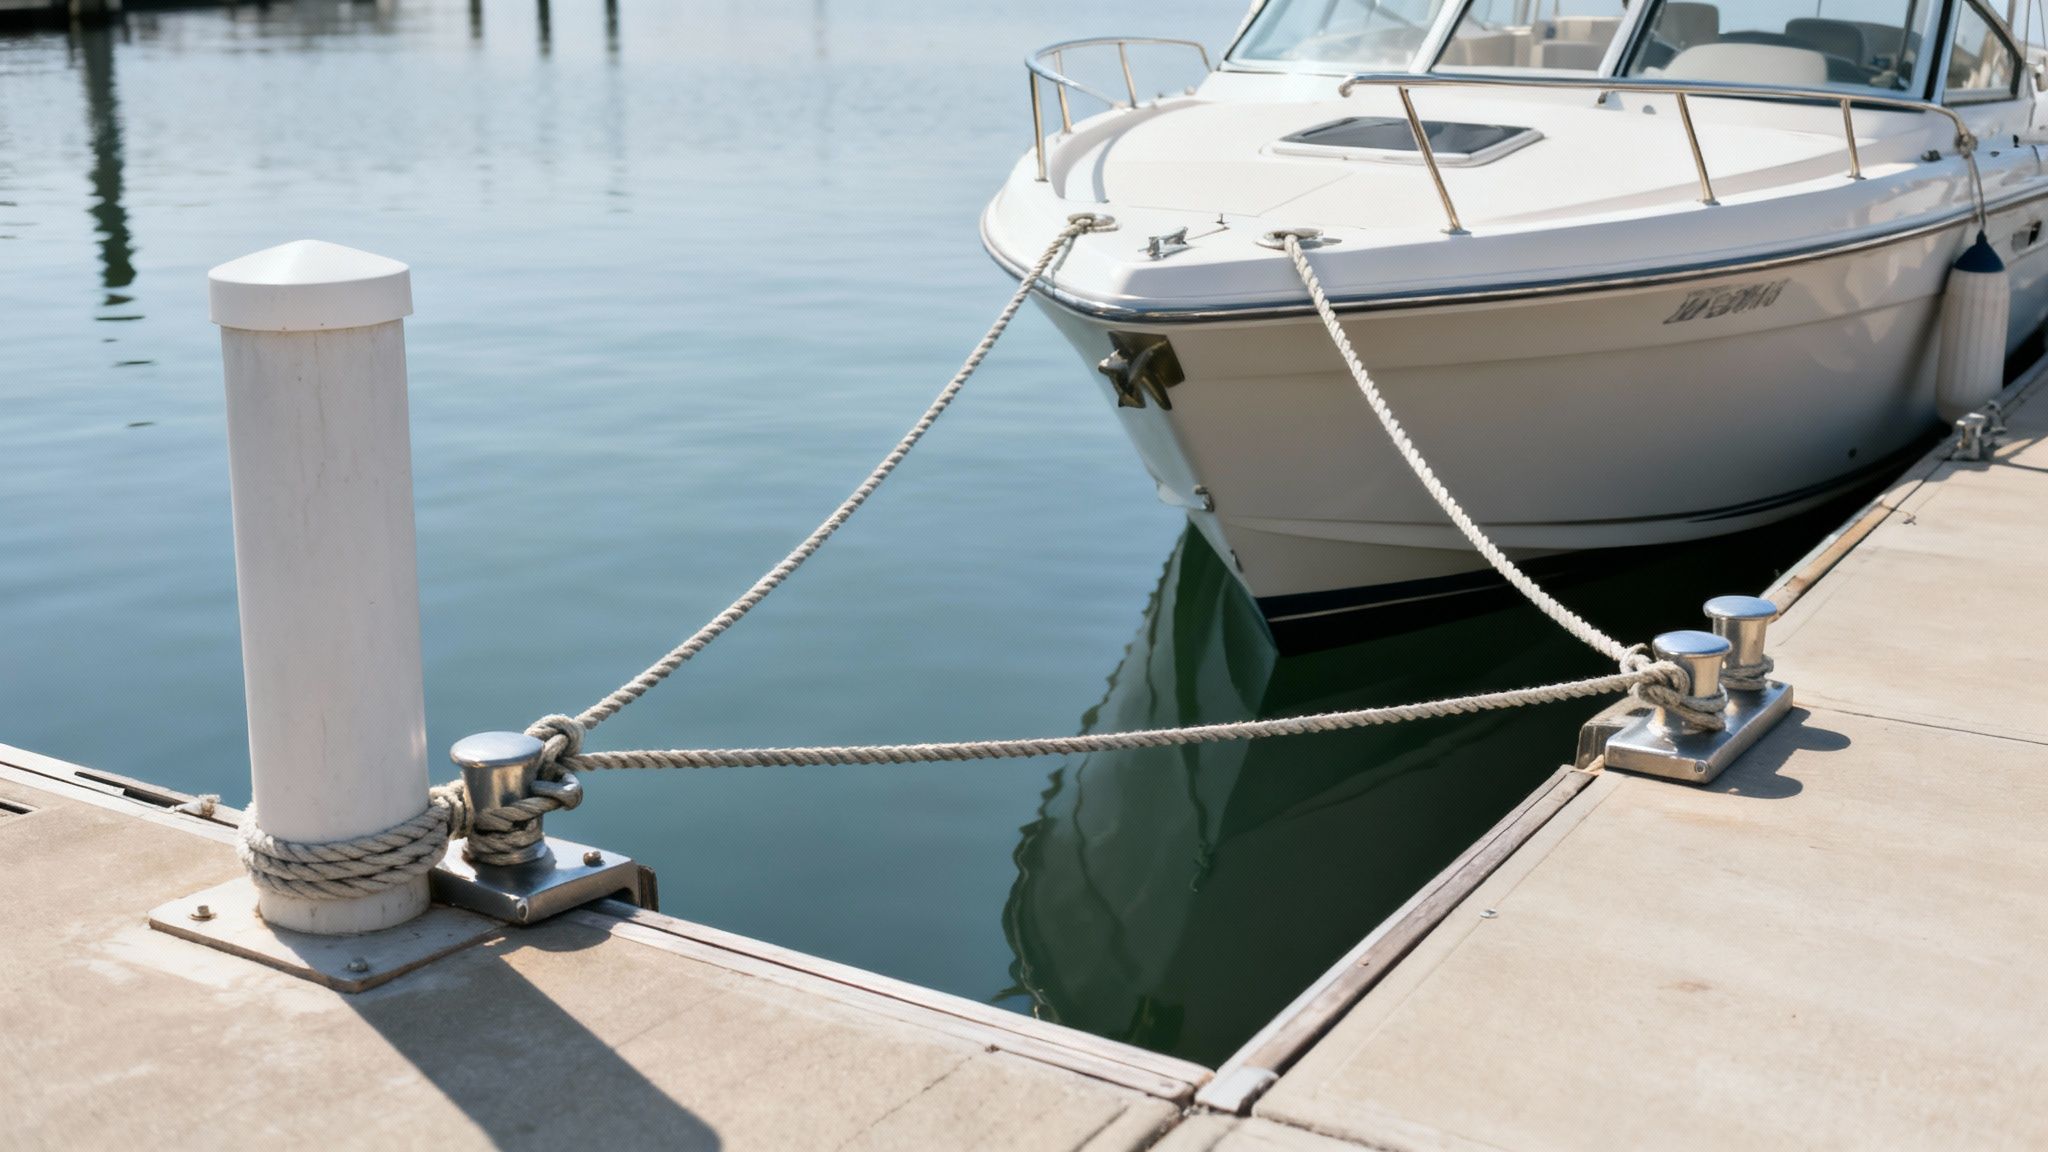
When you're trying to dock your boat securely, a boat spring line is the unsung hero you can't afford to ignore. It’s the key mooring line that stops your boat from lurching forward or backward in the slip, keeping everything stable and stress-free. While your bow and stern lines handle any side-to-side motion, the spring line is specifically rigged to counter the push and pull from wind and currents.
Understanding the Role of a Boat Spring Line
Ever seen a boat at the dock surge forward or slide back every time a wake rolls through or a big gust of wind hits? That's exactly the kind of uncontrolled, damaging movement spring lines are meant to prevent. Getting them right is the secret to a quiet, secure tie-up that protects your boat from expensive dings and scrapes.
For anyone who spends serious time on the water, like a professional dive boat captain, mastering this skill isn't just good practice—it's absolutely essential for safety and keeping the vessel in one piece.
The concept behind spring lines is surprisingly simple: they work against each other. By running lines from your boat to the dock at opposing angles, you create a balanced tension that locks your boat in place lengthwise.
The Two Essential Spring Lines
To really nail this technique, you'll need two different types of spring lines, and each one has a very specific job to do.
- Forward Spring Line: This line runs from a cleat on the stern of your boat forward to a dock cleat. Its whole purpose is to stop the boat from drifting backward (aft).
- Aft Spring Line (or After Spring): This one runs from a cleat on the bow or mid-ship aft (back toward the stern) to a cleat on the dock. As you might guess, it’s there to stop the boat from surging forward.
When you set both of these lines correctly, they form a sort of "X" pattern of tension that holds your boat snug. This prevents it from bumping into the dock in front or the pilings behind it. It's a common mistake for new boaters to skip this step, which often leads to gelcoat scratches or worse. For a deeper dive into different setups, you can check out our complete guide: https://betterboat.com/blogs/news/boat-spring-lines.
A properly set spring line isn't just about security; it gives you peace of mind. It’s what lets you sleep through the night without worrying about every bump instead of having a restless night on the water.
With more people getting into boating, this kind of fundamental knowledge is more important than ever. The global recreational boating market is expected to jump from USD 30.80 billion to USD 37.64 billion by 2030. That's a lot more boats at the dock, and a lot more boaters who need to know how to tie up safely.
Choosing the Right Rope for Your Spring Lines
The performance of your spring line setup comes down to one thing: the rope you choose. This is absolutely not the place to cut corners. A cheap or unsuitable line is always the first thing to fail under strain, and that failure can lead to some seriously expensive damage.
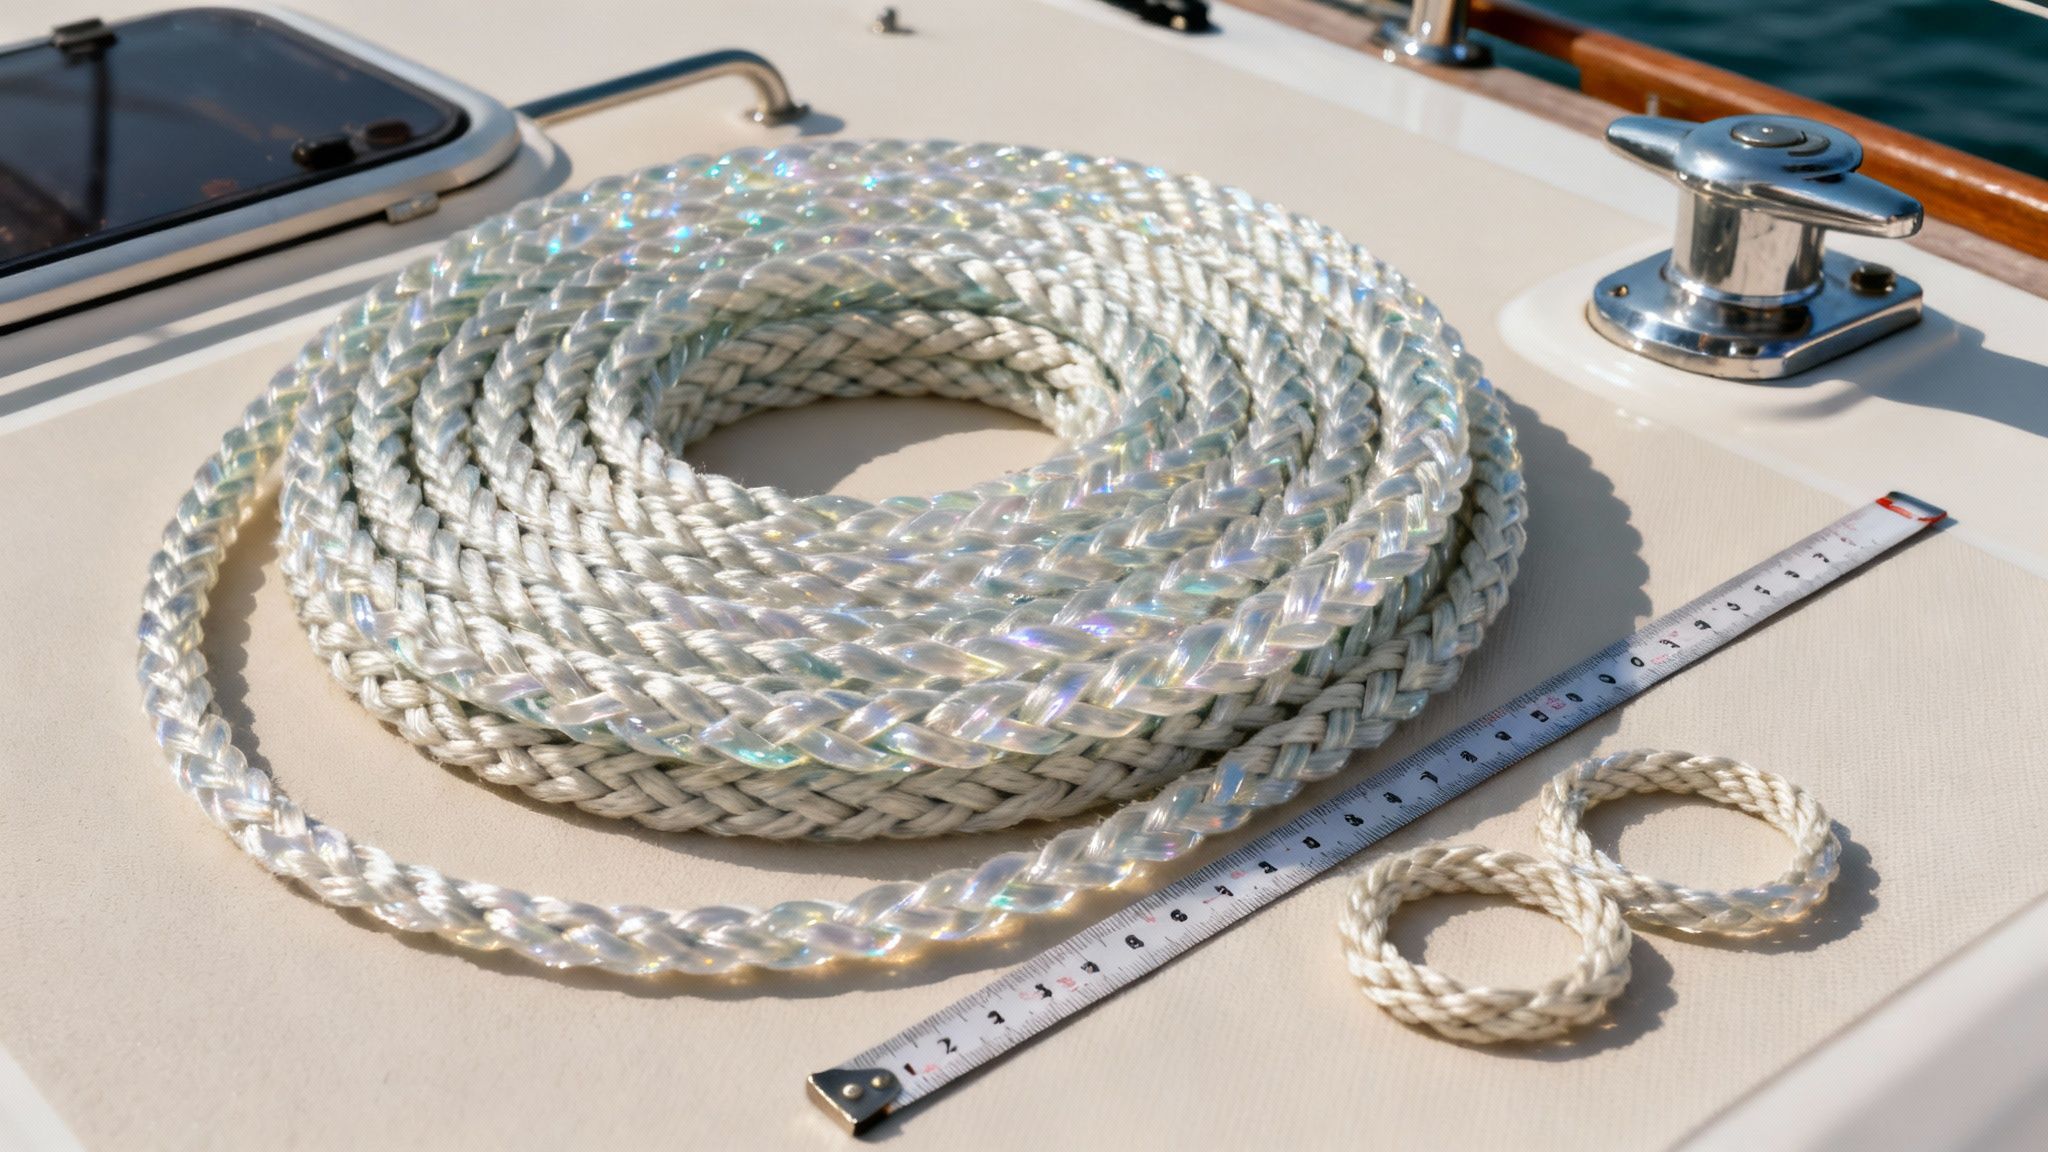
When it comes to dock lines, there’s a clear winner: double-braided nylon. It’s the undisputed champion for a reason. This stuff has immense strength, but more importantly, it has just enough elasticity to absorb the shock from wakes, wind, and current. Think of it as a cushion for your boat.
You might see other ropes out there, but they just don't stack up for this job. Polypropylene degrades in the sun and has almost no stretch. Polyester is strong, sure, but it’s too stiff to absorb the dynamic loads a boat experiences at the dock. That little bit of give from nylon is critical—it stops those harsh jolts from slamming your cleats and hardware, which saves you a ton of wear and tear over time.
Selecting the Correct Diameter
Picking the right rope diameter is just as crucial as the material. A line that’s too thin simply won’t have the breaking strength your boat needs, putting you at risk. On the other hand, a line that’s too thick is a pain to handle and might not even fit on your cleats properly.
Here's a quick reference to get you in the right ballpark.
Recommended Spring Line Diameter by Boat Length
This table provides a simple guideline linking your boat's length to the appropriate rope diameter. It's a great starting point for making sure your lines can handle the load.
| Boat Length (Feet) | Recommended Line Diameter (Inches) |
|---|---|
| Up to 27' | 3/8" |
| 28' – 35' | 1/2" |
| 36' – 45' | 5/8" |
| 46' – 54' | 3/4" |
| 55' – 63' | 7/8" |
Matching the right diameter to your boat size is key for both safety and practicality. For a deeper dive, you can learn more about dock line sizes in our complete chart. It'll help you get the sizing perfect for your specific vessel.

Getting the Length Just Right
So, how long should your spring lines be? A good rule of thumb I’ve always followed is to make them about two-thirds the length of your boat. For a 30-foot boat, that means you're looking for lines around 20 feet long.
This length hits the sweet spot. It gives you enough line to work with different cleat positions on the dock and handle tidal swings, but it’s not so long that you’re left with a tangled mess on deck. It's all about having the flexibility to tie up securely, whether you're in your home slip or visiting a new marina for the weekend.
When you’re buying rope, always look for lines specifically made for the tough marine environment. High UV resistance and excellent abrasion resistance are non-negotiable. Otherwise, you’ll find them weakened and frayed after just one season in the sun and salt.
Our Better Boat Double Braided Nylon Dock Lines are built exactly for this. They deliver that perfect blend of strength, stretch, and durability you need. Setting up your boat with quality lines gives you real peace of mind every time you tie up.
Rigging Your Spring Lines for Maximum Control
Putting theory into practice is where you really build confidence at the dock. Rigging spring lines isn't rocket science, but you do need to understand the simple physics at play. Nailing this setup is the difference between a secure, peaceful tie-up and a boat that’s constantly bumping and grinding against the dock.
The best and most common setup is a simple crisscross pattern. This arrangement creates opposing forces that lock your boat into place, stopping it from surging forward or backward with every wake or gust of wind.
Setting the Forward and Aft Spring Lines
To get this rock-solid setup, you’ll be working with two main lines. Each one has a very specific job in keeping your boat where you want it.
- The Aft Spring Line: This line runs from a cleat on your boat's bow (or a midship cleat works too) back towards the stern, where you'll secure it to a dock cleat. Its only purpose is to stop the boat from moving forward.
- The Forward Spring Line: This one is just the opposite. It runs from a stern cleat on your boat forward to a dock cleat positioned ahead of it. This line’s job is to stop the boat from drifting backward away from the dock.
When you rig them together, these two lines become a team. If a wave tries to push your boat forward, the aft spring line instantly goes taut and pulls it back. If a current tries to drag you backward, the forward spring line tightens and holds you firm. It’s a beautifully simple system that gives you maximum control with just two lines.
Mastering the Essential Knots
Of course, the most perfectly placed spring line is useless if the knot holding it slips. The good news is you don’t need to be a knot-tying guru. For docking, you only need to master two fundamental knots. They're strong enough to handle serious strain but are also designed to be untied easily—even after being pulled tight for hours.
Recreational boating is bigger than ever, and that means more boats jockeying for space in marinas. The small boats segment, which includes everything from pontoons to runabouts, is projected to jump from USD 21.4 billion in 2025 to USD 45.3 billion by 2035. For all these boat owners, knowing how to properly secure their investment with the right gear—like quality dock lines and fender lines—and techniques is absolutely critical.
The Indispensable Cleat Hitch
When you're tying a line to a cleat—either on your boat or on the dock—the cleat hitch is the only knot you should ever use. It’s fast, incredibly secure, and won't jam up on you when it’s time to cast off.
A well-tied cleat hitch actually tightens on itself under load. It’s a hallmark of good seamanship and a non-negotiable skill for any boater.
The Versatile Bowline Knot
For those times when you need to secure your spring line to a piling or post instead of a cleat, the bowline is your best friend. It creates a fixed loop in the end of your line that won’t slip or tighten, making it a breeze to just drop over a post. Best of all, it has a reputation for being easy to untie, no matter how much strain it's been under.
Get these two knots down, and you’ll be prepared for pretty much any docking situation you'll run into. If you want a more detailed look with step-by-step visuals, check out our guide on how to tie essential dock lines. Proper knots are the foundation of a safe and secure tie-up.
Adjusting Lines for Tides, Currents, and Wind
Tying up your boat isn't a "set it and forget it" task. The marine environment is constantly changing, and your spring lines need to be adjusted to handle the powerful forces of nature. A setup that’s perfect in calm conditions can become dangerous when the tide shifts, the current picks up, or the wind starts blowing.
Think of your lines as a dynamic suspension system for your boat. They need just enough give to absorb shocks without letting the boat slam against the dock. Too much slack, and you'll drift into trouble; too little, and you risk damaging your boat's hardware or even the dock itself.
This process flow shows the basic rigging sequence for securing your boat with a forward spring, an aft spring, and a proper knot.
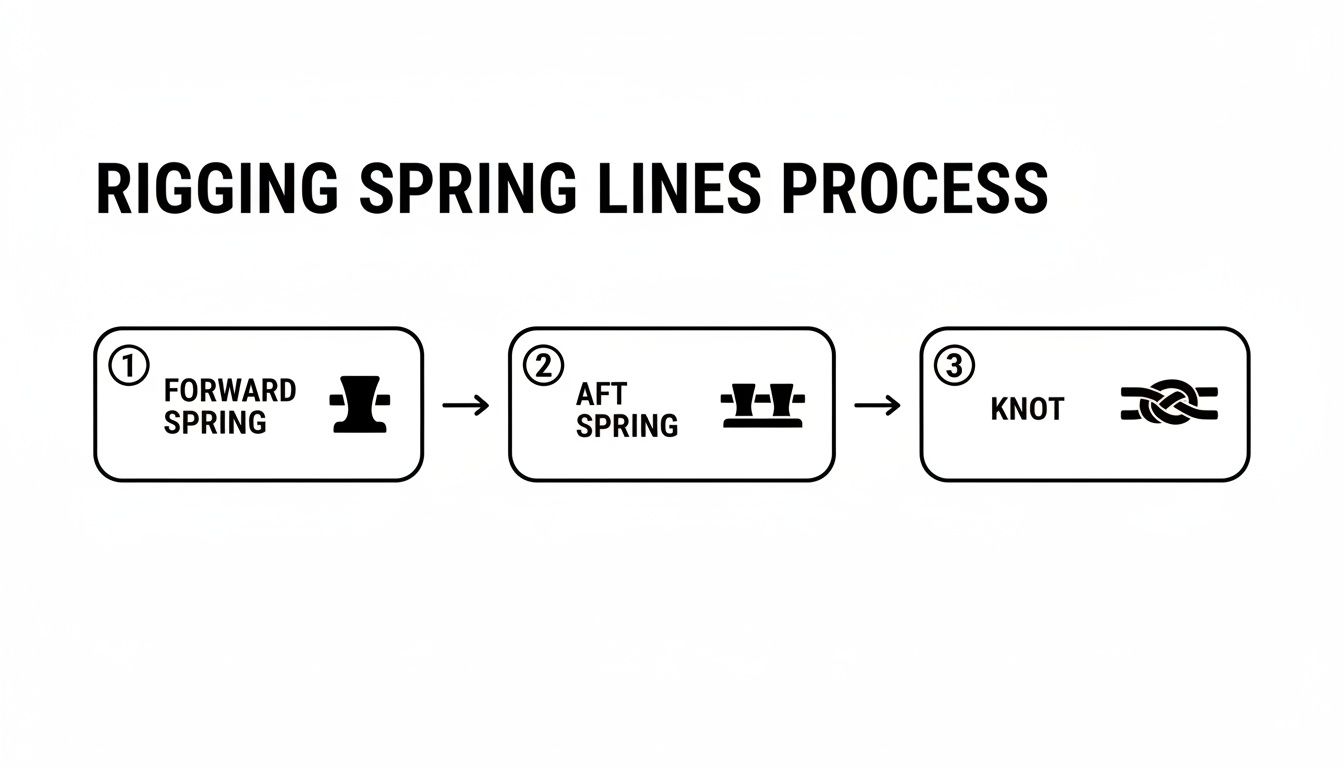
As the visualization highlights, establishing control with both the forward and aft spring lines is the crucial first step before finalizing the tie-up with a secure cleat hitch.
Handling Tidal Changes
In areas with significant tidal ranges, your lines will need enough slack to allow your boat to rise and fall without hanging it up or letting it drift too far. A four-foot tidal range means your boat will be four feet higher or lower relative to a fixed dock at different times of the day.
If your lines are too tight at low tide, the rising water could put immense strain on your cleats, potentially ripping them right out of the fiberglass. Conversely, if your lines are too loose at high tide, the falling water will give your boat too much room to roam, letting it hit the pilings.
A great technique for tidal areas is to cross your spring lines. By running them to cleats farther away on the dock, you create longer lines at shallower angles. This allows for more vertical movement without introducing excessive horizontal slack.
Adjusting for Wind and Current
Persistent wind or current pushing against your boat requires a more proactive approach. The key is to use your lines to create balanced tension that counters these forces. Let's imagine you have a steady 15-knot wind pushing your boat directly against the dock.
In this scenario, you'll want to slightly tighten the upwind spring line and other lines on that side. This keeps the boat snug and prevents it from repeatedly banging against the fenders. You should then ease the downwind lines a bit, as they aren't under the same load. This simple adjustment keeps the boat stable and quiet.
If the wind or current is trying to push you off the dock, the strategy is reversed. Your off-dock lines will be doing the heavy lifting, so they need to be secure, while your on-dock lines simply prevent the boat from swinging out too far.
For more detailed visual guides on managing these situations, you might be interested in our expert tips on how to dock your boat safely. Perfecting these adjustments is a core part of becoming a skilled boater.
Common Spring Line Mistakes and How to Avoid Them
Even the most seasoned boaters can fall into bad habits at the dock. Getting your boat spring line dialed in isn't just about tying the right knot; it's also about knowing the common pitfalls that can lead to some serious damage. Sidestepping these simple mistakes is the key to keeping your vessel safe, secure, and ready for your next trip out.
One of the most frequent errors I see is using lines that are just too short. It might look tidy, but a short line gives your boat zero room to rise and fall with tides or wakes. This puts an incredible amount of stress on your cleats and the line itself, turning a simple tie-up into a high-stakes gamble.
Another classic mistake is yanking the lines bar-tight. A lot of folks think a tighter line means a more secure boat, but the opposite is often true. A line cinched down with no slack at all transfers every single shockwave directly to your boat's hardware. That's a surefire way to get gelcoat cracks and strained cleat mountings.
Ignoring Chafe and Wear
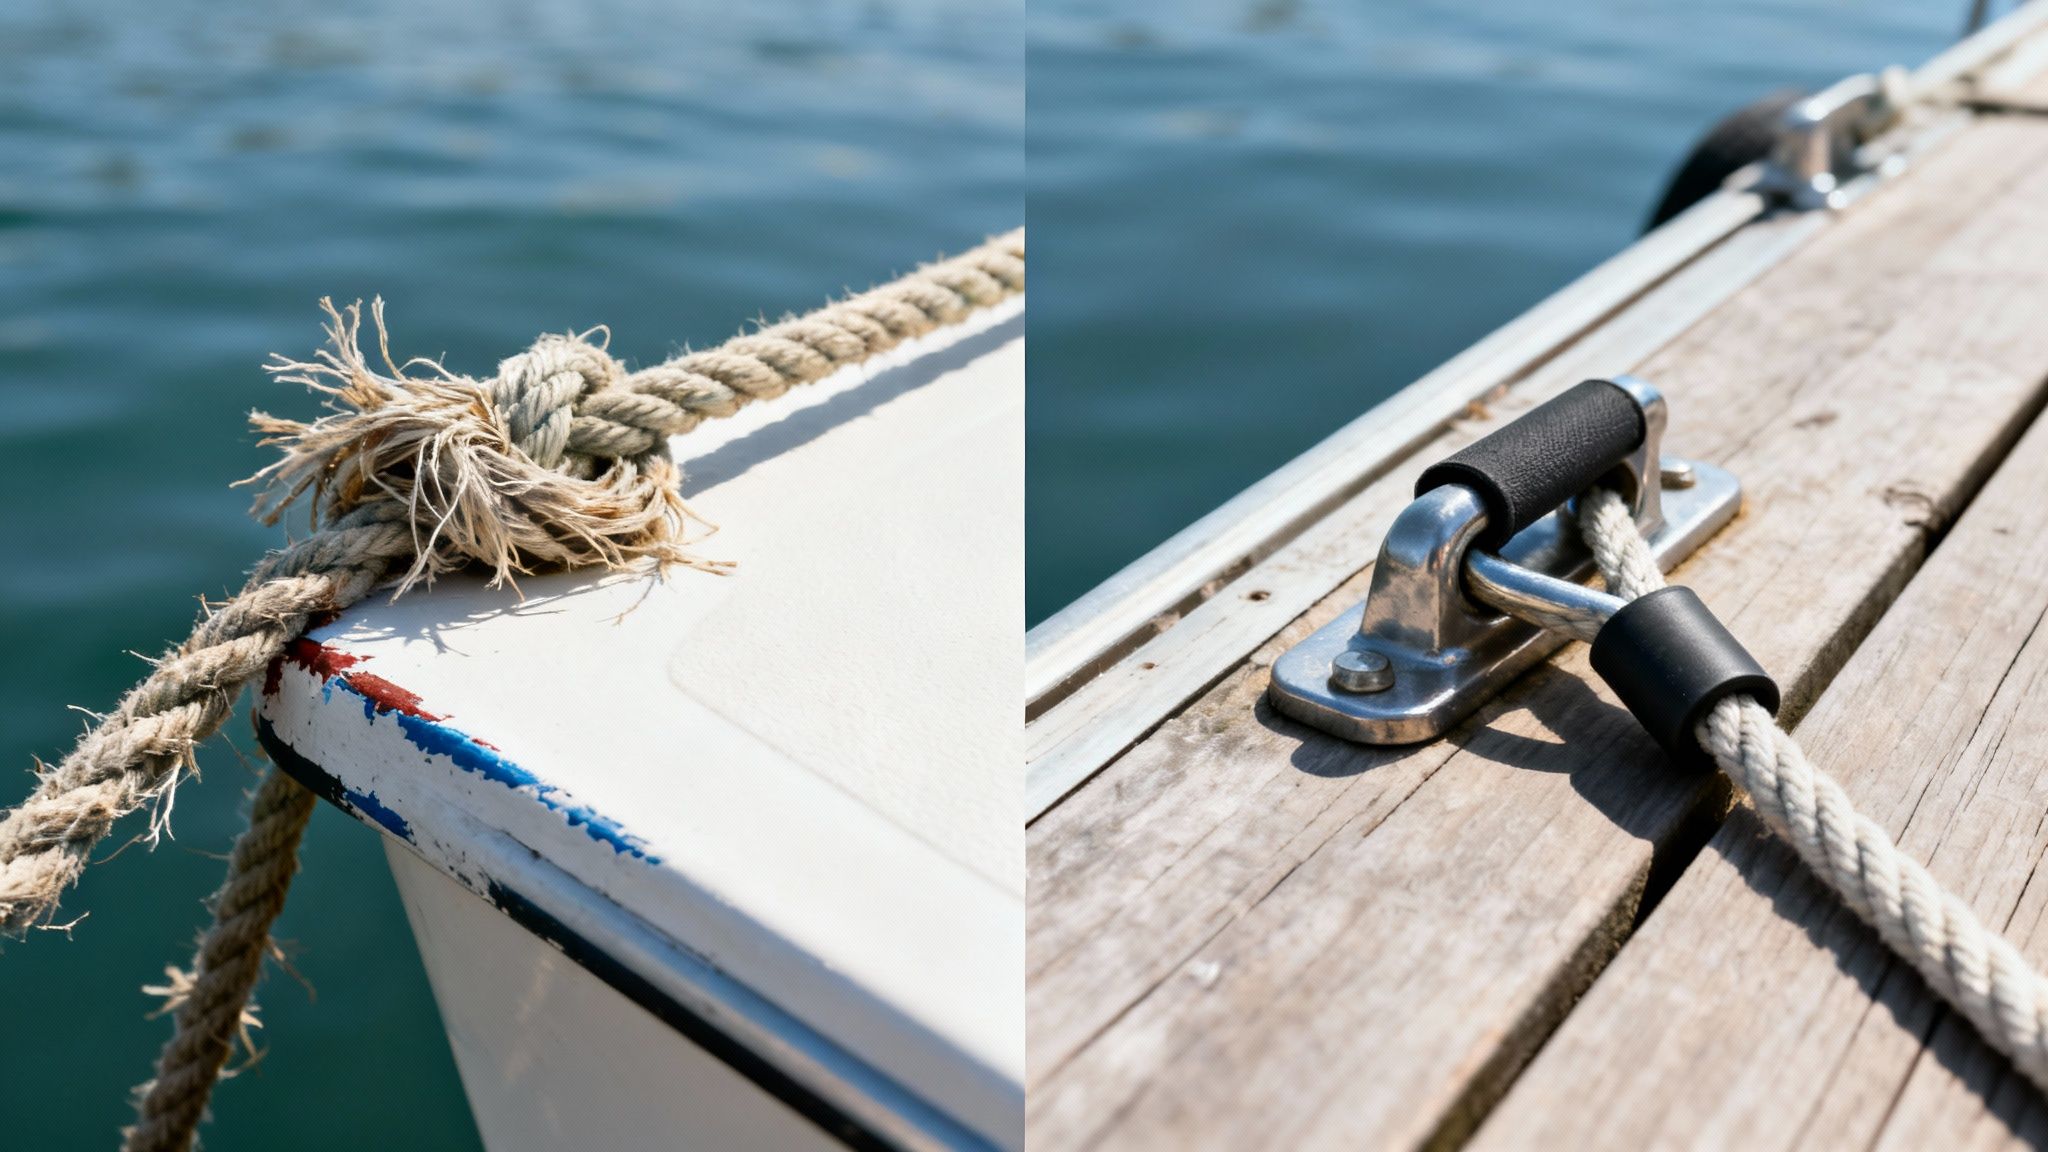
Chafe is the silent killer of dock lines. Seriously. Run a rope over a sharp corner on the dock, a rough piling, or even another line, and you create friction that can saw through a brand-new rope in a shockingly short time. It’s a problem that sneaks up on you, weakening your entire setup without any obvious signs until it’s way too late.
To fight back against chafe, always be mindful of where your lines are running.
- Use Chafe Guards: Slide a chafe guard—a tough sleeve made of leather, rubber, or heavy-duty fabric—over the line at any potential friction point. We offer durable rope chafe guards that easily attach to prevent this kind of damage.
- Check Your Angles: Try to run your lines as straight as possible from the boat cleat to the dock cleat. This minimizes rubbing against fairleads or dock edges.
- Do a Quick Inspection: Before you tie up, run your hands along the length of your lines. You'll be able to feel any rough, frayed spots that signal wear and tear.
Using Old and Damaged Ropes
Relying on old, sun-baked ropes is like driving on bald tires—it’s a risk that’s just not worth taking. UV radiation absolutely destroys nylon fibers over time, making them brittle and dangerously weak. A rope that looks okay at a glance might have lost over 50% of its original strength.
Your dock lines are the only thing connecting your valuable investment to the dock. Trusting them to old, compromised ropes is a false economy that can lead to catastrophic failure.
The global boats market is expected to hit USD 87.77 billion by 2033, and a huge slice of that is used boats. For these owners, upgrading worn-out gear like dock lines is one of the first and most important jobs to protect their new vessel. Investing in a high-quality set of Better Boat Dock Lines gives you reliable, UV-resistant ropes you can count on, season after season.
Spring Line FAQs
Even when you have the basics down, a few practical questions always pop up at the dock. Here are some quick answers to the most common things I hear boaters ask about getting their spring lines just right.
Can I Use One Long Line for Two Spring Lines?
While it might seem like a clever shortcut, using one long rope for both your forward and aft spring lines is a really bad idea.
This setup, sometimes called a "continuous spring," essentially creates a pulley system. If one side stretches or a knot slips even a little, the other side will immediately go slack. This defeats the whole purpose, allowing your boat to surge back and forth and compromising the security of your entire tie-up.
Always rig your forward and aft springs with two completely separate, dedicated lines. This is non-negotiable for keeping the tension independent and your boat secure.
Spring Lines vs. Breast Lines: What's the Difference?
It’s easy to mix these up, but they do two very different jobs.
- Spring Lines: These run lengthwise, from the bow toward the stern of the dock, and from the stern toward the bow of the dock. Their sole job is to stop the boat from moving forward and backward.
- Breast Lines: These run perpendicular to the boat, straight out from the midship or bow/stern to the nearest cleat. Their job is to keep the boat from moving sideways, pulling it tight against the dock.
Here's an easy way to remember it: Spring lines control the surge, while breast lines control the sway. A truly secure boat needs both.
How Tight Should My Spring Lines Be?
You're aiming for snug, but not guitar-string tight.
You want to take out most of the slack so the boat can't build up any momentum, but you need to leave just enough give for the nylon line to do its job—stretch and absorb the shock from a passing wake or a strong gust of wind.
A good rule of thumb is to push on the line with your foot. You should feel a little bit of flex. If it's rigid and bar-tight, you're putting unnecessary strain on both the line and your boat's hardware.
Do I Really Need Spring Lines for a Quick Stop?
Yes, absolutely. Even if you're just docking for five minutes to grab fuel or pick up friends, things can go wrong fast.
All it takes is one unexpected wake from a passing boat to send your vessel lurching forward into the dock or slamming backward into a piling. Rigging at least one spring line—usually the aft spring, since it stops the boat from surging forward—takes less than a minute.
It's a simple habit that provides crucial protection against sudden movements and expensive damage. Make it part of your routine for every single docking, no matter how short.
For a secure and stable setup every time you dock, you need lines you can trust. Better Boat offers a full range of high-quality, UV-resistant dock lines and boating accessories designed to protect your investment and give you peace of mind on the water.


