


Your Guide to Repair Boat Hull Damage
Finding a gouge or crack in your hull can make any boat owner’s heart skip a beat. Yet, taking on a repair boat hull project is well within reach for the hands-on DIYer. With straightforward guidance and the right materials, even dock rash or deeper fiberglass impacts can be tackled confidently.
From Dockside Damage To Seaworthy Confidence
A strong hull patch isn’t just about appearances. At its core, it restores the boat’s structural integrity, keeps everyone aboard safe, and preserves resale value. Fiberglass may be the most common material in recreational vessels, but even minor scrapes can open the door to water intrusion and delamination—the dreaded separation of fiberglass layers.
Addressing damage early prevents small issues from snowballing into major headaches. Plus, every repair builds your skill set and self-reliance. After all, the global boat maintenance and repair market was estimated at $15.5 billion in 2023, a figure that underlines just how vital solid repair know-how has become.
Why DIY Hull Repair Matters
Taking matters into your own hands brings real advantages:
- Cost Savings: Labor often makes up the bulk of a pro’s invoice. Do-it-yourself cuts out that expense.
- Deeper Knowledge: You’ll understand your boat’s construction inside and out, spotting potential problems before they worsen.
- Immediate Action: No waiting for a yard slot. Fixing damage the moment it appears stops it from getting worse.
A well-executed repair restores more than just fiberglass; it restores your peace of mind on the water.
That sense of confidence goes beyond a solid patch. To make sure you’re ready for every voyage, consult the ultimate boat safety checklist for NZ waters.
Before you even think about mixing a single drop of resin, you need to get a really good handle on the damage. This is, without a doubt, the most critical part of any hull repair. A good fix starts with a good diagnosis; get it wrong, and you'll be doing this all over again sooner than you'd like.

First thing's first: get your eyes on the problem. Not all damage is created equal, and you've got to know the difference between a cosmetic scuff and something that's threatening the integrity of your hull.
Identifying the Type of Hull Damage
Start by looking for the tell-tale signs of different imperfections. You might spot some fine, spiderweb-like cracks, which is usually just gelcoat crazing. This stuff is often only skin-deep, caused by flexing or a minor impact, and rarely makes it to the fiberglass laminate underneath.
Deeper gouges or scratches are a bigger deal. These have punched through the gelcoat and may have chewed into the fiberglass layers. Look closely at what’s exposed. If you can see the woven pattern of fiberglass cloth, you're looking at structural damage that needs a much more serious repair.
The real problem child is delamination. This is when the layers of fiberglass have actually separated from each other, creating a soft, spongy spot on the hull. This is a major structural failure and needs to be addressed immediately.
A great hands-on trick is the 'tap test.' Grab a screwdriver and use the plastic handle to gently tap around the damaged area. A solid, sharp sound means healthy laminate. If you hear a dull thud or a hollow echo, you’ve likely found a hidden void or delamination.
This simple test helps you map out the real size of the problem, which is often bigger than what you can see. Once you know exactly what you're up against, you can make a proper shopping list. Trust me, there's nothing worse than having to stop mid-repair to run out for more supplies.
To help you get started, here’s a quick-reference table to match what you're seeing with the right game plan.
Damage Type and Recommended Repair Approach
| Damage Type | Visual Cues | Recommended First Step | Primary Material |
|---|---|---|---|
| Gelcoat Crazing | Fine, spiderweb-like cracks in the topcoat. | Lightly sand the area to determine depth. | Gelcoat paste or filler. |
| Gouges & Scratches | Deeper grooves; fiberglass fibers may be visible. | Grind out the damage to clean, solid material. | Epoxy filler or polyester resin. |
| Structural Cracks | A clear break that goes through the fiberglass. | Bevel the edges of the crack with a grinder. | Epoxy resin and fiberglass cloth. |
| Delamination | Spongy or soft spots; may have a hollow sound. | Tap test to find the full extent, then cut it out. | Epoxy resin and multiple layers of cloth. |
This table should give you a solid starting point for figuring out what you need to buy and how to begin the prep work.
Your Essential Repair Toolkit and Materials
Getting all your tools and materials together beforehand is half the battle. When everything is organized and within arm's reach, the whole process just goes a lot smoother. For a solid rundown of what every boater should probably have in their dock box, check out this guide on essential boat tools.
For most fiberglass jobs, you're going to need a specific set of gear:
- Personal Protective Equipment (PPE): This is non-negotiable. Get a respirator with organic vapor cartridges, safety glasses, and a box of nitrile gloves. Fiberglass dust and resin fumes are nasty stuff you don't want to be breathing in.
- Grinding and Sanding Tools: An angle grinder is great for opening up cracks, but a rotary tool like a Dremel with a V-shaped bit gives you more control. You'll also want a random orbit sander and sandpaper in a few different grits—start with 80-grit for shaping and work your way up to 400-grit or higher for finishing.
- Cleaning Supplies: Acetone is the go-to for wiping down the repair area. It cuts through wax, grease, and any other gunk that could mess up your bond. Make sure you have plenty of clean, lint-free rags on hand.
- Repair Materials: The big choice here is epoxy versus polyester resin. Epoxy is the king for structural repairs below the waterline—it's stronger, sticks better, and is more waterproof. Polyester resin is cheaper and works just fine for cosmetic fixes above the waterline.
- Fiberglass Cloth: For anything structural, you’ll need woven fiberglass cloth. It comes in different weights, but a 6 oz. or 10 oz. cloth is a versatile choice for most common repairs.
- Fillers and Fairing Compounds: After you’ve laid your fiberglass, you'll need a marine-grade filler or fairing compound to smooth everything out before you can think about gelcoat.
- Application Tools: Simple stuff here. Mixing sticks, plastic spreaders, cheap disposable brushes, and some small squeegees are all you need for mixing and applying the resin.
Having this kit ready to go means you can stay focused on doing a high-quality repair. A well-stocked bench is the foundation of a job done right.
Any old salt will tell you the same thing: a good fiberglass repair is 90% prep work and only 10% actually laying the glass. This is where the magic really happens. If you skimp here, even the best epoxy in the world will fail, and you'll be doing this all over again in a season or two.
What we're doing isn't just cleaning. We're physically re-engineering the damaged spot to create an unbreakable bond. Get this right, and your repair won't be a simple patch—it'll be a permanent reinforcement that makes the hull whole again.
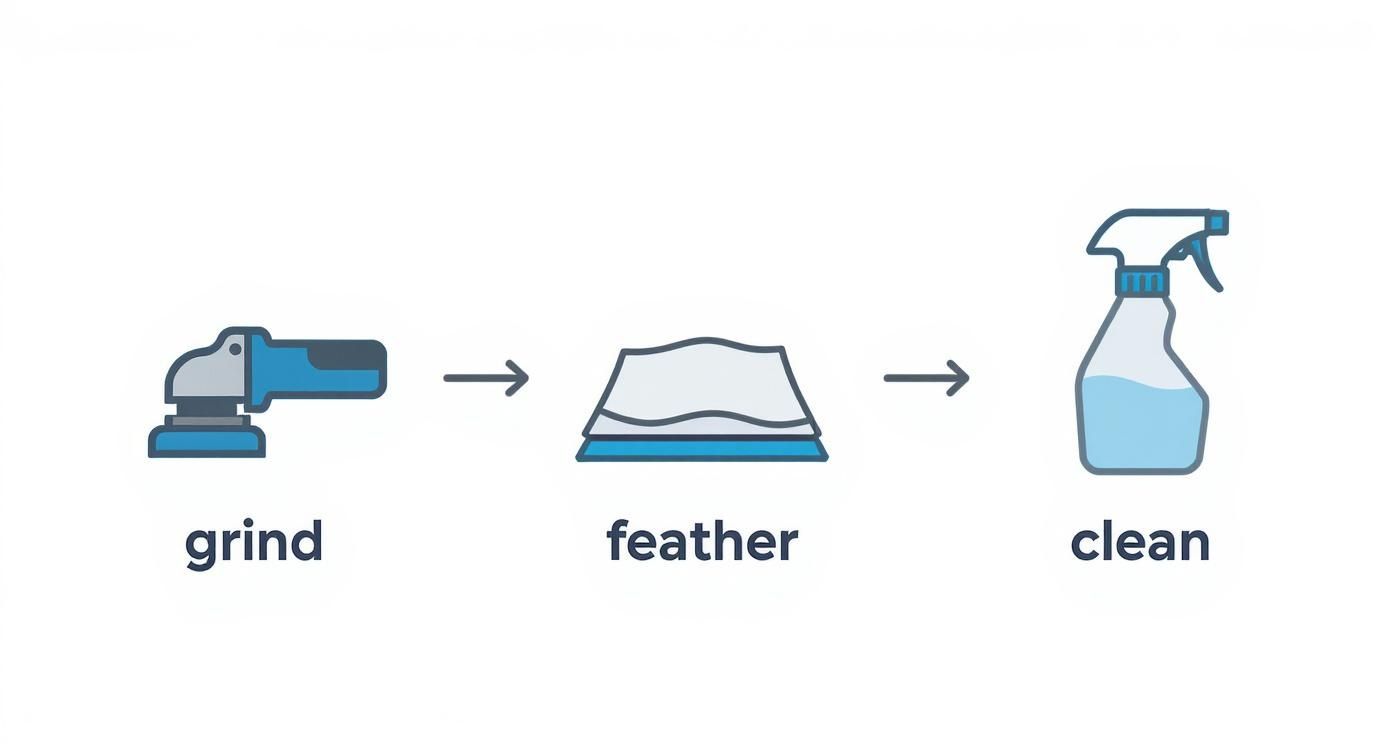
Creating the V-Groove for Maximum Adhesion
First things first, you need to grind out the damaged area. We're not just clearing out the loose stuff; we're creating a tapered depression known as a V-groove, or a bevel. This is absolutely fundamental because it massively increases the surface area for the new resin and fiberglass to grab onto.
Think of it this way: trying to glue two pieces of paper together just at the edges gives you a weak seam that will pop at the slightest bend. But if you overlap them by an inch, that bond is exponentially stronger.
The V-groove does the exact same thing for your hull. The rule of thumb here is a 12:1 ratio. For every 1/8 inch of hull thickness, you need to grind back 1.5 inches from the edge of the damage.
A small angle grinder with a 36-grit or 50-grit disc is perfect for bigger jobs. For smaller, more precise cracks and gouges, a rotary tool with a V-shaped grinding bit will give you the control you need. The goal is a nice, smooth, gradual slope from the healthy hull down to the deepest part of the damage.
Pro Tip: Don't even think about starting to grind without the right PPE. Fiberglass dust is nasty stuff. You need a high-quality respirator with organic vapor cartridges, proper safety glasses, and long sleeves. Your skin, eyes, and lungs will thank you.
Feathering the Edges for a Seamless Transition
With the main V-groove ground out, it's time to "feather" the edges. This just means sanding the perimeter of the repair area to create a perfectly smooth transition into the surrounding gelcoat and fiberglass. If you leave a hard, abrupt edge, it will stick out like a sore thumb through your final finish, no matter how much you sand later.
Grab a random orbit sander with 80-grit sandpaper and work your way around the outside of your bevel. You want to sand off the gelcoat and scuff up the fiberglass in a band about two inches wide all the way around the repair. This roughened surface gives the new epoxy something to bite into, making sure the patch becomes one with the original hull.
You’ll know you’re done when you can run your hand over the edge and feel nothing but a smooth, gradual slope. This feathered edge is critical for a couple of reasons:
- It helps completely hide the repair line after you apply new gelcoat.
- It distributes stress over a much wider area, which prevents new cracks from forming right at the edge of your patch.
The Final and Most Critical Cleaning Pass
After all that grinding and sanding, your work area will be covered in a fine layer of dust. This dust is the number one enemy of a strong epoxy bond. Even a microscopic amount of contamination will stop the resin from adhering properly, leading to a weak spot that's guaranteed to fail.
This is where acetone is your best friend. It’s a powerful solvent that cuts through grease and grime, then evaporates completely without leaving any residue.
Soak a clean, lint-free rag with acetone and wipe down the entire prepared area. Then, immediately follow up with a second, completely clean rag to wipe it dry. This is the "two-rag wipe-down" method, and it ensures you're actually lifting the contaminants off the surface instead of just smearing them around.
You'll probably need to do this two or three times to get it perfectly clean. Once you’re done, don’t touch the area with your bare hands—the oils on your skin are enough to ruin the bond. The surface is now prepped and ready for new fiberglass.
Knowing how to do this right is a valuable skill. The boat repair market is projected to grow from $7.64 billion to $11.6 billion between 2024 and 2029, driven by a boom in recreational boating. With new materials and techniques, a properly prepped hull can be made stronger than it was from the factory. Discover more about the trends driving this market growth and what it means for boat owners like you.

Laying Up Your Fiberglass and Resin with Confidence
Alright, your surface is prepped and perfect. Now comes the part where all that careful work pays off—it's time to start rebuilding the hull. This is less about speed and more about being methodical. Get this right, and your patch will be just as strong, if not stronger, than the original fiberglass.
The whole point here is to completely saturate the fiberglass cloth with resin. You want to create a solid, dense composite without a single air pocket, as those are the weak spots that can cause a repair to fail down the road.
As a quick recap, think about the prep work you just did in these three stages: grinding, feathering, and cleaning.
This process creates the ideal foundation for the new material to grab onto, ensuring the strongest possible bond.
The Big Debate: Epoxy vs. Polyester Resin
Before you start mixing, you’ve got a critical choice to make: epoxy or polyester resin. They might look similar in the can, but chemically, they're worlds apart. Picking the right one is essential for a repair that lasts.
Polyester Resin is what most production fiberglass boats are made of. It’s cheaper and kicks off (cures) quickly, which is why builders love it. However, for repairs, it has its downsides. It's more brittle, not as waterproof, and its secondary bond to old, cured fiberglass isn't nearly as tenacious as epoxy's. It's generally fine for small, cosmetic fixes above the waterline.
Epoxy Resin is the undisputed champion for structural repairs. It creates an incredibly powerful mechanical bond to old fiberglass, is almost completely waterproof, and has better flexibility to prevent cracking.
For any repair below the waterline or anything that affects the boat's integrity, epoxy is the only way to go. If you want to dive deeper, there's a great guide on epoxy boat repair that breaks it all down.
Here’s the one rule you can’t forget: You can put epoxy over old polyester, but you can never put polyester over old epoxy. The polyester just won’t cure correctly and the bond will fail. Every time.
Getting the Mix Just Right
Your resin is a two-part system—the resin and a hardener. Mixing them in the exact ratio the manufacturer specifies isn't just a suggestion; it's a hard rule. Get it wrong, and you’ll end up with a sticky, gooey mess that never fully hardens.
- Measure, Don't Eyeball: Use graduated mixing cups. Seriously. Guessing is the fastest way to ruin a repair.
- Mix Like You Mean It: Stir with a mixer for at least two solid minutes. Scrape the sides and bottom of the cup constantly to make sure every last drop is blended together.
- Work in Small Batches: Only mix what you can comfortably use within the resin's "pot life"—the working time before it starts to get stiff. Remember, heat is the enemy of pot life. A hot day can cut your working time in half.
Cutting and Layering Your Fiberglass Patches
The real strength of your repair comes from building up layers of fiberglass cloth within that V-groove you ground out. The trick is to cut patches that get progressively larger, creating a sort of layered pyramid that fills the damaged area and tapers out smoothly onto the surrounding hull.
Start by cutting a piece of cloth that just fits into the very bottom of the V-groove. Your next piece should be about an inch larger all around, the next one an inch larger than that, and so on. You’ll keep going until your final patch overlaps the feathered, sanded edge of the original hull by at least an inch.
A simple pro tip: lay out your cut patches on a clean piece of cardboard in the order you'll use them, from smallest to largest. It seems minor, but it keeps you from fumbling around when the resin is starting to kick.
The Art of the "Wet Out"
"Wetting out" is the term for saturating the fiberglass cloth with your mixed resin. Your mission here is to chase out every last air bubble.
- Paint a Base Coat: Grab a cheap, disposable brush and paint a thin layer of mixed resin directly onto the prepped hull. We call this a "tack coat," and it helps that first piece of cloth stick right where you want it.
- Place Your First Layer: Gently lay your smallest fiberglass patch onto the wet resin.
- Saturate the Cloth: Pour a little resin onto the center of the patch. Using a plastic spreader or squeegee, work the resin from the center outwards. You'll see the cloth turn from opaque white to translucent as it soaks up the resin.
- Squeeze Out the Air: This is crucial. Use firm, steady pressure with your squeegee, always working from the center out, to push any trapped air bubbles to the edges and out of the laminate. Air bubbles are your enemy—they're just hollow weak spots.
- Repeat and Layer: Don't wait around. Immediately place your next-largest patch on top and repeat the whole process. Keep layering until your biggest, final patch is on and totally wetted out.
For an even smoother finish, consider using peel ply. It's a special woven fabric you lay over the very last layer of wet fiberglass. Once the resin cures, you just pull it off. It leaves behind a uniform, textured surface that needs way less sanding before the final fairing. It also does a great job of squeezing out any excess resin and stubborn air bubbles as it cures.
Achieving a Flawless Finish with Gelcoat
You've done the heavy lifting and the structural work is solid. Now comes the satisfying part—making that repair completely disappear. This final stage is all about aesthetics and protection, turning a strong but obvious patch into a seamless, high-gloss surface that blends right in with the rest of your boat.
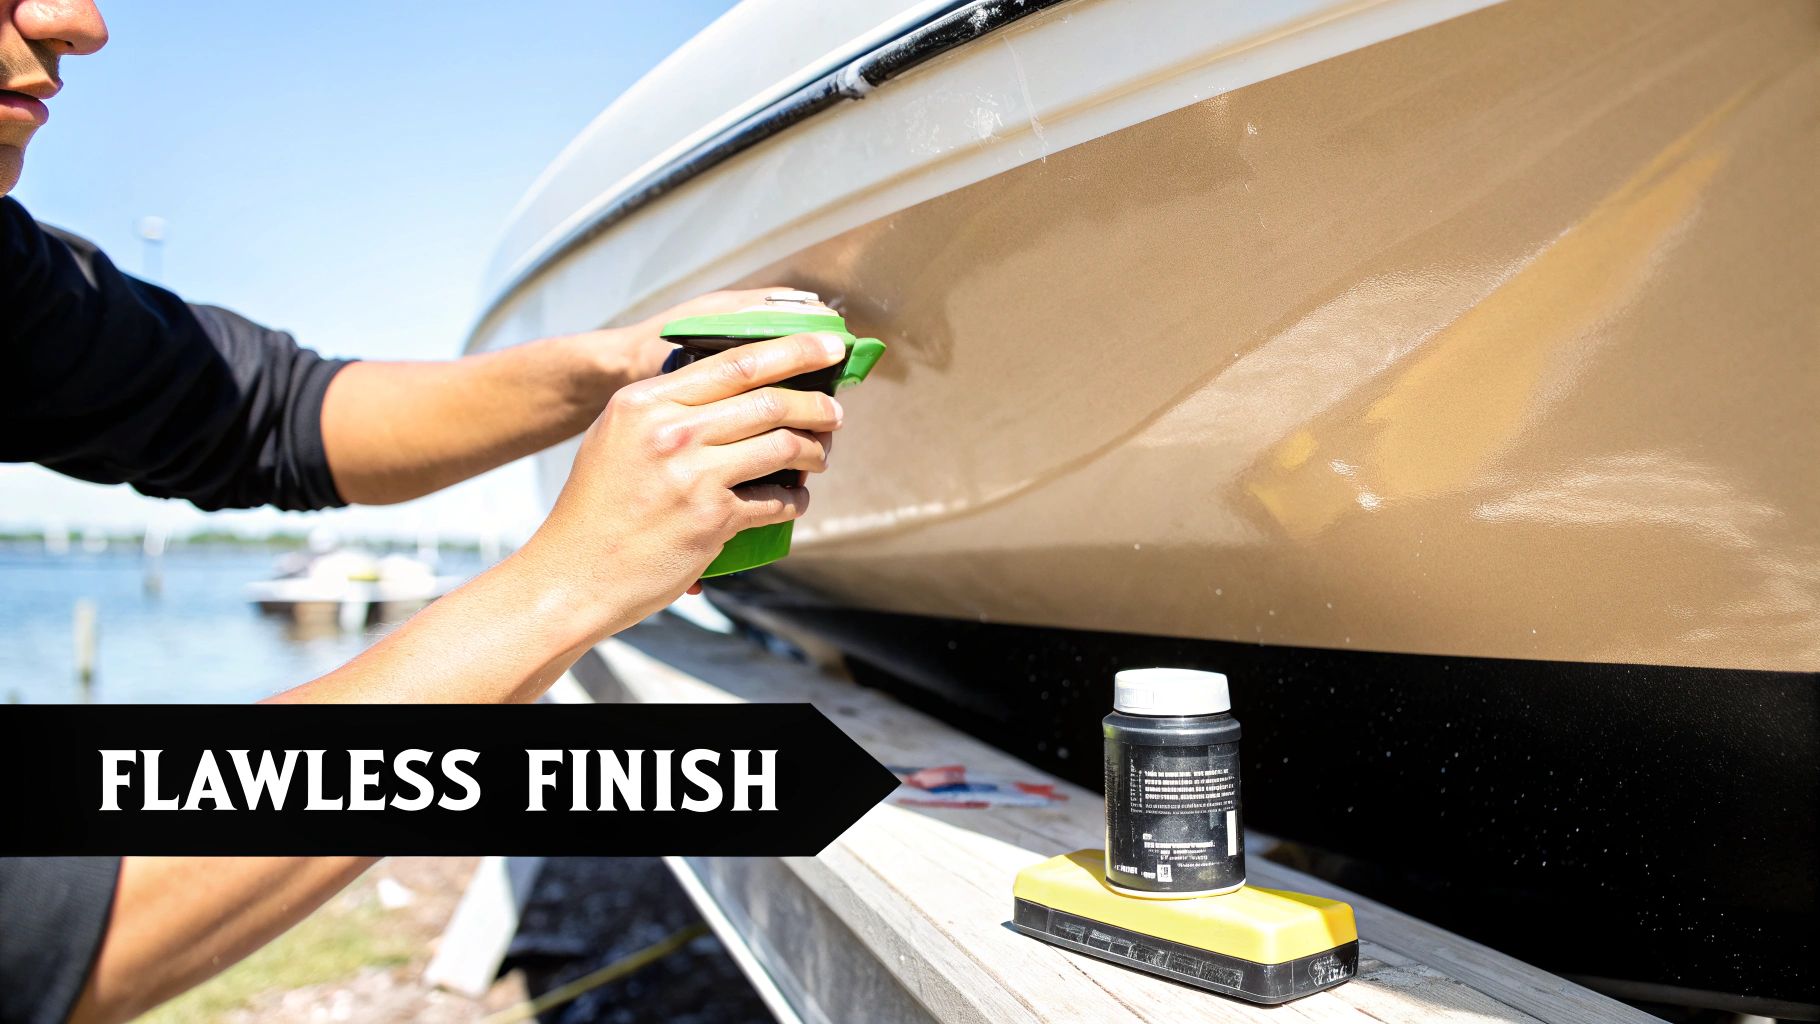
The road to an invisible repair starts with getting the surface perfectly smooth. Your cured epoxy and fiberglass patch is strong, but it's also lumpy and uneven. Before you can even think about color, you have to level things out. This is where fairing comes in.
Creating a Smooth Canvas with Fairing Compound
Marine-grade fairing compound is your best friend here. It's a thick, paste-like filler made specifically to smooth out imperfections on a boat. Think of it as Bondo for boats, but built to withstand the tough marine environment. Crucially, it's way easier to sand than cured epoxy, which will save you a ton of elbow grease.
Using a simple plastic spreader, skim a thin, even layer of the compound over the entire repair area. The goal is to fill in any low spots or hollows from the fiberglass work. It’s always better to apply two or three thin coats, sanding between each one, rather than slapping on one thick layer that will be a nightmare to shape.
Once the compound has fully cured, it's time to sand. Start with 80-grit sandpaper wrapped around a long sanding board or block. Using a rigid block is key—it helps you knock down the high spots without accidentally digging into the low spots, creating a genuinely flat plane. After it’s level, move up to 120-grit and then 220-grit to smooth out the deeper scratches.
Run your hand over the surface with your eyes closed. This is an old boatyard trick for a reason. Your fingertips are incredibly sensitive and can pick up on subtle waves or flaws that your eyes will miss. The surface should feel absolutely uniform before moving on.
When you're happy with the feel, give the area a final wipe-down with acetone to get rid of every last bit of sanding dust.
The Art and Science of Applying Gelcoat
Gelcoat is that final colored layer that not only makes your boat look good but also protects the fiberglass underneath from UV rays and water. Getting the color match and application right is what separates a professional-looking job from an obvious patch on your repair boat hull project.
Matching the color, especially on an older boat where the sun has done its work, can be a challenge.
- Reveal the True Color: Before you start mixing, grab a good polishing compound and buff a small spot of the original hull right next to your repair. This will cut through the oxidation and show you the boat's true, unfaded color.
- Get a Matching Kit: Most marine stores sell color matching kits that come with various pigments. You can add these to a white or neutral base to slowly dial in the perfect shade.
- Always Test: Mix a small test batch, dab it on an out-of-the-way spot, and let it cure completely. Gelcoat can shift color slightly as it hardens, so don't get impatient here.
For most DIY jobs, brushing or rolling on the gelcoat is the most practical method. Just be sure to thoroughly mix the gelcoat with its catalyst exactly as the manufacturer tells you to.
Ensuring a Proper, Tack-Free Cure
Here's something a lot of first-timers miss: standard gelcoat is "air-inhibited." That means it won't fully harden if it's exposed to oxygen while it cures, leaving you with a permanently sticky mess.
You have to seal it off from the air. The two easiest ways to do this are:
- Add a Waxing Agent: You can buy a liquid wax additive to mix into your final batch of gelcoat. As it cures, the wax floats to the top and creates a barrier against the air.
- Use PVA Film: Polyvinyl Alcohol (PVA) is a green-tinted liquid you can spray or brush over the wet gelcoat. It dries into a thin plastic film, blocking the air and allowing for a hard cure. The best part? It just washes off with water when you're done.
Polishing to a Mirror Shine
Once the gelcoat has fully cured (give it 24-48 hours), and you've removed the wax or PVA, the surface will probably look a bit dull. The final step is to bring out that deep, high-gloss shine that makes the repair vanish.
This is all done by wet sanding. You'll start with 400-grit wet/dry sandpaper and progressively work your way up through 600-grit, 800-grit, and finish with 1200-grit. Keep the surface wet—the water acts as a lubricant and carries away sanding debris so the paper doesn't clog.
For the final touch, break out a variable-speed buffer with a wool pad and a quality marine polishing compound. Work in small sections, and before you know it, the entire repaired area will gleam.
With the structural work done, you can perfect the finish using these effective boat gelcoat repair tips. For a deeper dive into this specific process, check out our comprehensive guide on boat gelcoat repair for more expert advice.
Common Questions About Boat Hull Repair
Getting ready for your first DIY hull repair can feel a little daunting. A lot of questions pop up, and you want straight answers before you start mixing resin. Let's tackle some of the most common queries I hear from fellow boat owners to get you moving forward with confidence.
Can I Repair My Boat Hull While It Is in the Water?
This is probably the number one question, and the answer is a hard no. I can't stress this enough. For any repair to stick and last, the area you're working on has to be bone dry, perfectly clean, and stable.
Trying to patch fiberglass in the water is a recipe for disaster. Moisture and all sorts of contaminants will get into your repair, completely preventing the resins and fillers from bonding correctly. It’s a guaranteed failure that will almost certainly lead to much bigger, more expensive problems later. The boat absolutely must be hauled out for any real hull work.
What Is the Real Difference Between Epoxy and Polyester Resin?
They might look similar in the can, but epoxy and polyester resins are worlds apart in how they perform. Knowing which one to use is crucial.
- Epoxy Resin: Think of this as the gold standard for repairs, especially for anything below the waterline. It's way stronger, more waterproof, and sticks to old, cured fiberglass like nothing else. For structural fixes, it's the only way to go.
- Polyester Resin: This is the stuff most fiberglass boats are built with from the factory, mainly because it's cheaper and cures fast. It's fine for small, cosmetic jobs above the waterline, but it’s more brittle and doesn’t have the same bulldog grip as epoxy.
Here's the golden rule every boat owner should memorize: You can always put new epoxy over an old polyester surface, but you can never put polyester over a cured epoxy repair. The chemical bond just won't happen, and your patch will peel right off.
How Can I Match the Gelcoat on a Faded Older Boat?
Getting a perfect gelcoat match on an older, sun-faded hull is part science, part art, but it's definitely doable. The first step is to find out what the boat's original color actually is.
Start by picking a small, out-of-the-way spot near your repair and hitting it with a good polishing compound. This will cut through years of oxidation and reveal the true, unfaded color hiding underneath. That's your target.
From there, a gelcoat color matching kit is your best friend. You'll add tiny amounts of pigment to a neutral base until it looks right. Always mix a small test batch, smear it on a piece of cardboard, and let it cure completely. The color can change as it hardens, so this step saves you from a mismatched patch.
What Is the Minimum Temperature for a Fiberglass Repair?
Temperature is a huge factor in whether your repair succeeds or fails. The chemical reaction that makes resin harden needs a certain amount of warmth to work properly.
Most epoxy and polyester resins need the ambient temperature to be at least 60°F (15°C) to cure correctly. If you try to work in colder conditions, the curing process will slow to a crawl or stop altogether.
You'll be left with a weak, sticky mess that never fully hardens. Always, always read the manufacturer's instructions for the specific product you're using—they'll give you the exact temperature range you need to work in.
At Better Boat, we provide everything you need for a lasting, professional-quality repair, from high-strength epoxies to premium finishing supplies. Shop our complete collection of boat maintenance and repair products and get your vessel back to pristine condition.


