 Skip to content

The Ultimate Guide to Aluminum Sealer for Boats
An aluminum sealer for boats is a specialized coating that creates an impenetrable barrier over your hull's metal surface. Think of it as a tough, invisible coat of armor, shielding the aluminum from the constant onslaught of saltwater, moisture, and corrosion that eventually leads to pitting and leaks.
Why Your Aluminum Boat Needs a Sealer
If you own an aluminum boat, you get it. You love the lightweight durability and no-nonsense performance. It could be a nimble jon boat for chasing fish in quiet coves or a big pontoon for lazy afternoons with the family. But as great as aluminum is, it has one major weakness in the water: corrosion.
Leave it unprotected, and even the toughest aluminum hull will eventually start to break down. This is where a high-quality aluminum sealer for boats shifts from being a "nice-to-have" to a non-negotiable part of your maintenance playbook. It's not just about looks; it's about protecting the structural integrity and value of your boat.
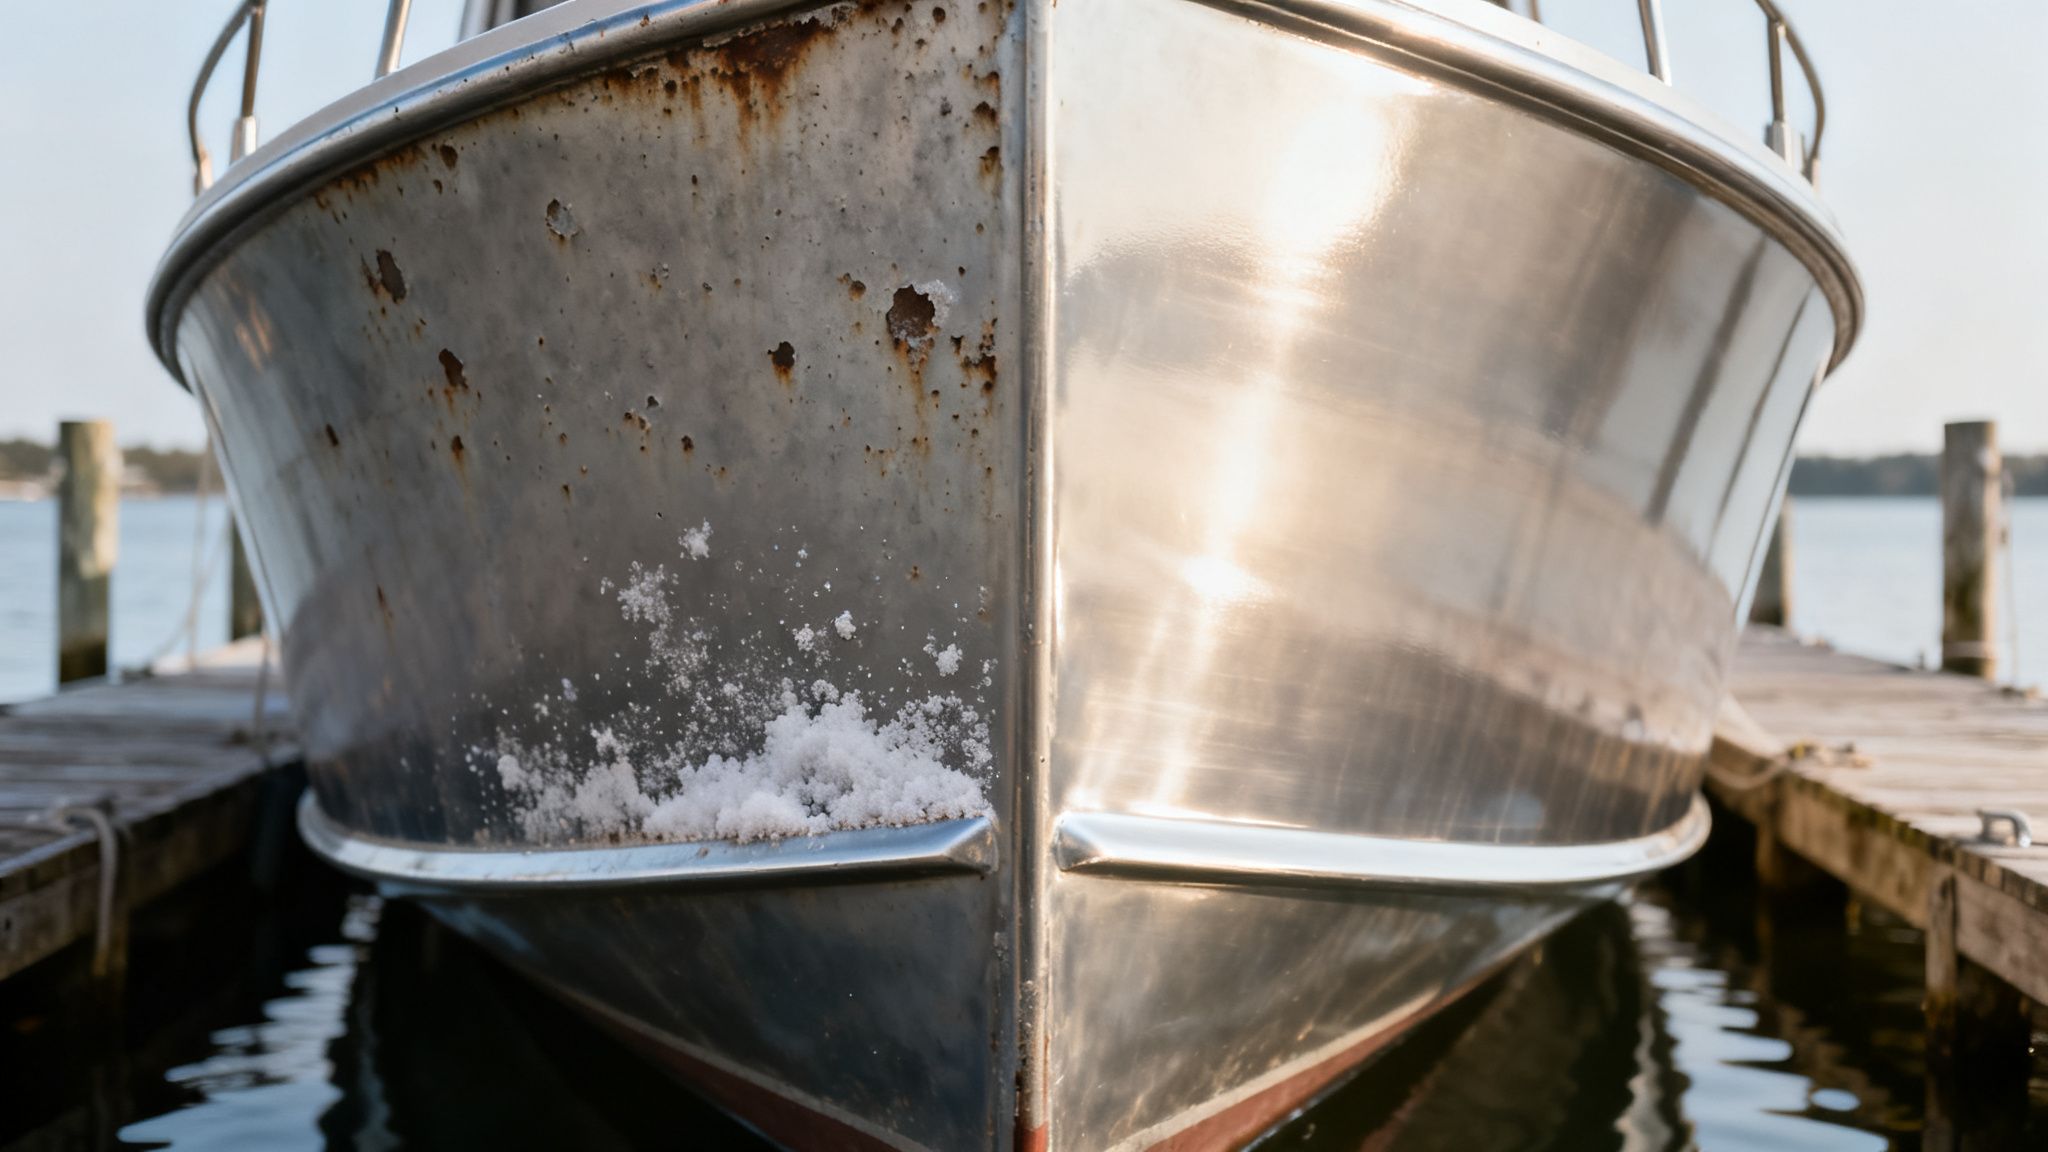
The Hidden Dangers of Bare Aluminum
It's true that aluminum has a neat trick up its sleeve. When exposed to air, it naturally forms a thin, hard layer of aluminum oxide. This layer offers some basic defense, but it’s just no match for the relentless attack of saltwater and pollutants. Sooner or later, this natural shield gives way, leaving the raw metal exposed to a whole host of problems.
A sealer is crucial for a few key reasons:
- Preventing Oxidation and Pitting: Saltwater is aluminum's worst enemy. A good sealer creates a waterproof barrier that stops salt from reacting with the metal, preventing that chalky white oxidation and the damaging pits that weaken the hull.
- Stopping Galvanic Corrosion: This is a sneaky one. When different metals—like your stainless steel screws or bronze fittings—are in electrical contact with the aluminum hull in water, a destructive electrical current forms. This process, called galvanic corrosion, literally eats away at the aluminum. A sealer isolates these different metals, stopping the process cold. For the ultimate defense, pairing a sealer with a sacrificial aluminum hull anode is the way to go.
- Sealing Leaky Rivets and Seams: Over the years, the constant flexing and stress on a hull can cause rivets and seams to weep or spring small leaks. A tough sealer lays down a continuous, waterproof membrane over these spots, sealing up those annoying pinhole leaks before they turn into bigger headaches.
Applying a sealer isn't just about fixing a problem you have now. It’s about getting ahead of future damage, which is always cheaper and less of a hassle than doing major repairs on a corroded hull down the line.
A Smart Investment in Your Boat's Future
Honestly, sealing your hull is one of the best investments you can make for your boat. A durable Epoxy Sealant, for example, provides a hard, resilient coating that stands up to abrasion, impacts, and the harsh marine environment for years.
Taking this one proactive step pays you back in several ways:
- Maintaining Resale Value: A clean, corrosion-free hull is a huge selling point.
- Reducing Maintenance Time: A sealed surface is smoother and less porous, making it way easier to clean and harder for marine growth to get a foothold.
- Extending the Boat's Lifespan: Protecting the hull from its number one enemy—corrosion—is the surest way to keep your boat safe and seaworthy for many seasons to come.
How Aluminum Sealers Actually Work
To get a handle on how an aluminum sealer does its job, you first have to appreciate aluminum's own little trick. The moment it hits the air, aluminum instantly grows a super-thin, tough skin of aluminum oxide. In a perfect world, that would be all the protection it ever needs.
But the marine environment is anything but perfect. Saltwater, grime, and constant moisture are relentless attackers, chipping away at that natural oxide layer. This constant assault leaves the raw, vulnerable metal exposed, and that’s when corrosion starts its dirty work.
Creating a High-Tech Raincoat for Your Hull
Think of an aluminum sealer for boats as a liquid-applied, high-tech raincoat for your hull. When you wipe it on, it's not just sitting on the surface. It's actually forming a chemical bond with the metal, creating a completely non-porous and hydrophobic (water-fearing) shield.
This seamless barrier cuts the aluminum off from its two mortal enemies: water and oxygen. Without those two ingredients, the chemical reactions that cause corrosion simply can't get started. The sealer forms an unbroken, microscopic shield that water molecules and corrosive salts can't muscle through, stopping oxidation and pitting before they even have a chance. This kind of proactive protection is a huge deal in a rapidly growing market.
The global aluminum vessel market was valued at USD 6.145 billion in 2024 and is expected to hit USD 9.675 billion by 2035. That growth just underscores how critical effective maintenance solutions are for protecting these valuable boats.
Defeating Different Types of Corrosion
This protective shield is a multi-purpose defender, putting a stop to the various forms of corrosion that plague aluminum boats. The most common villains are general oxidation—that chalky, white powder you see on unprotected hulls—and pitting, which drills tiny but deep holes that can seriously compromise a hull's strength.
A quality sealer creates a smooth, slick surface that prevents both. But its most important job might be stopping a far sneakier threat.
Key Takeaway: A sealer’s primary job is to create a tough, non-porous barrier that physically separates the aluminum from the salt and water trying to destroy it. It effectively hits the pause button on the aging process.
Stopping Galvanic Corrosion in Its Tracks
Ever heard of galvanic corrosion? It’s a huge problem on boats. It’s basically an electrochemical process that turns your boat into a battery. This happens when two different metals (say, a stainless steel screw and your aluminum hull) are touching each other while sitting in saltwater. This contact creates an electrical current that makes the "less noble" metal—your aluminum—rapidly corrode and literally dissolve away.
An aluminum sealer for boats is the perfect fix because it acts as a dielectric insulator. It creates a non-conductive layer between the different metals, which breaks the electrical circuit and stops the corrosion cold.
Here’s how a sealer shuts down this destructive process in the real world:
- Isolates Fasteners: It coats the area around stainless steel rivets, bolts, and screws, preventing them from making direct electrical contact with the aluminum.
- Protects Fittings: It seals the metal under cleats, railings, and other hardware, stopping the galvanic reaction right at the source.
- Waterproofs Seams: By sealing up seams and rivets, it stops water from getting trapped between panels—a favorite hiding spot for corrosion.
By forming this complete barrier, the sealer ensures all the different metals on your boat can live together in harmony without eating your hull for lunch. The basic idea is similar to how other protective coatings, like the ones you might have heard about for cars, create a barrier to protect surfaces.
You can dive deeper into the science by checking out our guide on what a ceramic sealant is. The end result is a stronger, longer-lasting boat that's way easier to clean and keep looking good for years to come.
Choosing the Right Type of Sealer for Your Boat
Picking the right aluminum sealer for boats can feel like a chore, but it really just boils down to knowing what you need the sealer to do. They’re not all the same; each type is a unique mix of strength, flexibility, and resistance designed for different parts of a boat and different marine environments. Get this choice right, and you're set up with long-lasting protection, not just a quick fix.
The world of marine sealants is huge and always growing, which tells you just how critical these products are for keeping a boat in good shape. Sealants made for aluminum hulls are a big deal, part of a market that hit USD 490.1 million in 2024 and is expected to jump to USD 687.4 million by 2030. That growth is all thanks to boat owners who know a top-quality sealer is their best line of defense against leaks and oxidation. You can explore the full market research on marine sealants to see the trend for yourself.
Epoxy Sealers: The Fortress of Protection
When you need something incredibly hard that creates an impenetrable barrier against water, scuffs, and chemicals, two-part epoxy sealers are the undisputed champs. Think of epoxy as a liquid shield that cures into a rock-solid, non-porous surface.
This makes them the go-to for anything below the waterline, especially on pontoons and bigger fishing boats where taking a beating is part of the job. An epoxy creates a rigid, seamless coating that’s fantastic at preventing osmosis and stopping those annoying pinhole leaks in seams and rivets. For this kind of tough-as-nails protection, our Better Boat Epoxy Sealant is specifically formulated to deliver that durable, lasting finish boaters count on.
- Best For: Complete hull coatings, especially below the waterline.
- Key Benefit: Exceptional hardness, chemical resistance, and water impermeability.
- Downside: It’s very rigid, so it’s not the best for areas that flex a lot.
Polyurethane Sealers: The Flexible Defender
Unlike the rigid strength of epoxy, polyurethane sealers are all about incredible flexibility and UV resistance. Picture a tough, rubbery coating that can stretch and move with your boat as it flexes and vibrates on the water. This makes polyurethane a perfect choice for sealing seams, joints, and rivets above the waterline that are always in motion.
For a hard-working jon boat where the hull panels bend under stress, or for sealing around fittings and hardware, a polyurethane sealer is often the smarter pick. Its ability to absorb shock and resist cracking from sunlight makes it ideal for topside jobs.
For these applications, a product like our Marine Sealant offers excellent flexibility and adhesion. It's also important to know the difference in adhesive strengths—some are permanent, while others aren't. We dive into those distinctions in our guide comparing popular sealants like 3M 4200 vs 5200.
Polymer Hybrids: The Versatile All-Rounder
Polymer hybrid sealers are the modern answer, blending the best features of both epoxy and polyurethane. They strike a great balance between strength and flexibility, which makes them a fantastic do-it-all option for many boaters.
These sealers grab onto aluminum aggressively but stay elastic enough to handle vibrations and minor flexing without cracking. They also usually have excellent UV stability, so they won't turn yellow or break down in the harsh sun. This makes them a solid pick for a whole range of tasks, from sealing deck hardware to patching small leaks both above and below the waterline.
Pro Tip: Your choice really depends on the job. For the ultimate below-waterline shield on a pontoon, go with epoxy. For flexible, sun-blasted seams on a utility boat, polyurethane is your best bet. Hybrids are a great middle-of-the-road choice for general-purpose sealing.
To make your decision even easier, here’s a quick rundown of the three main types of aluminum sealer for boats.
Comparison of Aluminum Boat Sealer Types
This table breaks down the key features of the most common sealers so you can match the right product to your project.
| Sealer Type | Key Benefit | Best For | Flexibility | UV Resistance |
|---|---|---|---|---|
| Epoxy | Unmatched hardness and impermeability | Complete hull protection below the waterline | Low | Moderate |
| Polyurethane | Excellent flexibility and elasticity | Seams, joints, and areas above the waterline | High | High |
| Polymer Hybrid | Balanced strength and flexibility | General-purpose sealing and repairs | Moderate | High |
By matching the sealer's properties to what your boat needs, you'll get a professional, long-lasting result that keeps your vessel protected and ready for the water for years to come.
Your Step-By-Step Sealer Application Guide
Applying an aluminum sealer for boats isn’t just another weekend task; it’s a process where preparation is everything. Seriously, a flawless, long-lasting finish is born from meticulous prep work long before you even pop the lid on the sealer. This guide will walk you through a professional-grade process that any dedicated DIYer can master, ensuring your hull gets the durable protection it deserves.
The secret to a rock-solid bond is giving the sealer a perfectly prepared surface to grab onto. Skipping these initial steps is the number one reason I see for premature failure, so taking your time here is the best investment you can make. It all starts with a deep, thorough cleaning.
Phase One: The Critical Preparation Work
Before you can even think about sealing, you have to clean, scuff, and degrease. This three-step foundation removes every possible barrier that could stop the sealer from forming a permanent, waterproof bond with the aluminum. Rushing this phase will absolutely compromise the entire project.
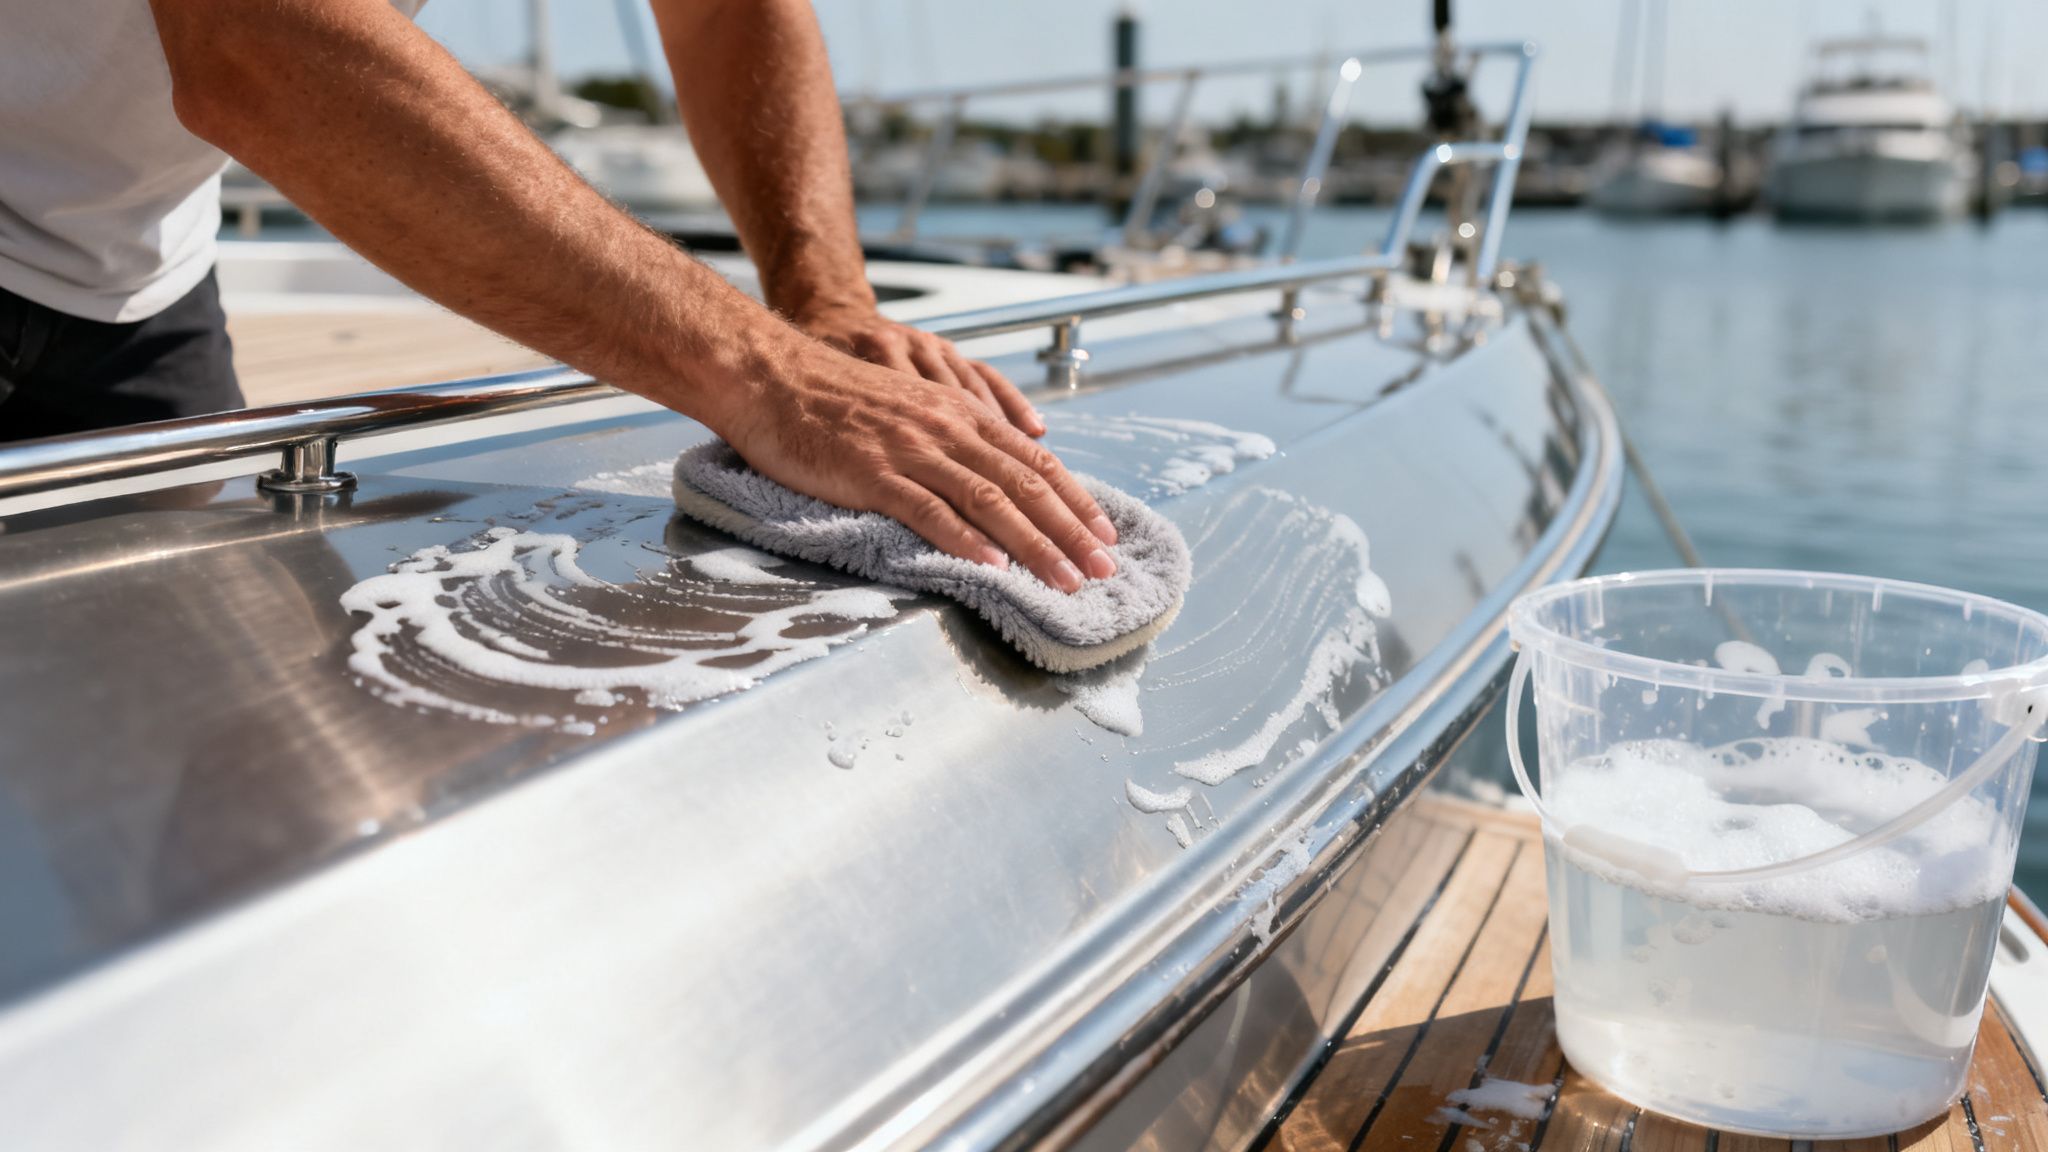
First, give your hull a comprehensive wash. You need to get rid of every trace of salt, grime, algae, and dirt that has built up. For this job, you'll want a cleaner that's powerful but safe.
A high-quality, pH-neutral product like our Better Boat Boat Soap is perfect because it cuts through tough marine gunk without leaving any residue that could mess with adhesion. Mix it up according to the directions and use a good deck brush to scrub every inch you plan to seal. Once you're done scrubbing, rinse the hull thoroughly with fresh water and let it dry completely.
After cleaning comes the next critical step: scuffing the surface. Even perfectly clean aluminum is just too smooth for most sealers to get a strong mechanical grip. You need to create a slightly roughened texture, or "tooth," for the sealer to really lock onto.
Use 120 to 220-grit sandpaper or a red Scotch-Brite pad to lightly abrade the entire surface. Your goal isn't to remove metal but just to dull the shine and create a uniform, matte finish. This micro-profile dramatically increases the surface area for the sealer to bond with, guaranteeing maximum adhesion. When you're done, wipe away all the sanding dust with a clean, dry cloth.
The final prep step is arguably the most important: degreasing. Oils, wax residue, and even the fingerprints from your own hands can create invisible barriers that will repel the sealer. A simple wipe-down with a solvent like denatured alcohol or acetone on a clean, lint-free rag will dissolve and lift away any contaminants. What you’re left with is a surgically clean surface that’s finally ready for sealing.
This chart breaks down the application process for the main types of sealers, showing how that foundational prep work is universal, even when the final steps might differ.
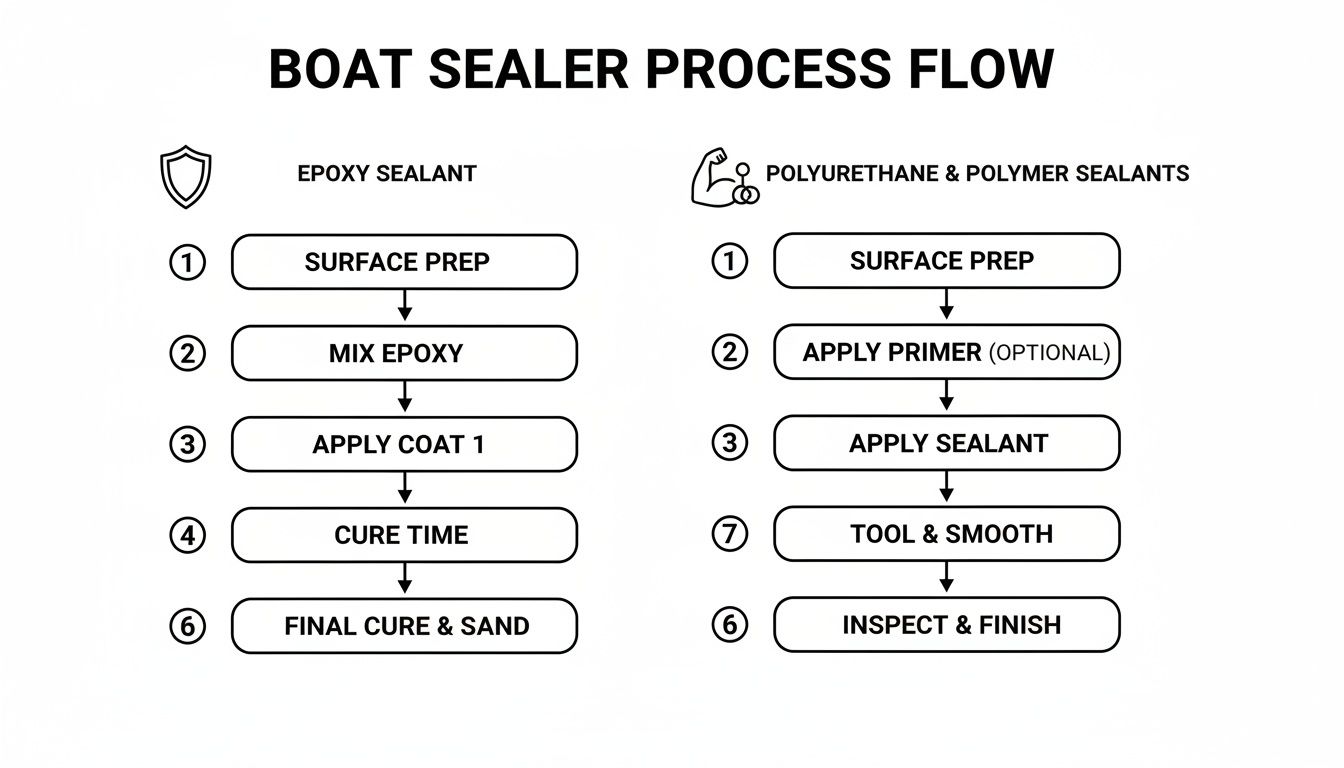
As you can see, whether you go with a rigid epoxy or a more flexible polyurethane, the process always kicks off with a thoroughly prepared surface.
Phase Two: The Application Process
With your hull perfectly prepped, it's time to lay down some sealer. Always work in a well-ventilated area and wear your personal protective equipment (PPE)—I’m talking gloves and safety glasses at a minimum.
Keep a close eye on the weather, too. Most sealers are picky about temperature and humidity ranges to cure properly. Trying to apply sealer in direct sun or on a damp, muggy day can completely ruin the finish.
Before you start, get all your tools ready and within reach:
- Your chosen aluminum boat sealer
- Mixing cups and stir sticks (for two-part epoxies)
- A high-quality, solvent-resistant foam roller or a good brush
- Painter's tape to mask off any areas you don't want sealed
If you're using a two-part epoxy, mixing it correctly is non-negotiable. Combine the resin and hardener using the manufacturer's exact ratio. Mix it thoroughly for several minutes, making sure to scrape the sides and bottom of the container so it's completely blended. And don't forget about the "pot life"—that's the limited time you have to apply the product before it starts to harden right there in your mixing cup.
Achieving a Professional Finish
Alright, let's get that sealer on the boat. The key to a smooth, pro-level look is to apply thin, even coats. Don't try to slop it on thick in one go. That’s a fast track to runs, drips, and an uneven cure.
- Start at one end of the boat and work systematically to the other. This helps you maintain a "wet edge" and avoid ugly lap marks where your sections overlap.
- Use a foam roller for large, flat areas to get a smooth, consistent finish. A high-density foam roller is best because it won't leave behind lint like a fabric one might.
- Use a brush for seams, corners, and hard-to-reach spots. This ensures you get complete coverage in the areas most vulnerable to leaks.
- Follow the recommended recoat time. If you're doing a second coat, wait for the specified time. Applying the next coat too soon or too late can seriously weaken the bond.
After your final coat is on, the waiting game begins. Curing is a chemical process that can take anywhere from 24 hours to a full week, depending on the sealer and the conditions. You have to resist the temptation to splash the boat too early.
A full, proper cure is what gives the sealer its ultimate hardness and all its protective powers. This process is very similar to what's needed for other coatings, and you can dive deeper by checking out our guide on applying aluminum boat primer and paint.
How to Maintain Your Sealed Aluminum Hull
Putting a high-quality aluminum sealer for boats on your hull is a huge step in the fight against corrosion, but the job isn't over just yet. To get every last bit of life out of that protective coating, you need a simple, consistent maintenance plan. You wouldn’t buy a new car and then never wash it, right? The same logic applies here.
A little routine care goes a long way, ensuring your sealer performs at its best for years. This protects your investment and keeps your boat looking sharp, preventing small issues from turning into major headaches.
There's a reason so much innovation is happening in this space. The marine sealants industry was valued at USD 1.24 billion in 2026 and is on track to hit USD 2.17 billion by 2035. With hull sealing making up over 41% of that market, it's clear that boat owners see the value in long-term protection. You can discover more insights about the marine sealants market and its impressive growth.
Your Regular Maintenance Schedule
The most critical maintenance task is also the easiest: regular washing. Salt, grime, and pollutants that sit on the hull can slowly eat away at the sealer over time. A quick rinse with fresh water after every single saltwater trip is a fantastic habit to get into.
For a more thorough job, plan on a full wash every few weeks—or at least once a month when you're using the boat regularly.
- Use the Right Soap: Stick with a pH-neutral, marine-specific soap. Harsh detergents can strip the sealer of its protective qualities. A gentle but tough product like our Better Boat Boat Soap is made to lift grime without harming the coating.
- Employ a Soft Touch: Grab a soft-bristled brush or a microfiber mitt to scrub the hull. Stay away from abrasive scouring pads or stiff brushes that could easily scratch the sealed surface.
- Rinse Thoroughly: Once you’re done washing, give the entire hull a good rinse with fresh water to get all the soap residue off.
A clean, sealed hull isn't just about looks. It creates a slicker surface that reduces drag in the water, which also makes it much harder for marine growth like algae and barnacles to get a grip.
Seasonal Inspections and Spot Repairs
At the start and end of each boating season, give your sealed hull a close look. Hunt for any signs of damage that might have happened from docking, trailering, or bumping into debris in the water.
Zero in on these common trouble spots:
- The Waterline: This area takes a constant beating from water, sun, and marine life.
- Chines and Keel: These are high-impact zones that are prime candidates for scratches.
- Around Fittings: Check the sealed areas around any hardware, transducers, and through-hulls.
If you find a minor scratch or a small chip where the sealer has peeled, a spot repair is usually all you need. Think of it as a miniature version of the original application.
You'll just clean the spot, lightly scuff the damaged area and a small border around it with fine-grit sandpaper, degrease it, and carefully brush on a thin coat of your sealer. This quick fix patches up the protective barrier before moisture can sneak underneath and create a much bigger problem.
For more pro tips on keeping your hull spotless, check out our guide on how to clean aluminum pontoons.
Of course. Here is the rewritten section, crafted to sound like an experienced human expert, following the provided style guide and examples.
Your Top Questions About Aluminum Boat Sealers, Answered
Even when you've got the basics down, a few specific questions always seem to surface. We get it. Let’s run through some of the most common things boat owners ask about using an aluminum sealer for boats. Think of this as your quick-reference guide for those nagging "what if" scenarios.
Can I Paint Over an Aluminum Sealer?
Absolutely. In fact, you should think of a high-quality sealer as the ultimate primer. A tough, two-part epoxy like the Better Boat Epoxy Sealant is specifically designed to create a rock-solid, non-porous foundation that paint loves to stick to.
The most important part of the job is just being patient. You have to let the sealer cure completely before you even think about painting. This can take anywhere from 24 to 72 hours, so always check the manufacturer’s instructions and follow them to the letter.
Once it's fully hardened, the rest is pretty simple:
- Grab some fine-grit sandpaper—something around 220-grit is perfect—and lightly scuff the entire sealed surface. This gives the paint a bit of texture to bite into, creating a much stronger mechanical bond.
- Wipe every last bit of sanding dust away with a clean, lint-free cloth. You want the surface perfectly clean.
- From there, just apply a good marine-grade paint according to its own directions.
By doing it this way, you get the best of both worlds: unbeatable corrosion protection from deep within the sealer and a beautiful, long-lasting finish from the paint on top.

How Often Do I Need to Reapply Sealer?
How long your sealer lasts really comes down to the product you use and where your boat lives. A heavy-duty, two-part epoxy that was applied to a perfectly prepped hull can easily give you 5 to 10 years of solid protection.
Now, that's a big range for a reason. If your boat is moored year-round in a salty, sun-baked marina, you're probably looking at the lower end of that timeline. On the other hand, if you've got a freshwater boat that you trailer home and keep under a cover, that sealer might last even longer.
Your best bet is to get in the habit of doing a thorough hull inspection at least once a year. Look for any signs of trouble—chalking, peeling, deep scratches, or just spots where the coating looks thin. If you start seeing widespread wear or, worse, bare aluminum peeking through, it's time to start planning your next application.
Pro Tip: Don't wait for a leak to tell you it's time to re-seal. An annual once-over is the best way to catch small problems before they turn into a weekend-ruining project. You'll save yourself a ton of time and money down the road.
Will a Sealer Really Stop All My Leaky Rivets?
For those annoying, slow weeps and pinhole leaks you get from rivets and seams, a coating-style aluminum sealer for boats is a fantastic solution. It essentially creates a single, seamless waterproof skin right over top of those problem areas, sealing them off from the outside.
But here’s the important part: a sealer is not a structural fix. It won’t do a thing for "working" rivets—the ones that are loose and physically moving as the hull flexes in the water. If you just coat over a loose rivet, that movement will eventually crack the sealer, and you'll be right back where you started. You have to fix the mechanical problem first by tightening or replacing the bad rivet.
For really stubborn leaks, a two-pronged attack works wonders:
- First, hit the source: Force a flexible marine sealant or caulk directly into the leaky seam or around the rivet head itself. Our Marine Sealant is perfect for this initial repair.
- Then, seal the deal: After that initial sealant has cured, applying your aluminum sealer over the entire area gives you a powerful, redundant barrier. It's the ultimate way to get a completely dry and protected hull.
Do I Really Need to Seal a Brand New Boat?
Yes! This is hands-down the smartest thing you can do for your boat. Sealing a brand-new hull is the ultimate preventative maintenance, setting your boat up for a long and happy life without corrosion issues.
The second your new boat touches the water (especially saltwater), the aluminum starts to oxidize. It’s an immediate process. Applying a sealer to a perfectly clean, fresh-from-the-factory surface is worlds easier than trying to sand down and restore a pitted, corroded hull a few years later.
By sealing it on day one, you’re locking in that pristine finish and stopping corrosion before it even has a chance to start. It’s a small amount of work upfront that pays off massively in longevity, resale value, and making future clean-ups a breeze.
At Better Boat, our whole mission is to give boat owners the products and know-how to protect their investment. From our tough Boat Soap to our bulletproof Epoxy Sealant, every product we make is designed for the real world and backed by our satisfaction guarantee.
Ready to give your aluminum boat the best defense against the elements? Check out our complete lineup of marine maintenance solutions at https://www.betterboat.com.