


A Complete Guide to Antifouling Paint for Aluminum Boats
So, you have an aluminum boat and you're wondering if you need to bother with antifouling paint. The short answer is yes, it's absolutely essential if you keep your boat in the water. But—and this is a big one—it's not as simple as grabbing any can off the shelf.
Using a standard, copper-based paint on your aluminum hull will kick off a nasty corrosive reaction that can do serious damage. You'll need a specialized, copper-free paint system to get the job done right and protect your investment.
Why Your Aluminum Boat Needs a Special Paint Job
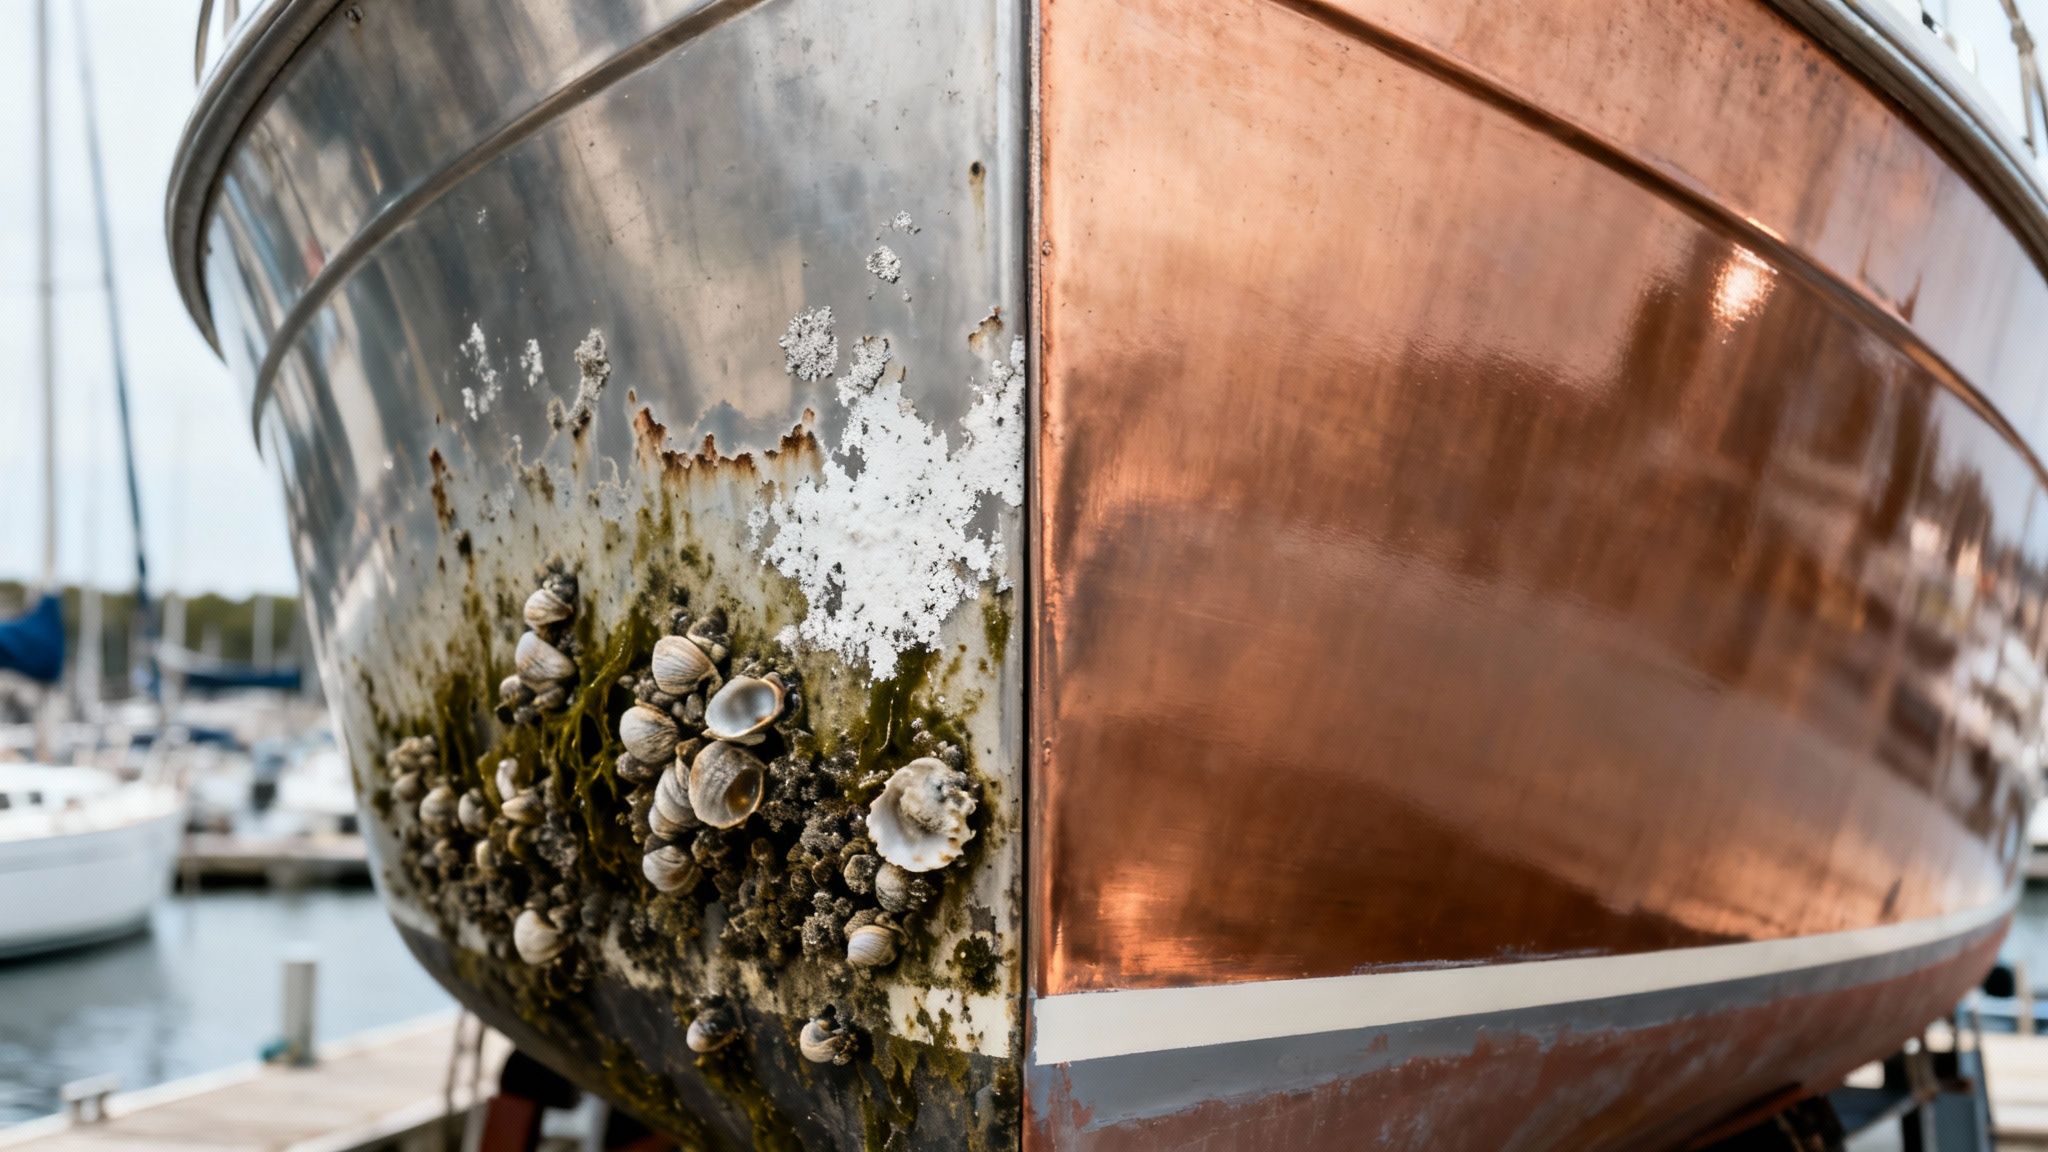
Looking at your tough aluminum hull, you might question what all the fuss is about. Aluminum is durable, right? It is, but once it's sitting in the water, it's up against two relentless enemies: marine growth and a sneaky chemical process called galvanic corrosion.
The first opponent, biofouling, is just a fancy term for all the barnacles, algae, and other critters that want to call your hull home. This isn't just ugly; it creates a ton of drag, which slows you down and makes your engine guzzle fuel. Unchecked marine growth can increase drag by as much as 60% and spike your fuel costs by a painful 20-30%. You can find more data on these impacts if you're curious about the numbers.
The Danger of Galvanic Corrosion
That brings us to the second, more sinister enemy: galvanic corrosion. The easiest way to think about it is like a battery. When you put two different metals (like copper and aluminum) into an electrolyte (like saltwater), one metal starts to corrode way faster to protect the other one.
Slapping a standard, copper-based antifouling paint on an aluminum hull is like intentionally setting up this destructive process. The copper in the paint is one metal, and your hull is the other. The result is aggressive corrosion that can literally eat holes through your boat.
Key Takeaway: Never, ever apply copper-based antifouling paint directly to an aluminum hull. The galvanic corrosion it causes can lead to severe, expensive damage and compromise the structural integrity of your boat.
This is exactly why a specialized system isn't just a good idea—it's a must-have for the health and longevity of your vessel.
Before we dive into the solution, here's a quick look at the challenges and how to tackle them.
Aluminum Hull Protection At a Glance
| Challenge | Impact on Aluminum Boats | Solution |
|---|---|---|
| Marine Growth (Biofouling) | Creates drag, increases fuel consumption, and reduces speed. | Copper-free antifouling paint with biocides like Econea or Zinc Omadine. |
| Galvanic Corrosion | Occurs when copper-based paint reacts with the aluminum hull, causing rapid and severe pitting and damage. | A multi-part system: an epoxy barrier coat to isolate the hull, followed by a copper-free topcoat. |
| Paint Adhesion | Aluminum's smooth, oxidized surface can make it difficult for paint to stick properly, leading to flaking or blistering. | Meticulous surface prep: cleaning, de-greasing, sanding, and applying an etching primer. |
With a clear understanding of the risks, the path to proper protection becomes much simpler.
The Two-Part Solution for Aluminum Hulls
Protecting your aluminum boat right calls for a two-part strategy. This approach shields you from marine growth without putting your hull at risk.
The system involves:
- A Robust Barrier Coat: This is a high-build epoxy primer that creates an impermeable shield. It completely seals off the aluminum from both the water and the antifouling paint, making it impossible for a chemical reaction to occur.
- Copper-Free Antifouling Paint: This topcoat uses biocides that are safe for aluminum, such as Econea or Zinc Omadine. These compounds are fantastic at stopping marine growth without kicking off galvanic corrosion.
This one-two punch provides a powerful defense against both biofouling and corrosion. While the right paint job is critical, remember that ongoing maintenance is just as important. You can learn more about fighting salt corrosion on boats in our detailed guide. Get this system in place, and you can get back to enjoying your time on the water with total peace of mind.
Choosing the Right Type of Antouling Paint
Not all antifouling paints are created equal, and for an aluminum boat, the differences are absolutely critical. Picking the right type isn't just about keeping the critters off your hull; it's about matching the paint's technology to how you actually use your boat.
Think of it like choosing tires for a truck—you wouldn't put slick racing tires on a 4x4 you take through the mud, right? Same idea here.
The world of antifouling paint for aluminum is really dominated by three main categories. Each one works differently, has its own set of pros and cons, and is really built for a particular kind of boater. Let's break them down so you can make a smart, confident choice.
Hard Antifouling Paints: The Durable Defender
Hard antifouling paints, which you'll often hear called hard-modified epoxies, cure to a tough, scrubbable finish. Picture it as a durable, protective shell around your hull that’s packed with biocides to fend off marine growth. The biocide leaches out slowly over time to do its job, but the paint film itself doesn't wear away.
This sheer durability makes it the perfect choice for a few specific situations:
- High-Speed Boats: That tough surface can handle the friction of fast-moving water without eroding.
- Trailered Boats: It holds up great against the inevitable bumps and scuffs that come with launching and retrieving.
- Boats Cleaned by Divers: The hard finish can be wiped or scrubbed mid-season to get rid of slime without stripping off the paint.
There is a trade-off, though. As the biocide gets used up, the paint film stays put. This means you get a buildup of old coats over the years, which eventually requires some serious sanding to remove before you can repaint. It makes the long-term maintenance a bit more labor-intensive.
Pro Tip: If you go with a hard antifouling paint, a light scuff sanding before applying a fresh coat each season is a good move. It helps the new paint stick and reactivates the surface.
Ablative Antifouling Paints: The Self-Polishing Workhorse
Ablative paints are the most popular choice for a good reason. The best way to think of an ablative coating is like a bar of soap. As your boat moves through the water, the paint slowly wears away, or "ablates," constantly exposing a fresh, potent layer of biocide. This self-polishing action means the paint is working as long as there's still paint on the hull.
This mechanism gives you a consistent, reliable defense against fouling. It’s the ideal setup for boaters who keep their vessel in the water most of the season and use it pretty regularly.
The biggest win here is multi-season protection without that heavy buildup. You can apply a few coats and know that each one will wear away over time, which makes your prep work for next season way easier.
A quick power wash is often all you need before slapping on a new coat. To get the full picture, check out our comprehensive guide to boat bottom painting, which covers the whole process. The only real downside is that heavy use or frequent scrubbing can wear the paint down faster than you might like.
Foul-Release Coatings: The Non-Stick Innovator
Finally, we have the newest kid on the block: foul-release coatings. These are usually silicone-based and, get this, contain no biocides at all. Instead of killing marine growth, they create an incredibly slick, non-stick surface that organisms just can't get a good grip on.
Imagine the slickest non-stick frying pan you’ve ever used—that’s exactly how these coatings work. Barnacles and algae might try to latch on, but the water movement from the boat cruising along is usually enough to just slough them right off. This makes them, by far, the most environmentally friendly option out there.
The advantages are pretty huge:
- Long-Lasting: These high-tech coatings can last for 5 years or more, blowing traditional antifouling paints out of the water.
- Eco-Friendly: With zero biocides, they don't release any harmful chemicals into the marine ecosystem.
- Fuel Efficiency: The ultra-smooth surface reduces drag, which can translate to better performance and even some fuel savings.
But they're not a perfect solution for everyone. They are usually more expensive upfront and require a more specialized, careful application. More importantly, they work best on boats that are used frequently and at higher speeds. For a boat that sits at the dock for long stretches, a soft slime can still develop and will need to be wiped off with a soft cloth.
The Critical Role of Primers and Barrier Coats
If you take one thing away from this guide, make it this: the primer system is your aluminum boat’s single most important line of defense. Jumping straight to the antifouling paint is like building a house without a foundation—it’s just not going to last.
Think of an epoxy barrier coat as the ultimate security guard for your aluminum hull. Its job isn't just to make the topcoat stick; it's to create a completely bulletproof shield. This barrier isolates the raw aluminum from the antifouling paint and, more importantly, from the saltwater itself.
This separation is the secret to a long-lasting, effective paint job. It stops the conditions that lead to blistering, flaking, and the dreaded galvanic corrosion before they can even get started.
Why You Can Never Skip the Barrier Coat
Even if you’re using a completely copper-free antifouling paint, a high-quality epoxy primer system is non-negotiable. Why? Because aluminum instantly forms a thin layer of oxidation when exposed to air, and paint just won't stick to it properly. A good primer actually etches into the metal, creating a tenacious grip that the next layers can lock onto.
Without it, your expensive topcoat will peel or flake off, and you'll be right back where you started, minus a lot of time and money. The core ideas behind general paint protection make it clear that a properly prepped and primed surface is key to any coating's lifespan, and that’s doubly true in the harsh marine world.
Expert Insight: Skipping the barrier coat is the number one reason paint fails on aluminum boats. It's a guarantee that moisture will eventually creep under the paint, causing it to lift and letting corrosion get a foothold underneath.
A flawless finish always starts with flawless prep. To get that perfect foundation for your barrier coat, the surface has to be absolutely free of contaminants. Using the right stuff, like a good marine-grade degreaser and clean towels, is essential to make sure the primer can create a perfect chemical bond with the aluminum.
Primers as Electrical Insulators
Beyond just making paint stick, the epoxy barrier coat has a critical electrical job. It acts as a dielectric shield, which is a fancy way of saying it doesn't conduct electricity. This is a huge deal for preventing galvanic corrosion, the destructive process that kicks off when different metals start reacting in saltwater.
A huge chunk of the antifouling market still relies on traditional paints. In fact, copper-based antifouling paints hold a commanding 45.8% revenue share in the global market. While they work great on fiberglass, they are an absolute disaster for aluminum because of how reactive copper is. A tough barrier coat is the only thing that stands between your hull and certain doom, though going copper-free is always the smartest play for aluminum.
Even with aluminum-safe paints, one tiny, pinhole-sized scratch in the topcoat could expose the hull. Without a barrier coat, that little breach becomes ground zero for corrosion. The primer ensures that even if the topcoat gets nicked, the aluminum itself stays safely sealed off.
A System for Success
The best way to tackle this is to think of the primer and topcoat not as separate products, but as a complete coating system. Follow these steps for the best results:
- Thorough Cleaning and Degreasing: Get rid of every trace of oil, wax, and grime.
- Sanding and Etching: You need to create a mechanical "profile" for the primer to grab onto.
- Immediate Primer Application: As soon as the surface is clean and dry, get that epoxy barrier coat on. Most manufacturers say you've got about an hour before the metal starts to oxidize again.
- Applying the Topcoat: Pay close attention to the primer's specific instructions for the topcoat application window. This ensures you get a strong chemical bond between the layers.
Taking the time to apply a high-build epoxy barrier coat the right way is the single best investment you can make in your boat's long-term health. For a deeper dive into picking the right products, check out our guide on how to choose an aluminum boat primer. Getting this foundational step right guarantees your antifouling paint can do its job for many seasons to come.
Your Step-by-Step Hull Painting Guide
Getting a professional-looking finish on your aluminum boat isn't about magic; it's about discipline and following a proven process. We’re going to break down the entire job into simple, manageable steps. What seems like a huge task can absolutely be a weekend project if you do it right.
From getting your safety gear on to laying down that final coat of antifouling paint, this guide will walk you through everything you need for a durable, protective finish that lasts.
Think of the whole job in three distinct phases: Degrease, Isolate, and Protect. Each step builds on the last, creating a bulletproof system for your hull.
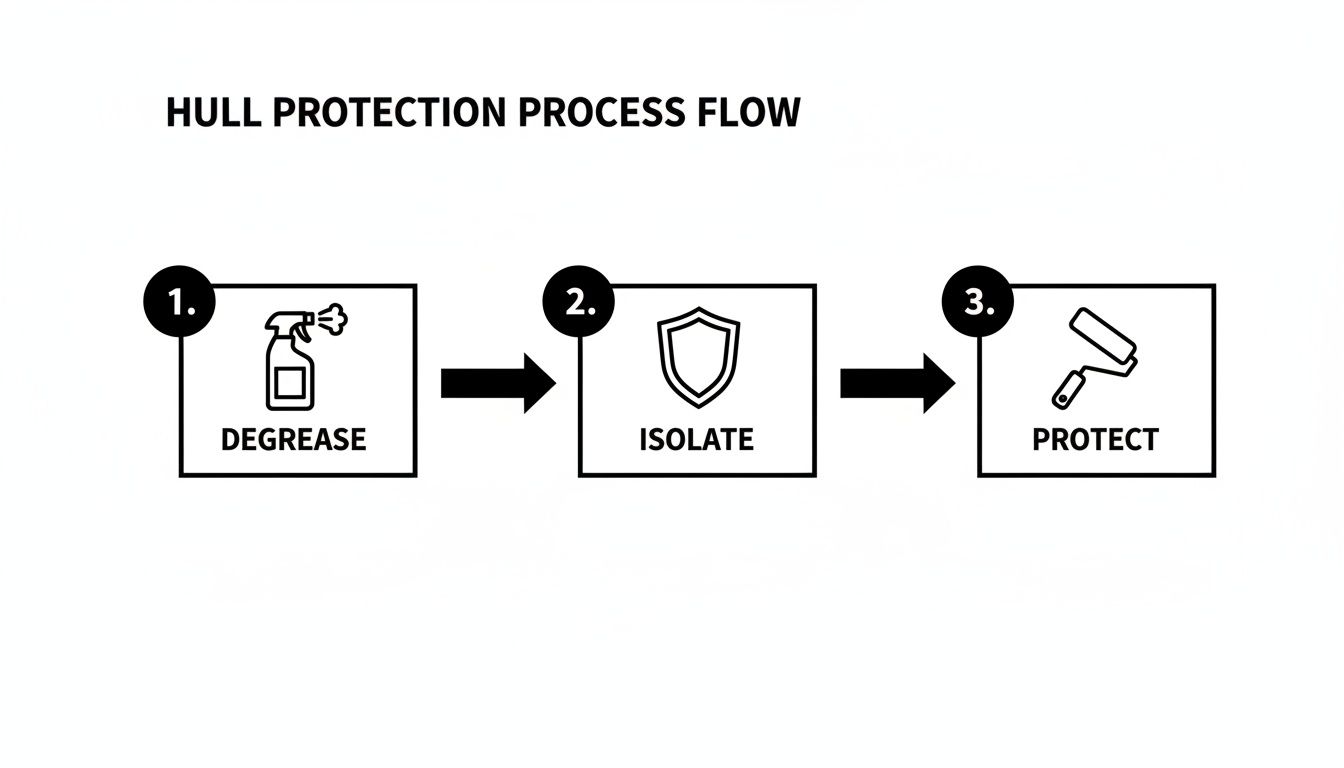
Get these three phases right, and you're golden. Skimp on any of them, and you'll be doing this all over again next season.
Phase 1: Safety and Surface Preparation
Before you even think about popping the lid on a can of paint, let's talk safety. This job involves some serious chemicals and a whole lot of dust, so your personal protective equipment (PPE) is completely non-negotiable.
Your Essential Safety Checklist:
- Respirator: Don't mess around here. Get a quality respirator with organic vapor cartridges to keep paint fumes and sanding dust out of your lungs.
- Safety Goggles: You need to shield your eyes from splashes, dust, and all sorts of debris.
- Gloves: A good pair of chemical-resistant gloves will keep harsh solvents and paints where they belong—off your skin.
- Coveralls: Protect your clothes and skin from getting covered in gunk with some disposable coveralls.
Once you’re geared up, the real work starts. The whole point of surface prep is to create a perfectly clean, slightly scuffed-up surface that the primer can grab onto and never let go.
- Strip Old Paint: If you’ve got old, flaking paint, it has to come off. No exceptions. A chemical stripper made for aluminum is one way to go, or you can get to work with some coarse 80-grit sandpaper to get back to bare metal.
- Clean and Degrease: With the old stuff gone, give the hull a serious bath with our powerful boat soap. Then, follow up with a solvent-based degreaser, using clean, high-quality microfiber towels to wipe away every last trace of oil, wax, or grime.
- Sand for Profile: Now, switch over to a medium-grit sandpaper, like 120-grit, and sand the entire hull. You’re not trying to make it shiny. The goal is a uniform, matte finish with thousands of tiny scratches for the primer to bite into. This is called creating a "mechanical profile," and it's absolutely vital.
- Final Clean: Give the boat a thorough rinse with fresh water to get all the sanding dust off. Do one last wipe-down with your solvent and then let the hull dry completely.
Crucial Timing: This is a big one. Bare aluminum starts to oxidize almost the second it hits the air. To get the strongest possible bond, you have to lay down your first coat of primer within 1-2 hours of your final cleaning and drying step.
Phase 2: Applying the Epoxy Barrier Coat
With a perfectly prepped hull, you're ready for the most critical player in this whole game: the epoxy barrier coat. This is the impermeable shield that separates your aluminum hull from the copper in the antifouling paint, stopping corrosion dead in its tracks.
You absolutely have to follow the manufacturer's instructions for your epoxy primer to the letter. These are two-part systems, meaning they need precise mixing ratios and have very specific windows for application. Don't eyeball it.
Mixing and Application Tips:
- Mix in Batches: Only mix up as much primer as you can realistically apply within its "pot life"—that's the working time you have before it starts to harden in the can.
- Use the Right Tools: A high-density foam roller works great for big, flat sections. For the tricky spots—corners, chines, and around fittings—our detail brush is your best friend.
- Apply Thin, Even Coats: You’re trying to build up a specific film thickness. Two or three thin coats are always better than one thick, heavy coat that can sag, drip, or cure unevenly.
- Watch Your Recoat Window: The instructions will tell you how long to wait between coats. Too early or too late, and you’ll mess up the chemical bond between layers. Set a timer!
Phase 3: Rolling on the Antifouling Topcoat
Once your final epoxy coat has cured to that perfect "tacky" stage (check the instructions!), it's time for the main event: the antifouling paint. This is the layer that does the hard work of keeping the barnacles and slime away.
Just like with the primer, technique matters. Grab a fresh roller and tray to avoid any contamination. You'll want to apply at least two full coats to get complete coverage and make sure there's enough biocide to last the season. For an even deeper dive into the painting process, check out our guide on how to repaint an aluminum boat for more pro tips.
When you’re done, resist the urge to splash the boat immediately. Let that final coat dry and cure completely, exactly as the manufacturer recommends. Rushing this last step can undo all of your hard work.
To help you keep track of everything, here's a simple checklist to guide you through the process.
Antifouling Paint Application Checklist
This checklist breaks down the job into clear phases and actions, ensuring you don't miss a single critical step for a flawless, long-lasting finish.
| Phase | Key Action | Recommended Better Boat Product |
|---|---|---|
| 1. Preparation | Gear up with essential PPE (respirator, goggles, gloves). | Safety First! (PPE not sold by BB) |
| Strip old, failing paint down to bare aluminum. | Sandpaper/Stripper (Check local marine store) | |
| Degrease the hull thoroughly with a marine soap and solvent. | Boat Soap & Microfiber Towels | |
| Sand the entire hull with 120-grit paper to create a profile. | Sanding Supplies | |
| 2. Barrier Coat | Mix epoxy primer in small, manageable batches. | (Check local marine store for compatible primer) |
| Apply 2-3 thin, even coats of primer, respecting recoat times. | Detail Brush Set | |
| Allow the final primer coat to cure until tacky. | Follow Primer Instructions | |
| 3. Antifouling | Apply at least two full coats of copper-free antifouling paint. | (Check local marine store for compatible paint) |
| Use a fresh roller/tray to avoid contamination. | Painting Supplies | |
| Allow the final coat to cure completely before launching. | Follow Paint Instructions |
Follow this process with care, and you’ll end up with a durable, professional finish that not only looks great but also protects your investment for years to come.

Maintaining Your Finish and Solving Common Problems
Just because the paint is dry doesn't mean your work is done. If you want to get years of solid performance out of your new antifouling paint, proper maintenance is the name of the game. It’s what makes your investment in time and materials pay off, season after season.
Think of it this way: a simple inspection and cleaning routine is your first line of defense. It helps you catch minor issues before they spiral into major, wallet-draining headaches and keeps your hull slick and protected.
Annual and Mid-Season Maintenance
A little bit of attention really does go a long way. Setting up a simple maintenance schedule will preserve your coating's integrity and squeeze every last bit of life out of it.
Your Basic Maintenance Checklist:
- Annual Haul-Out Inspection: When you pull the boat for the season, give the hull a good, long look. Hunt for any chips, scrapes, or spots where the paint looks thin—pay special attention to the waterline and chines where wear is most common.
- Gentle Mid-Season Cleaning: Noticing some slime buildup mid-season? No problem. Just clean it gently with a soft cloth or sponge and our pH-neutral boat soap. You want to wipe the surface, not scrub the antifouling layer off, especially if you used an ablative paint.
- Check Sacrificial Anodes: Keep an eye on your zinc anodes. If they look more than 50% depleted, it’s time to swap them out. They’re absolutely critical for stopping galvanic corrosion in its tracks and protecting your aluminum hull.
Troubleshooting Common Paint Problems
Even if you did everything by the book, problems can still pop up. Knowing what to look for helps you diagnose and fix them before they seriously compromise your hull.
Blistering or Flaking
If you're seeing bubbles, blisters, or paint peeling off in flakes, the culprit is almost always poor prep work. This is a classic sign of adhesion failure. It usually means some contaminant like oil, grease, or moisture got trapped under the primer, or the aluminum wasn’t scuffed up enough for the primer to bite into. The only real fix here is to sand the problem area back down to bare metal and re-do the primer and paint system the right way.
Rapid or Patchy Growth
Seeing barnacles and algae showing up way too soon? This could be a sign that the paint was applied too thinly. Most antifouling paints need at least two solid coats to pack enough biocide punch for a full season. It could also just be a signal that the paint is at the end of its useful life and is ready for a fresh coat.
Expert Insight: When antifouling paint fails early, 90% of the time you can trace the problem back to a rushed prep phase. Meticulous cleaning, degreasing, and sanding aren't just suggestions—they're non-negotiable for a finish that lasts.
When to Recoat Your Hull
Knowing when to reapply paint saves you from either wasting product or, worse, leaving your hull unprotected. With ablative paints, it's pretty obvious: you’ll start seeing the primer peeking through as the paint wears away.
That's your cue to recoat. Hard paints are trickier since they don’t wear off, but their antifouling power fades. Plan on giving them a light sanding and a fresh topcoat every one to two seasons.
Self-polishing copolymer paints are a top choice for good reason, offering a controlled biocide release for fantastic performance. For aluminum boat owners, these paints are a double win—they slash fouling and can even cut your fuel costs by 15-25% per season. Those are some serious savings. You can learn more about these market trends and see the economic impact for yourself. Sticking to a smart maintenance schedule ensures your antifouling system delivers maximum protection and value.
Frequently Asked Questions About Aluminum Boat Paint
Let's dive into the questions that pop up for just about every aluminum boat owner. This is where we cut through the noise and give you clear, straightforward answers for the real-world situations you'll face. We'll reinforce the big takeaways and get you ready to tackle your boat's hull protection like a pro.
Can I Use Copper Paint if I Apply a Good Primer First?
This is a classic question, and while it seems like a logical workaround, it's a high-stakes gamble we strongly advise against. Think of your epoxy barrier coat as a suit of armor—incredibly tough, but not indestructible.
Even with a thick, professionally applied barrier, all it takes is one good scrape or chip from a submerged log or rock to pierce that shield. The second that happens, you've created a tiny, perfect storm. The saltwater becomes the conductor between the copper in your paint and the aluminum of your hull, kicking off a powerful galvanic corrosion reaction. That one little nick can lead to severe, rapid-fire damage to your hull.
The only truly safe bet is to always use a copper-free antifouling paint made specifically for aluminum. These paints rely on effective biocides like Econea or Zinc Omadine that stop marine growth in its tracks without putting your hull at risk of corrosion. It's just not worth the potential for catastrophic failure.
How Often Should I Reapply Antifouling Paint?
There’s no single answer here—it really comes down to the type of paint you choose and how much you use your boat. Matching the paint to your boating habits is the key to getting it right.
- Ablative (Self-Polishing) Paints: These wear away slowly, kind of like a bar of soap, and usually need a new coat every 1-2 seasons. The more you're on the water, the faster they wear. The upside? Prepping for the next coat is typically as simple as a good power wash.
- Hard Antifouling Paints: These tough coatings can last 2-3 seasons, but their slime-fighting power fades over time. To keep them working their best, many boaters will give the surface a light scuff-sand and apply a fresh coat each year to reactivate the biocides.
- Foul-Release Coatings: These super-slick, silicone-based coatings are the marathon runners of the group, often lasting five years or more. They do, however, require special cleaning techniques to keep their non-stick magic alive.
Always check the manufacturer's guidelines for your specific product. They'll give you the most accurate timeline for reapplication.
What Is the Single Most Important Step in This Process?
Hands down, meticulous surface preparation is the absolute foundation for a paint job that lasts. This is the one area where taking a shortcut is a guarantee for failure later.
You could have the most advanced, expensive antifouling paint in the world, but if you slap it on a dirty, oxidized, or poorly prepped surface, it's going to fail. Period. The entire system's success hinges on the primer getting a death grip on that bare metal.
Rushing the prep stage is the number one cause of paint flaking, blistering, and corrosion. Taking the time to thoroughly clean, degrease, and sand the aluminum to create the perfect surface profile for the primer is non-negotiable.
Do I Need Antifouling Paint if My Boat Lives on a Trailer?
If your boat lives on a trailer and only sees the water for day trips, you can probably skip the full antifouling paint system. Critters like barnacles and algae need to be constantly submerged to set up shop, so keeping your boat high and dry is the best defense.
But, if you plan to leave your boat in a slip or on a mooring for more than a week at a time—especially in warm water where things grow fast—antifouling paint becomes essential. It only takes a few days for that first layer of slime to form, and from there, the biofouling process takes off.
For trailered boats, a regular wash-down with our quality boat soap is usually all you need to keep the hull looking sharp. Of course, boat ownership involves more than just paint. Knowing who to call for reliable boat towing services can be a lifesaver when things don't go as planned. Proper maintenance, both on the hull and with general boat care, is what makes for a stress-free season on the water.
At Better Boat, we know your vessel is your priority. From prepping the surface with our premium microfiber towels to keeping your hull spotless between seasons with our powerful Boat Soap, we have the high-quality accessories you need to get the job done right. Trust our family-owned American company for the tested, proven products that keep your boat looking its absolute best. Explore our full range of boat care solutions today!


