Skip to content

How to Clean Boat Vinyl Seats: The Definitive Guide
Before you can bring that brilliant white gleam back to your boat’s upholstery, you've got to gather the right cleaning arsenal. Showing up with the correct tools and products doesn't just make the job go faster—it’s your best defense against accidentally damaging your seats.
The goal is to cut through the grime without stripping the vinyl of its protective topcoat or causing it to dry out and crack. Think of it like prepping for a day on the water; you wouldn't cast off without checking the fuel, so don't start scrubbing without the proper gear. The difference between a quick, successful clean and a frustrating afternoon often comes down to what's in your bucket.
Your Essential Cleaning Supplies Checklist
Your toolkit doesn't need to be complicated, but it does need to be specific to marine vinyl. So many common household cleaners contain harsh chemicals like bleach or ammonia that will absolutely wreck your boat's interior over time, leading to yellowing, cracking, and even deteriorated stitching.
To get the job done right, here's a quick rundown of what every boat owner should have on hand.
| Item | Recommended Product/Type | Primary Use |
|---|---|---|
| All-Purpose Cleaner | Better Boat All-Purpose Cleaner | Lifts grime, salt, and sunscreen without damaging vinyl. |
| Soft Brushes | A medium and a small detail brush | Agitates dirt out of the vinyl grain and tight crevices. |
| Microfiber Towels | At least 3 lint-free towels | Wiping, rinsing, and drying without leaving residue. |
| Fresh Water Supply | A bucket or hose nozzle | Rinsing away cleaner and grime to prevent residue buildup. |
| Mildew Stain Remover | Better Boat Mildew Stain Remover | Tackles stubborn black spots and mold stains. |
| Vinyl Protectant | Better Boat Vinyl Protectant | Conditions vinyl and shields it from sun damage. |
Having these items ready to go in a dedicated kit means you’re always prepared for routine maintenance or surprise spills.
Choosing the Right Supplies
A pH-balanced, non-abrasive cleaner is non-negotiable. Our Better Boat All-Purpose Cleaner is your go-to here, formulated specifically to break down stubborn salt, grime, and sunscreen residue without harming the vinyl's finish.
You'll also need a brush that's soft enough not to scratch the vinyl but firm enough to get into the material's texture where dirt loves to hide. A medium brush for the main seat areas and a small detail brush for tight crevices and seams is the perfect combo.
Finally, grab at least three microfiber towels—one for cleaning, one for rinsing with fresh water, and a final one for drying. Microfiber is super absorbent and, best of all, won't leave annoying lint behind.
Professional detailers will tell you that the right tools are only half the battle. Proper technique—spraying, gentle scrubbing, and thorough wiping—is what really restores vinyl to about 90% to 97% of its original condition.
A common mistake I see all the time is people reaching for an overly aggressive tool, like a magic eraser or a stiff-bristled brush, for general cleaning. While those have their place for a very specific, stubborn scuff, using them all over the seat will dull the finish and create micro-abrasions that actually attract more dirt down the road.
By putting together a dedicated kit, you ensure every tool you grab is safe for marine use. For a more detailed breakdown of what to include, check out our complete guide to building the perfect boat cleaning kit. It'll save you a ton of time and make sure you're ready for anything.
The Foundational Cleaning Method for Boat Seats
Got your tools? Good. Let's get into the cleaning process that will knock out about 90% of the dirt and grime your seats see. This is your go-to routine for regular upkeep or for when you need to bring them back to life after a long weekend on the water.
Following these steps is the key to avoiding damage and making sure that clean look actually lasts. The whole process is pretty straightforward when you break it down.
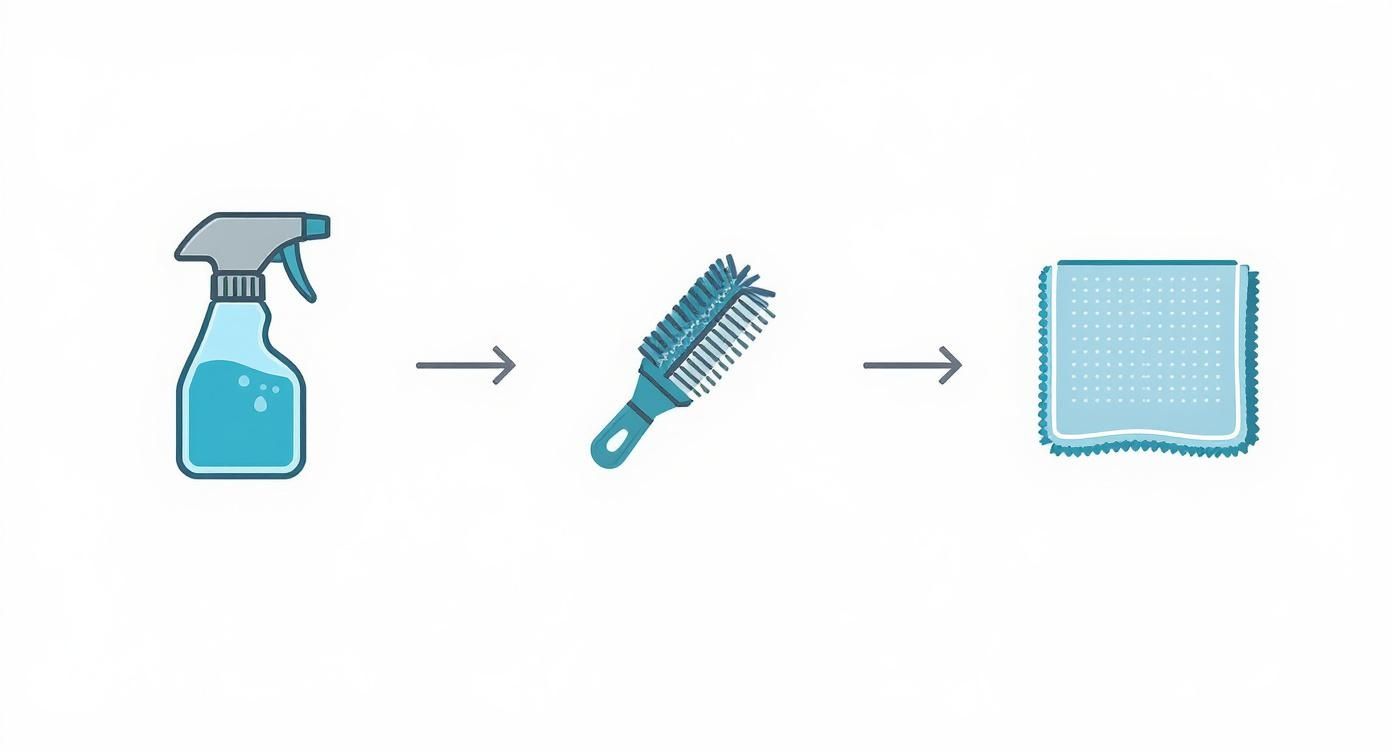
This simple flow is the heart of effective vinyl seat care: spray the cleaner, give it a good scrub with the brush, and wipe it all away with a clean cloth.
Start with a Clean Slate
Before you even think about spraying anything, you’ve got to get all the loose stuff off. Grab a vacuum with a soft brush attachment and go over every inch of the seats. You want to pull up all the sand, dirt, and dried salt crystals from the surface and especially out of the seams.
So many people skip this, and it’s a huge mistake. If you don't vacuum first, those little gritty particles basically turn into sandpaper when you start scrubbing. This creates tiny micro-scratches in the vinyl's protective topcoat, which dulls the finish and, ironically, makes the seats attract even more dirt down the road. Take a few extra minutes here—a good vacuum is your best defense against accidental damage.
Applying Your Cleaner the Right Way
Alright, now it’s time for the cleaning solution. The trick is to work in small, manageable sections, like one cushion or a seat back at a time. This keeps the cleaner from drying out before you've had a chance to work it in, which can leave a gross, sticky film.
Generously spray the Better Boat All-Purpose Cleaner onto the section you’re working on. Let it sit for a minute or so; this gives it time to start breaking down sunscreen residue, body oils, and all that embedded grime. You don’t need to drown the seat, but make sure you have even coverage before you start scrubbing.
Pro Tip: Trying to clean in direct, hot sunlight is a recipe for disaster. The heat just evaporates the cleaner almost instantly, leaving behind a concentrated soap scum that’s a real pain to rinse off and acts like a dirt magnet. Always work in the shade or on a cloudy day for the best results.
Agitate and Lift the Grime
Once the cleaner has had a moment to work its magic, it's time to get scrubbing. Take your soft-bristled brush and work in small, circular motions. There's no need to put a ton of muscle into it; you want to let the bristles and the cleaner do the heavy lifting.
This gentle agitation is what lifts the dirt out of the vinyl’s texture. For those pesky seams and tight corners where grime loves to hide, switch to a smaller detail brush to make sure you get everything. You should start to see a light lather forming, which is a good sign the cleaner is pulling all that gunk to the surface.
The Crucial Rinse and Dry
As soon as you finish scrubbing a section, grab a clean, damp microfiber towel and wipe it all down immediately. This is critical for removing both the dirt and the cleaning solution. If you leave soap residue behind, you'll end up with a tacky surface that gets dirty again in no time.
Right after you wipe with the damp cloth, follow it up with a completely dry microfiber towel. Dry the entire section thoroughly, paying close attention to seams and crevices where water likes to hide.
Any leftover moisture is just asking for mildew to show up, which completely undoes all your hard work. This final drying step is your number one weapon against future mildew growth.

How to Tackle Tough Stains on Marine Vinyl
While your regular cleaning routine handles everyday grime, some stains are just in a different league. I'm talking about the stubborn ones: sunscreen, ink, grease, and the boater's arch-nemesis, mildew. These require a more focused game plan. This is where you graduate from basic upkeep to the fine art of stain removal, getting your seats back to pristine condition without causing any harm.
Hitting these spots with the right product and technique is everything. Grab the wrong chemical, and you could set that stain for good or, even worse, eat right through the vinyl. Let's break down the usual suspects and how to send them packing.
Defeating Mildew The Right Way
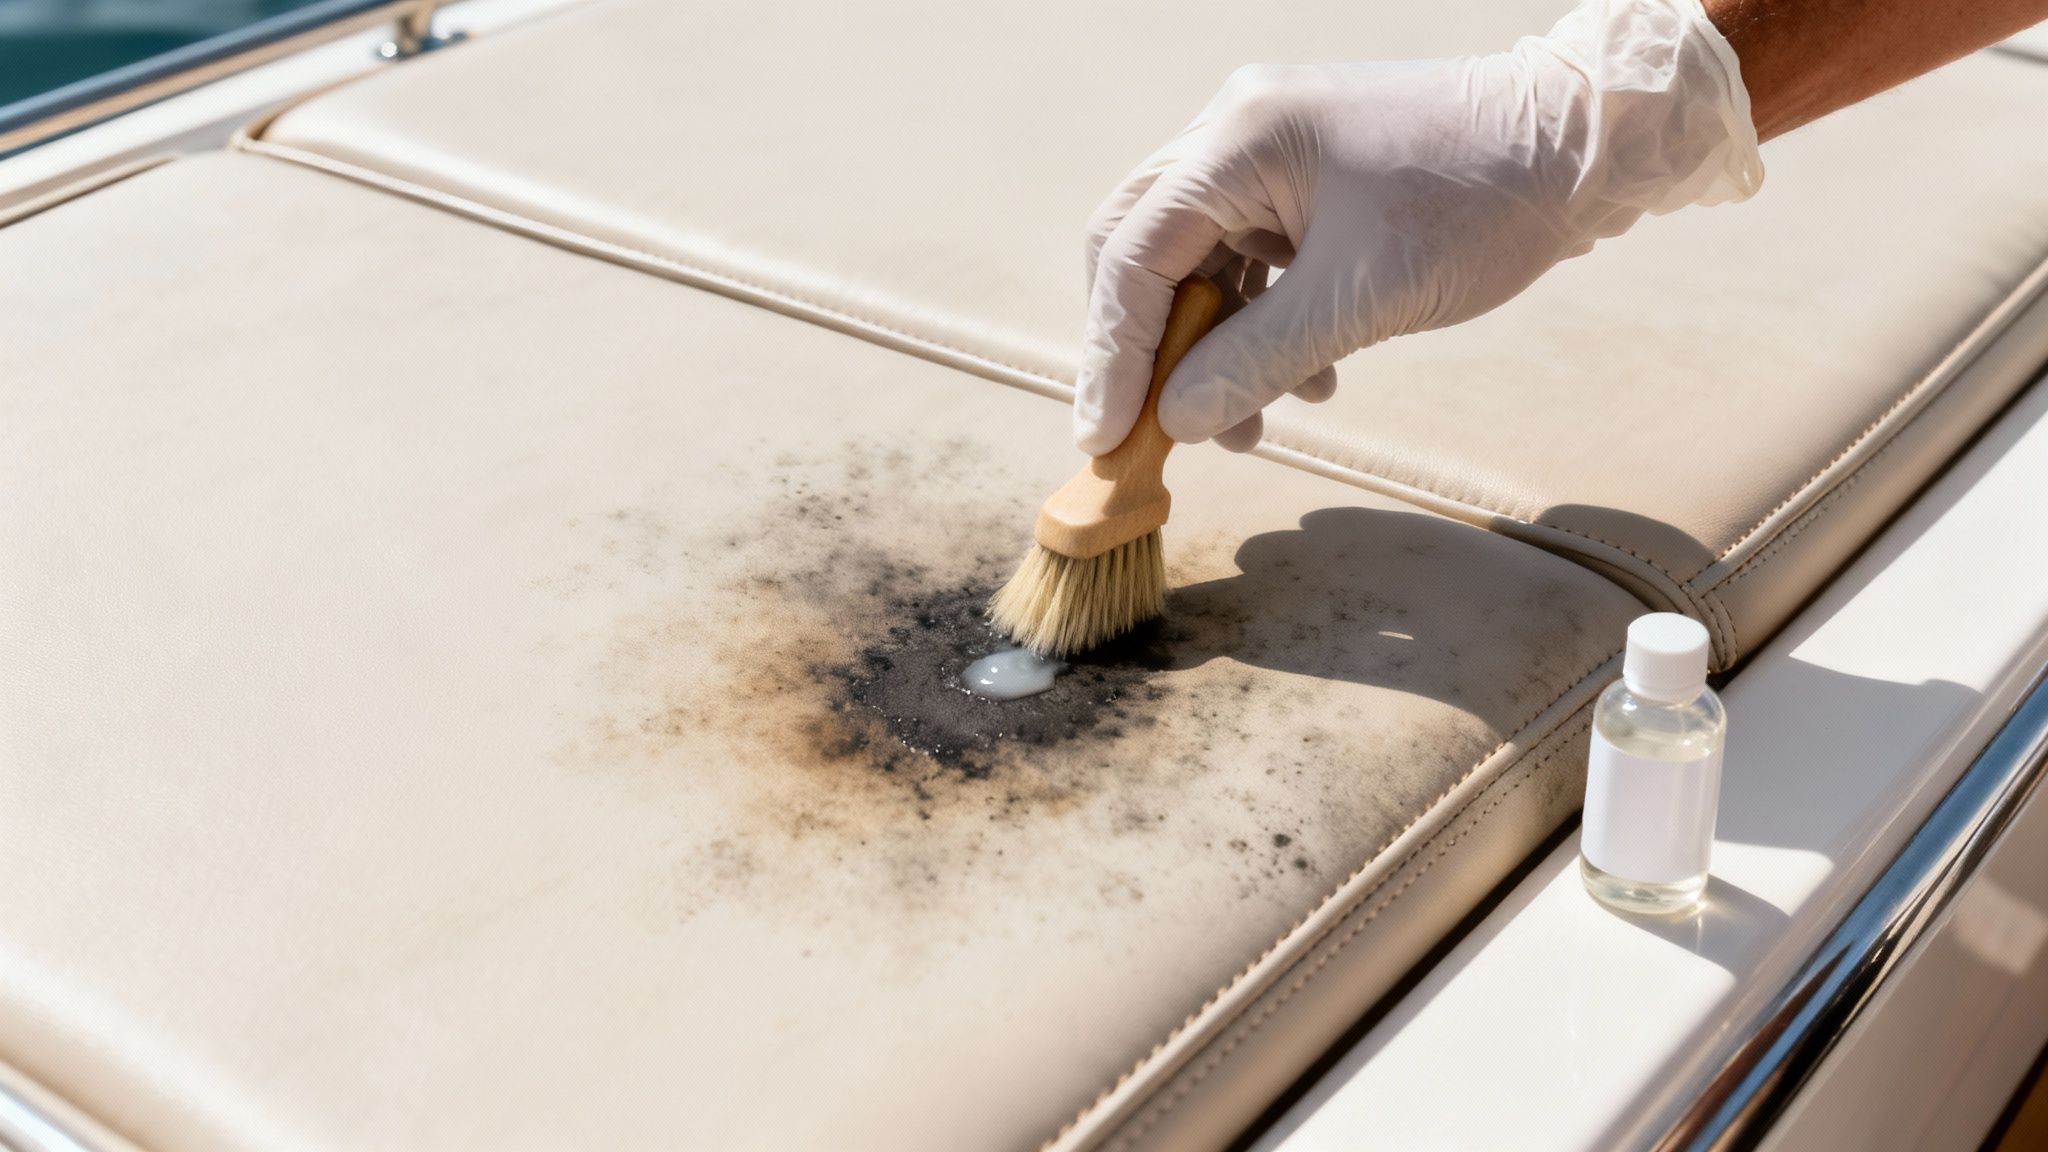
Let's be honest, mildew is enemy number one for marine vinyl. Those nasty black spots aren't just ugly; they're a living fungus that burrows deep into the material's pores, making them a real headache to get rid of. The trick is to hit it hard and fast with a product that actually kills the spores, not just bleaches the surface.
Our Better Boat Mildew Stain Remover is engineered for exactly this fight. It gets down into the vinyl to kill mildew at the root, lifting the stain without the harsh, damaging effects of chlorine bleach. A lot of people reach for bleach as a quick fix, but it's a huge mistake—it will yellow your vinyl over time and can even dissolve the thread in your seams, leading to a total blowout later on.
To put the remover to work, spray it directly onto the mildewed spots. Give it a few minutes to sit and let the formula do its thing. You should literally see the black spots starting to fade.
For a light dusting of mildew, a simple wipe-down with a microfiber cloth might be all it takes. But for those more stubborn, set-in stains, you’ll want to gently work the area with a soft-bristled brush. Use small, circular motions to help the cleaner get into the vinyl's texture and push the stain out.
Once the mildew is gone, give the area a thorough rinse with fresh water and dry it completely. A bone-dry surface is your best defense against mildew making a comeback.
Conquering Sunscreen and Oily Stains
You can't go without sunscreen on the water, but man, is it a nightmare for your seats. The oils and chemicals (especially avobenzone) can soak into the vinyl, leaving behind ugly yellowish-brown stains that look permanent. A greasy drip from a burger can do the same kind of damage.
The key to getting these oily messes out is to break them down chemically. Your go-to here should be our Better Boat All-Purpose Cleaner. Just spray it on the stain and let it sit for a minute or two. This gives it time to emulsify the oils and start lifting them from the surface.
Next, take your soft brush and give the area a gentle scrub. The goal is to lift the oil out of the vinyl, not grind it deeper in. After a light scrub, wipe it all down with a clean, damp microfiber cloth. For older stains that have had time to set, you might need to repeat the process.
Removing Ink and Dye Transfer
An accidental pen mark or some dye bleeding from a wet pair of shorts can leave a shockingly bright stain on your clean white vinyl. These are tough because ink, by design, is meant to be permanent. But if you act fast, you can often get them out completely.
For fresh ink stains, speed is critical. The very first thing you should do is blot the area with a dry cloth. Blot, don't rub! Rubbing will just smear it and make the problem bigger.
If you're dealing with a set-in ink mark, isopropyl (rubbing) alcohol is your best bet. Put a small amount on a clean white cloth or a cotton swab and gently dab at the stain. You'll see the ink start transferring from the seat to the cloth.
Keep dabbing with a fresh section of the cloth until the stain is gone. As soon as you're done, clean the spot with your all-purpose cleaner and rinse it with water to get rid of any alcohol residue.
Eradicating Rust Spots
Rust stains are another common headache, usually showing up after a forgotten snap, screw, or fishing hook was left sitting on a seat. These orange marks are from oxidized metal particles that have worked their way into the vinyl.
To get rid of them, you need a mild acid to dissolve the rust. A simple paste made from lemon juice and salt can actually do the trick. Apply the paste to the rust spot, let it sit for about an hour (out of direct sun), and then gently scrub it with a soft brush.
After scrubbing, rinse the spot completely with fresh water to neutralize the acid, and then wipe it dry. For stubborn spots, our Better Boat Boat Erasers can act like a rust magnet, lifting particles out of the vinyl’s pores. Always test on a hidden area first to be safe. For a deeper dive into these kinds of cleaning challenges, you can check out our guide on complete mildew removal for boat seats, as many of the principles for deep cleaning apply here, too.
Protect and Condition Your Vinyl for Longevity
After all that scrubbing and stain fighting, your boat seats are finally looking spotless. But your job isn't quite done yet. Cleaning is only half the battle; keeping that vinyl looking great for years to come is all about proactive protection. Think of it like waxing your hull—it’s the final, crucial step that shields all your hard work from the elements.
This conditioning stage is what stands between your pristine vinyl and the relentless assault of sun, salt, and moisture. Skipping it is like leaving a freshly painted masterpiece out in the rain.
Why Conditioning Is a Non-Negotiable Step
Marine vinyl is tough, but it’s not invincible. Its biggest enemy, hands down, is the sun. Day in and day out, the sun’s ultraviolet (UV) radiation breaks down the vinyl’s plasticizers—those are the compounds that keep it soft and flexible.
When you don't have a layer of protection, you're setting yourself up for a cascade of problems:
- Fading: The vibrant color of your seats will slowly bleach out, leaving them looking old and tired.
- Drying and Cracking: As the vinyl loses its flexibility, it becomes brittle. That's when you start seeing those ugly, and often irreparable, cracks appear.
- Increased Stain Absorption: A dry, unprotected surface is way more porous. This means future spills and stains can set in much deeper and faster.
Conditioning your seats right after you clean them restores essential moisture and lays down a protective barrier. You’re essentially giving your vinyl a shield against everything the marine environment throws at it.
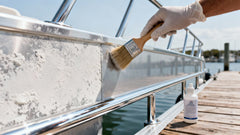
The Power of a Dedicated Vinyl Protectant
This is where a specialized product really makes a difference. A good cleaner removes grime, but a protectant is engineered to defend against future damage. Our Better Boat Vinyl Protectant does more than just add a temporary shine; it creates a durable, non-greasy layer that actively repels the things that destroy your upholstery.
It’s specifically formulated to block harmful UV rays, which is the single most important thing you can do to prevent long-term fading and cracking. On top of that, it helps repel water and creates a surface that’s less welcoming to mildew spores, giving you an extra line of defense.
It's really important to understand the different roles of cleaning and protecting products—they are two sides of the same coin for proper vinyl care.
Vinyl Cleaner vs. Vinyl Protectant
| Feature | Better Boat All-Purpose Cleaner | Better Boat Vinyl Protectant |
|---|---|---|
| Primary Function | Removes existing dirt, grime, and stains | Prevents future damage and stains |
| Key Action | Breaks down and lifts contaminants | Creates a protective barrier against elements |
| UV Protection | No | Yes, blocks harmful UV radiation |
| Surface Finish | Leaves a clean, neutral surface | Restores a rich, non-greasy shine |
| When to Use | During routine and deep cleaning | After every cleaning and before storage |
Grasping this difference is key. Cleaning without protecting is an incomplete job that leaves your vinyl vulnerable the moment you finish wiping it down.
Proper Application for Maximum Protection
Applying a vinyl protectant is easy, but doing it right ensures you get even coverage and results that actually last.
Always start with a completely clean and, most importantly, bone-dry surface. If you apply protectant to damp vinyl, you'll trap moisture underneath, which can ironically encourage mildew to grow.
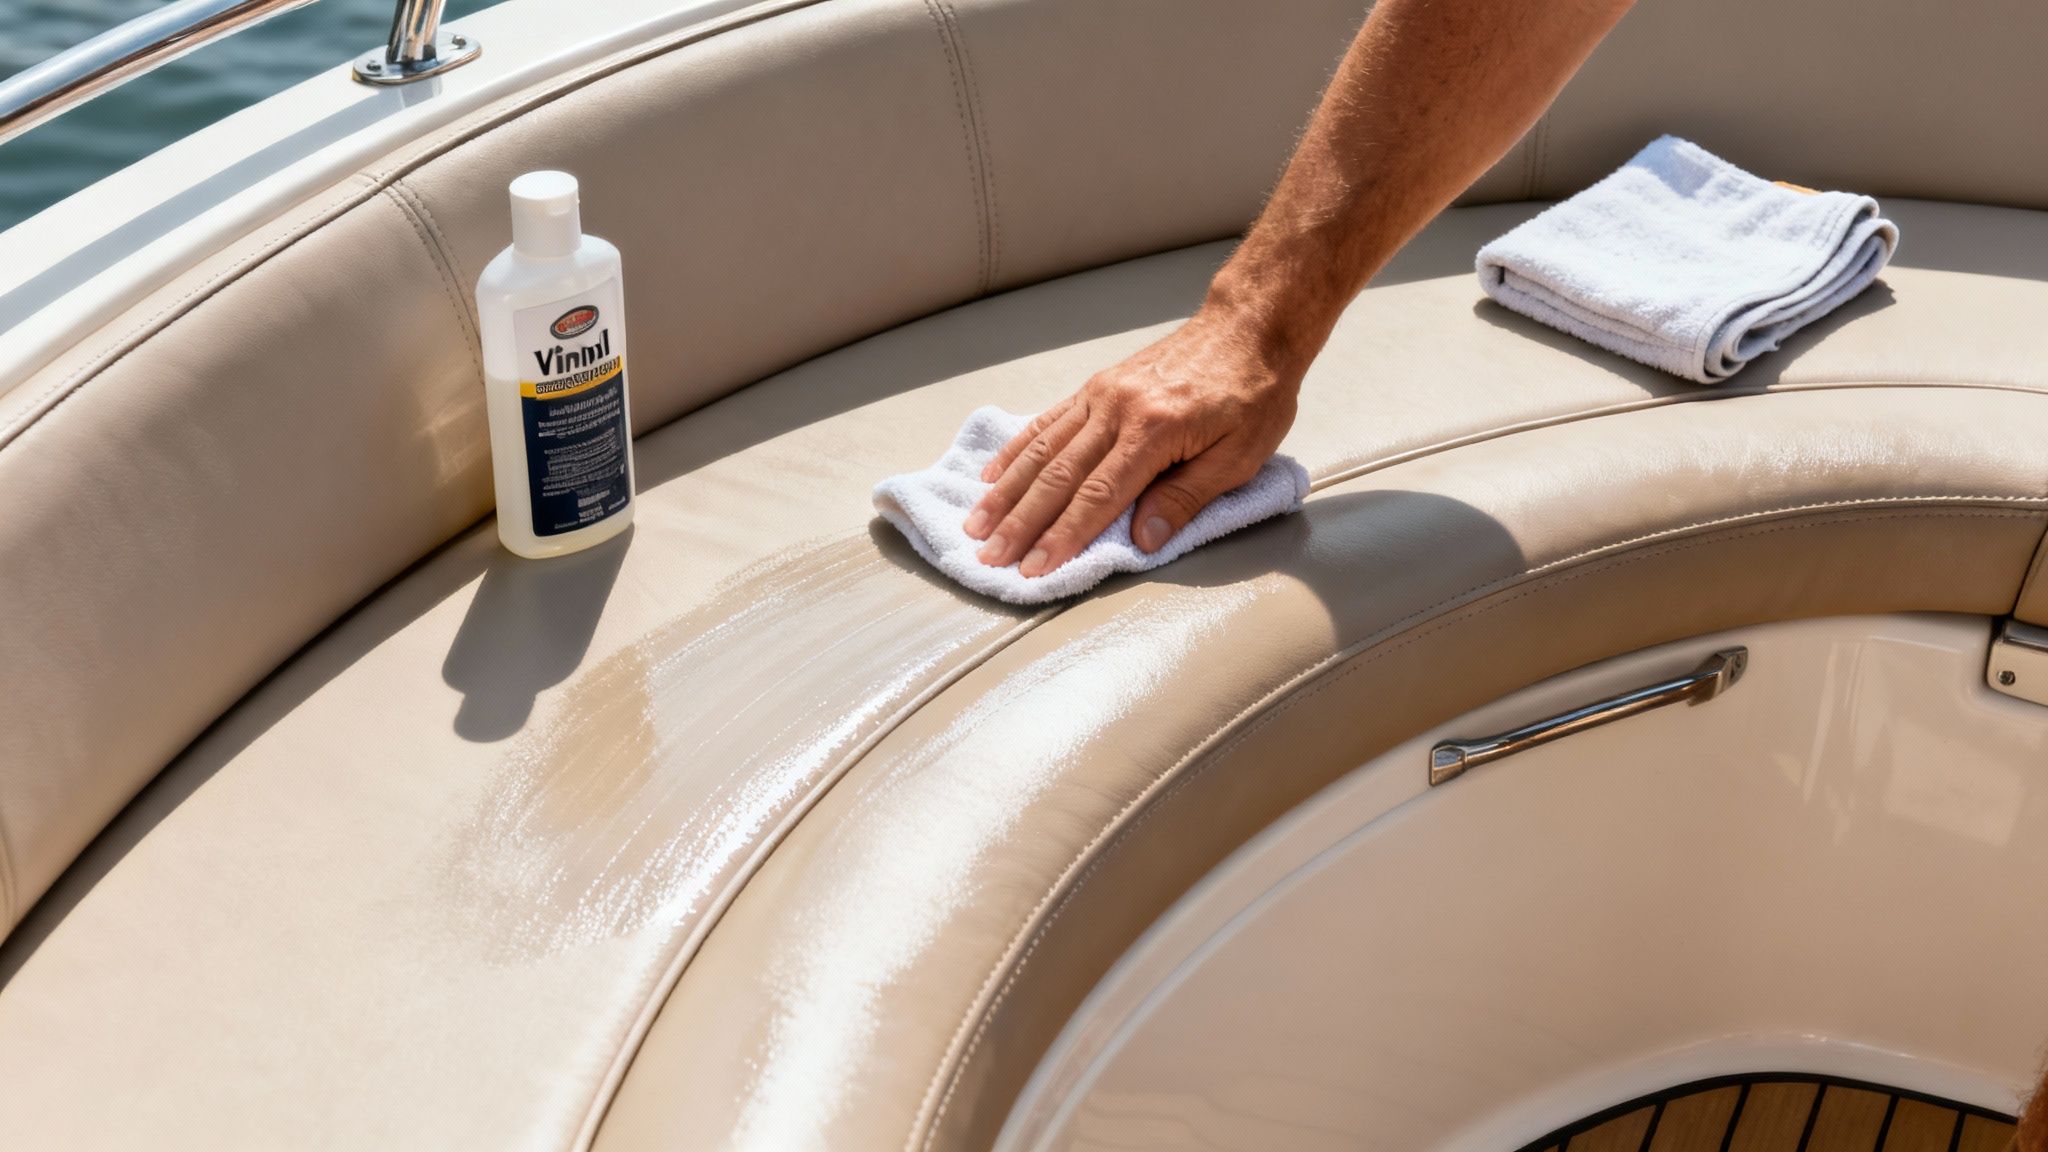
Lightly mist the Better Boat Vinyl Protectant directly onto a small section of the seat. You can also spray it onto a clean microfiber applicator or towel. A little goes a long way here; you're aiming for a thin, even coat, not a soaked surface.
Gently wipe the product into the vinyl using overlapping circular motions. This helps work the conditioner into the material’s grain for deeper protection. Once you're done applying, grab a second, dry microfiber towel and give the area a final buff. This removes any excess product and reveals a uniform, rich finish without any greasy feeling.
The real value of protection becomes clear over time. Data from upholstery care experts shows that vinyl can lose over 50% of its color intensity in just three seasons in high-sun areas if left unprotected. Consistent application of a protectant not only prevents this fading but also extends the vinyl's life by stopping micro-cracks before they start, which is a massive cost-saver when you consider that annual boat maintenance can run 10-15% of the boat's total value.
For an in-depth look at how different products work, our article on choosing the right marine vinyl cleaner offers additional context on what makes marine-grade formulas so effective.
Building a Smart Maintenance Routine
Giving your boat's vinyl seats a deep clean is a great way to hit the reset button. But the real secret to keeping them looking showroom-new, year after year? It’s not about one single, intense scrubbing session. The magic is in the routine.
Building a simple, consistent maintenance habit is what separates a boat that looks its age from one that still turns heads at the dock. This is how you stop major issues like mildew and cracking before they even get a foothold. A little proactive care now saves you hours of back-breaking labor down the road.
Your Post-Trip Ritual
The most powerful habit you can form kicks in the second you tie up after a day on the water. This is your golden opportunity to knock out the biggest culprits of vinyl damage before they have time to cause real trouble.
Make this quick checklist a non-negotiable part of wrapping up your day:
- Wipe Down Every Seat: Grab a clean, damp microfiber towel and give all your vinyl a once-over. This simple act gets rid of fresh salt spray, sunscreen lotions, and body oils. Salt, especially, acts like fine-grit sandpaper on your vinyl's finish if you let it sit.
- Attack Spills on Sight: Did someone spill a drink or drop some food? Deal with it immediately. A quick wipe is usually all it takes to handle a fresh spill, preventing a minor drip from becoming a weekend-ruining stain.
- Dry, Dry, Dry: Before you even think about throwing the cover on, take a dry microfiber towel and wipe away any lingering moisture. Pay extra attention to the seams and crevices where water loves to pool.
This whole process should take five or ten minutes, tops. But honestly, it's probably the most important maintenance you'll ever do. It’s a small investment of time that pays off big in the long-term health and look of your boat's interior.
The Critical Role of Proper Storage
How you store your boat—both between trips and during the off-season—has a huge impact on your vinyl. Your mission is simple: shield it from the elements while stopping trapped moisture in its tracks.
Your boat cover is your first line of defense here, but not all covers are created equal. Stay far away from cheap, non-breathable plastic tarps. Sure, they keep the rain out, but they also trap every bit of humidity and condensation, basically turning your boat into a five-star resort for mold and mildew.
A high-quality, breathable marine fabric cover is one of the smartest investments you can make for your boat. It blocks damaging UV rays and repels water while still allowing air to circulate, letting any sneaky moisture evaporate. This single piece of gear is your best friend in the fight against mildew.
Building a Seasonal Schedule
Beyond the daily wipe-downs, having a simple seasonal schedule ensures nothing falls through the cracks. It's your roadmap to keeping your vinyl in prime condition all year long.
- Monthly Deep Clean: During boating season, set a reminder to do a more thorough cleaning once a month with your Better Boat All-Purpose Cleaner.
- Bi-Monthly Protection: Reapply a fresh coat of Better Boat Vinyl Protectant every 6-8 weeks. If your boat lives in a high-sun area like Florida or Arizona, you might want to do it more often to keep that UV barrier strong.
- Pre-Storage Conditioning: Before you put the boat away for the winter, do one last deep clean and then apply a generous layer of vinyl protectant. This gives the seats a fighting chance against the temperature swings and downtime of the off-season.
By making these simple habits part of your boating life, you move from constantly reacting to stains to proactively preserving your investment. For a bird's-eye view of how this fits into your overall upkeep, our complete boat maintenance checklist is the perfect guide for year-round care.
Got Questions About Cleaning Your Boat's Vinyl? We've Got Answers.
Even when you have a solid game plan, you're bound to run into a few head-scratchers. When it comes to knowing the right way to clean boat vinyl seats, getting quick and clear answers can save you a ton of time, money, and frustration down the road. Let's dig into some of the most common questions we hear from boaters.
These are the kind of real-world problems that pop up at the dock, and getting them right is the key to making your boat's interior last.
Can I Just Use Household Cleaners on My Boat Seats?
It's so tempting to reach for that familiar spray bottle under the kitchen sink, but trust me, this is one of the biggest mistakes you can make. You need to avoid bleach, ammonia-based cleaners, and other harsh household chemicals at all costs. Bleach, for instance, will chemically eat away at your vinyl's protective topcoat, severely weaken the thread in your stitching, and cause permanent yellowing over time. It's just not worth it.
What about something like a Magic Eraser? While it might seem like a good idea for a stubborn scuff mark, it should only ever be a last-resort option. It's a micro-abrasive—basically, super-fine sandpaper. Using it over large areas will strip the vinyl's finish, dulling its shine and creating tiny scratches that just end up attracting more dirt.
The best and safest bet is always a pH-balanced cleaner made specifically for marine environments. A product like our Better Boat All-Purpose Cleaner is built to cut through salt, sunscreen, and grime without stripping away the essential plasticizers that keep your vinyl soft and prevent it from cracking.
How Often Should I Slap on a UV Protectant?
The real answer here boils down to one simple factor: sun exposure. The sun is your vinyl's number one enemy, and a good UV protectant is its only line of defense.
- High-Sun Regions: If your boat lives in a sunny spot like Florida or Arizona, or if it's stored without a cover, you'll want to apply a quality marine UV protectant every 3-5 weeks during the peak season.
- Moderate Climates or Covered Boats: For those in less intense climates or who are diligent about using a boat cover, reapplying every 1-2 months should do the trick.
A great rule of thumb is to reapply the protectant when you see that water no longer beads up on the vinyl surface. The key is consistency. A regular coat of Better Boat Vinyl Protectant is the absolute best way to fight off long-term fading and cracking.
What's the Secret to Preventing Mildew?
Honestly, preventing mildew is a thousand times easier than trying to remove it later, and it all comes down to controlling moisture. If you want to stop mildew before it even thinks about starting, you have to make your vinyl a terrible place for its spores to live.
The single most important thing you can do is make sure your seats are bone dry before putting the boat cover on. After a cleaning, a rainstorm, or even just a heavy dew, take a few extra minutes to wipe everything down with a dry microfiber towel.
Using a high-quality, breathable boat cover instead of a cheap plastic tarp is also a game-changer. A breathable fabric lets air circulate, allowing trapped moisture and condensation to escape. A plastic tarp, on the other hand, just creates a humid, stagnant greenhouse—the perfect breeding ground for mildew.
Finally, regularly applying a vinyl protectant that contains mildew inhibitors creates a physical barrier on the surface. This makes it much harder for mildew spores to get a foothold in the first place, giving you a complete defensive strategy.
At Better Boat, our whole mission is to make boat care simple and effective. Grab the right products and keep your vinyl seats looking like new for years of adventures to come.
Related Posts
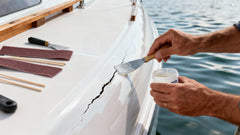
A DIY Guide to Flawless Boat Repair Epoxy
Your Guide to Choosing the Best Aluminum Corrosion Cleaner for Your Boat