


Painting With Gel Coat A Pro's Guide To Flawless Boat Finishes
When people talk about "painting with gel coat," it's easy to picture a simple cosmetic touch-up. But that's not really what's happening. Applying gelcoat is a completely different process, and honestly, it’s far superior for a fiberglass boat.
You're not just adding a coat of color; you're laying down a thick, protective, and structural layer. It’s less like painting and more like restoring your boat's original armor.
Why Gelcoat Is Your Boat's Ultimate Armor
A lot of boat owners ask why they should go through the trouble of using gelcoat instead of a high-quality marine paint. It's a fair question. While paint just sits on top of a surface, gelcoat is a polyester resin that actually forms a chemical bond with the fiberglass. It becomes a true, integral part of the hull.
This process creates a much tougher, more durable finish that has been the gold standard in the marine industry for decades, and for good reason. This integrated shield gives your boat a level of resilience that marine paints just can't compete with. It’s built to take a beating from the harsh marine environment, day in and day out.
Unmatched Durability and Protection
The biggest advantage of gelcoat is its incredible hardness and resistance to abrasion. Just think about the daily abuse your boat endures—the inevitable docking bumps, run-ins with floating debris, and the constant chafe from lines and fenders. Gelcoat is engineered to absorb these impacts far better than paint, which can easily chip or scratch, leaving your fiberglass exposed to water.
On top of that, gelcoat offers top-tier protection from the elements. Its dense molecular structure makes it a beast against:
- UV Degradation: It’s packed with UV inhibitors that stop the sun's rays from breaking down the fiberglass laminate. This is what prevents that chalky, faded look you see on older, oxidized hulls.
- Saltwater and Chemicals: Its non-porous surface is a powerful barrier against saltwater corrosion and the common boat-cleaning chemicals that can eat away at lesser finishes.
- Osmotic Blistering: By creating a truly waterproof layer, a properly applied gelcoat finish is your number one defense against water seeping into the fiberglass and causing those dreaded blisters.
A well-maintained gelcoat finish does more than just look good; it actively preserves the structural integrity of your boat's hull, protecting your long-term investment.
Boosting Resale Value and Aesthetics
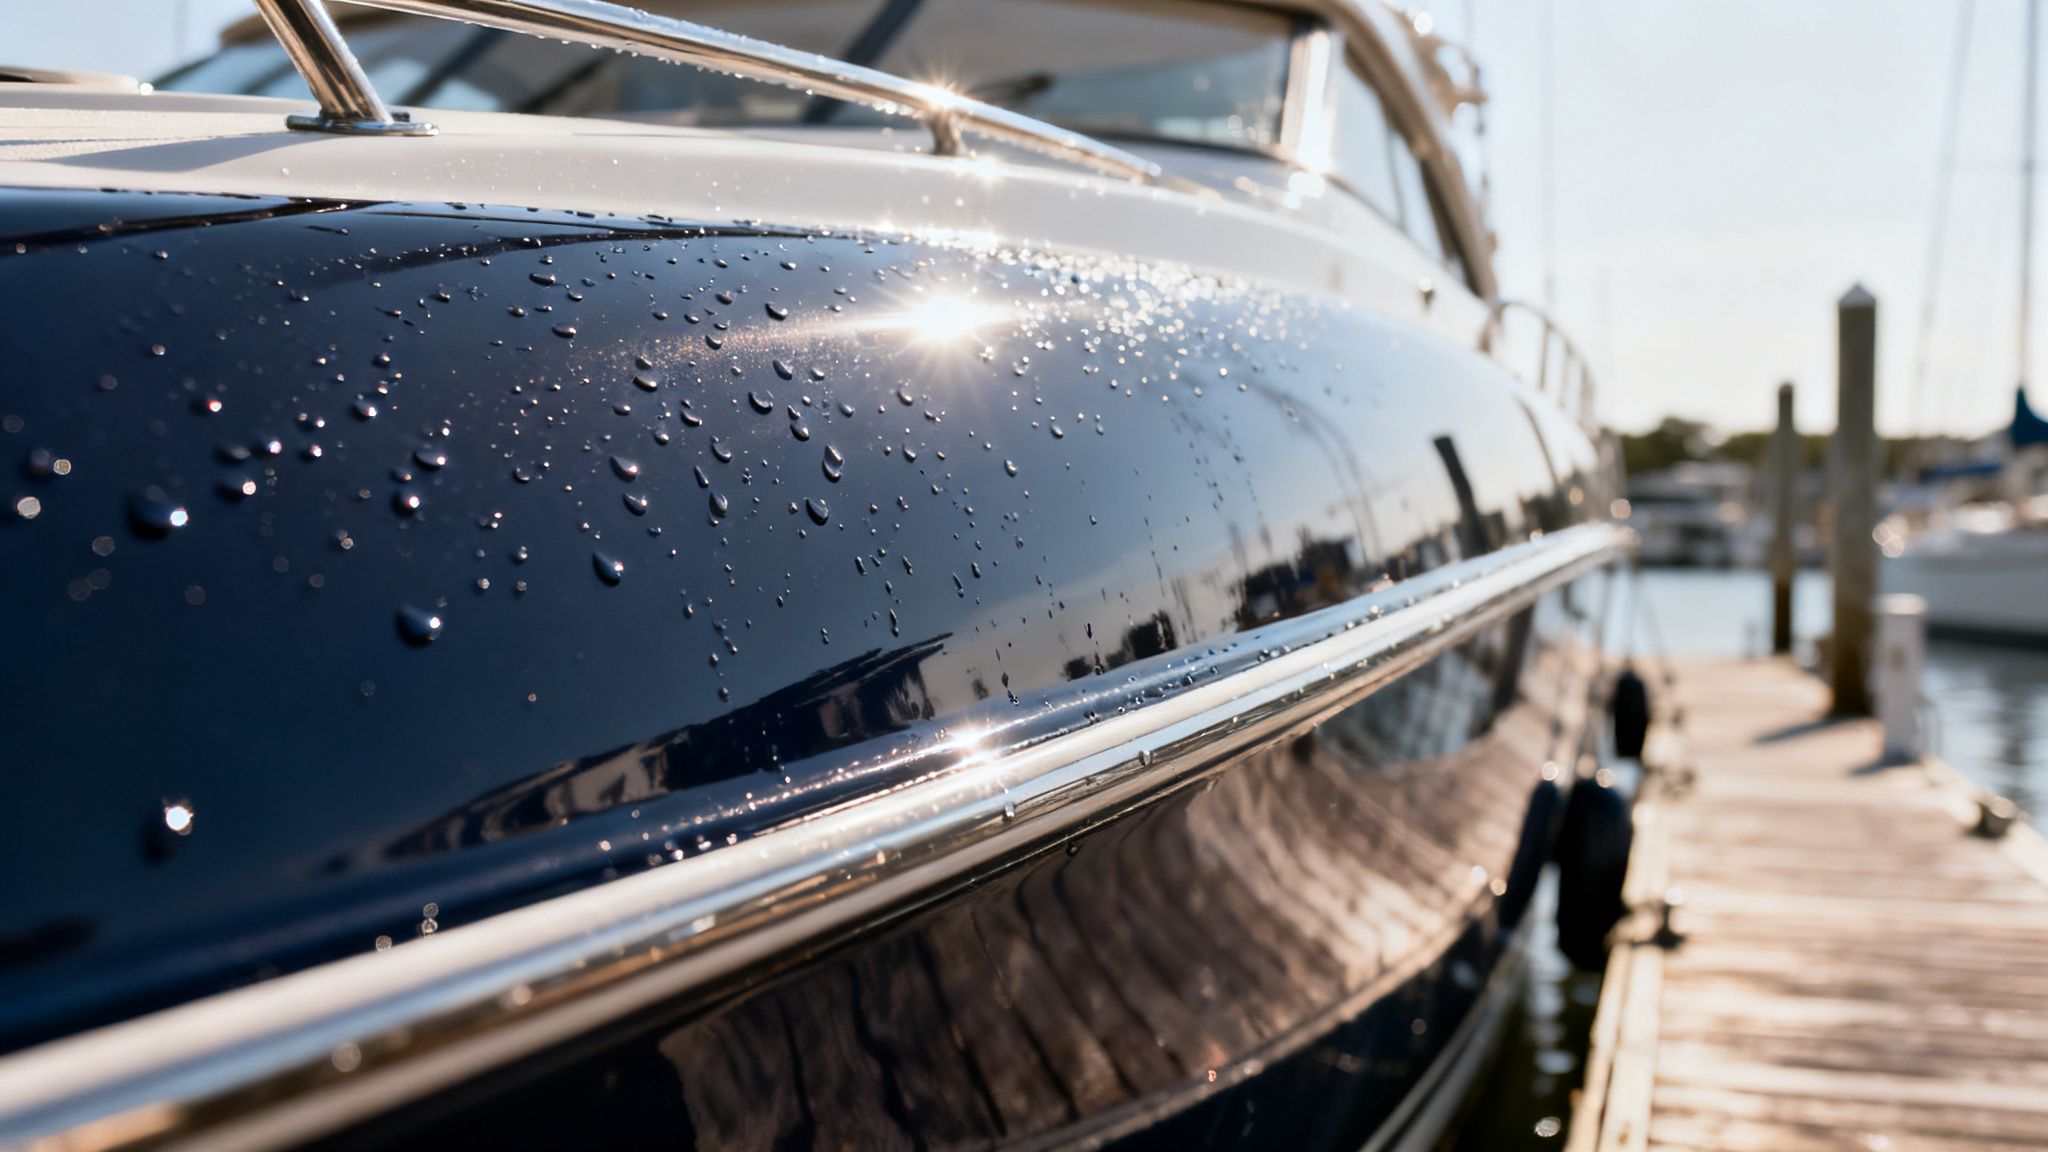
Let's be honest, a boat with a vibrant, glossy gelcoat finish just pops at the dock. It also holds its value significantly better over time. A chalky, faded, or cracked hull is one of the first red flags for a potential buyer, screaming neglect and hinting at potential underlying problems.
Restoring your boat's gelcoat is one of the most effective things you can do to boost its market appeal and asking price. You can get a deeper look into its makeup and advantages by checking out our guide that explains what gelcoat on a boat is and why it's so critical.
The whole point of this guide is to show you how, with the right techniques and a bit of patience, you can get a professional-grade finish yourself. This isn’t a quick patch job. It’s about restoring the protective armor that will keep your vessel safe and looking its absolute best for years to come.
Assembling Your Gelcoat Project Toolkit
Walking into a gelcoat project with the right gear makes all the difference. Anyone who's done this knows that being prepared is what separates a frustrating mess from a flawless, professional-grade finish. Think of it as setting up your workshop for success before the first can is even opened.
This isn't your average paint job where a single brush and pan will cut it. A proper gelcoat application demands specific tools for prepping the surface, applying the material, and—most importantly—keeping yourself safe. Let’s break down exactly what you’ll need to have on hand.
Essentials For Surface Preparation
The foundation of any durable finish is a perfectly clean and prepped surface. I can't stress this enough: any leftover wax, grime, or moisture will wreck the bond, leading to peeling and failure down the road. You simply cannot cut corners here.
To start, you need a serious cleaning solution. A high-quality degreasing soap is a must for stripping away years of built-up wax and oils. Our Better Boat Boat Soap is formulated to cut through that tough marine grime without harming your boat's surfaces, making it the perfect first step. If you've got stubborn dark spots, especially in non-skid areas, our Mildew Stain Remover can get the surface back to a pristine state.
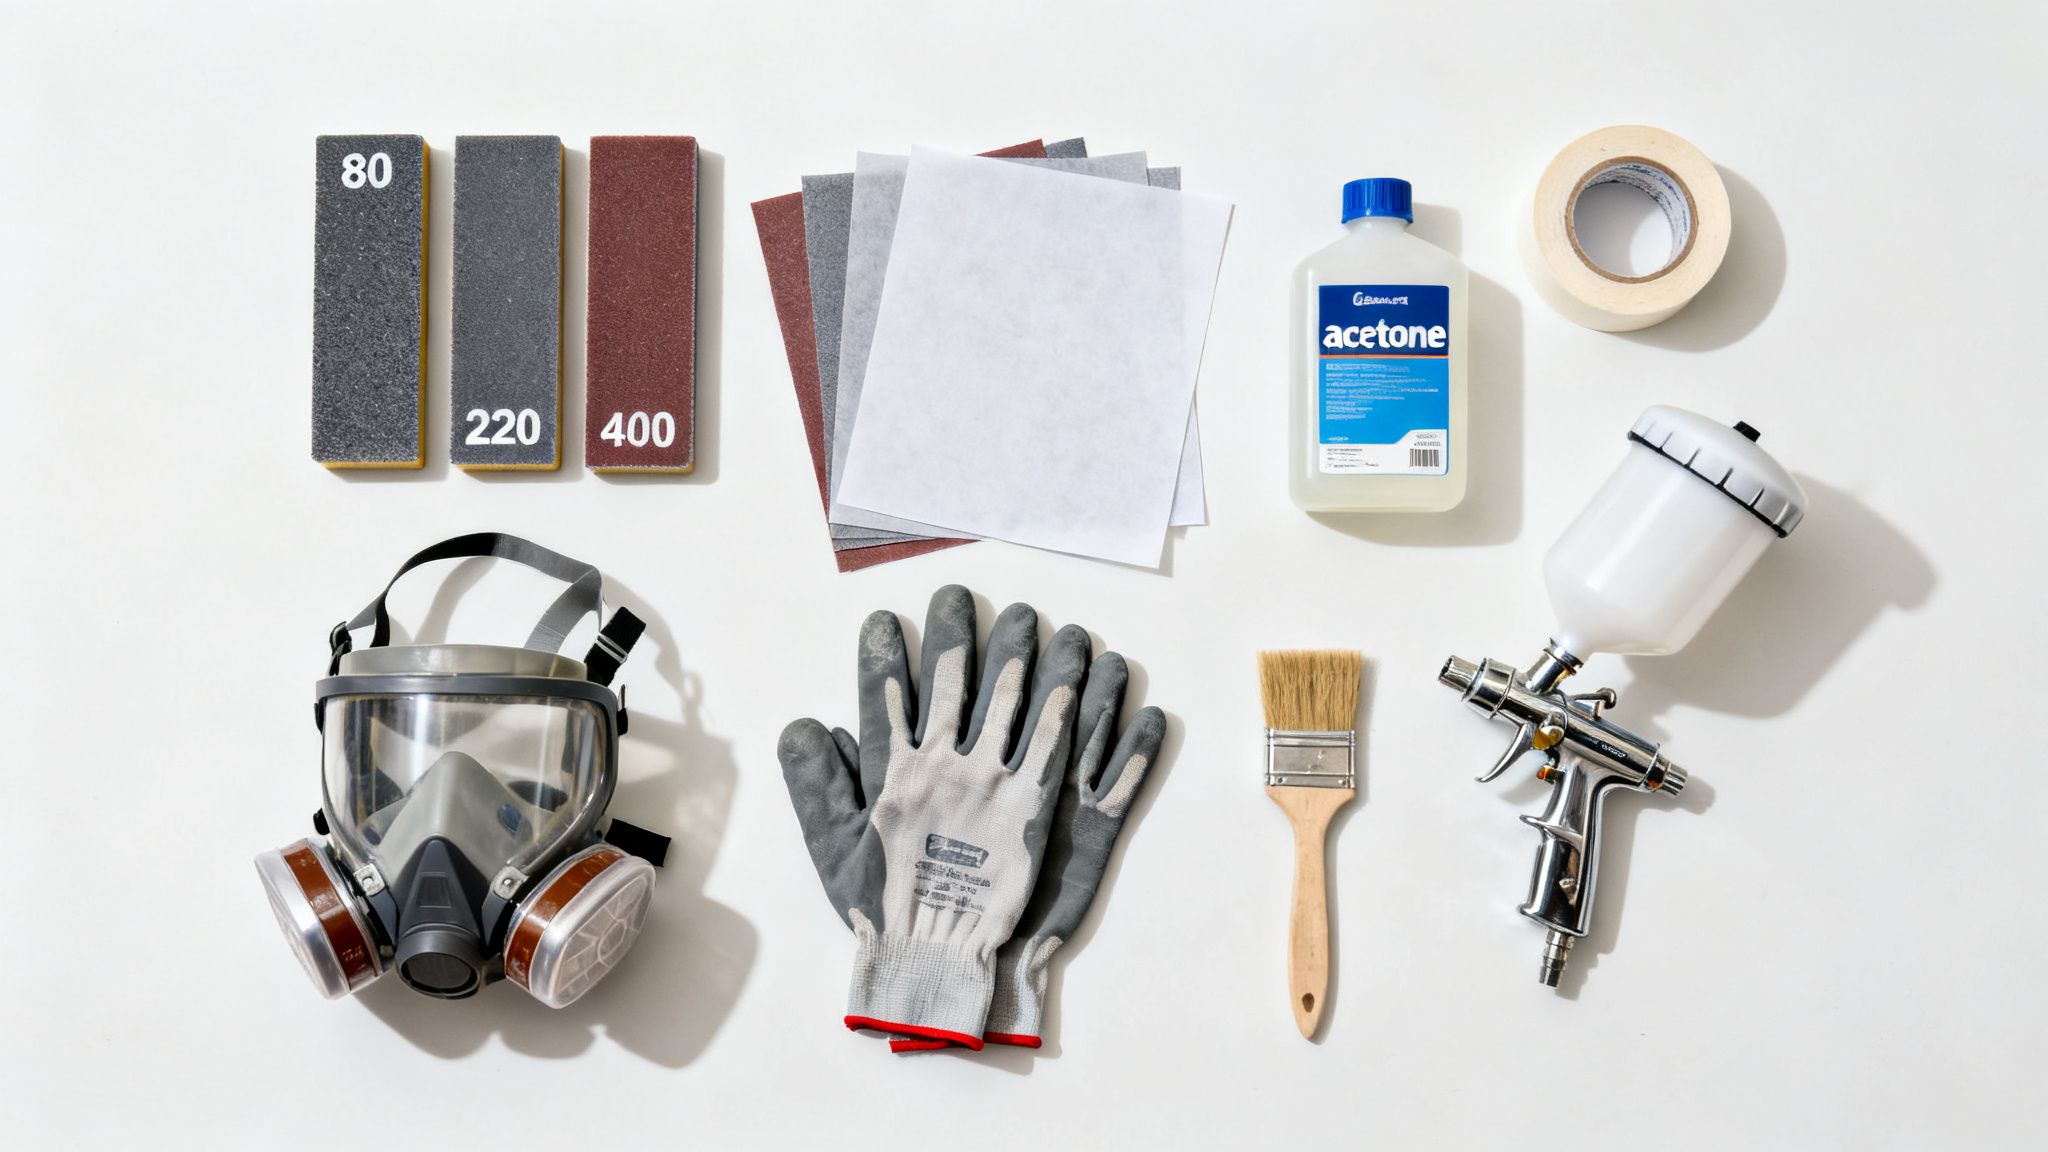
Beyond just cleaning, your prep toolkit absolutely needs:
- Sandpaper: Don't skimp here; get a variety of grits. You’ll want coarse stuff like 80-grit for grinding out old, damaged gelcoat and finer grits like 220-grit to create that final "tooth" for the new layer to really grip onto.
- Acetone or Solvent: This is non-negotiable for the final wipe-down. It gets rid of all the sanding dust and any other lingering contaminants.
- High-Quality Masking Tape: Use a premium painter's tape to get those clean, sharp lines and protect any areas you don't want to coat.
- Clean Rags: You'll go through a ton of these. Make sure they’re lint-free for cleaning and applying solvents.
Tools For Application
How you put the gelcoat on depends on the size of your project and the finish you're after. The demand for reliable marine protection is huge; in fact, the marine sector took a whopping 40% of the global gelcoat market in 2023, pushing the industry to a value of USD 1.35 billion. This just goes to show how critical a proper application is for boat owners everywhere. You can learn more about the growing gelcoat market on gminsights.com.
Pro Tip: For small repairs or tight spots, a high-quality, solvent-resistant natural bristle brush is your best friend. Synthetic bristles can actually dissolve in the gelcoat's chemicals, creating a mess you don't want to deal with.
For larger areas, you've got a few options, each with its own pros and cons. Choosing the right one is key to getting the results you want without pulling your hair out.
Choosing Your Gelcoat Application Method
Deciding whether to brush, roll, or spray your gelcoat can feel like a big decision. Each method has its place, depending on your project scope, budget, and how perfect you need that final finish to be. This table breaks down the key differences to help you make the right call.
| Method | Best For | Skill Level | Finish Quality | Cost |
|---|---|---|---|---|
| Brushing | Small repairs, touch-ups, tight corners, and detailed work. | Beginner | Fair to Good (Brush strokes likely) | Low |
| Rolling | Medium to large flat surfaces like decks or cabin tops. | Beginner to Intermediate | Good (Often leaves an "orange peel" texture) | Low to Medium |
| Spraying | Full hull restorations and large, smooth surfaces. | Intermediate to Advanced | Excellent (Smoothest, most professional finish) | High |
Ultimately, a small chip repair is perfect for a brush, while a full hull repaint almost demands a spray gun for a factory-like finish. Don't be afraid to combine methods, either—you might spray the large panels and use a brush for the hard-to-reach spots.
Non-Negotiable Safety Gear
Let's be clear: gelcoat involves chemicals that produce harmful fumes and can seriously irritate your skin. Your safety is paramount, so this part of your toolkit is absolutely mandatory. There are no shortcuts or substitutes when it comes to personal protective equipment (PPE).
Your essential safety checklist must include:
- Respirator: A simple dust mask is not enough. You need a dual-cartridge respirator rated for organic vapors to protect your lungs from dangerous styrene fumes.
- Chemical-Resistant Gloves: Nitrile or butyl gloves will keep the gelcoat and catalyst off your hands.
- Safety Goggles: Protect your eyes from accidental splashes, which are common when you're mixing or spraying.
- Coveralls: A disposable suit will keep the sticky resin off your skin and clothes, making cleanup a whole lot easier.
Having every single one of these items ready before you start means you can work efficiently, safely, and with the confidence you need to achieve that perfect, durable shine.
The Art of Flawless Surface Preparation
Talk to any seasoned boat owner, and they'll tell you the same thing: a jaw-dropping gelcoat finish is earned long before you ever crack open a can of resin. The hard truth is, 90% of your final result hinges on the painstaking, sometimes tedious, prep work you put in beforehand. It's the foundation for everything that follows. Skimp on this step, and even the slickest application technique in the world won't save you from a finish that fails.
Think of it like this: your new gelcoat needs a perfectly clean, stable, and slightly rough surface to grab onto and form a permanent chemical bond. Any bit of leftover wax, oil, moisture, or dust creates a barrier, stopping that bond from ever happening. That's why proper prep isn't just a suggestion—it's the most critical part of the entire job.
The Initial Deep Clean and Degreasing
First things first, you have to go to war with every last trace of wax, grime, and whatever else has decided to call your hull home. This isn't a job for your average household soap. You need something with a bit more muscle, designed to strip away those tough contaminants without harming the fiberglass underneath.
Kick things off with a heavy-duty wash using a high-quality degreaser. A dedicated product like our Better Boat Boat Soap is formulated specifically to slice through the stubborn waxes and oils you find in a marine environment. The two-bucket method is your best friend here—one for soapy water, one for rinsing your wash mitt. This keeps you from just dragging the same dirt all over the hull.
Don’t be fooled by a surface that looks clean. Old wax and polish can be invisible, but they are the number one enemy of gelcoat adhesion. Be relentless in this first cleaning step.
Once you've washed and rinsed everything down, let the surface dry completely. Now it's time for a final wipe-down with a strong solvent. Acetone is the industry standard for a good reason. It flashes off quickly, taking any lingering residue with it and leaving you with a surgically clean surface that's ready for the next phase.
Sanding for Mechanical Adhesion
Now that the surface is stripped bare, it’s time to give it some "tooth." We need to create a mechanical key that the new gelcoat can physically lock into, and we do that by sanding. The goal here is twofold: remove any old, oxidized gelcoat and create a uniform, slightly coarse texture across the entire work area.
The secret is working your way through the sandpaper grits logically. Don't just jump to a fine grit; it won't have enough bite to cut through that tough, weathered outer layer.
- Stripping and Leveling: Start with a coarse 80-grit paper. Use a dual-action (DA) sander for the big, open areas and a sanding block for tighter spots. This will make short work of the chalky, faded layer and help level out minor imperfections.
- Refining the Surface: Once you're done with the initial pass, switch to 120-grit to smooth out the deeper scratches the 80-grit left behind. Make sure to keep your sander moving in a consistent pattern to avoid gouging the surface.
- Final Keying: Finish up your sanding prep with 220-grit. This is the sweet spot—fine enough to knock down any heavy scratches but coarse enough to leave that perfect texture for the new gelcoat to grip onto.
Following this progression ensures you get a uniform surface profile, which is absolutely essential for a mirror-smooth final finish.
Addressing Deeper Damage and Flaws
As you're sanding, you'll probably uncover some bigger issues—deep gouges, chips, or spider cracks that sanding alone won't solve. It is critical to stop and fix these now. Just slathering new gelcoat over an unstable crack or a deep void is a recipe for disaster; the flaw will just telegraph right through to your new finish.
For deep gouges or spots where the fiberglass is exposed, you'll need a high-strength filler. A product like our Epoxy Sealant is ideal for this job. It creates a waterproof, rock-solid repair that bonds permanently with the existing fiberglass.
Mix the epoxy as directed, overfill the damaged spot slightly, and let it fully cure. Once it's hard, sand it flush with the surrounding area, using the same 80-120-220 grit progression. For a deeper dive into these kinds of fixes, check out our pro's guide to boat gelcoat repair.
I can't overstate how important this prep work is. For DIYers and pros alike, painting with gelcoat restores an incredible 90% gloss retention even after five years, compared to just 50% for standard paints, effectively cutting repaint frequency in half. But that longevity is 100% dependent on adhesion, and poor prep is the culprit in roughly 60% of all application failures. You can explore more about the long-term benefits of gelcoat finishes on sphericalinsights.com.
The Final Wipe and Masking
You're in the home stretch of prep. After all the sanding and repairs, the surface will be coated in a fine layer of dust. This dust is just another contaminant that has to go.
Grab some clean, lint-free rags for one last, thorough wipe-down with acetone. The best way to do this is the "wipe-on, wipe-off" method: use one rag to apply the acetone and a second, clean rag to immediately wipe it dry. This actually lifts the dust off the surface instead of just smearing it around.
Finally, with a perfectly clean and keyed surface, it's time to mask everything off. Use a high-quality automotive painter's tape to get sharp, clean lines around hardware, rub rails, or any other areas you need to protect. Be patient here. A clean tape line makes a world of difference in how professional your finished project looks.
Mastering Gelcoat Mixing and Application
With a perfectly prepped surface, you're ready for what I consider the most critical part of the job. This is where the magic happens, turning liquid resin into that tough, glossy shell your boat deserves. Getting the mix right and laying it down smoothly is what separates a professional, durable finish from a sticky, frustrating disaster.
Gelcoat is a two-part system that needs a chemical kickstart to harden, or cure. You have your main component—the pigmented polyester resin—which will stay liquid forever on its own. The secret ingredient that kicks off the whole process is the catalyst, almost always Methyl Ethyl Ketone Peroxide (MEKP).
Understanding The Catalyst and Mixing Ratios
When you add MEKP, you're starting a chemical chain reaction. This reaction generates heat (it's called an exothermic reaction) and causes the gelcoat to solidify into a hard plastic. The amount of catalyst you add is absolutely crucial and depends almost entirely on two things: temperature and humidity.
These two factors dictate your "pot life"—how much time you have to work before that perfectly mixed gelcoat in your cup turns into a useless lump of jelly. It's a real balancing act.
- Too much catalyst on a hot day will make the gelcoat "kick" way too fast. You'll end up with a wrinkled mess before you can even get it on the surface.
- Too little catalyst on a cold, damp day might mean the gelcoat never fully cures, leaving it tacky forever. No amount of waiting will fix it.
As a starting point, most manufacturers suggest a catalyst ratio of 1% to 2% by volume. So, for every 100ml of gelcoat, you'd add between 1ml and 2ml of MEKP. Always read the can, but be ready to tweak the formula based on the conditions in your shop.
I see this all the time: people "eyeballing" the catalyst. Don't do it. Precision is your best friend here. Use dedicated measuring cups or marked syringes to nail your ratios. Even a small miscalculation can ruin the whole batch.
Choosing Your Application Method
As we touched on, your main choices are brushing, rolling, or spraying. The technique is what truly counts at this stage. And this isn't just a backyard hobby; the marine industry is huge. In 2023, North America alone accounted for 31.52% of the global gelcoat market, a slice valued at around USD 1.38 billion. That scale shows just how important it is to get the application right. You can read more about the gelcoat market on grandviewresearch.com.
No matter how you apply it, remember that success starts long before you mix the first cup. This process flow chart is a great reminder of the foundation you need to build.
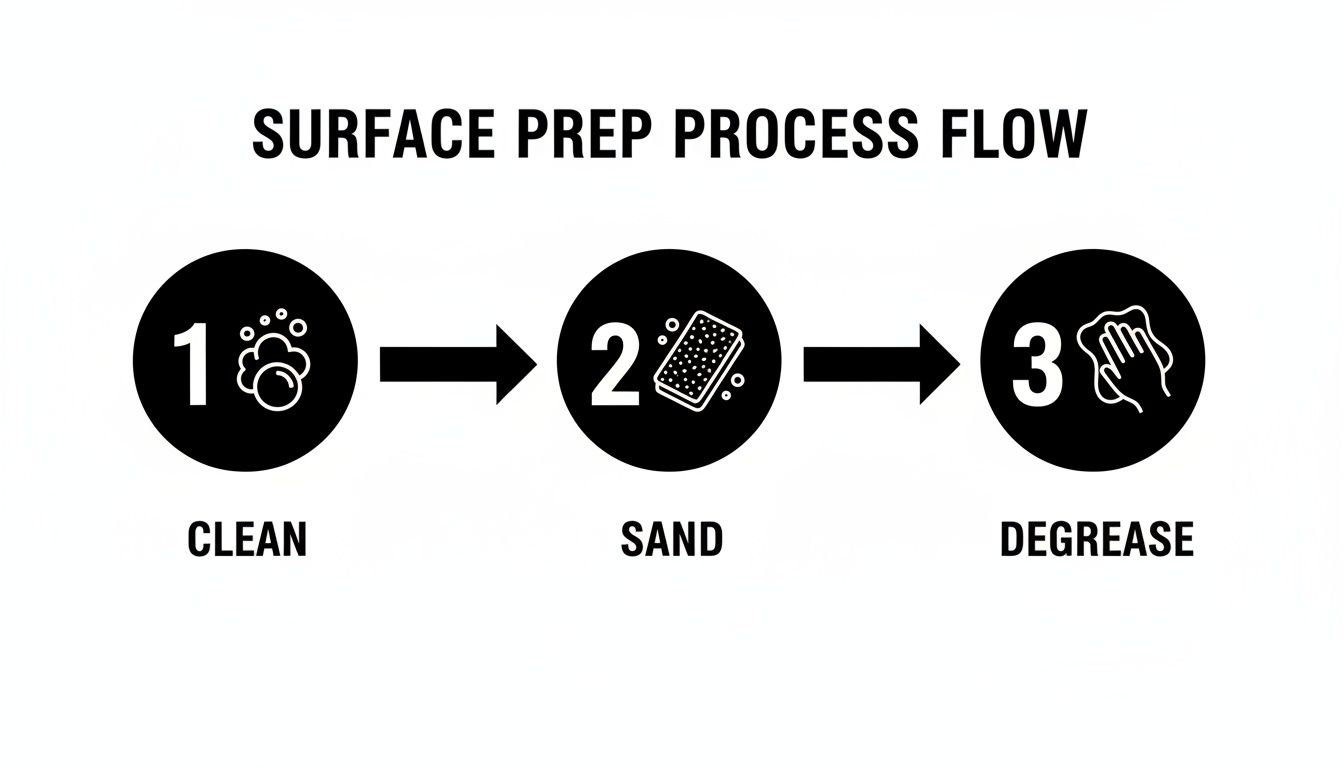
This visual guide nails it: a great finish is built on a solid foundation of cleaning, sanding, and degreasing. You simply can't afford to rush these steps.
The Art of Spraying Gelcoat
For big, open surfaces like a hull, nothing gives you a better finish than a good HVLP (High Volume, Low Pressure) spray gun. Spraying lays down an incredibly even, consistent coat that really cuts down on the "orange peel" texture you'll have to sand out later.
But you can't just pour gelcoat into a spray gun and go. It's much thicker than paint and needs to be thinned with a solvent like acetone or a special patching compound to flow properly.
My tips for a great spray job:
- Thinning: Start by thinning about 10-15%. Crucially, mix the thinner into your gelcoat before you even think about adding the catalyst.
- Gun Setup: You'll need a spray gun with a bigger nozzle tip, usually in the 2.0mm to 2.5mm range, to handle the thicker material.
- Application: Hold the gun about 6-8 inches from the surface. Move in smooth, steady passes, overlapping each pass by about 50%. This is key to avoiding light and heavy spots.
Getting your gun dialed in is half the battle. For a deep dive into gun settings and specific techniques, check out our complete guide on how to spray gelcoat.
Brushing and Rolling Techniques
For smaller repairs or tricky non-skid decks, brushing and rolling are your best bet. A classic pro technique for flat areas is the "tip and roll" method. It really helps if you have a second person for this.
One person applies the gelcoat with a solvent-resistant roller in a small section. Right behind them, the second person uses a high-quality brush with light, horizontal strokes to knock down the roller texture (the "tip"). Working as a team like this stops the gelcoat from setting up before you can get it perfectly smooth.
Applying Multiple Coats and Maintaining a Wet Edge
Trying to lay down one thick coat is a one-way ticket to drips, runs, and sags. The professional approach is to apply two or three thinner coats instead. Timing is everything here. You want to apply your next coat when the previous one is in its "tack window"—it should feel sticky, but not transfer onto your gloved finger when you touch it.
That slight tackiness allows the new layer to melt into the one below it, forming a super strong chemical bond.
And one final tip, no matter which method you're using: always maintain a "wet edge." This just means you should always be painting from a freshly applied area into an unpainted one. It's the only way to prevent those ugly lap marks that show up where sections overlap and dry at different rates.
Achieving a Mirror Finish Through Sanding and Polishing
Alright, your final layer of gelcoat has had plenty of time to cure—give it at least 24 to 48 hours. The surface feels rock hard, but it probably looks pretty disappointing right now. It's dull, maybe a little hazy, and has a slight texture to it. Don't panic. This is exactly what it's supposed to look like.
That texture is what we call "orange peel," and it’s a totally normal part of the process. Now for the fun part: turning that matte, functional coating into a brilliant, mirror-like finish. This is where your hard work really begins to shine, literally. It’s all in the sanding and polishing.
This multi-stage process is what gets rid of those tiny surface imperfections and brings out that deep, rich gloss that makes gelcoat famous. It requires some patience, but if you rush or skip these steps, you'll end up with a finish that's just okay, not spectacular. Let's get that head-turning shine.
The Wet Sanding Progression
The secret to a flawless finish is wet sanding. It's a game-changer. Unlike dry sanding, which can create deep scratches and a ton of heat, wet sanding uses water as a lubricant. This lets the sandpaper gently level the high spots of the orange peel without gouging the surface. Plus, it keeps the paper from getting clogged up with dust.
The idea is to work your way through progressively finer grits of sandpaper. Each new grit is designed to remove the scratches left by the one before it. For that coveted mirror finish, don't cheap out on your abrasives. You'll need a good range of quality sand papers and rolls to get the job done right.
And please, use a firm sanding block. If you try to sand by hand with just your fingers, you’ll end up with a wavy, uneven surface because your fingers will just follow the existing imperfections instead of leveling them out.
Your grit progression should look something like this:
- Start with 400-Grit: This is your initial leveling pass. It's aggressive and will quickly knock down the orange peel, leaving you with a uniform, flat, but very hazy surface.
- Move to 800-Grit: Now you'll start removing the deeper scratches from the 400-grit paper. You'll even begin to see a faint sheen developing.
- Refine with 1500-Grit: The surface will get much smoother here. You should see a noticeable semi-gloss appearance taking shape.
- Finish with 2000-Grit (or finer): This is the final sanding stage. It sets the stage for a truly deep gloss, leaving only microscopic scratches that will buff out easily.
Remember to keep the surface consistently wet and rinse your sandpaper frequently to clear away the gelcoat slurry.

Compounding and Polishing to a High Gloss
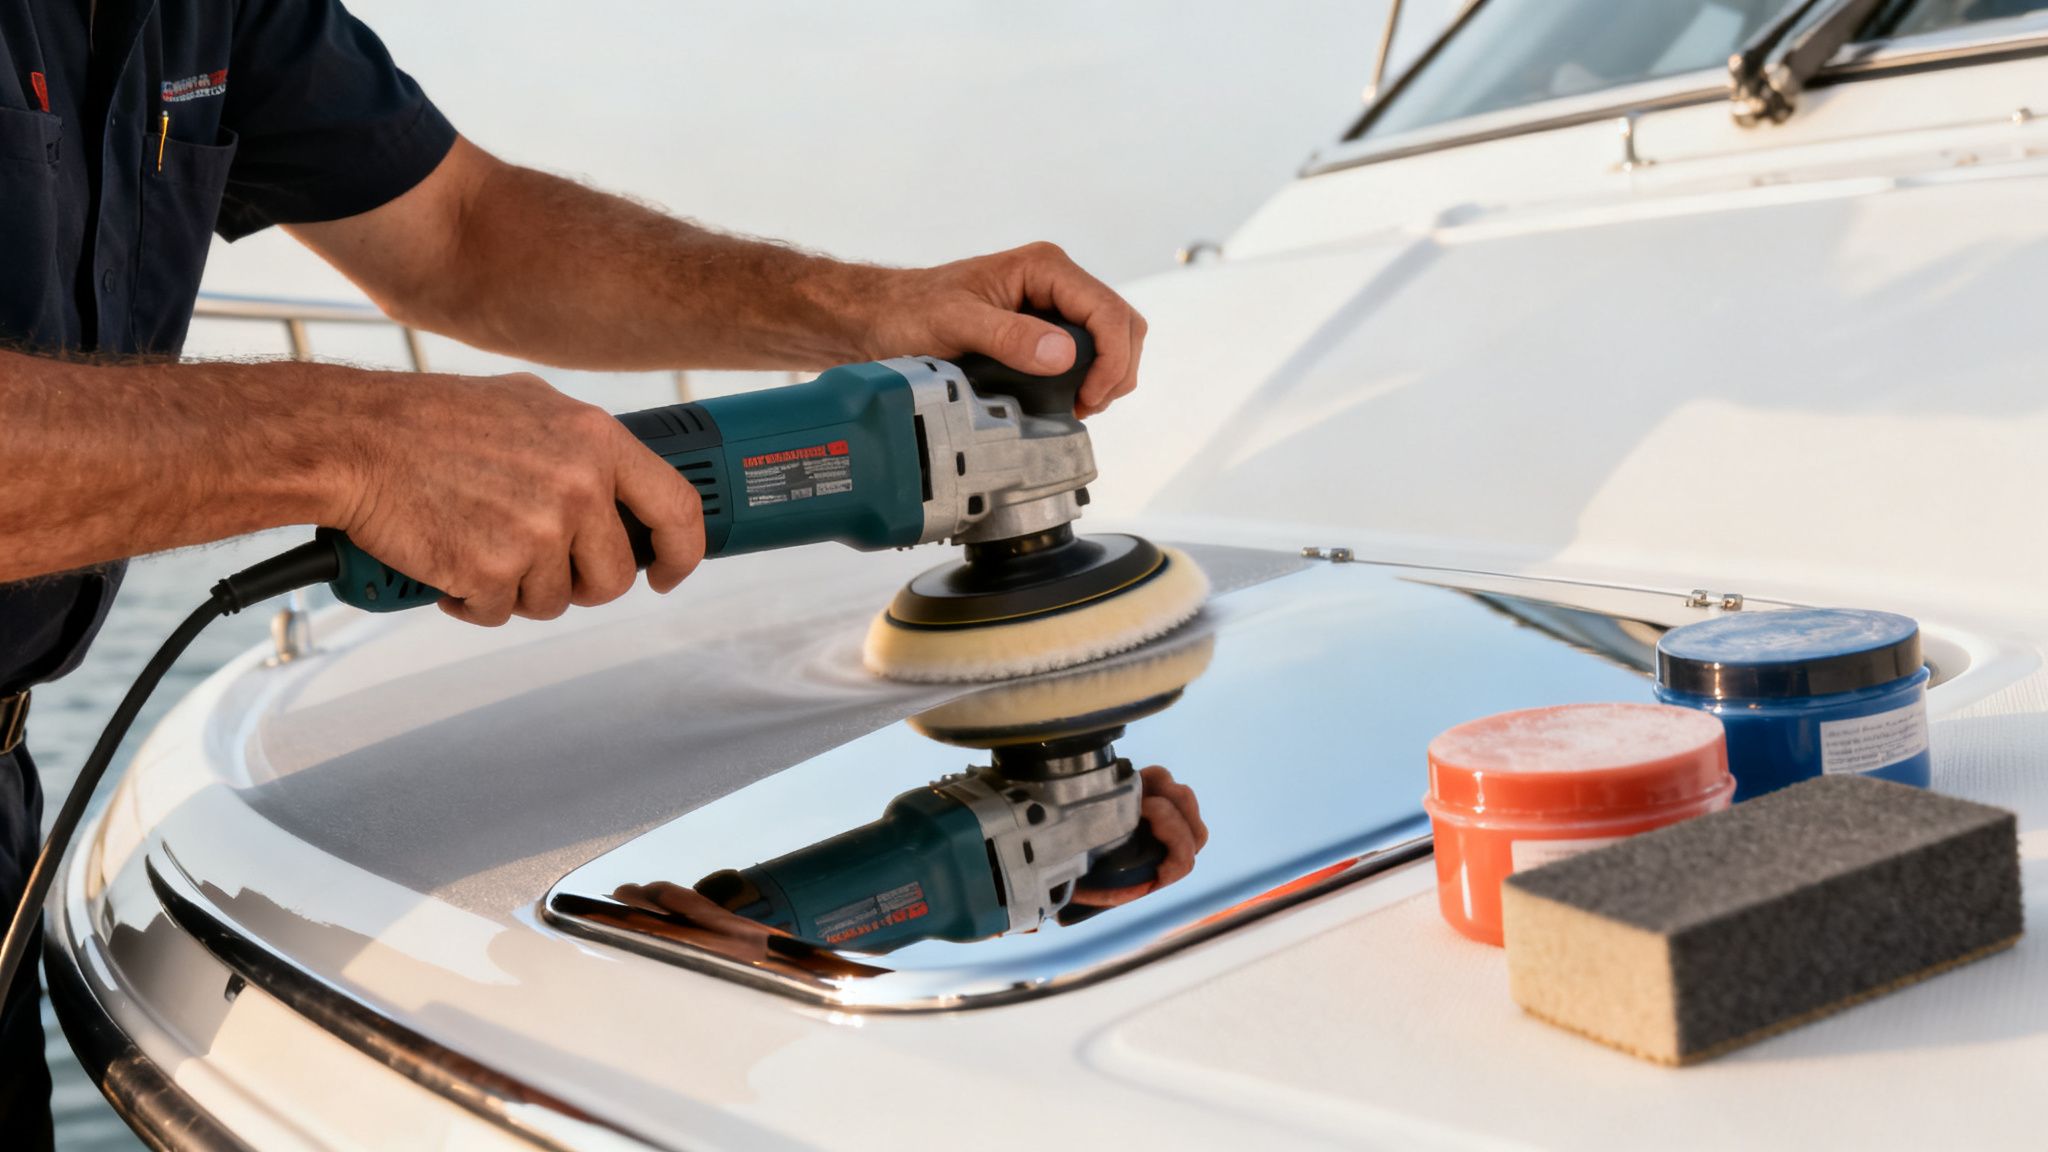
With the surface sanded perfectly smooth, it's time to bring out the real shine. This is a two-step process that calls for a variable-speed buffer, a good cutting compound, and a finishing polish.
First up is the rubbing compound. Think of this as a very aggressive liquid abrasive designed to erase the fine scratches left by your 2000-grit sandpaper. Apply a small amount of our Better Boat Marine Rubbing Compound to a wool cutting pad on your buffer.
Pro Tip: Keep the buffer speed low—somewhere around 1200-1500 RPM—and never stop moving. If you let that buffer sit in one spot for even a second, it can generate enough heat to burn right through your new gelcoat.
Work in small, manageable 2x2 foot sections. Use overlapping passes to ensure even coverage. Once the compound has done its job, the surface will have a brilliant shine, but we're not quite done yet.
Final Polish and Protection
The last step is to refine that shine with a dedicated finishing polish. Swap out the wool pad for a soft foam polishing pad and apply a high-quality product like our Better Boat Marine Polish. This will remove any fine swirl marks left by the compound and produce that deep, wet-looking gloss we're after.
For a more detailed walkthrough of this final stage, check out the great tips in our guide on how to polish fiberglass.
After all that effort, the last thing you want is for it to fade. Let the new gelcoat cure for at least a week to allow any remaining solvents to off-gas, then lock in that shine with a protective layer. Our Better Boat Marine Wax is a premium carnauba-based formula that will seal the surface, give it exceptional UV protection, and make that incredible shine last all season long.
Answering Your Top Gelcoat Questions
Even the best guides can't cover every single question that pops up when you're elbow-deep in a project. Applying gelcoat is one of those jobs—incredibly rewarding, but full of little details that can trip you up. This section is all about tackling the most common questions and troubleshooting hiccups boat owners run into.
Think of this as your go-to reference for those "what-if" and "oops" moments. We’ve pulled together the real-world issues that come up time and again, so you have the answers you need to get that perfect finish.
Can You Apply Gelcoat Over Old Paint or Gelcoat?
This is easily one of the most critical questions we hear. The short answer is yes, you can absolutely put new gelcoat over an old, properly prepped gelcoat surface. But you should never, under any circumstances, apply gelcoat directly over paint.
The powerful solvents in fresh gelcoat will eat right through the paint layer underneath. This causes it to bubble, lift, and peel away, guaranteeing a complete failure of your new finish. If your boat has been painted, you have no choice but to strip that paint completely down to the original fiberglass or gelcoat before you even think about moving forward.
When you're going over an existing gelcoat finish, the prep work is what makes or breaks the job:
- First, get rid of every trace of wax and grime with a thorough cleaning.
- Follow that up with a final wipe-down using acetone to ensure the surface is totally pure.
- Finally, give the entire area a good sanding with 80 to 120-grit sandpaper. This roughs up the surface just enough to create a solid mechanical grip for the new gelcoat.
What Are The Ideal Conditions For Applying Gelcoat?
The weather plays a massive role in how your gelcoat cures. You're looking for a sweet spot between 60°F and 80°F (15°C to 27°C), with humidity staying below 65%.
Trying to work outside these conditions is just asking for trouble. If it's too cold, the chemical reaction slows to a crawl, and your gelcoat might stay tacky forever. On the flip side, if it's too hot, the reaction goes into overdrive, causing the gelcoat to "kick off" way too fast. That's when you get frustrating problems like wrinkles and that dreaded "alligator skin" texture.
My best advice? Plan your gelcoat job for a calm, moderate day. If you can, work in a shaded, well-ventilated spot to keep things stable. And always, always double-check the manufacturer's specific guidelines on the can before you start mixing.
How Do I Fix Runs or Sags in New Gelcoat?
It's a gut-wrenching moment: you step back to admire your work and see a sag or run in that beautiful, wet gelcoat. The most important thing to do right now is... nothing. Seriously, step away from the boat.
Resist every urge to touch it, smooth it, or mess with it. Trying to fix a run while the gelcoat is wet will only create a giant smear that's ten times harder to repair.
Patience is your best friend here. Let the gelcoat cure completely—until it’s rock-hard to the touch. Once it’s fully cured, you can tackle the fix. Grab a firm sanding block and some 120-220 grit sandpaper and carefully start sanding down the high spot of the run.
The goal is to level it perfectly flush with the surface around it. Once it's level, you can just blend the spot back in by continuing with your normal wet sanding progression (400, 800, 1500-grit, etc.) before compounding and polishing the area back to a flawless shine.
How Long Does Gelcoat Need to Cure Before Sanding or Waxing?
Cure times are all about temperature, but a few rules of thumb will keep you out of trouble. In ideal conditions (around 70°F), you'll want to wait at least 24-48 hours before you even think about touching it with sandpaper. This gives the gelcoat enough time to harden so it won't just gum up your paper.
Waxing, however, is a different story. You need to give a fresh gelcoat finish a much longer time to fully "gas out." This process allows all the solvents to evaporate as the material cures to its maximum hardness. If you slap wax on too early, you trap those solvents, which can soften the finish and interfere with the final cure. As a rule, give your new gelcoat a solid one to two weeks to cure completely before you seal it up with a protective coat of wax.
Bringing your boat's finish back to life is an incredibly satisfying project. With the right techniques and premium supplies from Better Boat, you can achieve a durable, professional-grade shine that protects your investment for years. Explore our full range of marine maintenance products to get everything you need for your next job.


