


Polish Aluminum Boat: How to Polish Aluminum Boat to a Mirror Finish
If you've got an aluminum boat, you know that dull, chalky look it can get over time. That's not just a cosmetic problem, it's oxidation, and it's slowly eating away at your hull. The good news is you can reverse it. Getting that brilliant, mirror-like shine back is totally doable, but it starts with a thorough cleaning and deoxidizing before you even think about touching it with a polisher.
Once the surface is prepped, a machine polisher with the right pads and a quality aluminum polish will work wonders. The final, crucial step is locking in that shine with a tough marine-grade sealant.
Why Polishing Your Aluminum Boat Is Worth the Effort
That chalky film on your hull is a clear signal that the elements are winning. Polishing isn't just about making your boat look good at the dock; it's fundamental maintenance that protects your investment and even helps it perform better on the water.
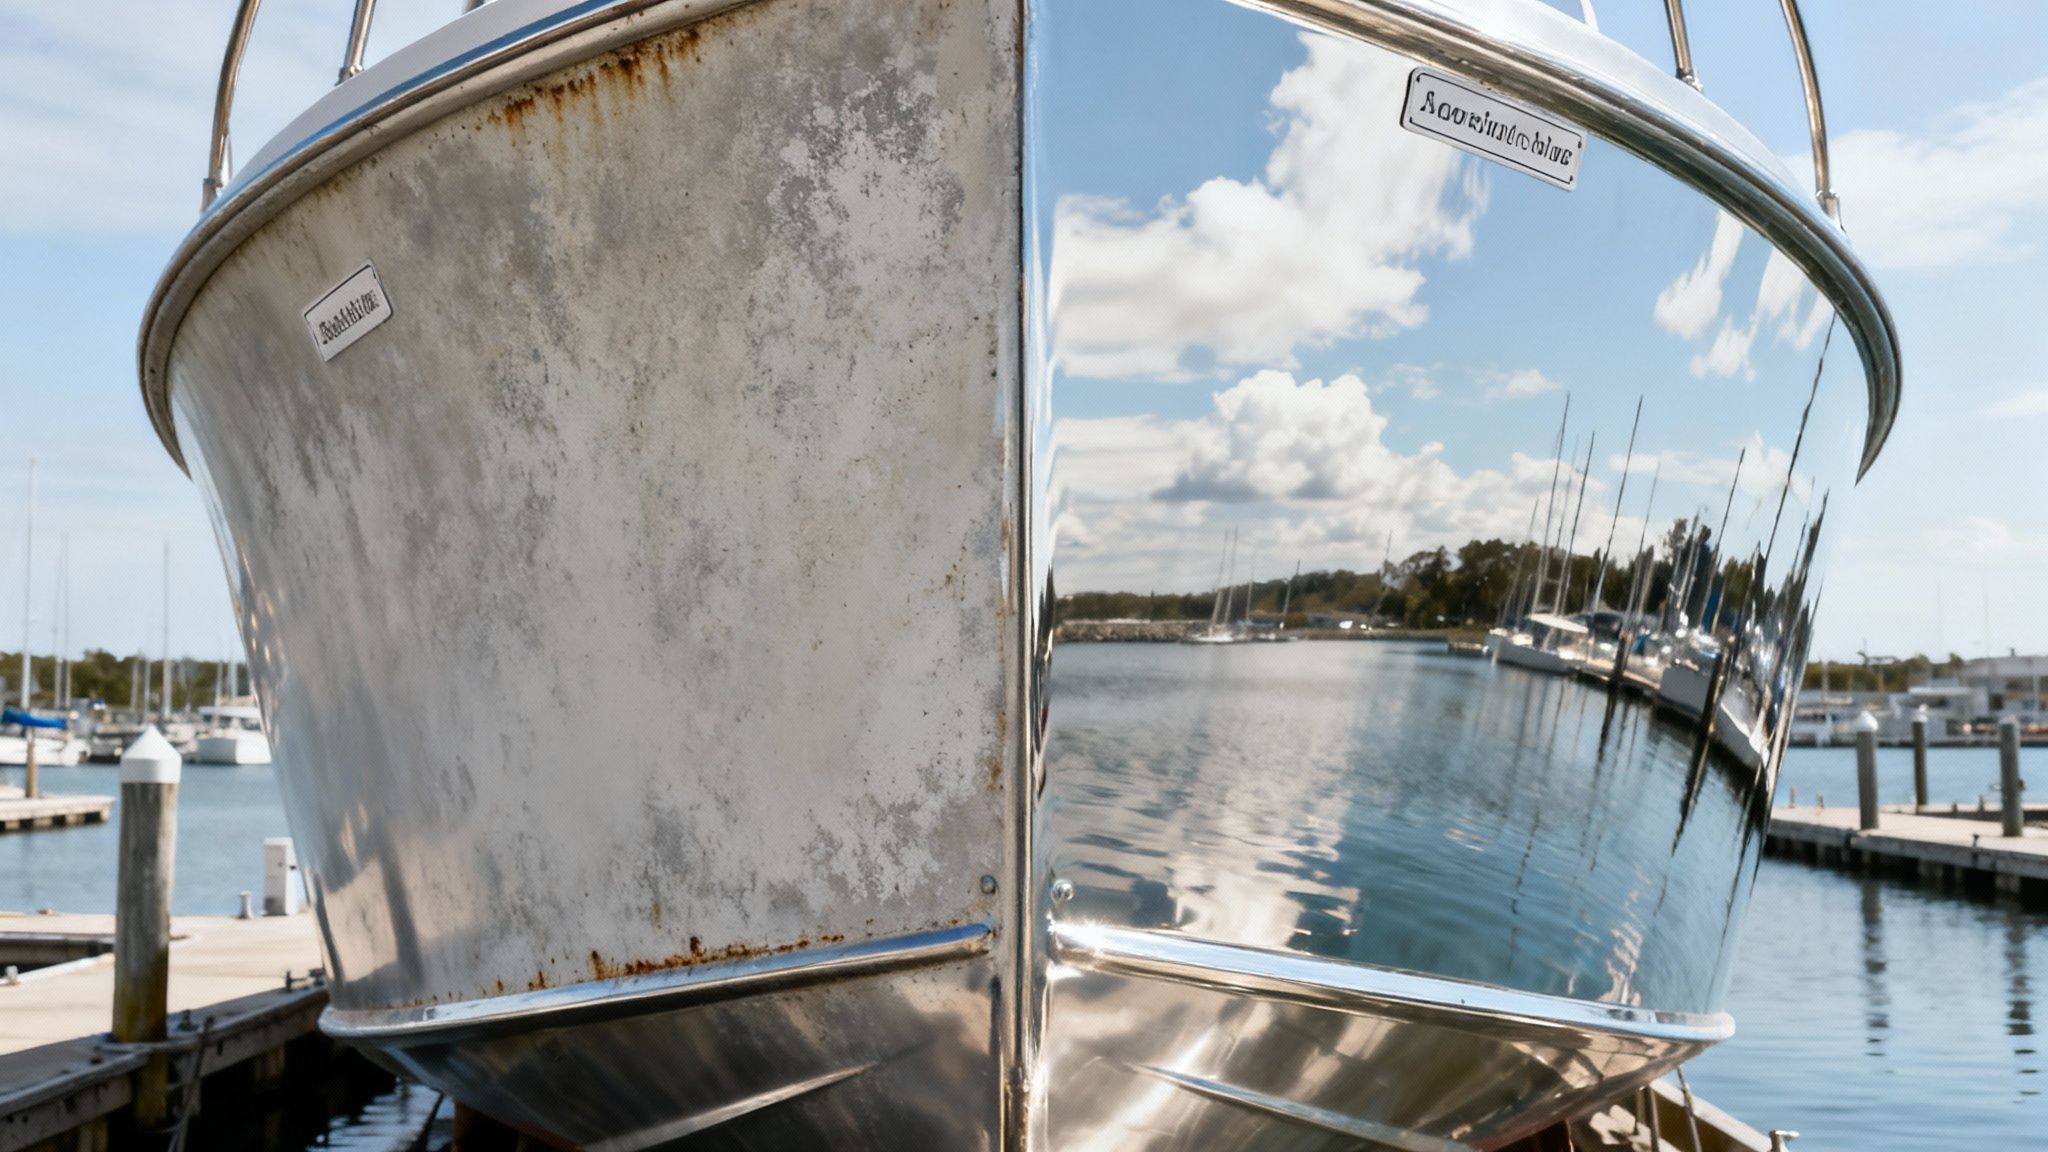
A freshly polished hull isn't just slick and shiny. It creates a smooth, non-porous surface that gives you some real functional advantages. Think of it as armor against future corrosion. It also helps repel grime and algae, which makes your regular clean-ups a whole lot faster.
More Than Just a Pretty Shine
Bringing back that factory shine does more than just make you the envy of the marina. It has a direct impact on the health and performance of your boat. Here’s what all that elbow grease really gets you:
- Enhanced Protection: A polished surface is less porous. That makes it incredibly difficult for salt, minerals, and other corrosive gunk to get a foothold, dramatically slowing down oxidation and preventing pitting.
- Improved Performance: A smoother hull means less drag in the water. It might not seem like much, but this can actually improve your fuel efficiency and maybe even add a little boost to your top speed.
- Increased Resale Value: Let's be honest, a gleaming, well-cared-for boat will always fetch a higher price. That incredible visual appeal translates directly to real-world value when it's time to sell.
Aluminum fishing boats are more popular than ever, with the global market hitting $2.1 billion in 2023. Keeping those hulls in top shape is just smart ownership. In fact, a properly polished surface can cut down on water drag by as much as 10%, which is a serious gain in fuel efficiency. If you're curious, you can explore more data on the aluminum boat market to see just how big this trend is.
Key Takeaway: Polishing is preventative care, plain and simple. You're removing the existing oxidation while laying down a protective barrier to fight off the harsh marine environment. It's one of the best things you can do to extend the life of your boat.
This guide will walk you through the entire process, step-by-step. From the initial prep work to applying that final protective coat, you'll learn the techniques to get professional-grade results all on your own.
Gathering Your Tools for the Perfect Polish
Trying to polish an aluminum boat without the right gear is like trying to navigate without a compass, you might get there eventually, but it's going to be a long, frustrating journey. When you have everything you need within arm's reach, the job transforms from a major chore into a genuinely rewarding process.
Believe me, the final mirror-like finish you're after depends just as much on your tools as it does on your technique.
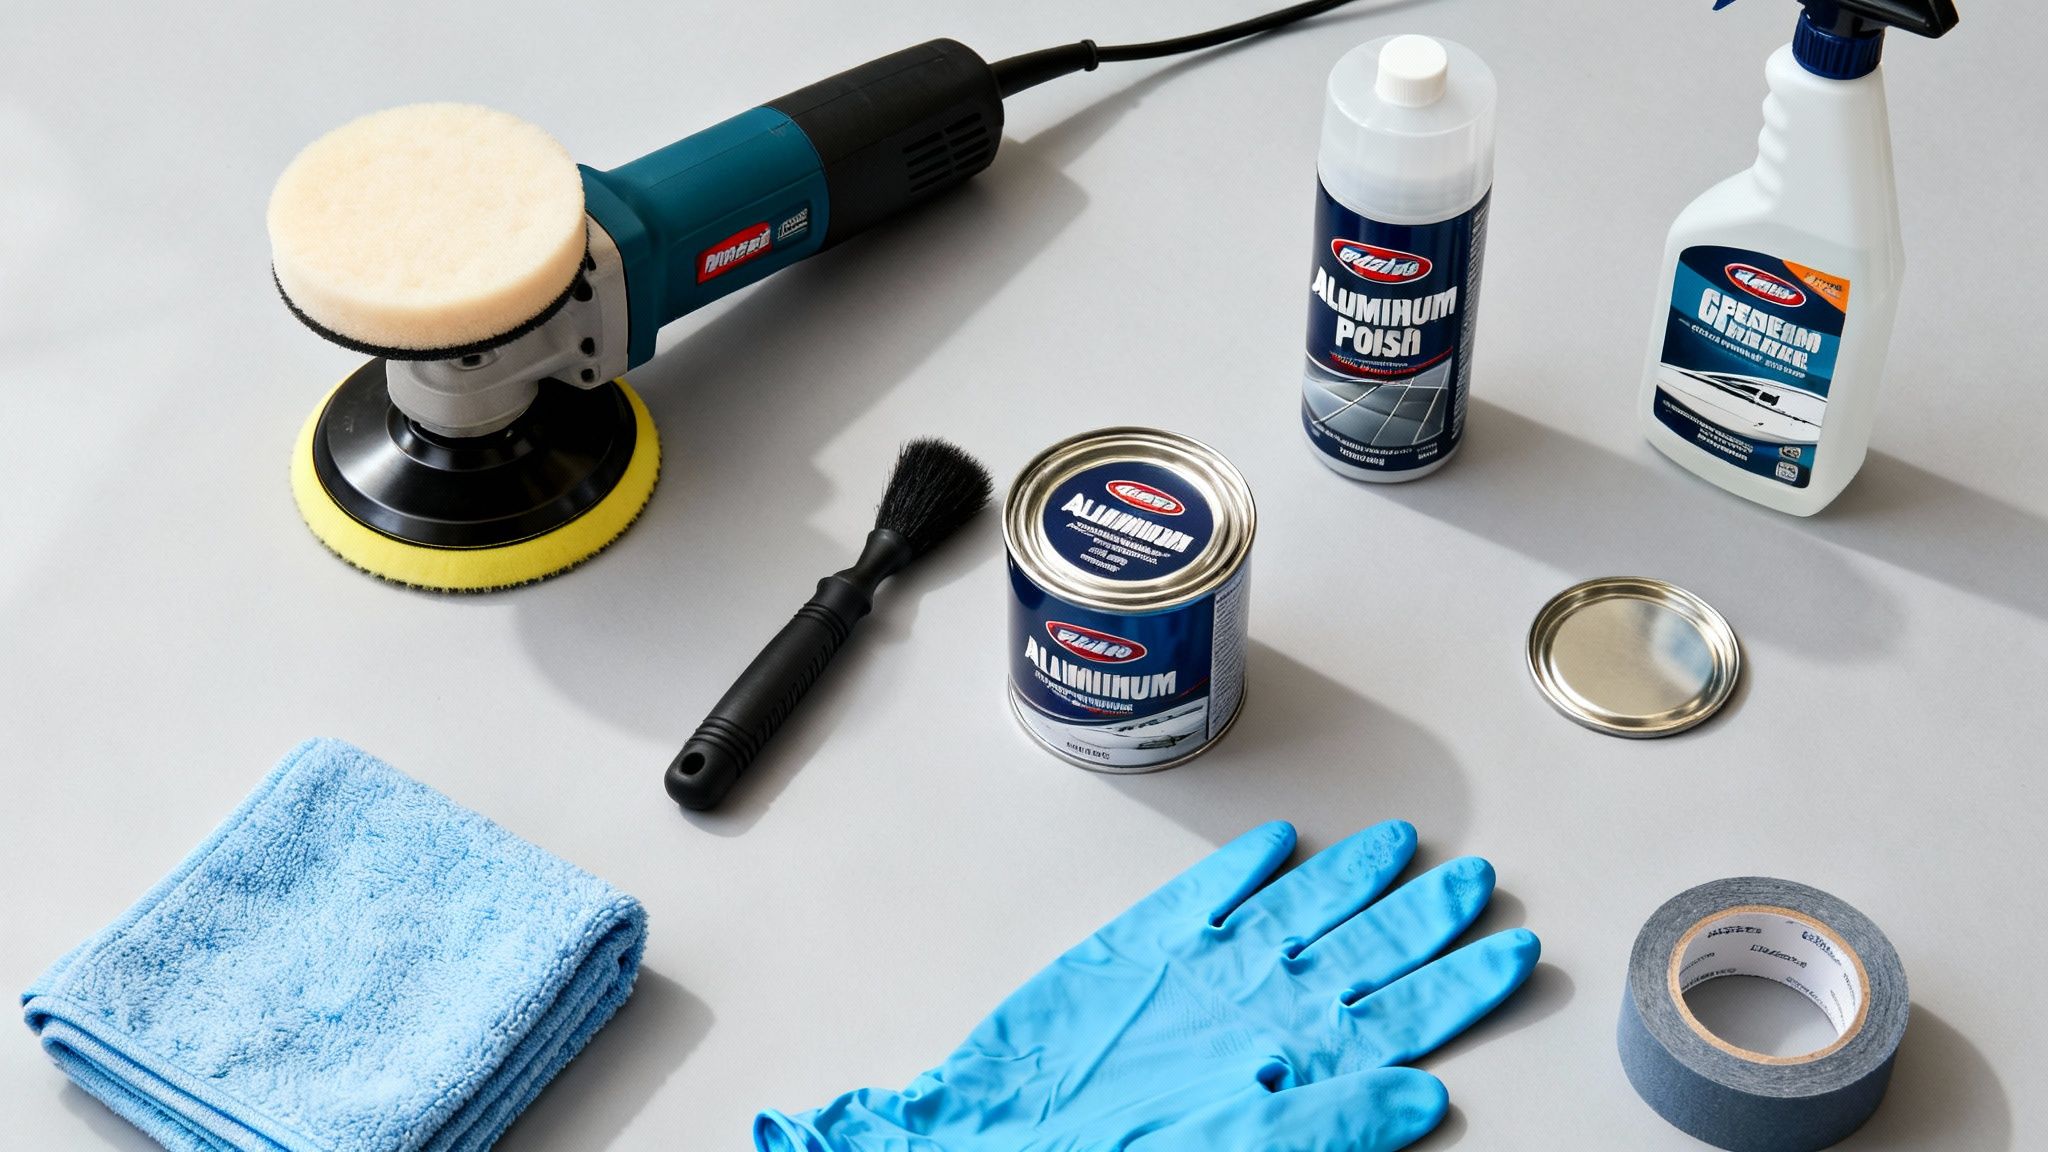
Before you lay a hand on the hull, let's build your arsenal. This isn't just about grabbing a random bottle of polish off the shelf. It’s about putting together a complete system where every tool has a specific, vital role to play.
First Things First: Safety Gear
Let's be clear: polishing compounds and the resulting metal dust can be pretty harsh. Protecting yourself is completely non-negotiable. Don't even think about firing up that polisher without the right personal protective equipment (PPE).
- Safety Glasses or Goggles: This is a must. They'll shield your eyes from chemical splashes and the tiny aluminum particles that get kicked up by the polisher.
- Nitrile Gloves: Keep your hands safe. The chemicals in cleaners and polishes can seriously dry out or irritate your skin after a few hours of work.
- Respirator Mask: When you're running a machine polisher, you're creating fine metal dust that becomes airborne. A good dust mask or respirator is crucial to avoid breathing that stuff in.
The Heavy Lifters: Polishers and Applicators
The biggest decision you'll face is whether to apply the polish by hand or with a machine. The truth is, each method has its place, and most jobs are done best with a combination of both. Your choice really comes down to the size of your boat, how bad the oxidation is, and how much elbow grease you're willing to put in.
An orbital polisher is an absolute game-changer for large, flat areas like the sides of a pontoon or the hull of a fishing boat. It covers a ton of ground quickly and gives you consistent results with way less effort.
But for all the work a machine can do, you'll still need hand applicator pads. They give you the precision required for tight corners, railings, and all those intricate spots where a buffer just can’t fit.
A classic rookie mistake is thinking you can do the entire job with a machine. You will always need hand applicators for the details, so just plan on having both from the start. This dual approach is the secret to getting a uniform shine across every single inch of your boat.
The Real Workers: Cleaners and Polishes
This is where the magic really happens. The products you choose will directly impact the quality and longevity of your finish. Starting with a perfectly clean, degreased surface is critical, if you don't, the polish simply can't do its job effectively.

Start with a clean surface
Aluminum Cleaner
Aluminum Cleaner cuts through heavy oxidation and embedded stains that regular soap cannot touch, giving you the bare, clean surface that makes every polishing step more effective.
To get you set up for success, I've put together a quick checklist of everything you'll need. Having these items ready to go will make the whole process smoother and give you a far better result.
Your Complete Aluminum Boat Polishing Checklist
| Category | Essential Item | Purpose and Pro Tip |
|---|---|---|
| Preparation | Aluminum Cleaner/Restorer | Cuts through heavy oxidation and stains that soap alone can't handle. |
| Cleaning | Boat Soap Concentrate | Washes away surface dirt and salt without stripping any existing protective coatings. |
| Polishing | Premium Aluminum Polish | Specifically formulated to cut through oxidation and bring back that deep luster. |
| Application | Orbital Polisher & Pads | The workhorse for large, flat surfaces. Saves time and ensures an even finish. |
| Detailing | Hand Applicator Pads | Essential for polishing tight corners, railings, and areas where a machine won't fit. |
| Finishing | Clean Microfiber Towels | Use separate towels for applying products and buffing to a final, streak-free shine. |
| Safety | Safety Glasses, Gloves, Mask | Non-negotiable protection from chemical splashes and airborne aluminum dust. |
With these tools on hand, you're not just prepared, you're set up for a professional-grade finish that will turn heads at the dock.
Choosing the right compound is crucial. Some are designed for heavy cutting on badly oxidized boats, while others are for fine finishing. To help you pick the perfect one, we put together a detailed guide on the best boat polishing compounds to match your boat's specific condition. This little bit of research ensures you get the right level of abrasive action without causing any damage to the surface.
Preparing Your Hull for a Flawless Finish
The real secret to a jaw-dropping, mirror-like shine on an aluminum boat has almost nothing to do with the final polishing step. Seriously. The entire job is won or lost in the prep work.
Think of it like painting a masterpiece; you wouldn't just start slathering paint on a dirty, unprepared canvas. This is the stage where you systematically hunt down and eliminate every speck of grime and oxidation. It's all about creating the perfect, clean surface for the polish to work its magic.
Rushing this part is the single most common mistake I see boat owners make. They get excited to see that shine and jump straight to the buffer, only to end up with a hazy, uneven mess. A little extra patience here will save you hours of frustration and rework later on.
The Initial Deep Clean
Before you can even think about tackling oxidation, you need to get rid of all the surface-level gunk. Your boat's hull is constantly getting blasted with salt spray, dirt, algae, and road grime. Trying to polish over this layer is completely pointless, you'll just grind that dirt right into the aluminum, creating scratches and a cloudy disaster.
Your first move is a thorough wash. And I don't mean a quick rinse. This is a deep clean meant to strip away everything that doesn't belong.
- Start with a Freshwater Rinse: Grab a hose and knock off all the loose dirt and salt deposits. This simple first pass keeps you from rubbing abrasive salt crystals into the hull when you start scrubbing.
- Use a Quality Boat Soap: Mix a dedicated Boat Soap with water according to the directions. Unlike dish soap or other household detergents that can be too harsh, a real boat soap is formulated to cut through marine grime without damaging the aluminum.
- Scrub Systematically: Using a soft-bristled brush, wash the entire hull in manageable sections. Always work from the top down. This ensures dirty water isn't constantly running over the areas you've just cleaned.
Once you’ve scrubbed every inch, give the boat another complete rinse to get all the soap residue off. You can let it air dry or use a clean microfiber towel if you're in a hurry.
Confronting the Real Enemy: Oxidation
With the surface dirt gone, the true culprit is finally revealed: oxidation. This is that dull, chalky, sometimes white or gray film that makes an otherwise great aluminum boat look old and neglected. It’s just a natural chemical reaction that happens when aluminum meets air and water.
Expert Tip: You cannot polish over oxidation and expect good results. Polishing is meant to refine a clean surface, not remove a thick layer of corrosion. Trying to do so will instantly clog your polishing pads and leave you with a disappointing, hazy finish.
Finding and removing this layer is non-negotiable. Run your hand over the surface; if a white, powdery residue comes off on your fingers, you've got significant oxidation to deal with.
For boats that are heavily oxidized, you might need a specialized aluminum cleaner or even a mild acid wash made for marine use. This will dissolve the layer chemically before you get to polishing. If your boat only has light to moderate oxidation, a good quality aluminum polish with some cutting power will often be enough to handle it during the polishing stage itself.
Masking for Precision and Protection
The final prep step is all about protecting the parts of your boat you don't want to polish. A high-speed buffer can easily scuff up or destroy decals, painted pinstripes, and plastic trim. This is where a roll of painter's tape becomes your absolute best friend.
Take the time to carefully mask off the edges of:
- Vinyl Decals and Graphics: Polishing compounds are abrasive and will quickly ruin the color and finish of any vinyl.
- Painted Sections: Protect any painted names, registration numbers, or decorative stripes from getting scuffed.
- Antifouling Bottom Paint: You want a clean, sharp line between your polished hull and the bottom paint.
- Plastic or Rubber Trim: Buffers can burn or discolor these materials in an instant.
This small investment of time is critical. It doesn't just prevent costly damage; it lets you polish right up to the edges with confidence, giving you a much cleaner and more professional-looking result in the end.
For a more detailed walkthrough on cleaning aluminum, especially on pontoons which face similar challenges, you can check out our guide on how to clean aluminum pontoons. It's packed with extra tips for tackling stubborn buildup. With your hull now perfectly clean, deoxidized, and masked, you're finally ready to bring out the polish and reveal that brilliant shine.
Mastering the Polishing Process Step by Step
Alright, with your hull perfectly prepped, it's time for the magic to happen. This is where all that cleaning and taping off really pays off, transforming that dull, chalky aluminum into a brilliant, mirror-like finish. The secret is to be methodical, whether you're using a powerful orbital buffer or doing the work by hand.
You're not just slathering on some polish and hoping for the best. The real goal is to systematically break down the polish's tiny abrasives, which refines the aluminum surface and reveals that deep, clear shine hiding underneath.
This little guide sums up the prep work you should have already knocked out before you even think about polishing.
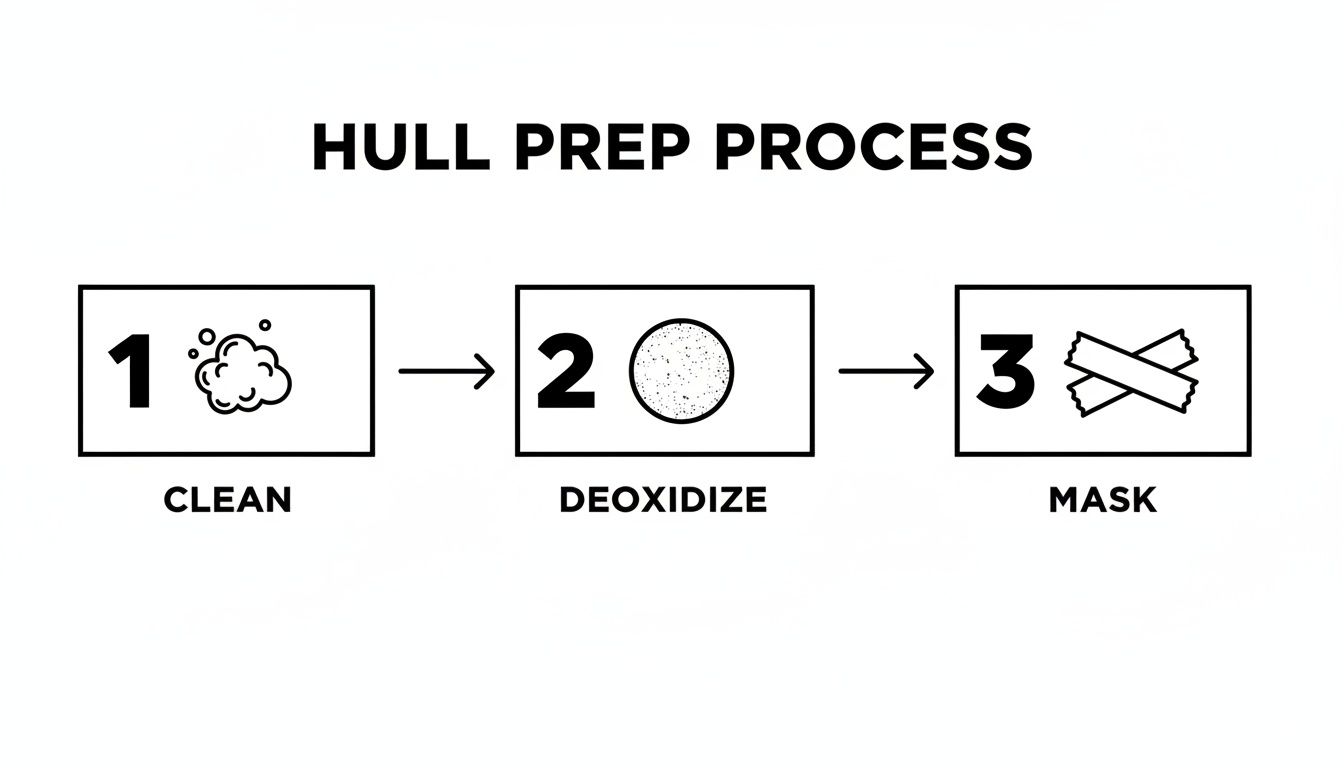
As you can see, each step sets the stage for the next, making sure the polish can do its job without fighting against leftover dirt or heavy oxidation.
The Great Debate: Hand Polishing vs. Machine Polishing
The first call you have to make is how you're going to apply the polish. Honestly, there’s no single right answer here. The best approach often involves a combination of machine power and good old-fashioned elbow grease.
An orbital buffer is your best friend for the big, open areas, think the flat sides of the hull or the tops of your pontoons. It covers a lot of ground fast and keeps the pressure consistent, which is key for a uniform, professional-looking finish. A machine seriously cuts down on the physical labor and gets results that are almost impossible to get by hand alone.
But a machine can’t get into every nook and cranny. That's where hand polishing comes in. It's essential for tight corners, working around cleats and hardware, along railings, and on tricky curves. It gives you the fine control you need to polish awkward spots without scuffing up adjacent surfaces.
Pro Tip: Don't think of it as an either/or situation. Use an orbital buffer for about 80% of the boat, the easy, wide-open parts. Save hand polishing for the final 20% that requires a delicate touch. This hybrid method gives you the best of both worlds: speed and precision.
Applying Your Aluminum Polish with Precision
Now, let's talk technique. How you apply the polish makes all the difference between a head-turning shine and a cloudy, swirled mess.

The polish for this job
Marine Aluminum Polish
Marine Aluminum Polish is formulated specifically for aluminum hulls, using fine abrasives that lift oxidation without digging into healthy metal, so each small section you work delivers a clear, reflective result.
Always work in small, manageable sections. A 2x2 foot area is the sweet spot. This lets you maintain complete control and stops the polish from drying out before you've had a chance to properly work it in. If the polish dries, it's a real pain to buff off and won't give you the shine you're after.
Here’s how to do it right:
- Apply Polish to the Pad: Squeeze a few small, pea-sized dots of a quality Aluminum Polish directly onto your foam or wool pad. A little goes a long way. Piling it on just makes a mess and wastes product.
- Spread Before You Start: With the polisher off, dab the pad around your 2x2 section. This spreads the polish out evenly and prevents it from slinging everywhere the second you flick the switch.
- Work the Polish In: Set your polisher to a low or medium speed and start moving it in a steady, overlapping pattern, either side-to-side or up-and-down. Use light to moderate pressure and keep it consistent. Let the machine do the heavy lifting; your job is just to guide it.
- Watch for the Change: As you work the area, you’ll see the polish start to break down. It will go from a creamy or hazy liquid to a thin, dark, almost oily film. That's your cue that the abrasives have done their job and smoothed out the surface. Time to stop.
- Buff to a Shine: Before that residue has a chance to dry, grab a clean, dry microfiber towel and wipe it away. A quick buff with light pressure will reveal that incredible shine you've been working for.
Just repeat this process section by section, making sure to slightly overlap your work areas to avoid any dull lines or patches. Consistency is everything here. If you want a deeper look at machine techniques, our guide on how to buff and wax a boat covers a lot of the same core principles you can apply here.
Recognizing When You're Done
So, how do you know when a section is truly finished? Look for the "break." When the polish has been fully worked in, it won't look wet or pasty anymore. Instead, you'll see that dark, filmy haze. Wiping it away should reveal a stunning difference in clarity and reflection.
If the area still looks hazy after you buff it, one of two things happened: you didn't work the polish long enough, or you let it dry on the surface. No big deal. Just reapply a tiny bit of polish and go over the area again until you see that crystal-clear transformation.
Protecting Your Hard Work for a Lasting Shine
You've put in the hours, and the hull looks absolutely incredible. That dull, chalky surface has been transformed into a brilliant mirror. But hold on, the job isn't quite done yet.
Polishing an aluminum boat strips away that old, oxidized layer, but in doing so, it leaves the fresh, raw aluminum totally exposed to the elements.
This is a critical moment. Without a protective layer, that beautiful shine will start to fade surprisingly fast. You'll often see it dulling within just a few weeks of exposure to sun, salt, and water. Applying a high-quality sealant is the final, essential step to lock in all your hard work and guard against future damage.
Choosing Your Shield: Carnauba Wax vs. Synthetic Sealants
Not all protectants are created equal, especially when you're up against the harsh marine environment. Your choice generally boils down to two main camps: traditional carnauba-based waxes and modern synthetic polymer sealants.
Traditional waxes, often made from carnauba, are famous for producing a deep, warm gloss. They're a classic for a reason, but they tend to have a shorter lifespan, breaking down more quickly under intense UV exposure and constant saltwater spray.
Synthetic polymer sealants, on the other hand, are engineered specifically for durability. They create a much stronger, more resilient bond with the aluminum surface. This results in longer-lasting protection that stands up far better to the unique challenges of boating. For an aluminum boat that actually lives in the water, a synthetic option is almost always the smarter choice.
Key Insight: Polishing is the step that creates the shine, but sealing is what preserves it. Skipping the sealant is like painting a house but forgetting the primer, the finish simply won't last.
The Right Way to Apply Marine Wax
For a product like our Marine Wax, which is a synthetic polymer blend, the application process is straightforward but definitely requires a gentle touch. The whole goal is to lay down a thin, even coat without accidentally introducing new scratches or swirl marks.

Seal and protect the finish
Boat Marine Polish
Boat Marine Polish lays down a synthetic polymer barrier over freshly polished aluminum, blocking salt, UV, and moisture from attacking the raw surface you just worked so hard to restore.
Here’s the best way to get it done:
- Use a Clean Applicator: Always start with a fresh microfiber applicator pad. Never, ever use the same towels or pads you used for polishing, as they’ll still have abrasive polish residue on them.
- Apply Sparingly: Squeeze just a small amount of wax onto the pad. Remember, a little goes a very long way. Applying too much product just makes it a pain to buff off and doesn't add any extra protection.
- Work in Sections: Just like with polishing, tackle small, manageable sections at a time. Apply the wax in a thin, even layer using gentle, overlapping circular or straight-line motions.
- Let It Haze: Give the wax time to dry to a light haze. How long this takes depends on the temperature and humidity, but it's usually around 10-20 minutes. You can test it by swiping a finger across the surface; if it wipes clean without smearing, it's ready.
- Buff to a High Gloss: Grab a separate, clean microfiber towel and gently buff away the haze to reveal a brilliant, slick shine. Make sure to flip your towel frequently to a clean side to avoid just spreading the residue around.
This final layer provides robust UV protection to prevent sun damage and creates a hydrophobic barrier that makes water bead up and roll right off. This not only looks great but also makes future cleanups much easier and helps prevent stubborn water spots.
The value of this final step is immense. Proper protection after you polish aluminum boat surfaces can extend the metal's lifespan by 5-7 years and even boost resale value by up to 18%.
For a deeper dive into the differences and benefits of various products, check out our guide on choosing between marine wax and polish. It'll help clarify exactly when to use each for the best possible results on your vessel.
Got Questions About Polishing Your Aluminum Boat?
Even the most detailed guide can't cover every little thing that pops up during a big project. Polishing an aluminum boat is seriously rewarding work, but it’s totally normal to hit a snag or just wonder if you’re on the right track. We get it.
That’s why we put together this section. Think of it as having a seasoned pro right there with you, ready to answer the most common questions we hear from boat owners. We’ll tackle everything from how often you really need to do this, to fixing those pesky swirl marks.
How Often Should I Be Polishing My Aluminum Boat?
This is the big one, and the honest-to-goodness answer is: it depends entirely on your boat's life. A boat that spends its days in a saltwater slip, baking in the sun, is going to need a lot more love than a freshwater boat that lives in a garage.
As a solid rule of thumb, plan for one big, thorough polish once a year. Think of this as your pre-season reset, getting that shine back and laying down a serious layer of protection.
To keep it looking sharp, a quick touch-up polish and a fresh coat of wax every 3-4 months during boating season is the way to go. This isn't a huge job; it's just maintenance. Staying on top of it prevents heavy oxidation from taking hold and makes that big annual polish a whole lot easier.
Can Polishing Actually Damage the Aluminum?
It’s a fair question, you are using an abrasive, after all. But the short answer is no, not if you’re doing it right. Quality marine-grade aluminum polishes are engineered with super-fine abrasives. Their only job is to skim off that chalky, microscopic layer of oxidation without digging into the healthy metal underneath.
When damage does happen, it’s almost always from one of these common missteps:
- Grabbing the wrong stuff: Never, ever use household cleaners, steel wool, or aggressive automotive compounds. They’re way too harsh and will leave you with a mess of deep scratches.
- Getting heavy-handed: Let the machine and the polish do the work for you. Forcing the buffer into the hull with all your weight can burn right through the finish or gouge the metal.
- Using dirty gear: A dirty pad or towel is your enemy. It just grinds old grit and dried-up polish back into the surface you just perfected, which is a classic recipe for swirl marks.
Stick with products made specifically for marine aluminum, trust the process, and you’ll be improving your boat’s finish, not hurting it.
What if I See Swirl Marks After Polishing?
Ugh. You’ve put in all that work, and now you see a network of fine, circular scratches in the sunlight. It’s frustrating, but don’t panic, it's almost always fixable and usually just means a small tweak in your technique is needed. Swirls often show up when you move the polisher too fast, use a pad that's too aggressive for finishing, or fail to keep the buffing pad perfectly flat against the hull.
The secret to a flawless, swirl-free finish is being smooth and consistent. Keep your polisher moving at a steady, overlapping pace, and give the polish enough time to fully break down before you wipe it off. Rushing is the number one cause of imperfections.
To get rid of them, just revisit the area with a finer finishing polish on a fresh, soft foam pad. Dial back the machine speed, use very light pressure, and let the product work its magic. This gentle pass will smooth out those tiny imperfections and bring back that perfect mirror shine you were after.
At Better Boat, we’re a family-owned American company, and we know that taking care of your vessel is a labor of love. That’s why we’re committed to making premium, straightforward products that give you professional-grade results. Protect all your hard work and keep that aluminum gleaming with our marine care solutions. You can check out our full lineup of boat cleaning and detailing gear at betterboat.com.


