


How to Buff and Wax a Boat for a Perfect Shine
Bringing a dull, chalky boat hull back to a showroom shine boils down to a simple, three-stage process. First, you'll deep clean the surface. Then, you'll use a compound to correct any oxidation and scratches. Finally, you'll lay down a high-quality marine wax to protect all your hard work. This is the exact process the pros use to transform a tired finish into something spectacular.
Your Quick Guide to Restoring a Brilliant Shine
Getting your boat's gelcoat looking good again is about more than just looks—it's essential maintenance that protects your investment from the harsh marine environment. A proper buff and wax job is like sunscreen for your boat. It shields the hull from UV rays that cause fading, wards off saltwater corrosion, and protects against all sorts of nasty environmental contaminants.
This kind of upkeep is a huge part of the boating world. In fact, the boat repair and maintenance industry was valued at a whopping $7.64 billion in 2024, and it's only getting bigger. You can dig into the numbers yourself in this detailed market report.
Before we get into the nitty-gritty of which compounds and pads to use, let’s get a bird's-eye view of the whole process. The basic idea is to get the surface as perfect as possible before you seal it.
- Cleaning: This is non-negotiable. You have to start with a surface that's completely free of dirt, grime, and salt.
- Buffing (Compounding): Here's where the magic happens. You'll use an abrasive compound to physically remove the top oxidized, chalky layer of gelcoat.
- Polishing: Think of this as a finer, more delicate version of compounding. A good polish will remove any light swirls left by the compound and really amp up the gloss.
- Waxing (Sealing): The final step. This is where you apply a protective layer that locks in that incredible shine and guards the hull against future damage.
This entire workflow is fundamental to proper boat care. To see how it fits into the bigger picture of keeping your vessel in top shape, check out our comprehensive guide on how to detail a boat.
To make things even clearer, here’s a quick breakdown of what each stage involves and the kind of gear you'll need to get it done right.
Buffing and Waxing Process at a Glance
| Stage | Purpose | Recommended Better Boat Gear |
|---|---|---|
| Cleaning | Remove surface dirt, grime, salt, and old wax for a clean slate. | Boat Soap Concentrate & Microfiber Towels |
| Buffing/Compounding | Correct heavy oxidation, chalkiness, and deeper scratches. | Marine Compound with a wool or aggressive foam cutting pad. |
| Polishing | Remove fine swirls and imperfections for maximum gloss. | Marine Polish with a soft foam polishing pad. |
| Waxing/Sealing | Apply a durable protective layer to seal the finish and add shine. | Marine Wax with a clean microfiber applicator or towel. |
Remember, you can't get a great final result without a great foundation. Taking the time to properly clean and correct the surface is what separates a decent wax job from a truly professional one.
Gathering Your Tools and Prepping the Hull
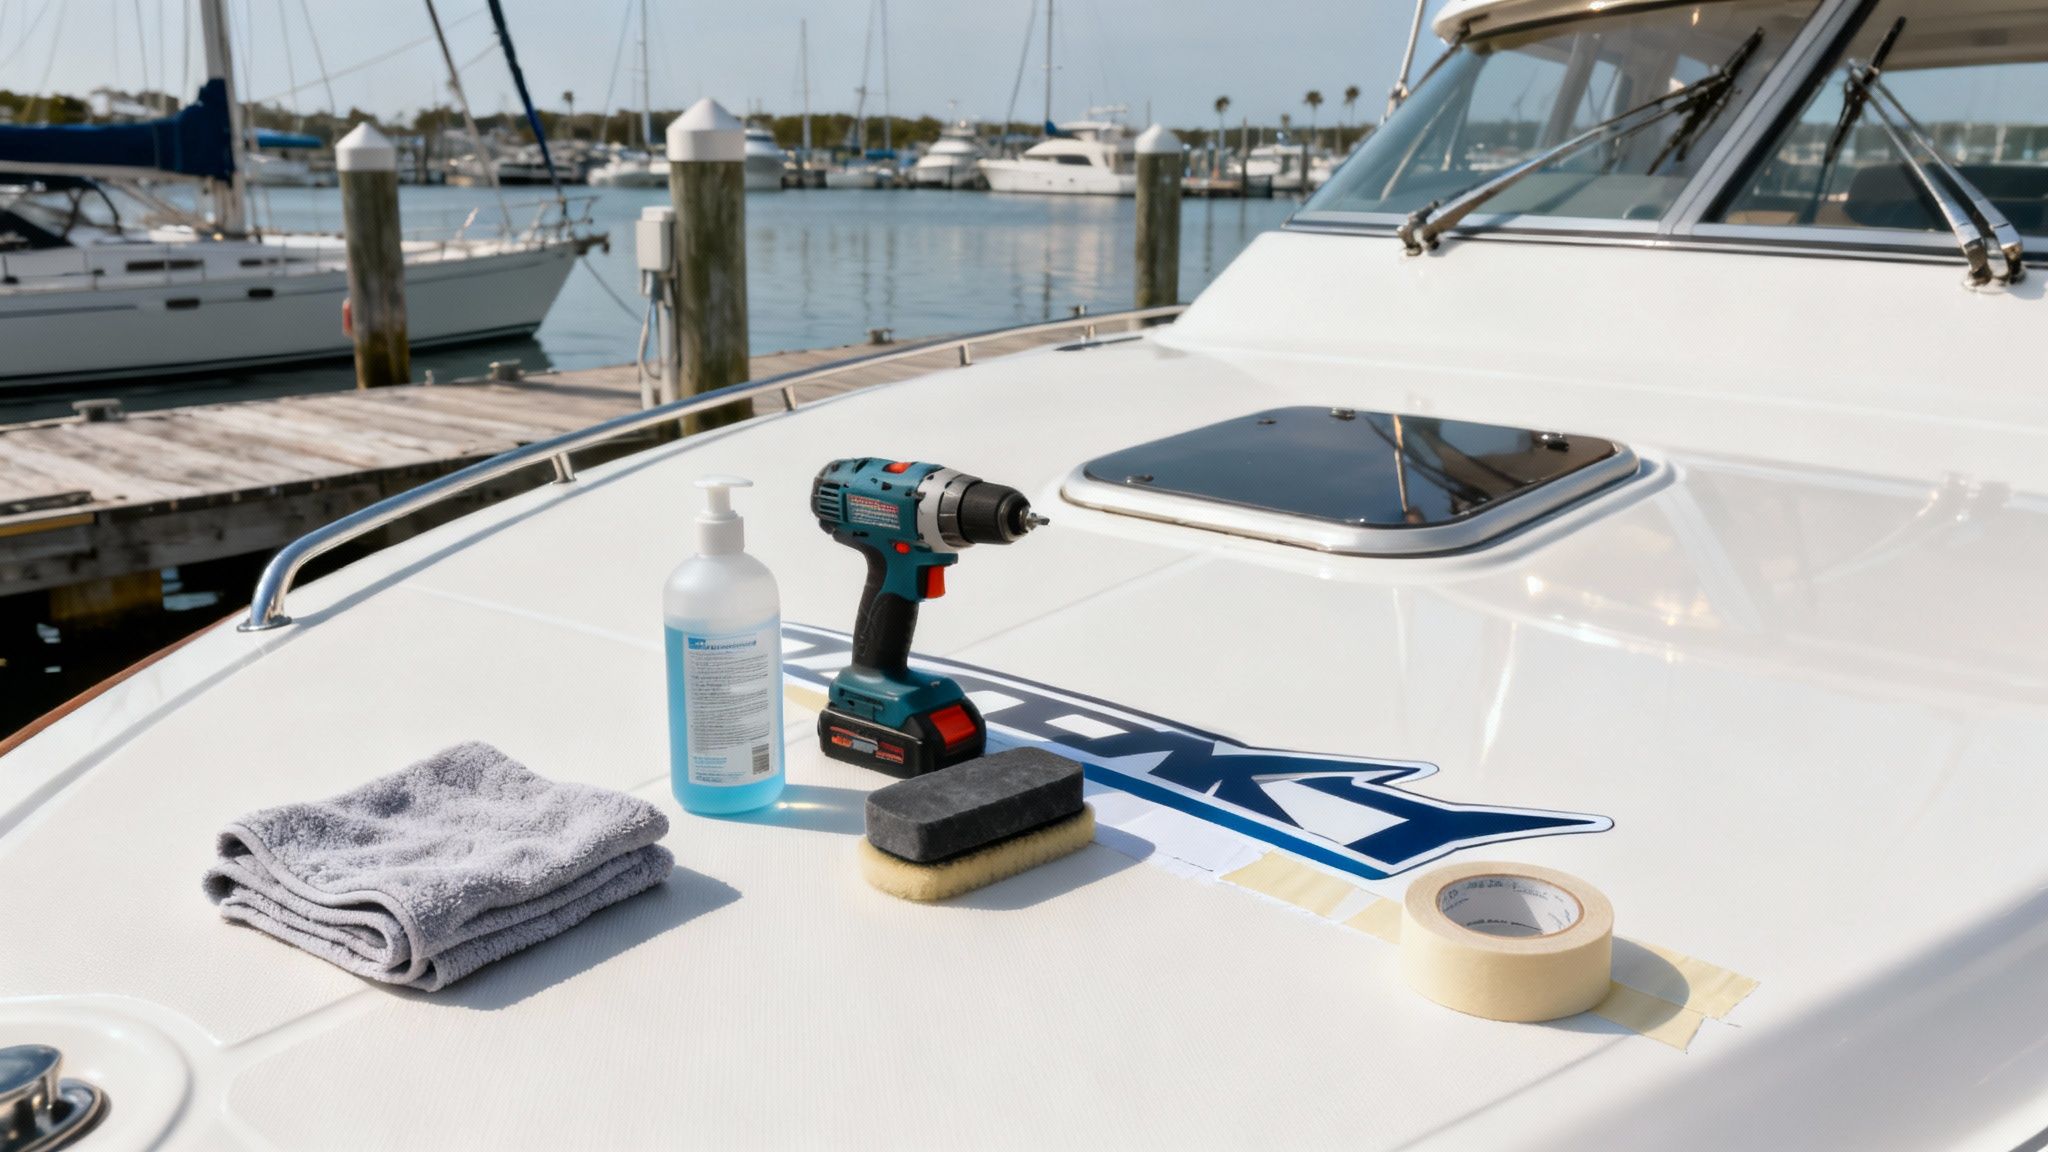
You can have the best wax and polisher on the market, but that perfect, mirror-like finish is earned long before you start buffing. It all comes down to meticulous prep work.
Think of it like painting over rust—if you don't deal with the underlying issues, you're just hiding problems that will come back to haunt you. Before a single drop of compound touches your hull, the surface has to be flawlessly clean and ready for correction.
First things first, give your boat a thorough wash. You've got to get all the loose stuff off—salt spray, bird droppings, dust, and the general grime that builds up. Grab a quality, pH-neutral boat soap, like our Boat Soap Concentrate, that’s tough on dirt but won't strip any existing protection.
Mix your soap in a bucket, grab a soft wash mitt, and clean the entire hull, always working from the top down. Rinse it well with fresh water and—this is important—dry it completely with clean Microfiber Towels. If you don't, you'll be dealing with annoying water spots.
Decontaminating and Masking the Hull
Even after a good wash, your boat’s gelcoat is likely holding onto stubborn, embedded contaminants. We're talking about tiny particles like industrial fallout and tree sap that have bonded to the surface, and soap alone won't touch them.
How can you tell? Run your hand over the clean, dry hull. If it feels even slightly gritty instead of perfectly smooth, it’s time to decontaminate.
A marine clay bar or clay mitt is your best friend here. It glides over the surface and gently pulls those embedded particles right out of the gelcoat’s pores. Just spray a clay lubricant on a small section and work the clay bar back and forth with light pressure. You'll literally feel the surface turn glass-smooth under your hand.
Once the hull is perfectly clean, your next job is to protect everything you don't want to buff. Get some high-quality painter's tape and carefully mask off all the sensitive areas.
- Decals and Pinstripes: A spinning buffer can burn or peel the edges of vinyl graphics in a second.
- Hardware: Cover up your cleats, railings, and any other metal or plastic fittings.
- Non-Skid Surfaces: Trust me, you do not want to get compound in these textured areas. It's a nightmare to remove and leaves a white residue.
- Seals and Gaskets: Protect all the rubber and plastic trim around windows and vents.
Selecting Your Polisher and Safety Gear
The polisher is the heart of this whole operation. While you can buff small spots by hand, a machine is non-negotiable for tackling an entire hull with any sort of efficiency. You've got two main choices.
A rotory polisher is a powerful, direct-drive tool that the pros love because it chews through heavy oxidation in no time. The downside? It generates a ton of heat and can easily burn right through gelcoat if you don't know what you're doing. It’s not the best choice for beginners.
The far safer and more user-friendly option is a dual-action (DA) orbital polisher. Its head oscillates in a random pattern, which drastically reduces heat buildup and pretty much eliminates the risk of creating swirl marks. For most boat owners, a DA polisher is the perfect balance of power and safety.
Your safety is just as important as the boat’s finish. Always wear safety glasses to protect your eyes from compound splatter, a dust mask so you’re not inhaling fine particles, and gloves to keep your hands clean.
Proper hull maintenance is a huge part of the global yacht maintenance market, a sector valued at USD 2.9 billion in 2025 and projected to more than double by 2035. Having the right supplies makes this critical job much simpler. Our guide to building the ultimate boat cleaning kit can help you get stocked up on everything you need.
Choosing The Right Compounds And Pads
Picking the ideal pad-and-compound pairing is where gelcoat restoration feels more like art than a chore. If you mismatch your tools, you’ll grind through hours of work with nothing to show but frustration. Get this right, and you’ll unlock that depth of shine every boat owner dreams of.
It’s all about matching the aggressiveness of your pad and compound to the hull’s condition. A chalky, heavily oxidized surface demands a tougher approach than one marred by light swirls. Let’s dive into the options and how they work together.
Understanding Your Arsenal Of Buffing Pads
Buffing pads come in three primary materials. Stock up on at least two or three types—each shines in different scenarios.
-
Wool Pads
Natural fibers make these the heavyweight champs of cutting power. They generate heat fast, slicing through deep oxidation and stubborn scratches. Use them first on neglected hulls, then follow up with finer pads to erase swirl marks. -
Microfiber Pads
Striking a balance between cutting and finishing, microfiber pads excel at medium-duty correction. They tackle moderate defects in one pass without the swirl risk you get from wool. -
Foam Pads
Foam’s beauty lies in its variety.- A firm “cutting” foam pad removes mid-level oxidation
- A medium “polishing” pad refines the surface
- A soft “finishing” pad lays down wax or sealant for that final gloss
Starting with a medium-density foam pad and a mild compound is a safe bet. You can always increase aggressiveness, but you can’t undo overcutting.
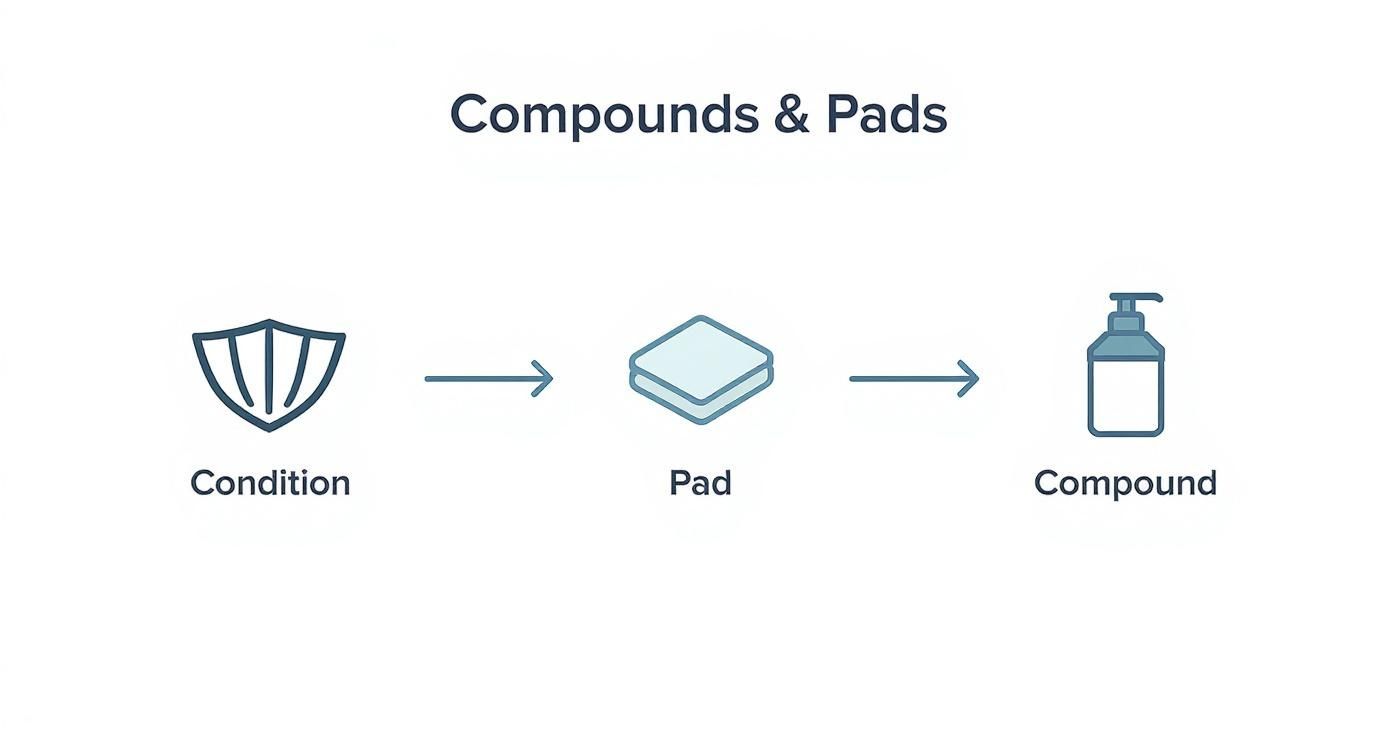
Pairing Compounds With Pads For Perfect Results
Once you’ve selected your pad, pair it with the right abrasive:
-
Cutting Phase
For severe oxidation and scratches, grab a wool pad and a robust rubbing compound, like our Marine Compound. This combo removes the oxidized layer and levels minor imperfections quickly. -
Polishing Phase
After cutting, switch to a medium-density foam pad with a marine polish, like our Marine Polish. It erases fine swirl marks and brings out that wet-look gloss. -
Finishing Phase
Finish up with a soft foam pad and a quality marine wax, such as our Marine Wax. This last step seals your work, blocks UV damage, and leaves water beading off happily.
For an in-depth look at compound options, refer to our guide on the best boat polishing compound.

Matching Compounds and Pads to Your Hull
Below is a quick-reference table to help you find the perfect pairing for your boat’s current state.
Description: Find the perfect combination for your boat's specific needs and condition.
| Hull Condition | Recommended Pad | Better Boat Compound | Goal |
|---|---|---|---|
| Severely oxidized with deep scratches | Wool Pad | Marine Compound | Cut through heavy oxidation |
| Moderate chalkiness and swirl marks | Microfiber Pad | Medium Marine Compound | Balance cutting and finishing |
| Light swirls, fading gloss | Foam Polishing Pad (Medium) | Marine Polish | Remove haze and enhance shine |
| Freshly polished, ready for protection | Foam Finishing Pad (Soft) | Marine Wax | Seal, protect, and boost water beading |
Use this chart alongside your visual inspection to zero in on the right gear. With practice, you’ll learn when to swap pads mid-job and how far to push each compound.
Armed with these combinations, you’ll turn every buffing session into a satisfying step toward that showroom-quality finish.
Mastering Your Buffing Technique
Buffing a boat isn't just about making it shiny; it's about technique. You need a steady hand and good control over your tools. Getting this right is the difference between a mirror finish and a hazy mess, or worse, a burnt gelcoat.
This image from Wikipedia gives you a good visual of how a polishing pad should move across a surface.
See how the contact is uniform? That’s the key to spreading the heat out and letting the compound do its job without damaging the surface.
Selecting RPM and Pressure
This is where a lot of people go wrong. Too much speed, and you'll burn right through the gelcoat. Too little, and you're just polishing dirt around without actually cutting through the oxidation.
For most dual-action polishers, a sweet spot is between 1,500 and 2,000 RPM.
As for pressure, let the machine do the work. Aim for about 5 to 10 pounds of pressure—just enough to keep the pad engaged with the surface.
- Start on a low speed, then gradually bump it up until you see the compound breaking down into a thin, hazy film.
- Every so often, stop and touch the pad. If it's hot, take a break.
- Always keep the pad flat against the surface. Tipping it on its edge is a surefire way to create swirls and gouges.
Stick to this, and you’ll avoid a lot of the common headaches that trip up beginners.
Expert Tip
Overlap each pass by about 50%. This guarantees you get even coverage and don't end up with tiger stripes on your hull.
Working In Manageable Sections
Don't try to be a hero and buff the whole side of the boat in one go. You'll end up with dried-out compound and an arm that feels like it’s going to fall off.
Break the job down into small, manageable 2x2 foot squares. Work one square completely, then wipe the residue off with a clean microfiber towel before moving to the next.
This simple discipline keeps the compound from drying on the hull, which can be a real pain to remove later.
- Use a bit of painter's tape or removable chalk to outline your sections. It helps you keep track of where you've been.
- Let the area cool for a minute or two before starting the next panel.
- Swap out your pads every 15 minutes or so. A clean pad cuts better and more safely.
Trust me, this methodical approach feels slow at first, but it actually cuts your total project time down significantly because you won't have to go back and fix mistakes.
Navigating Tricky Spots
Your hull isn't one big, flat surface. You've got cleats, vents, chines, and other hardware to work around. These tight spots demand a bit more finesse.
A small 2-inch foam finishing pad on your polisher can be a lifesaver here. For the really tight corners where a machine just won't fit, don't be afraid to go old school and buff by hand.
We get into the nitty-gritty of gelcoat work in our complete guide on how to polish fiberglass. It’s worth a read if you’re tackling a fiberglass hull for the first time.
And a quick safety note: always wear eye protection, especially around vents where compound can get flung out unexpectedly. It’s best to save these tricky areas for last so you can blend any overlap into the larger panels you’ve already finished.
Buffing By Hand Or Using A Polisher
So, do you need a machine? Not always.
Hand buffing is perfect for small touch-ups and getting into those awkward curves. Just apply your compound to a foam applicator pad and work in small, circular motions. The major plus here is that you have total control and virtually no risk of heat buildup. The downside? It's a serious workout.
For doing an entire hull, a dual-action (DA) polisher is your best friend. It covers large areas quickly and evenly. Our Better Boat Cordless Polisher is a great option for the DIYer—it has variable speeds and is designed to run cool, making it perfect for knocking out a 30-foot boat over a weekend.
Whether by hand or machine, the process is the same:
- Start with a clean, dry surface.
- Apply a few dabs of compound directly to the pad.
- Work in overlapping passes until the compound turns clear.
Buffing Equipment Maintenance
Don't neglect your tools. A dirty, clogged pad won't cut effectively and can even scratch your gelcoat.
After you're done for the day, give your pads a good rinse with warm water and a little mild soap. Squeeze them out and let them air dry completely.
"A well-maintained pad performs like new every time. It's the cheapest insurance against a bad finish." - Mike, Coastal Detail
Before you start a job, give your pads a quick inspection. Store them flat and out of the sun to keep them from getting brittle.
- Clean pads after every single use. No exceptions.
- Check the backing plate for worn-out threads.
- Toss any pads where the foam is starting to tear or separate.
| Method | Best For | Pros | Cons |
|---|---|---|---|
| Hand Buffing | Small areas, tight spots | Low heat risk; precise control | Time-consuming; tiring |
| DA Polisher | Full hulls, large surfaces | Fast coverage; consistent finish | Heavier; requires some practice |
Here’s the bottom line: Proper tool care isn’t just about making your gear last longer—it’s about getting a better result.
Storing And Inspecting Your Polisher
Your polisher is the heart of the operation, so treat it right.
When you're finished, unplug it and wipe down the housing with a damp cloth to get rid of any compound dust. Take a second to look over the power cord for any cuts or frays. And finally, check your owner’s manual for any lubrication points that need attention. A little maintenance goes a long way.
Applying Wax for Long-Lasting Protection
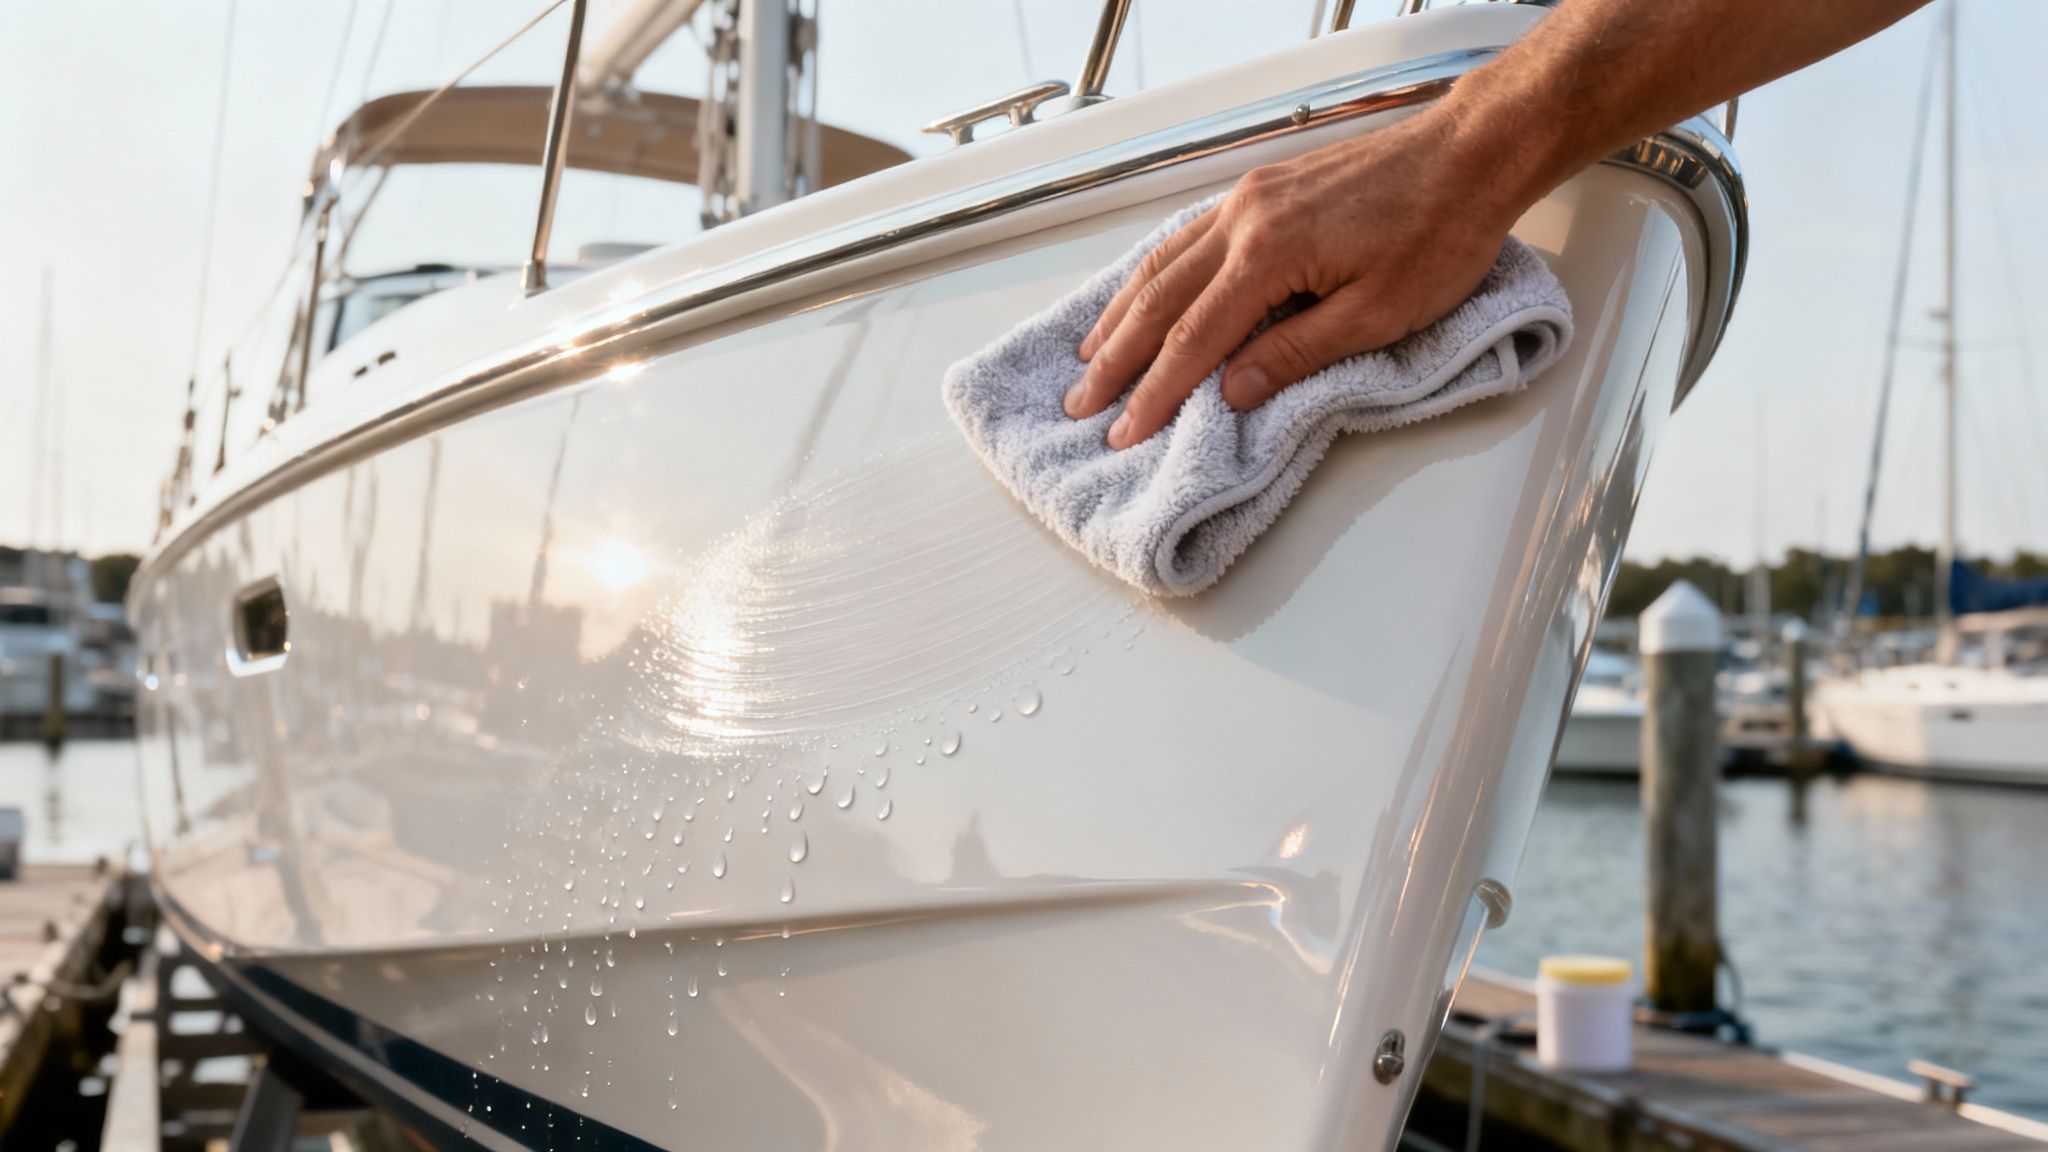
You've done the hard work of correcting and polishing the hull, and it looks incredible. Now it’s time to seal in that shine and protect your masterpiece.
Waxing is that final, crucial barrier that stands between your pristine gelcoat and the harsh realities of UV rays, saltwater, and everyday grime. Without it, all that buffing work will be short-lived.
The big question is, should you go with a traditional paste wax or a modern liquid polymer sealant? The answer really comes down to what you value more: the deepest possible shine or longer-lasting protection.
Comparing Paste Wax and Polymer Sealants
There's something classic about a good paste wax. Thanks to its carnauba content, it delivers a rich, deep glow that many boaters swear by. It’s a warmer, more traditional look.
On the other hand, liquid polymer sealants are all about endurance. What they might lack in that old-school depth, they more than make up for in durability, often lasting 4 to 6 months per application.
- Paste wax demands more elbow grease but rewards you with that unmatched warm sheen.
- Polymer sealants are a breeze to spread and cure much faster, which is a lifesaver on larger boats.
| Feature | Paste Wax | Liquid Sealant |
|---|---|---|
| Carnauba Content | High for sheen | Minimal |
| Durability | 2 months | 4-6 months |
| UV Protection | Good | Excellent |
| Application | Multiple thin coats | Single coat |
Key Takeaway: A thin, uniform wax layer beats thick globs every single time. Less is definitely more.
Putting on too much just means you’ll be working harder to buff it off, and it doesn’t add any extra protection.
Now, let's get into the best techniques for laying down our Better Boat Marine Wax.
The Right Way to Apply Marine Wax
For smaller boats or those tricky, tight areas, applying by hand is the way to go. It gives you great control.
Grab a foam applicator or a microfiber towel and work the wax in with gentle, overlapping circles.
- By Hand: Apply a super-thin coat and let it haze over for about 10 minutes before you start buffing.
- Orbital Polisher: Set the speed to low to spread the wax evenly. Once you have coverage, bump it to a medium setting to work it in.
- Wipe-Off: No matter which method you use, wipe off the haze with a clean, dry microfiber towel, using very light pressure.
Our formula combines powerful UV blockers and water-repellent agents to give your boat a tough, defensive shield.
If you’re tackling a bigger vessel, an orbital polisher will be your best friend. It dramatically speeds up the job and ensures you get a perfectly consistent coat.
- Orbital polishers save your arms and shoulders from a serious workout.
- They make it easy to maintain an even coat thickness across those huge, flat hull sides.
Finishing for a Durable Gloss
The time it takes for wax to properly cure can vary a lot based on the weather.
On a warm, dry day, the wax film will firm up and be ready to buff in 30 to 45 minutes. If it's cooler or more humid, you might need to give it 1 hour or even a bit longer.
Being patient here is critical. Rushing it will just smear the wax around. A proper cure creates a harder, more weather-resistant finish that will last.
- Don't wipe it off too soon, or you'll just lift the wax right off the surface.
- Not sure if it’s ready? Test a small, inconspicuous corner. If the haze buffs off cleanly to a shine, you’re good to go.
- Always buff with a fresh microfiber towel, using broad, circular motions.
When you're done, you'll see it: rainwater will bead up like perfect little pearls across the hull. That’s the sign of a job well done.
This hydrophobic barrier will last for months, seriously cutting down on your maintenance time. Plan to reapply wax every 3 months if you're in saltwater and every 4 months for freshwater boats.
We've seen it on 70-foot cruisers: a proper wax application reduced algae adhesion by a whopping 60%.
That translates directly to less scrubbing at the dock and more time enjoying the water.
Maintaining Your Waxed Surface
Keeping that shine is easier than you think. A regular rinse with fresh water is often all you need to remove light salt spray and dirt.
For a quick touch-up, a spray wax booster like our Better Boat Instant Wax is perfect for keeping the gloss level high between full waxing sessions.
- Use fresh, clean microfiber towels for any wipe-downs. Old, dirty towels can scratch the finish.
- Avoid high-pressure washers on waxed areas. They can be aggressive enough to strip the wax right off.
- Schedule a full buff and re-wax each season to maintain peak protection.
With just a little bit of care, that showroom shine can easily last all season long.
Pro Insight: Always try to do your final buffing in the shade. Direct sun heats the wax too quickly, which can cause streaking and swirl marks.
Work in small, manageable sections. This gives you much better control over the process and leads to a far better finish. This is the last critical step to buff and wax a boat like a pro.
Avoiding Common Buffing And Waxing Mistakes
It’s happened to the best of us. You spend hours buffing and waxing, only to step back and see swirl marks, a hazy finish, or streaks baked into your beautiful hull. A few small slip-ups can turn a productive afternoon into a frustrating do-over.
Knowing what not to do is just as important as knowing the right steps. Let's walk through the common pitfalls I’ve seen over the years and how to sidestep them for a perfect, water-ready shine.
For instance, a buffing pad that looks clean might be hiding old grit just waiting to scratch your gelcoat. Or maybe you've tried to speed things up by globbing on extra compound, only to leave ugly buffer trails behind. The good news is these are completely avoidable with a few simple habits.
Here are the big three mistakes to watch out for:
- Dirty Pad Swirls: A contaminated pad is your worst enemy. It grinds old grit and particles right into the gelcoat, causing damage. A quick rinse between panels is all it takes to prevent this.
- Too Much Compound: More isn't better here. Excess compound just gets flung around, cakes up on the pad, and drags across the surface, leaving trails. Stick to a dime-sized amount and spread it thin.
- Waxing in the Sun: Applying wax to a hot surface is a recipe for disaster. The wax can bake on instantly, making it a nightmare to buff off and leaving it stuck in every nook and cranny. Always work in the shade or during cooler parts of the day.
Common Problems and How to Fix Them
One of the quickest ways to ruin a section of gelcoat is to let the pad get too hot. A spinning pad creates friction, and too much friction burns the surface. You can avoid this by letting the polisher do the work. Start on a low speed and only increase it gradually, never forcing the machine down. This simple trick keeps the surface heat below 120°F, which is the safe zone.
“I once scorched my boat’s waterline by skipping a pad swap. The pad got gummy and overheated in seconds. Now I change pads every 20 minutes, no exceptions.” – Captain Jan, seasoned cruiser
If you do run into trouble, don't panic. Most issues have a straightforward fix:
- After applying wax, let the residue cure for 10–15 minutes before attempting to buff off the haze.
- Get into the habit of rinsing and inspecting your pads after every single use. You don't want old, dried grit showing up next time.
- When it's time to remove wax haze, use a fresh, clean microfiber cloth and wipe in gentle, circular motions.
These aren't just textbook tips; they're lessons learned from hundreds of hours detailing boats just like yours. They'll save you a ton of frustration and get that shine back faster.
Pro Tips to Avoid Mistakes
Before you go all-in on the entire hull, always do a small test patch in an inconspicuous area. This is your chance to see how the compound and pad combination works on your boat. If you spot any issues, you can adjust your technique or product choice before it becomes a big problem.
Another game-changing tip is to work in small, manageable sections. I like to use painter's tape to outline a 2x2-foot area. This method is fantastic because it:
- Guarantees you don't miss any spots.
- Keeps the compound from drying out before you can work it in.
- Makes it easy to see your progress.
Finally, the easiest way to avoid a grueling buffing session is to keep up with regular maintenance. A quick wash every couple of weeks with a quality soap like Better Boat Boat Soap prevents grime and salt from building up. A clean boat is always easier to wax.
Key Takeaway
Consistency and preparation are everything. Mastering how to buff and wax a boat is more about preventing mistakes than it is about fixing them.
Take your time, follow these guidelines, and your next detailing session will be smoother and faster, leaving you with nothing but a stress-free shine to enjoy.
Your Boat Maintenance and Shine Schedule
That stunning, high-gloss finish isn't something you achieve in a single, intense weekend of work. It’s the result of a smart, consistent maintenance routine. Believe me, keeping that showroom shine is far easier than trying to restore it from scratch every year. By sticking to a simple schedule, you stop heavy oxidation from ever getting a real foothold.
This proactive approach is all about shifting from corrective action (heavy buffing) to preventative maintenance (regular washing and protection). A well-maintained boat just needs less intensive labor each season, which saves you a ton of time and elbow grease in the long run.
Your Seasonal Shine Plan
How often you'll need to detail your boat really depends on your environment. A boat soaking in a harsh saltwater setting is naturally going to demand more attention than one kicking back on a freshwater lake.
Here’s a simple, effective schedule I recommend:
-
After Every Single Use: Give the hull a quick rinse with fresh water. This is probably the most important habit you can develop. It gets rid of salt crystals and surface grime before they have a chance to bond with your wax and cause real trouble.
-
Every 2-4 Weeks: Time for a proper wash. Use a quality, pH-neutral soap like our Better Boat Boat Soap to gently lift dirt without stripping away that protective wax layer you worked so hard on.
A consistent wash schedule is your first line of defense. It lets you spot any new issues—like new scuffs or stains—early on, before they turn into major projects.
When To Boost and When To Re-Wax
Over time, even the best protective wax layer will naturally wear down. Knowing when to give it a little boost versus when to do a full re-application is the key to efficient maintenance.
-
Monthly Touch-Up: To keep water beading like crazy and the gloss level high, a quick spray-on product is your best friend. Our Better Boat Instant Wax is perfect for this. Think of it as a booster shot for your existing wax. It only takes a few minutes after a wash and dramatically extends the life of your base coat.
-
Full Re-Wax (Every 3-6 Months): When you notice water has stopped beading up tightly and the shine looks a little tired, it’s time for a fresh coat of marine wax. The good news? If you've kept up with maintenance, this usually doesn't require any compounding. Just wash, dry, and apply a new layer of protection.
A full-blown buffing and waxing session should be an annual event at most, something you tackle during spring commissioning or only when you see light oxidation starting to return. Following this simple schedule ensures that the arduous task of buffing and waxing a boat becomes a much lighter lift each year.
At Better Boat, we provide everything you need to protect your investment and keep your vessel looking its absolute best. Our family-owned business is dedicated to creating high-quality, easy-to-use products that simplify boat care. Discover our full range of cleaning and detailing supplies to build your perfect maintenance kit today.


