


Waxing Gel Coat: Mastering Waxing Gel Coat Techniques for a Brilliant Shine
Waxing your boat isn't just about making it look good—it's the single most important thing you can do to protect the gelcoat from UV damage and oxidation. Think of it as a sacrificial barrier that preserves the gloss and health of the underlying surface, saving you from a world of expensive restoration work down the road.
Why a Good Wax Job Is Your Gelcoat's Best Defense
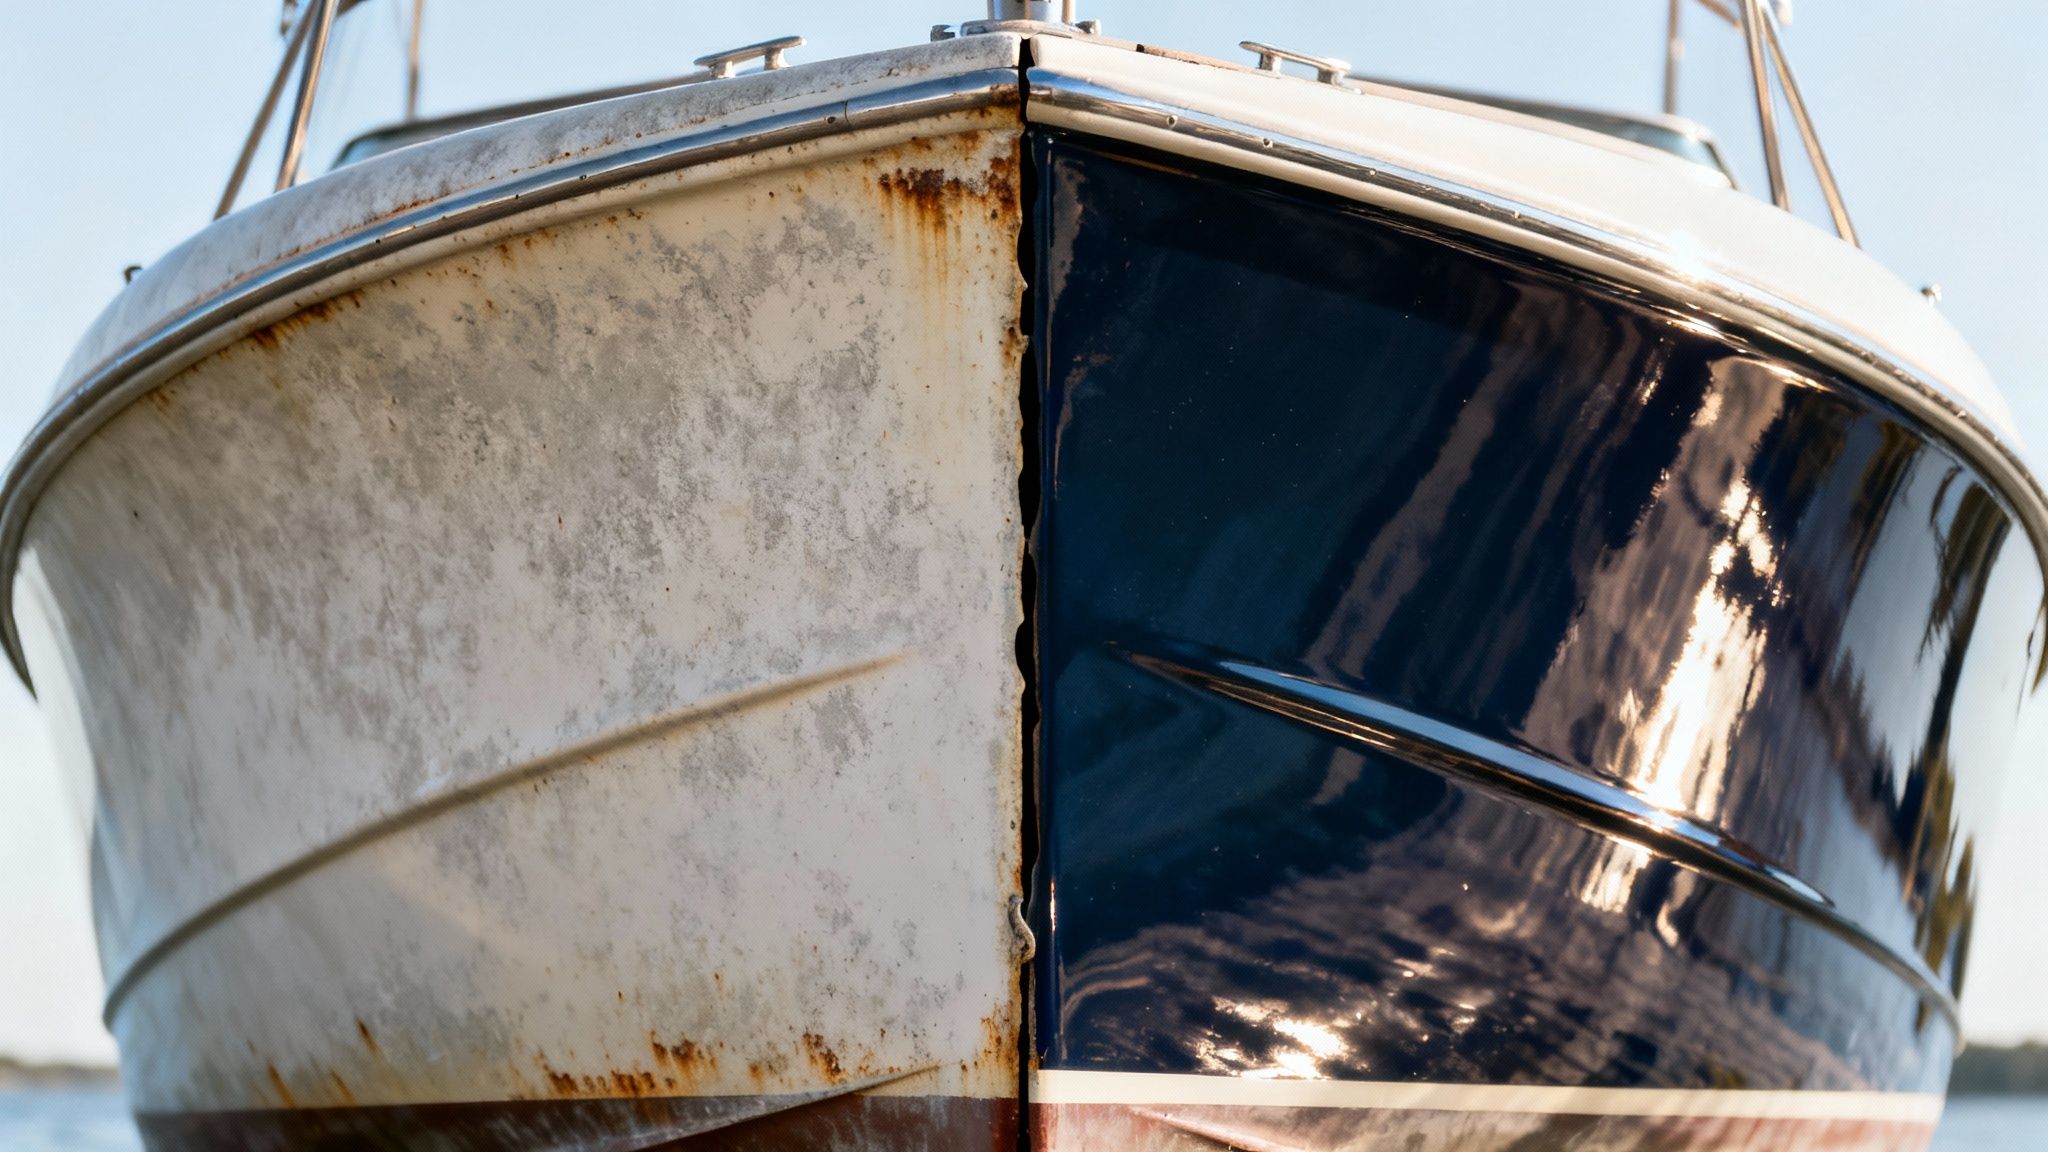
Ever see that chalky, faded look on a boat hull? It's more than just an eyesore; it's a warning sign. Unlike car paint that’s tucked safely under a clear coat, gelcoat is a porous resin. It's a lot like skin—without some form of sunscreen, it's completely exposed to the harsh marine environment.
That porosity is where the trouble starts. UV rays, saltwater, and oxygen get into those tiny pores, breaking down the resin and kicking off the oxidation process. The result is that dull, chalky residue that not only looks terrible but is actually the slow decay of your boat's protective skin.
The Sacrificial Shield
This is exactly where a good wax job becomes a non-negotiable part of boat ownership. A quality marine wax does more than just add shine. It gets down into the microscopic pores of the gelcoat and seals them off, creating a protective barrier that takes the abuse from the sun and salt so your gelcoat doesn't have to.
I've seen it happen time and again: a new boat owner skips waxing for a couple of seasons. The first year, the gloss just fades a bit. By the end of the second, the hull is noticeably chalky and feels rough to the touch.
Not only has the resale value taken a hit, but a simple wax job is no longer an option. Now, that owner is looking at a full weekend of heavy compounding and polishing just to bring the finish back—work that a few hours of waxing each year could have easily prevented.
Waxing isn't just for looks; it's preventative maintenance that directly protects your investment. A few hours of work each season can save you thousands in potential gel coat restoration costs down the line.
A Smart Financial Decision
Protecting this critical outer layer is more important than you might think. The global marine gel coat market was valued at $4.2 billion in 2022 and is projected to hit $7.5 billion by 2032, all thanks to a worldwide boom in recreational boating. As more boats hit the water, the need to maintain them properly has never been greater.
Ultimately, regular waxing is one of the smartest financial moves a boat owner can make. It protects your boat's value, its appearance, and even its structural integrity. Of course, before you can lay down that crucial protective layer, you need to know exactly what you're working with. Check out our guide on what gelcoat is on a boat for a deeper dive.
Laying The Groundwork For A Flawless Finish
Here's the single biggest mistake I see boaters make: they try to apply wax to a dirty or oxidized surface. It’s like trying to paint over rust—you’re just trapping the problem underneath. That new wax won't bond properly, and you'll have wasted a whole lot of effort for a shine that doesn't last.
If you want a professional-grade result, you have to prep the canvas first. This isn't just a quick rinse-down. It's a critical three-stage process: deep cleaning, decontaminating, and correcting the surface. Getting this groundwork right is what separates an amateur job from a brilliant, long-lasting shine.

The Deep Clean
First things first, you need to get all that loose surface grime off—the salt spray, bird droppings, dust, and general dockside dirt. Whatever you do, don't reach for the dish soap from the galley. Those household detergents are packed with harsh degreasers that will strip any old wax and dry out your gelcoat, which ironically makes it even more prone to oxidation.
You'll want a dedicated, pH-neutral boat soap for this job. A quality product like our Better Boat Boat Soap is formulated specifically to cut through marine grime without being overly aggressive. Grab a soft deck brush or a wash mitt and work from the top down, rinsing thoroughly as you go.
Decontaminating The Surface
After that initial wash, you’re bound to notice some stubborn blemishes that the soap just couldn't touch. These are the contaminants that have bonded with the gelcoat and need a little more persuasion to leave.
You'll see things like:
- Mineral Deposits: Those annoying hard water spots, especially if your boat lives on a lake.
- Exhaust Stains: The dark, sooty smudges that always seem to build up on the transom.
- Scuff Marks: Black streaks left behind from fenders, dock bumpers, and wayward shoes.
Using a specialized stain remover or a non-abrasive cleaner will lift these without gouging the surface. For tough scuffs and marks, our Better Boat Eraser Sponges work wonders, lifting stains without damaging the gelcoat. It's a must-do step to get the surface truly bare and ready for the real work.
Correcting Gelcoat Oxidation
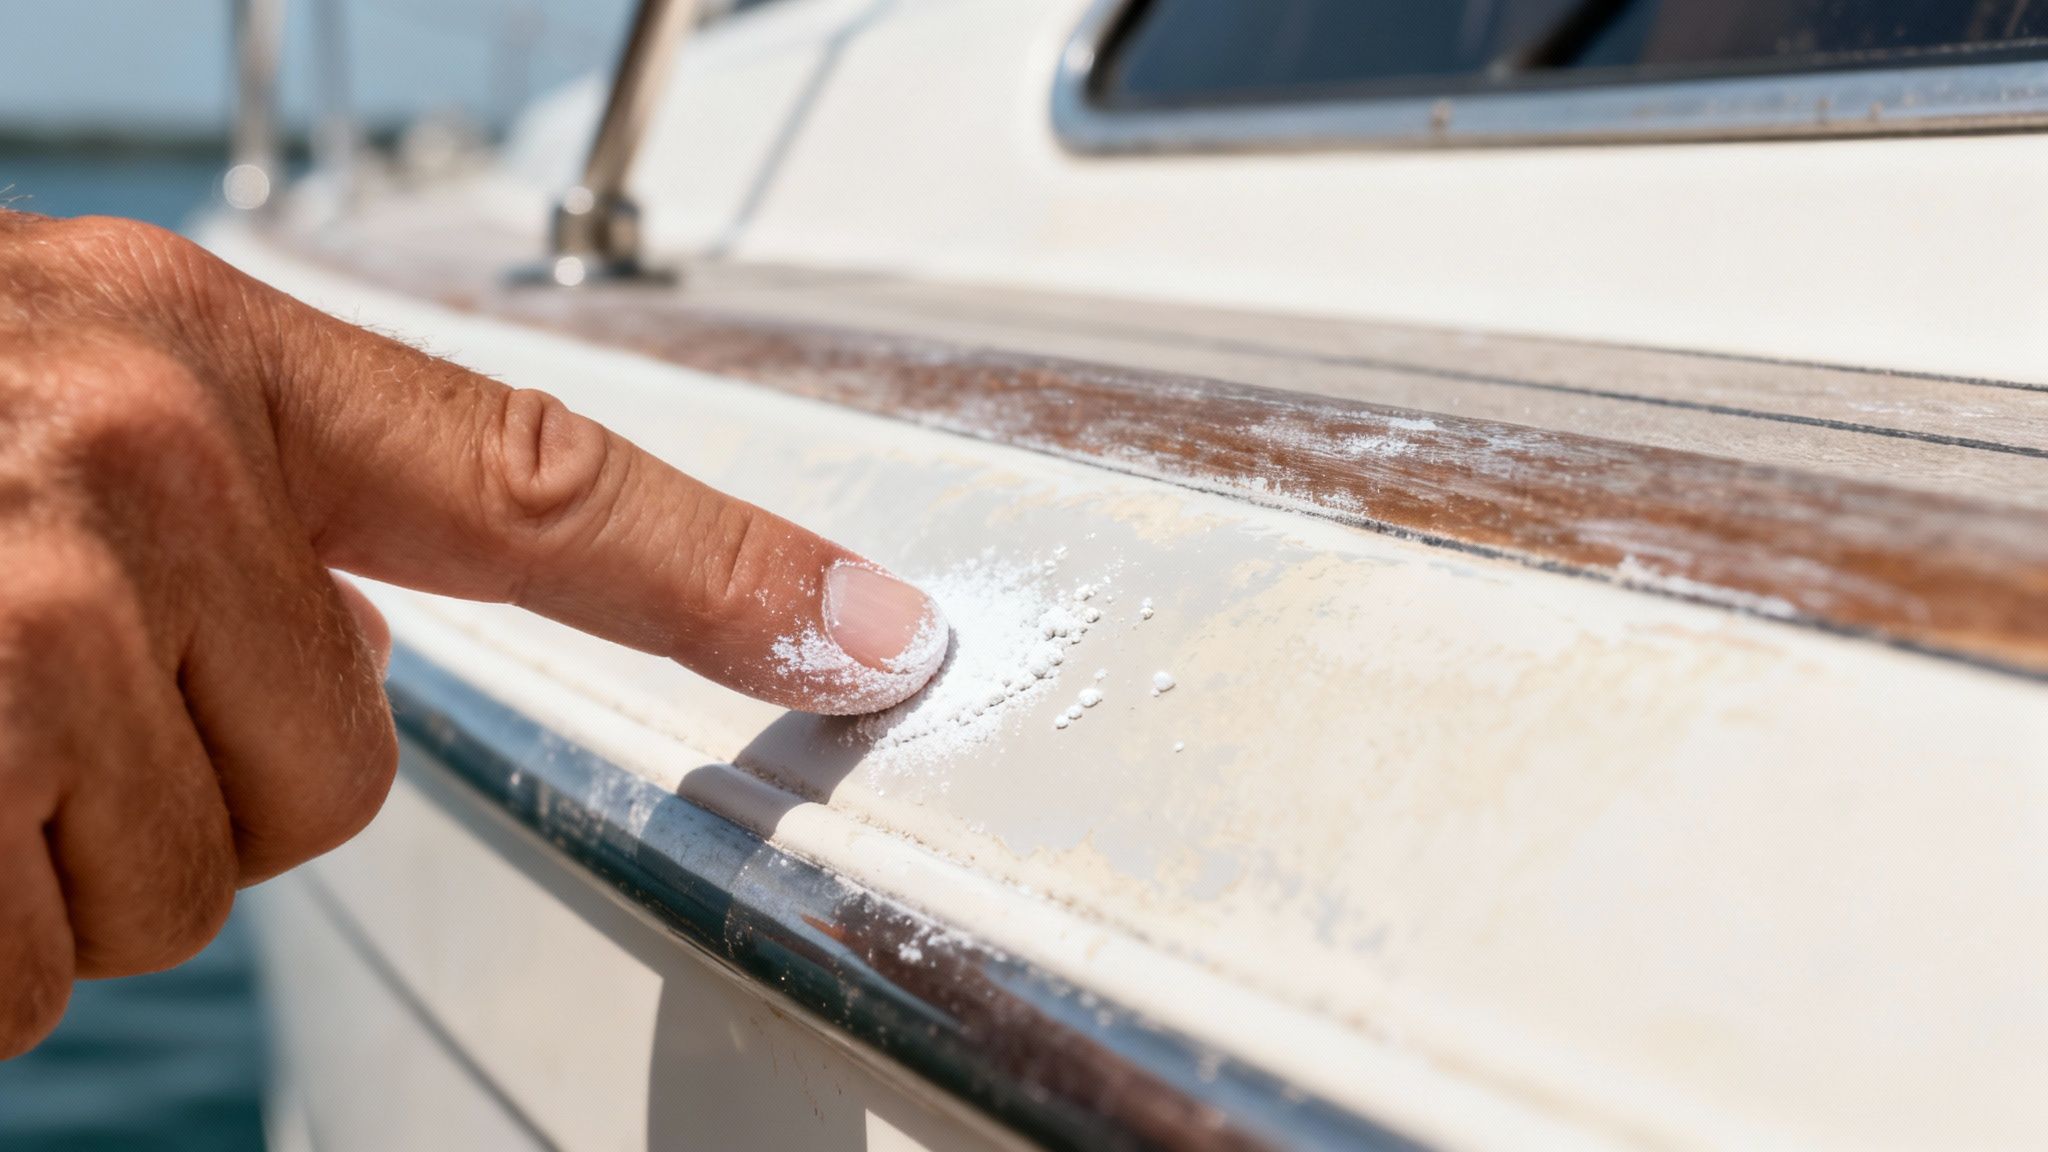
With the surface finally clean, it's time to face the music and assess the real condition of your gelcoat. Oxidation is that chalky, dull layer that builds up as the sun’s UV rays and the elements beat down on your boat.
The Fingertip Test: A dead-simple way to check for oxidation is to rub your fingertip across a dry section of the hull. If a chalky white (or colored) residue comes off on your finger, you've got oxidation, and it has to go before you even think about waxing.
How much chalkiness you find will dictate your next move. For very light dullness, our Marine Polish might be all you need. But for moderate to heavy oxidation, you’re going to need a more aggressive rubbing compound to cut through that dead layer and reveal the fresh, vibrant gelcoat underneath.
Skipping this correction phase is a critical error. Waxing over oxidation just seals in the dullness, giving you a cloudy, weak finish that won't last more than a few weeks. The real, deep gloss comes from the smoothness of the gelcoat itself—the wax is just there to protect it and make it pop.
Choosing Your Wax And Detailing Arsenal
Alright, with all the prep work done, it's time for the fun part: picking out the products and tools that will give your boat that head-turning shine. What you choose here makes all the difference in the final look, how long it lasts, and just how deep that gloss gets. The world of marine waxes can feel a bit crowded, but it really just comes down to three main types, each with its own job to do.
Think of your wax choice like picking the right armor for a fight. Some are all about a dazzling, show-car finish, while others are built from the ground up for pure, rugged endurance.
Carnauba Waxes: The Choice for Unbeatable Shine
If you want that deep, wet-looking gloss that makes colors pop, carnauba is your go-to. Often called the "queen of waxes," it’s a natural product from a Brazilian palm tree, and nothing quite matches the rich, three-dimensional shine it gives a gelcoat. It’ll make a navy blue hull look a mile deep and a white deck look impossibly bright.
That incredible look comes with a trade-off, though. Carnauba has a lower melting point, which means the sun and heat on the water break it down faster. You're typically looking at 3-4 months of protection. It's the perfect choice for the show boat owner or anyone who doesn't mind waxing a bit more often to get that absolutely stunning finish.
Synthetic Sealants: The Workhorse for Durability
When your number one priority is long-lasting protection, you want a synthetic polymer sealant. These are engineered in a lab to bond to your gelcoat and create a tough, slick barrier against the elements. This man-made shell stands up to UV rays, salt spray, and pollution far better than any natural wax.
A quality synthetic sealant can easily give you 6 months or more of solid protection. This makes it the practical choice for most of us, especially if your boat lives in a harsh saltwater environment or gets baked by the sun all season. The shine might not have the warm glow of carnauba, but modern formulas deliver a sharp, glassy reflection that’s still mighty impressive.
Here's a pro tip many boaters swear by: Use a hybrid approach. Lay down a durable synthetic sealant as your base coat for long-term protection, then top it with a layer of carnauba. You get the best of both worlds—longevity and that extra "wow" factor.
Cleaner Waxes: The All-In-One Time Saver
For a boat that’s already in good shape or for those mid-season touch-ups, a one-step cleaner wax is a lifesaver. Products like our Better Boat Marine Wax are designed to do a few things at once. They have gentle cleaners to lift light oxidation and stains, fine polishes to smooth the surface, and a protective wax, all in one bottle.
It's the ideal product for routine upkeep, saving you a ton of time and elbow grease. Just remember, it’s not a miracle worker. If you're starting with a chalky, neglected hull, you'll still need to do the heavy lifting with a compound and polish first.
To make the choice a bit clearer, let's break down the options and the tools you'll use to apply them.
Gel Coat Wax and Applicator Comparison
Choosing the right combination of wax and application method is key to getting the results you want without spending your whole weekend on the project. This table lays out the most common options to help you find the perfect fit for your boat and your schedule.
| Category | Best For | Pros | Cons | Better Boat Recommendation |
|---|---|---|---|---|
| Carnauba Wax | Show-stopping, deep wet gloss | Unmatched depth of shine, enhances color | Lower durability (3-4 months), needs frequent reapplication | Marine Polish with Carnauba Wax for the ultimate shine |
| Synthetic Sealant | Long-lasting, durable protection | Excellent UV and salt resistance, lasts 6+ months | Shine can be less "warm" than carnauba | Boat Wax Sealant Hybrid Ceramic Spray for easy, durable protection |
| Cleaner Wax | Routine maintenance, light oxidation | Saves time and effort, cleans and protects in one step | Not for heavy oxidation or major correction | Marine Wax for efficient mid-season upkeep |
| Hand Application | Small boats, tight spaces, curved areas | Excellent control, satisfying process | Labor-intensive, difficult to get an even coat on large hulls | High-quality foam or microfiber applicator pads |
| Machine (DA Polisher) | Boats over 20 feet, achieving a uniform finish | Faster, applies a thin and even coat, less tiring | Requires an initial tool investment, has a slight learning curve | A quality dual-action (DA) orbital polisher for safe, swirl-free results |
Ultimately, there's no single "best" answer—it's about what works for you. A sealant topped with carnauba applied by machine might be perfect for a spring detail, while a quick hand application of cleaner wax is all you need mid-July.
Hand Application Versus Machine Polishing
Once you've got your wax, how are you going to get it on the hull? Both hand and machine application have their moments.
-
Hand Application: There's something satisfying about applying wax by hand with a good foam applicator pad. It’s perfect for getting into tight corners, around cleats and railings, and over complex curves. It gives you great control, but be prepared for a workout if you're doing a larger boat.
-
Machine Application: If your boat is over 20 feet, do yourself a favor and get a machine polisher. It’s a total game-changer. A machine spreads a much thinner, more consistent layer of wax, which is actually more effective and easier to buff off. For any DIYer, a dual-action (DA) orbital polisher is the way to go. Its random oscillating pattern is incredibly safe and virtually eliminates the risk of burning the gelcoat or leaving swirl marks.
Don't Skimp On The Final Touches
This last point is more important than most people realize: your towels and applicators matter. You can do everything else right, but a cheap, scratchy towel can ruin your hard work in seconds by leaving lint or, even worse, fine scratches on your freshly waxed surface.
Invest in a good stack of high-quality microfiber towels. Their soft, looped fibers are designed specifically to grab wax residue and lift it away cleanly without marring the finish. Using premium tools from start to finish is the final piece of the puzzle for achieving that perfect, swirl-free, professional look.
Perfecting Your Wax Application Technique
Alright, your boat is prepped and you’ve got your products picked out. Now for the fun part—this is where all that hard work pays off. But getting that flawless, professional-grade finish is all about technique, not just elbow grease. Let's ditch the generic advice and walk through how to actually wax a gelcoat surface, focusing on the little details that make a huge difference.
Picture this: you're working on a 24-foot center console on a warm, sunny morning. Your first instinct might be to work in the direct sun to help the wax dry faster. That’s a critical mistake. Sunlight heats up the gelcoat, causing the wax to flash-cure almost instantly. This makes it a nightmare to spread evenly and even harder to buff off, usually leaving you with a streaky, hazy mess.
So, rule number one is to work in the shade or on an overcast day. If you can't, stick to the early morning or late evening when the sun is low and the hull feels cool to the touch.
Mastering The Art Of Less Is More
The next key to success is breaking the job down into small, manageable sections. Don't even think about trying to tackle the entire side of the hull at once. Mentally divide the surface into 2-foot by 2-foot squares. This disciplined approach is the secret to applying a thin, even coat and removing it at the perfect moment, before the product dries out and becomes a beast to remove.
Slathering on too much wax is probably the most common mistake out there. A thick layer doesn't add more protection; it just wastes product and makes the buffing stage a real workout. You’re aiming for a thin, translucent film—just enough to see that you've covered the area.
This simple workflow shows how each step contributes to the final goal.
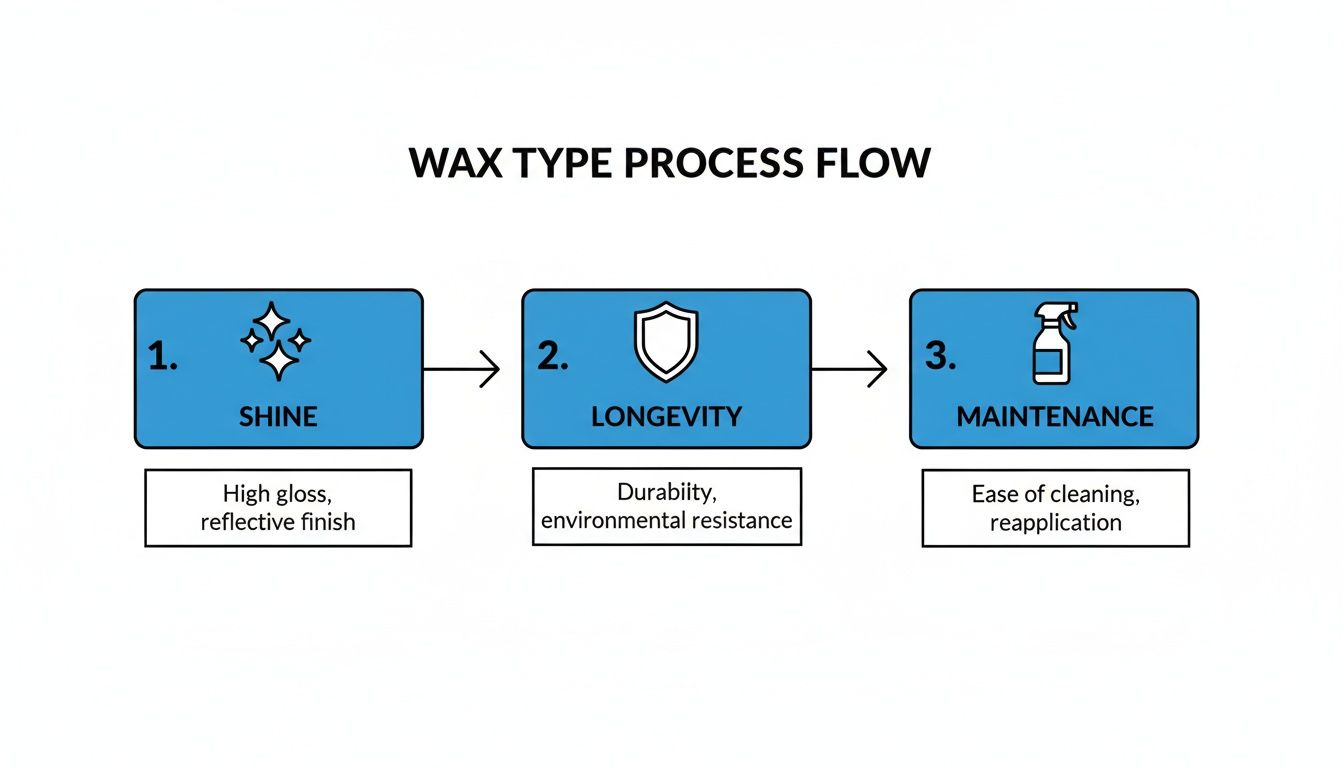
From that initial pop of shine to long-term protection, it's all about following a proven process that makes future cleanups easier.
Hand vs. Machine Application Patterns
How you apply the wax will determine the pattern you use to get that complete, even coverage. Each technique is designed to prevent high spots and thin spots, giving you a totally uniform layer of protection.
- Hand Application: If you're going old-school with a foam applicator pad, use small, overlapping circular motions. This classic technique is great for gently working the wax into the gelcoat's pores. Once you've covered your 2'x2' section, finish up with a few straight, back-and-forth passes to level everything out.
- Machine Application: Using a dual-action (DA) polisher? The cross-hatch pattern is your best friend. Make a few slow, overlapping passes horizontally across your section, then follow up with a few passes vertically. This method is incredibly efficient for creating a consistent, thin film and saves you a ton of time and energy compared to working by hand.
The goal, whether by hand or machine, is a whisper-thin, uniform layer. A polisher makes it easier, but a careful hand application can deliver the same stunning result.
And maintaining that gelcoat is more important than you might think. The gelcoat market, where marine applications make up over 40% of the share, was valued at USD 1,380.1 million in 2023 and is only getting bigger. For boat owners, neglecting gelcoat care isn't just a cosmetic problem—it can slash a vessel's resale value by as much as 20-30%.
The Foolproof Swipe Test
Okay, so you've applied the wax to your section. How do you know exactly when it’s ready to be buffed off? This is where people get tripped up. Wipe it too soon, and you get a greasy smear. Wait too long, and you'll be fighting to remove a rock-hard residue.
The answer is the simple, yet invaluable, swipe test.
Let the wax sit for a few minutes (the exact time will vary based on the wax, temperature, and humidity). Then, gently swipe your index finger across a small spot.
- If it smears: The wax is still wet. Give it another few minutes to haze up.
- If it comes off clean: Perfect. The wax has cured and is ready for removal. The residue on either side of your finger swipe should look chalky and dry.
This test takes all the guesswork out of the equation. Once the wax passes, grab a clean, high-quality microfiber towel. Gently buff the residue away, flipping the towel often to a clean side. Using a premium towel is non-negotiable here; a cheap one will just leave lint and can even cause fine scratches.
Nailing these techniques will build your confidence and help you achieve that perfect, long-lasting shine every single time.
Keeping Your Boat's Shine All Season Long
You did it. You put in the hours—the compounding, the polishing, the careful waxing. Now, how do you make that brilliant, glass-like shine last? This is where maintenance comes in. It’s what separates a finish that looks good for a few weeks from one that protects your gelcoat all season long.
Think of that fresh wax coat as a shield. Every trip out, it takes a beating from UV rays, salt, and grime. Over time, that shield gets thinner. Your job is to keep it reinforced before it’s gone completely.
Create a Sustainable Annual Routine
A solid maintenance plan keeps you from having to do a massive restoration project every single spring. By staying on top of it, the heavy lifting becomes a thing of the past.
- Start of the Season: This is when you put in the main effort. After a good wash, do a full compound and polish to get rid of any oxidation or swirls from the off-season. Follow that up with a high-quality base coat of wax. This is your foundation for the entire season.
- Mid-Season Reinforcement: If your boat lives in a high-stress environment—like the brutal sun in Florida or corrosive saltwater—a second coat of pure wax mid-season is a game-changer. This recharges the protective layer right when it's needed most, usually around July or August.
This simple one-two punch ensures your gelcoat is never left exposed.
The Importance of Regular Washing
Honestly, the single best thing you can do to make your wax last is to wash your boat regularly. Salt crystals left on the hull are like millions of tiny magnifying glasses, focusing the sun's rays and just cooking your wax. Dirt and grime are also abrasive, slowly scuffing that shine away.
But—and this is a big but—you have to use the right soap. Washing your boat with dish soap or a harsh detergent is the fastest way to strip that protective wax layer you just applied. Always grab a pH-neutral, wax-safe boat soap like our Better Boat Boat Soap. These are made specifically to lift away salt and grime without destroying your protective coat. A quick wash every few trips makes a huge difference.
Here's a habit to get into: a simple rinse with fresh water after every single saltwater trip. It gets the most corrosive stuff—the salt—off before it can dry and start eating away at your finish.
Boost and Reinforce After Every Wash
Want a pro tip that will completely change your maintenance game? Start using a high-quality spray wax after each wash while the hull is still a little damp. This isn't a replacement for your main wax coat; think of it as a booster shot.
Products like Better Boat's Instant Wax are perfect for this. It seriously only takes a few extra minutes to spray down a section and wipe it with a clean microfiber. This quick step does a few key things:
- Reinforces the Wax Barrier: It lays down a fresh, thin layer of protection over your existing wax, patching up any microscopic weak spots.
- Boosts Gloss and Slickness: You instantly get back that "just-waxed" look and feel. The surface becomes incredibly slick and shiny again.
- Makes Future Cleanings Easier: Because the surface is so slick, new grime has a tough time sticking. Your next wash will be faster and easier.
When you make this part of your regular washing routine, you're constantly topping off that protective layer. This strategy will dramatically extend the life of your main wax job, which means less compounding and polishing for you and more time enjoying a boat that looks incredible.
Got Questions About Waxing Your Gelcoat?
Even guys who've been on the water for decades still have questions about the finer points of waxing gelcoat. That's totally normal. Getting the details right is the difference between a shine that lasts and having to do the whole job over again in a month. Let's tackle some of the most common questions I hear.
How Often Do I Really Need to Wax My Boat?
For the average boater, a solid wax job twice a year is the magic number. I always recommend a thorough application right before the season kicks off and another one just before she goes into winter storage. Think of it as opening and closing ceremonies for your boat.
Now, your local environment changes everything. If you're running your boat in the harsh Florida sun or it's sitting in a saltwater slip all year, you absolutely need to add a third coat mid-season. No question. Salt and UV rays are relentless.
Here's the best pro tip I can give you: Forget the calendar and watch the water. When it stops forming those tight, pretty little beads on your hull and starts spreading out in flat sheets, your wax is gone. That's your boat telling you it's time to reapply.
Can't I Just Use My Car Wax?
I see this question a lot, and while I get the temptation, using car wax on your boat is a big mistake. It might seem like a simple shortcut, but gelcoat and automotive paint are worlds apart. Gelcoat is way more porous and faces a much, much tougher life than your car's clear coat.
Marine waxes are a completely different animal. They're packed with heavy-duty UV blockers and special polymers engineered to bond to that porous gelcoat and fight off saltwater, algae, and constant sun. Car wax just doesn't have the muscle. It’ll break down and wash away in a few weeks, leaving your gelcoat totally vulnerable.
What's the Real Difference Between Polish and Wax?
This is probably the most critical thing to understand, and so many people mix them up. It's actually pretty simple when you break it down: polish corrects, wax protects.
- Polish: A polish has tiny, microscopic abrasives in it. Its only job is to smooth out the surface of the gelcoat by removing oxidation, light scratches, and those ugly swirl marks. Our Marine Polish restores the shine of the gelcoat itself.
- Wax: A wax is purely a protective layer. It has no abrasives. You apply it on top of that freshly polished surface to create a sacrificial barrier against the elements.
If your boat's finish is in pretty good shape and just a little dull, a one-step cleaner wax like our Marine Wax can be a great time-saver. But for that deep, wet-looking, boat-show shine, you always want to polish first, then seal in that perfection with a dedicated wax.
My Gelcoat is Super Chalky. Is It a Lost Cause?
It's almost never too late! But you're right to think that wax alone won't fix it. Heavy, chalky oxidation is basically a layer of dead, sun-baked gelcoat. You can't protect it; you have to remove it.
You're going to need to start with a more aggressive rubbing compound to cut through that dead layer and get down to healthy gelcoat. This is the elbow-grease part of the job. After compounding, you’ll step down to a finer polish to remove any haze from the compound and really bring out that deep gloss.
Only then, once the surface is smooth and shiny again, are you ready to lay down your protective wax. It's definitely more work, but this is how you bring a neglected boat back from the dead. The results are worth it.
At Better Boat, we're boaters just like you, and we know keeping your vessel looking its best is a point of pride. Our family-owned business is all about creating top-tier, straightforward products that give you professional-grade results. Don't let all your hard work go to waste—keep that gelcoat gleaming with a wax designed for the job.
Explore our collection of boat waxes and polishes and find the perfect match for your boat's needs.


