 Skip to content

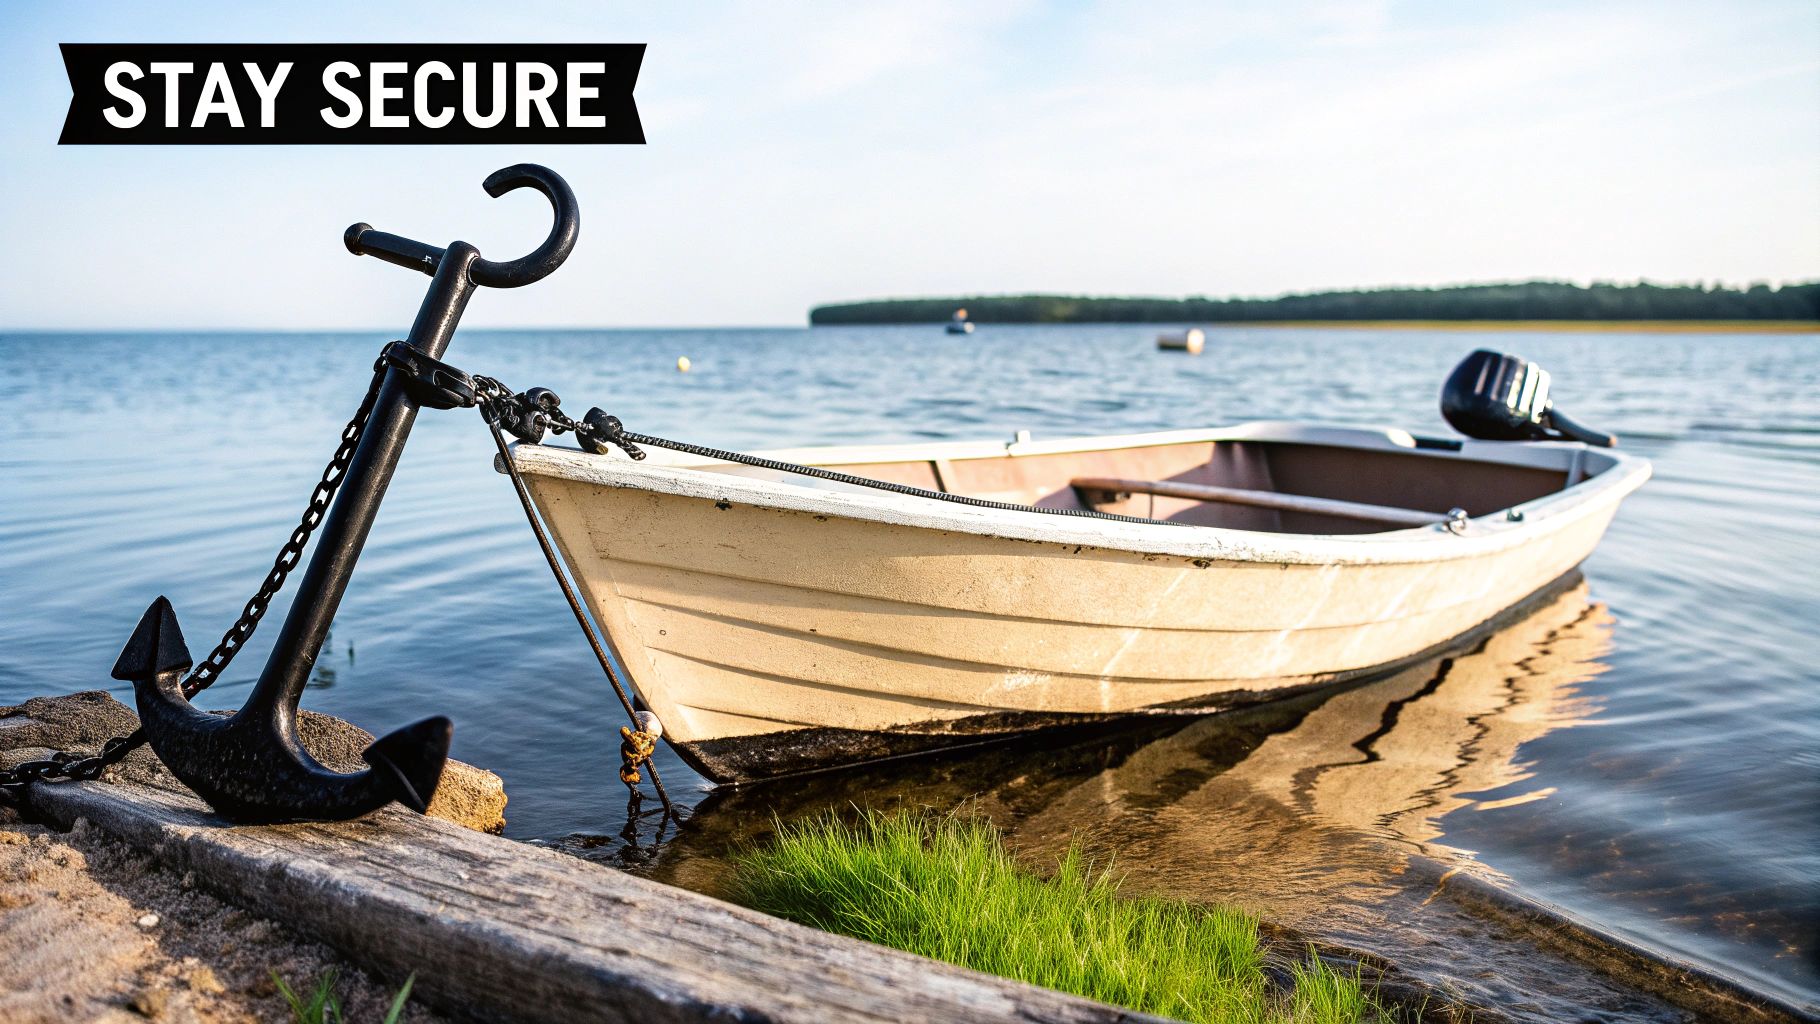
Install Your Boat Anchor Holder Like a Pro
An anchor rattling around on deck isn't just annoying—it's a recipe for stubbed toes and a damaged boat. A proper boat anchor holder is your ticket to stowing your anchor safely, keeping it out of the way but ready to drop at a moment's notice. The key is finding one that provides a snug, secure fit for your specific anchor and boat.
Matching the Right Anchor Holder to Your Boat
Before you start drilling any holes, you need to play matchmaker. A good anchor holder should fit your anchor and vessel like a glove. The needs of a small fishing boat on a calm lake are worlds apart from an offshore cruiser tackling choppy seas.
Your anchor's style is the biggest piece of the puzzle.
- Fluke (Danforth) Anchors: These flat, popular anchors slide neatly into chocks or specially designed brackets that lock the flukes down.
- Plow and Claw Anchors: With their unique shapes, these anchors almost always require a bow roller or a pulpit-mounted holder. This setup guides the anchor smoothly over the bow for hassle-free deployment and retrieval.
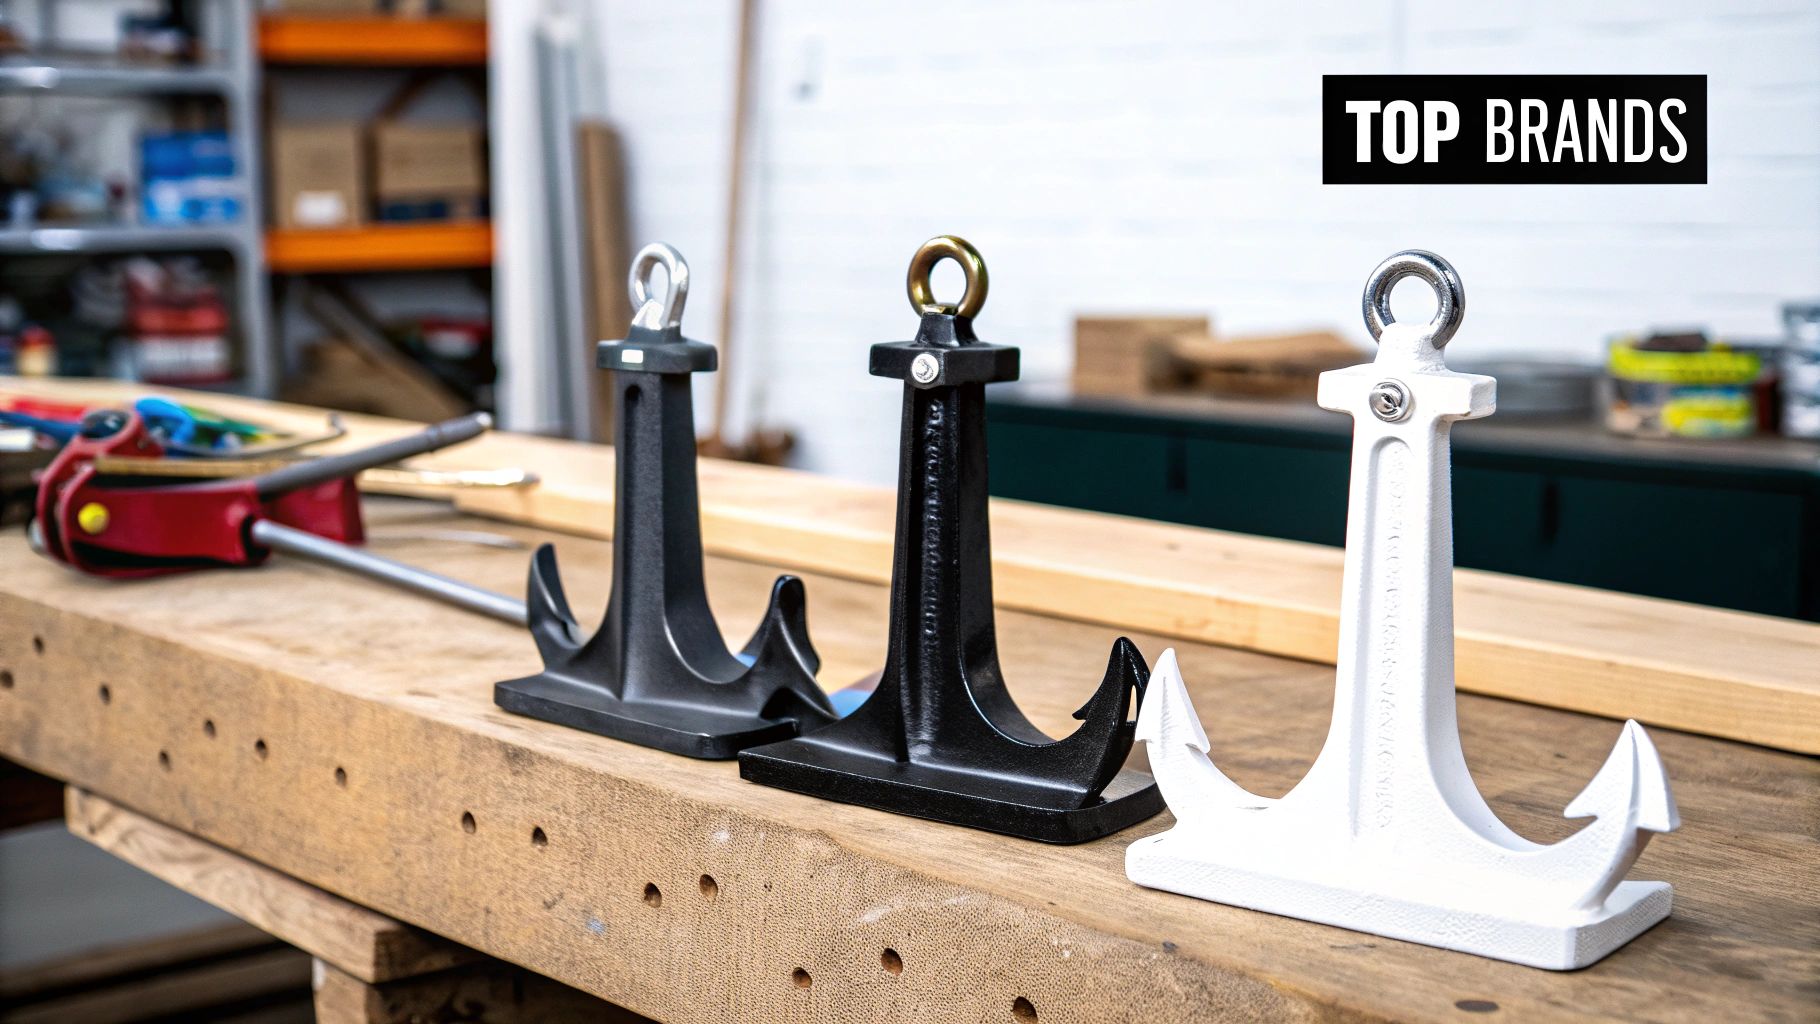
Material Matters in Marine Environments
The material of your anchor holder is just as critical as its design, especially when you factor in the environment. For anyone boating in saltwater, 316 stainless steel is the gold standard. Its superior resistance to corrosion is unmatched, making it a smart investment in durability and longevity.
There's a reason you see so much stainless steel on the water. In fact, the global market for boat anchors was valued at USD 2.7 billion in 2021, and it continues to grow, with rugged materials like stainless steel leading the charge.
Of course, if you're strictly a freshwater boater or working with a tighter budget, high-quality marine polymers or even galvanized steel can get the job done. Just know they might not hold up as well against the elements over the long haul.
Let's break down the common materials so you can see what works best for you.
Anchor Holder Material Comparison
Here’s a quick look at the most common materials, their strengths, and where they really shine.
| Material | Pros | Cons | Best For |
|---|---|---|---|
| 316 Stainless Steel | Excellent corrosion resistance, strong, durable, polished look | Most expensive option, can be heavy | Saltwater environments and heavy-duty use |
| Galvanized Steel | Good strength, more affordable than stainless | Zinc coating can wear off, susceptible to rust over time | Freshwater boats and budget-conscious boaters |
| Marine-Grade Polymer/Composite | Lightweight, corrosion-proof, affordable, won't scratch deck | Not as strong as metal, can degrade with UV exposure | Smaller boats, freshwater use, lightweight anchors |
| Rubberized/Coated Metal | Protects boat finish, reduces noise and rattling | Coating can peel or crack over time, exposing metal to rust | Securing fluke anchors where deck protection is a priority |
Choosing the right material really comes down to where you boat and how much you're willing to invest upfront for long-term performance.
Key Takeaway: Always put your boating environment first. Saltwater demands stainless steel, hands down. Freshwater gives you more flexibility with options like marine-grade composites and galvanized steel.
Ultimately, you're looking for a holder that not only fits your anchor perfectly but can also handle the stress of rough water and wind. If you're still trying to pick the anchor itself, our guide on the best boat anchors can help you lock in that decision before you find its perfect holder.
Pre-Installation Prep for a Flawless Finish
I’ve learned the hard way that a successful anchor holder installation is 90% preparation and only about 10% drilling. If you get this part right, you'll save yourself from a world of hurt later—think spider cracks in your gelcoat, frustrating leaks, or a holder that rips clean off the deck under a heavy load.
Think of it as your own pre-launch checklist. Before you even think about picking up a drill, lay the new holder on your deck. Try out a few different spots. Can you visualize how your anchor rode will run? You're looking for a clear, straight path from the holder, over the bow roller, and down into the water. Any weird angles or bends will just chafe the line and make hauling the anchor back up a real chore.
Gathering Your Installation Toolkit
Having all your gear ready to go makes the job ten times smoother and saves you those annoying mid-project trips to the marine store. You don't need a massive toolbox, just the essentials.
- Drill with Marine-Grade Bits: Don't skimp here. Sharp bits designed for fiberglass are a must to avoid chipping that beautiful gelcoat.
- Quality Marine Sealant: This is absolutely non-negotiable. Grab a good polyurethane sealant like 3M 5200 for a permanent bond or 4200 if you think you might ever want to remove it. This is what waterproofs your drill holes.
- Wrenches and a Socket Set: You’ll need the right sizes to get the nuts and bolts properly tightened down.
- Painter’s Tape and a Pencil: The perfect combo for marking your drill spots without leaving any permanent marks on your deck.
Here’s a pro tip I swear by: make a simple cardboard template. Just trace the base of your holder onto a piece of cardboard, cut it out, and use that little pattern to test your positions and mark the drill holes. It's a foolproof way to get your alignment perfect before you make any permanent decisions.
Expert Insight: Always, always, always check what’s underneath your chosen mounting spot. Get access from below deck or through a hatch to make sure you aren't about to drill straight into hidden wiring, a water hose, or a critical structural support.
This prep stage is also the ideal time to double-check that your anchor is the right size for your boat. The entire system—holder, rode, and anchor—works together, and it all starts with having the correctly weighted anchor. Take a minute to review a reliable anchor size chart to be sure your gear is properly matched to your boat's length and displacement before you start drilling holes.
Your Guide to a Secure Anchor Holder Installation
Alright, you've got your tools ready and the perfect spot picked out. Now for the moment of truth. This is where we get down to business, but don't sweat it. A little patience and precision here will give you a rock-solid boat anchor holder that you can count on. The most important thing is getting the drilling right, especially on fiberglass.
First, grab that cardboard template you made and tape it down exactly where you want the holder to live. Give it one last look—is it straight? Is it centered? Once you're happy with it, use a pencil or a fine-tipped marker to mark the very center of each drill hole. This simple step is your best friend when it comes to avoiding a crooked installation.
Drilling and Sealing for a Watertight Fit
I get it—drilling into your boat’s beautiful gelcoat can be nerve-wracking. Nobody wants to see those ugly little "spider cracks" branch out from a drill hole.
Here’s the trick I’ve always used: start small. Drill a small pilot hole first, then step up your bit size until you reach the final diameter needed for your bolts. Another pro tip is to run the drill in reverse for the first few seconds. This scores the gelcoat cleanly before the bit really starts to chew into the fiberglass.
For a truly bulletproof seal, I always oversize the final holes by about 1/8 inch. Why? Because when you pump marine sealant into this gap, you’re not just sealing the surface; you're creating a perfect little "sealant pocket" around the bolt. This technique creates a far superior waterproof barrier and completely isolates the fiberglass core from any chance of water intrusion down the road.
Pro Tip: Whatever you do, don't skip the backing plate. Think about the incredible forces pulling on that anchor in rough seas. A sturdy metal or marine-grade plywood plate on the underside distributes that immense load. Without it, your bolts could literally rip right through the fiberglass.
This whole process, from choosing the right anchor to deciding on placement, is a flow. You need to get each step right before moving on to the next.
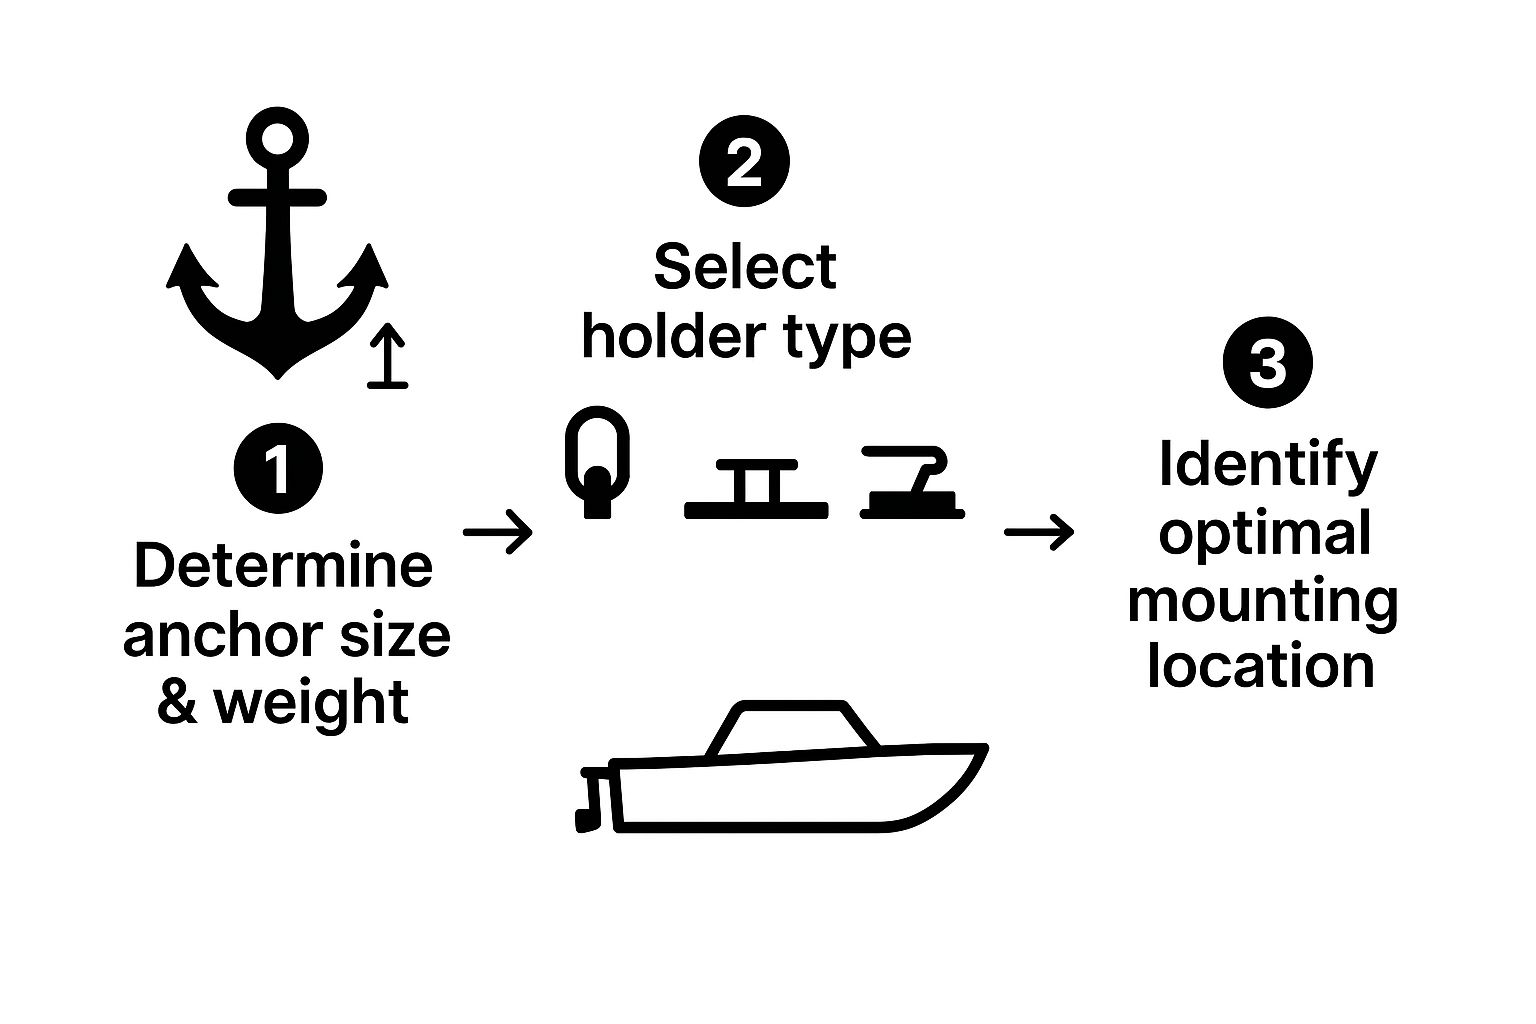
As you can see, a successful installation really begins long before you even pick up the drill.
The Final Tightening Sequence
With your holes drilled and cleaned out, it's time for sealant. Lay down a generous bead of marine-grade sealant on the underside of the anchor holder's base. Make sure to get some into the drill holes and on the bolt threads, too. Don't be shy with it—any excess that squeezes out is easy to clean up later.
Now, place the holder and insert the bolts. From underneath, add your backing plate and thread on the nuts.
When you start tightening, do it in a crisscross pattern, just like you would with the lug nuts on a car tire. This applies even pressure across the base, giving you a perfect seal without warping the hardware. Snug the nuts down until you see the sealant just start to squeeze out from the edges, then stop. Let it cure for the time recommended by the manufacturer before coming back for one final tightening. This two-stage approach creates the strongest, most waterproof bond you can get.
Common Installation Mistakes You Need to Avoid

Even the slickest, most expensive anchor holder is worthless if it's installed poorly. I’ve spent countless hours at marinas and boat ramps, and trust me, I've seen some common slip-ups that lead to serious damage or just a plain frustrating day on the water. Avoiding these pitfalls is every bit as important as the installation steps themselves.
One of the most frequent errors I see is guys grabbing hardware from the local big-box store. Sure, those standard zinc-plated bolts might look fine in the aisle, but they'll turn into a rusty, corroded mess in a marine environment. Eventually, they’ll fail under load. For this job, you have to insist on 316 stainless steel for all your bolts, nuts, and washers. It's non-negotiable for long-term strength and corrosion resistance.
Mounting and Sealing Errors
Another classic mistake is picking a weak spot to mount the holder. Drilling into an unsupported section of the deck without a solid backing plate is just asking for trouble. The immense force from a deployed anchor can rip the holder right out of the deck, causing major fiberglass damage you don't want to deal with.
Similarly, skimping on a quality marine-grade sealant is a recipe for disaster down the line.
- Inadequate Sealant: Not using enough sealant—or using the wrong kind—lets water seep into your boat's core. That leads to delamination and rot over time.
- Poor Alignment: Even a slightly crooked holder can cause the anchor rode to chafe and wear out way too fast. It can also make deploying and retrieving the anchor a complete nightmare.
An anchor isn’t just a piece of marine gear; it’s a critical tool for your boat's stability and safety. This same principle applies well beyond boating, where high-performance anchors are essential in construction and major infrastructure projects to meet strict safety regulations. You can learn more about the critical role of anchors across different industries from Stratview Research.
Take the extra few minutes to double-check your alignment and use the right materials from the start. It will absolutely save you from expensive repairs and ensure your gear works perfectly when you really need it to.
Keeping Your Anchor System in Top Shape for the Long Haul
Just because the last bolt is tight doesn't mean your work is done. If you want your boat anchor holder and the rest of your ground tackle to be there for you when you need it most, a little proactive maintenance goes a long way. Trust me, a few minutes of inspection after each trip can save you from a world of hurt later.
Start with a simple once-over. Give the holder a good look for any signs of stress, like tiny cracks forming around the mounting bolts. You'll also want to watch for any discoloration, which is often the first sign of corrosion setting in. If you've got a stainless steel holder, a quick rinse with fresh water is all it takes to wash off the salt deposits that can cause ugly pitting. Double-check that all the fittings are still nice and snug.
Your Routine Inspection Checklist
A more thorough check a couple of times a season is a smart habit to get into. This quick routine hits all the critical spots.
- Sealant Integrity: Go ahead and press firmly around the base of the holder. If the sealant feels brittle, has visible cracks, or is starting to pull away from the deck, it’s time to act. Scrape out the old stuff and lay a fresh bead to keep water from seeping into your deck's core.
- Hardware Check: Give every nut and bolt a quick check with a wrench. The constant vibration on a boat can work them loose over time, and you want everything to be rock-solid.
- Rode and Chain: Eyeball your anchor line for any fraying or signs of chafe where it might rub. If you have a chain, look for rust on galvanized links or wear and tear on the shackles connecting everything together. Our guide to boat anchor lines has more great tips for keeping them in prime condition.
This kind of attention to detail is what separates a prepared skipper from one who's asking for trouble. It’s no surprise the ship anchor market was valued at around USD 1.3 billion back in 2021; reliable gear is everything when it comes to staying put in all kinds of marine conditions. You can dig into more insights about the global ship anchor market on cognitivemarketresearch.com.
Frequently Asked Questions About Boat Anchor Holders
It’s normal to have a few questions pop up when you're tackling a project like this. Let's get them sorted out with some quick, straightforward answers to the things we get asked most often about anchor holders.
Can I Mount an Anchor Holder Anywhere on My Boat?
Absolutely not, and this is one you really want to get right. The location you choose is critical. Your anchor holder has to be mounted on a structurally solid part of the boat, like the bow pulpit or a properly reinforced section of the deck.
Trying to mount it on a thin, unsupported piece of fiberglass is asking for trouble. The stress from an anchor pulling in a current can cause serious damage to your boat or rip the holder clean off. Before you even think about drilling, always check underneath the deck to make sure there's enough support and you can get to it.
What Is the Best Sealant for This Job?
To get a truly waterproof and bomb-proof seal, you need to use a high-quality, marine-grade polyurethane sealant. Forget the stuff you have in your garage. The two go-to options for boaters are:
- 3M 5200: This stuff is legendary for a reason—it creates a permanent, incredibly strong bond. Only use this if you are 100% sure you will never need to remove that hardware.
- 3M 4200: This is what I'd recommend for most jobs. It provides a tough, semi-permanent bond that’s still removable later if you're willing to put in some elbow grease.
Both are specifically made to handle the beating of a harsh marine environment, keeping water out and providing a seal that stays tough but flexible.
Key Takeaway: Grabbing a tube of household silicone or some other non-marine sealant is a huge mistake. It will inevitably fail, leading to leaks that can cause water damage to your boat's core material.
Are Backing Plates Really Necessary?
Yes. Full stop. For pretty much any installation through a fiberglass deck, using a backing plate isn't just a good idea—it's non-negotiable for a safe and secure setup.
Think about the immense strain your anchor puts on those mounting bolts. Backing plates distribute that pulling force over a much larger surface area. Without them, all that stress gets focused on a few small points, which could eventually allow the bolts to pull right through the deck when the wind and current kick up.
For all the anchoring equipment, marine-grade sealants, and accessories you need for your next project, trust Better Boat to deliver reliable, high-quality gear. Find the perfect solutions to keep your boat secure and well-maintained at https://www.betterboat.com.
Related Posts

A Pro's Guide to Repair Pontoon Boat Problems

Boat Repair Gel Coat Guide: Perfect Your Repair Today
