 Skip to content

A Pro Guide to Boat Detailing How To Get a Showroom Shine
Before you even think about grabbing a polisher or unrolling the hose, the real secret to a jaw-dropping finish is what you do first. Knowing how to detail a boat is less about elbow grease and more about having a solid game plan. A few minutes of prep saves hours of frustration later.
Think of it as a pre-flight check for your boat. You need to inspect your vessel, round up the right tools for the job, and get your workspace ready before a single drop of soap hits the deck. This is how you get that professional-grade shine.
Your Boat Detailing Game Plan
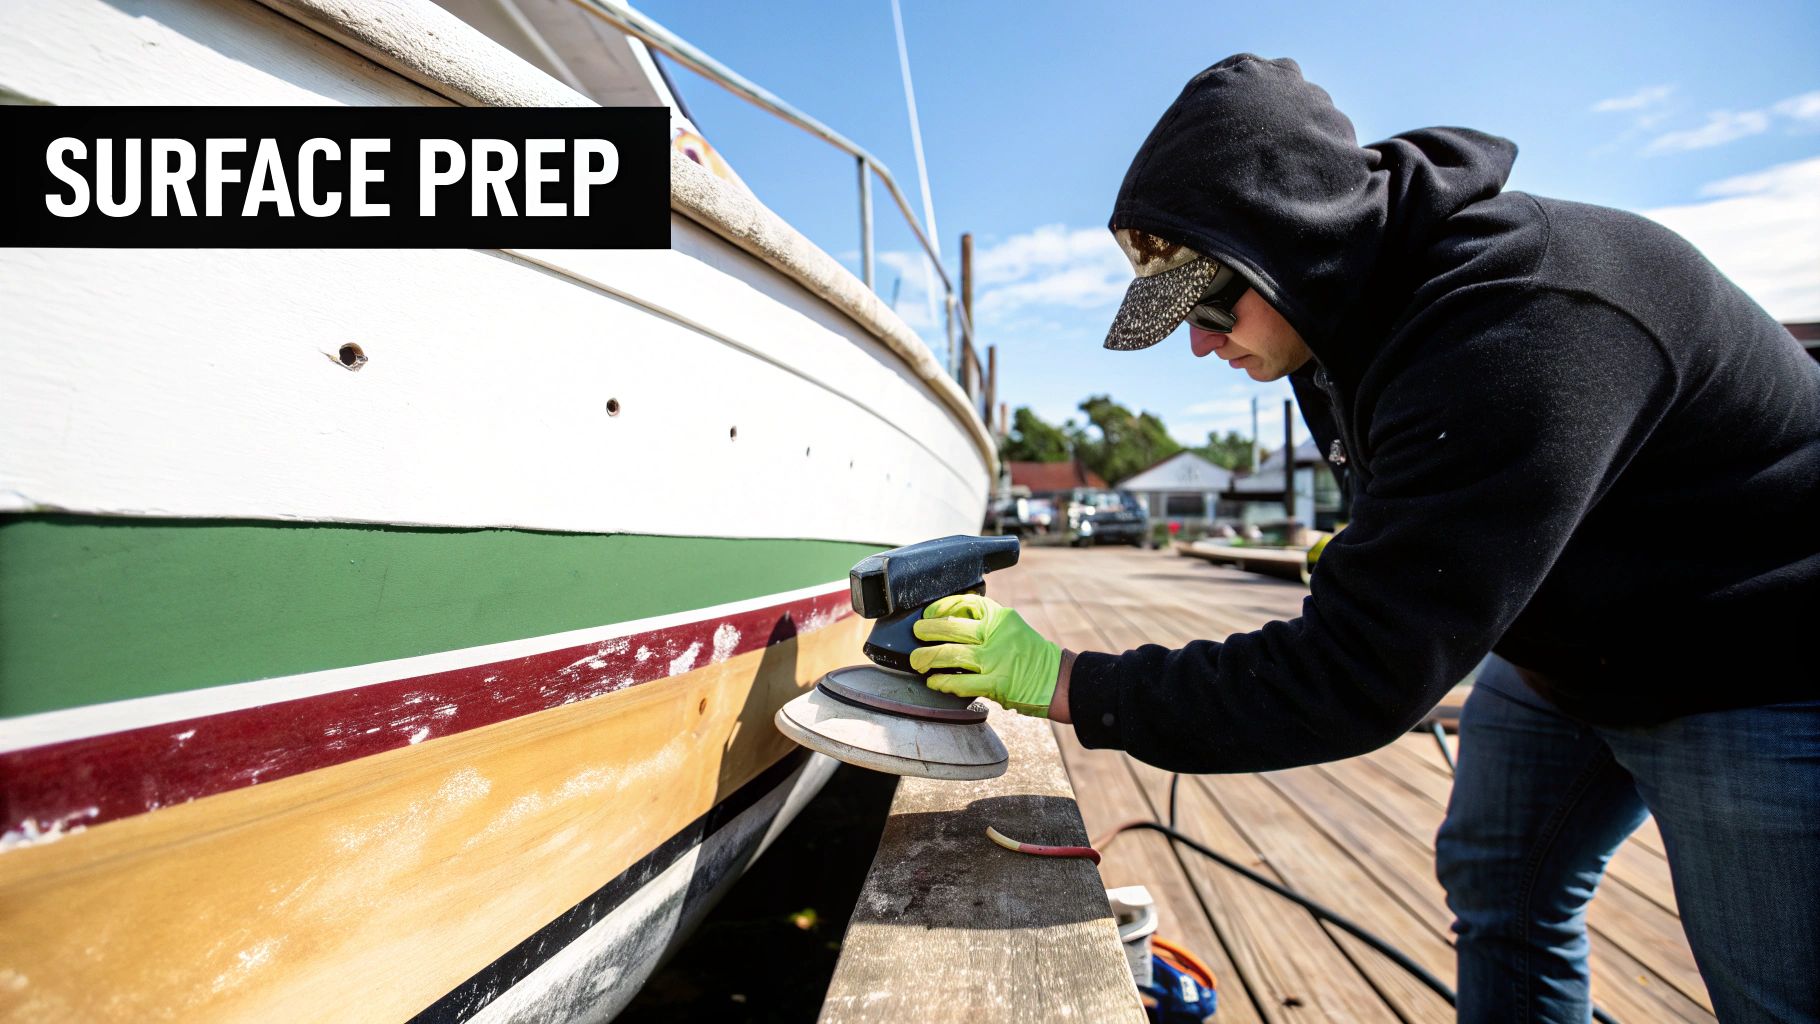
It all starts with a walk-around. Get up close and personal with your boat and take a critical look. Is the gelcoat feeling a bit chalky when you run your hand over it? That's oxidation, and it tells you a simple wash and wax won't cut it—you'll need a more aggressive compound.
Spot any stubborn black streaks under the rub rail? Or maybe some dark spots creeping onto the vinyl seats? That’s mildew calling, and it requires a specialized cleaner to knock it out for good.
Assessing the Condition
Here’s a quick checklist of what to hunt for during your inspection:
- Heavy Oxidation: This looks like a dull, chalk-like film on the gelcoat. You'll usually find it on the areas that get hammered by the sun, like the topsides and deck.
- Waterline Stains: That classic yellow or brown "boat mustache" along the hull is caused by minerals and marine growth.
- Mildew Growth: Keep an eye out for black or gray spots on vinyl cushions, canvas, and hiding in the non-skid patterns on your deck.
- Scuffs and Scratches: Minor battle scars from docks or gear that a good polishing can likely buff out.
Your findings here will dictate your entire approach. A boat that's seen light use might just need a good wash and a fresh coat of wax. But if you’re dealing with serious oxidation, you’re looking at a full multi-step correction process to bring that gelcoat back to life.
Preparing Your Workspace and Tools
Once you’ve got a handle on the condition, it’s time to set up your work area. If your boat is on a trailer, try to find a shady spot. Working in direct sunlight is a recipe for disaster, as products will dry on the hot gelcoat almost instantly, leaving streaks and residue.
If you’re tied up in a slip, make sure fresh water and power are easily accessible. And don't forget to check local regulations about runoff—using eco-friendly soaps might not just be a good idea, it might be the law.
Pro Tip: Don't even think about using your car cleaning brushes. They're not built for this. You absolutely need a medium-bristle deck brush for non-skid surfaces, and a stack of high-quality, plush microfiber towels is non-negotiable for buffing off wax without creating swirls.
The final step before you start is to gather your entire arsenal. Lay out your buckets, applicators, polishing pads, and all your Better Boat cleaners, compounds, and waxes. When everything is organized and within arm's reach, you can work efficiently and build momentum toward that incredible showroom shine. This is the real secret behind every great boat detailing job.
The Foundation: A Deep and Thorough Wash
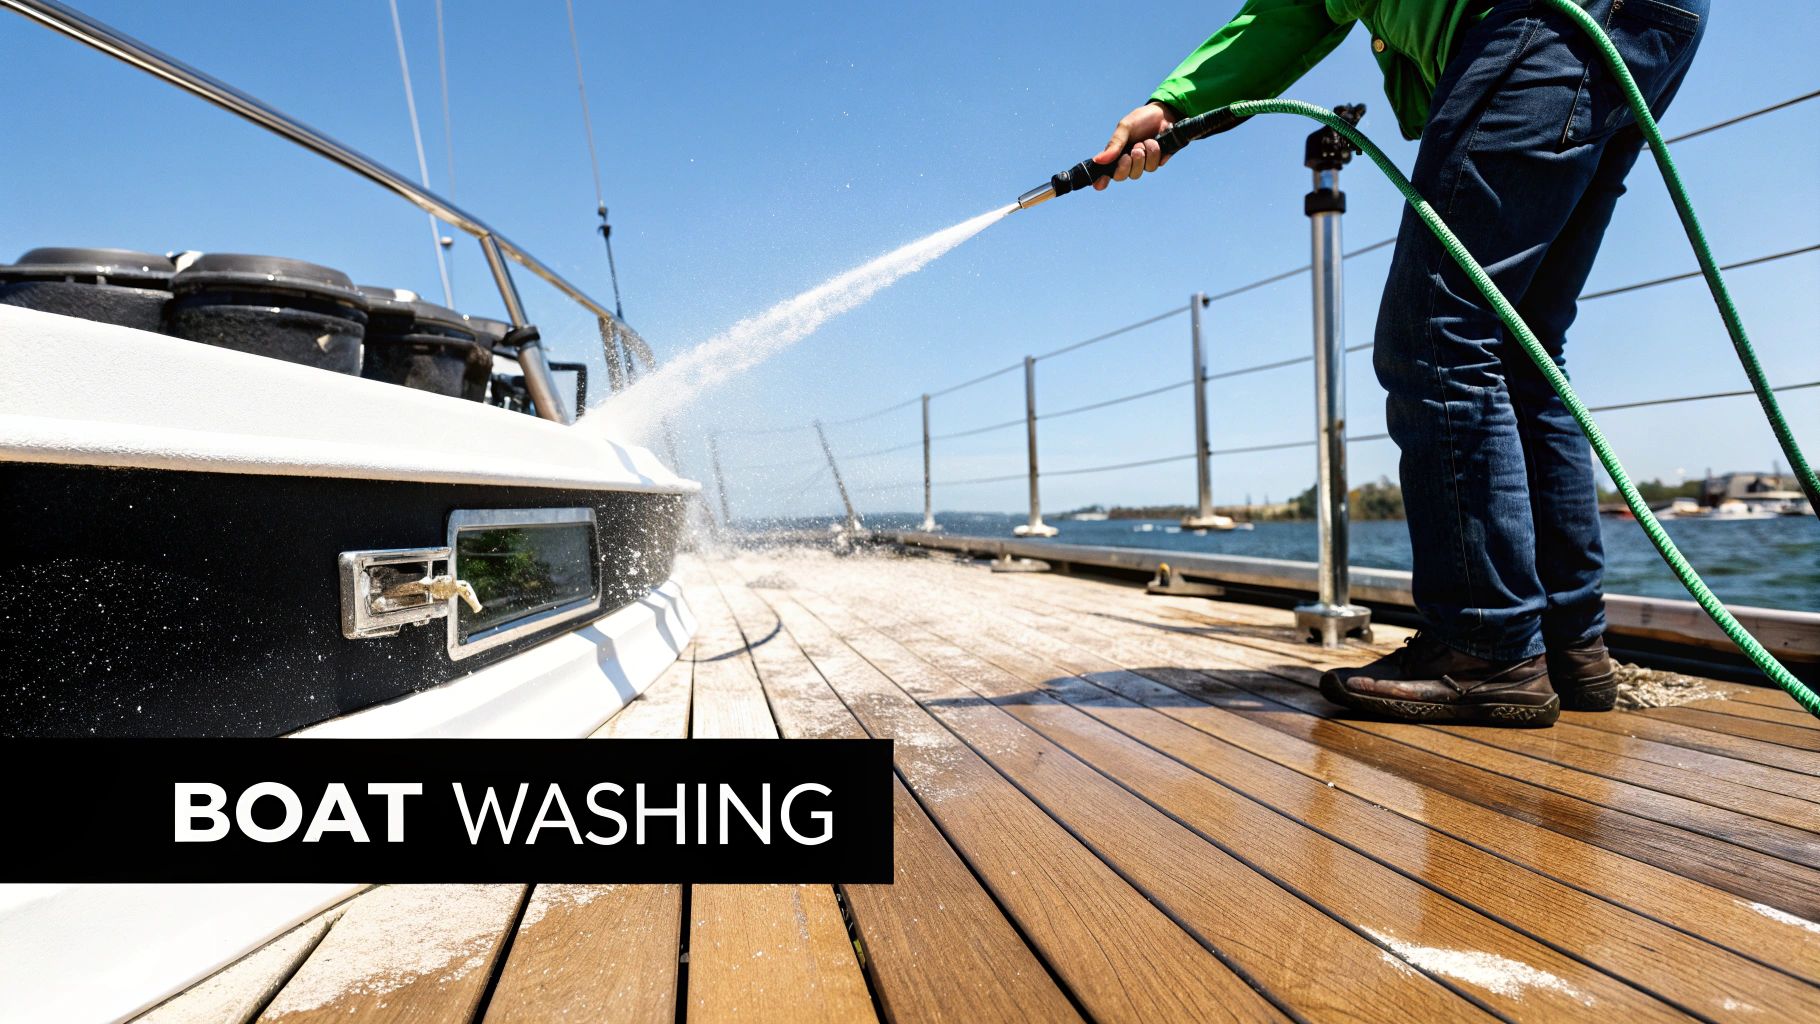
This is where the real work—and the real transformation—begins. A proper, deep wash is way more than a quick rinse. It’s the absolute bedrock for every compounding, polishing, and waxing step that follows. If you cut corners here, you’re just grinding salt, dirt, and grime into your gelcoat later on. No thanks.
The first rule every pro follows is to work from the top down. It sounds simple, but you’d be surprised how many people get it wrong. Start with the flybridge, tower, or cabin roof. This way, all the dirty water runs down over unwashed areas, preventing you from having to re-clean spots and chase frustrating streaks down the hull.
Choosing and Using the Right Boat Soap
First things first: step away from the dish soap. While it’s great for greasy pans in the kitchen, it's way too harsh for your boat’s gelcoat. It’ll strip any protective wax right off, leaving the surface exposed.
You need a dedicated, pH-balanced marine soap. Our Better Boat Soap is formulated specifically to tackle the tough stuff—salt spray, bird droppings, and general grime—without being abrasive.
Getting the most out of it comes down to proper dilution. A good rule of thumb that's always served me well is mixing one ounce of concentrated soap per gallon of water. This ratio gives you plenty of suds and cleaning power without leaving a nasty residue.
And please, use the two-bucket method. It's a non-negotiable tactic for anyone serious about a good finish. One bucket holds your soapy solution, the other holds clean water for rinsing your wash mitt or brush. This keeps you from dragging all the grit you just removed right back onto the hull. We cover the whole process in more detail right here: https://betterboat.com/blogs/news/how-to-clean-a-boat.
The demand for purpose-built products like these is on the rise. The global boat cleaner market was valued at roughly $1.5 billion in 2025 and is on track to hit about $2.3 billion by 2033. It’s a clear sign that boat owners are getting more serious about proper maintenance.
Tackling the Toughest Areas
Even the best soap runs into stubborn problems that every boat owner knows well. Different surfaces need different tools for the job, and matching the right product to the problem gets it done faster and better.
- Non-Skid Decks: These textured surfaces are absolute magnets for dirt. A soft brush just glides over the top. You'll need a medium-stiff deck brush and our Non-Skid Deck Cleaner to really get in there. The cleaner lifts the embedded grime out of the crevices so the brush can scrub it away.
- Waterline Stains: Ah, the dreaded "boat mustache"—that yellow-brown stain at the waterline. It's caused by mineral and organic buildup, and soap alone won't touch it. A powerful Hull Cleaner is designed to dissolve these stains chemically. Just apply it, let it sit for a few minutes (don't let it dry!), give it a light scrub, and rinse away years of buildup.
- Vinyl and Canvas: Go easy here. A dedicated Vinyl Cleaner is gentle on upholstery and won't dry it out or cause cracking like harsh, all-purpose cleaners can. For your canvas, a mild soap solution and a soft brush are all you need to remove dirt without wrecking the water-repellent coating.
A huge mistake I see people make is hitting their canvas and vinyl with a pressure washer. It can force water right through the fabric, tear up the seams, and cause serious premature wear. Always, always opt for a gentle hand wash on these materials.
To make sure you've got all your bases covered before you start, here's a quick checklist of the essentials.
Essential Boat Cleaning Product Checklist
Having the right cleaners on hand makes all the difference. This table breaks down the core products you'll need for a truly comprehensive boat wash.
| Product Type | Primary Use Area | Key Benefit |
|---|---|---|
| pH-Balanced Boat Soap | Entire boat surface | Lifts dirt and grime without stripping wax. |
| Hull Cleaner | Waterline, hull | Chemically dissolves tough organic and mineral stains. |
| Non-Skid Deck Cleaner | Textured deck surfaces | Penetrates crevices to lift out embedded dirt. |
| Vinyl Cleaner | Seats, cushions, bolsters | Cleans safely without drying or damaging upholstery. |
| Marine Degreaser | Engine bay, exhaust areas | Cuts through stubborn oil, grease, and black streaks. |
With this arsenal, you're equipped to handle just about any cleaning challenge your boat can throw at you.
The Hull: The Final Frontier
Once the topsides are sparkling, it’s time to give the hull your full attention. This part of the boat takes a beating from marine growth and waterline staining, so getting it clean is crucial for both looks and performance.
If your boat lives in the water, you're likely dealing with algae, slime, and maybe even some barnacles. Your hull cleaner is the first line of defense against the stains this stuff leaves behind. Apply it generously, let it do the hard work for you, and then give it a thorough rinse. For a really deep dive on this process, check out this excellent guide on how to clean your boat hull effectively.
After that final rinse, grab some high-quality microfiber drying towels or a chamois and dry the entire boat. This is key to preventing water spots and getting the surface perfectly prepped for the next phase: restoring that beautiful gelcoat shine.
Restoring Your Gelcoat: From Compounding to Polishing
Alright, with the boat washed and fully dried, we get to the part where you really see the transformation happen. This is where all the prep work pays off. We're about to take that clean but dull surface and bring back a deep, glossy shine that’ll make people notice. This stage is all about correcting the imperfections in your gelcoat, and it's what separates a quick wash from a professional detail.
The one-two punch for this job is compounding and polishing. People often use the terms interchangeably, but they do very different things. Think of compounding as the heavy lifting for major correction, and polishing as the final, fine-tuning step.
Compounding vs. Polishing: What’s the Difference?
Compounding is your go-to when you have noticeable surface problems. If you run your hand across the hull and it feels chalky or looks faded and hazy, you're dealing with oxidation. This is exactly what a good compound, like our heavy-duty Marine Rubbing Compound, is made for. It uses more aggressive abrasives to cut through that dead, oxidized top layer, effectively removing scratches and bringing back the original color.
Polishing, on the other hand, is a much less aggressive process. It uses finer abrasives to smooth out the surface after compounding, getting rid of any light swirls or haze the compound may have left behind. It’s also the perfect tool for boats that only have light oxidation or minor blemishes to begin with. A quality polish, like our Marine Polish & Sealant, refines the gelcoat on a microscopic level. This creates an incredibly smooth surface that reflects light perfectly, giving you that coveted deep, "wet" look.
Not sure which one you need? Here’s a quick test. After washing, just run your hand across a sun-beaten part of the hull.
- Got a chalky residue on your hand? You’ll need to start with a compound.
- Feels smooth but just looks dull? You can probably jump straight to polishing.
- Looks pretty good but has some fine swirls? A light polish will make it perfect.
This isn't just about looks; it's about preservation. The global boat polish market was valued at around USD 145 million in 2024 for a reason. It's a critical part of protecting a vessel from UV damage and oxidation. A proper polish job doesn't just make a boat look good—it extends its life and protects your investment. You can find more data on the boat polish market from industry research reports.
The Art of Application: Machine vs. Hand
Look, you can apply these products by hand, but for the best results in the shortest amount of time, a machine polisher is the way to go. A dual-action (DA) or random orbital buffer works the product in far more evenly and effectively, breaking down the abrasives properly to achieve a finish you just can't replicate by hand.
If you are working by hand, grab a good applicator pad and work in small, overlapping circles with firm, consistent pressure. It's a serious workout, but it’s fine for small touch-ups or very light polishing jobs. For an entire hull, a machine is almost a necessity.
This infographic gives a great overview of the whole detailing flow, showing you exactly where polishing fits between cleaning and the final protective wax coat.
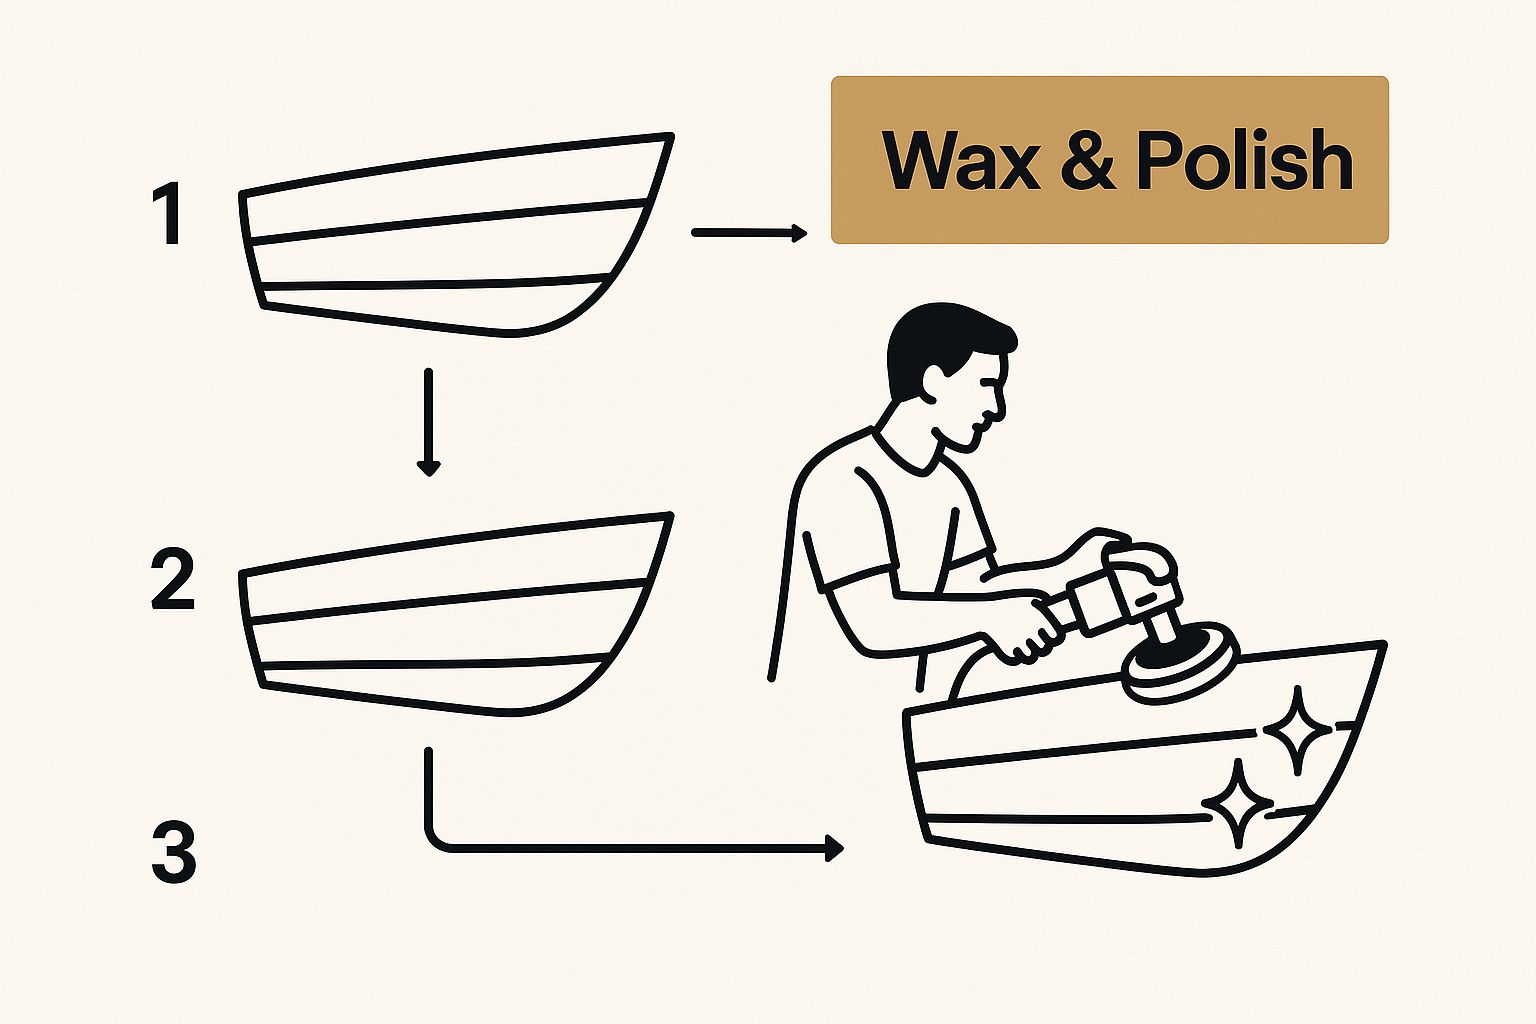
As you can see, polishing is that crucial bridge. It takes a clean boat and makes it a restored boat, ready to be sealed and protected.
Mastering the Technique for a Flawless Finish
Whether you're compounding or polishing, consistency is everything. The biggest rookie mistake is trying to tackle a huge area all at once. You'll just wear yourself out and get a patchy, uneven finish because the product will dry out before you can work it in properly.
Pro Tip: Stick to a small, manageable section, about 2x2 feet at a time. This lets you concentrate your effort, fully work the product before it dries, and ensure every single inch gets the attention it needs.
Here’s my process when using a machine buffer:
- Pick the Right Pad: For heavy compounding on a really oxidized gelcoat, a wool pad is your best bet for its aggressive cutting power. For lighter compounding or polishing, a medium-cut foam pad is perfect.
- Apply Product to the Pad: Squeeze a few dime-sized drops of compound or polish onto the pad. Don't slather it on—too much product just makes a mess and can gum up the pad, making it less effective.
- Spread on Low Speed: Place the buffer on your 2x2 section before turning it on. Start on a low speed to spread the product evenly across the area. This keeps it from slinging everywhere.
- Work the Product In: Bump the speed up to a medium setting (a 3-4 on most DA polishers). Move the buffer in slow, overlapping passes, first side-to-side, then up-and-down. Let the machine do the work; you only need light to moderate pressure.
- Watch for the Change: As you work, you'll see the compound or polish go from a milky white to a thin, clear, oily film. That's your cue. It means the abrasives have broken down and done their job.
- Wipe and Inspect: Turn the machine off and lift it away. Use a clean, plush microfiber towel to wipe off the residue. Grab a good light and inspect the area for an even shine before you move on to the next section.
A perfect real-world scenario is tackling a dark-colored hull, like a navy blue or black. Those colors are notorious for showing every single swirl and imperfection. By sticking to small sections and keeping your pad clean, you can get that flawless, mirror-like finish you're after.
When you're done, the gelcoat should feel slick and smooth to the touch, and the color should look deep and vibrant. Now you've got the perfect canvas for that final layer of protection.
Applying a Durable Wax or Sealant for Lasting Protection
After all that hard work compounding and polishing, your boat’s gelcoat is finally back to its original glory. Now for the most important part of the entire job: protecting that incredible shine.
Skipping this final step is like winning a race and then leaving the trophy outside to rust. You absolutely have to lock in that gloss with a tough, durable protective layer. Think of it as a sacrificial barrier, taking the hits from UV rays, salt spray, bird droppings, and all the other grime that wants to ruin your finish. Without it, the oxidation you just spent hours removing will start creeping back, sometimes in just a few weeks.
Choosing Your Shield: Carnauba Wax vs. Polymer Sealant
You’ve got two main choices here: a traditional carnauba-based marine wax or a modern synthetic polymer sealant. They both do a great job, but they have different strengths. The right one for you really depends on your boating habits and even your local climate.
-
Marine Carnauba Wax: This is the classic choice, famous for producing an incredibly deep, wet-looking shine. If you're an enthusiast who loves that rich, warm gloss, carnauba is for you. It provides excellent UV protection and makes water bead up like crazy. The trade-off? Its natural formula means it doesn't last as long, typically giving you 2-4 months of protection before you need to reapply.
-
Polymer or Ceramic Sealants: These are the lab-engineered workhorses. They might not have the same warm glow as carnauba, but they make up for it with sheer durability and longevity. A quality polymer sealant can shield your gelcoat for 4-6 months or even longer, which is a huge plus for boaters who want maximum protection with less elbow grease. They create a stronger chemical bond with the surface for tougher resistance.
For a lot of folks, a hybrid product like our Marine Polish & Wax hits the sweet spot. It combines fine polishing agents with protective polymers, letting you maintain the shine and add a durable shield all in one go.
Mastering the Application Technique
No matter which product you pick, how you put it on is what separates an okay job from a professional one. One of the biggest mistakes I see boat owners make is slathering the stuff on thick. The thinking is "more product, more protection," but it's actually the opposite.
A heavy layer of wax or sealant won't cure properly. It becomes a nightmare to buff off, leaving you with a hazy, streaky mess that actually attracts more dirt and dust. The golden rule is simple: thin is in.
Put a few dime-sized drops on a clean foam applicator pad. Gently spread it over a small, manageable section—let's say 3x3 feet at a time—using overlapping circular motions. You’re aiming for a thin, even, almost transparent film.
Knowing When to Buff: The Swipe Test
So, you've applied a thin coat. How do you know when it’s ready to be buffed off? This is where a simple pro trick called the "swipe test" saves the day.
After waiting the time recommended on the bottle (usually 10-20 minutes, depending on the temperature and humidity), just gently swipe your index finger across a small spot.
- If it smears or streaks: The product is still wet. Give it more time to cure. Wiping it off now will just create a greasy mess you'll regret.
- If your finger leaves a clean, clear path with zero smearing: It’s perfectly cured and ready for buffing.
This little test takes all the guesswork out of the process, ensuring you buff at the perfect moment for the easiest removal and the best possible shine. If you want to dive deeper into the whole process, our guide on how to properly wax a boat has all the details you need.
The final piece of the puzzle is your towel. Please, ditch the old cotton t-shirts and bath towels. For a flawless, streak-free finish, nothing beats a plush, high-quality microfiber towel. Use one side for the initial wipe to get most of the wax residue off. Then, flip to a clean, dry side for the final buff to really bring out that brilliant, mirror-like shine. This careful final step ensures all your hard work is locked in and protected for months, keeping your boat looking its absolute best all season long.
Mastering the Finer Details of Interior Care
A gleaming hull is only half the story. The best detailing job extends to every nook and cranny of the interior, from the cockpit vinyl to the cabin carpet. Let's be honest, this is where you and your guests spend most of your time, so making it a clean, fresh, and welcoming space is just as important as that exterior shine.
Taking care of the inside of your boat isn’t just about a quick wipe-down. You have to tackle specific materials with the right products and techniques to avoid causing real damage. Using harsh household cleaners can dry out and crack marine vinyl, and scrubbing too hard can permanently mar beautiful wood trim. The secret is a methodical approach that cleans, conditions, and protects each unique surface.
This isn't just something fussy owners do anymore; it's becoming the standard. The market for professional boat cleaning and detailing services is growing fast. As more people get into recreational boating, the expectations for vessel care are higher than ever, pushing pro-level detailing from a luxury to a key part of regular marine maintenance.
Deep Cleaning Marine Vinyl and Upholstery
Your boat’s vinyl seats and cushions take a serious beating from sunscreen, salt, sweat, and mildew. Before you even think about cleaners, give every seat a thorough vacuuming. Really get into the seams and crevices—that's where all the dirt and crumbs love to hide.
Next, grab a dedicated Marine Vinyl Cleaner. These are specifically formulated to be tough on grime but gentle on the material itself. A pro tip: spray the cleaner onto a microfiber towel, not directly onto the vinyl. This gives you more control and prevents overspray. For stubborn stains or ground-in dirt, use a soft-bristle brush to gently agitate the area in small, circular motions.
Sunscreen stains are the absolute worst. The chemicals can actually bond with the vinyl, making them a nightmare to remove. For these spots, apply the cleaner, let it sit for a minute to really penetrate, and then gently scrub. Never, ever use abrasive pads or magic erasers; they will permanently scratch the vinyl’s surface.
After everything is clean, the most crucial step is applying a quality UV protectant. Think of it as sunscreen for your seats. This final step is what prevents the material from drying out, cracking, and fading over time.
Restoring Wood Trim and Polishing Metal
Those classic wood accents and shiny metal fixtures are what give a boat its touch of class, but they need specific care to stay brilliant.
- Wood Trim: For any interior wood, start with a gentle cleaner on a microfiber cloth. Once it's clean and completely dry, follow up with a good wood conditioner or oil. This step is all about nourishing the wood, bringing back its natural luster, and protecting it from the constant moisture in the air.
- Metal Fixtures: Railings, cleats, and other stainless steel or chrome fittings can get dull and pitted from salt and oxidation. Use a dedicated metal polish and a clean cloth to bring them back to life. A little polish goes a long way here; just apply a small amount and buff until the shine returns.
Focusing on these high-end finishes is what separates a good detail from a great one. It’s these finer points that truly define a complete boat detailing job.
Shampooing Carpets and Tackling Neglected Spaces
Marine carpets are magnets for sand, dirt, and moisture, making them a prime spot for musty odors to develop. A deep clean always starts with a thorough vacuuming. For any stains or heavily soiled areas, a marine-grade carpet shampoo is your best friend.
Work the shampoo into the fibers with a carpet brush, then use a wet/dry vac to pull out all the dirt and moisture. The key here is to let the carpet dry completely. Open up all the hatches and get some air flowing to prevent any mildew from taking hold.
Finally, don't skip the often-overlooked spots:
- Storage Lockers: Empty them out completely. Wipe them down with an all-purpose cleaner and let them air out before putting everything back.
- Head Compartments: Clean and sanitize every single surface, paying extra attention to the toilet and sink fixtures.
- Bilges: A clean bilge is a happy (and less smelly) bilge. Use a good bilge cleaner to break down any oil and grime, then pump or wipe it out according to your local environmental regulations.
Taking the time to hit all these details ensures your boat isn't just visually stunning but is also fresh, clean, and ready for your next trip out on the water. For an even broader look at the entire process, check out our complete guide on how to detail a boat from top to bottom.
Common Boat Detailing Questions
Even when you have a solid game plan, questions are bound to pop up. Getting the right answers can be the difference between a frustrating afternoon fighting with your buffer and achieving that perfect, mirror-like finish. We hear a lot of the same questions from boat owners, so let's tackle them head-on.
Knowing the why behind each step is just as important as the how. A little bit of know-how will help you work smarter, protect your pride and joy, and get boat-show results every single time.
How Often Should I Detail My Boat?
Honestly, this really depends on how you use and store your boat. For most folks, a full-blown detail—we're talking compounding, polishing, and waxing—is an annual affair. It's the perfect project to tackle before the season kicks off or to get your boat buttoned up for winter storage.
That protective layer won't last a whole year, though. You'll want to plan for a good wash and a fresh coat of wax every 3-4 months. This is especially true if your boat lives in the water or gets blasted by the sun all day.
Pro Tip: The absolute best habit you can get into is giving your boat a quick freshwater rinse after every single trip. It sounds simple, but especially in saltwater, this one step does more to extend the life of your wax and keep grime from building up than anything else.
Can I Use Car Detailing Products on My Boat?
We get this one all the time, and the answer is a hard no. It's an easy mistake to make, but car and boat surfaces are worlds apart. Most boats have a gelcoat finish, which is much more porous and significantly harder than the clear coat on your car.
Marine detailing products are engineered from the ground up to handle the unique challenges of a boat's life.
- UV Protection: Marine waxes are packed with powerful UV inhibitors to fight off the relentless sun exposure that fades and damages gelcoat.
- Salt Resistance: They're specifically formulated to create a durable barrier that stands up to corrosive salt spray.
- Tougher Bonding: Boat products are designed to bond tenaciously to gelcoat, giving you much longer-lasting protection on the water.
Using car wax on your boat is just asking for trouble. It'll break down in a hurry, leaving your gelcoat with virtually no protection against the elements.
What Is the Difference Between Polishing and Waxing a Boat?
This is a big one. Getting this right is fundamental to detailing. Polishing and waxing are two completely different jobs that serve totally different purposes.
Polishing is corrective. Think of it like a very, very fine liquid sandpaper. It uses tiny abrasives to physically smooth the surface, shaving off a microscopic layer of oxidized or damaged gelcoat. This is how you get rid of that chalky look, fine scratches, and swirl marks to bring back the original gloss.
Waxing is protective. Once the surface is shiny, wax adds a sacrificial layer on top of the gelcoat. This layer takes the abuse from UV rays, salt, and dirt, preserving the shine you worked so hard to create. You polish to restore the shine, and you wax to protect it. Always wax after you polish—never the other way around.
What Is the Best Way to Remove Stubborn Black Streaks?
Ah, the dreaded black streaks. Those ugly lines running down the hull are usually caused by water runoff from things like window trim, railings, or canvas covers. If you catch them early, a good boat soap and a medium brush might be all you need.
For the tougher, baked-on stains, you’ll need to bring in a dedicated Black Streak Remover. These cleaners are formulated to dissolve that specific type of grime without being so harsh that they strip your wax or damage the gelcoat. Just put a little on a microfiber cloth, wipe the streak away, and give the area a good rinse. Whatever you do, resist the urge to grab a harsh household cleaner or a scrubby pad—you could end up causing permanent damage.
For every detailing challenge your boat can throw at you, Better Boat has a solution. From our hard-hitting Black Streak Remover to our long-lasting Marine Polish & Wax, our products are designed by boaters, for boaters. Check out our full line of American-made cleaning and detailing supplies to keep your vessel looking its best.
Find everything you need for your next project at https://www.betterboat.com.
Related Posts

DIY Gelcoat Repair for Boats a Flawless Finish Guide

Essential Boat Cleaning Materials for a Perfect Shine
