How to remove oxidation from boat: Restore its shine
Tackling oxidation on your boat boils down to a pretty straightforward process: you clean, you compound, and you polish the surface to strip away that dull, chalky layer and bring back the original shine. After that, you lock it in with a good wax or sealant to keep it from coming back.
The real secret? Match the aggressiveness of your product to how bad the oxidation is. You don't bring a sledgehammer to a tack job.
What Is This Chalky Stuff on My Boat? Understanding Oxidation
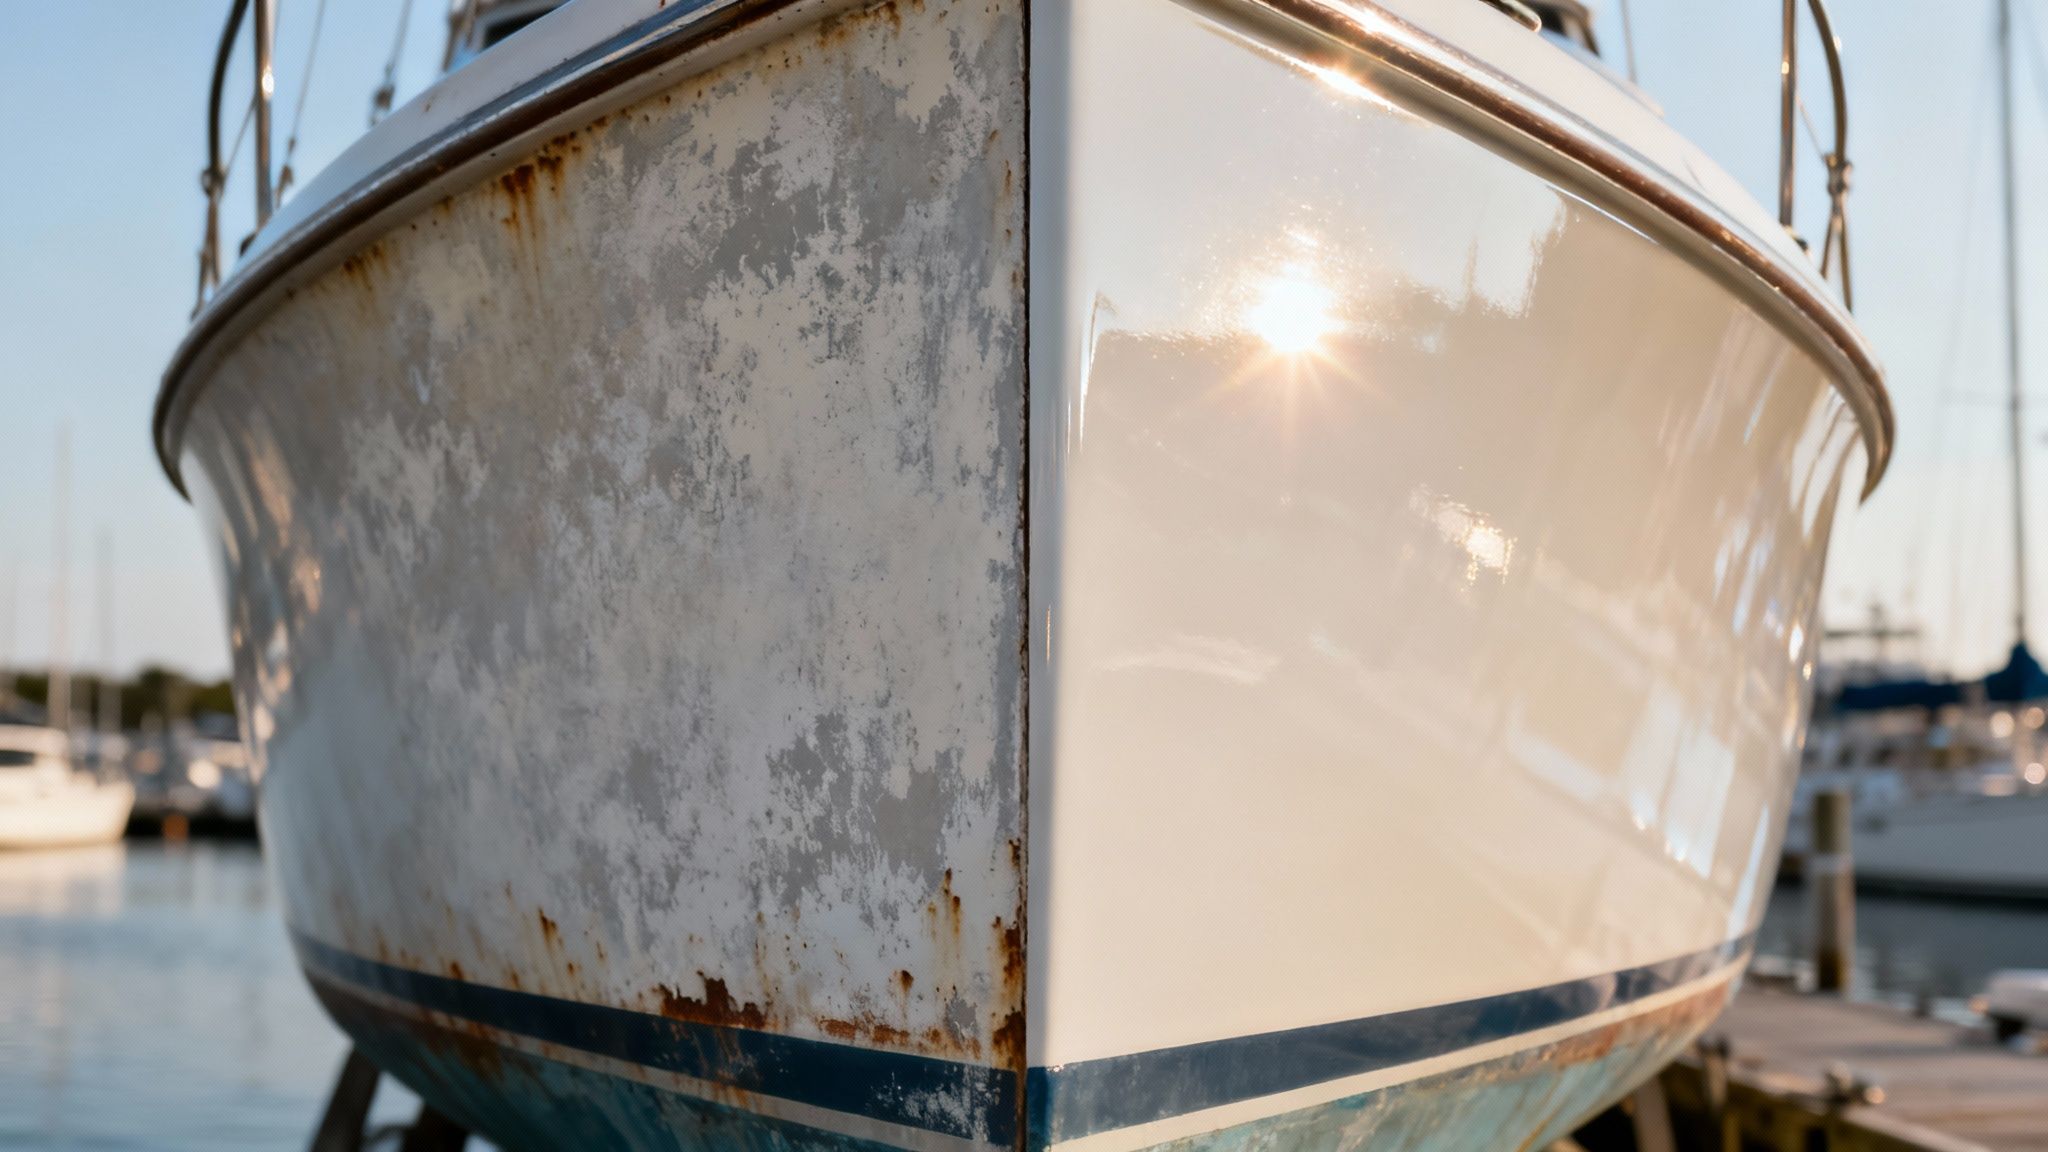
If your boat’s once-gleaming finish now looks dull, faded, or even chalky to the touch, you’re dealing with oxidation. Honestly, the best way to think of it is as a sunburn for your boat. It’s a natural chemical reaction that happens when the gelcoat or paint gets hammered by the elements day in and day out.
The main culprits are no surprise: UV rays from the sun, saltwater, and good old oxygen. This trio works together to break down the resins in the gelcoat, causing it to degrade. This chemical breakdown creates microscopic pits and pores on the surface, which scatter light instead of reflecting it. That’s what gives you that classic, faded look.
Why Some Surfaces Get Hit Harder
Gelcoat and fiberglass are especially prone to this because they're porous by nature. Your gelcoat is the primary protective skin on a fiberglass hull. When it starts to break down, your boat doesn't just lose its shine; it loses its main defense against moisture getting in.
While gelcoat is the most common victim, oxidation doesn't stop there:
- Painted Surfaces: Marine paints aren't immune. They can oxidize too, leading to a loss of color depth and that same chalky feel. The fix is similar to gelcoat, but you might need to be a bit more gentle.
- Metals: Aluminum and stainless steel oxidize in their own unique ways. Aluminum often gets a dull, white, powdery coating. Stainless steel can show "tea-staining" or even light surface rust. We've got a whole guide dedicated to this if you need it: find the detailed steps in our guide on how to polish an aluminum boat.
The good news is that oxidation is almost always just a surface-level problem. Underneath that faded, tired layer, the original brilliant finish is just waiting for you to bring it back out with the right products and a little elbow grease.
The Science of Bringing Back the Shine
Modern solutions for removing oxidation have gotten a lot smarter and more effective, thanks largely to specialized chemical removers. Many of these products contain ingredients like oxalic acid, which actually dissolves the oxidized layer without you having to scrub and buff excessively.
This isn't just talk. A 2019 study highlighted just how well these systems work, showing that 92% of boats with moderate to heavy oxidation saw a huge improvement in appearance. The study also found that protective coatings applied after the restoration could last up to six years—a massive leap forward from old-school waxes that needed constant reapplication.
Understanding what you're up against is half the battle. While oxidation is a constant headache for any boat owner, it's completely manageable. With a clear game plan, you can restore that showroom shine and protect your investment for many seasons to come.
Assembling Your Oxidation Removal Toolkit
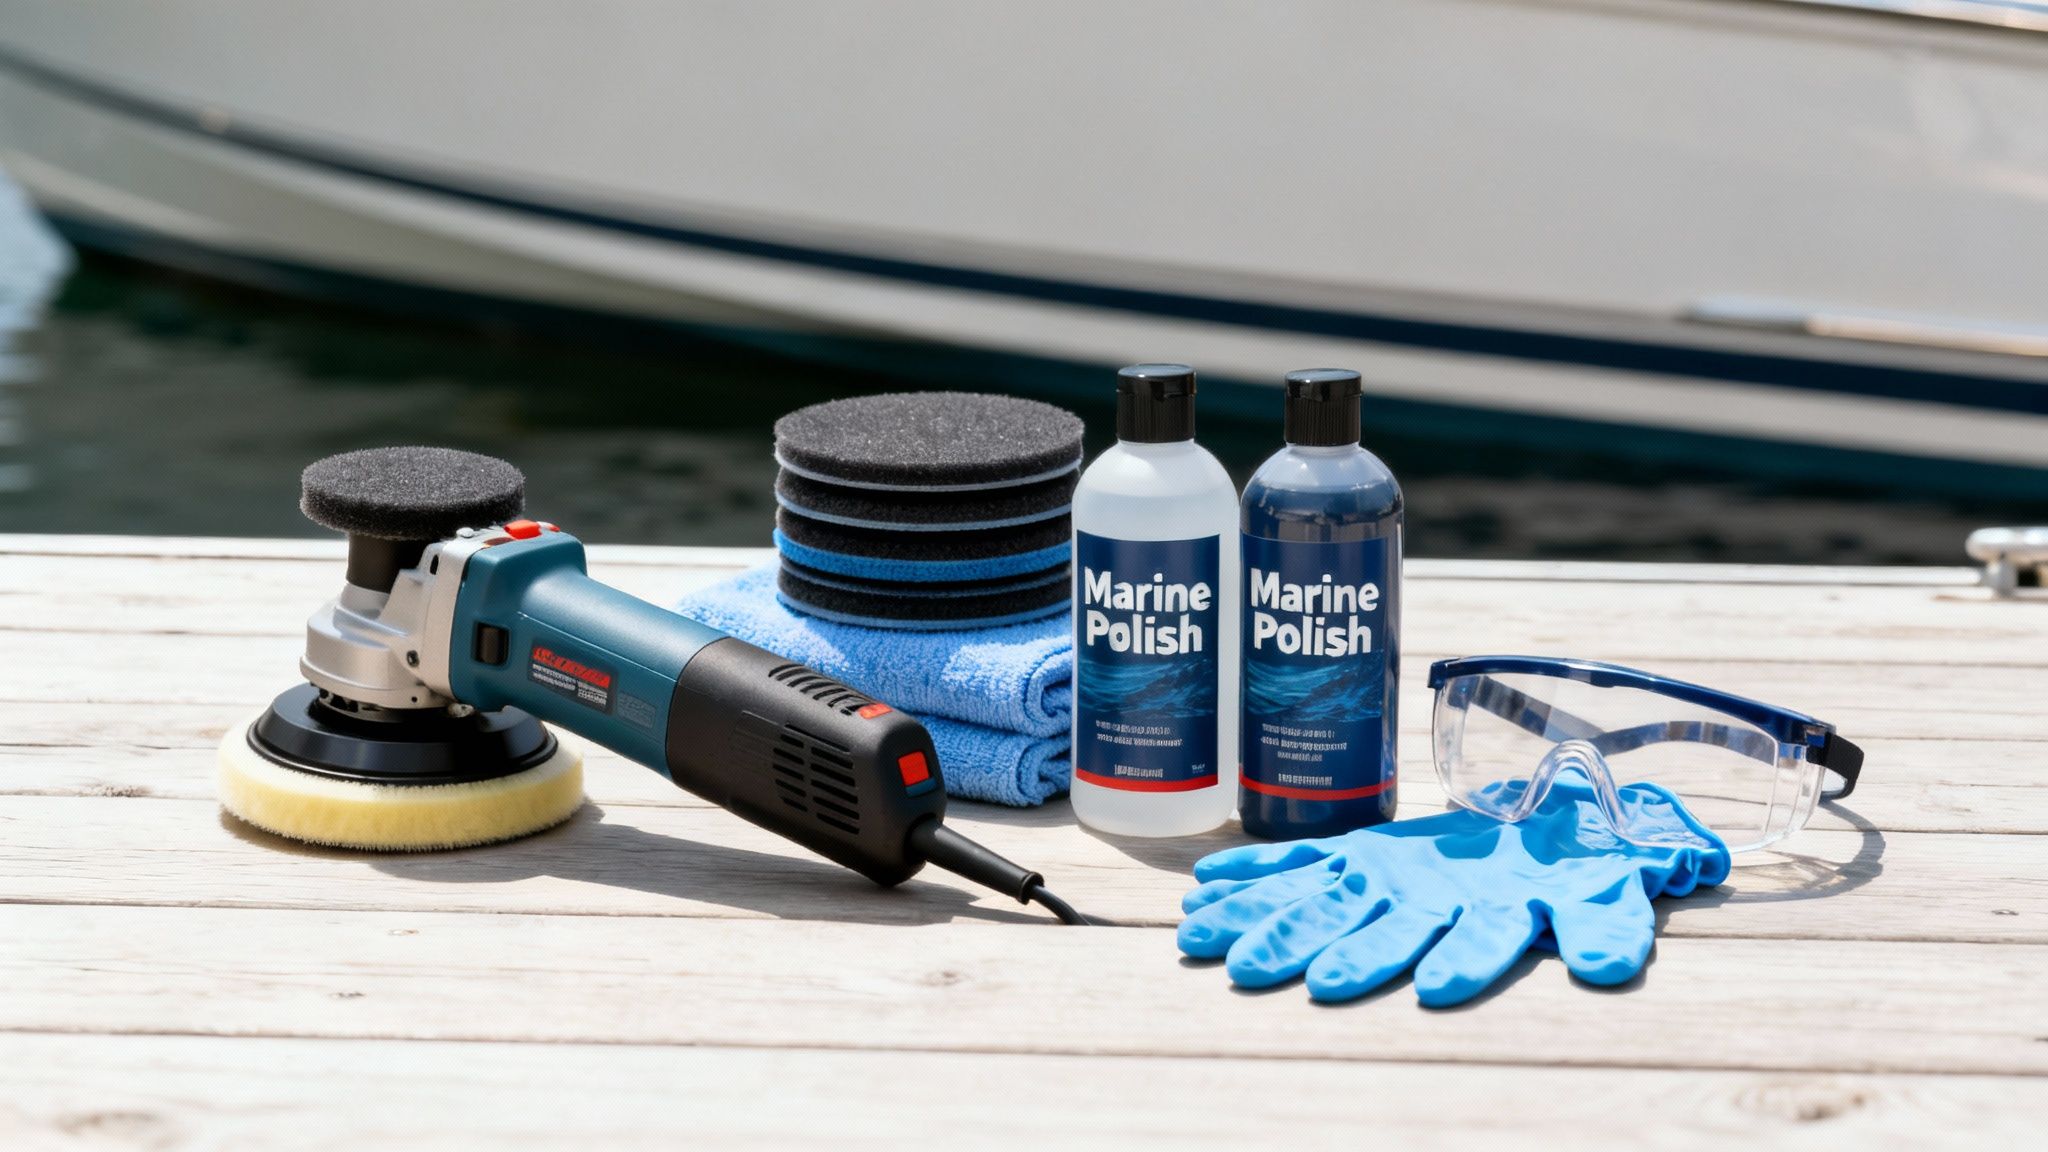
Trying to remove oxidation without the right gear is a recipe for frustration. You wouldn't paint a portrait with a house roller, and you shouldn't try to restore your hull's shine without the proper tools. Getting everything you need lined up before you start is the single biggest step toward a professional, long-lasting finish.
Think of it as setting up your workspace for a successful project. No last-minute runs to the marine supply store, no "making do" with the wrong pad. Just a smooth process from start to finish.
Before you even think about touching the hull, gather your supplies. Here’s a quick-glance table of what I recommend having on hand.
Essential Toolkit for Boat Oxidation Removal
| Category | Essential Items | Better Boat Recommendation and Pro Tip |
|---|---|---|
| Compounds & Polishes | Oxidation Remover, Rubbing Compound | Our Marine Polish with Wax, Medium Cut Compound, or Heavy Cut Compound. Match the product to the level of oxidation. |
| Protection | Marine Wax or Sealant | A high-quality carnauba wax or a modern polymer sealant is non-negotiable. Our Better Boat Wax provides a long-lasting protective barrier. |
| Power Tools | Dual-Action (DA) Orbital Polisher | A DA polisher is much safer for DIYers than a high-speed rotary buffer. It's almost impossible to burn through your gelcoat. |
| Applicators | Polishing Pads (Wool & Foam), Microfiber Towels | Match your pads to the job: wool for heavy cutting, firm foam for polishing, soft foam for finishing. Our Microfiber Towel Set prevents scratching. |
| Safety & Prep | Safety Glasses, Gloves, Painter's Tape, Boat Soap | Always start with a clean surface. Our Better Boat Soap is formulated for marine use. Tape off anything you don't want covered in compound splatter. |
With this checklist, you’re prepared for just about any level of oxidation you might encounter. Having the right tool for each stage of the process makes all the difference in the final result.
Core Restoration Products
This is the heavy-lifting crew in your toolkit. These are the products that will actually strip away that chalky, faded layer and bring back the deep gloss your boat had when it was new. The key is to match the product to the severity of the oxidation.
-
Oxidation Remover & Polish: For light to moderate chalkiness, a good one-step product is usually all you need. Our Marine Polish with Wax is perfect for this, as it cleans up light oxidation and swirl marks while laying down a protective carnauba wax layer in one pass.
-
Heavy-Duty Rubbing Compound: Is your hull so chalky you can write your name in it? You'll need to bring out the big guns. A dedicated rubbing compound like our Heavy Cut Compound is designed to cut through years of heavy, baked-on oxidation. Just remember, this is an aggressive step, and you’ll need to follow it up with a finer polish to restore the gloss.
-
Protective Wax or Sealant: After all that hard work, you have to protect the finish. This isn't optional. A quality marine wax like our Better Boat Wax creates a barrier against the sun and salt that caused the oxidation in the first place.
Essential Tools and Applicators
Sure, you can do this all by hand, but unless you're looking for a serious workout, a few key tools will make the job faster and the results infinitely better. Most boat owners spend between $150 and $300 a year on gelcoat maintenance, and a good polisher is a wise investment that pays for itself quickly.
A 2020 survey revealed that 62% of boat owners rely on a dual-action polisher, and 85% of them get great results without having to resort to more aggressive techniques like wet-sanding.
Pro Tip: If you're going to buy one tool, make it a dual-action (DA) or random orbital polisher. It’s far more forgiving than a pro-grade rotary buffer, so the risk of burning your gelcoat is practically zero. It has all the power you need to cut through oxidation without the danger.
Here’s what to pair it with:
- Orbital Polisher: This is your best friend for a project like this. It makes covering large areas like the hull almost effortless.
- Polishing Pads: Get a variety. A wool or aggressive foam cutting pad is for your compound, while softer foam polishing and finishing pads are for bringing out that final mirror shine.
- Microfiber Towels: You can never have too many. Use separate towels for wiping off compound residue and for the final buff. Our Better Boat Microfiber Towel Set is designed to be ultra-soft to prevent scratching that fresh finish. For more ideas, check out our guide to building the ultimate boat cleaning kit.
Safety and Prep Gear
Don't forget the simple stuff that protects both you and your boat. A little prep work prevents a lot of cleanup later.
- Safety Glasses and Gloves: Compound will sling everywhere. Protect your eyes, and keep the chemicals off your hands.
- Painter's Tape: Mask off vinyl decals, non-skid decks, window trim, and anything else you don’t want the polisher to touch.
- Boat Soap & Brushes: You can't polish a dirty boat. Start with a thoroughly clean, dry surface using our Better Boat Soap for the best results.
Getting Your Boat Ready for a Flawless Finish
If you want disappointing results, go ahead and jump straight into compounding a dirty hull. But if you're after a professional-grade shine, the project absolutely lives and dies by the prep work.
Think of it like painting a room—you wouldn't just slap a new color over dirty, dusty walls. You're trying to create the perfect blank canvas. Without it, you're just grinding salt, grime, and other junk into your gelcoat, which is a surefire way to create new scratches and ugly swirl marks. A little time upfront ensures your polish and wax can actually bond to the surface, giving you that deep gloss and protection that lasts.
Start With a Deep Clean
Before a single drop of polish touches your boat, it needs a serious bath. The goal here is to get rid of all the surface-level offenders: salt spray, bird droppings, water spots, and the general grime that builds up. This isn't a quick rinse-off; it's a deep scrub to make sure there are no loose abrasives left behind.
You'll want a quality boat soap that's formulated for marine messes but won't strip off any wax you might still have. Our Better Boat Soap is perfect for this.
- Give it a good scrub: Use a medium-bristle brush on a long handle to work that soap into a rich lather all over the hull.
- Rinse it all off: Grab the hose and rinse with fresh water until every last bit of soap is gone. Any residue left behind can mess with your polishing compound.
- Dry it completely: Use a big, clean microfiber towel or a shammy to get the boat bone dry. You can't start the next steps on a wet surface.
Protect the Sensitive Areas
That orbital polisher is a beast, but it can be a bit clumsy around the more delicate parts of your boat. Compound splatter can easily stain vinyl, and one wrong move with the polisher can scuff up decals or damage your trim. Trust me, a few minutes with some tape can save you hours of cleanup and regret.
Grab a roll of high-quality painter's tape and carefully mask off anything you don't want the polisher or products to touch. This includes stuff like:
- Vinyl graphics and decals
- Non-skid deck surfaces
- Window frames and rubber seals
- Metal hardware like cleats and railings
- Plastic trim and vents
Pro Tip: This little step does more than just protect these areas. It lets you work faster and with more confidence right up to the edges, ensuring a perfectly uniform finish without the stress of making a mess.
Work in Manageable Zones
Trying to tackle the whole side of the boat at once is one of the biggest rookie mistakes I see. If you're working on a hot day or in direct sun, your compounds and polishes will dry out almost instantly. When that happens, they get gummy, become a nightmare to work with, and are nearly impossible to buff off cleanly.
The solution is a pro technique I call "zoning." Just mentally divide the hull into small, manageable sections, about 2'x2' at most. This strategy lets you apply the product, work it in with the polisher, and buff it off completely before it even has a chance to dry. It's a systematic approach that kills the streaky, uneven results that plague so many DIY jobs and guarantees a consistent, flawless shine across the entire boat.
With your boat cleaned and prepped, it's time for the fun part: bringing that shine back. This is where you'll see the real transformation, watching that dull, chalky surface give way to a brilliant gloss right before your eyes.
The secret is matching your technique to the surface you're working on. Gelcoat, for instance, can handle a much more aggressive approach than a delicate painted surface, while metal requires its own special touch.
We'll break it down surface by surface, giving you the exact game plan for a flawless finish. Just remember to work in small, manageable 2'x2' sections. This keeps the product from drying out and helps you maintain a consistent, even result. Let the polisher do the heavy lifting; your job is just to guide it.
The overall workflow is pretty straightforward: get it clean, tape off anything you don't want polish on, and work in those small zones.
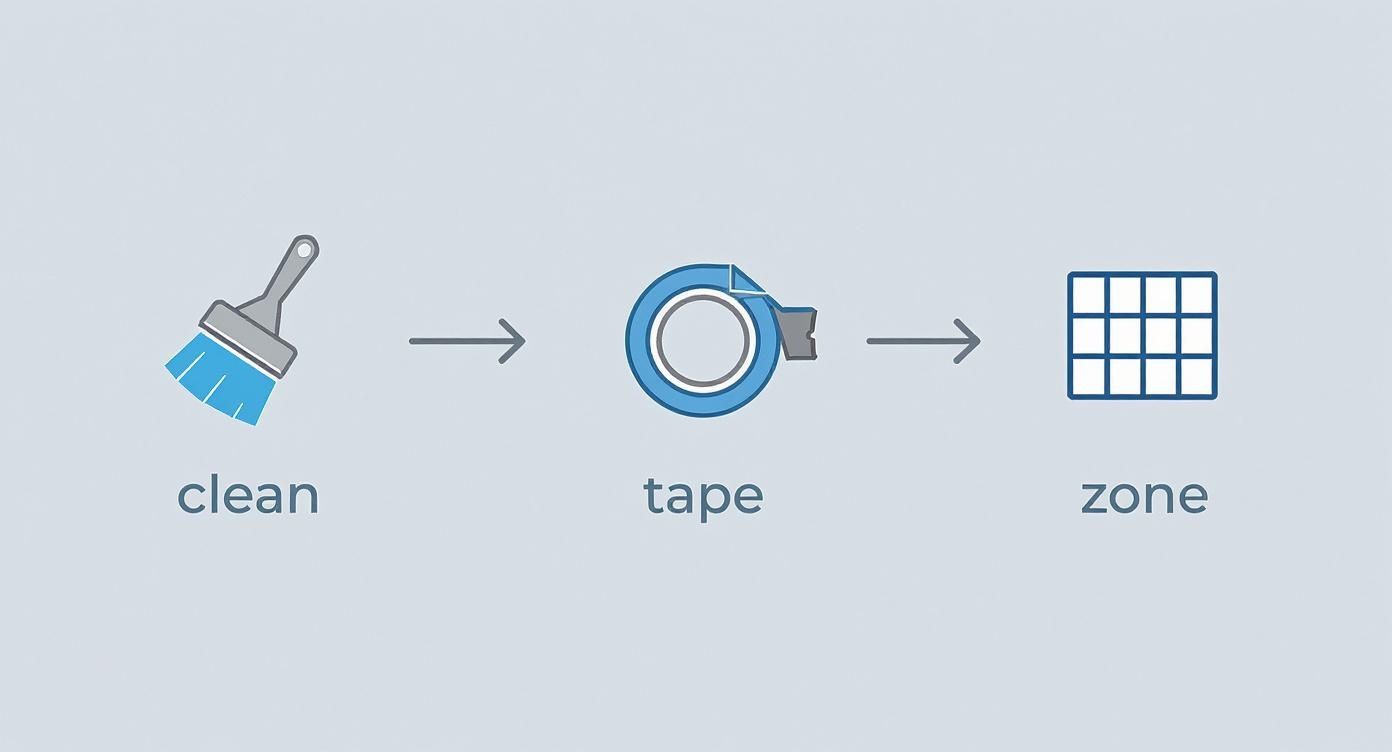
As you can see, a great finish starts with great prep. Taking the time to get the surface ready will make the polishing stage so much more effective.
Tackling Oxidation on Gelcoat and Fiberglass
Gelcoat is the tough, durable finish found on most fiberglass boats for a reason. Its resilience means you can get a bit more aggressive to cut through years of built-up oxidation. For this job, your orbital polisher and the right product are a perfect match.
Different levels of oxidation call for different products. Before you start, it helps to identify just how faded your gelcoat is so you can choose the right approach.
Matching the Treatment to the Oxidation Level
Use this guide to identify your boat's level of oxidation and select the appropriate Better Boat product and method for the best results.
| Oxidation Level | Visual Cues | Recommended Product (Better Boat) | Application Method |
|---|---|---|---|
| Light | Surface is slightly dull or hazy; still has noticeable gloss. | Marine Polish with Wax | Orbital polisher with a foam polishing pad. |
| Moderate | Surface has a chalky feel and appearance; color is faded. | Medium Cut Compound followed by Polish. | Orbital polisher with a wool or medium-cut foam pad. |
| Heavy | Surface is very chalky, dull, and may have a powdery residue. | Heavy Cut Compound followed by Medium Cut and Polish. | Orbital polisher with a wool cutting pad. |
Once you've got the right product, you're ready to get to work. For light to moderate oxidation, our Marine Polish with Wax is often all you need. It has just enough abrasive to slice through that faded top layer, restoring gloss while leaving a protective coat of wax behind.
Here’s the game plan:
- Prime Your Pad: Squeeze a few pea-sized drops of polish onto your foam pad. It’s a good idea to spread a thin layer across the pad's face before you even turn the machine on—this stops it from slinging product everywhere.
- Spread on Low: Place the polisher flat against the hull, then turn it on. Set it to a low speed (like 1 or 2) and quickly spread the polish over your 2'x2' area.
- Work the Polish: Now, bump the speed up to a medium-high setting (around 4 or 5). Move the machine in slow, overlapping passes—first side to side, then up and down. This crosshatch pattern is key for even coverage. You only need to apply about 5-10 pounds of pressure. Let the machine's rotation do the real work.
- Check Your Work: After a few passes, you'll notice the polish start to turn clear as it breaks down. This is your cue. Turn off the polisher and lift it away. Grab a clean microfiber towel, wipe off the residue, and check out that shine.
- Repeat if Needed: Still see a little haze? No problem. Just repeat the process. Once you're happy with the gloss, you’re ready to move to the next section.
The key to a seamless, factory-fresh look is consistency. Use the same speed, pressure, and number of passes on every single section of the hull. That’s how you get that perfect, mirror-like finish.
For an even deeper dive, our guide on how to polish fiberglass boats covers everything from picking the right pads to advanced techniques.
A Gentler Approach for Painted Surfaces
If your boat has a painted finish like Awlgrip or Imron, you’ve got to dial back the aggression. These finishes are much softer than gelcoat and can be easily burned through or swirled by the wrong compound or pad. The goal is the same, but finesse is the name of the game.
Switch out your medium-cut polish for a fine-cut finishing polish. You'll also want to use a soft foam finishing pad, not a more aggressive cutting pad. Keep the polisher speed on the lower side, maybe around a 3 or 4, to avoid building up too much heat that could damage the paint. The steps are the same—apply, spread, work, and wipe—just with a much lighter touch.
Bringing Back the Gleam to Metal Fixtures
Oxidation on your stainless steel railings, cleats, and aluminum T-tops looks different—it's more of a dullness, pitting, or a chalky white film. To bring back the gleam, you need a dedicated metal polish. The compounds designed for gelcoat just aren't formulated to work on metal.
You've got two ways to go about it:
- By Hand: For smaller, intricate parts like cleats and chocks, it's often easiest to use a microfiber cloth. Put a dab of metal polish on the cloth and work it into the surface with tight, circular motions until the tarnish vanishes. Buff it off with a clean part of the towel, and you're done.
- With a Polisher: Got a big aluminum T-top or tower? A polisher will be your best friend. Use a small foam pad (a 3-inch pad is perfect for getting into tight spots) on a low speed setting. The machine will make quick work of the oxidation and restore that brilliant luster in no time.
No matter what surface you’re working on, the guiding principle is simple: always start with the least aggressive method that will get the job done. Try a finer polish and a softer pad first. You can always step it up to a more aggressive combo if you need to, but you can't undo damage from going too hard, too fast. This careful, methodical approach is your ticket to restoring that head-turning shine your boat deserves.
Protecting Your Hard Work With Sealing and Maintenance
After all that compounding and polishing, your boat's finish finally looks incredible. That gloss is deep, the color is popping, and the chalky haze is a distant memory. But don't pop the top on a cold one just yet—the job isn't quite done.
Getting the shine back is only half the battle. Keeping it is what really matters.
The whole process of removing oxidation strips away that damaged, porous top layer of gelcoat. While that’s great for revealing the fresh surface underneath, it also leaves those microscopic pores wide open and totally vulnerable. Without a protective barrier, the sun and salt will get right back to work, and you'll be dealing with this all over again in just a few months.
Sealing the Deal: The Final Protective Layer
This is it—the critical final step that locks in all your hard work. Applying a high-quality sealant isn't just about adding more shine; it's about creating a tough, durable shield against the very elements that caused the oxidation in the first place. A good marine wax fills in those tiny pores, creating a slick, hydrophobic surface that sheds water and contaminants.
For this job, we swear by our Better Boat Wax. It’s formulated with premium carnauba wax, which is famous for its ability to create a deep, wet-look gloss while forming a tough barrier against UV rays and saltwater. This layer is your boat's first line of defense.
Think of it this way: by sealing the surface, you're not just adding a final cosmetic touch. You're fundamentally changing how the gelcoat interacts with its environment, making it far more resistant to future fading and damage.
Application Techniques for a Durable Finish
Whether you’re an old-school hand-waxer or you prefer the speed of a machine, the goal is the same: a thin, even, and completely haze-free coat.
Applying Wax by Hand
This method is fantastic for control, especially when you're working around tricky spots like cleats, vents, and railings.
- Go Easy on the Product: Grab a foam applicator pad and put a small, nickel-sized amount of wax on it. Seriously, a little goes a long way.
- Work in Small Sections: Gently spread the wax over a manageable area (about 3'x3') using overlapping circular motions. The key here is a super thin, even coat.
- Let It Haze Up: Give the wax a few minutes to dry to a light haze. How long this takes depends on the temperature and humidity.
- Buff to a Mirror Shine: Using a clean, plush microfiber towel, gently wipe away the haze. Keep flipping the towel to a clean side to avoid just moving the wax around.
Applying Wax with a Polisher
When you’re tackling big, open surfaces like the hull, a polisher is your best friend. It’s way faster and delivers a perfectly uniform coat.
- Grab a Finishing Pad: Attach a soft foam finishing pad to your orbital polisher. No cutting pads here!
- Spread it Out: Dab a few small drops of wax onto the pad. Set the machine to a low speed (1-2) and quickly spread the wax across your working section before turning it on.
- Light and Easy Does It: Keep the speed low and use very light pressure. Move in overlapping passes until the wax is just a thin, translucent film on the surface.
- The Final Buff: Let the wax haze over, then come back with a clean microfiber towel and buff it off by hand for that final, brilliant shine.
Your Long-Term Maintenance Schedule
A little bit of proactive care will save you a massive headache later. Honestly, a simple and consistent routine is the secret to making sure heavy oxidation never comes back.
- Wash It Down: Give your boat a good wash with our Better Boat Soap every few weeks, or after every single trip in saltwater. This gets the salt and grime off before they have a chance to eat through your wax.
- Wax On, Wax Off (Quarterly): Plan to apply a fresh coat of Better Boat Wax every 3-4 months. This regular reapplication keeps that protective barrier strong and effective.
- Off-Season Protection: For the best long-term protection, especially if your boat sits for the winter, looking into professional vehicle storage solutions can be a game-changer. It’s a smart investment to keep that finish looking brand new.
Stick to this schedule, and you’ll turn a major restoration project into a simple, easy upkeep routine. If you want to dive deeper into the differences between various products, check out our guide comparing marine wax and polish. Protecting your finish is the best way to protect your investment and keep your boat ready for the water at a moment's notice.
Common Mistakes and Troubleshooting Tips
Even the most carefully planned oxidation removal project can hit a snag. We’ve all been there. The difference between a pro finish and a frustrating afternoon often comes down to knowing how to navigate these common issues. The good news is, most problems are easy to fix once you know what to look for.
One of the most frequent mistakes I see is people working in direct sunlight or on a hot surface. When your gelcoat is hot, polishes and compounds dry almost instantly. They become gummy and incredibly difficult to buff off, killing your progress. Always try to work in the shade or on a cool day to give the product enough time to do its job.
Another common pitfall is using way too much product. It’s tempting to think more is better, but overloading your pad just leads to messy splatter and a caked-on residue that’s a real pain to remove. A few pea-sized drops per 2’x2’ section is plenty. Trust me, a little goes a long way.
Solving On-the-Fly Issues
You’re in the middle of polishing, and things aren’t looking quite right. Don't panic. Here are some quick fixes for the stuff you'll run into while trying to get that shine back on your boat.
-
Product Won't Buff Off Cleanly: If your compound has dried too quickly and feels tacky, don't just scrub harder—you'll risk scratching the surface. The trick is to lightly mist the area with a quick detailer spray. This re-lubricates the surface, letting you gently wipe it away with a clean microfiber towel.
-
Seeing New Swirl Marks: You've put in the work, but now you're seeing fine, circular scratches (swirls or holograms). This usually means you're being too aggressive. It could be a compound that's too harsh for the job, a dirty pad, or simply too much machine speed and pressure.
The Fix: It's time to ease up. Step down to a finer polish, like our Marine Polish with Wax, and switch to a softer foam finishing pad. Reduce your polisher speed and use just enough pressure to keep the pad flat against the surface. A light touch is key to getting that flawless, mirror-like finish.
Avoiding Pad-Related Problems
The polishing pad you choose is just as important as the polish itself. Using the wrong one can stall your progress or, even worse, create new problems for you to solve.
For example, using a soft finishing pad with a heavy-cut compound is a total mismatch. The pad just isn't firm enough to let the abrasives work effectively and cut through the oxidation. On the flip side, using an aggressive wool pad for a final polish is almost guaranteed to leave swirl marks behind.
The key is to always match the pad’s aggressiveness to the product and the task at hand. Use cutting pads for compounds, and save the softer polishing or finishing pads for your polishes and waxes. Get that right, and you're well on your way to a professional result.
A Few Common Questions About Boat Oxidation
Even with a detailed guide, a few specific questions always seem to surface. Let's tackle some of the most common ones we hear from boat owners about getting rid of oxidation, so you can get the best possible results.
Can I Really Get Rid of Heavy Oxidation Without Wet Sanding?
It's possible, but it really depends on what you mean by "heavy." For that chalky, deeply faded gelcoat, you can often bring it back with the right combo: a rotary polisher, a wool cutting pad, and a pretty aggressive rubbing compound like our Heavy Cut Compound. This setup is designed to cut through that dead, oxidized layer.
But, if the surface is so far gone that compounding isn't making a dent, wet sanding might be your only move to get back to a healthy gelcoat layer. Honestly, if you're not comfortable with sanding, this is usually the point where it's smart to call in a professional.
My rule of thumb is to always start with the least aggressive method that gets the job done. Give a quality compound a shot first. You can always step it up to sanding if you need to, but you can't undo it once you've started.
How Often Should I Be Polishing My Boat?
This is one of those "it depends" answers, because every boat's life is a little different. There’s no single schedule that works for everyone, but these are the big factors to consider:
- How You Use It: A boat that lives in saltwater and gets used daily is going to need a lot more love than a freshwater boat that only comes out a few weekends a month.
- How You Store It: Keeping your boat indoors or even just under a good cover makes a huge difference. It dramatically cuts down on UV exposure, which is the main enemy of your wax and polish.
- Where You Live: The intense sun and humidity you get in a place like Florida will chew through protective coatings much faster than the cooler, milder weather up north.
As a good baseline, plan on applying a fresh coat of a quality wax like our Better Boat Wax every 3-4 months. If you keep that protective layer healthy, a full-on compound and polish job should only be needed every few years, not every season.
From heavy-duty compounds for serious restoration to protective waxes that keep your boat looking its best, Better Boat has the professional-grade products you need. Restore your shine and protect your investment with our easy-to-use solutions. See our full lineup of boat care products at BetterBoat.com.


