


How to Store a Boat for Winter: Your Complete Guide
Properly tucking your boat away for the winter isn't a single task—it's a process with three non-negotiable phases: a deep exterior cleaning and waxing, winterizing all the mechanical and plumbing systems, and finally, choosing the right cover and storage spot. If you cut corners on any of these, you're rolling the dice against costly damage from moisture, freezing temps, and even pests.
Your Pre-Storage Cleanup and Protection Plan
Before you even reach for the engine fogging oil or fuel stabilizer, your winterization mission starts with a good, old-fashioned deep clean. I can't stress this enough: putting a dirty boat away for the season is just asking for trouble. That layer of salt, algae, bird droppings, and general grime can permanently stain or, even worse, corrode your gelcoat, paint, and metal fittings over a long winter layup.
Think of this first cleaning blitz as laying the groundwork for a successful storage season. It's your best chance to get hands-on with every inch of your vessel, spotting little issues like minor cracks or blisters before they become big problems. The goal is to put away a boat that’s in its absolute best condition.
The Non-Negotiable First Step: Cleaning Your Hull
Always start with the hull. It takes the most abuse all season. You need to get every last bit of marine growth, waterline scum, and salt residue off. That saltwater residue is especially nasty; if left on, it can accelerate corrosion by as much as 10 times. A high-quality boat soap is your best friend here—it's strong enough to lift the grime but gentle enough that it won't strip off any existing wax.
For the really stubborn stuff, like that nasty brown stain at the waterline, a dedicated hull cleaner is a lifesaver. It works chemically to break down the gunk, which means way less scrubbing for you.
- Topside Scrub: Grab a soft-bristle deck brush and your boat soap to tackle the deck, cockpit, and all the non-skid surfaces.
- Compartment Clear-Out: Empty every single storage locker, anchor well, and fish box. Wipe them down completely to get rid of any dirt and moisture that could turn into a mildew nightmare over the winter.
- Final Rinse: Give the whole boat a thorough freshwater rinse from top to bottom. Make sure you get all the soap residue off, then let it air dry completely. A little sunshine here is a huge help.
The most overlooked part of pre-storage cleaning is allowing the boat to dry completely. Trapped moisture, especially in cushions and compartments, is the primary cause of mold and mildew growth during the winter.
Applying a Protective Wax Barrier
Once she’s sparkling clean and bone-dry, it's time for the final protective step: a solid coat of wax. A good marine wax does a lot more than just make your boat shine. It creates a tough barrier that seals the microscopic pores in the gelcoat, defending it against moisture, dirt, and UV rays.
Honestly, this one step is one of the best things you can do to protect your investment. A good wax job before storage can slash UV degradation by a whopping 50% by the time you pull the cover off in spring.
For an even deeper dive into cleaning techniques, you should check out our comprehensive guide on how to clean a boat.
Applying wax isn't complicated, but it does require a bit of patience. I find it’s best to work in small, manageable sections, maybe three-by-three feet at a time. Put a thin, even coat of marine wax on with an applicator pad, using overlapping circular motions.
Let it dry to a haze—just a few minutes, depending on the weather—then buff it off with a fresh microfiber towel. You'll be left with a slick, glossy surface that will bead water and shrug off dirt all winter long. And if you're curious about the boat storage market, you can explore some valuable industry insights to see current trends.
To make this crucial first phase a bit easier to track, here's a quick checklist you can follow.
Winterization Cleaning and Protection Checklist
| Area of Boat | Cleaning Task | Protection Task | Recommended Better Boat Product |
|---|---|---|---|
| Hull (Below Waterline) | Remove all marine growth and scum | Apply a fresh coat of wax | Instant Hull Cleaner |
| Hull (Above Waterline) | Wash with boat soap to remove salt & grime | Apply a high-quality marine wax | Boat Soap |
| Deck & Cockpit | Scrub all surfaces, including non-skid | Ensure all drains are clear and open | Deck Brush & Boat Soap |
| Metal & Chrome | Clean and polish all fittings and rails | Apply a metal polish or protective sealant | Metal Polish |
| Vinyl & Upholstery | Clean seats and cushions thoroughly | Apply a UV vinyl protectant | Vinyl Cleaner & Vinyl Protectant |
| Storage Compartments | Empty, clean, and wipe dry | Leave open to air out completely | All-Purpose Microfiber Towels |
Getting this cleaning and protection phase done right is more than just about looks; it's about setting your boat up for a safe, damage-free hibernation so it's ready to hit the water the moment spring arrives.
Winterizing Your Engine and Fuel System
Once your boat’s hull is sparkling and protected, it’s time to turn your attention inward to the heart of your vessel: the engine and fuel system. I can't stress this enough—this is the most critical part of winter storage. A simple oversight here can lead to some truly catastrophic (and expensive) damage from frozen water or gunky fuel, keeping you high and dry when spring finally rolls around.
The big three threats to your engine during a long layup are freezing temperatures, fuel going bad, and internal corrosion. Every engine type is a little different—outboard, inboard, sterndrive—but the goals are always the same. If you protect these core systems now, you're guaranteeing your boat will roar back to life on that first beautiful day of the season.
Flushing and Protecting the Cooling System
First things first: you have to get all the gunk out of the cooling system. We're talking salt, silt, and any mineral deposits that have built up over the season. The easiest way is to run the engine with fresh water using "ear muffs" or a built-in flushing port. It’s a simple step, but it’s your best defense against the kind of internal corrosion that can eat away at your engine from the inside out.
After the flush, you need to protect the system from freezing solid.
- Drain It Completely: Make sure you get every single drop of water out of the engine block, manifolds, and hoses. Pull out your owner's manual and find every drain plug. Missing just one can lead to a cracked engine block, and that's a repair bill nobody wants to see.
- Fill with Antifreeze: Run a non-toxic marine antifreeze (you'll often hear it called "the pink stuff") through the system. Keep it running until you see that pink liquid coming out of the exhaust. This pushes out any leftover water and gives you a safety buffer against even the most brutal deep freeze.
Pro Tip: Never, ever use automotive antifreeze (the green or orange ethylene glycol) in your boat's cooling or freshwater systems. It's incredibly toxic to fish and other aquatic life, and it can wreak havoc on your system's impellers and seals. Stick to the pink stuff.
Changing Engine Oil and Filters
This one is non-negotiable. You have to change the engine oil and filter before you put the boat away for the winter. Over a long season, engine oil collects all sorts of nasty stuff—moisture, acids, and other corrosive byproducts from combustion. If you let that contaminated oil sit in the engine all winter, you're practically inviting rust and pitting to form on critical parts like bearings and cylinder walls.
The process itself is pretty straightforward. Just warm up the engine for a few minutes to get all those contaminants suspended in the oil, then pump it all out. Replace it with fresh oil and a new filter, and you're done. This way, your engine gets to rest in a clean, protective bath of new oil, ready for a fresh start in the spring.
This next graphic breaks down the whole pre-storage prep into three core stages, beginning with that deep clean we talked about.

Think of it this way: the "clean, scrub, and wax" steps are the foundation you build on before getting into the more technical winterization of the boat's systems.
Stabilizing Fuel and Fogging the Engine
Today's fuel, especially gasoline blended with ethanol, can be a real nightmare for a marine fuel system if it sits for months. The fuel starts to break down, forming a sticky varnish and gum that will clog up your injectors, carburetor, and fuel lines. Worse, ethanol is hygroscopic, meaning it attracts water right out of the air. This can lead to "phase separation," where a sludge-like layer of water and ethanol settles at the bottom of your tank, just waiting to get sucked into your engine.
The fix is a good quality fuel stabilizer. Your best bet is to fill the fuel tank to about 90-95% capacity (this minimizes air space and condensation), add the stabilizer according to the directions, and then run the engine for 10-15 minutes.
This gets the treated fuel circulated through the entire system, protecting everything from the tank to the injectors. To get a really good handle on this, check out our in-depth guide on how to properly winterize a boat motor.
Your last move here is to fog the engine. We’ve seen data from boating forums showing that untreated motors can suffer a 25% rate of stuck valves from gummed-up fuel—that’s one in four boats with problems right out of storage.
A good stabilizer prevents phase separation in about 95% of cases with ethanol-blended gas, which is critical since nearly 85% of marine fuel in the U.S. contains ethanol. Fogging oil is sprayed directly into the carburetor or air intake while the engine is running. It coats all the internal surfaces—cylinder walls, pistons, you name it—with a protective layer of oil that stops condensation from causing rust and corrosion.
Securing Your Plumbing, Electrical, and Interior Systems
With the engine and exterior buttoned up, it's time to turn our attention inside. The next phase of winterizing your boat is all about the complex network of systems running through your vessel.
It's easy to forget about your boat's plumbing, electrical, and interior components, but ignoring them can lead to burst pipes, dead batteries, and a cabin full of mildew come springtime. These systems are just as vulnerable to the cold and damp as your engine is.
Think of this stage as preventing the kind of damage that creeps in silently. A tiny bit of water left in a hose can expand when it freezes, splitting the line and causing a huge headache (and a major leak) next season. Likewise, a battery left to fend for itself all winter probably won't have the juice to start your engine when you're itching to get back on the water.
Protecting Your Boat's Plumbing From Freezing
Any system on your boat that holds water is a prime candidate for freeze damage. This means freshwater tanks, sinks, showers, heads, and even livewells. The mission is simple: get every last drop of water out.
Start by opening all the faucets and draining the freshwater tank completely. Don't forget any hot water heaters or shower hoses. Once the system is empty, you'll need to run non-toxic marine antifreeze through all the lines. This displaces any stubborn drops of water and protects the system from cracking.
- Freshwater System: Pour the pink antifreeze into your freshwater tank. Some folks use a bypass kit to pump it directly into the system, which works great too.
- Turn on Faucets: One by one, turn on every faucet—hot and cold—until you see the pink antifreeze flowing out.
- Don't Forget the Head: Flush the marine toilet several times until you see the antifreeze running through it.
- Livewells and Raw Water Washdowns: Make sure these are also fully drained and protected.
This process is pretty similar across different types of recreational vehicles. For a really detailed guide that offers some excellent, transferable advice, check out this post on how to winterize your RV.
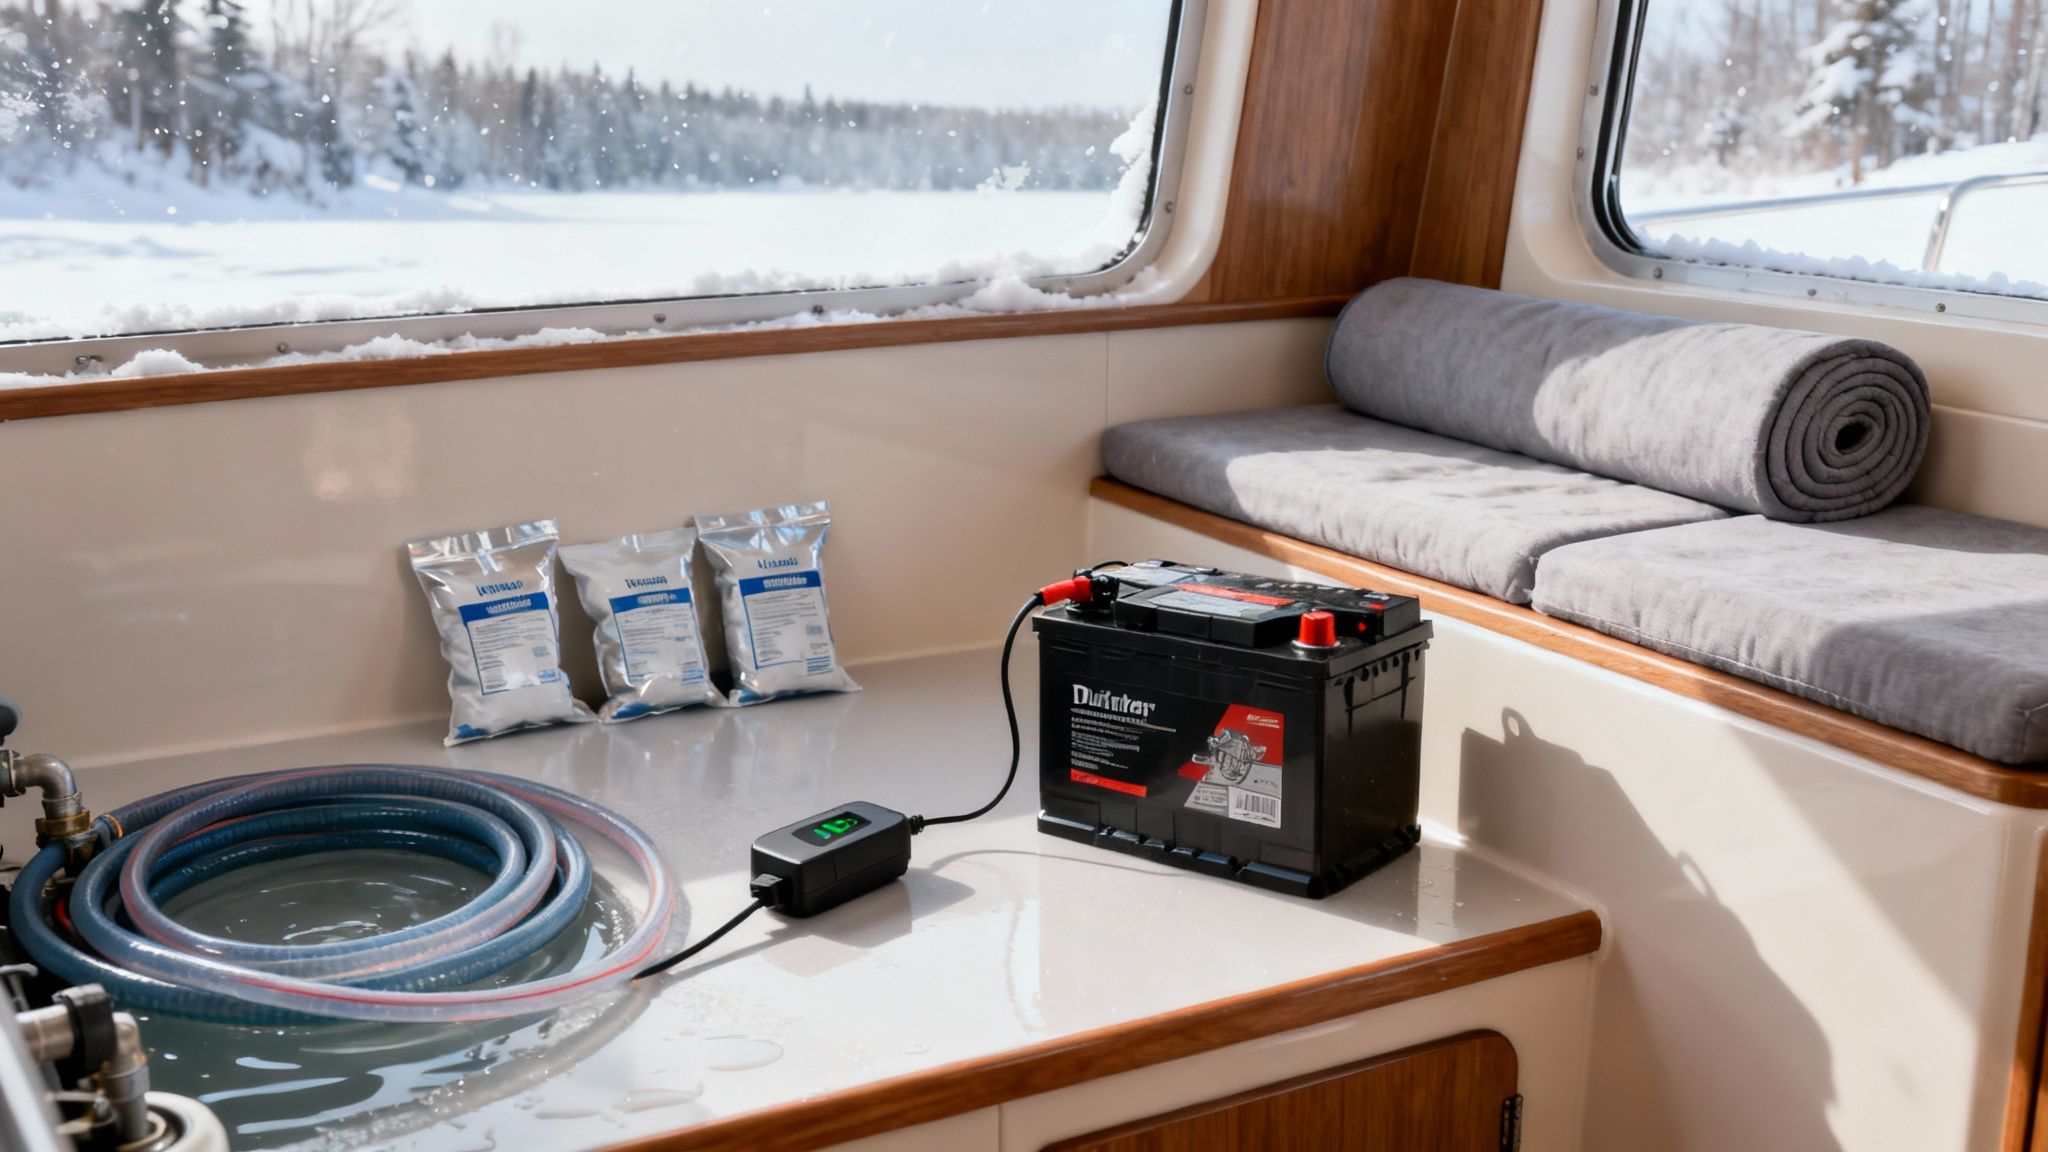
Proper Battery Care for Winter Storage
Your boat’s battery is its heart, and leaving it unattended all winter is a surefire way to shorten its life. A battery slowly loses its charge over time, and a discharged battery can easily freeze, crack, and become completely useless. Just disconnecting it isn't enough.
The absolute best practice is to remove the battery entirely. Bring it home and store it in a cool, dry place off the concrete floor, like on a wooden block or a garage shelf. Take a moment to clean the terminals to get rid of any corrosion.
Then, hook it up to a smart trickle charger. These devices monitor the battery's health and maintain its charge safely all winter long. It's a small step that guarantees you'll have reliable power on day one of the next boating season.
A fully charged battery is far more resistant to freezing than a discharged one. A lead-acid battery at full charge won't freeze until temperatures drop to around -76°F (-60°C), while a completely discharged one can freeze right at 32°F (0°C).
Winning the War Against Interior Moisture
The final frontier in protecting your boat's systems is the interior. A sealed-up boat cabin is the perfect breeding ground for mold and mildew, which can absolutely ruin upholstery, carpets, and headliners. The enemy here is trapped moisture.
Start by getting everything you can out of the cabin. Cushions, life jackets, linens, towels, and any other fabrics should be stored at home in a dry environment. This not only protects them but also massively improves air circulation inside the boat.
Next, it's time to get aggressive with moisture control. Place moisture absorbers or desiccants throughout the cabin, inside lockers, and in the head. These products actively pull humidity from the air, keeping things nice and dry.
If your boat will be stored with access to shore power, running a small, marine-safe dehumidifier can make a world of difference. To see what's out there, you can learn more about the best boat dehumidifiers and how they protect your interior.
Before you lock up for the winter, give all your vinyl and fabric surfaces one last treatment. A proactive spray with a quality Mildew Stain Remover can help prevent spores from ever taking hold. This ensures your cabin smells fresh and clean—not musty—when you finally open it back up.
Choosing the Right Storage Location and Cover
You’ve put in the hard work getting the engine, plumbing, and interior ready for the long winter nap. Now comes the final big decision: where will your boat live for the next few months, and what will protect it? These two choices will have the biggest impact on its condition come springtime.
Think of the right storage spot and cover as a fortress, guarding all your careful winterization work against the onslaught of snow, ice, rain, and relentless UV rays. It all comes down to a balancing act between three things: cost, security, and the level of protection you're aiming for.
Weighing Your Storage Options
When you boil it down, you've really got three main paths to choose from for where your boat will ride out the winter. Each has its own clear advantages and disadvantages.
- Indoor Professional Storage: This is the five-star hotel for your boat. Tucked away inside a climate-controlled facility or a dry-stack warehouse, your boat is completely shielded from weather, sun, and would-be thieves. It's the priciest option by a long shot, but it buys you the ultimate peace of mind.
- Outdoor at a Marina or Storage Lot: A solid, more budget-friendly middle ground. Your boat will be in a secure, fenced-in area, so theft is less of a concern. While it’s still exposed to the elements, you often get the added benefit of having professional services like shrink-wrapping and winterization right on-site.
- Storing at Home: Keeping your boat in your own driveway or yard is definitely the cheapest route. You get easy access for checking on it throughout the winter, but you're also 100% responsible for its security and protection. This means investing in a top-notch cover is non-negotiable.
Deciding where to store your boat for the winter is a major decision. To help you weigh the pros and cons, here's a quick comparison of the most common options.
Boat Storage Options Compared
| Storage Option | Pros | Cons | Best For |
|---|---|---|---|
| Indoor Facility | Complete protection from weather, UV, & theft. Climate control prevents moisture issues. | Most expensive option. Access may be limited. | Boat owners seeking maximum protection and peace of mind, especially for high-value vessels. |
| Outdoor Marina/Lot | Secure, fenced-in location. Professional services often available on-site. More affordable than indoor. | Exposed to elements. Requires a high-quality cover or shrink-wrap. | Those looking for a balance of security and cost, with the convenience of professional support. |
| At Home (Driveway/Yard) | Most affordable (often free). Easy, anytime access for checks and maintenance. | Least secure. Fully exposed to weather. Requires a superior cover and self-managed winter prep. | DIY-savvy boat owners with adequate space and a tight budget who are diligent about security and protection. |
Ultimately, the best choice depends on your boat's value, your budget, and how much work you're willing to do yourself.
Selecting the Best Protective Cover
Your boat's cover is its first and last line of defense, especially if it's spending the winter outdoors. The wrong cover can cause more damage than no cover at all by trapping moisture or chafing your gelcoat.
Let's get one thing straight: a generic blue tarp from the hardware store is a terrible idea. Sure, they're cheap, but they fit poorly, letting wind whip underneath and slap against your boat's finish all winter long. They also sag instantly under the weight of rain or snow, creating pools of water that invite mildew and can even collapse the whole setup.
A custom canvas cover is a huge upgrade. Because it’s tailored to your boat’s exact dimensions, you get a much snugger fit. These are typically made from durable, breathable materials that last for years. They are a worthy investment but require a solid support frame underneath to properly shed snow and water.
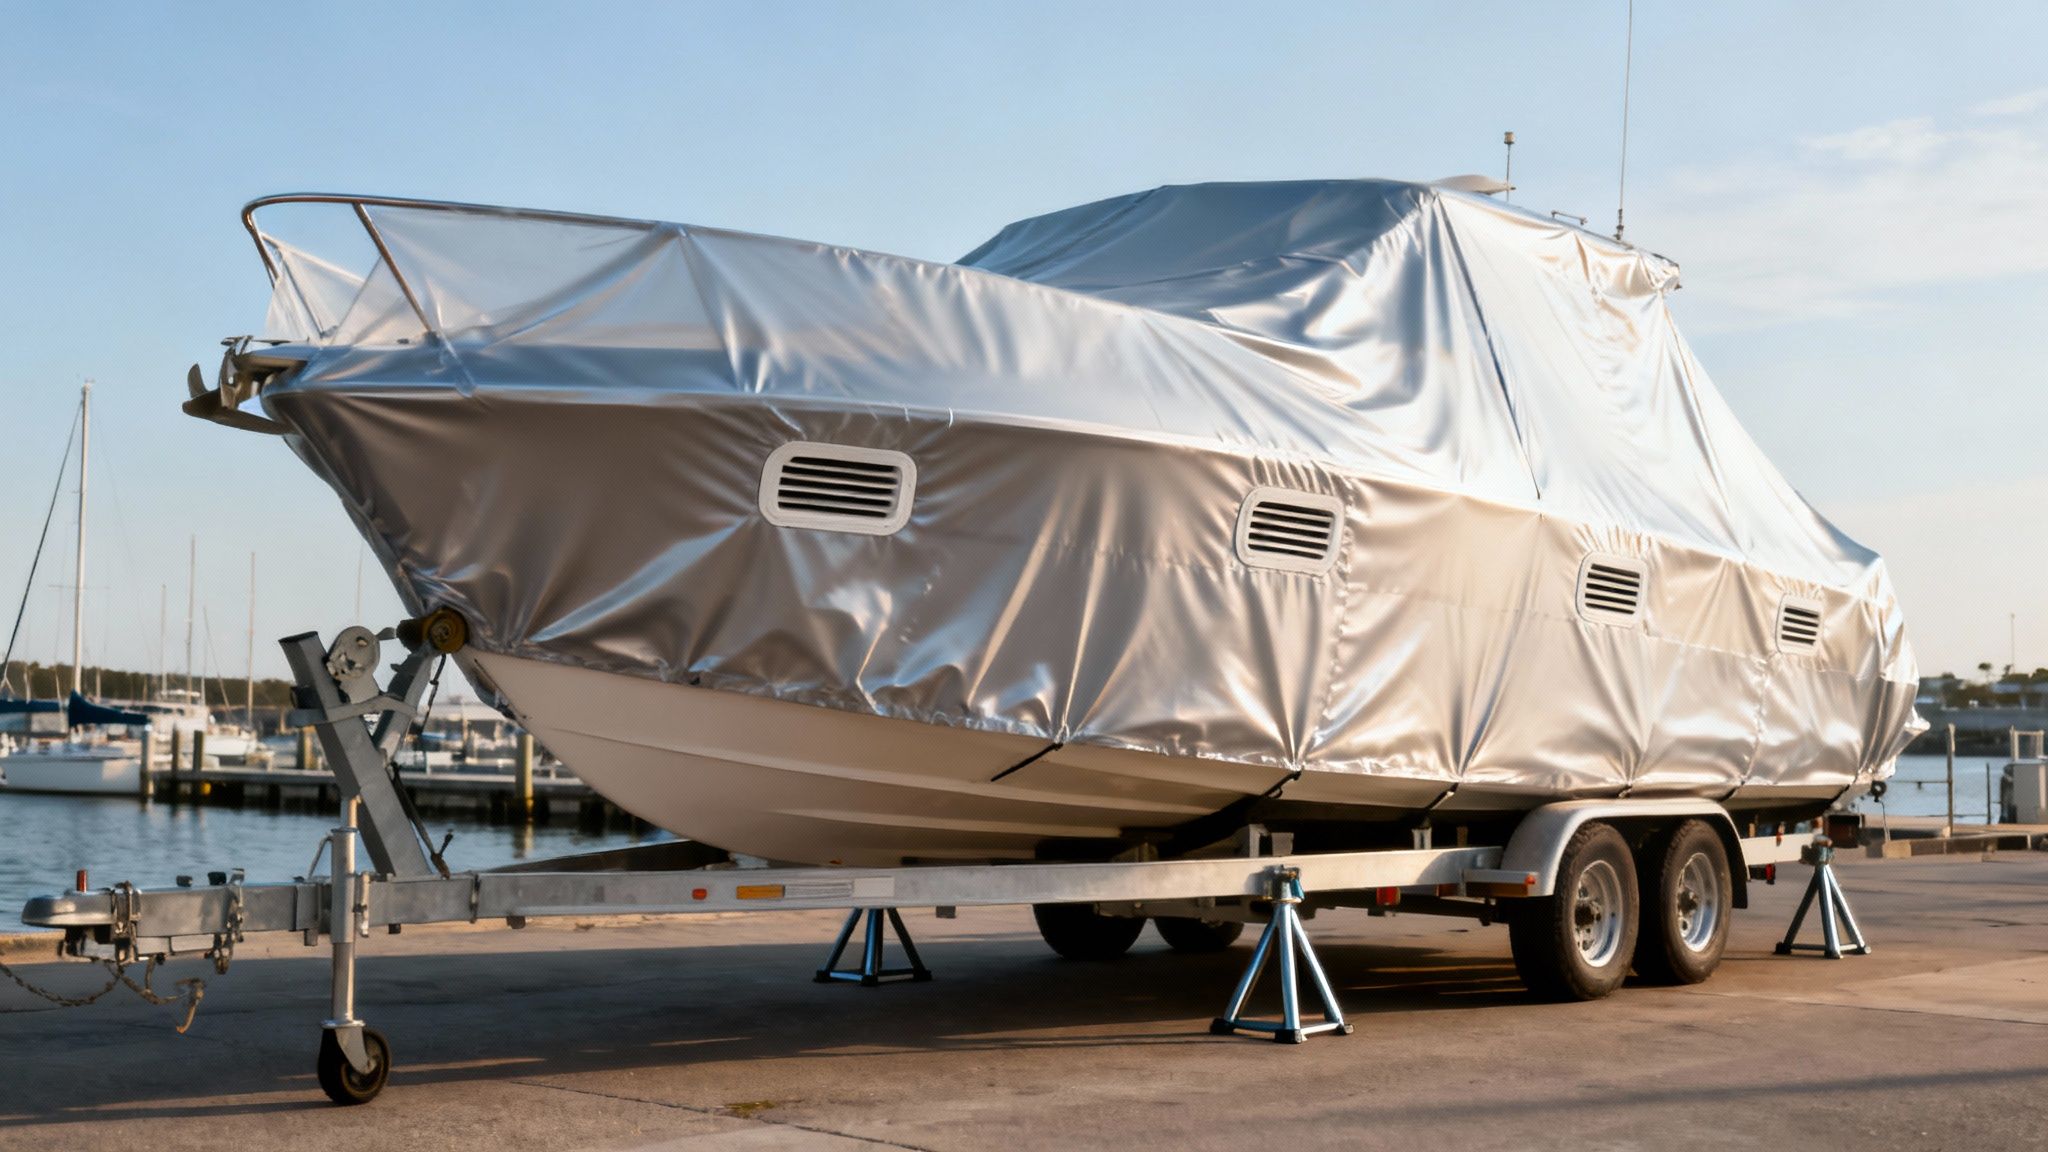
Professional shrink-wrapping is often the best all-around solution for outdoor storage. When a pro installs it with the right support structure and ventilation, it creates a drum-tight barrier that sheds snow and ice like a dream. Those little vents are critical—they prevent moisture buildup, which is enemy number one for causing mildew.

Ventilation: The Secret to a Dry Winter
No matter what cover you choose, proper ventilation is absolutely mandatory. A boat that's sealed up completely is a science experiment you don't want to run. As outside temperatures go up and down, condensation will form inside, turning your cabin into a damp, humid petri dish for mold and mildew.
Here’s how to make sure air can move freely:
- Install Vents: If you go with shrink-wrap, make sure the installer adds several weatherproof vents. If you have a canvas cover, check that it has built-in vents or find a way to prop it up to create airflow.
- Use Support Poles: A good boat support frame does more than just stop water from pooling. It also creates a vital air gap between the cover and the deck, which is essential for circulation.
- Crack a Hatch: If your boat is securely covered and protected from rain and snow getting in, cracking a non-exposed hatch or two can dramatically improve interior airflow.
By carefully matching your storage location to the right type of cover—and ensuring it all breathes properly—you’re setting your boat up for a safe, stable hibernation. This final protective shield ensures all your winterizing work pays off, greeting you with a clean, dry, and damage-free boat next season.
Preparing Your Trailer and Preventing Pest Invasion
If you're like most boaters and keep your vessel at home on a trailer, your winterization checklist has a few more items on it. Your trailer is a critical piece of gear, and it needs its own prep work to make sure it’s ready to roll come springtime. Skipping this is a classic mistake that can lead to some seriously frustrating—and expensive—delays when you're itching to get back on the water.
At the same time, you've got to deal with a silent but incredibly destructive threat: pests. To a mouse or insect trying to escape the cold, a stored boat looks like a five-star hotel. They can chew through upholstery, nest in storage compartments, and destroy critical wiring, causing thousands of dollars in damage.
Winterizing Your Boat Trailer
Your trailer takes a beating all season, from dunks in saltwater to long hauls on the highway. A little bit of attention now will save you from seized bearings and rotted tires down the road.
- Wheel Bearings: This is probably the single most important trailer maintenance task. You need to inspect, clean, and re-pack the wheel bearings with fresh marine-grade grease.
- Tire Care: Pump the tires up to the maximum recommended pressure, which you'll find printed right on the sidewall. Give them a good cleaning and, if you can, cover them up to shield them from UV damage.
- Lights and Electrical: Give all your trailer lights a quick check to make sure they're working. It's also a good idea to clean the contacts on the wiring harness and dab on a bit of dielectric grease to keep corrosion at bay.
The most important thing you can do is get the weight off the tires for the long layup. Use heavy-duty jack stands to lift the trailer frame so the wheels can hang free. This simple move prevents your tires from developing permanent flat spots. In fact, some data shows that flat-spotted tires from static weight plague 25% of trailer boats stored for more than four months.
Storing your boat on a trailer is more involved than just finding a spot to park it. For a full rundown on the best ways to use chocks, blocks, and stands, dive into our guide on storing your boat on a trailer. It covers all the critical details for a safe and secure setup.
Fortifying Your Boat Against Pests
Once the trailer is squared away, it’s time to turn your boat into Fort Knox. Believe me, an ounce of prevention here is worth a pound of cure, especially since rodent damage often isn't covered by insurance.
Your first line of defense is a boat that's spotlessly clean. Get rid of every last crumb, every candy wrapper, and that forgotten bag of chips. Vacuum all the carpets and wipe down every surface. Pests are on the hunt for food, so if you remove the buffet, your boat becomes a much less appealing winter home.
Next, you need to block off every possible entry point. A mouse can squeeze through a hole the size of a dime.
- Exhaust Ports: These are like superhighways for rodents. Stuff them with coarse bronze or steel wool—they can't chew through it.
- Drain Holes: Make sure any other drain holes are protected as well.
- Repellents: Scatter some strong-smelling deterrents throughout the boat. Things like cotton balls soaked in peppermint oil, mothballs, or our own Mildew Stain Remover, which has a strong scent that helps deter pests, can work wonders.
Mice are notorious for nesting in stored boats and love to chew on wiring and upholstery. If you think you might already have a problem or just want to be extra careful, check out a good guide on how to get rid of mice.
By tackling both your trailer prep and pest control, you can rest easy knowing that your boat and its ride will be in prime condition for next season.
Common Questions About Storing a Boat for Winter
Even with a solid winterizing checklist in hand, a few questions always seem to pop up as you're getting your boat ready for its long winter nap. We hear them all the time. Getting the right answers is the key to dodging common pitfalls and making sure you’ve truly buttoned everything up.
Let's dig into some of the most frequent questions we get from boat owners about winter storage.
Should I Store My Boat with the Fuel Tank Full or Empty?
This is a classic debate, but for most boats, the experts have a clear consensus. If you've got a gasoline engine with a built-in tank, you'll want to fill it up to about 90-95% full. That little bit of extra room allows the fuel to expand and contract with temperature swings without forcing its way out of the vents.
Why so full? It’s all about minimizing the air space inside the tank. Less air means less room for water vapor to condense on the tank walls as the temperatures fluctuate. Water in your fuel is enemy number one, leading to all sorts of engine headaches, including phase separation in today's ethanol-blended fuels.
Before you top off the tank, pour in a quality fuel stabilizer. Then, fire up the engine and let it run for 10-15 minutes. This is a crucial step that ensures the stabilized fuel makes its way through the entire system, from the fuel lines right up to the injectors or carburetor. Now, if you're dealing with portable fuel tanks, the advice is the opposite—it's best to run them completely empty.
Is It Really Necessary to Remove the Battery for Winter?
Yes. One hundred percent. If there's one step you absolutely shouldn't skip, it's this one.
Even with the main battery switch off, a connected battery can slowly be drained by onboard electronics that need power to maintain their memory, like your stereo or GPS. But the bigger danger is that a battery left in a cold, damp boat will naturally self-discharge over time.
A dead or weak battery is incredibly vulnerable to freezing. The electrolyte inside is mostly water, and once it freezes at 32°F (0°C), it expands, cracks the battery case, and completely ruins it.
Your best move is to pull the battery from the boat, give the terminals a good cleaning, and store it somewhere cool and dry—a garage shelf is perfect, just keep it off the concrete floor. Hook it up to a smart charger or a battery tender, which will keep it perfectly topped off all winter without the risk of overcharging.
Can I Just Use a Regular Tarp Instead of Shrink-Wrap?
It's tempting to grab a heavy-duty tarp from the hardware store to save a few bucks, but this approach often creates more headaches than it's worth. Here's a quick rundown of why it’s not a great idea:
- Lousy Fit: Tarps are one-size-fits-none. Wind easily gets underneath, causing it to flap violently against your gelcoat all winter, which can chafe and dull the finish.
- Water Pooling: Without a proper support structure underneath, that tarp will inevitably sag under the weight of rain and snow. Those pools can become incredibly heavy, straining and even breaking your support frame or the tarp itself.
- Trapped Moisture: Tarps don't breathe. They trap moisture underneath, turning the inside of your boat into a damp, stagnant greenhouse—the perfect environment for mold and mildew to take over.
Professional shrink-wrap, by contrast, is heat-shrunk to create a drum-tight seal that sheds snow and water like a dream. Most importantly, a pro installation will include vents that allow air to circulate, which is critical for preventing the moisture buildup that leads to mildew. If you absolutely have to use a tarp, make sure you build a robust frame to support it and lash it down so tightly it can't move.
What Is the Most Common Winterizing Mistake?
The single most common—and most expensive—mistake is not getting every last drop of water out of the engine block and cooling systems. It's a painful lesson to learn.
Even a tiny amount of trapped water will freeze, expand with incredible force, and crack an engine block or exhaust manifold. That’s a repair that can easily run into thousands of dollars.
Always follow your engine manufacturer's specific instructions for draining. Find and open every single petcock and drain plug. While adding non-toxic (pink) antifreeze provides an excellent secondary layer of protection, it is not a replacement for a thorough drain. Never just assume you got all the water out; go back and double-check every hose and port.
At Better Boat, we know protecting your investment is priority number one. From our tough Mildew Stain Remover to our long-lasting marine wax, we’ve got the premium products you need for a stress-free winter layup. You can check out our full lineup of solutions to make your next winterization project easier and more effective at BetterBoat.com.


