


Installing Your Boat Anchor Bracket Like a Pro
A boat anchor bracket is the unsung hero of your anchoring system. It’s the piece of hardware that securely holds your anchor in place, usually up at the bow, so it's not swinging around and causing chaos. Think of it as a dedicated holster that makes deploying and retrieving your anchor much safer and a whole lot smoother.
Choosing the Right Anchor Bracket for Your Boat

Picking the perfect boat anchor bracket isn’t just about making sure it bolts on. It’s a careful process of matching the hardware to your boat's design, the specific anchor you use, and the kind of water you’ll be in. Get this right, and you’re set up for safety, convenience, and a hull free from ugly dings and scratches.
The right choice means your anchor is always ready to go at a moment's notice but stays locked down tight when you're underway. An ill-fitting bracket can turn into a real headache, leading to tangled lines, hull damage, or even a total failure when the waves kick up.
Materials Matter Most
The environment your boat lives in should be the number one factor in choosing a material. For anyone boating in saltwater, 316-grade stainless steel is the undisputed champion. The molybdenum in its alloy gives it superior corrosion resistance, allowing it to shrug off the harsh effects of salt spray day after day.
If you stick to freshwater lakes and rivers, galvanized steel is a tough and budget-friendly option. It won’t have the mirror finish of polished stainless, but its zinc coating provides more than enough protection against rust in less corrosive environments.
Your bracket's material is its first line of defense. Choosing stainless steel for saltwater isn't just about looks—it's a long-term investment in durability that prevents a rusty failure at the worst possible time.
This focus on reliable anchoring gear is a big deal in the boating world. In fact, the global boat anchor market was valued at around USD 3.59 billion in 2024 and is expected to keep growing. Boaters everywhere are looking for better, safer ways to anchor, which is driving a lot of innovation in the industry.
When picking the right material for your anchor bracket, it really comes down to where you'll be boating and what you value most—longevity, cost, or looks.
Boat Anchor Bracket Material Comparison
| Material | Best For | Pros | Cons |
|---|---|---|---|
| 316 Stainless Steel | Saltwater environments | Excellent corrosion resistance, strong, polished look | More expensive |
| Galvanized Steel | Freshwater boating | Durable, cost-effective | Less corrosion-resistant than stainless, less polished |
| Aluminum | Lightweight applications, small boats | Very light, good corrosion resistance | Not as strong as steel |
Ultimately, matching the material to your environment is key to getting a bracket that will last for years to come.
Matching the Bracket to Your Boat Style
The kind of boat you run will point you toward the right style of anchor bracket. Every hull and deck layout has its own unique needs.
Here are a few common scenarios I see all the time:
- Cabin Cruisers and Yachts: These bigger boats, especially those with an electric windlass, are practically made for a sturdy bow roller. A good roller guides the anchor and rode cleanly over the bow, protecting your gelcoat and ensuring the windlass can pull straight without strain.
- Pontoon Boats: Pontoons have a unique setup, and that's where rail-mounted brackets really shine. They clamp right onto the railings, giving you flexible placement options without having to drill a single hole in your deck.
- Fishing and Ski Boats: On smaller boats where deck space is precious, you'll want something more compact like a simple fluke anchor holder or a small bow roller. The goal is to keep the anchor secure without it getting in the way when you're casting a line or moving around.
At the end of the day, you're trying to build a seamless system. The bracket has to fit your boat, but it also has to work perfectly with the anchor you're using. If you're looking for more info on different anchor types, be sure to check out our guide on selecting the best boat anchors for different bottom conditions.
Assembling Your Toolkit for a Flawless Installation
A smooth installation of your new boat anchor bracket really hinges on one thing: having everything you need before you start. Think of this as your pre-flight checklist. Getting your tools and materials in order first is the best way to avoid those frustrating mid-project trips to the hardware store and prevent a sloppy, leaky, or failed installation.
The right tools don't just make the job easier; they make it safer for both you and your boat's hull. Trust me, trying to make do with a mismatched socket or a dull drill bit is a classic recipe for stripped bolts and cracked gelcoat.
The Essential Tools for the Job
Your basic toolkit probably has most of what you'll need, but a few items are absolutely non-negotiable for this task. Before you even think about drilling, round up these essentials:
- Variable-Speed Drill: This is all about control. You need it for drilling through fiberglass or aluminum without causing cracks or damage.
- Drill Bits: Use high-quality bits made for the material you're drilling. Cobalt bits are great for stainless steel, while brad-point bits will give you a clean entry into fiberglass without splintering.
- Socket Wrench Set & Combination Wrenches: You’ll need these to tighten the nuts and bolts properly without over-torquing them.
- Caulking Gun: This is for applying your marine-grade sealant evenly and cleanly. A good, smooth application is key to a watertight seal.
- Measuring Tape & Marker: The old saying "measure twice, cut once" has never been more true. Accuracy is your best friend here.
For a deeper dive into what every boater should have on hand, check out our comprehensive guide to building the ultimate boat tool kit.
Hardware That Makes a Difference
The hardware you choose is just as important as the bracket itself. I've seen it time and time again—using substandard fasteners is a common mistake that leads to corrosion, leaks, and even catastrophic failure under load. Don't cut corners here.
Your shopping list absolutely must include:
- Marine-Grade Stainless Steel Bolts: Specifically, look for 316 stainless steel. Its corrosion resistance is far superior, especially if you're in saltwater.
- Lock Nuts: Nylon-insert lock nuts (often called nylocs) are critical. The constant vibration from the engine and waves will try to loosen your fasteners over time, and these prevent that.
- Oversized Fender Washers or a Backing Plate: This is crucial, so don't skip it. These pieces distribute the immense pulling force across a much wider surface area on the inside of the hull, which prevents stress cracks and keeps the bolts from pulling right through the fiberglass.
- Marine Sealant: To create a waterproof bond, you'll need a flexible, high-quality marine-grade sealant. Our Marine Sealant & Adhesive is designed to withstand harsh saltwater environments and UV exposure, ensuring a durable, leak-proof installation.
Pro-Tip: Create a Template First
Before you drill a single hole, do this one simple thing: trace the base of your boat anchor bracket onto a piece of cardboard and cut it out. This little template lets you test out different placements on your bow or transom.
You can check for clearance, see how it aligns with your cleats, and make sure you can actually reach the nuts from inside the hull—all without leaving a single permanent mark.
Mounting Your Bracket on the Bow, Transom, and Rails
Alright, you've got your tools and hardware picked out. Now for the main event: getting that new anchor bracket mounted on your boat. Whether you're aiming for the bow, transom, or rails will change the playbook a bit, but the core principles don’t waver. It’s all about careful measurement and creating a seal that’s absolutely waterproof.
This is more than just drilling a few holes. You're integrating a critical piece of safety gear onto your vessel. Get the alignment wrong or secure it poorly, and you’re looking at frustrating anchor retrieval, a damaged hull, or worse—a total failure when it's under a heavy load.
The image below breaks down the essential prep work, no matter where you're installing the bracket.
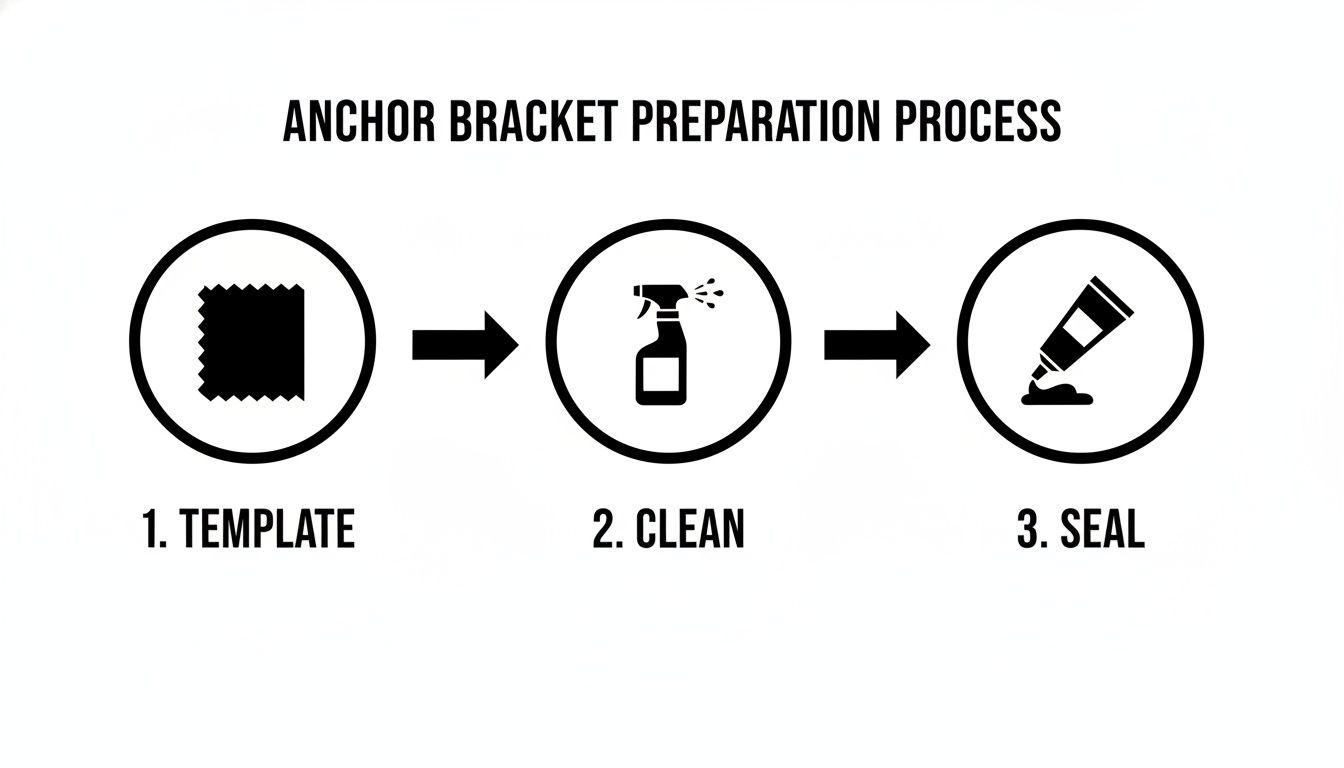
This really drives home the point that a solid installation comes down to three things: a precise template, a squeaky-clean surface, and a perfect application of sealant.
Bow Roller Installations for a Clean Pull
For most boats, the bow is the go-to spot for an anchor bracket, especially if you have a windlass. The name of the game here is perfect alignment. Your bow roller needs to create a dead-straight path for the anchor line or chain, running from the windlass, over the roller, and straight down into the water.
Start by laying your cardboard template on the bow. Move it around until the rope path lines up perfectly with your windlass gypsy and the bow cleat. Any kind of angle will cause the rope to chafe and put a ton of unnecessary strain on all your gear. Once you’ve nailed down the perfect spot, mark your drill holes. And remember the old carpenter’s rule: measure twice, drill once.
Transom Mounting Considerations
It's less common, but a transom-mounted bracket can be a fantastic setup for smaller boats or as a secondary anchor point for stern anchoring. The big challenge here is clearance. You have to think about the full range of motion of your outboard or sterndrive engine.
Position your bracket where it won’t get in the way of the engine when it's tilted all the way up or turned from side to side. Also, think about accessibility. You need to be able to get to the anchor easily and safely, even when the water gets choppy. Once you've confirmed the placement, the drilling and sealing process is exactly the same as a bow mount.
The best-looking jobs are the ones you barely notice—they just blend right in with the boat's lines. The secret is all in the sealant work. After you tighten down the bolts, run a clean, smooth bead of our Marine Sealant & Adhesive around the entire base of the bracket. Then, use a wet finger or a sealant tool to smooth it into a perfect fillet. That's how you get an impenetrable, factory-finish seal.

Rail Mounts for Pontoon Boats
Pontoon boats give you a unique mounting option thanks to those sturdy railings. Rail-mounted brackets offer incredible versatility, and you don't have to drill a single hole in your deck. Here, it’s all about clamping, not drilling.
When you're picking out a rail mount, get clamps that perfectly match your rail's diameter—whether it's square or round. This is crucial for a rock-solid grip. Most decent kits will come with rubber gaskets; don't even think about skipping them.
They protect your rails from getting scratched up and also help keep the bracket from slipping under load. Tighten the clamps down evenly until the bracket is completely secure and won't twist or slide on you.
If you're outfitting your pontoon with other gear like downriggers, our guide on how to install a downrigger on a pontoon boat covers very similar principles for getting a secure installation on your rails.
The whole anchoring system, from chains to lines, is a massive part of the marine industry. Just look at the global anchor chain market—it’s projected to blow past USD 750 million by 2033.
This just goes to show how important it is to choose quality components for every single part of your setup. No matter where you mount it, that final, critical step is applying a high-quality marine-grade sealant. That's what guarantees a waterproof installation that will last for years to come.
Mastering the Final Fastening and Safety Checks
A great boat anchor bracket installation lives or dies in the final details. You've drilled the holes and laid down the sealant, but these next steps are all about creating a bond that can handle the massive forces of a dug-in anchor. This isn't just about cranking things down tight; it's about doing it right.
One of the most common mistakes I see is people just slapping a bolt through with a nut on the other side. This concentrates all that pulling force onto a tiny area around the bolt head—a perfect recipe for stress cracks and gelcoat damage down the road.
The Anatomy of a Secure Fastening
To spread that load out properly and protect your boat, you need to follow a very specific sequence. Think of it like making a hardware sandwich. For each bolt, the order has to be:
- Bolt Head
- Washer
- The Bracket and Hull
- Backing Plate (or an oversized fender washer on the inside)
- Another Washer
- Lock Nut
This "sandwich" method is the professional standard for a reason. It ensures the pulling force is distributed across the wide surface of the backing plate, which keeps the bolts from damaging or, even worse, pulling right through your fiberglass or aluminum.
Crucial Tip: Fight the urge to overtighten the bolts. Your goal is just to compress the sealant enough to create a waterproof gasket—not to squeeze every last bit of it out from under the bracket. Overtightening can crush your hull's core, crack the gelcoat, and ultimately weaken the entire installation.
There's a growing emphasis on marine safety, and for good reason. The market for boat anchors and all the related gear is projected to grow steadily, partly because regulations encourage boaters to use reliable equipment—like a properly installed anchor bracket.
This North American boat anchors market report shows just how seriously the industry is taking it. It really underscores why it's so important for us boaters to get these safety-critical jobs done right the first time.
Final Safety Inspections
Once everything is bolted down, it’s time for a thorough hands-on check. Don't be shy here—grab the bracket and give it a firm push and pull from a few different angles. There should be absolutely zero movement, wiggling, or flexing. It needs to feel like it’s a factory part of the boat itself.
Next, get in close and do a visual inspection of the sealant bead around the base of the bracket. You're looking for a continuous, unbroken seal all the way around. Any gaps, no matter how small, are an open invitation for water to sneak in. If you do spot a gap, just apply a little more sealant to close it up.
These final checks are a critical part of your overall safety routine on the water. For a full rundown of what you should be inspecting before every trip, our comprehensive boat safety checklist is a great resource. This final once-over ensures your new bracket is truly ready to handle whatever the wind and waves throw its way.
Long-Term Care for Your Anchor Bracket
Your anchor bracket lives a tough life, constantly getting blasted by sun, salt, and moisture. If you want it to give you years of reliable service, you’ll need a simple but consistent maintenance routine. Trust me, proactive care is the best way to stop corrosion in its tracks and avoid a nasty surprise when you really need your anchor to hold.
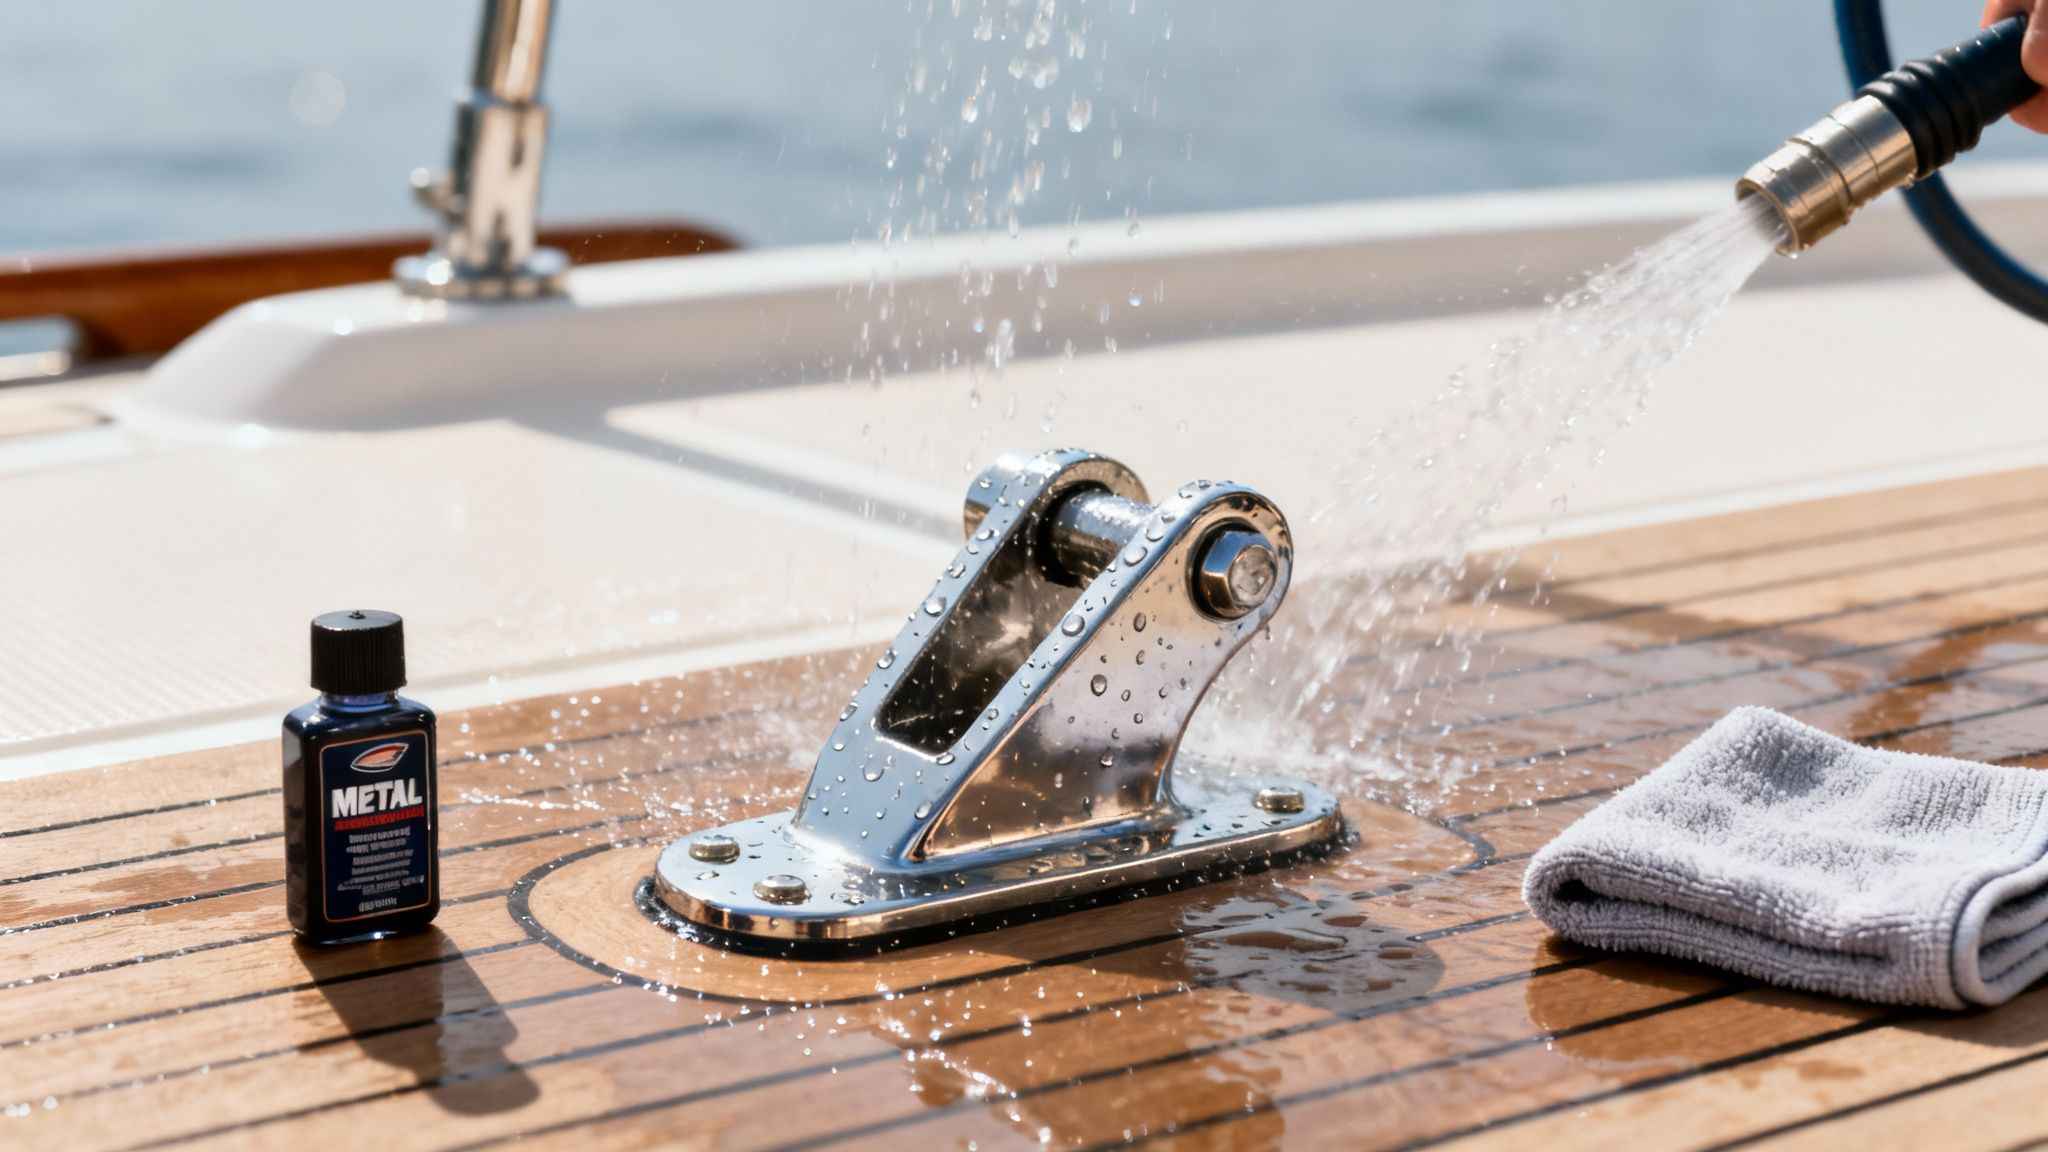
The single most important habit you can get into, especially after a day in saltwater, is giving everything a thorough freshwater rinse. Salt is incredibly corrosive, and letting it dry on your bracket is basically an invitation for rust and pitting to set up shop. A quick rinse-down is all it takes to neutralize the salt and wash away any gritty residue.
Creating a Simple Maintenance Schedule
Beyond the daily rinse, a more detailed inspection a couple of times per season can catch small issues before they blow up into big problems. A little attention really does go a long way in keeping your anchor bracket solid.
This doesn't have to be some complicated, all-day affair. Just set aside a few minutes to check these key areas:
- Fasteners: Give the bracket a good wiggle and check every nut and bolt. You want to make sure they’re still tight and haven't worked themselves loose from all the vibration.
- Sealant: Take a close look at the marine sealant around the base of the bracket. Are there any cracks, peeling sections, or gaps where water could sneak in?
- Surface Condition: Scan for any early signs of rust or corrosion. Pay special attention to the areas around welds and bolt holes, as that's where trouble often starts.
For some solid general principles on keeping things in top shape, looking at guides on the long-term care of outdoor furniture can be surprisingly helpful. The same ideas of regular cleaning and inspection apply directly to marine hardware.
Deep Cleaning and Protection
Regular washing is another cornerstone of keeping your gear in fighting shape. Using a gentle, marine-safe soap stops salt crystals and grime from building up, which can trap moisture and speed up wear and tear.
Our Better Boat Soap is formulated specifically to cut through that stubborn salt and dirt without stripping off protective waxes or coatings. A quick wash during your regular boat cleaning routine will keep the bracket looking sharp and working perfectly.
If you've got a stainless steel bracket, periodic polishing is your best friend. A quality metal polish doesn't just restore that mirror shine; it actually reinforces the passive chromium oxide layer that gives stainless steel its legendary resistance to corrosion. To keep stainless steel looking its best and prevent rust spots, our Metal Polish is formulated to clean, polish, and protect marine hardware.
This simple maintenance cycle—rinse, inspect, and wash—is your best defense against the harsh marine environment. It’s a tiny investment of your time that pays off big time in the longevity and safety of your entire anchoring system.
Common Questions About Anchor Bracket Installation
Even the most straightforward boat projects can leave you scratching your head. When it comes to something as critical as your anchor bracket, you want to be 100% sure you're doing it right. Let's walk through some of the most common questions we get from boaters just like you.
A big one we hear often is about reusing marine sealant if you need to move the bracket. The short answer? Don't do it. Once that sealant cures, it forms a perfect, custom gasket for that exact spot. If you move the bracket, you have to scrape off every last bit of the old stuff and lay a fresh bead. It's the only way to guarantee a truly watertight bond.
Sizing and Placement FAQs
"How big should my backing plate be?" That's a great question, and getting it right is crucial. As a solid rule of thumb, your backing plate should extend at least one inch beyond the bracket's footprint on all sides. This extra surface area is key for spreading the load out, preventing a ton of stress on one small point of your hull.
Another common point of confusion is drilling the holes. People ask, "Should the drill bit be the exact same size as the bolts?" Not quite. You actually want to use a drill bit that's just 1/16 of an inch larger than your bolt's diameter.
That tiny bit of wiggle room is perfect for letting the marine sealant get all the way around the bolt, creating a bulletproof waterproof seal without letting things get sloppy.
A word of caution: resist the temptation to grab hardware from the local big-box store. For anything on your boat, especially your anchoring system, you must use marine-grade 316 stainless steel for every bolt, nut, and washer. Anything less will corrode in a hurry, seriously compromising the safety of your setup.
So, what happens if you start drilling and hit a soft spot or a void in the fiberglass? Stop. Immediately. That's a red flag for a potential structural weak point. You'll need to pause the installation and fill that area with a high-strength marine epoxy before you can safely mount anything to it. A marine-grade epoxy putty stick is perfect for these types of repairs, curing rock-hard even underwater.
Your anchoring system is a chain, and it's only as strong as its weakest link. From the bracket itself to the line you use, every single piece plays a vital role. At Better Boat, we've got you covered with premium Double Braided Nylon Anchor Lines that deliver the strength and shock absorption you need for total peace of mind.


